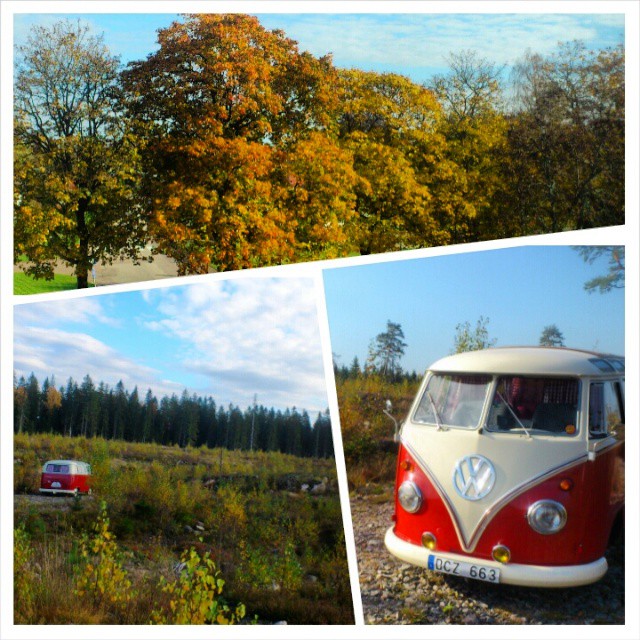
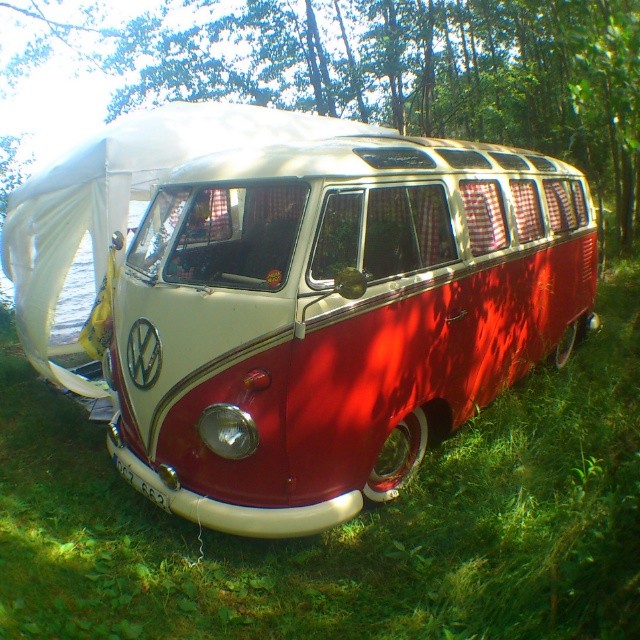
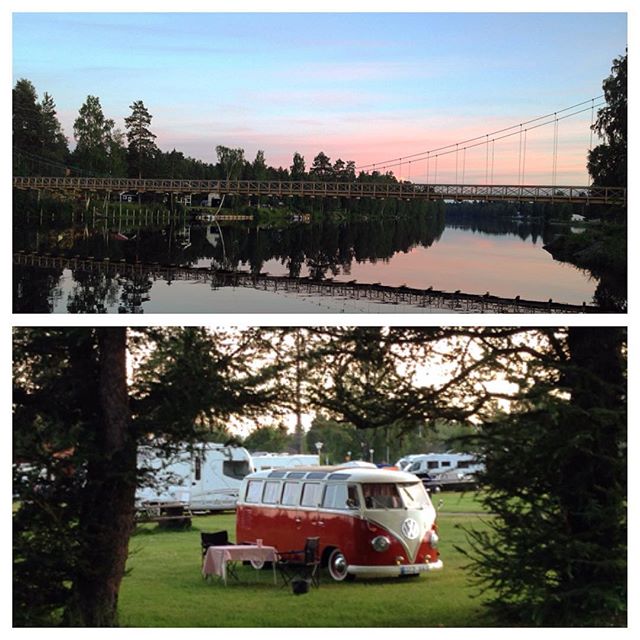
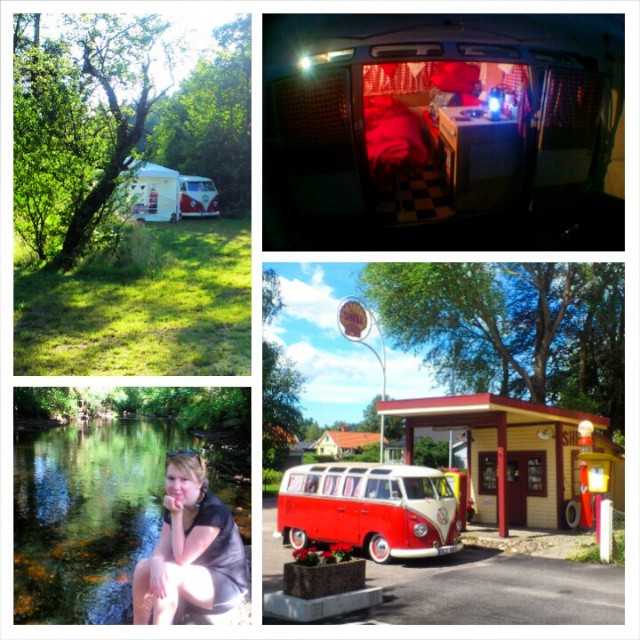
First camping trip of the year, what a great time! Cant wait until next time…
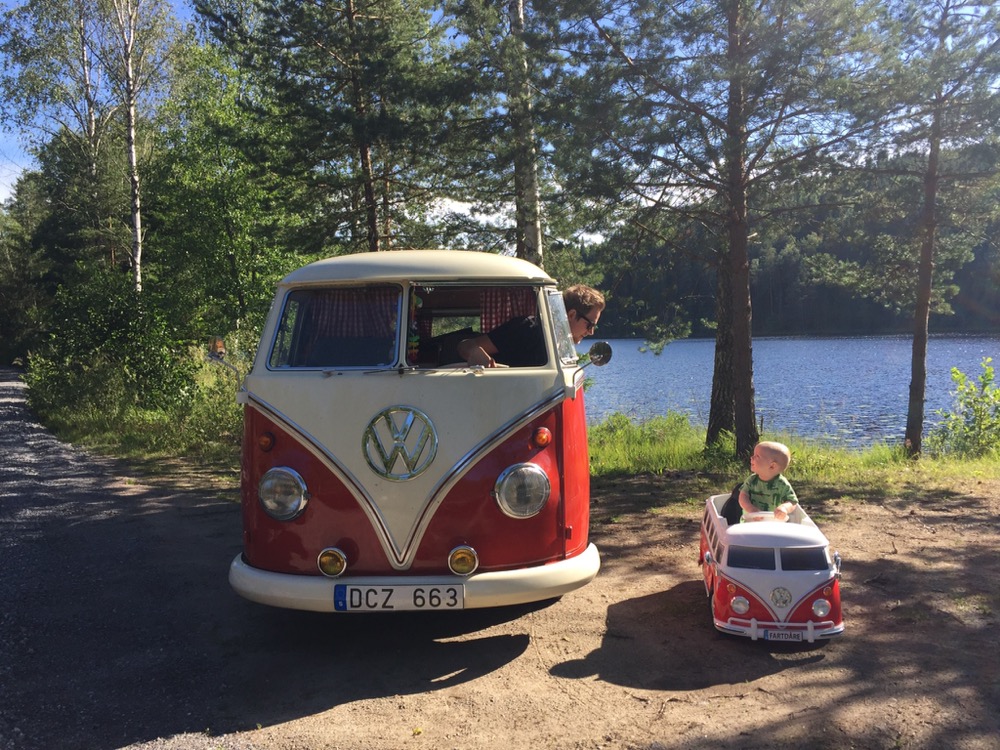
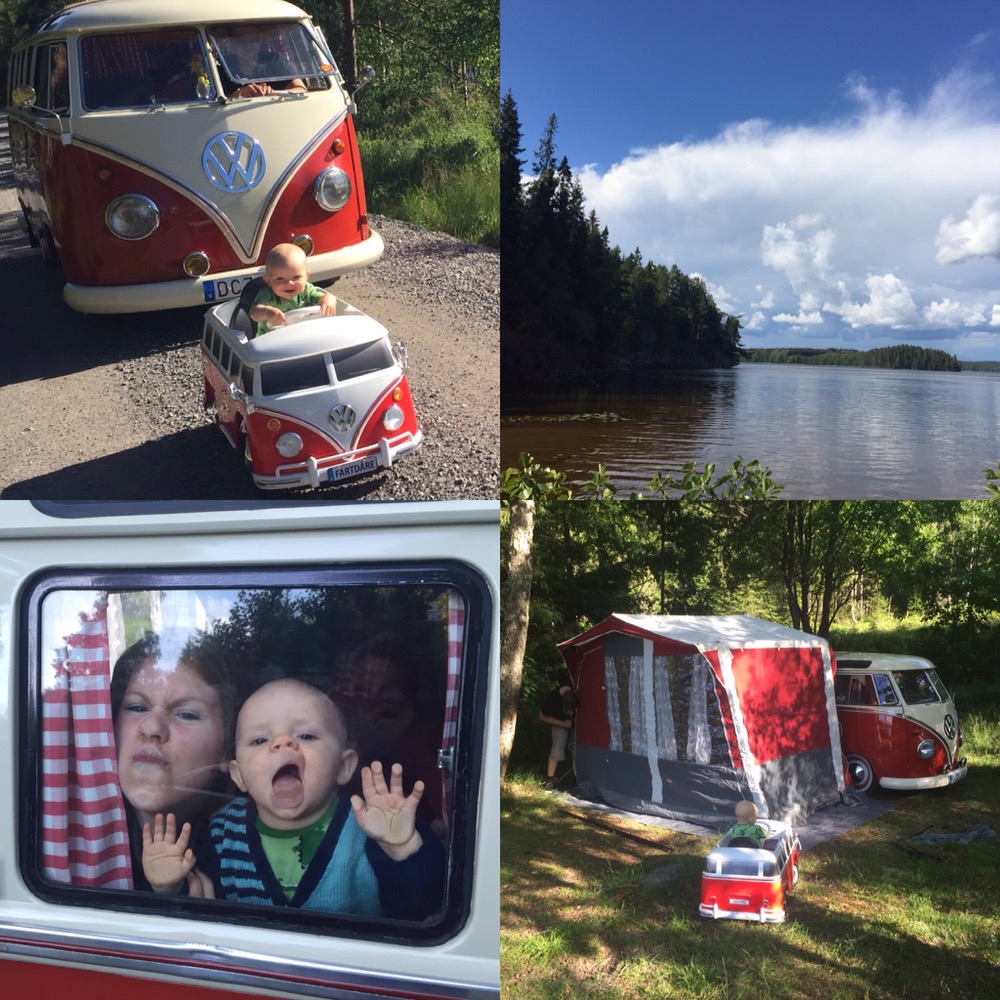
First camping trip of the year, what a great time! Cant wait until next time…
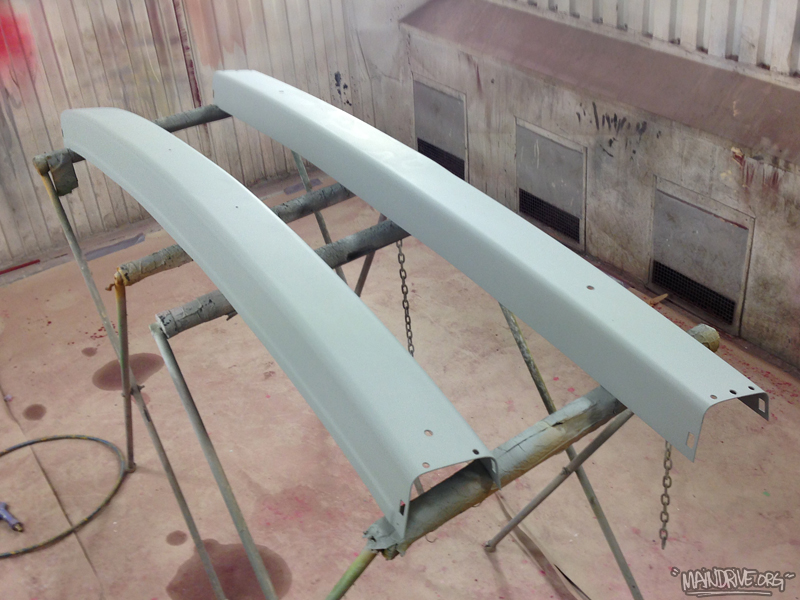
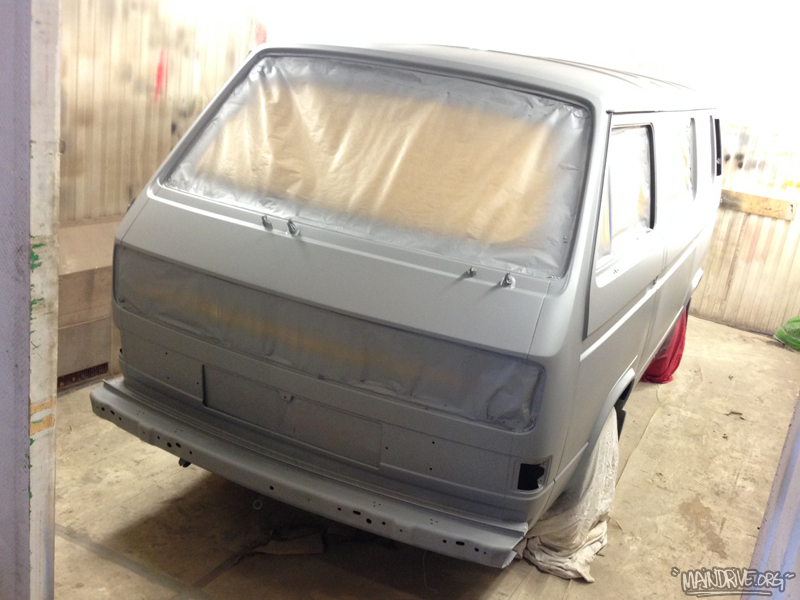
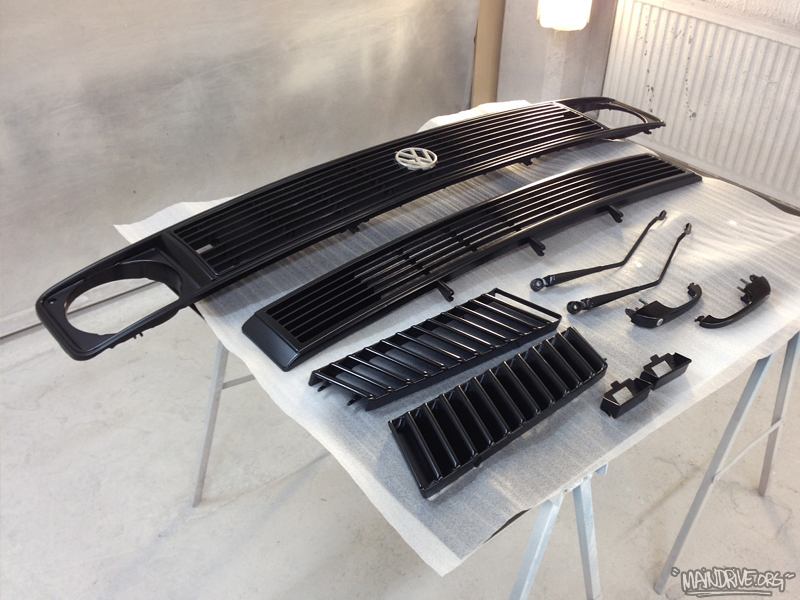
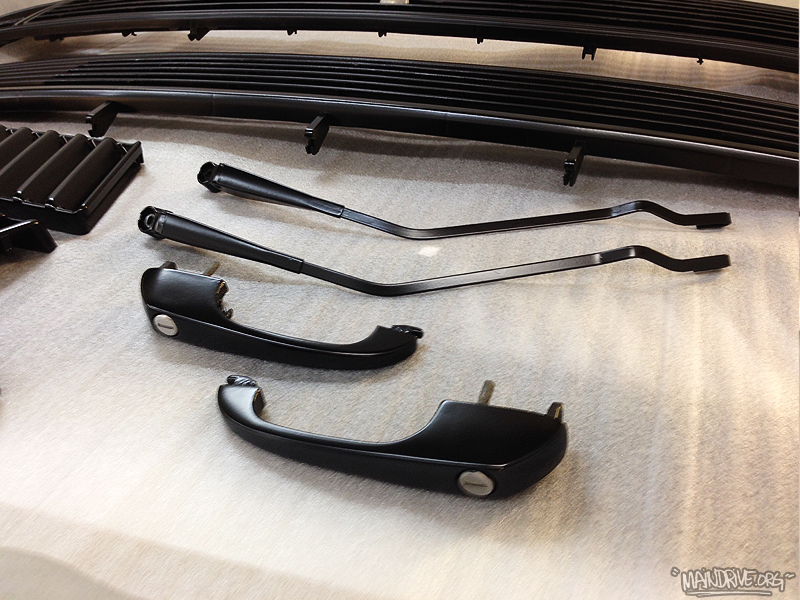
Today the bus was dropped of at the glasshop for new front windscreen and installing all windows with new rubber seals. The last final parts (bumpers) are getting painted tomorow or on Thursday. They were handpainted with brush, twisted, rusty and lots of small dents. After sandblasting they got welded, straightned and all dents hammered out. Then a light coat of bodyfiller to make them straight again, then Zinc rustprimer and after this surfacer/ground primer to get them smooth again after the sandblasted surface. Next up is some more sanding and then Deepblack paint. New covers and bolts are waiting from Just Kampers! The bus should be ready for the road in the end of the week! More pics to come…
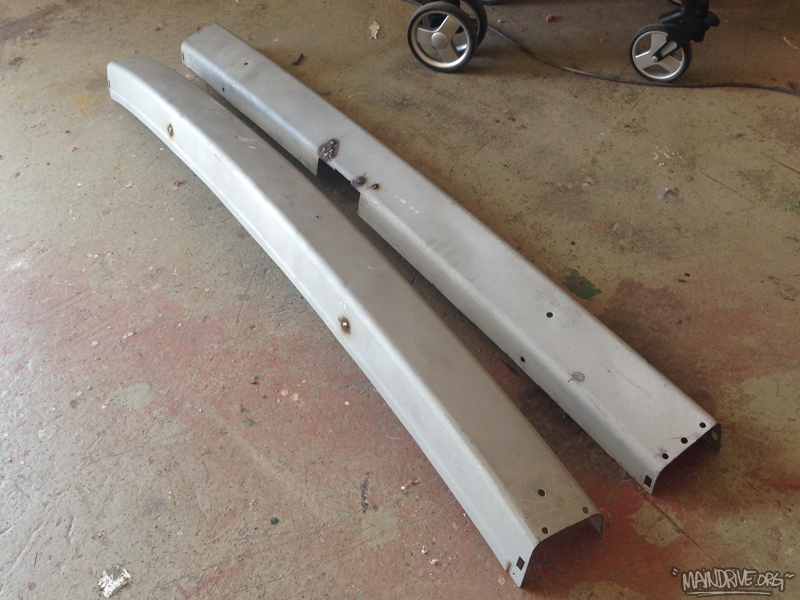
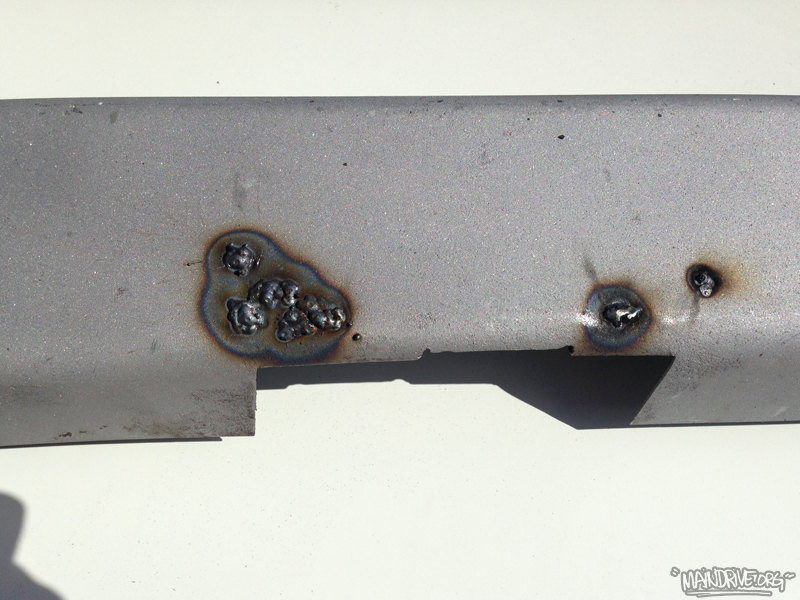
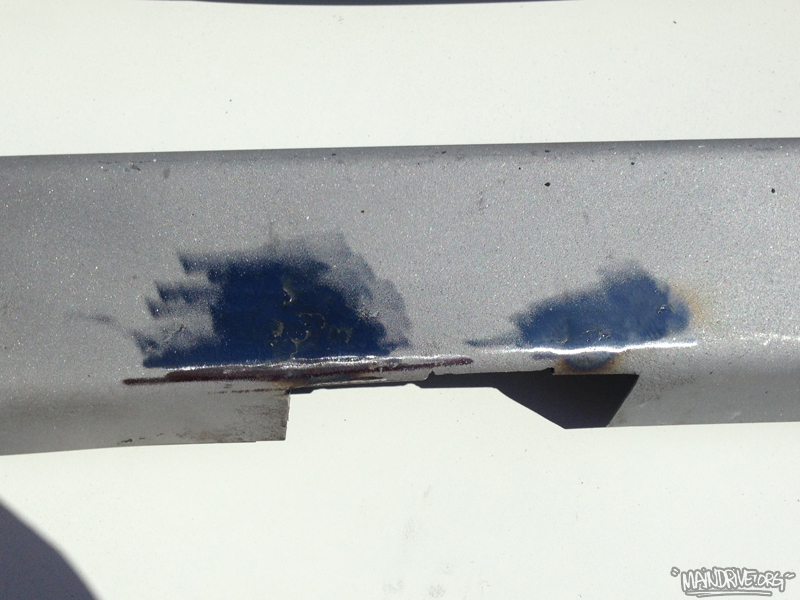
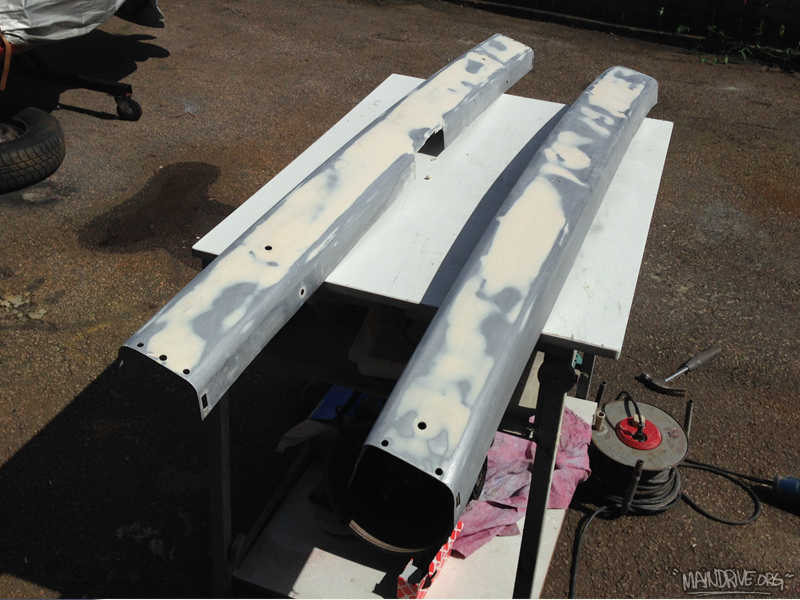
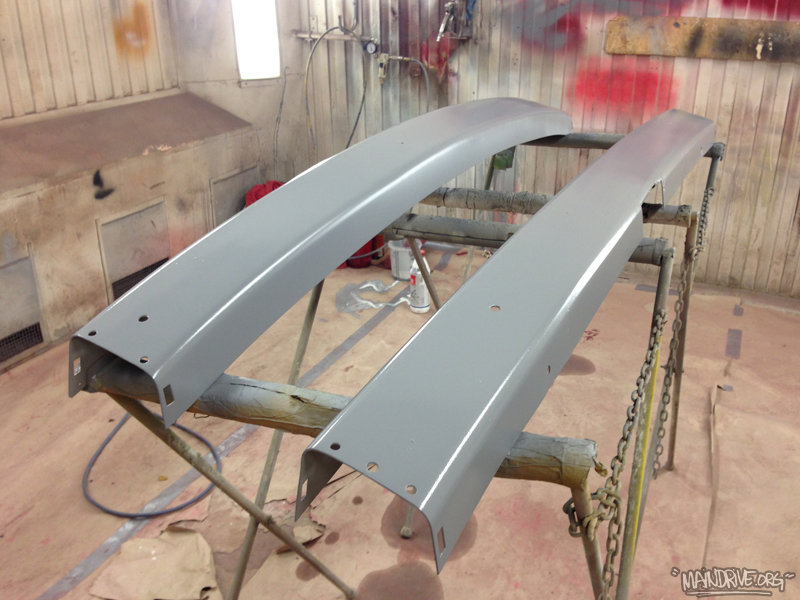
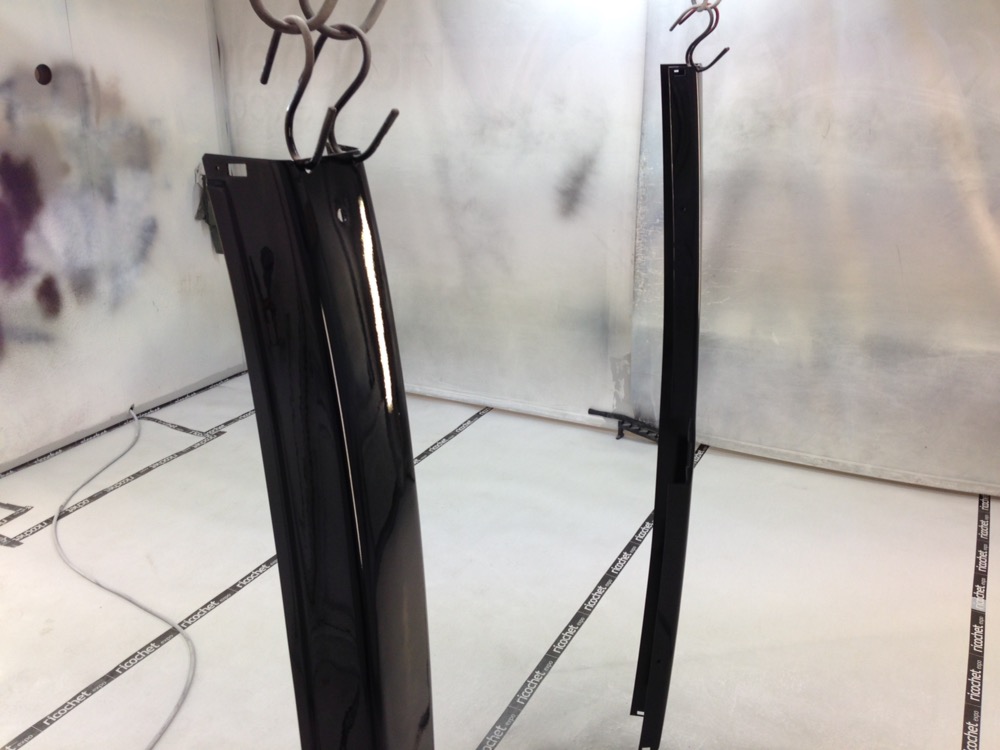
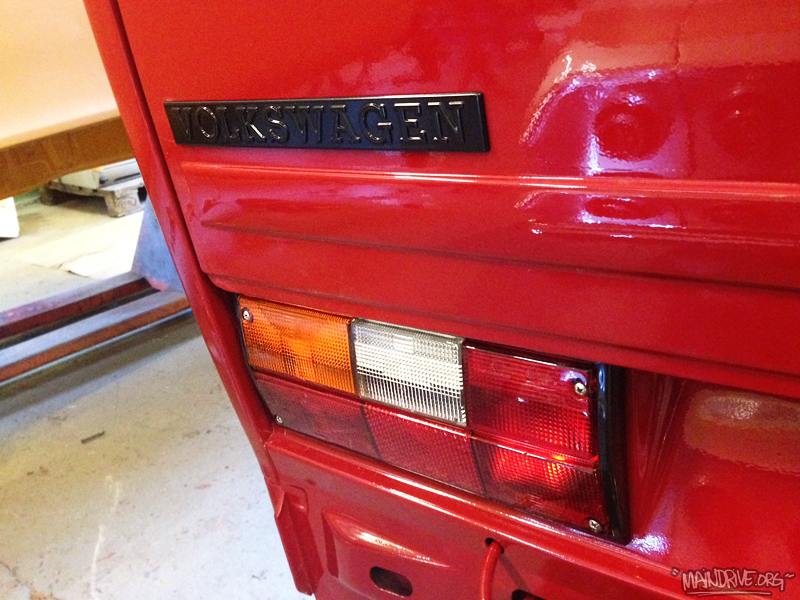
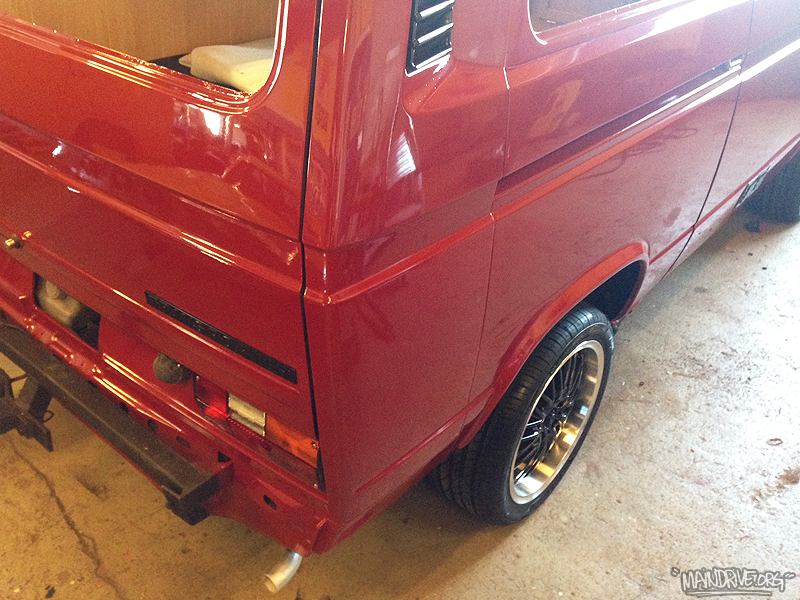
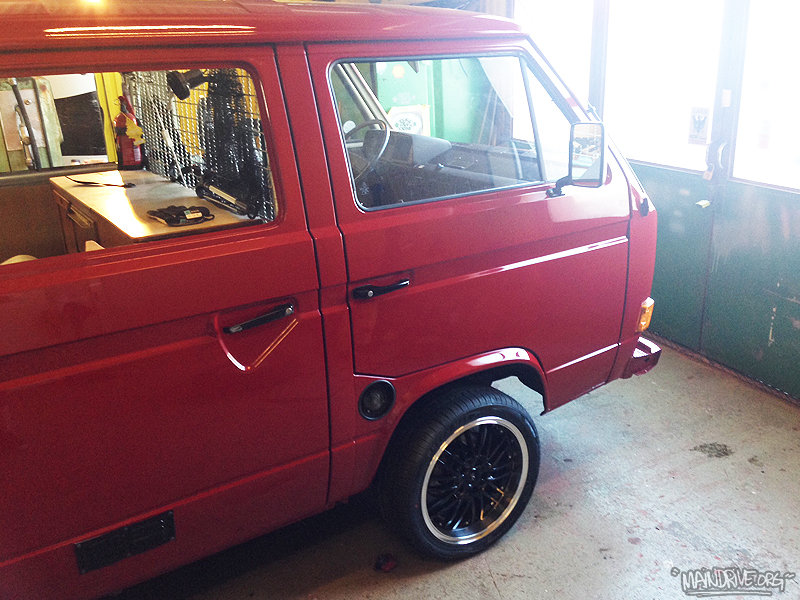
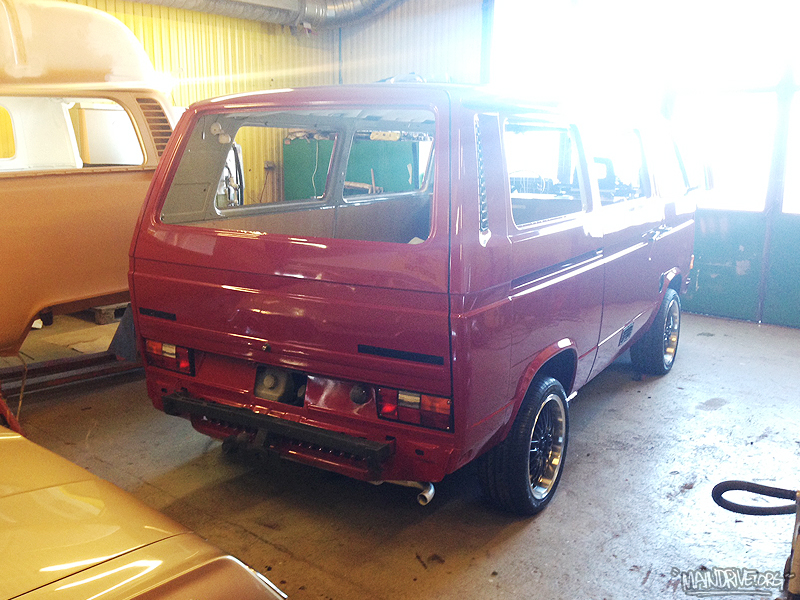
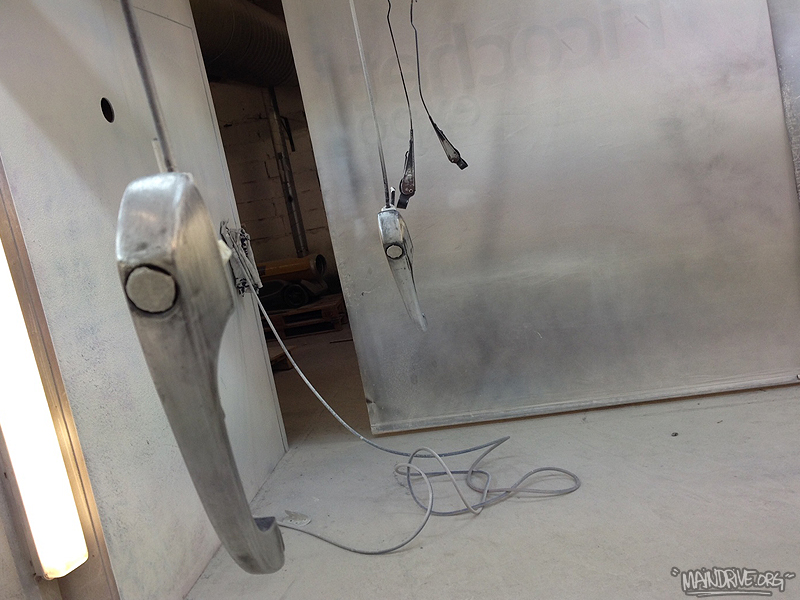
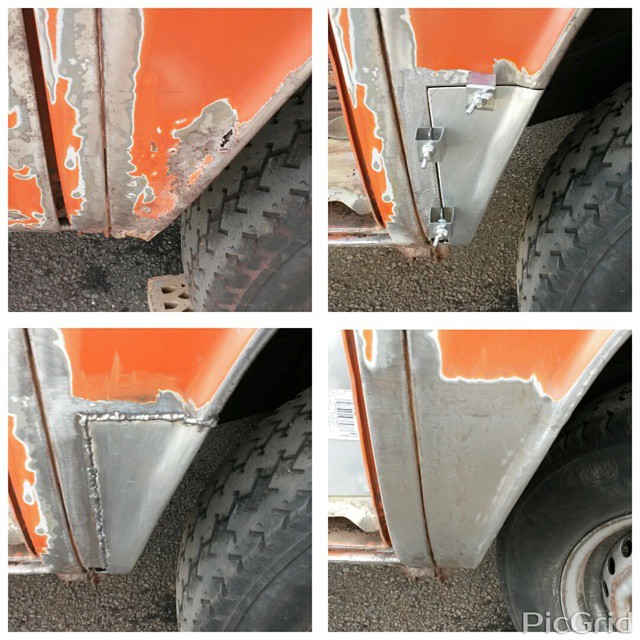
Wheels have been fitted, needed 5mm spacers all around and longer wheelstuds (56mm) in the rear and new bolts. Wheels are 17″ inch with 225/45 tires, offset 35. Need to make a custom centercap for the speedometer tho. Lots of new parts have been installed from Just Kampers, like new taillights, fuelfiller neck, footsteps, roof ventilation, mirrors, windowfelt trim in front doors etc. Waiting on tailgate seal and new clips for the freshly painted front grills. Bumpers have been blasted and are now getting welded, straightned up and removing big dents before paint in Deep Black. Next big step is taking it to the glass shop and get all windows installed with new rubber seals! Then its ready for the road…
A great documentary about the Volkswagen buses, hit the play button!
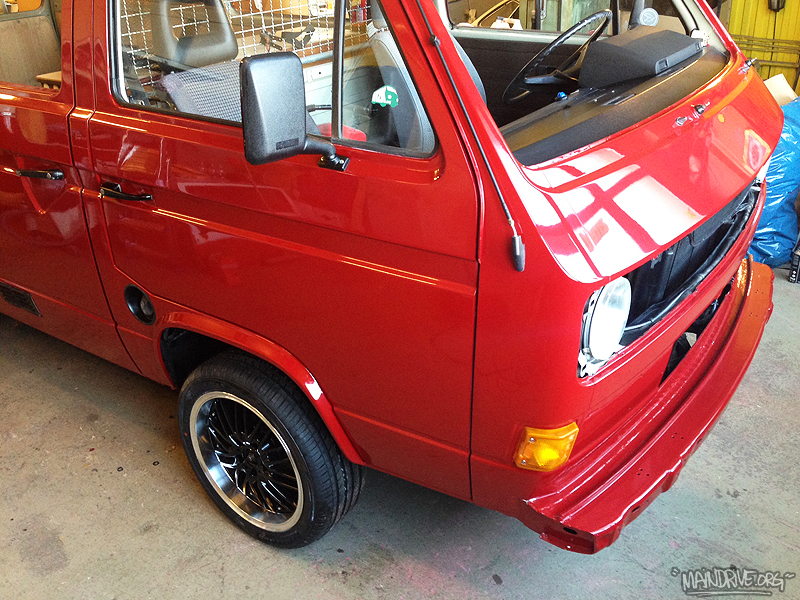
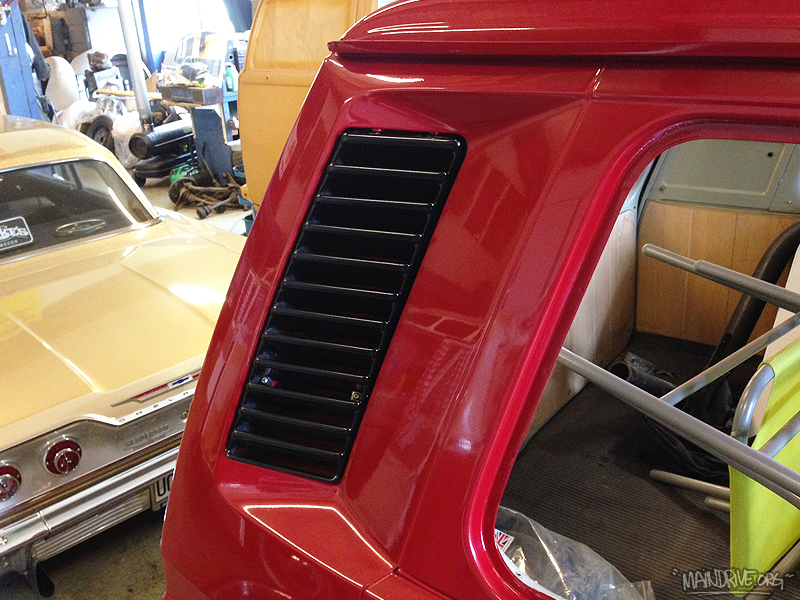
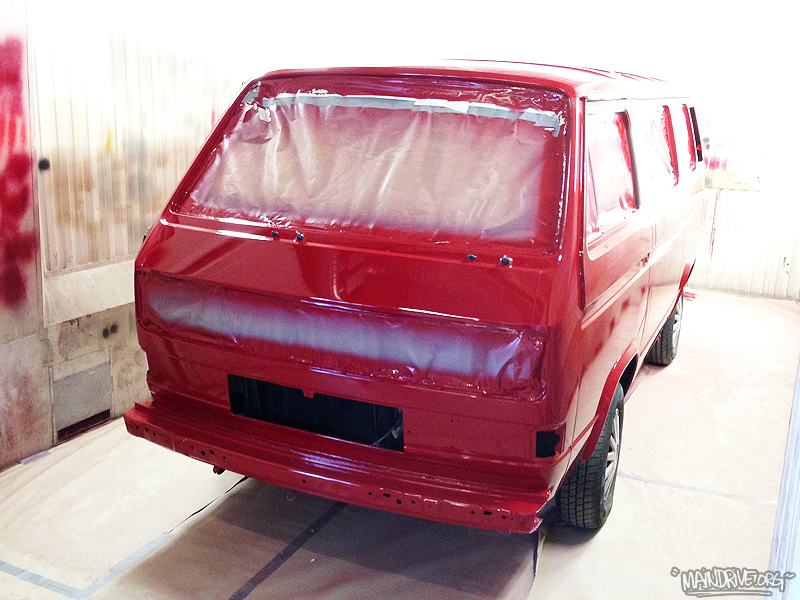
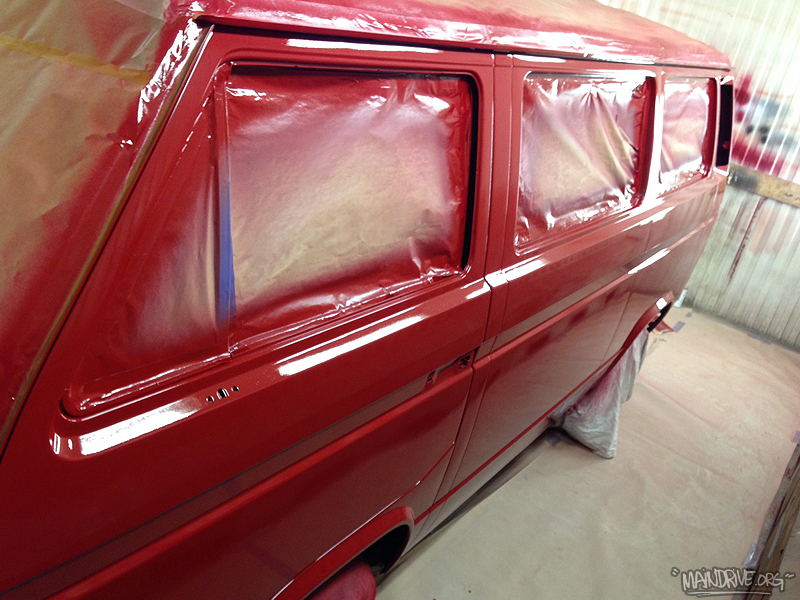
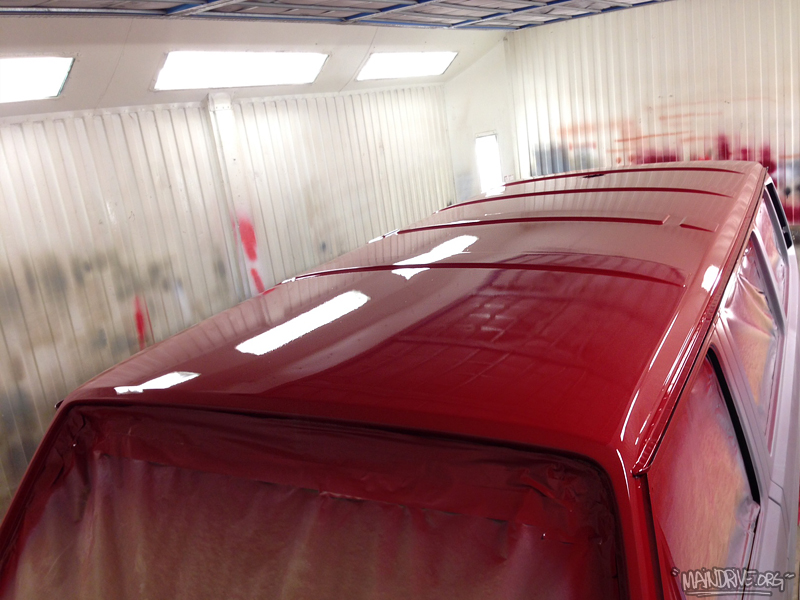
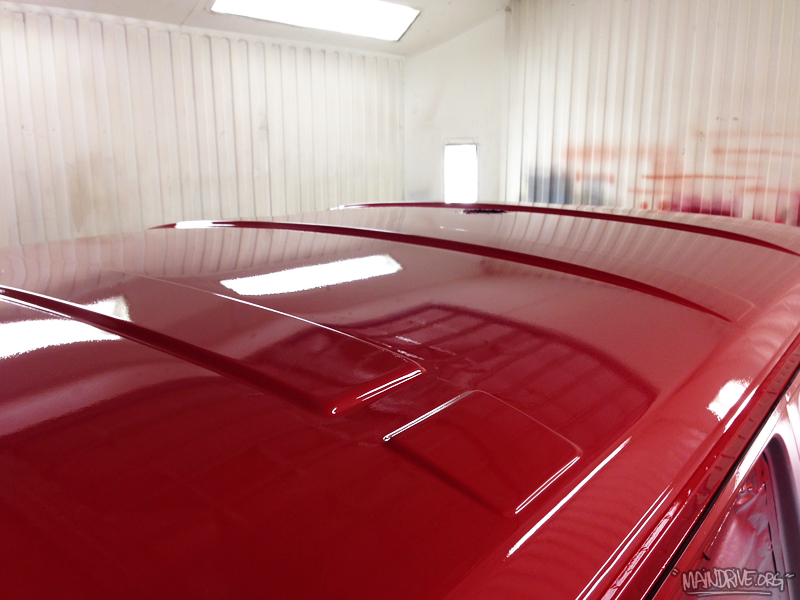
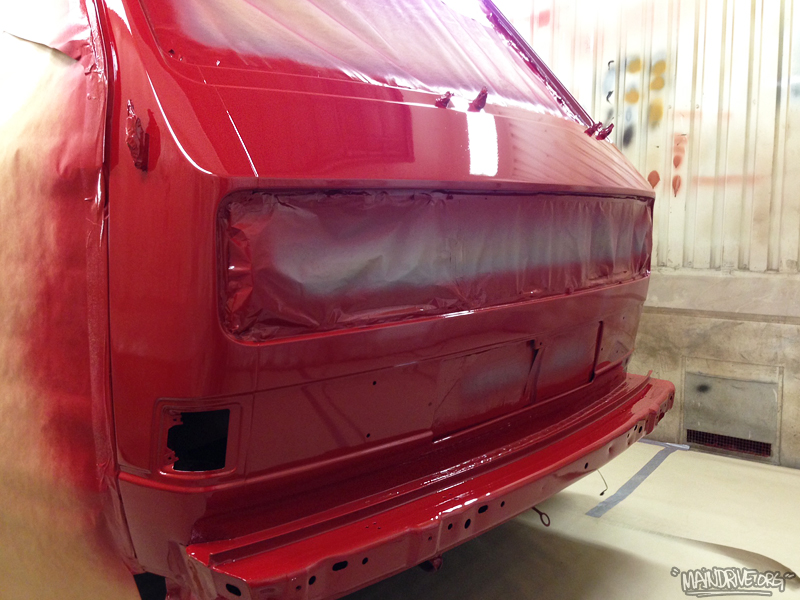
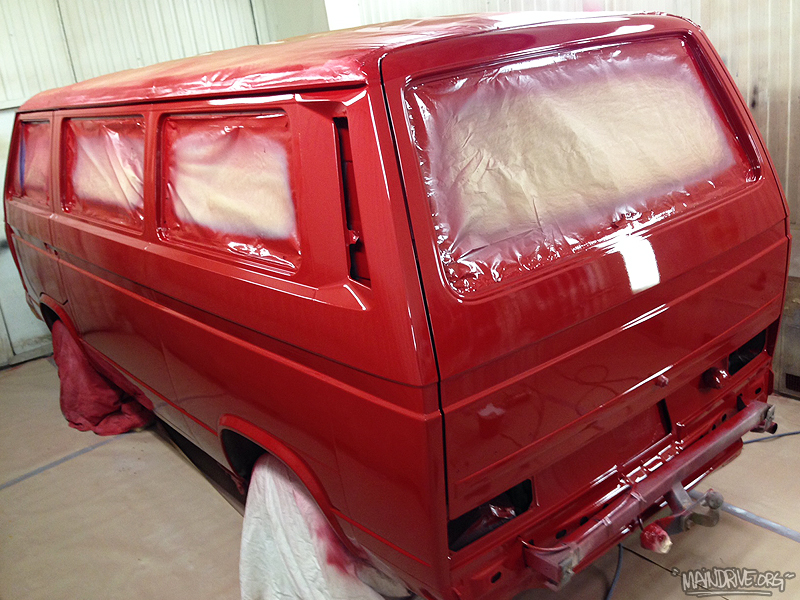
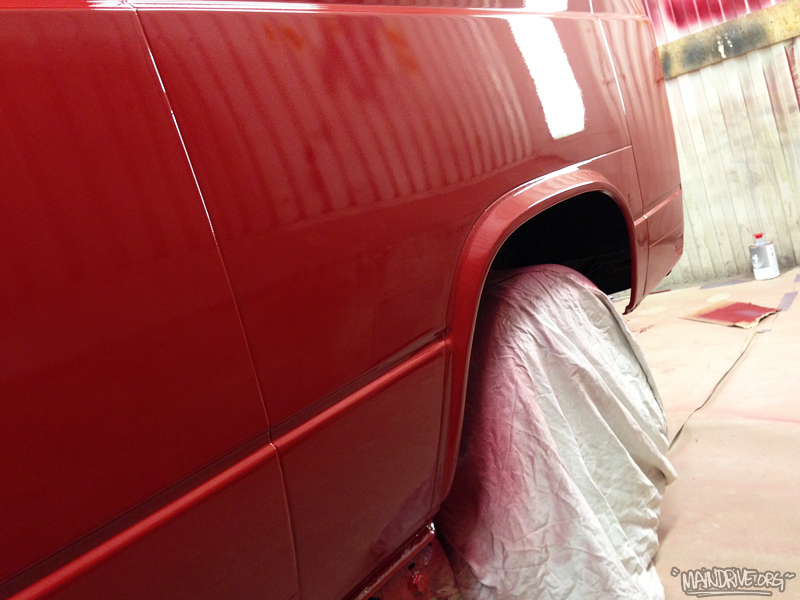
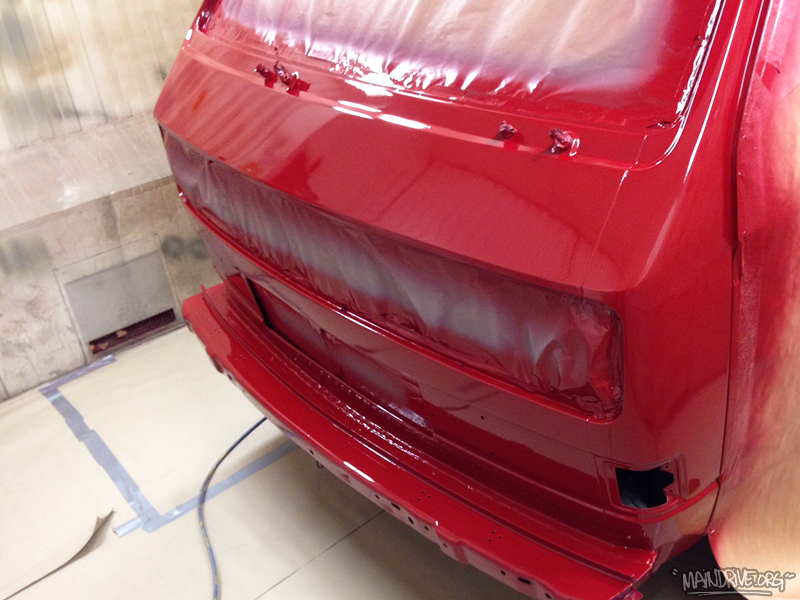
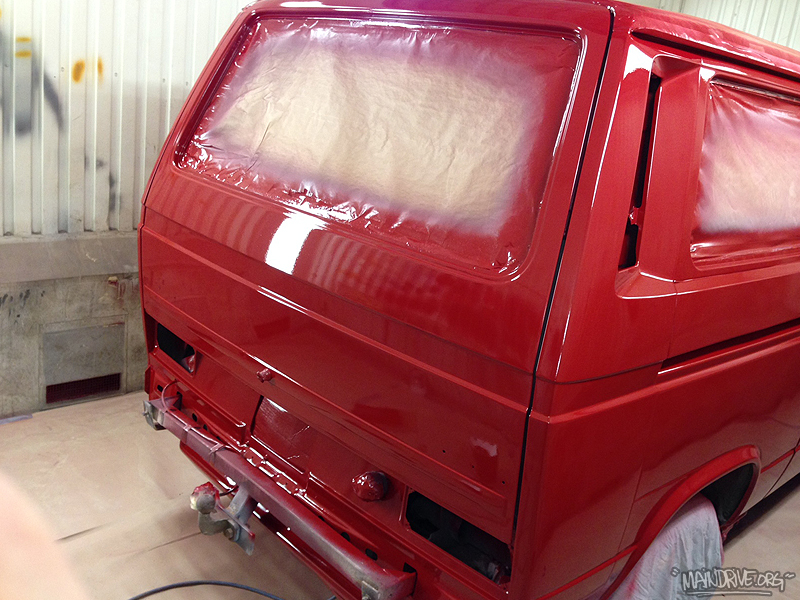
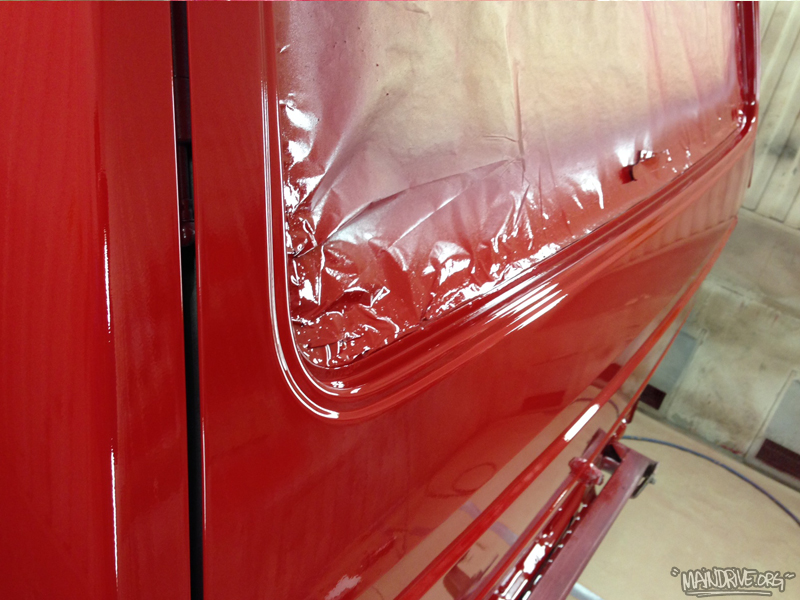
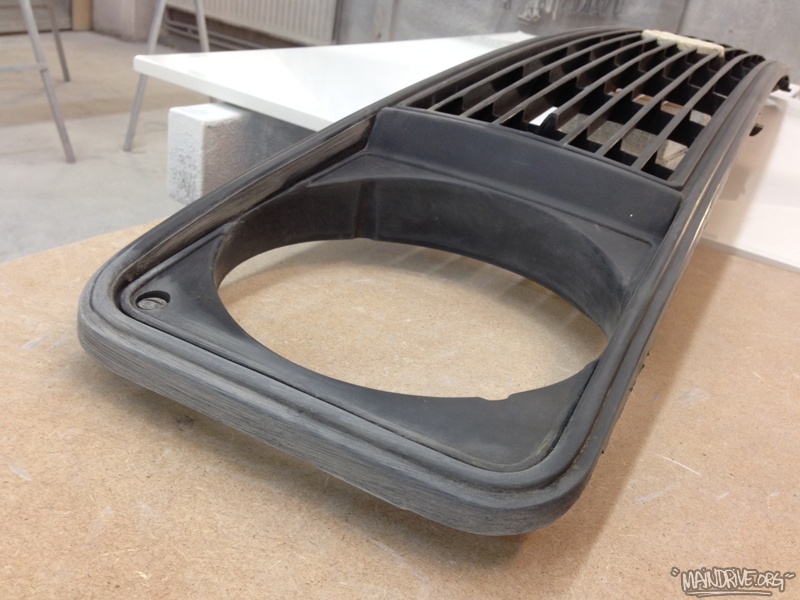
After alot of bodywork and sanding it was time for topcoat paint in VW Marsala Red H3D. Looks nice in red! Also got new Deepblack paint on the sun grey faded trim and parts like the front grills, handles, air intakes, wipers etc. I think all the black parts will match the black wheels perfect when its all together. The wheels from Germany will arrive this week and the other new VW parts from Just Kampers will be here tomorrow!
Get the latest updates from us on your smartphone/Instagram: maindrivegarage
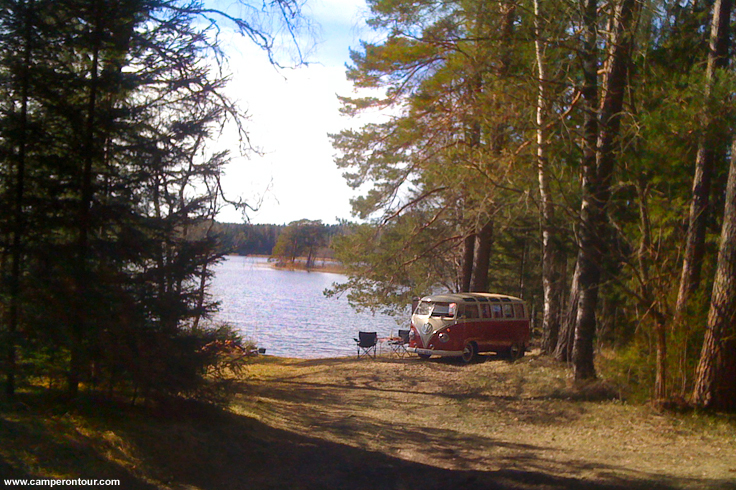
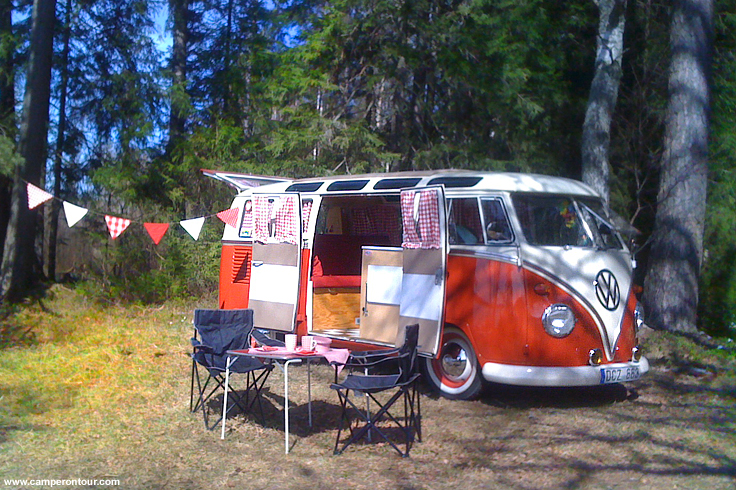
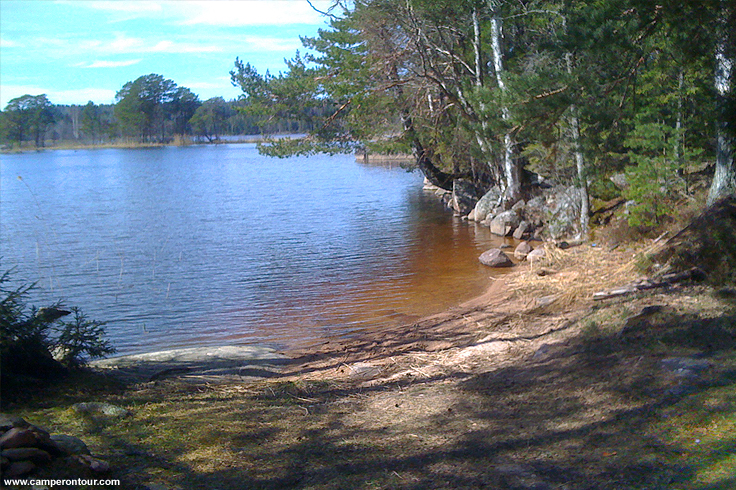
More videos, pics and storys from our roadtrips visit: www.camperontour.com
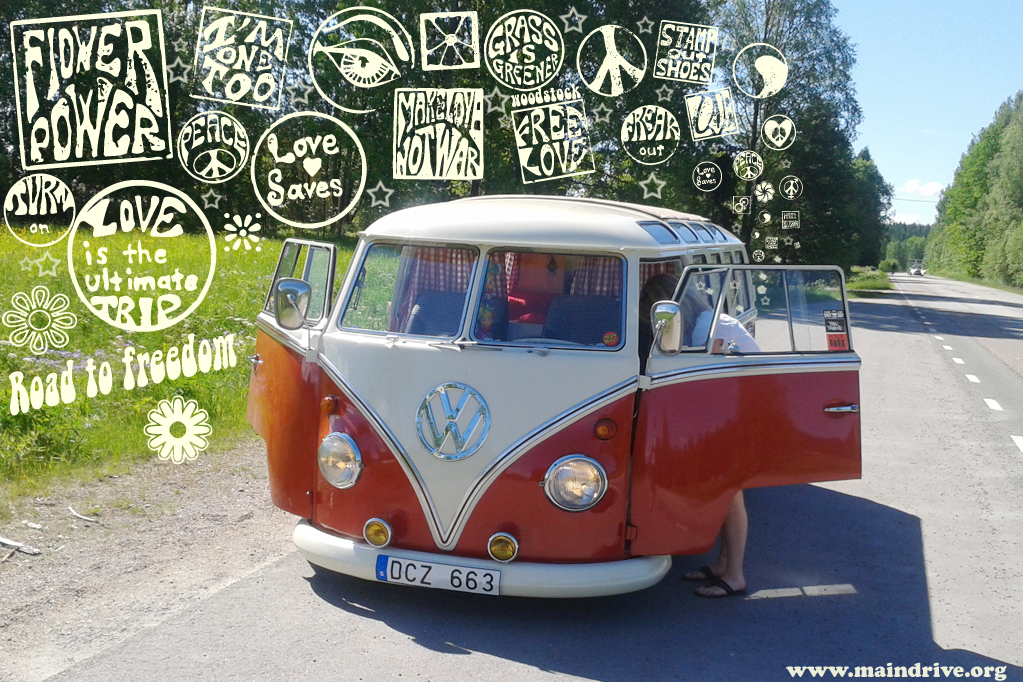
VW Kleinbus Deluxe 21 window samba splitbus
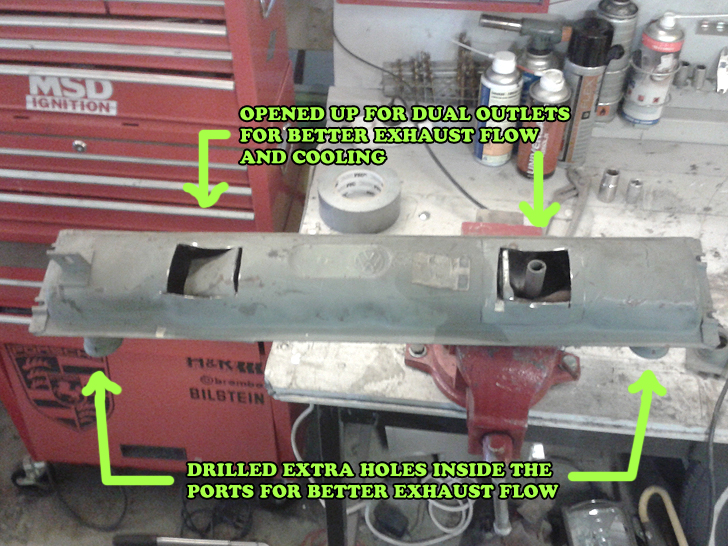
Couple of weeks ago I modified the NOS (New Old Stock) VW bus muffler with some extra drilled holes inside and welded a extra exhaust port to run dual stock exhaust pipes. I bought a new extra exhaust pipe and cut it in pieces and welded it “flipped” and “mirrored” to fit on right/passangerside of the bus. All this to get a little less back pressure and gain better exhaust flow and still keep the “stock” look, instead of bolting on a extractor pipe. Looks and sounds cool!
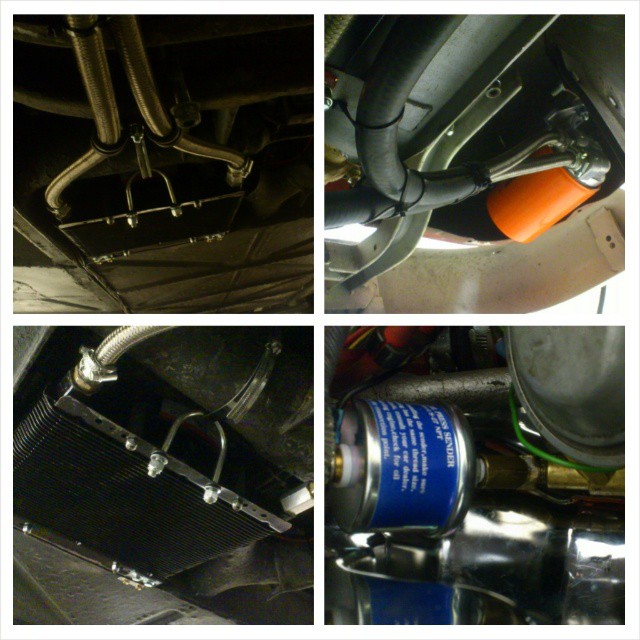
Stainless lines and filter hooked up to the new EMPI oilcooler on the VW bus. And oil temp and pressure unit installed also. Test drive this week I hope.
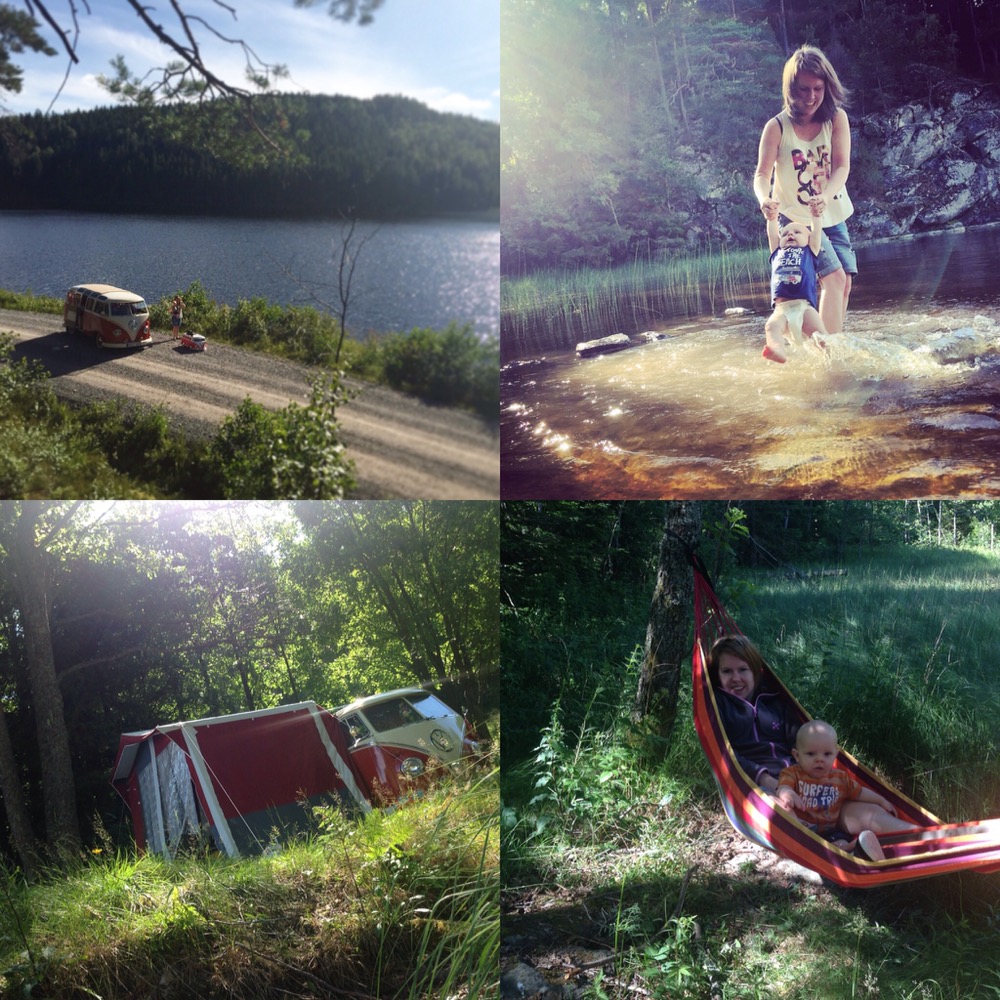
Read all about our VW bus roadtrip we made last summer on: www.camperontour.com
Today I got some stuff done on the bus, that just have been standing in the shop since August while I have been working on other projects. After last summer (2014) when it was crazy hot here, and driving hard with a fully packed bus with a freewayflyer (type1 1968) transmission, the engine runned a little too warm for my taste. Specially when driving long times on the highways, when driving slower or standing still it cooled just fine. The engine a “H” bus case, 1500cc (that was completely rebuilt in 2013) got new 1600cc cylinders and dual-port heads etc. It got updated with a doghouse cooler but clearly its not up to the job so next step will be an bigger external/remote EMPI oil cooler with fan. And I also going to install a real oilfilter, which will make the engine live longer in the future. This was things VW added on later buses so why not upgrade a old one too.
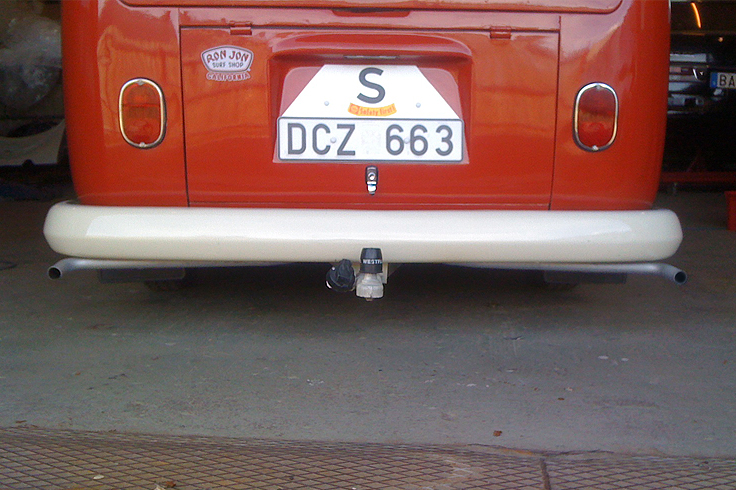
And maybe change the alternator pulley to a Porsche 356 pulley (that have smaller diameter= more cooling for the heads). Since we just driving on the summer I will not use a “by-pass” valve in the oil system, I will just let it idle some extra minutes when it’s cold, before take off. The NOS 1500cc exhaust/muffler will get modified with dual outlets (like on the beetle) but with stock bus exhaust pipes/outlets installed instead so it will look just like original but with dual bus exhausts coming out under the bumper. Also some extra drilled holes inside the muffler will be done. All this just for little less “back pressure” and better exhaust flow and hopefully it will cool the engine a little better too when the hot exhaust fumes can get out from the muffler more quickly. Im going to report after some test runs how big the difference got after all this modifications. So stay tuned. Here comes part 1.
To be continued…
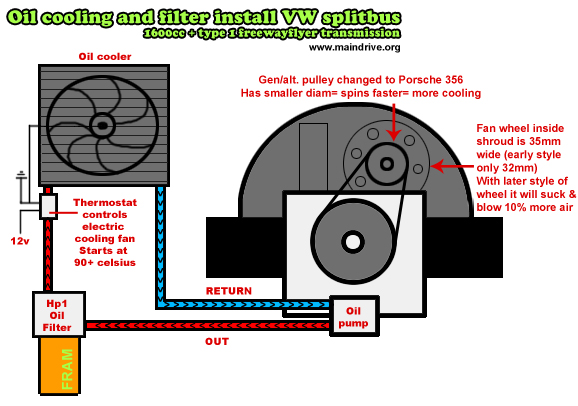
I made this diagram to show how my oil system will be when it’s finished. And I will post the engine cooling result here after some test runs…
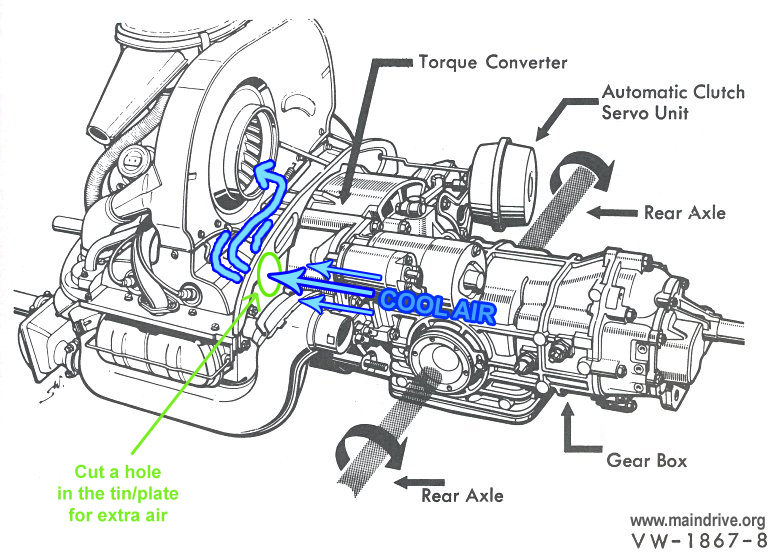
Another trix is to make a hole or like I did cut 2 lines in the tin/plate and folded the the metal down, then it’s possible to adjust how much extra air is flowing in. I suggest that you make a net in front of the opening, you don’t want to have the fanshroud full of leaves etc. I know some VW drivers in the Arizona desert who have made this modification with good results and they could even see the temp. meter drop a bit too. This is an easy way to get more air in a small engine compartment like on a splitbus, with a bigger engine that need more cooling air. Later model buses (Bay window 1968) got bigger air intakes (with angle) in the rear roof for scooping in more air in the engine compartment. You don’t want to mount ugly scoops on your split.

Bumper, sheetmetal and exhaust removed. Going to install a Maxi flow oilpump with dual IN & OUT ports for external oilfiler FRAM and the oilcooler.
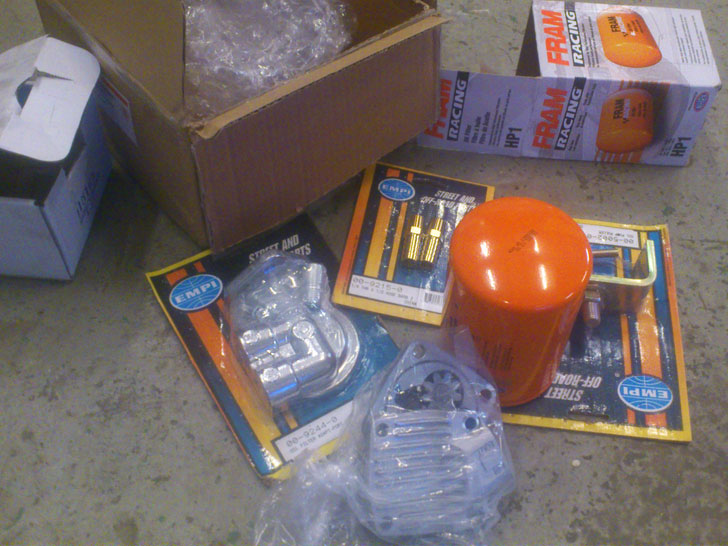
New parts arrived…
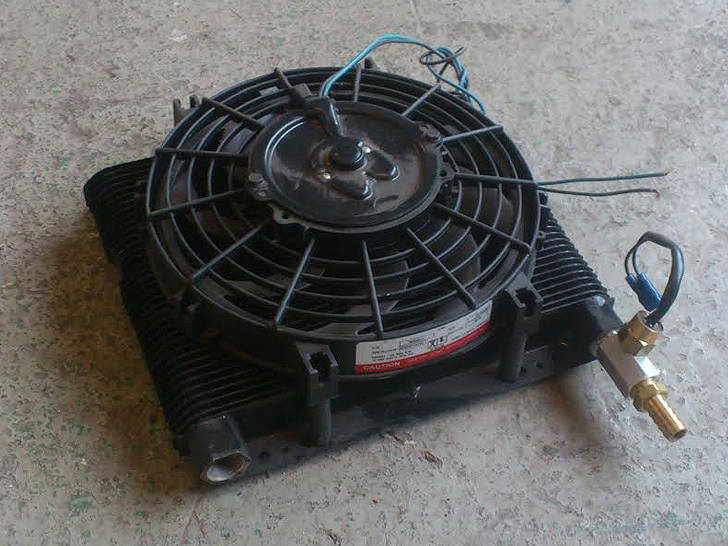 The new EMPI 72 plate oilcooler with 9″ electric rotary fan controlled by a inline thermostat. So the fan will start and stop by itself when needed (when hot). Just like on modern watercooled cars…
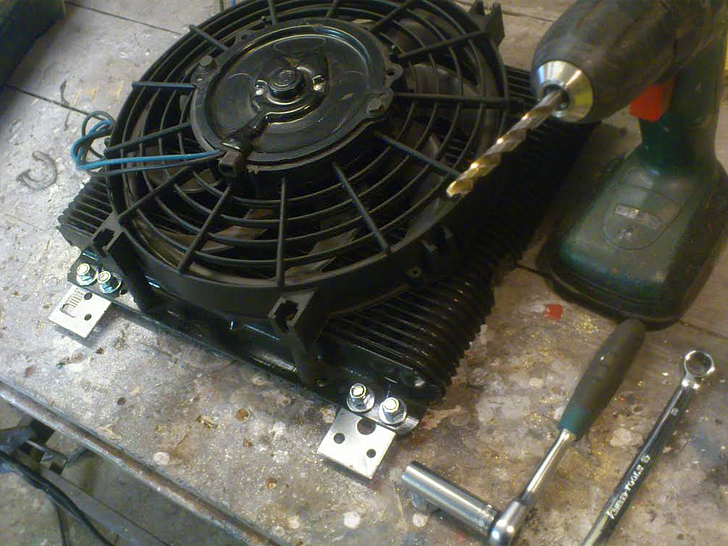
Had to make some custom brackets. Made it adjustable on 1 side, so possible to adjust the angel up & down on the cooler for more airflow if needed, but don’t think it will be necessary with this big fan.

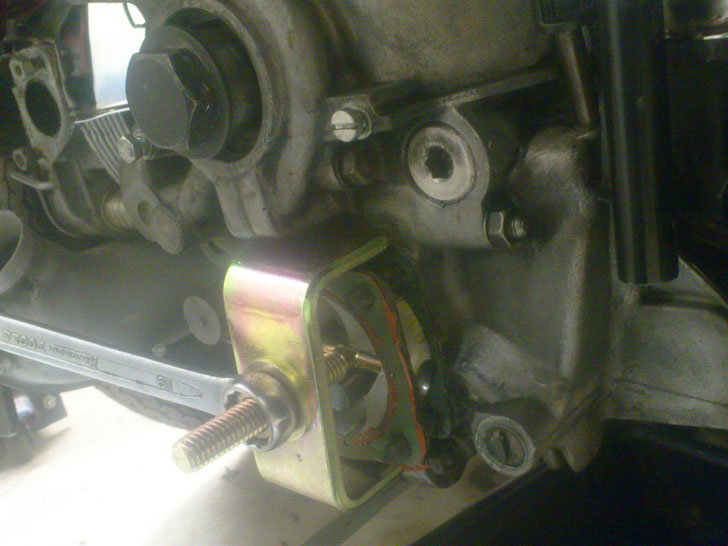
On a Samba bus it isn’t really much space underneath like on an ordinary splitbus or bay. Because Deluxe and sunroof buses have extra strengthed floors underneath.

This was the only place the cooler would fit nice, just in front of the transmission. Cooler lays flat with the floor so it wont hit anything when driving low or bumpy roads.
Removing the “old” oil pump…

Maxiflow oil pump has IN & OUT outlets on the oilpump cover. No drilling, tapping or messing around with the engine case. Almost “bolt-on”.
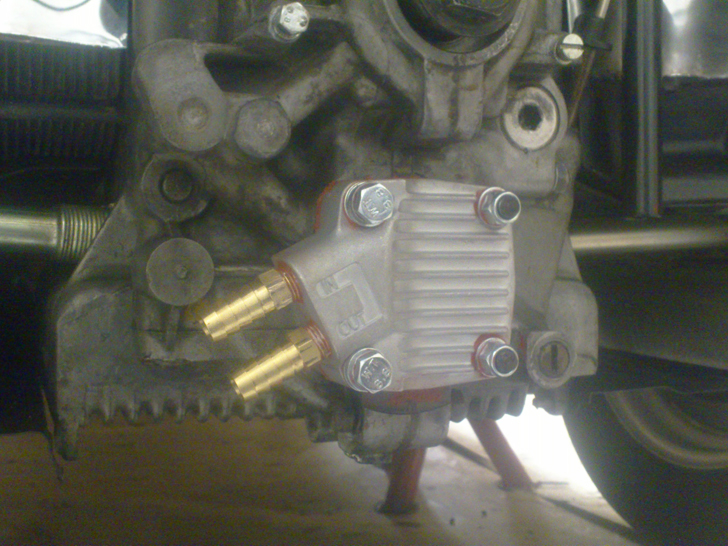
Pump installed and ready. Watch out for using the bolts that is supplied with the oil pump kit, some of them are to short and can destroy the threads in the engine case. I took some longer ones instead.
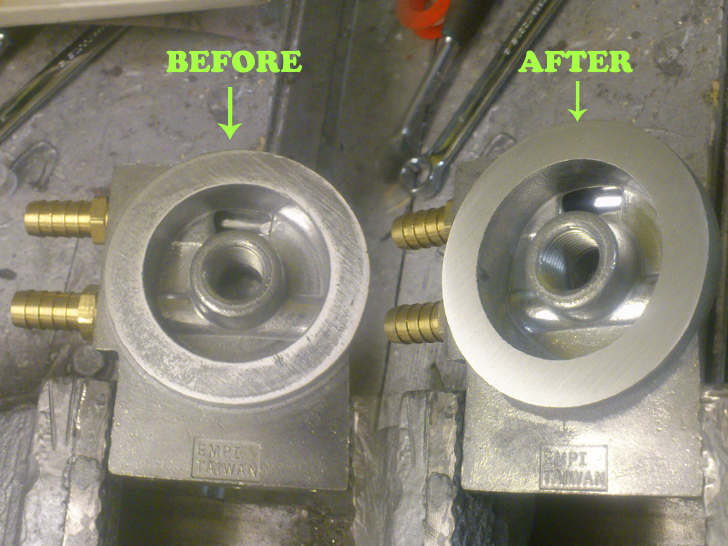
EMPI is not what it used to be (made in US) as you can see its now made cheap in Taiwan. It works but the quality is poor. I had to machine/sand down the surface to make the oilfilter o-ring seal tight. And always watch out for “cast beard” in canals and holes, you don’t want that in your engine…
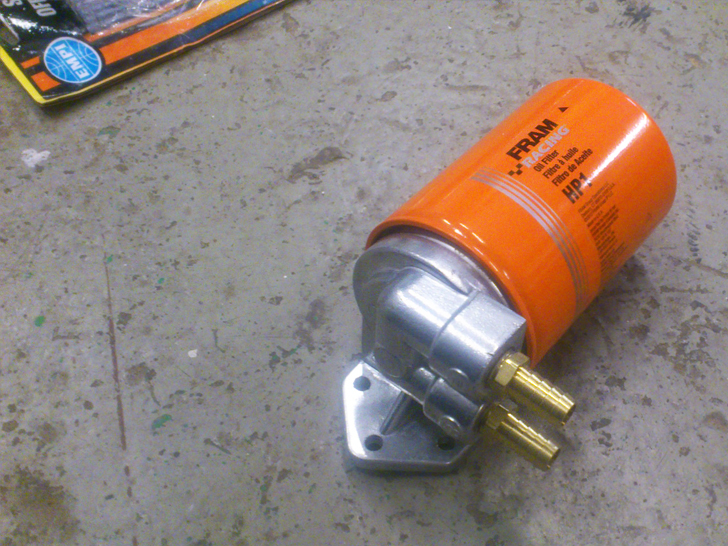
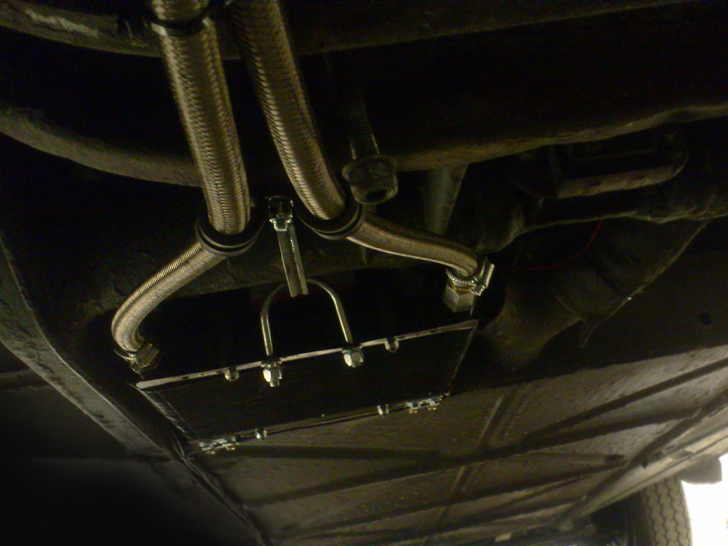
Filter and holder/bracket ready to go in. I will mount it in the left corner under the battery tray so it will be easy to change filter in the future. Also if there should be a oil leak somewhere from the hoses I can loop the hose back to the oilpump and keep driving.
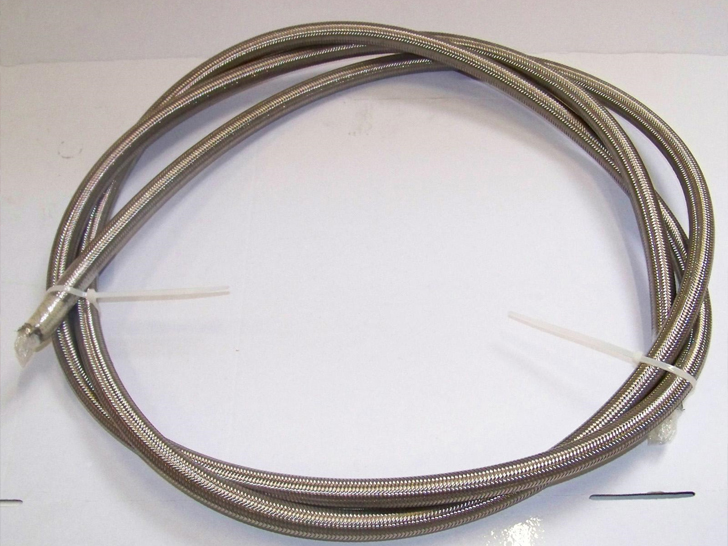
Heavy-duty stainless steel braided oil hose. Good for -90 to 160+ celsius. Pretty pricey. Im not planning to drive at Le-mans but good to know that you have hoses that will last on those hot summer days, right? I will use dual hoseclamps in each end. I know some historic Porsche rally/racing cars that use hoseclamps so it will work just fine on an old bus like this too…
Modified for 1600cc+. It’s not finished in the picture above of course…
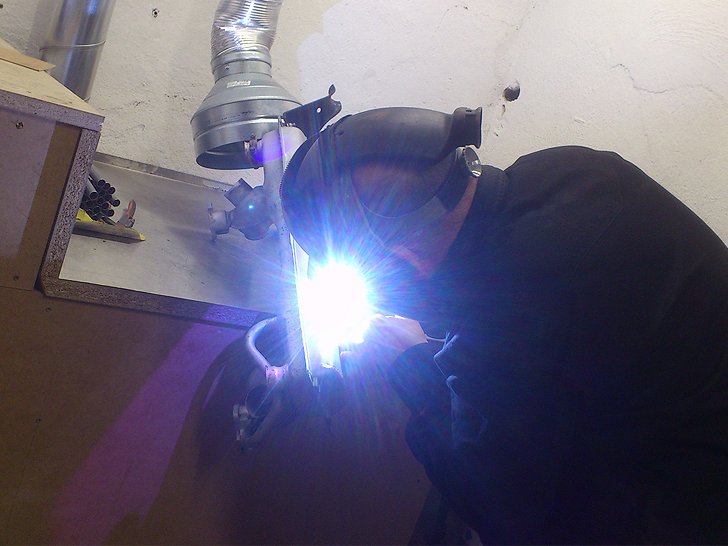
TIG weldning
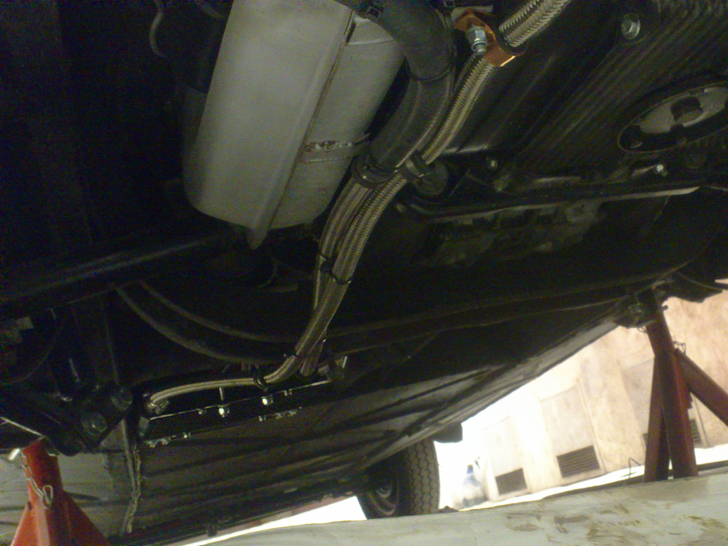
Stainless lines routed

System is now filled up with new oil. No leaks. Great. Almost 1 extra liter of oil needed to fill it up now. More oil in the engines oilsystem is good, keeps the oil fresh longer and helps cooling.
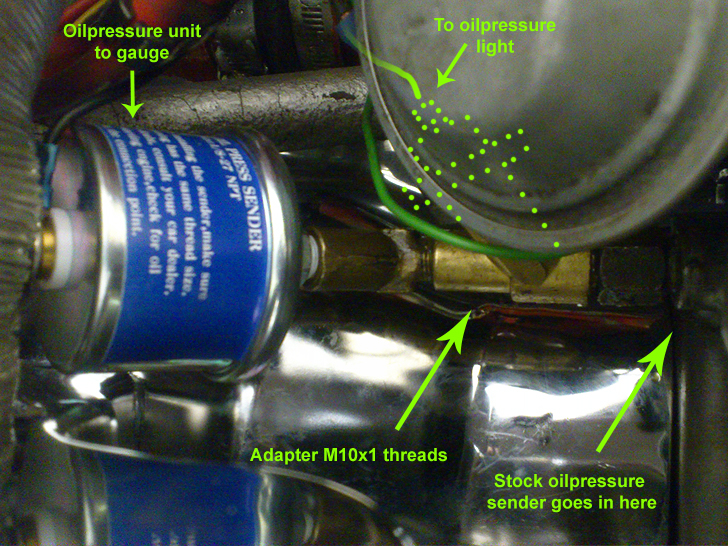
Oilpressure gauge is now installed, the sender was mounted on a adapter, the case is M10x1 threads. Oiltemp is measured thru the dipstick. Left to do is a testdrive, when weather approves…
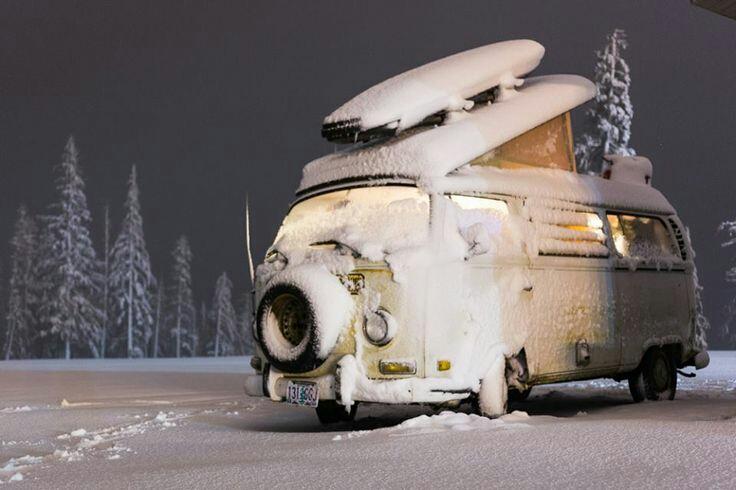
Very cool shot on an early VW Baywindow Camper in the winter…
Spend sometime in the garage, get shit done…
Looking for parts to Late Bay like, slidingdoor, passenger door and full length roof rack. Let us know what you got: info[@]maindrive.org