Broken pieces of yesterdays life… 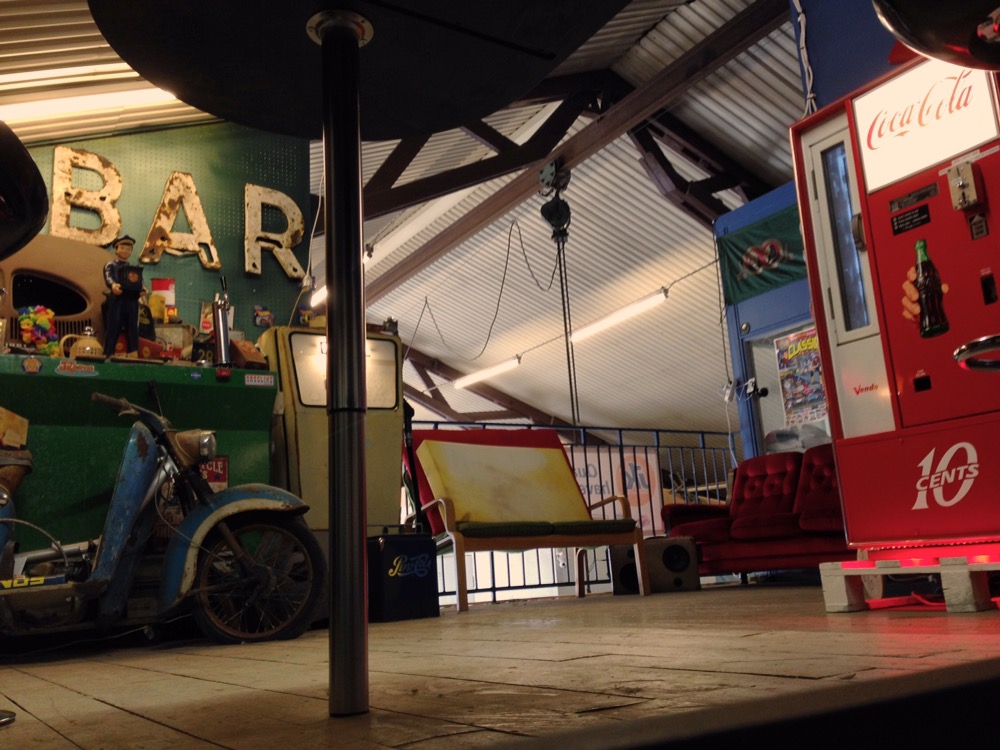
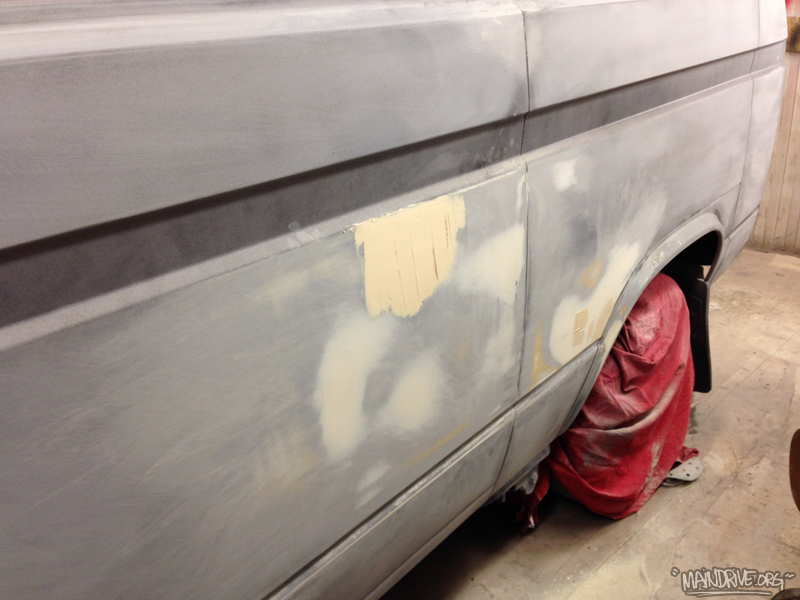
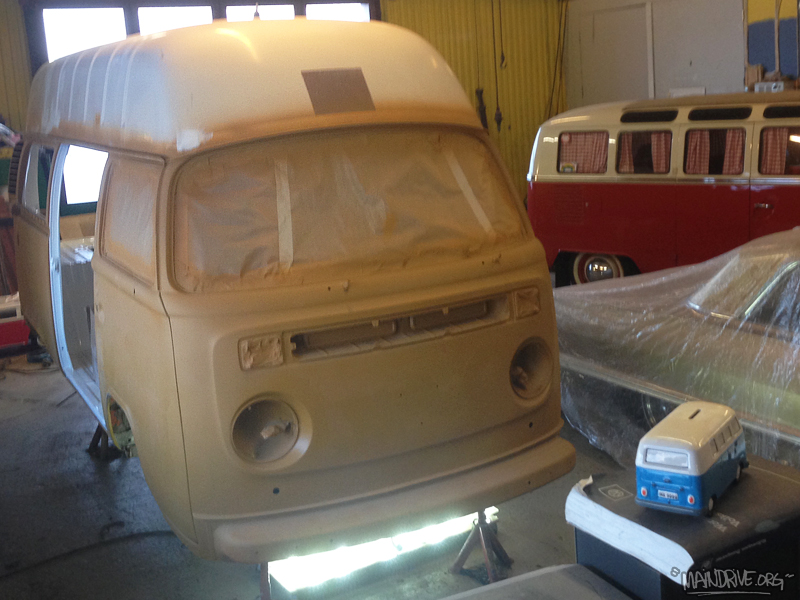
Time to sand the primer and fix small dents and scratches, and its alot of them both. When this is done a new coat of grey primer/filler is needed to get a good even base that needs a light sanding with 800 grit by hand before paint! Alot of work for sure!
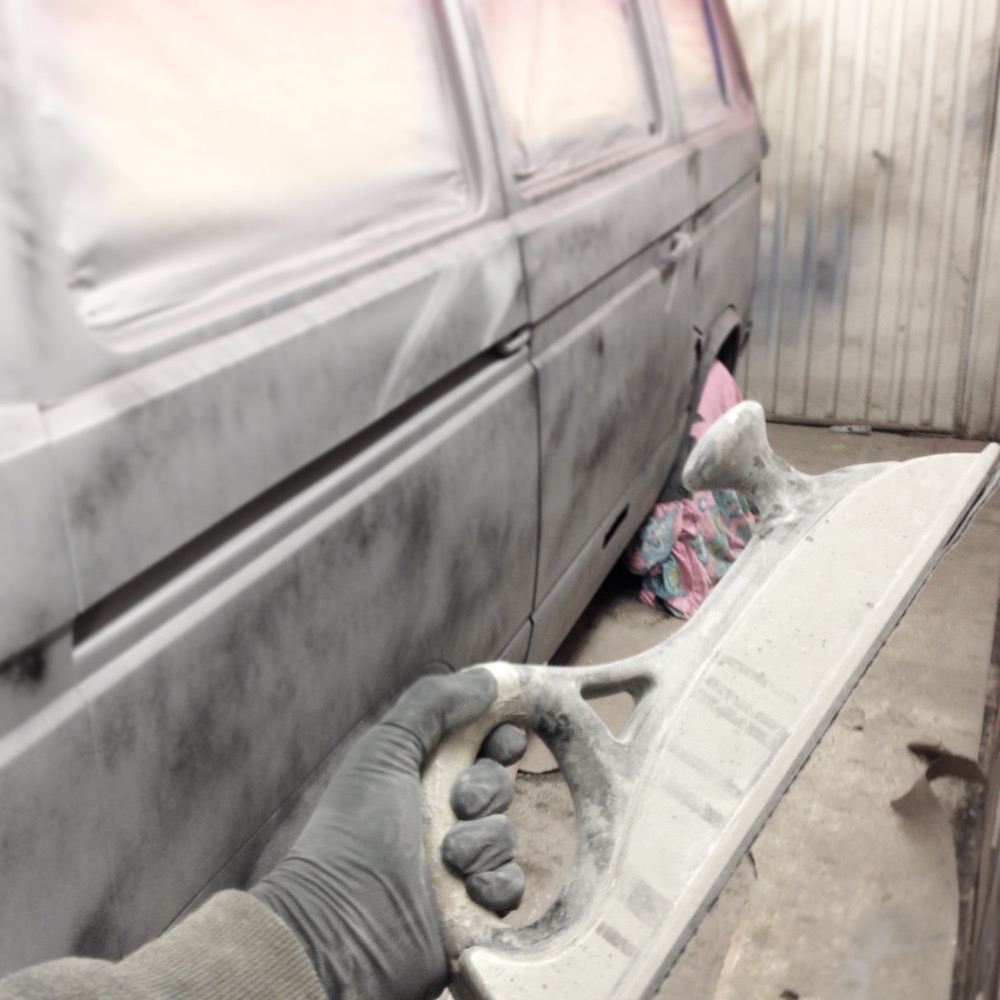
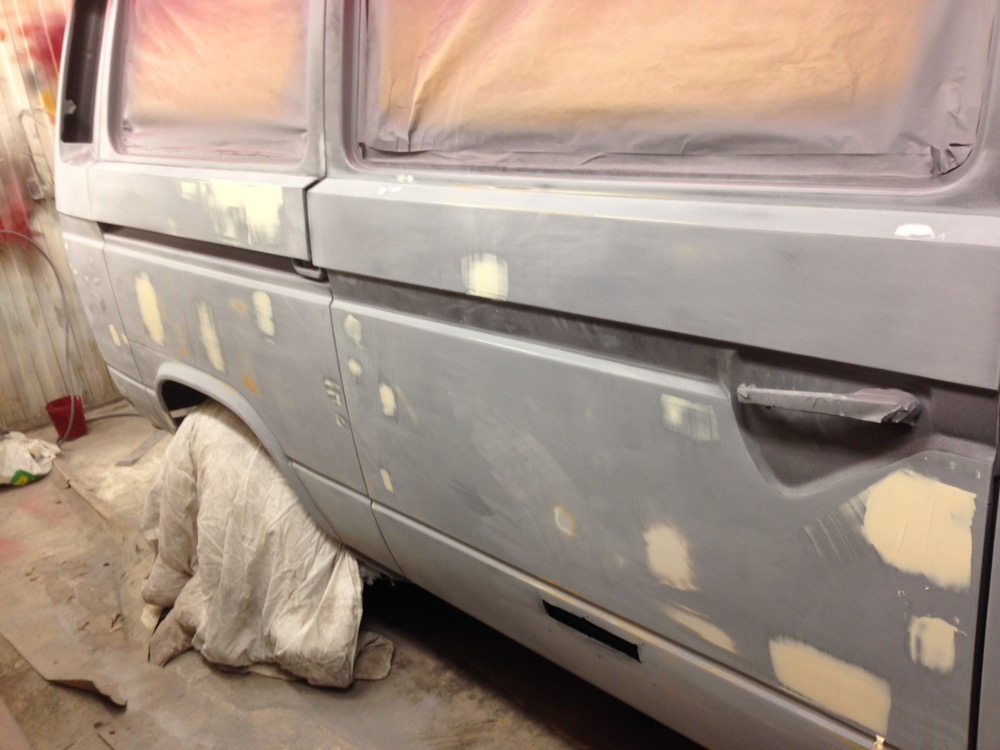
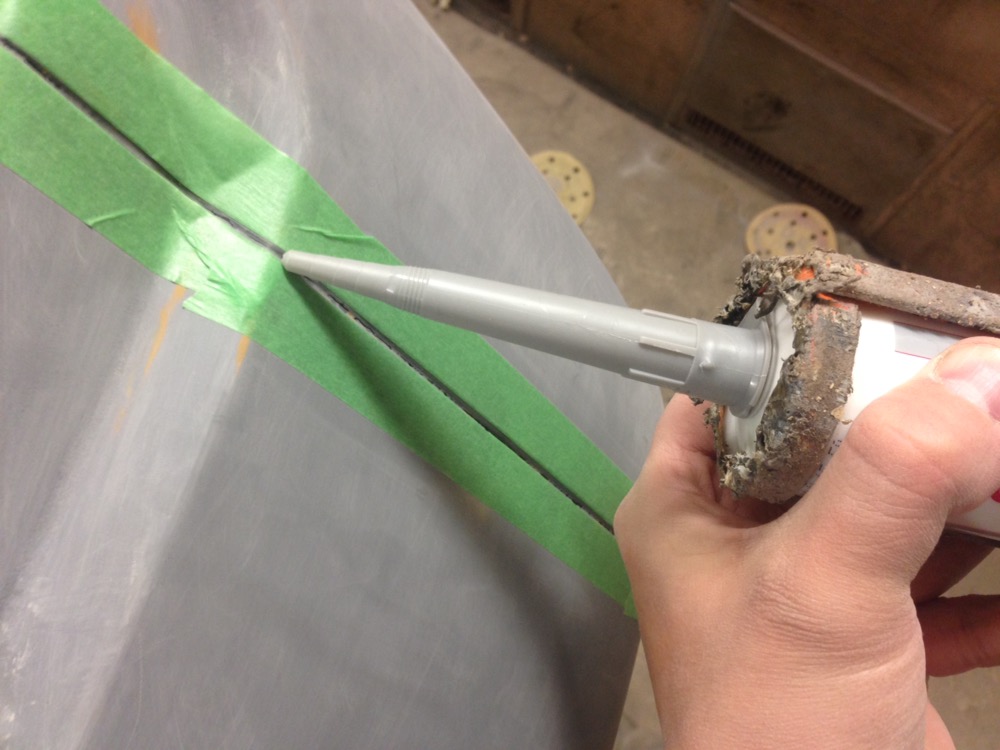
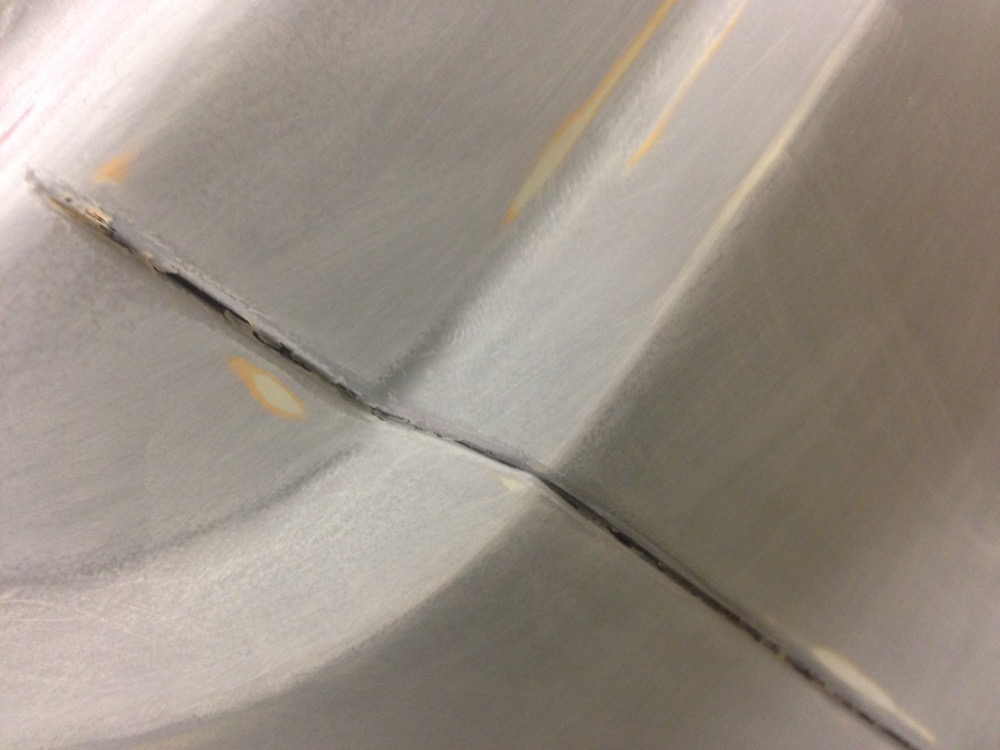
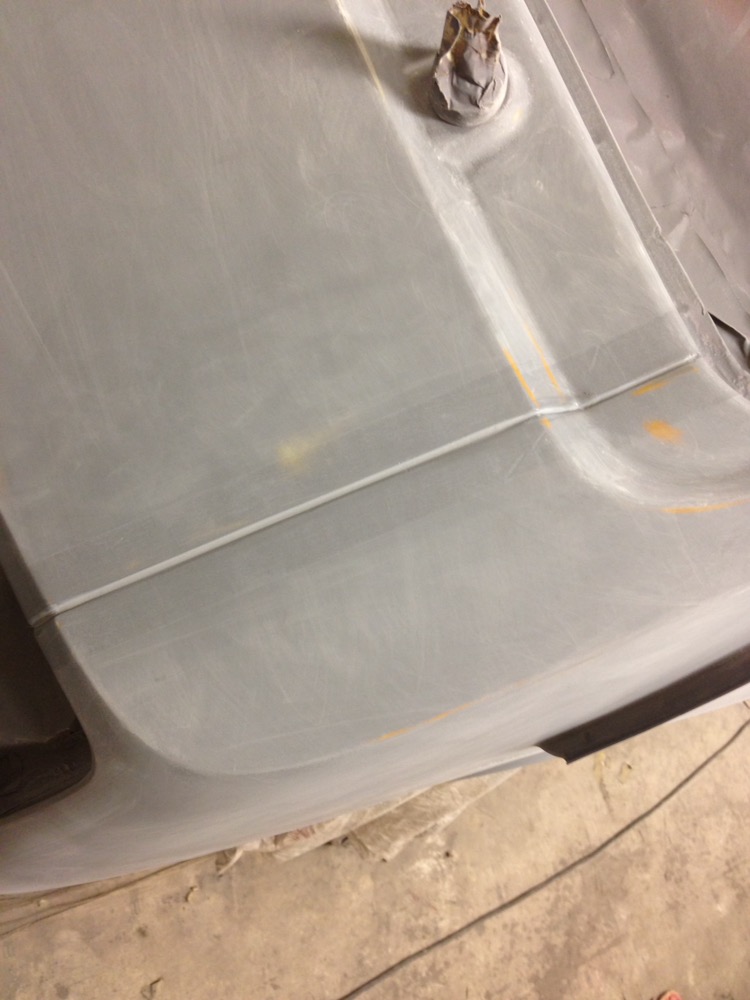
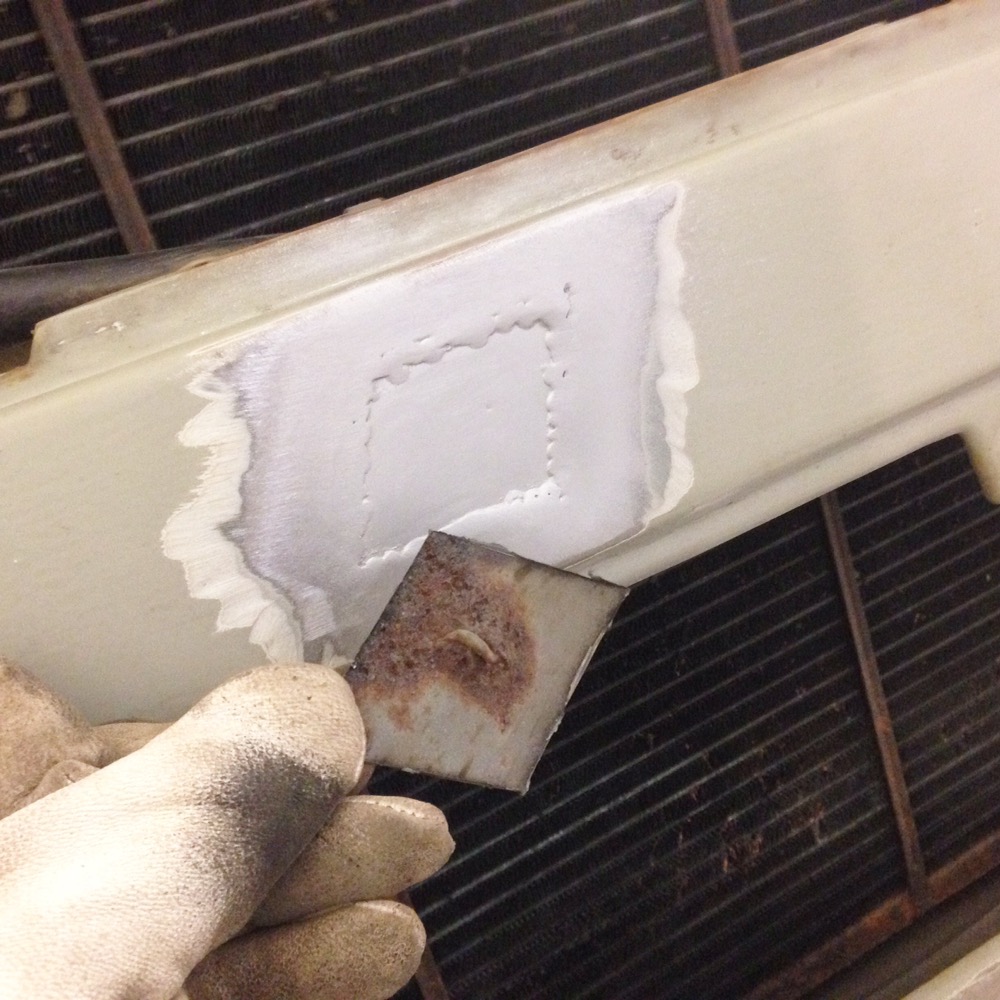
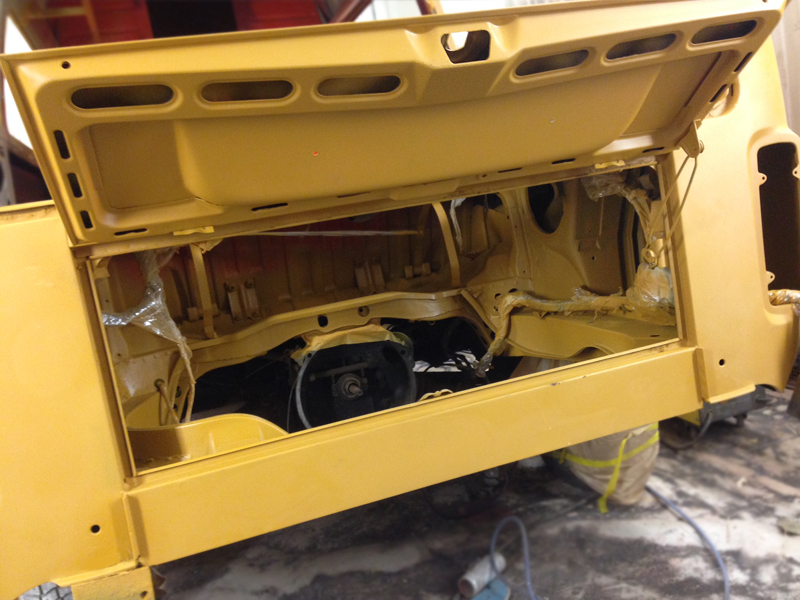
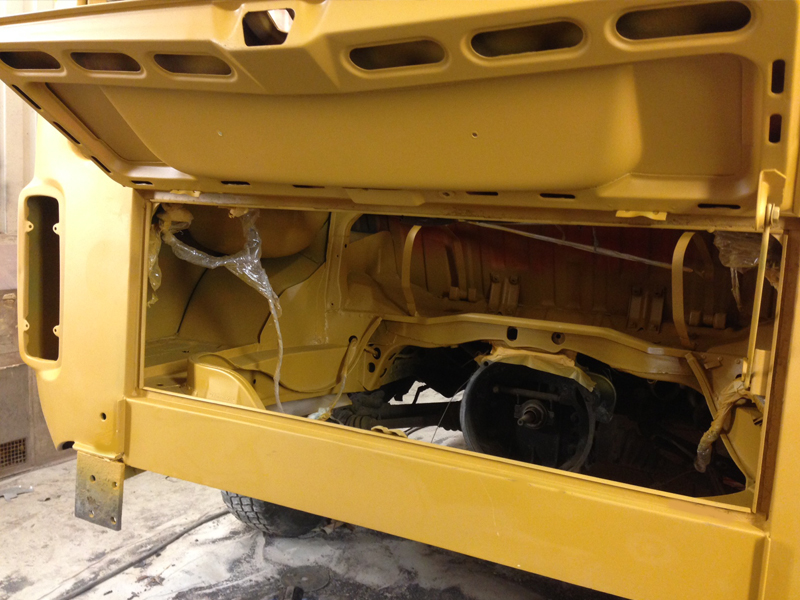
All the places that have been sanded and sandblasted down to the bare metal have been painted with yellow 2k epoxy rust primer for protection. After this, all the small dents, scratches and imperfections in surface/metal after sandblasting etc have been filled up and sanded smooth and all the seams have been sealed up with new seamsealer. Then it was covered in yellow epoxyprimer again. When it was all dryed it just needed a light sanding before 3 coats of grey surfaceprimer was added. Now it has to dry a couple of days before it can be sanded down again, but this time more carefully and must be perfect! When this is done its ready for topcoat paint in VW Marsala Red H3H3.
Bumpers and some smaller parts is at the sandblasters at this moment and more new parts from Just Kampers in UK is on its way right now. Time to choose some cool wheels also, stay tuned for more pics and updates!
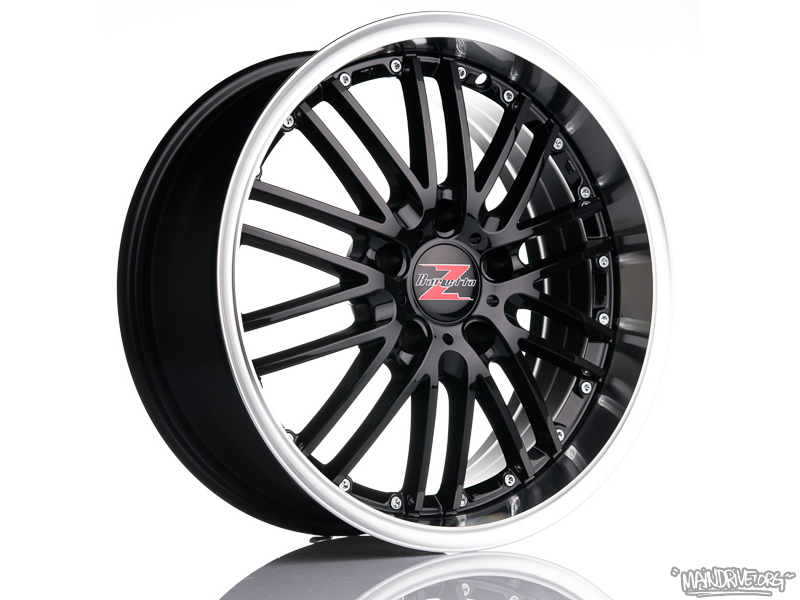
Maybe these 17″ wheels? 🙂
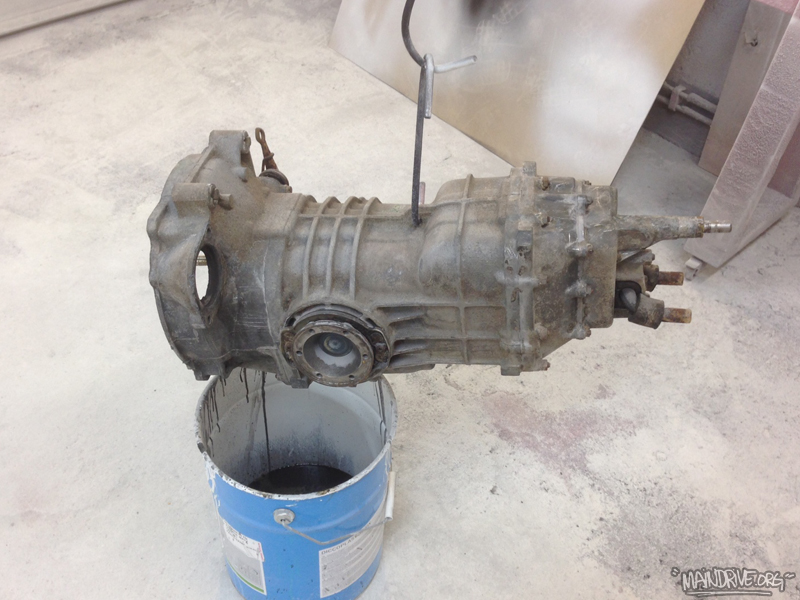
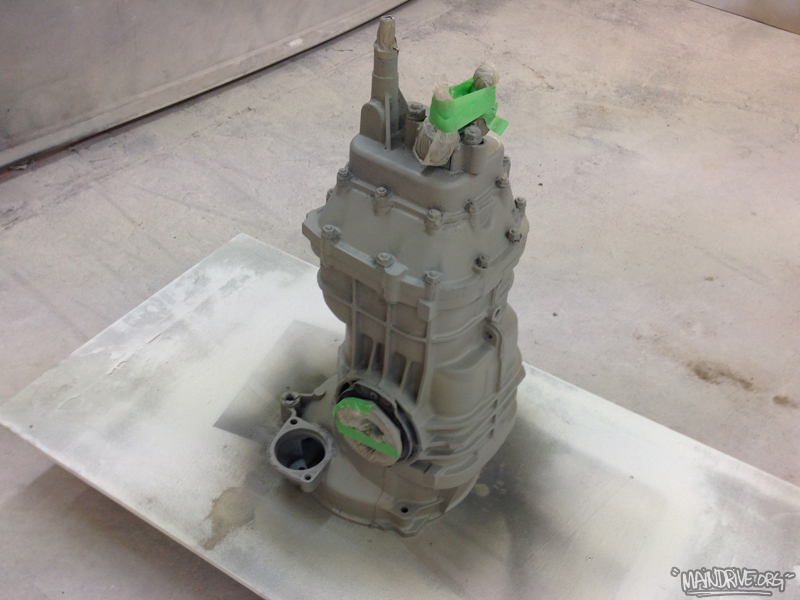
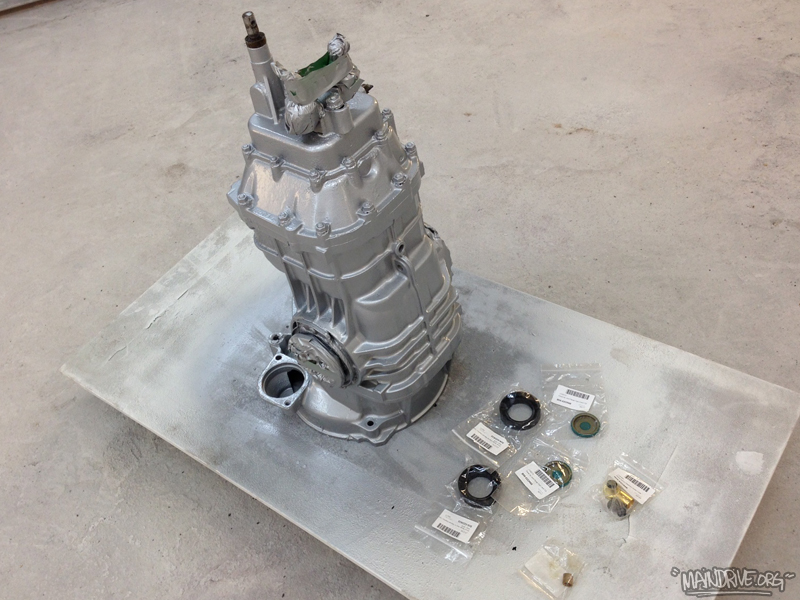
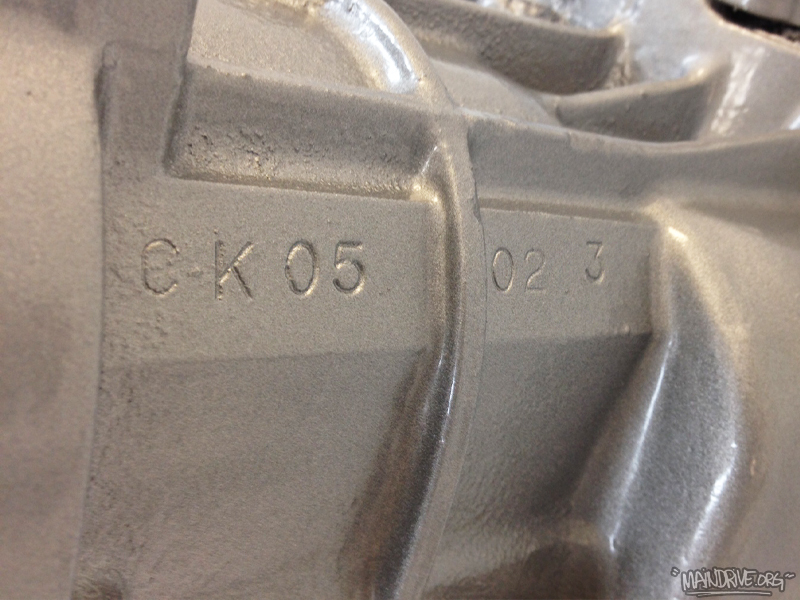
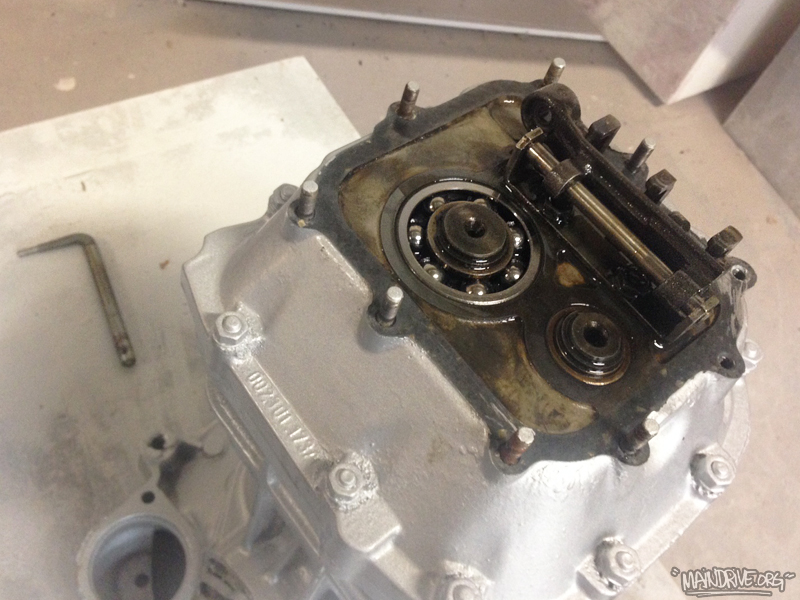
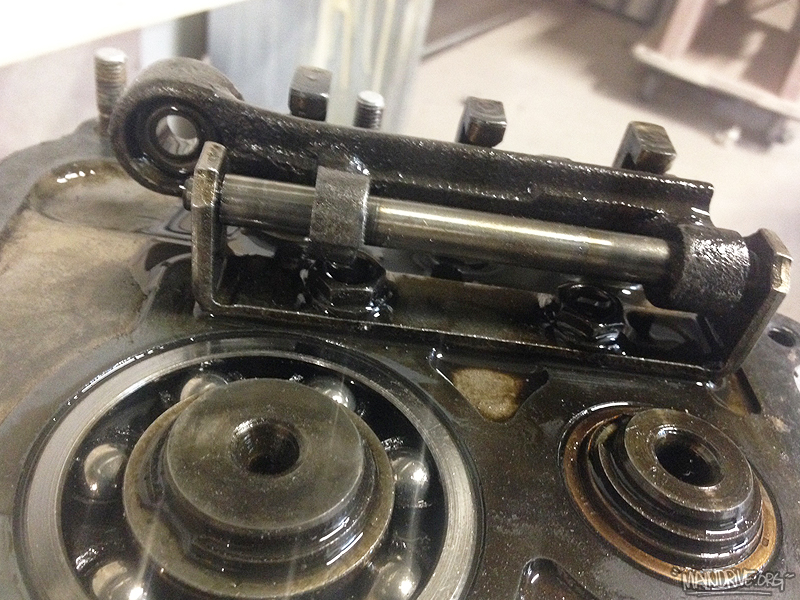
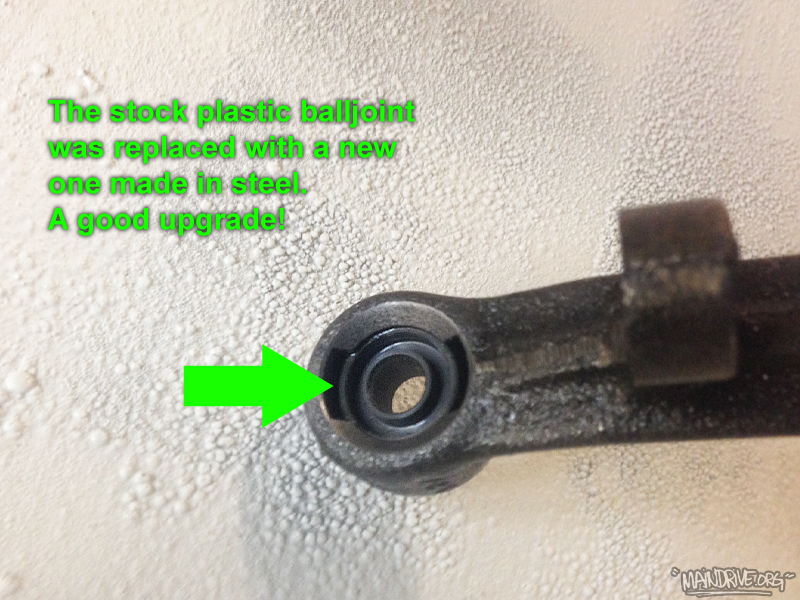
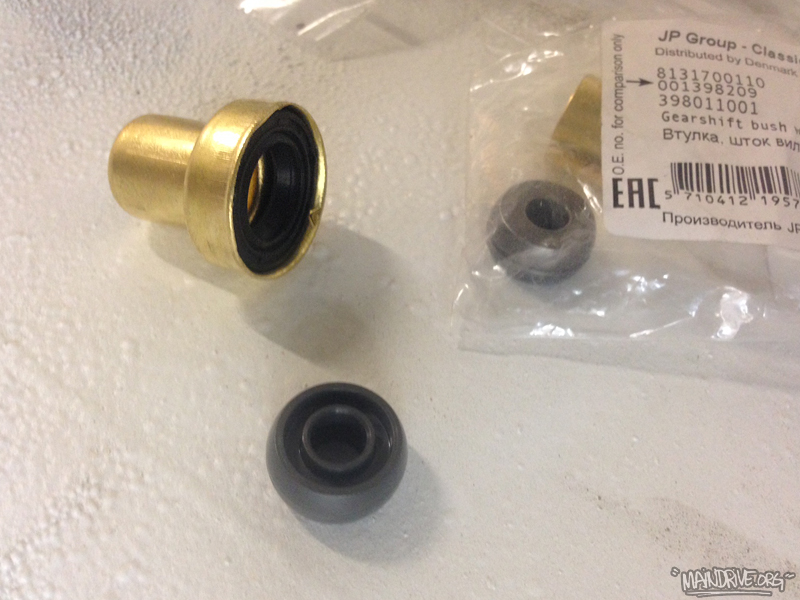
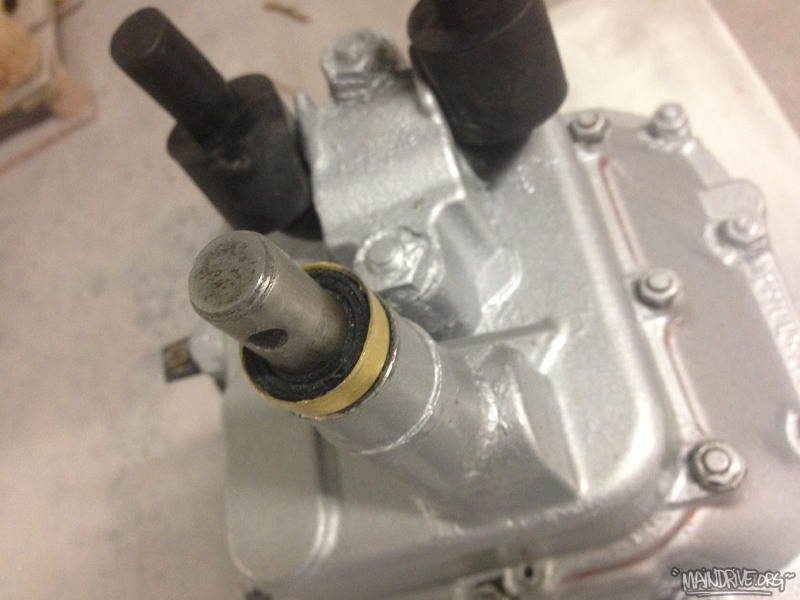
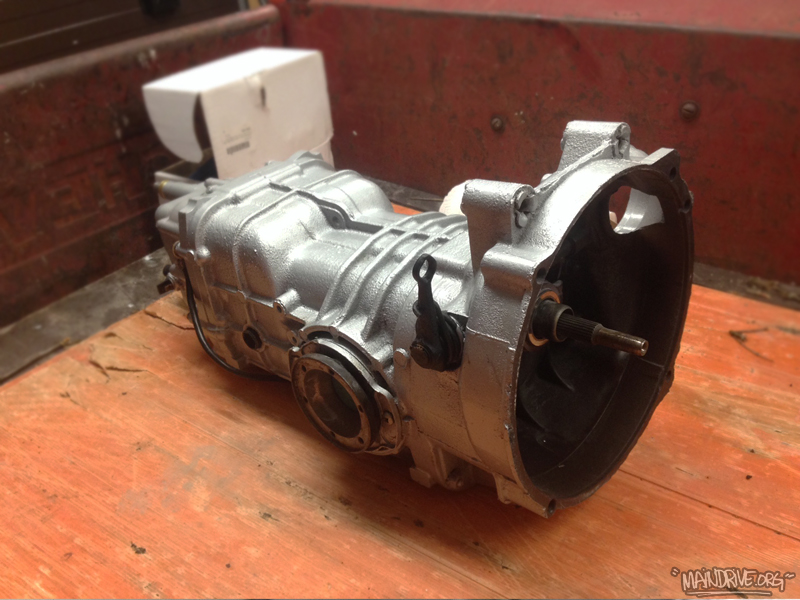
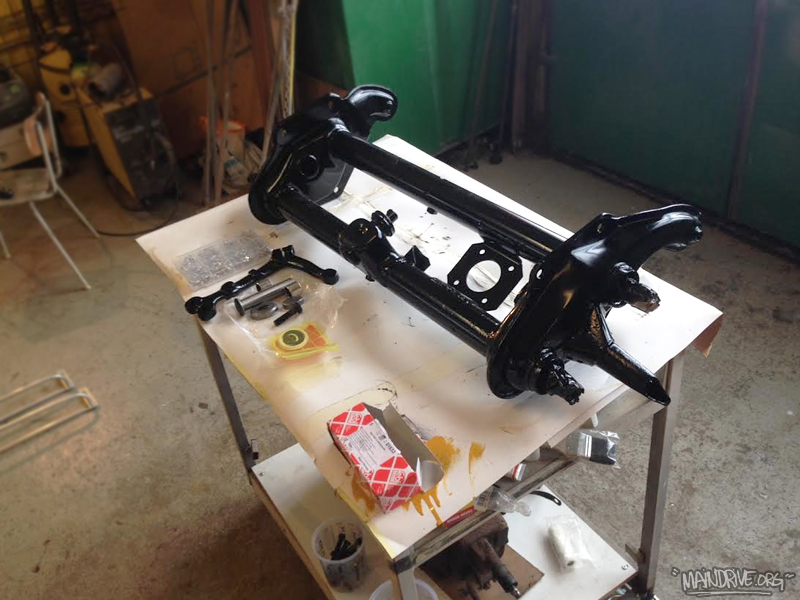
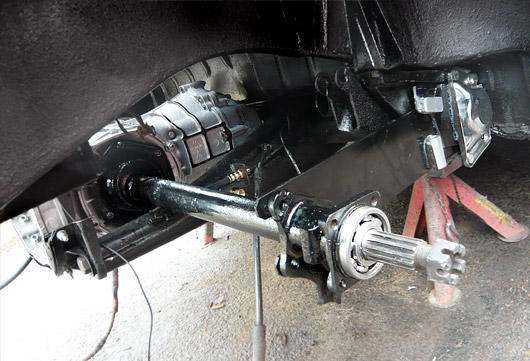
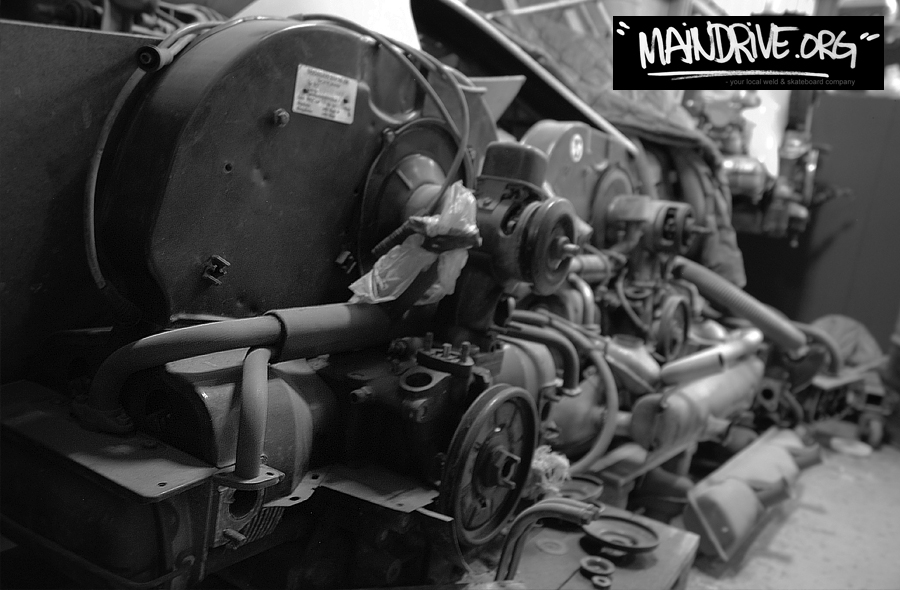
Stephans VW Bay project moves on and here is some pics from the transmission overhaul made last week here in the garage. The transmission is a 002 case, 3 rib from late 1973. Code CK. The Baywindow buses are famous for their poor gearshifts. If you have a sloppy gearstick on your bus, first check all bushings in the gearlinkage that runs thru the floor from front to back. If the shifting still is bad, then its possible that the gearleveler balljoint (made in plastic) inside the nosecone is worn out. I replaced this balljoint on this tranny for one made in metal instead, so it will last for ever! The magneticplugs was cleaned, oil drained, all gaskets and seals new and then a coat of fresh paint. Now its ready to be bolted back in the bus again.
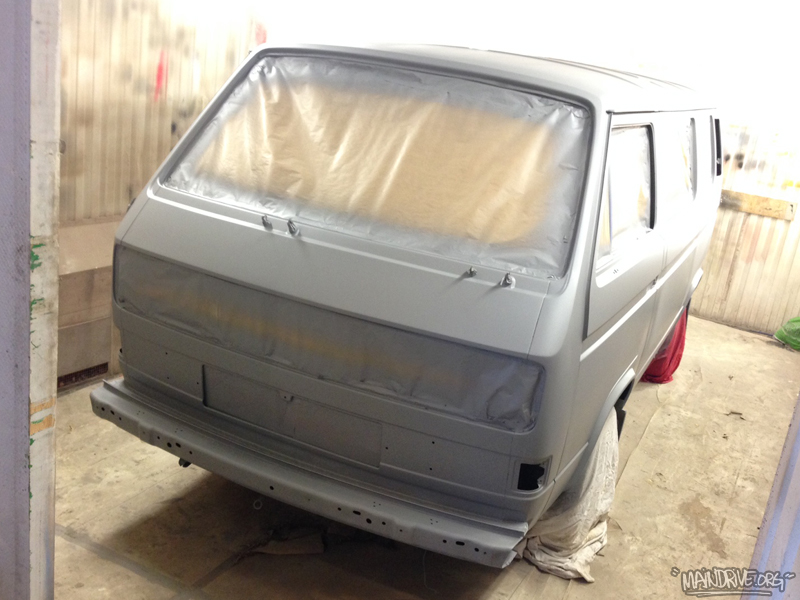
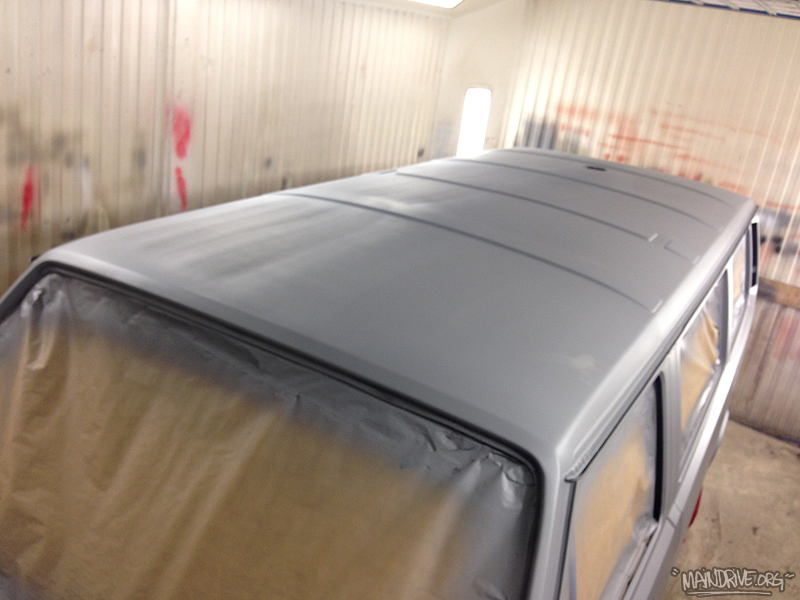
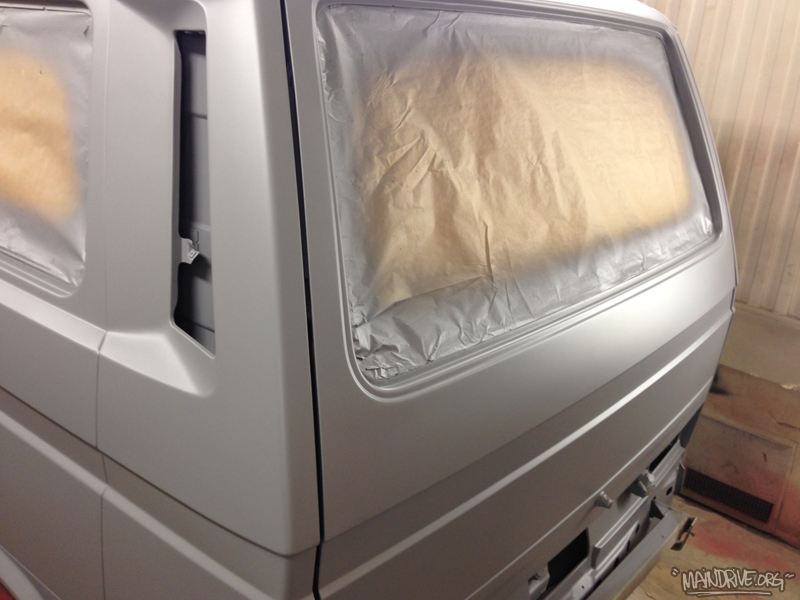
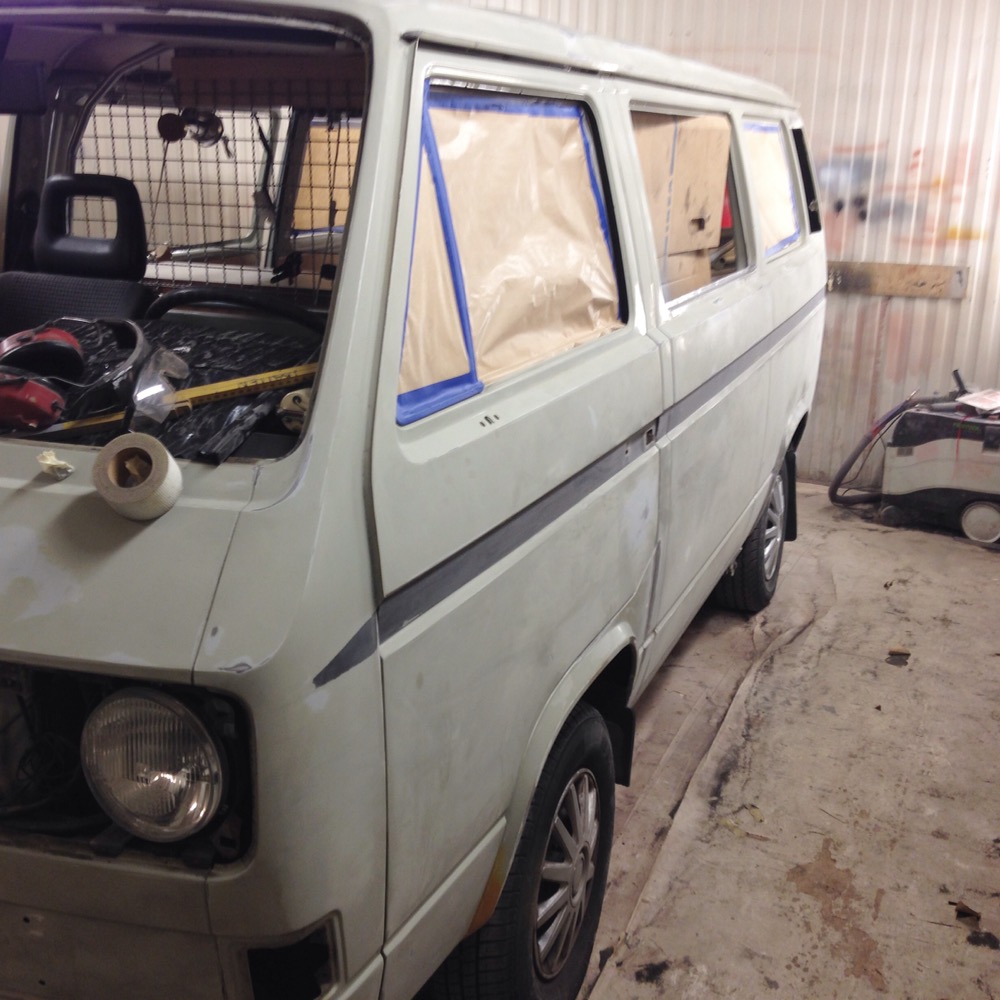
Some updates! All windows are out, all rust is repaired and the body have been sanded. Now the body work can start and I hope to have it in primer next week. Then its ready for more sanding and smaller bodywork before topcoat goes on. Maybe VW Marsala red paint?
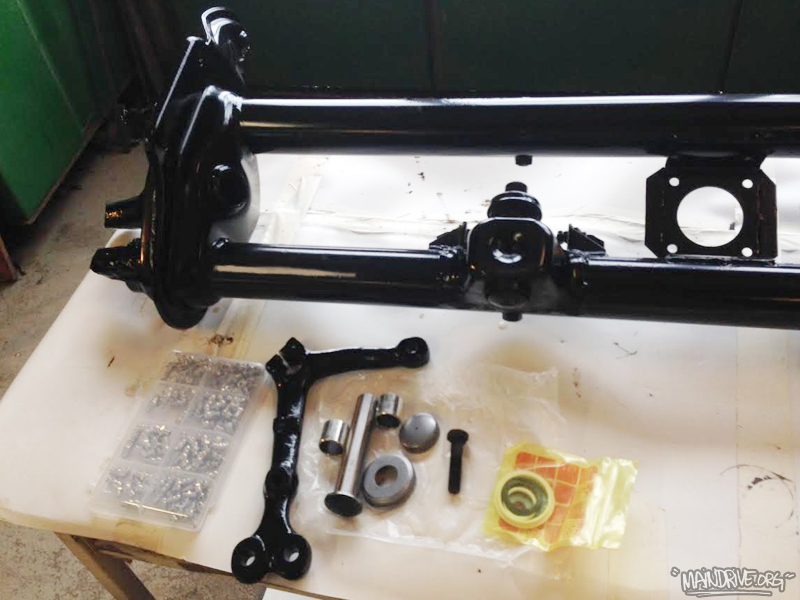
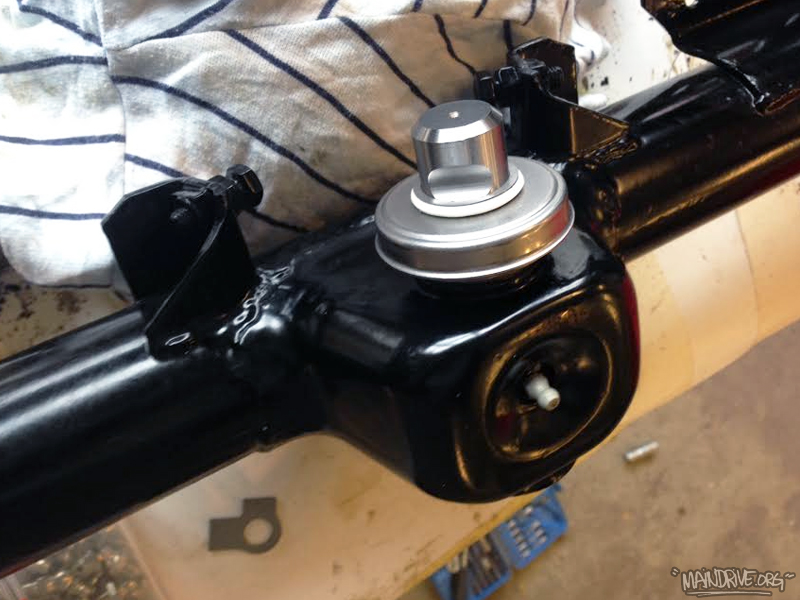
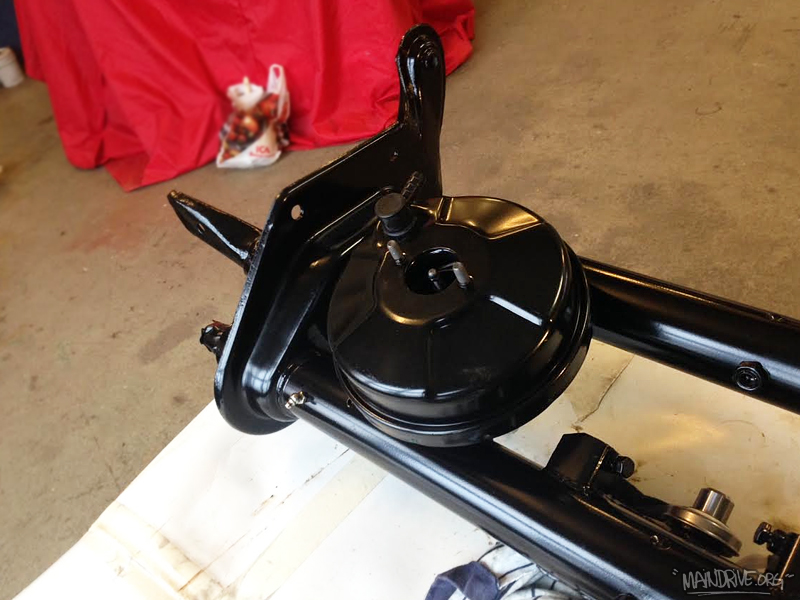
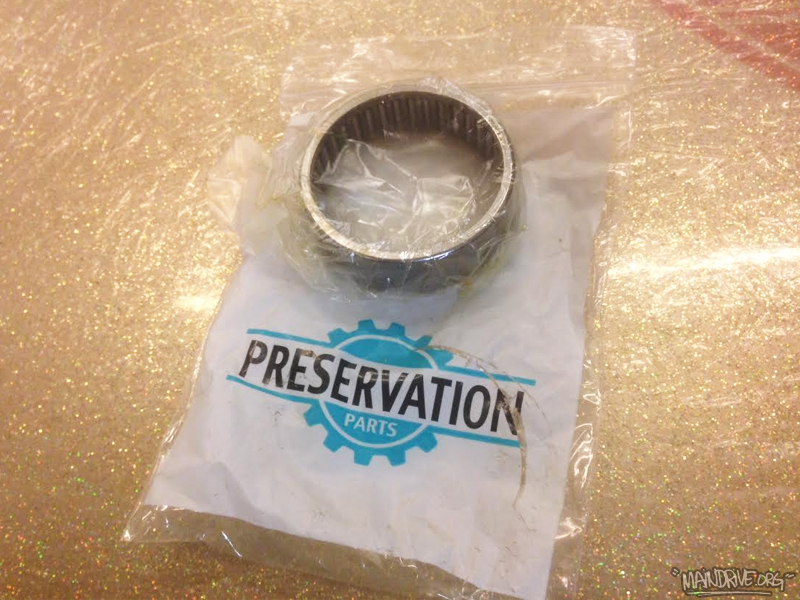
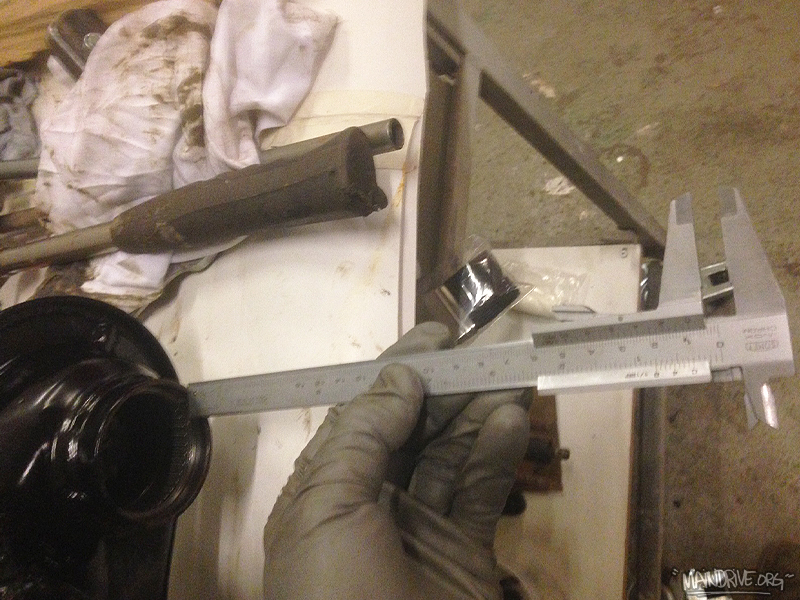
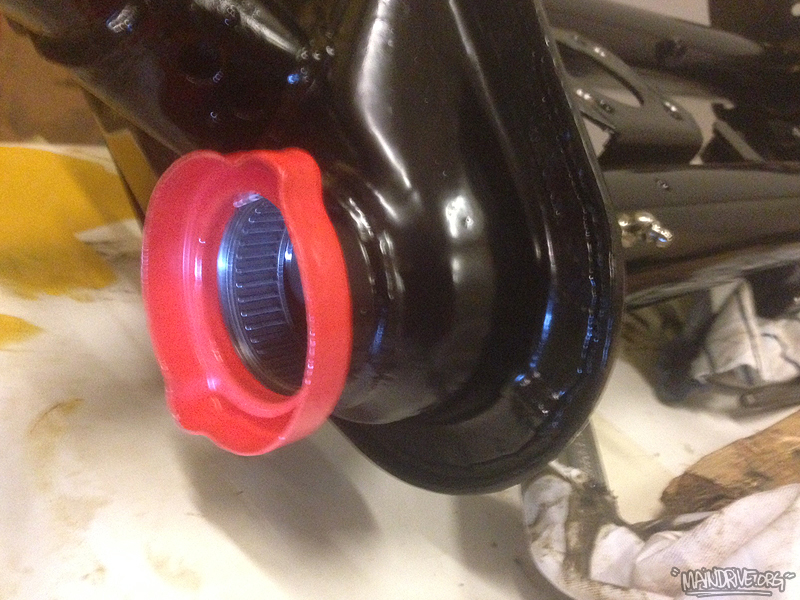
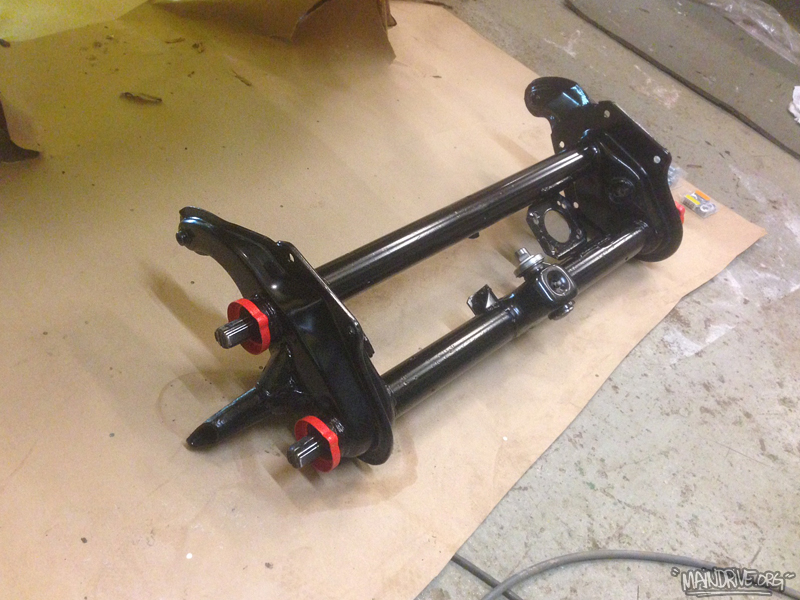
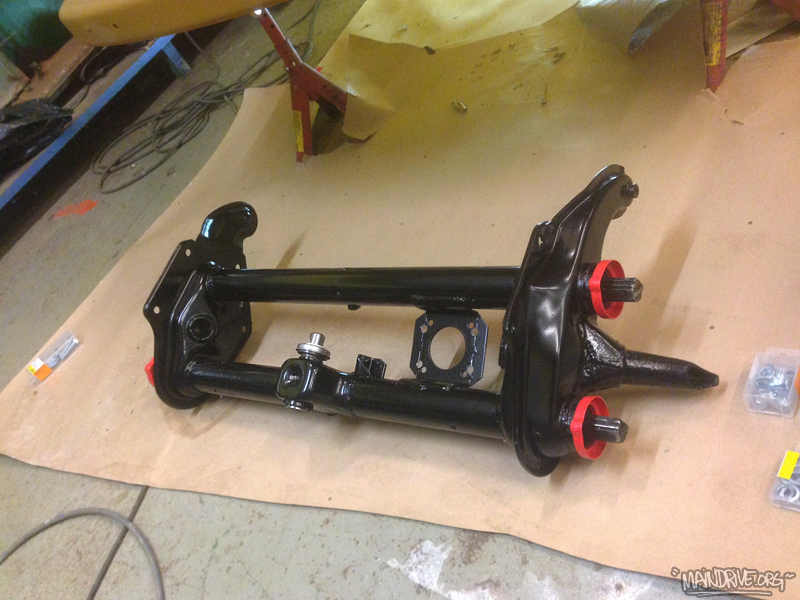
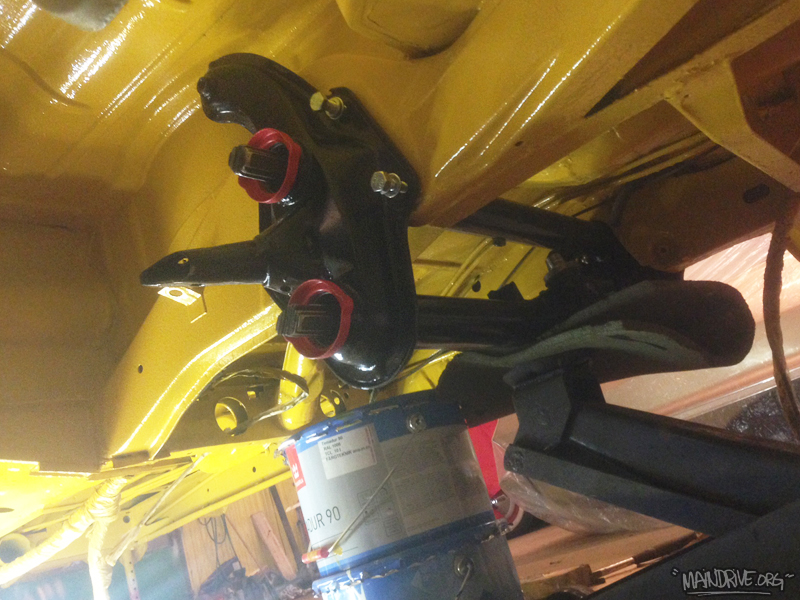
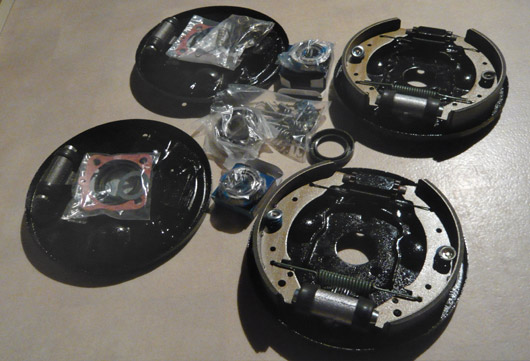
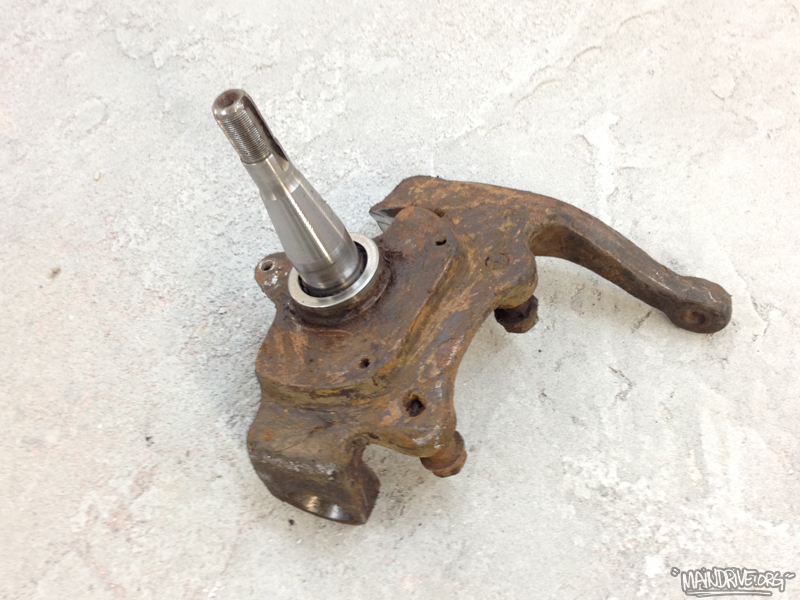
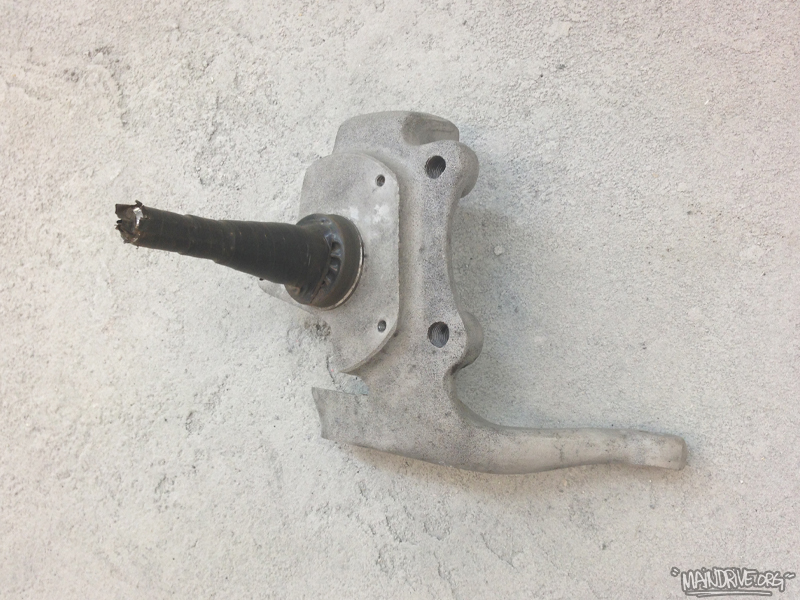
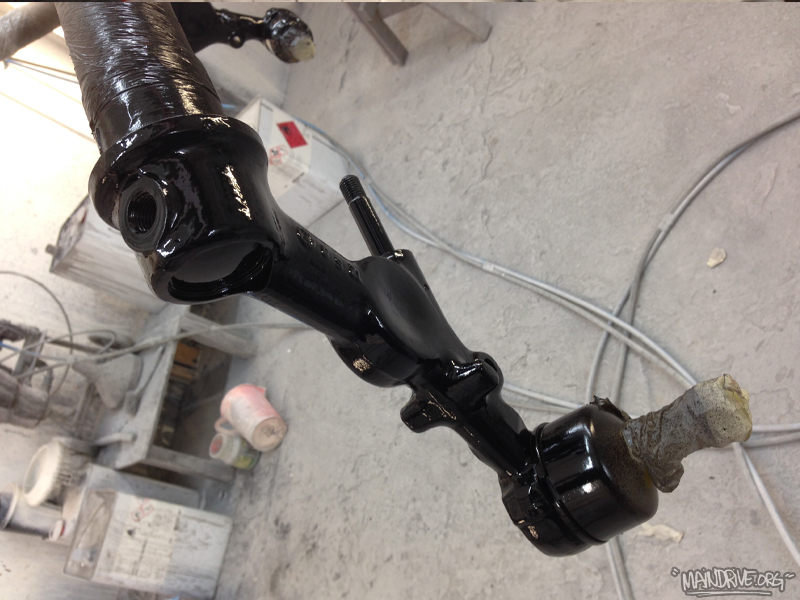
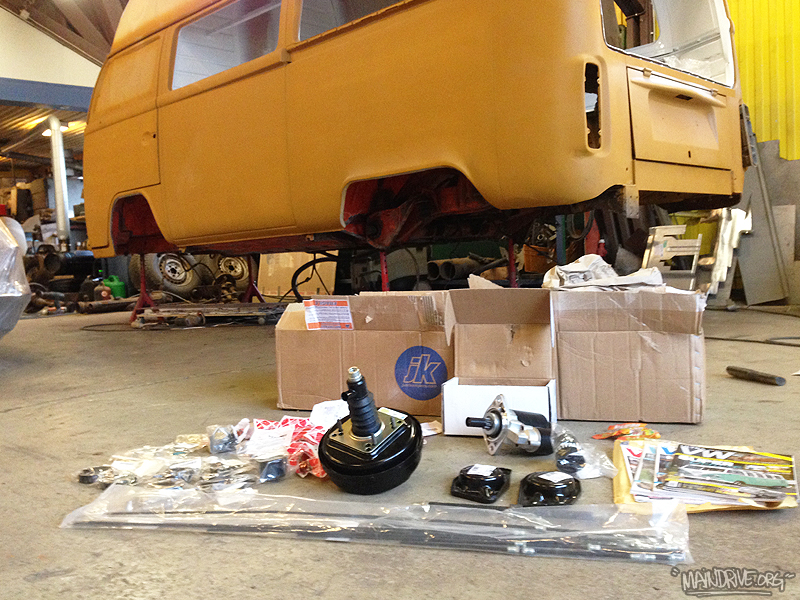
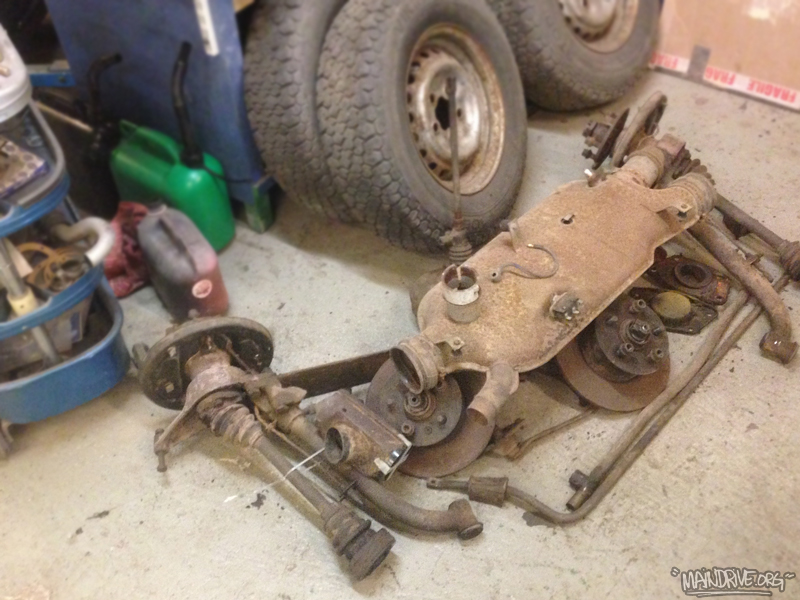
Got some stuff done on the front beam/axle on the Highroof bus this week. Fitted new grease zerks to the beam, installed a new center swivelpin and bushings, test fitted the new brakebooster, 4 new needlebearings (made a tool so they were easy to pull out). They were seated 8mm inside the tubes. Used a old bearing to knock them in again, and then the tool the last bit. New dustcovers mounted too. Got the axle bolted up in the frame on the bus and during the weekend, I will start installing torsionarms, spindles, tierods etc. The bus starts to look really nice, atleast underneath! 😉 More pics coming soon!


 Volkswagens original tool

Been in Barcelona, Spain with the family on a vacation and just got back home. Nice to see some sun instead of snow! 🙂 Going to start put together the front beam axle this week. I have all the new parts from JUSTKAMPERS waiting for it, and hopefully have it bolted back up in the frame on the bus. More pics coming soon!
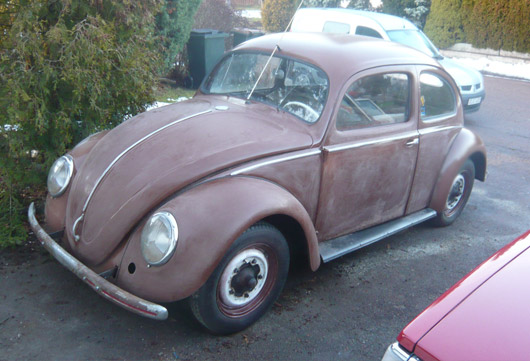
Updated the old 1950 VW Beetle page with all the pics from the build up in 2008. Cool early and rare car! Go to RIDES/PROJECTS or click here for more pics and info.
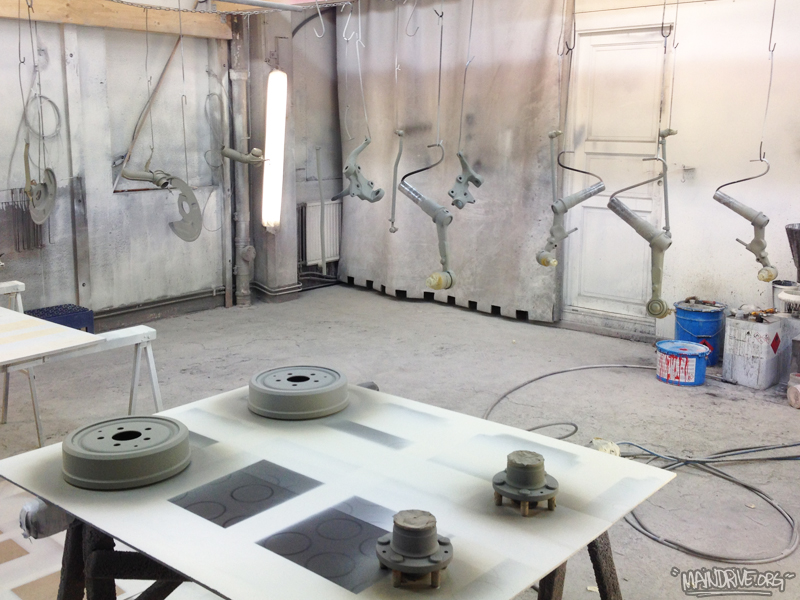
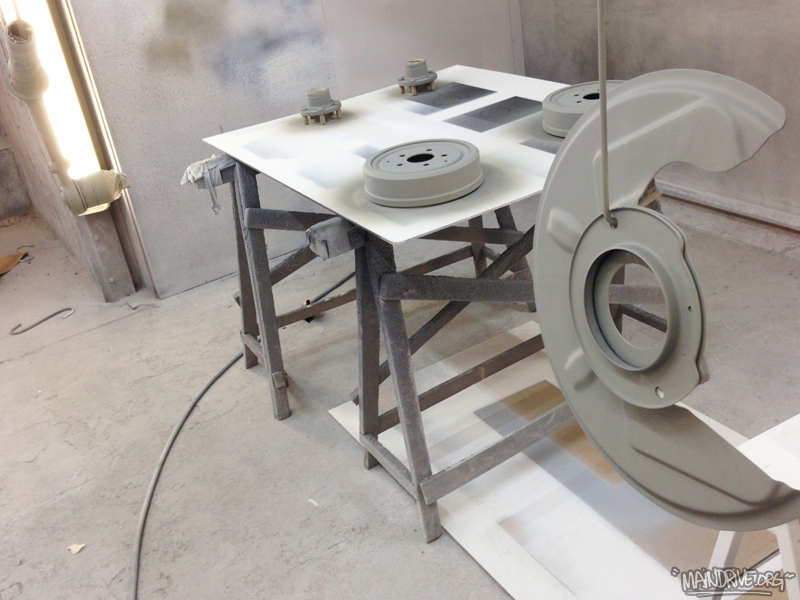
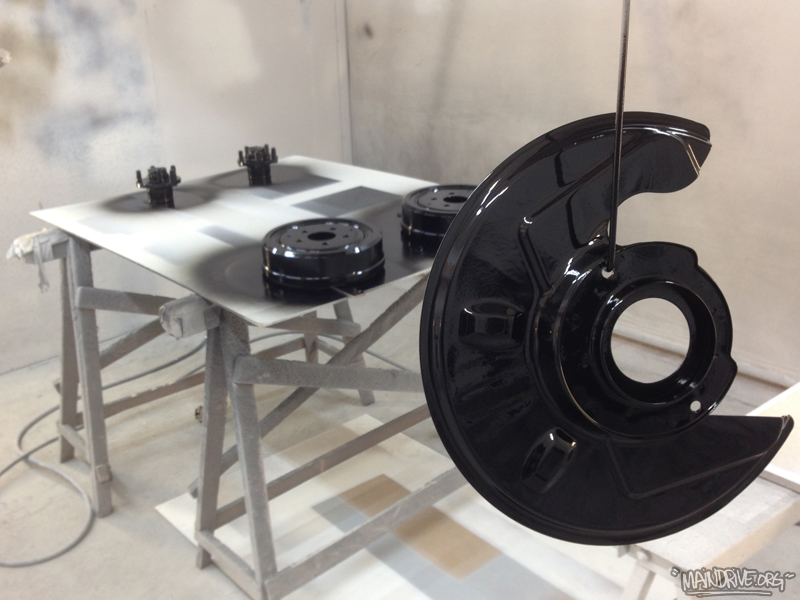
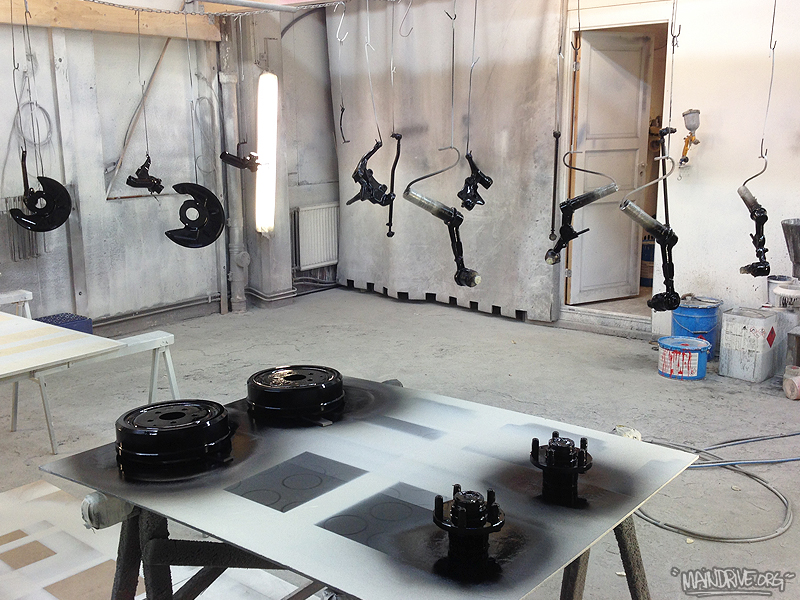
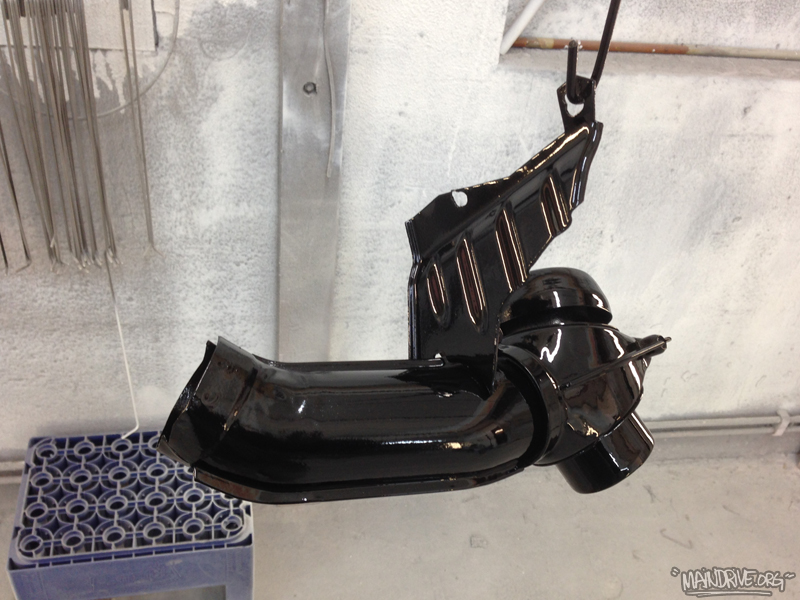
Painting tons of chassi parts in Deepblack paint at the moment to the Highroof bus!
Get the latest updates from us on your smartphone/Instagram: maindrivegarage
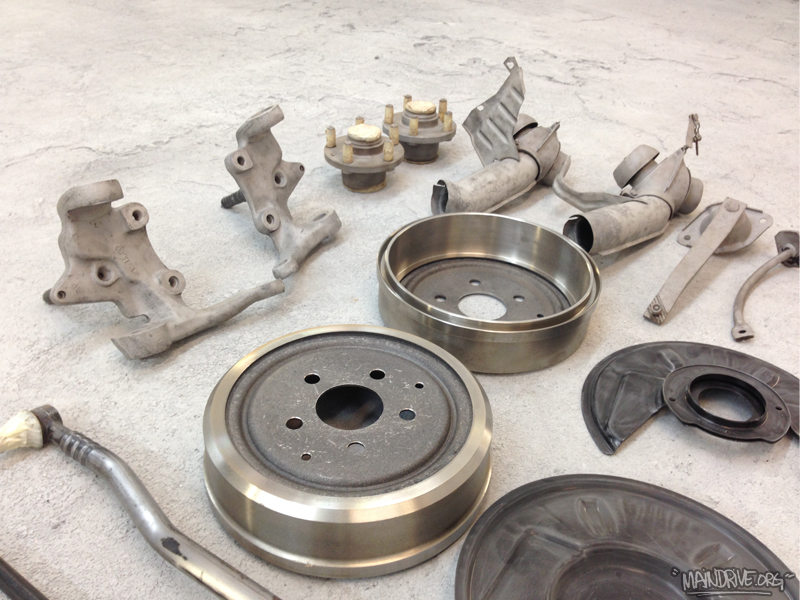
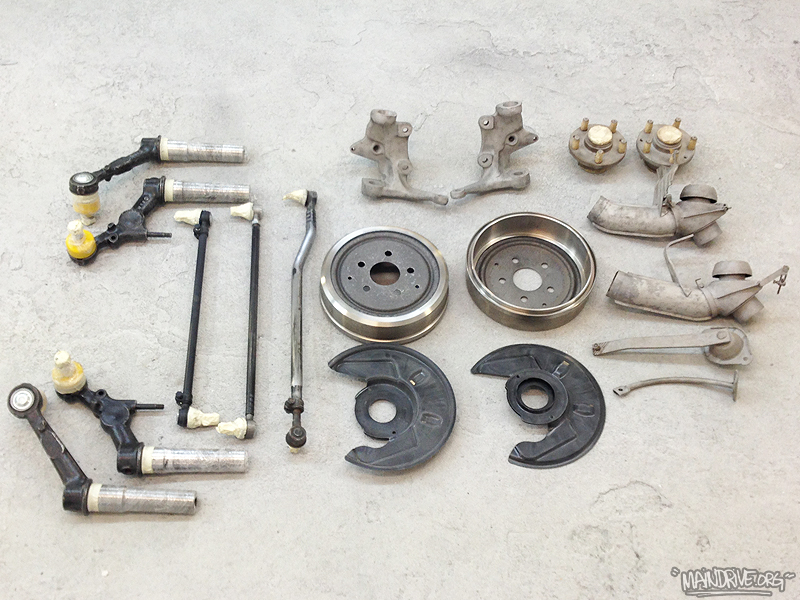
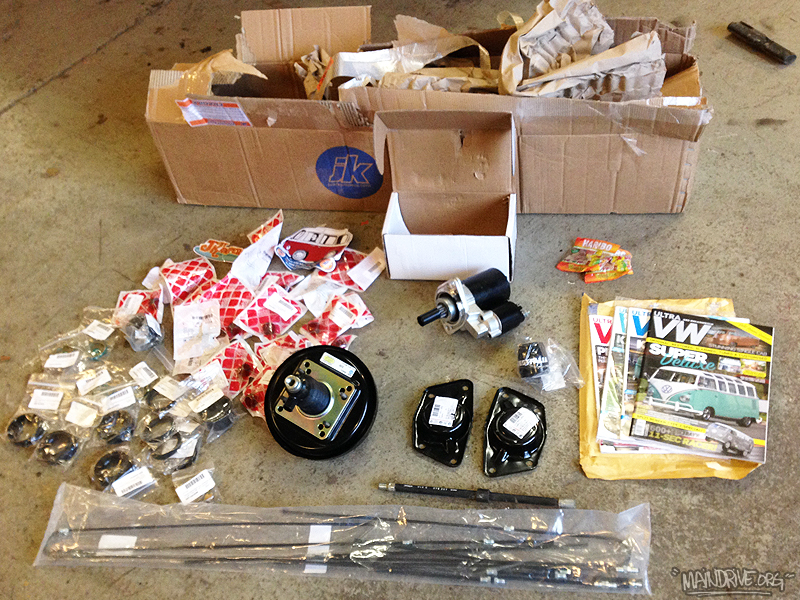
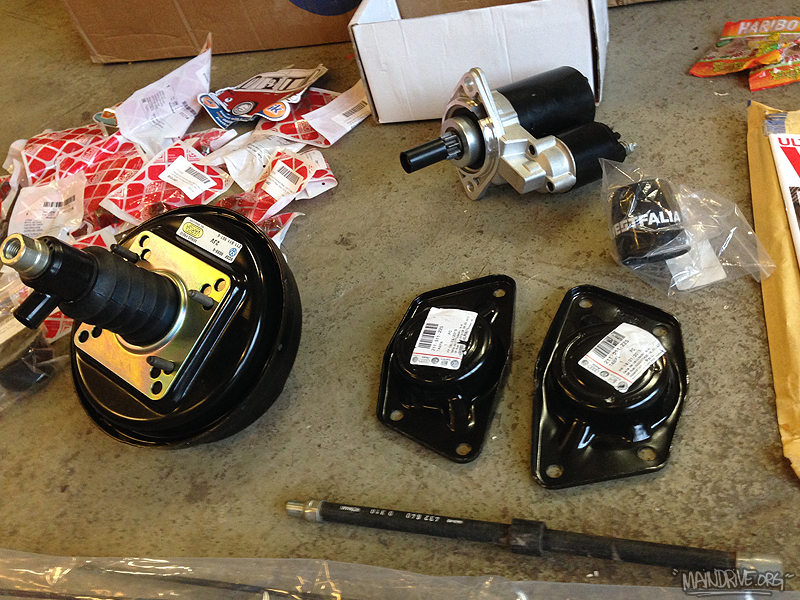
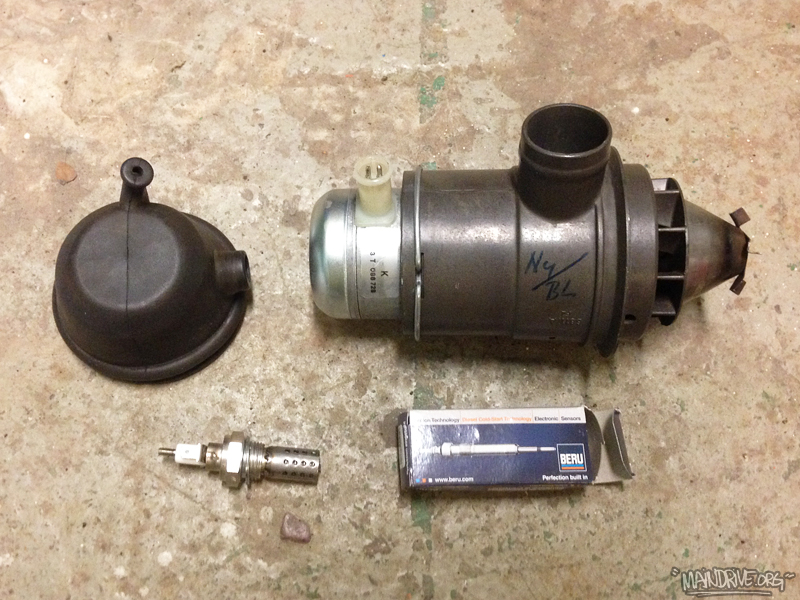
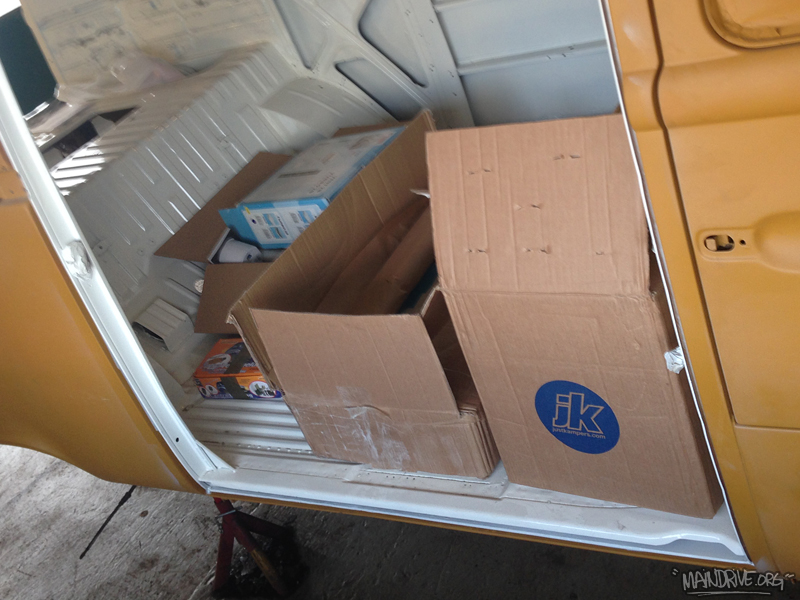
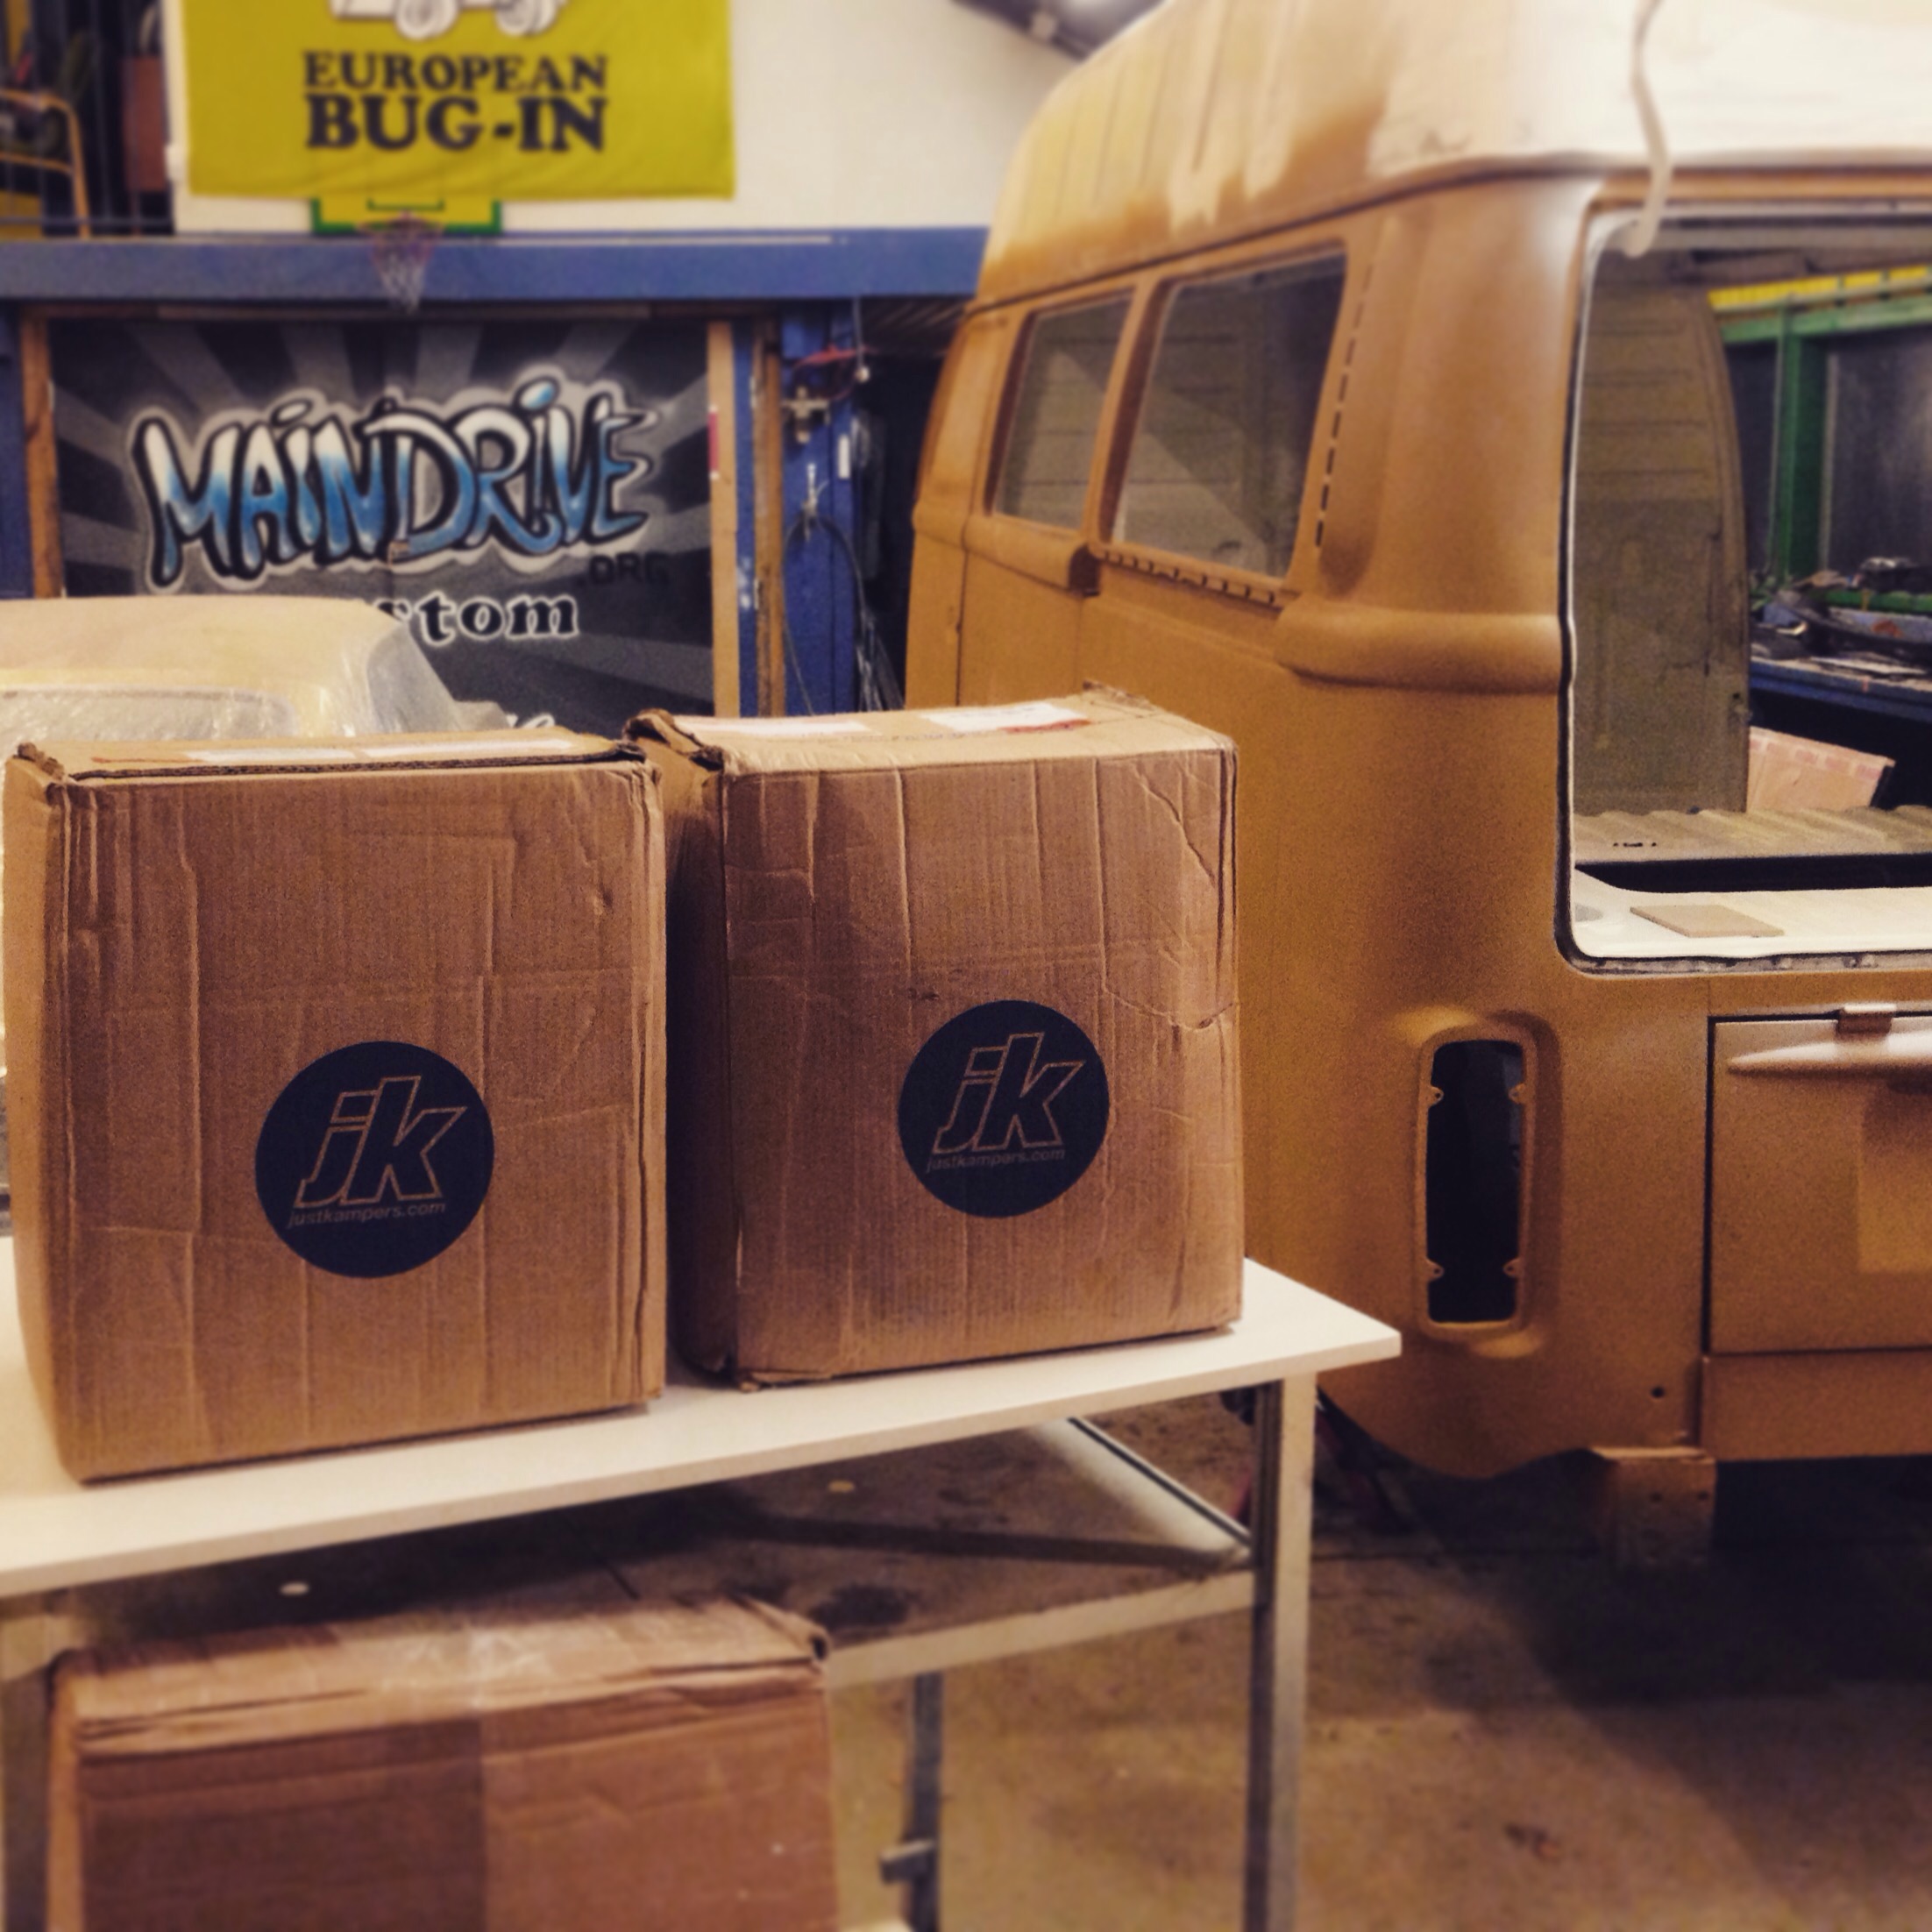
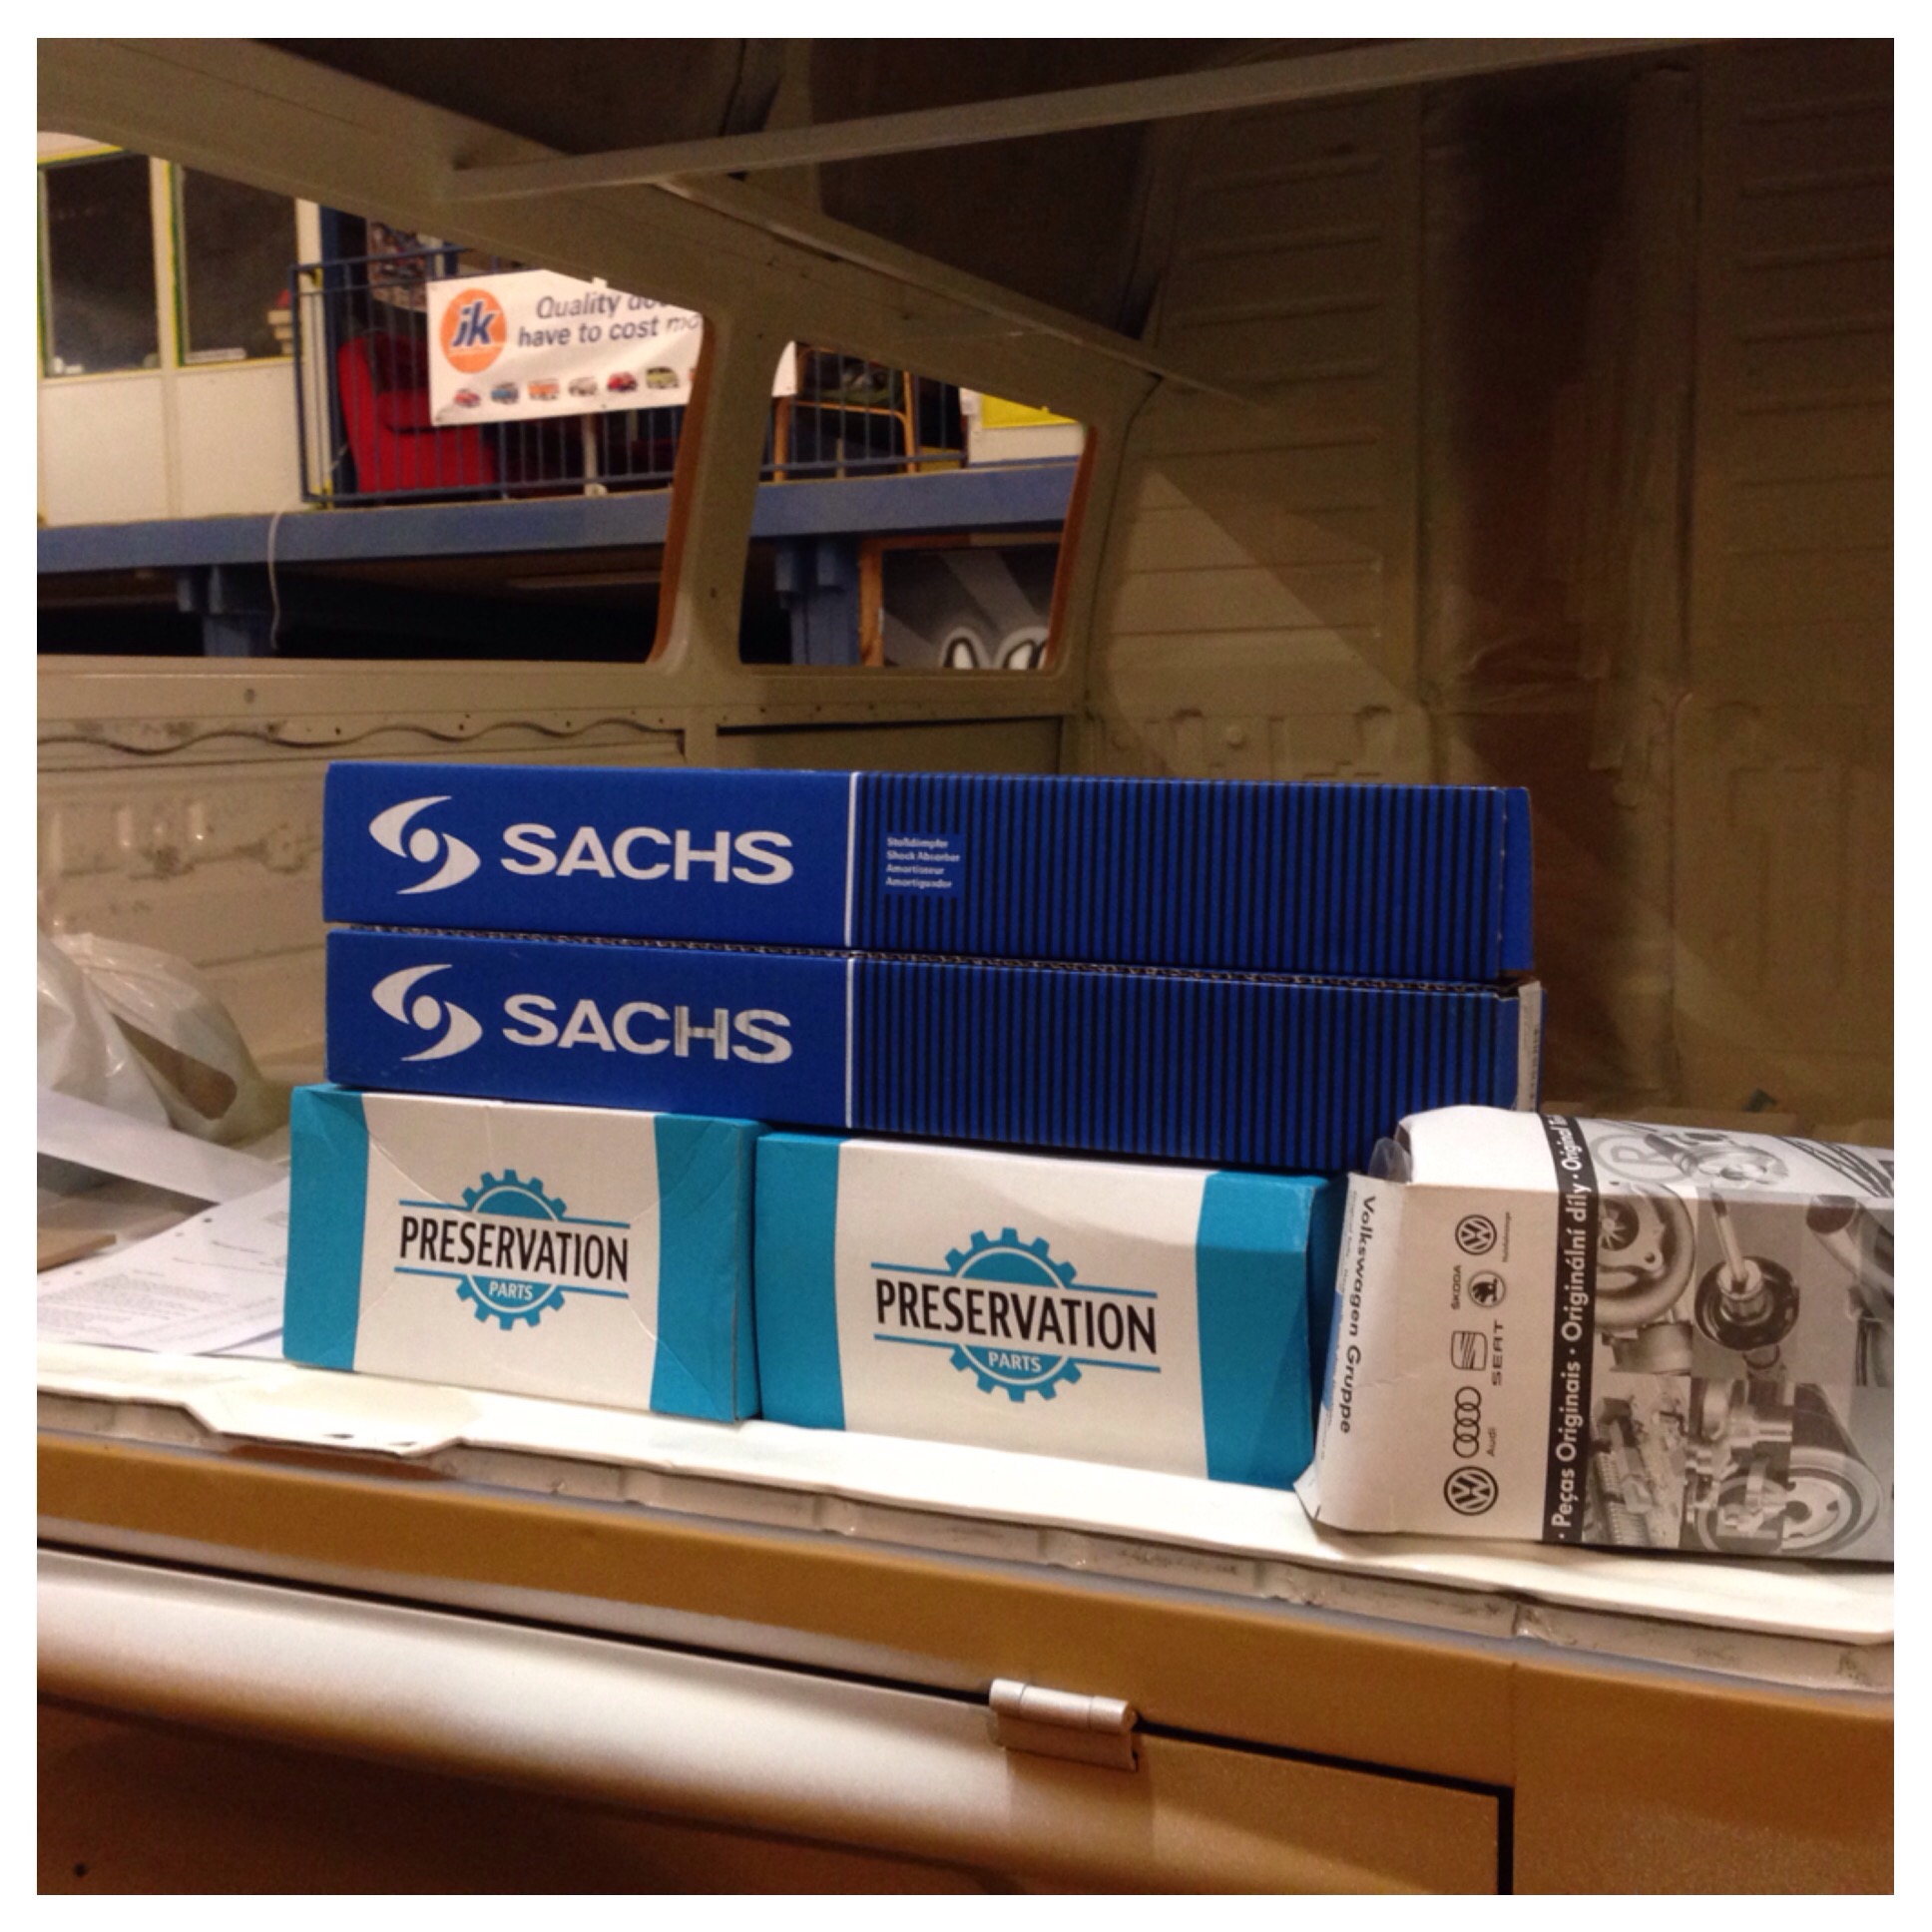
Have sandblasted alot of parts in the new cabinet, so nice to have. No need for waiting on the mediablasting company any more. Just put it in the box and go! Got a box full of new parts from Justkampers.com yesterday too. Brakeservo, starter, all brakepipes, front beam seals, 4 torsionarms with new pressed in balljoints, transmission gaskets and seals etc. Also scored a NOS Eberspächer combustion/airpump for the BA6 heater. Found a supplier in the UK of new BERU glowplugs for BA6, the GZE201 plug replaces the old (original) BZE22. Have anyone tried the new GZE201? Let me know how it worked: info@maindrive.org
Have scraped and cleaned all of the chassi during the last 2 weeks. Hope to push on further with the chassi this week and weekend and get it primered, seam sealed, undercoated and painted in body color. After that the chassi is ready to get all the new parts bolted on! More coming soon…


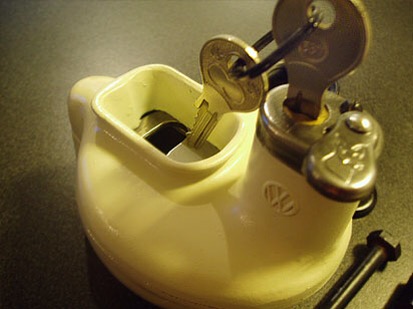
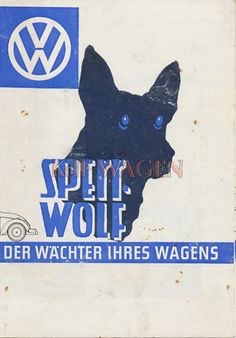
Restored this original VW Sperrwolf shifter lock awhile back. New keys, new paint and new zinc plating. This was an option that costed extra when you bought it new, but in return you got cheaper car insurence. Because the car was now harder to steal!
Want your restored or have one for sale? Let me know: info@maindrive.org 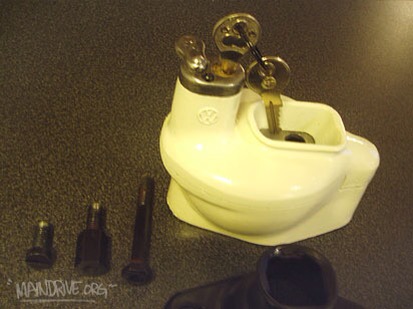
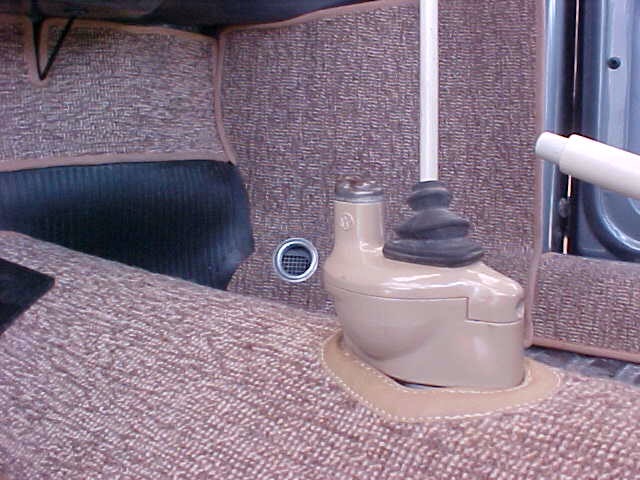
How it looks installed. Cool!
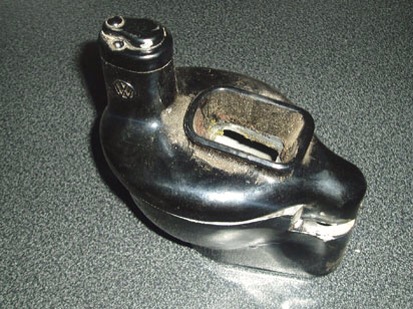
How it looked when I found it.
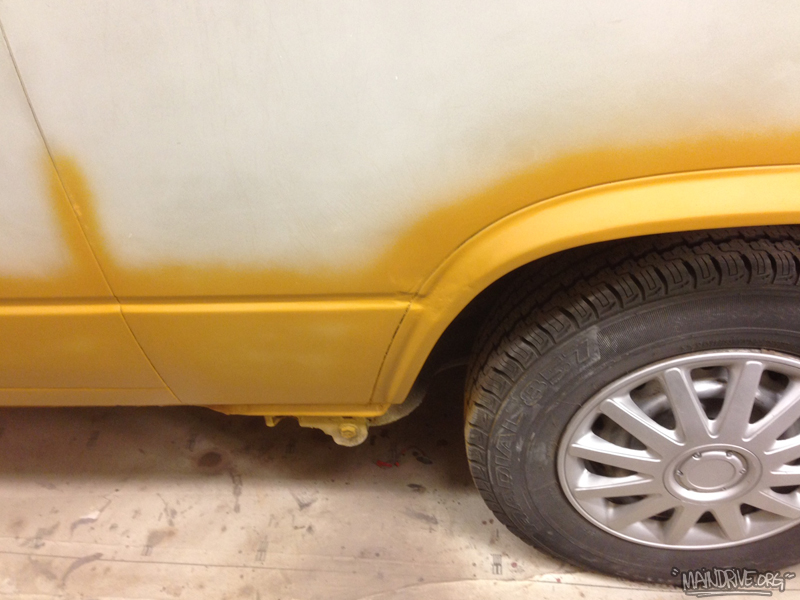
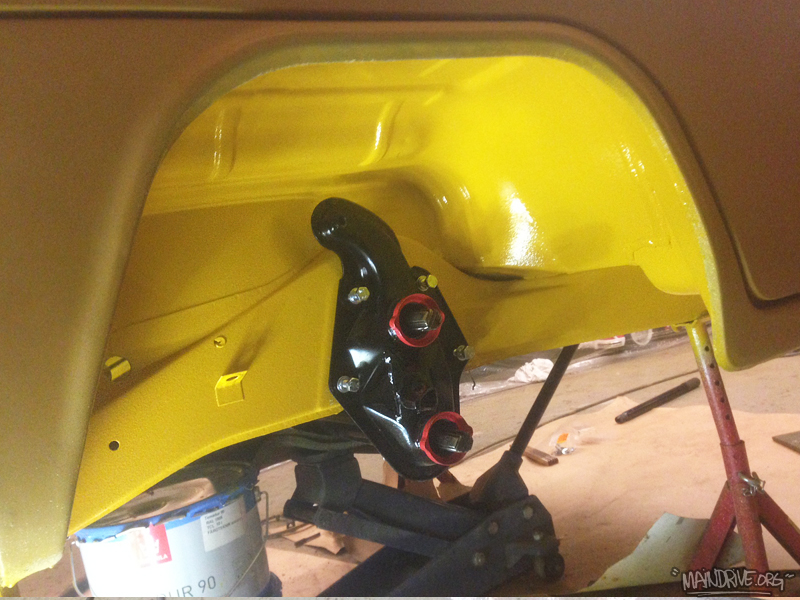
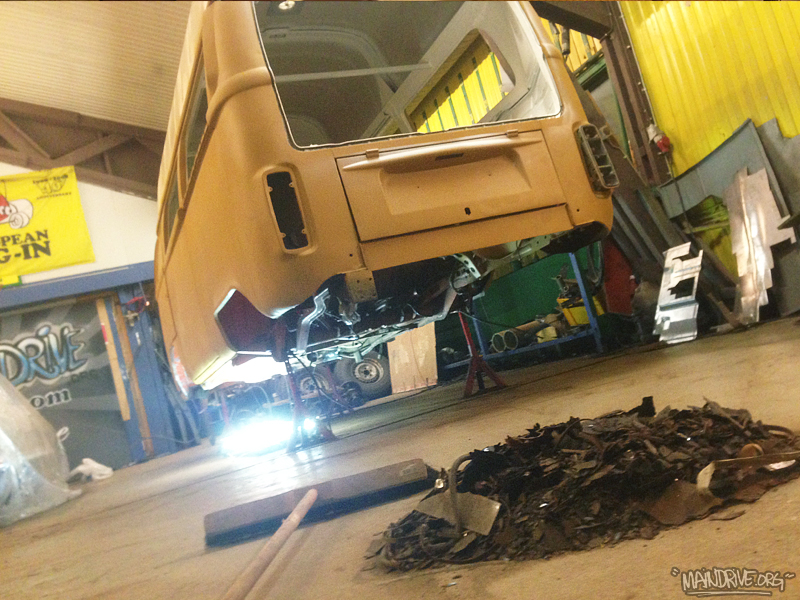
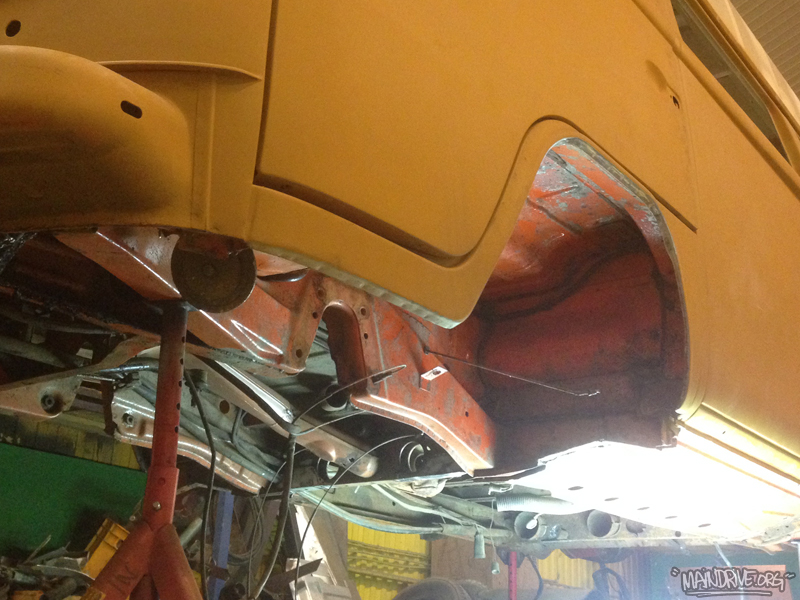
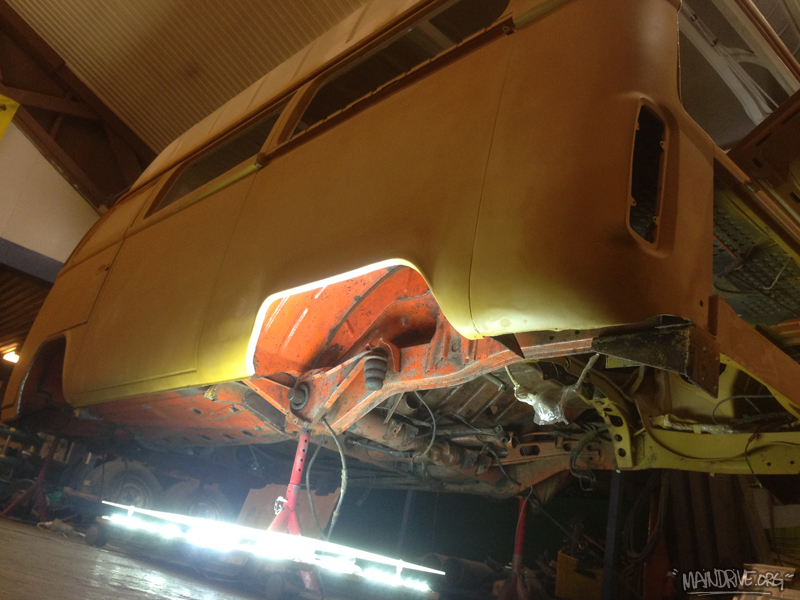
Doing some really boring work on the Highroof Baywindow at the moment. Specially when it’s -20 celsius outside. Removing all of the old undercoating. Work that takes alot of blood, sweat and tears and is not showing much later, but good to know it’s like new under also. Only going to drive it on the summers anyway. Next time I can start sanding the chassi and lay a coat of rust protection (epoxy primer). Then add a new layer of fresh undercoating, that sort thats possible to paint over. So when it have dried for some days I can paint all of the underside in top color, VW L20 Marino yellow. Ready for all the new parts, wires, hoses, grommets, bearings, bushings, balljoints, steering rods, brakelines, servobooster basicly every nut and bolt!
When the chassi is painted and ready I can start restoring the frontbeam, transmission and get the Eberspächer BA6 working again. A really good and clever heater, much better then the older BN4 ones. Will be nice on chilly mornings in the spring!
Still looking for some parts if someone have for sale? NOS parts for BA6 is intresting, like sparkplugs (BZE22) etc. Also looking for a pair of the slider rail metal covers (held with 2 screws). Engine cooling thin and heatexchangers is missing. Send me a mail on: info@maindrive.org
Chassi parts that are going to be sandblasted and painted/restored.
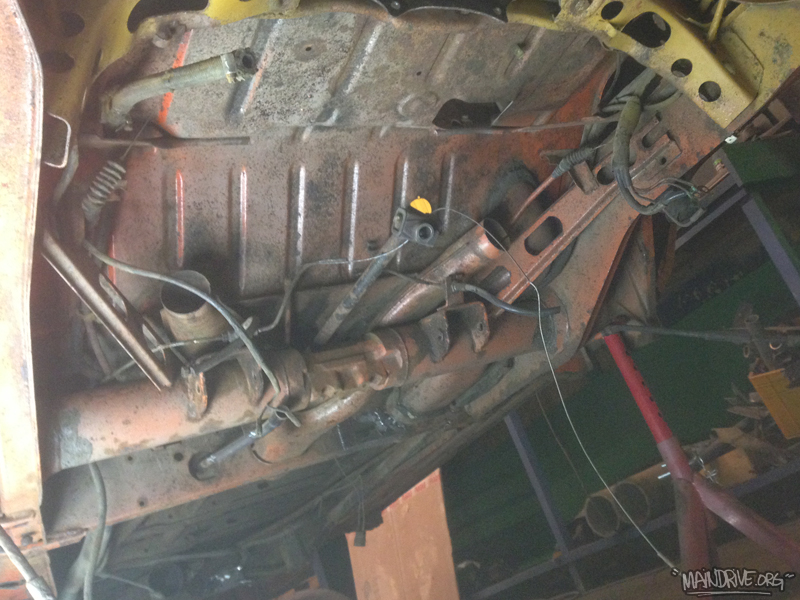
No more undercoating. Just some wires and tubes that needed to be removed before sanding and primer. Here you can see factory grey primer and the orange overspray from body. When I am done with this chassi it will be better and nicer than it was from factory for sure.
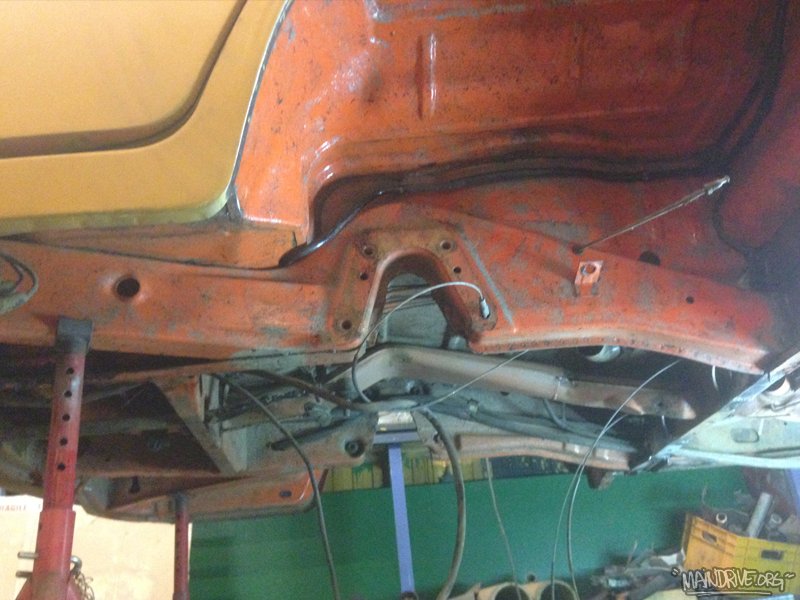
Color on chassi will be the same as on the body, original VW color, L20A Marino yellow. Period correct.
Can’t wait to start bolting on new parts on the painted chassi!
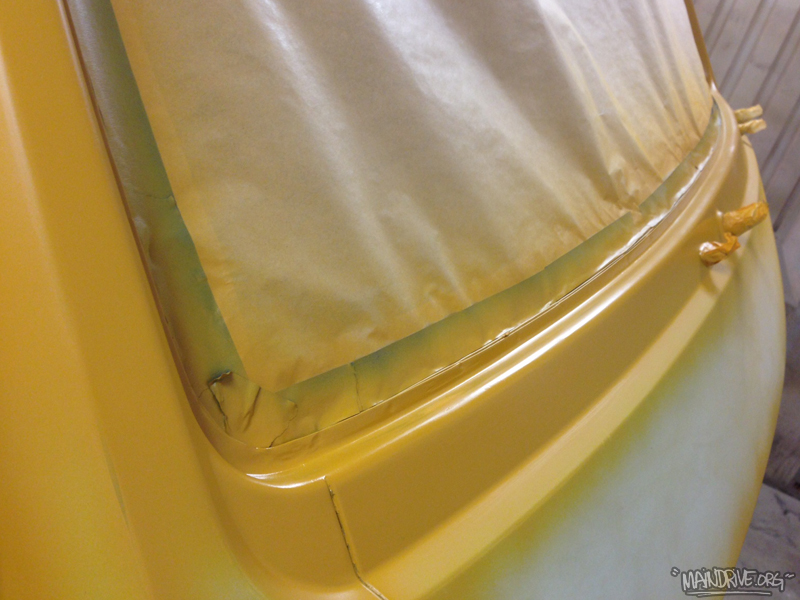
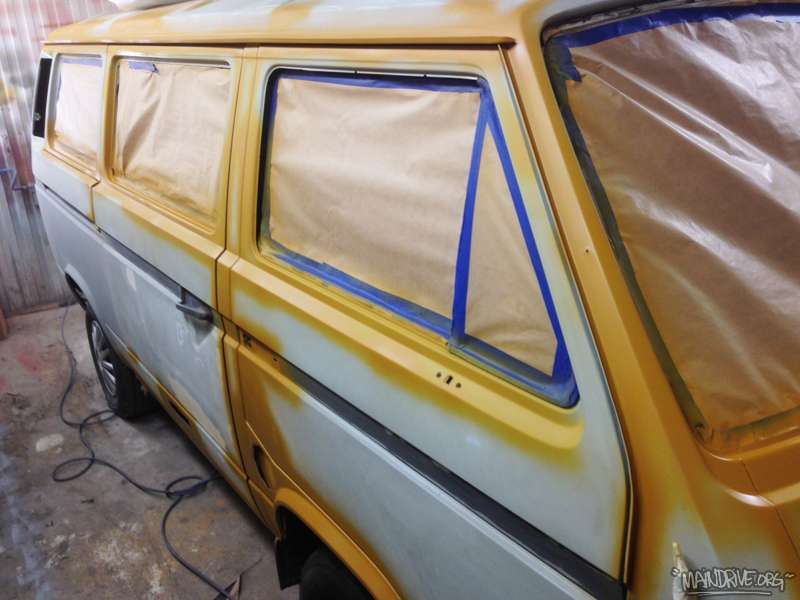
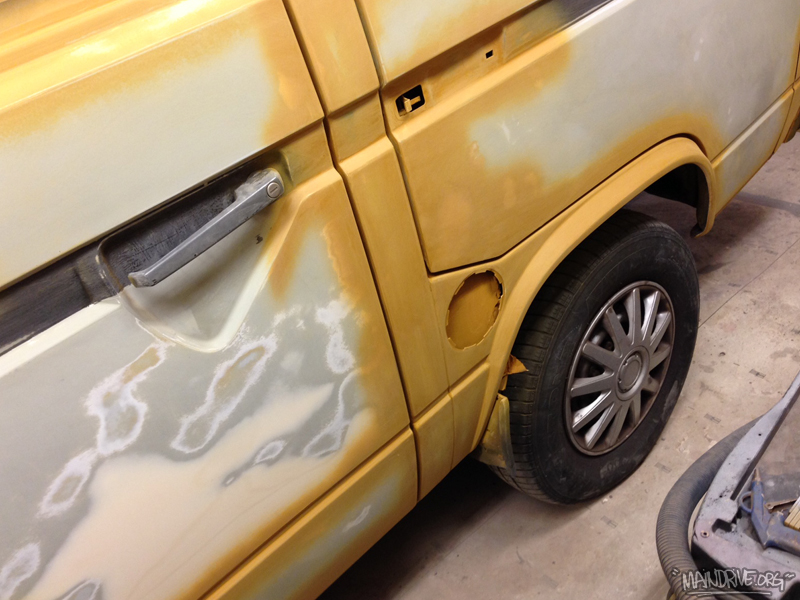
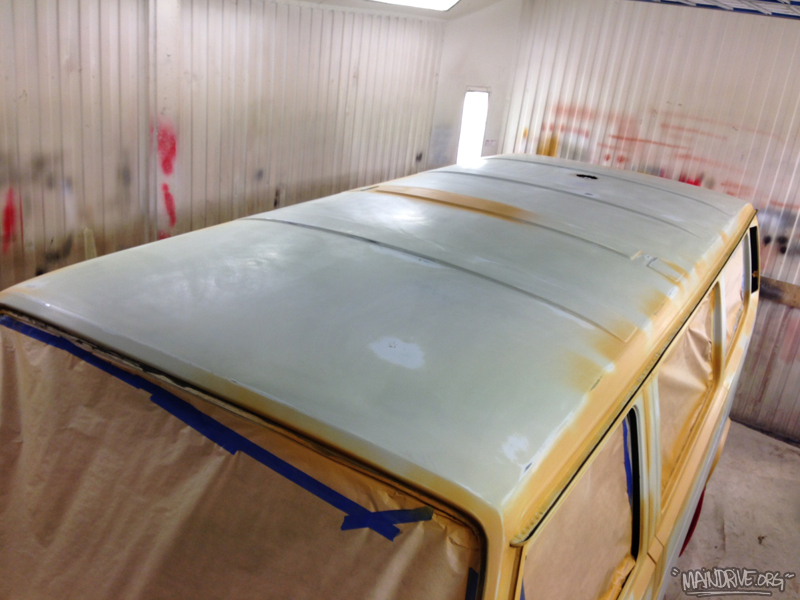
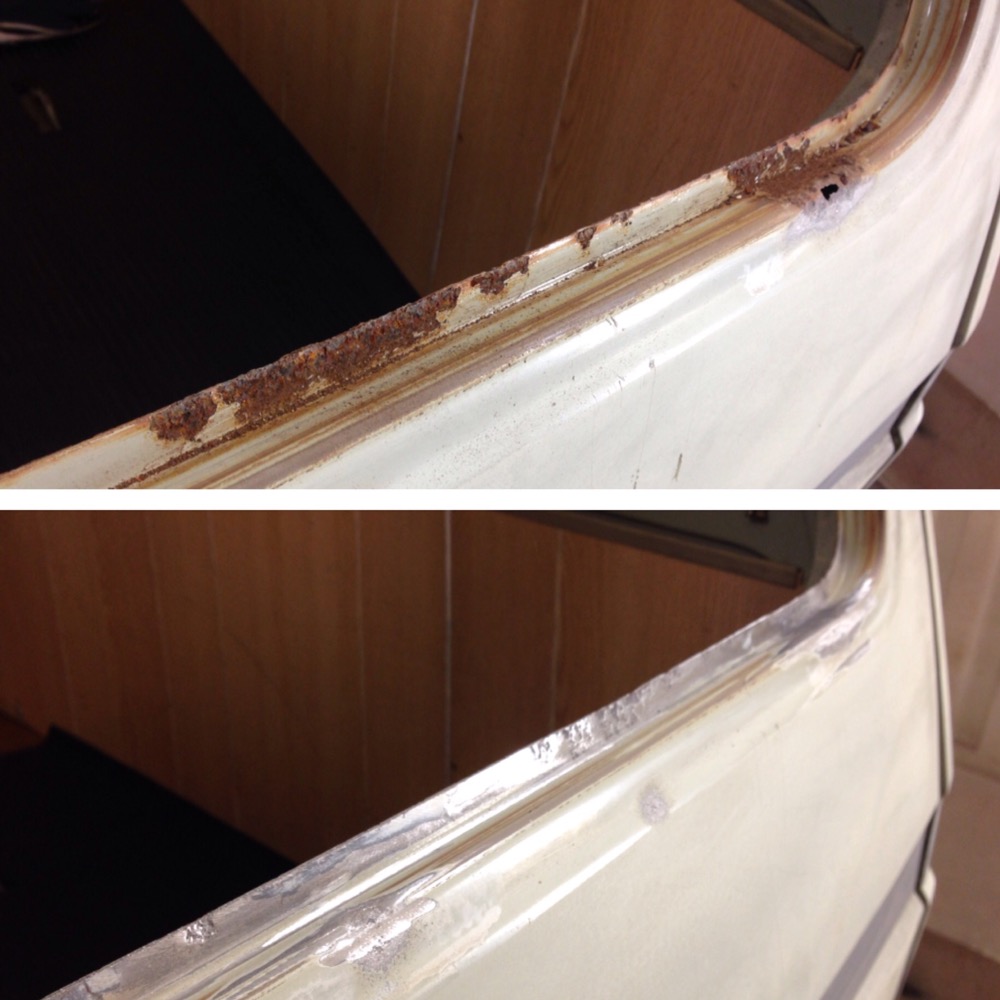
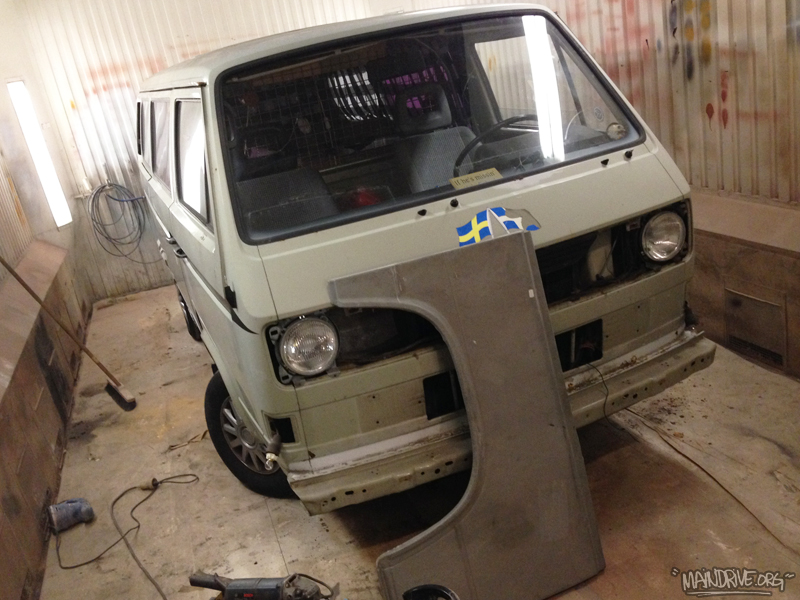
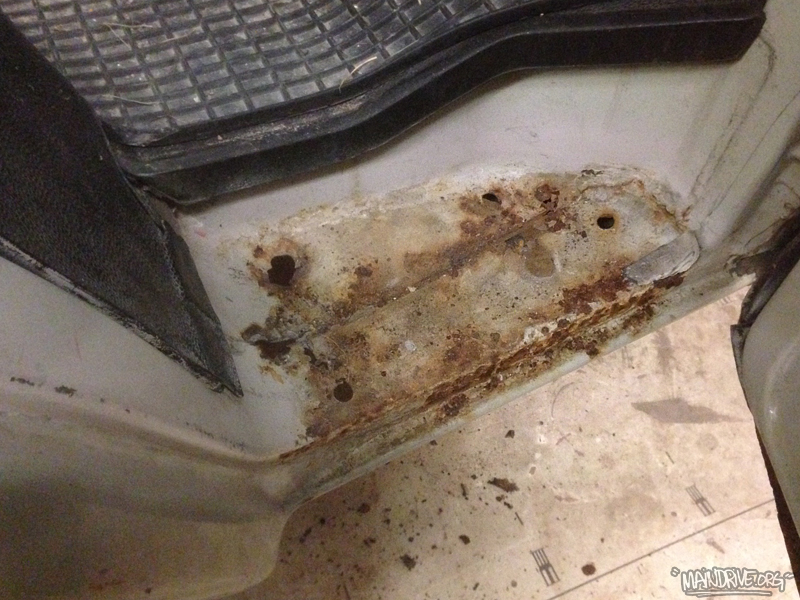
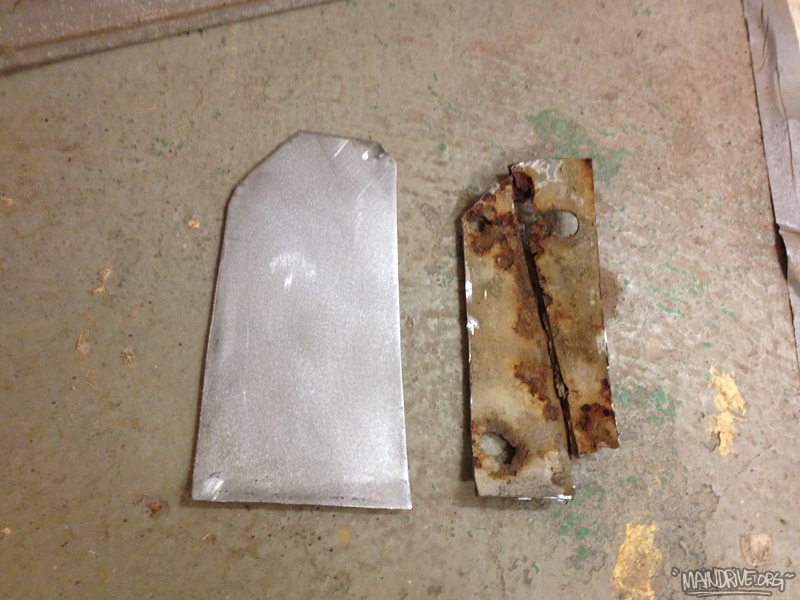
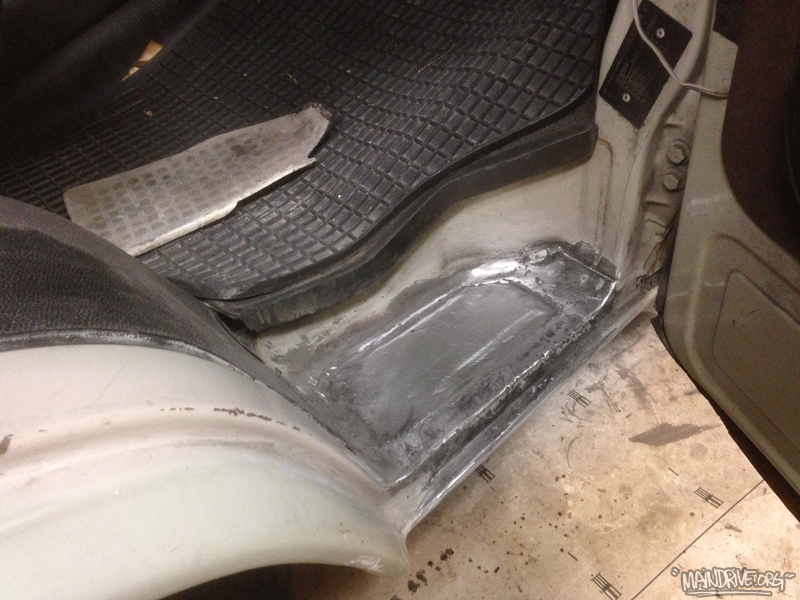
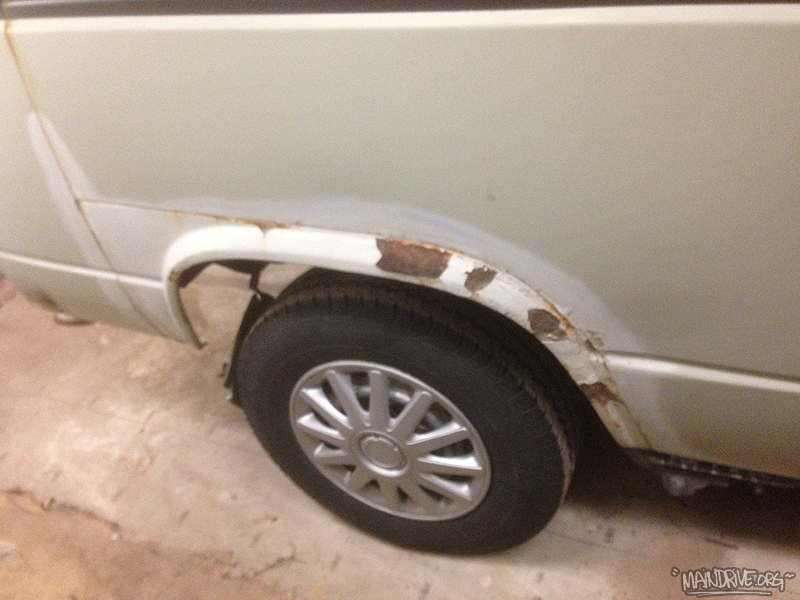
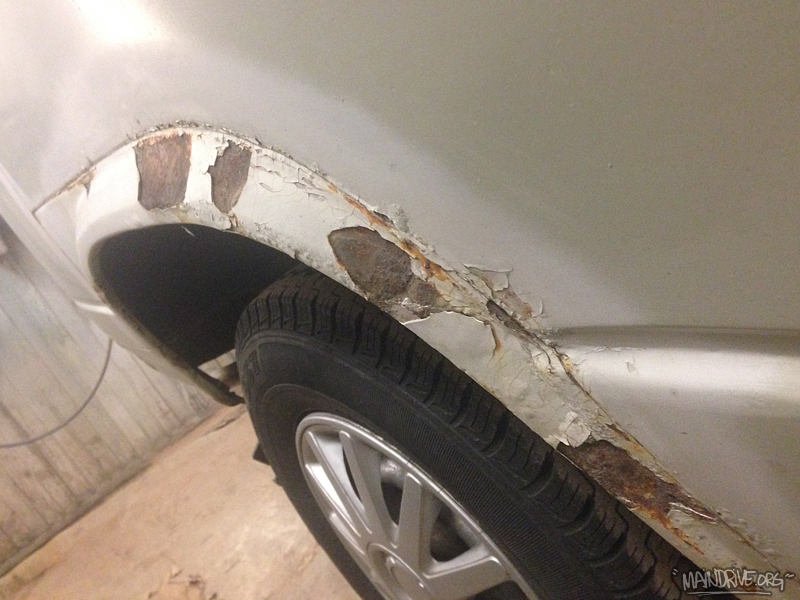
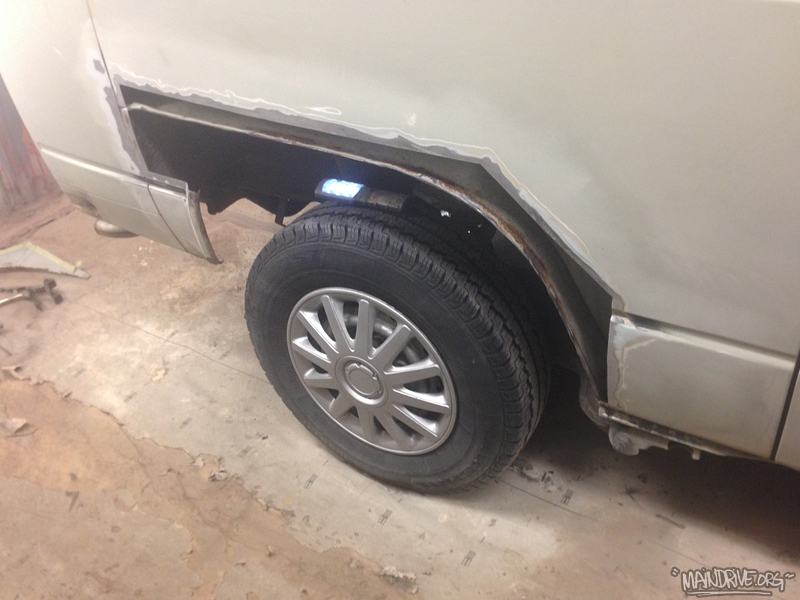
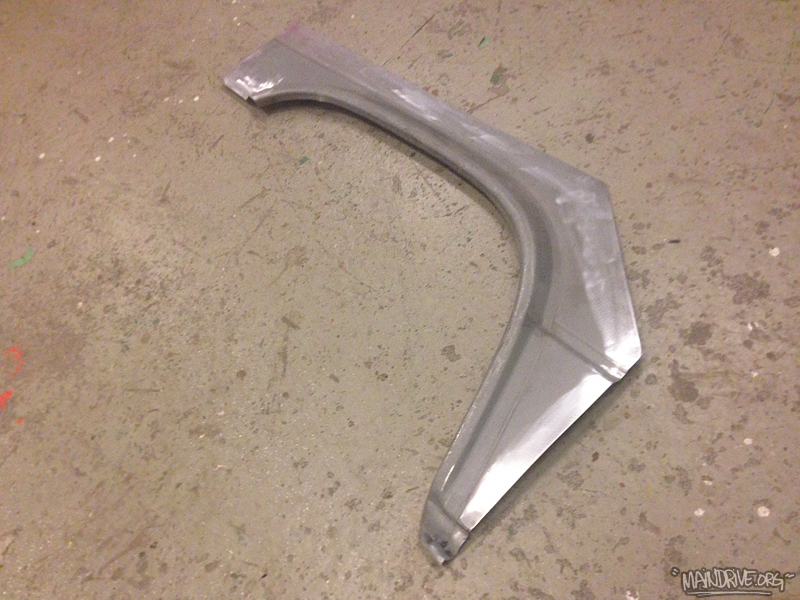
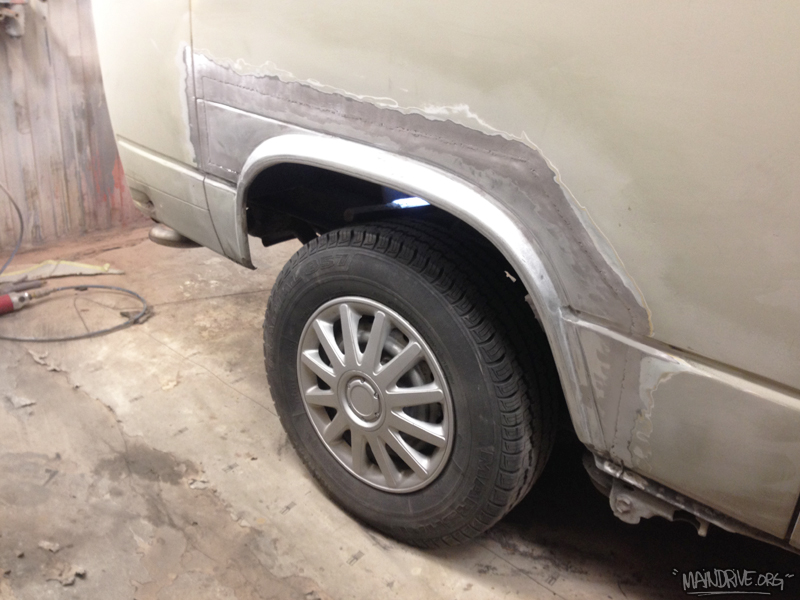
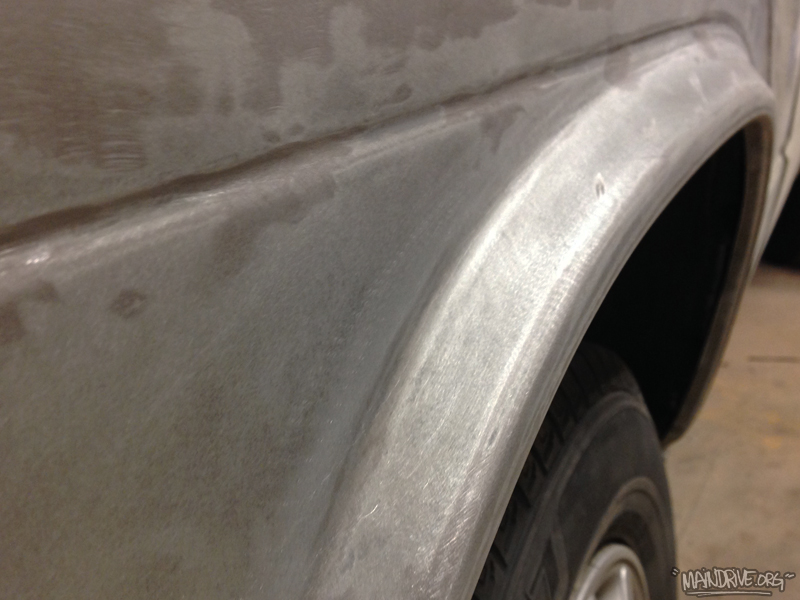
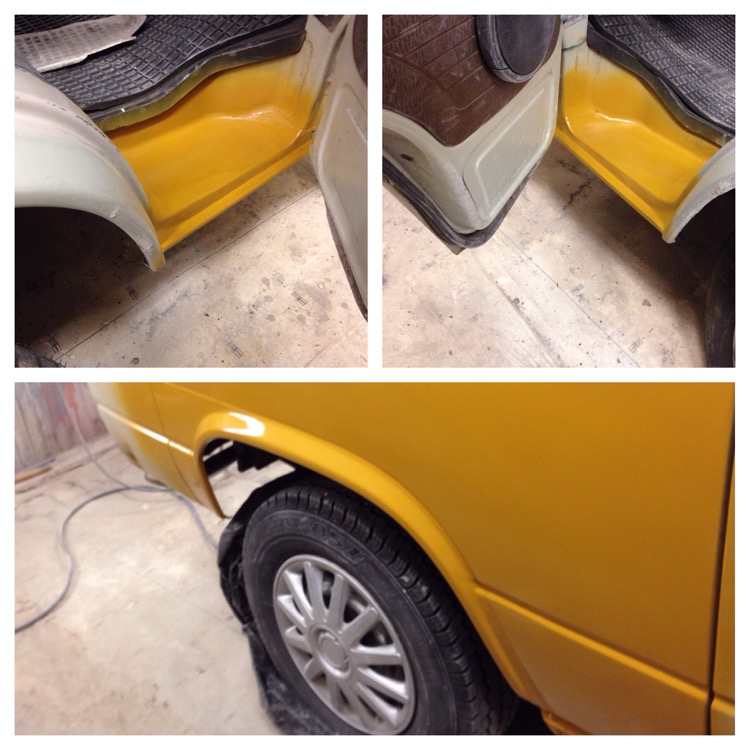
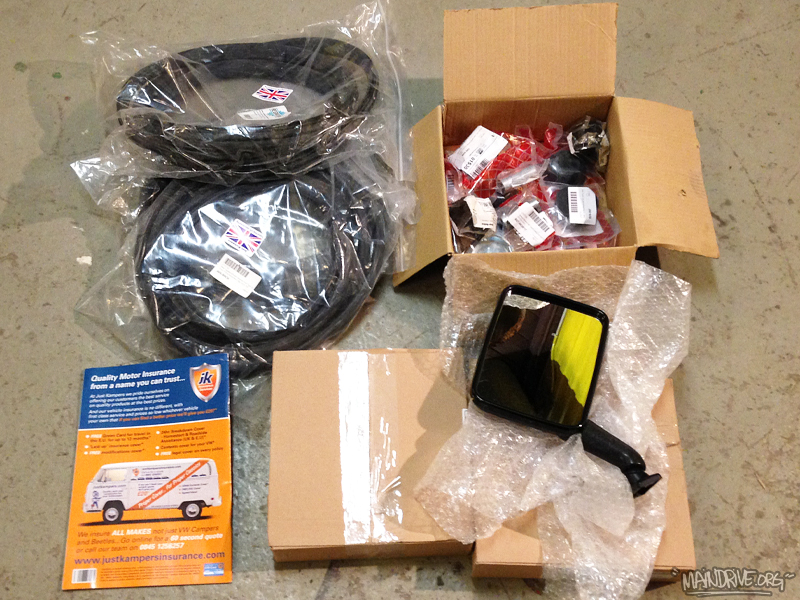
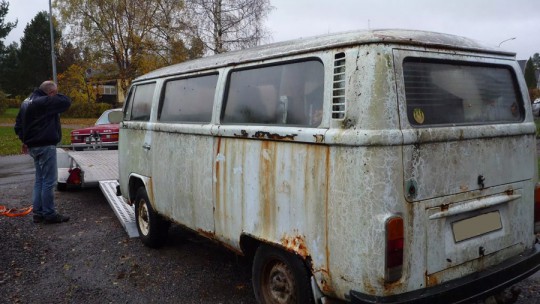
Replacing all rust with new metal on Benny’s bus, the VW transporter from 1983. Hope to finish the rest tonight and then it’s ready for sanding/bodywork/paint. New rubberseals for the all 6 windows, new bushings for frontend and new mirrors from Just Kampers.
A short TV-serie from the UK. Traveling around in a Baywindow in Devon and all around the country. You can see them all on Youtube for free!
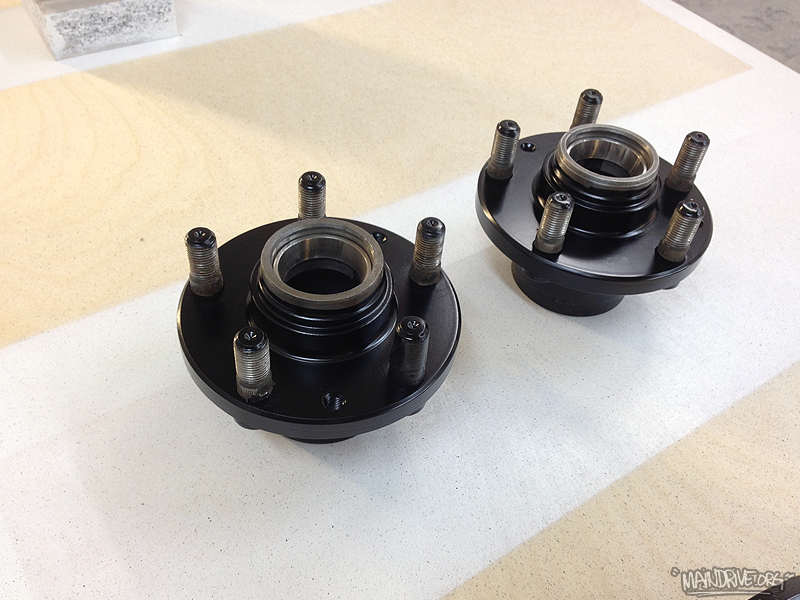
Got loads of brand new parts from Justkampers today. Wow what a quick delivery! Basicly a new bus chassi in parts. Removed front beam, torsionarms and brakes. I think every nut and bolt had to be cut, they were froozen stuck! But it dosen’t matter everything going to be replaced with new parts anyway. Need to remove all chassi parts for sandblasting and painting!

#maindrivegarage on Insta
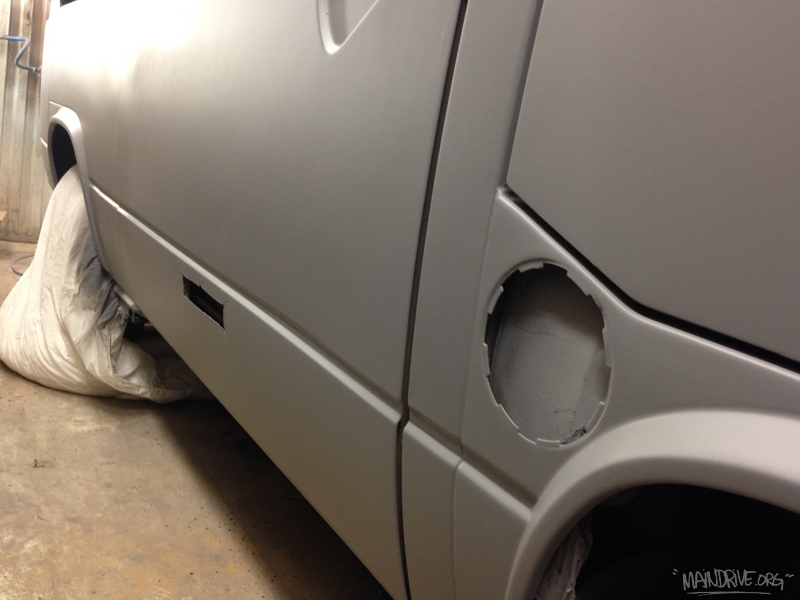
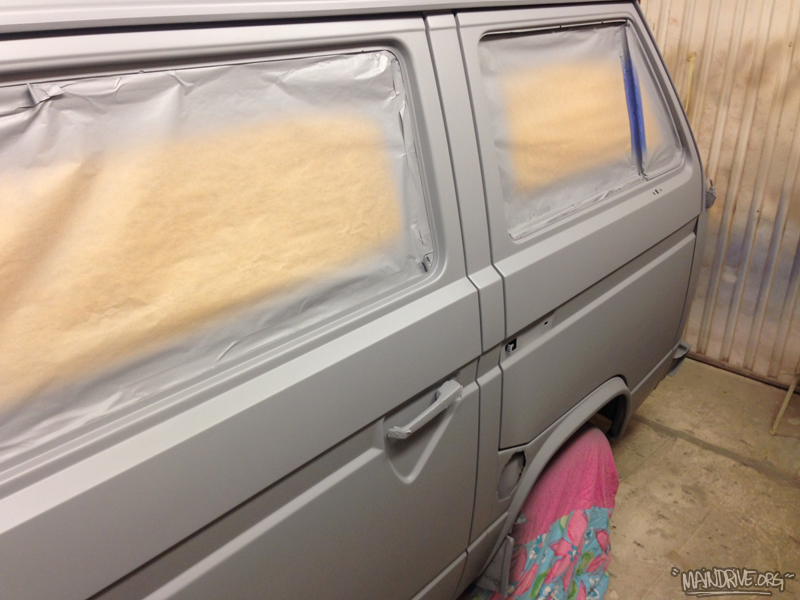
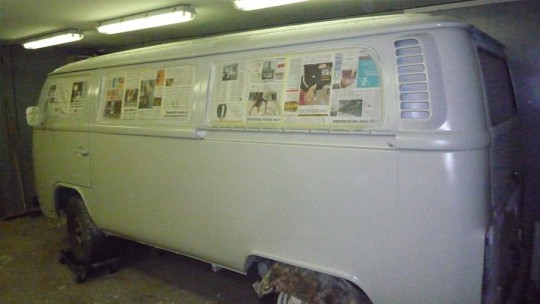
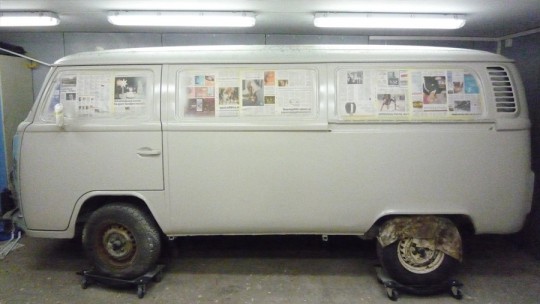
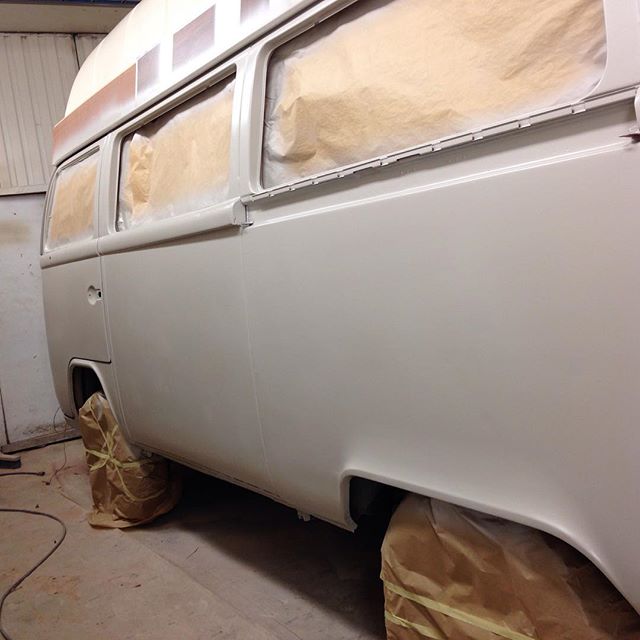
Stephan’s Baywindow have come a long way. Painted in primer tonight. The 2.0L engine have been overhauled as well and is soon ready to be installed. Question is; what color is it going to be?
The engine bay was blasted out during the week and tonight it was time to paint it all in 2K epoxy primer/sealer for rust protection. Looks clean already!
VW Kleinbus Deluxe 21 window samba splitbus
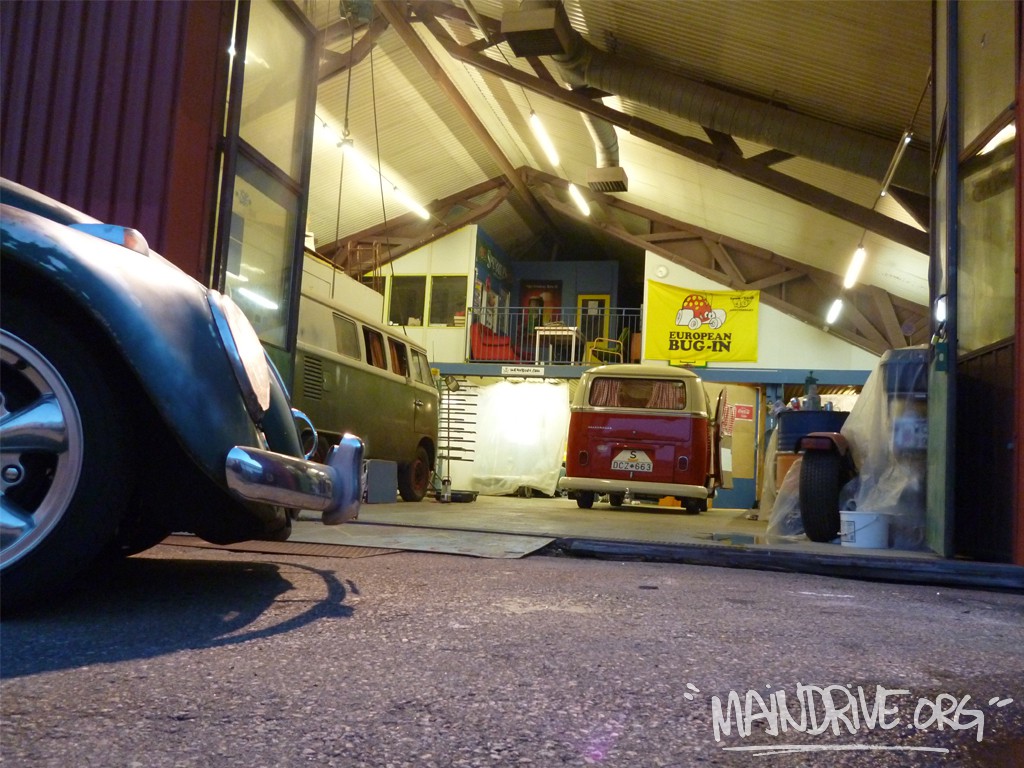
The MainDrive garage
The old VW Beetle 1963 type 1 ratlooker project (see build up pic in RIDES&PROJECTS). Sold last year! 🙁