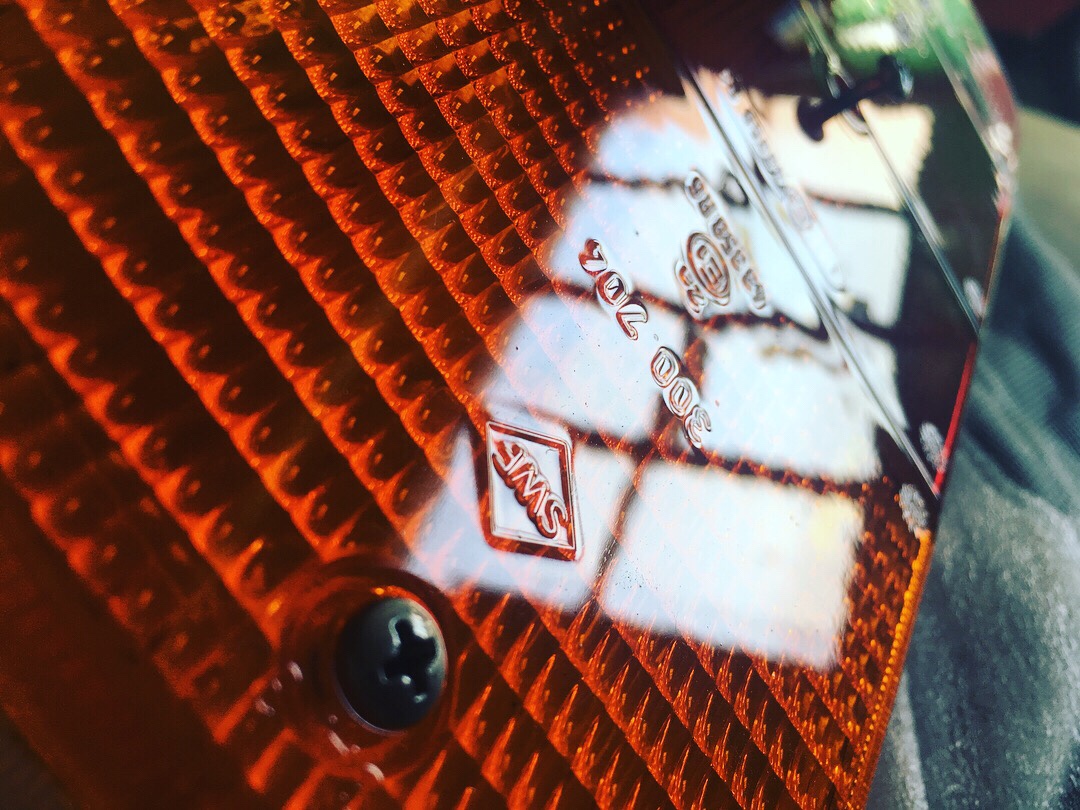
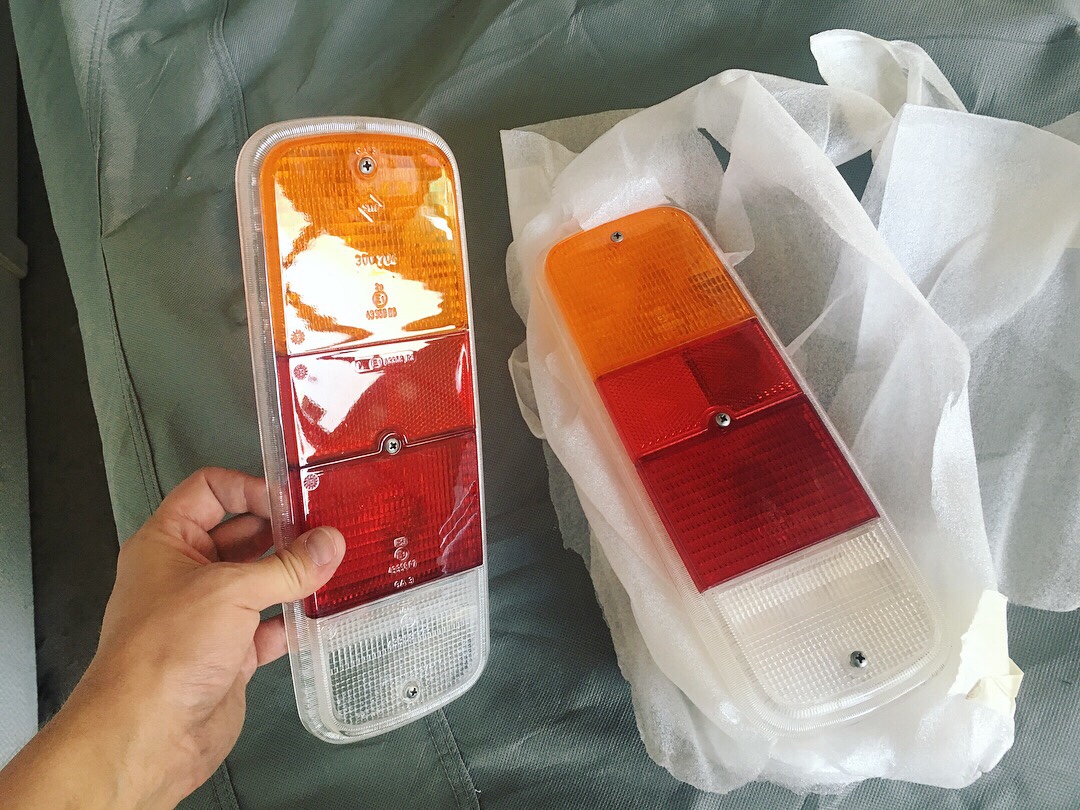
New rear taillights on the Highroof Bay bus. Housings are new aftermarket, lenses are clearcoated original VW from SWF. Some pics…
#highroofbayproject
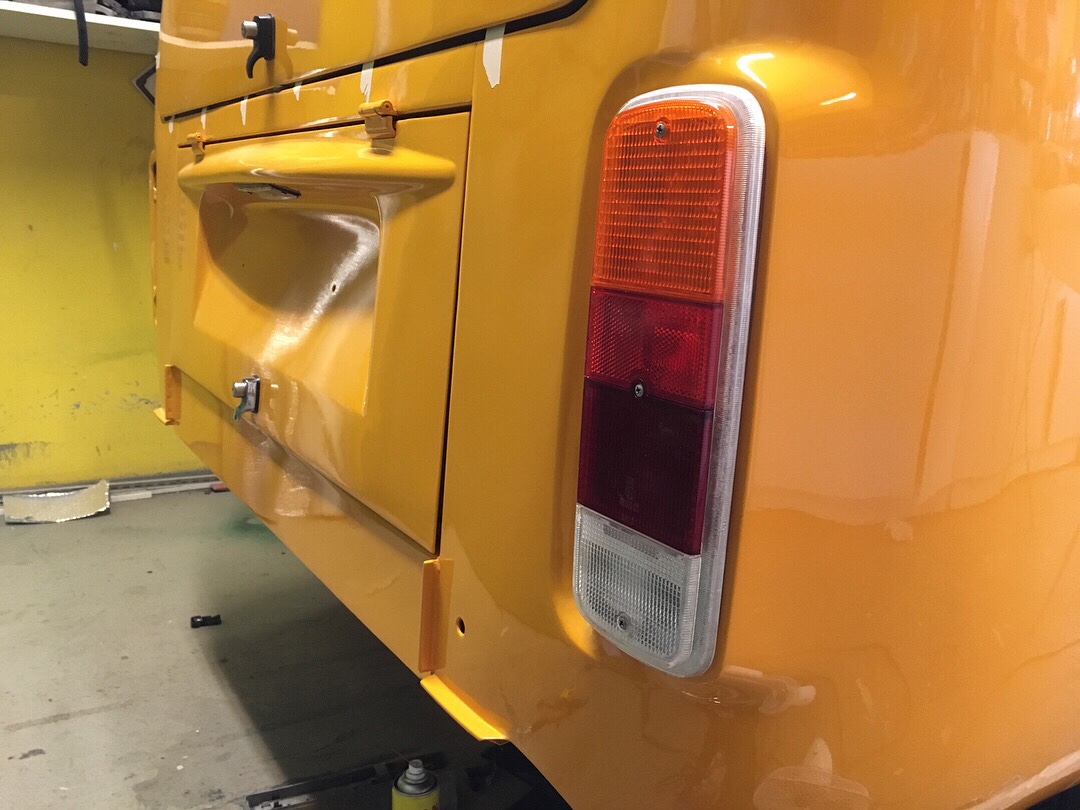
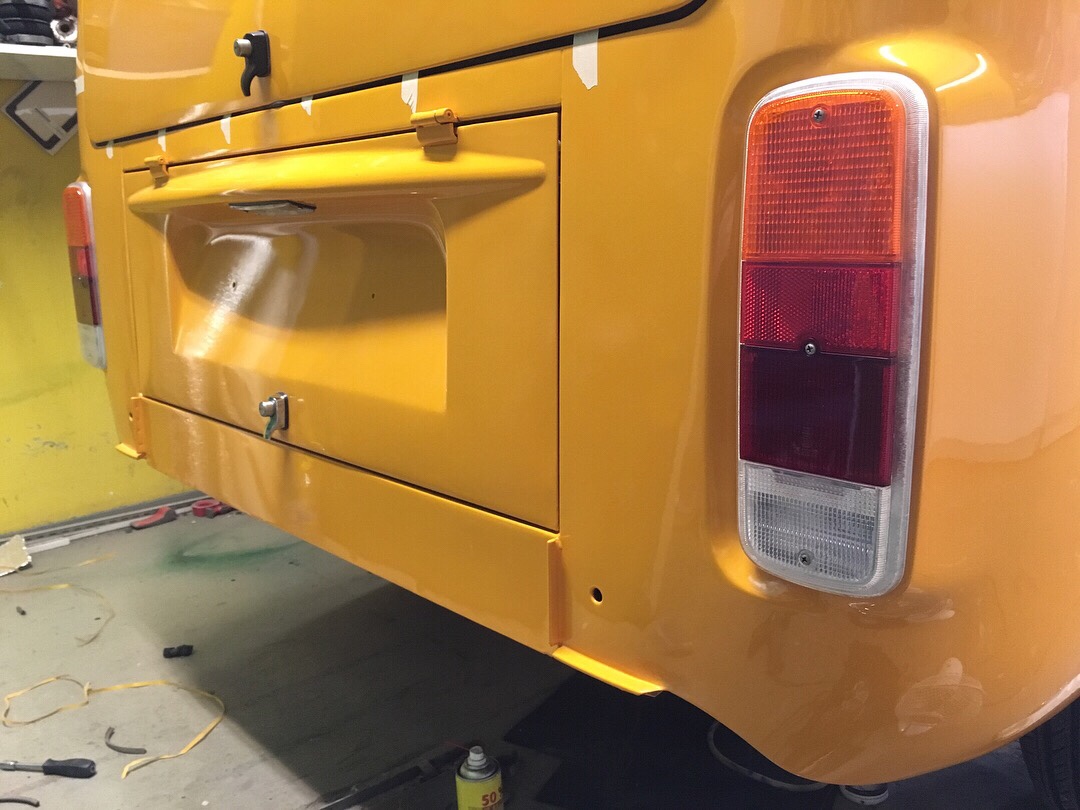
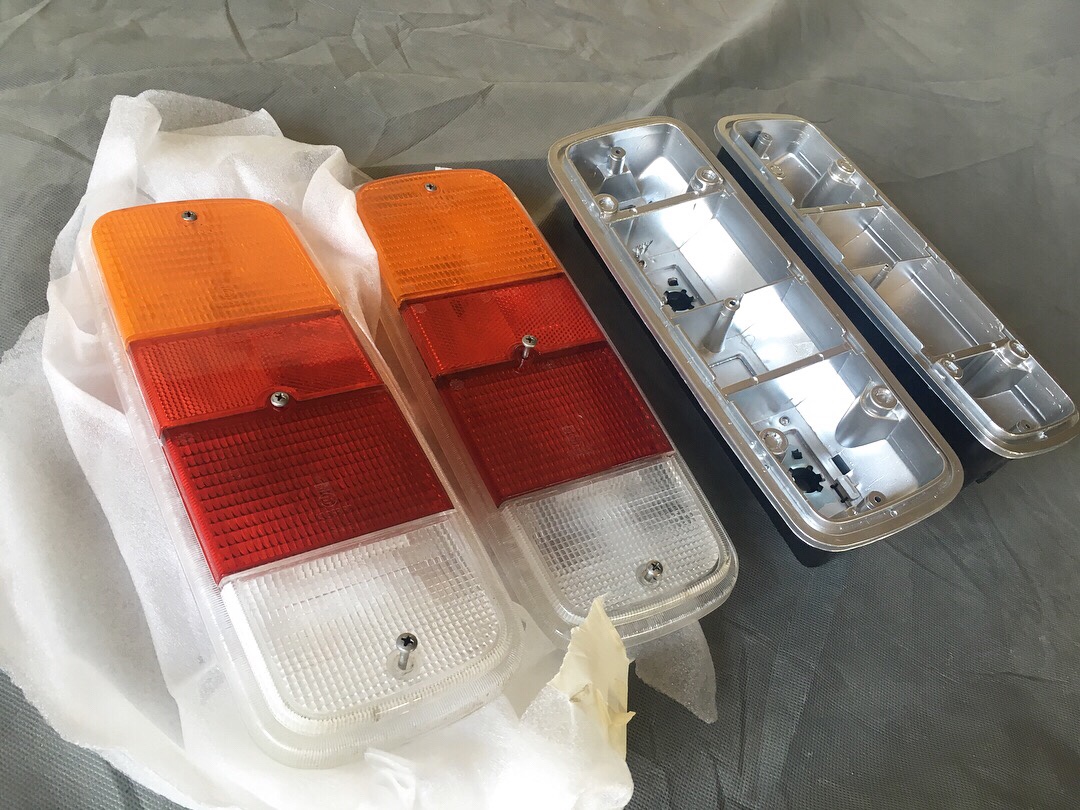
New rear taillights on the Highroof Bay bus. Housings are new aftermarket, lenses are clearcoated original VW from SWF. Some pics…
#highroofbayproject
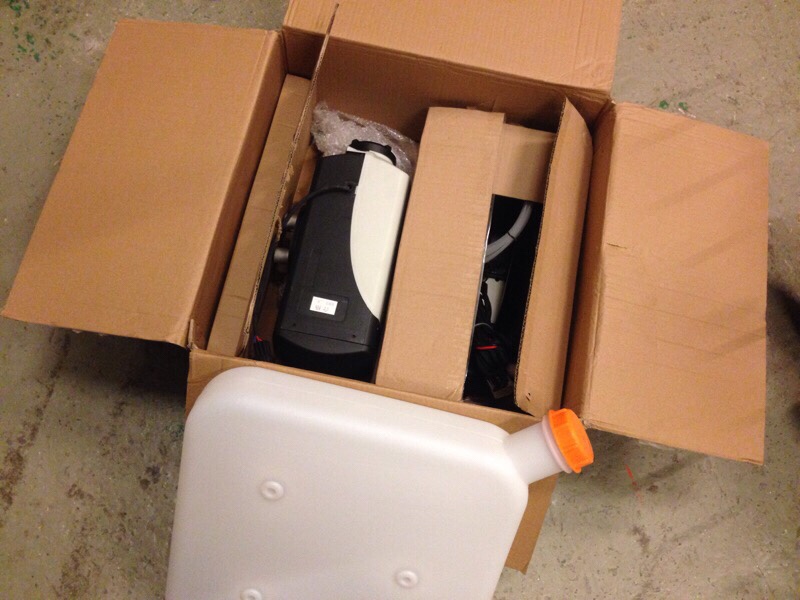
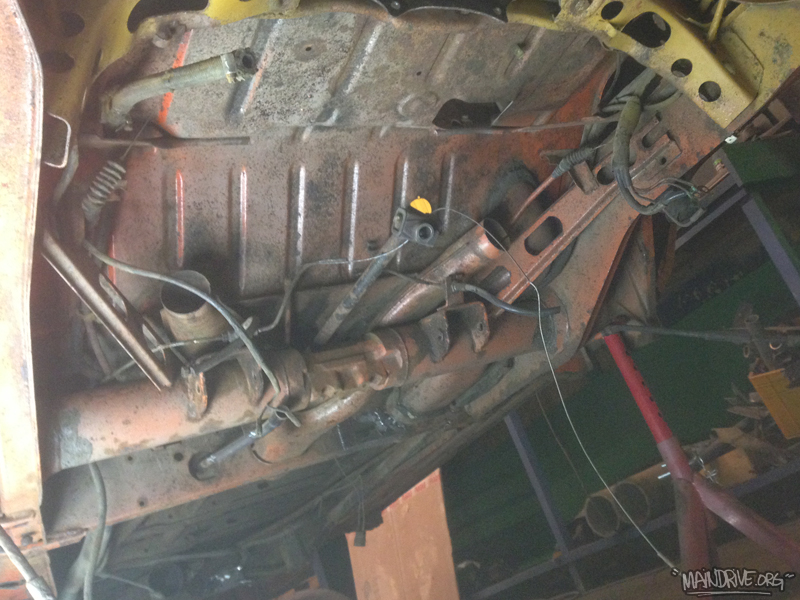
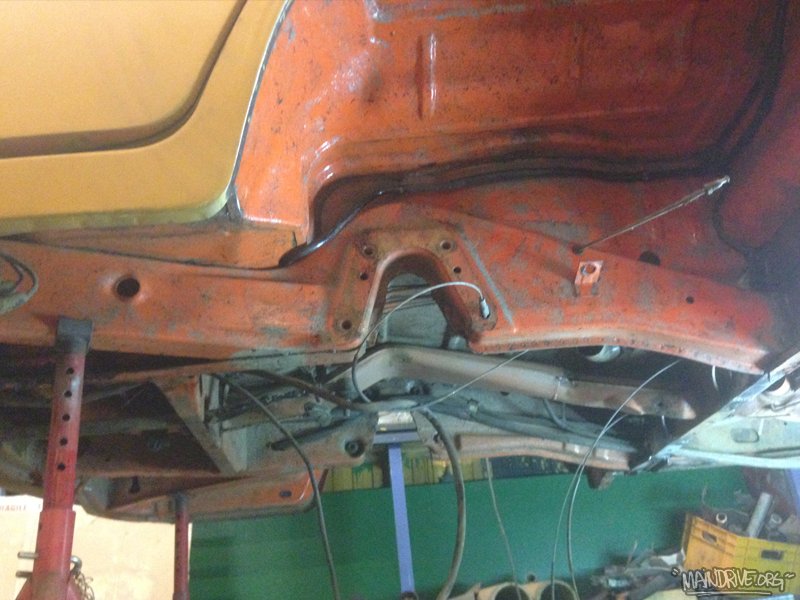
The new heater is now installed and incorporated with the old heater system design on the Highroof bus. Easiest and fastest way to install this would be to just place it under one of the sofas inside the bus and pull the heater hose out. But I decided to complicate it a little more but in the end with a much better result I believe. My bus had the Eberspacher heater M-code from factory so my idea is to remove the old heater and replace it with a new modern diesel heater.
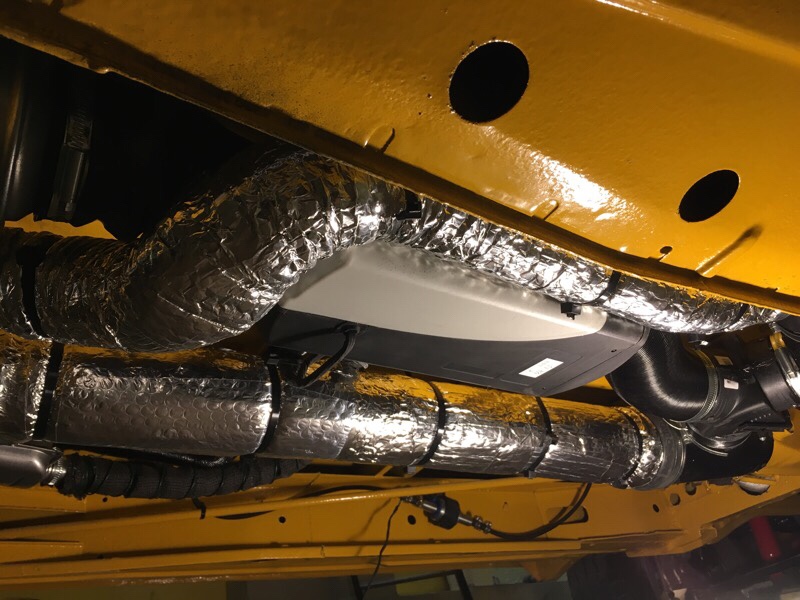
Doing it this way, I will get a modern reliable diesel non explosive/safer heater than the old which ran on petrol. I will automatically get digital display with timer, remote start, thermostat control and much more. I will not loose space or hear the noise from it (like if it was installed inside the bus) because the heater will now be outside under the middle floor (inside the protective splashpan) where the old factory heater was mounted. I will now get heat not only in the rear of the bus but also in front cab and windshield ect. I will also add some extra airflaps in the heaterchannel so I can adjust the heat to only front or back to the rear floor, bed and top bunk. I will then insulate all pipes with aluminum air bubble foil to protect the heat from the cold surrounding. More work doing it like this but I think it will be all worth it in the end.
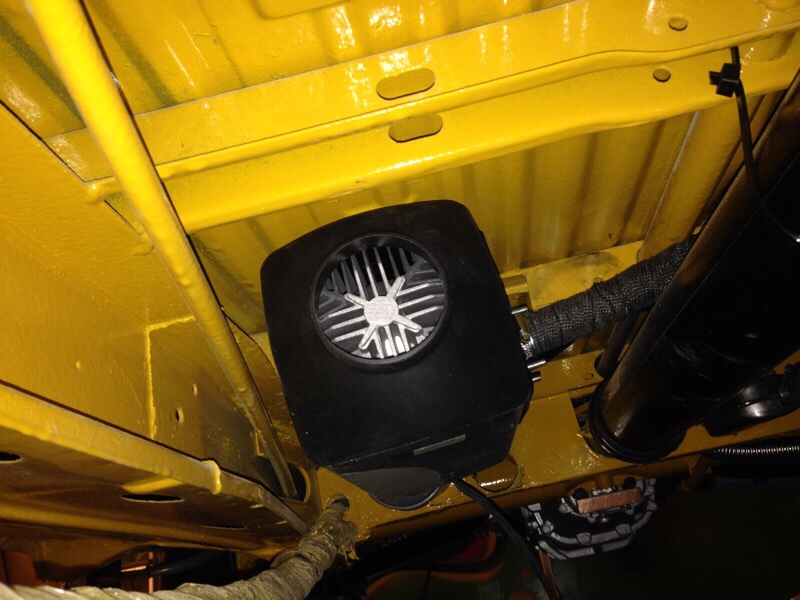
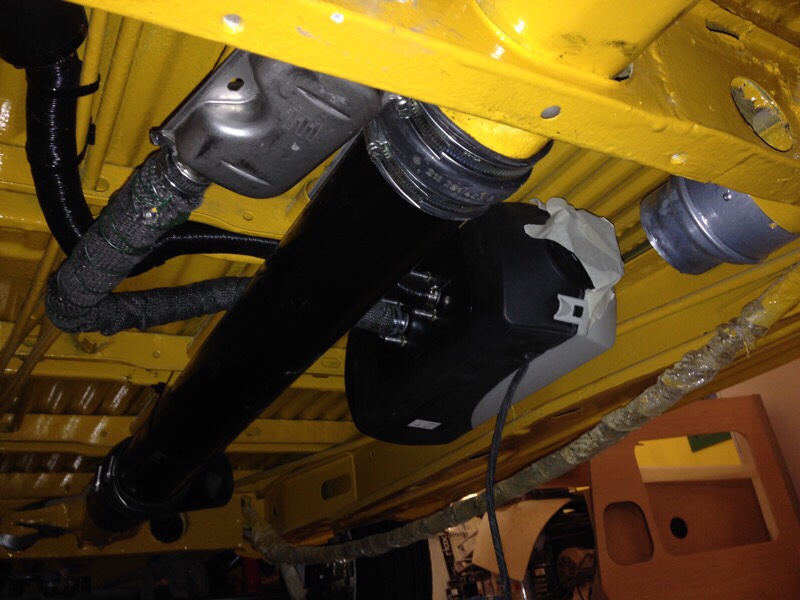
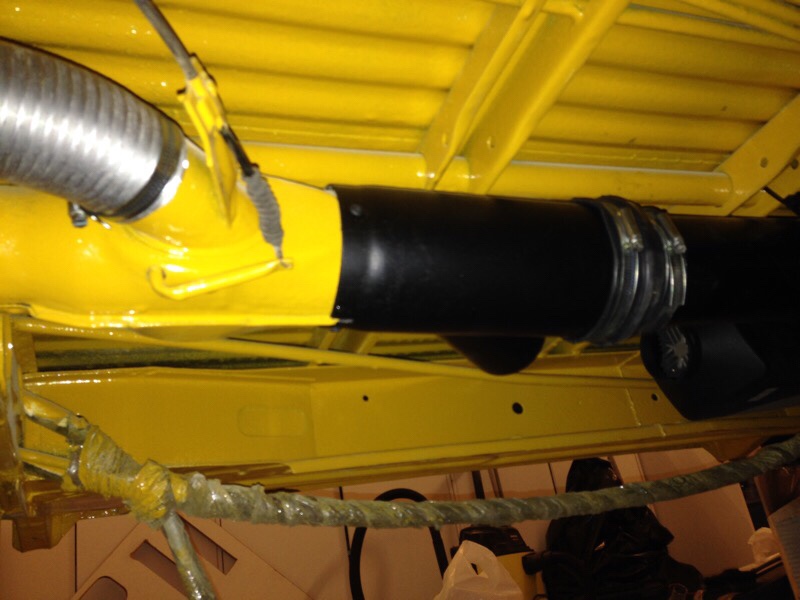
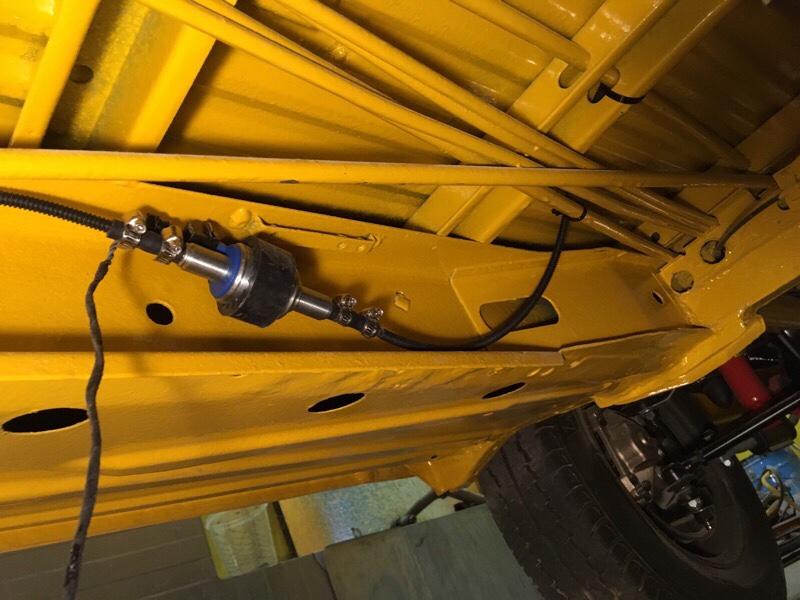
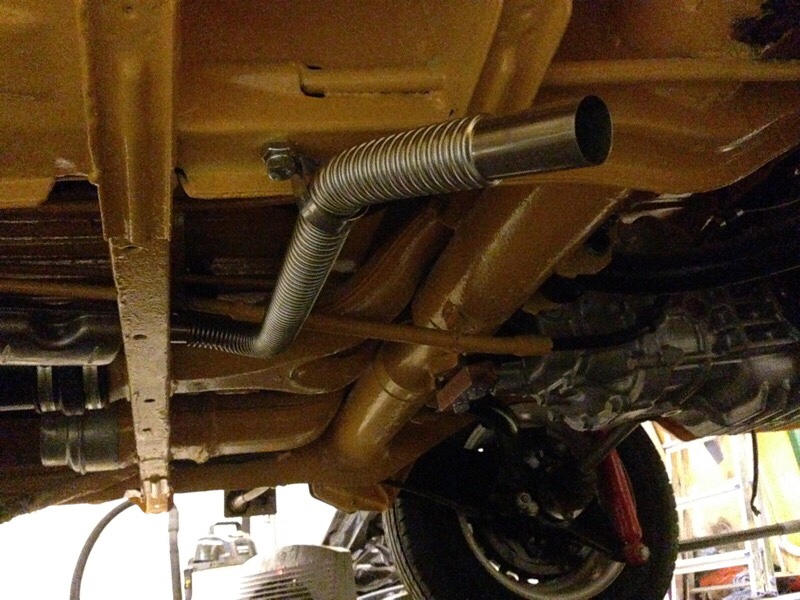
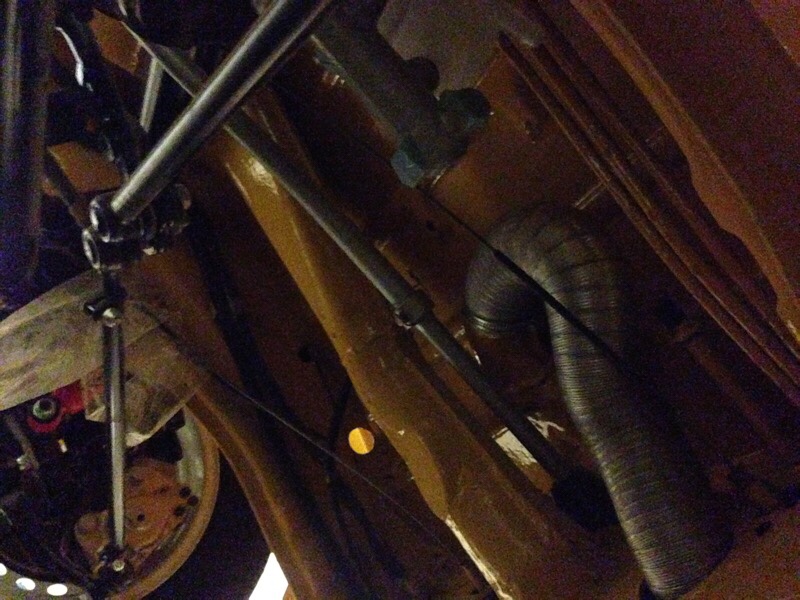
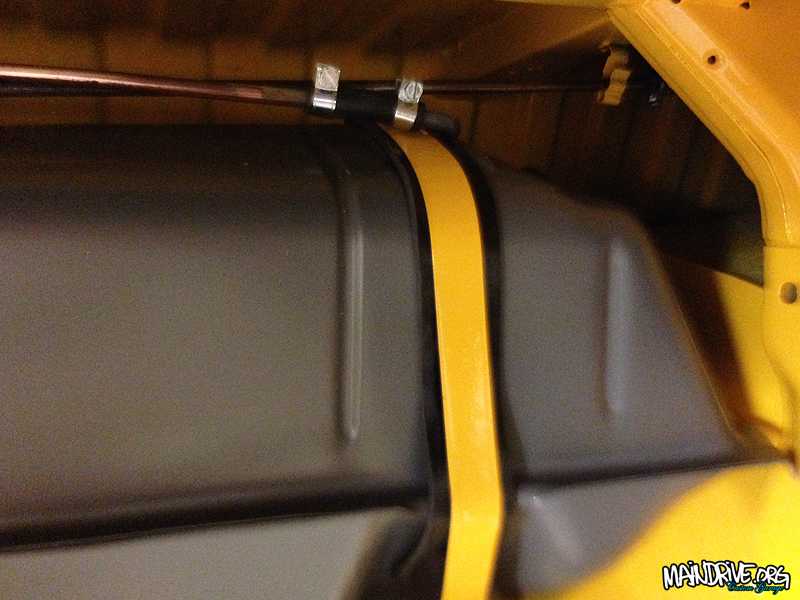
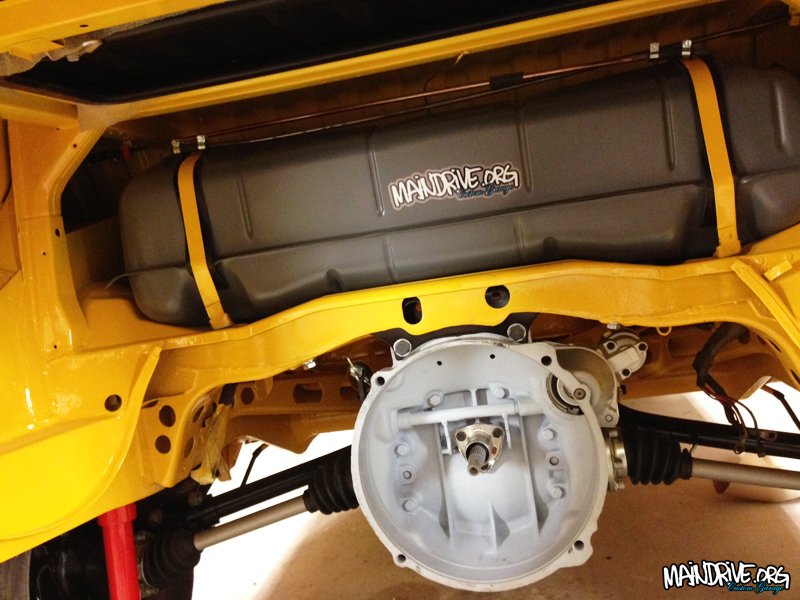
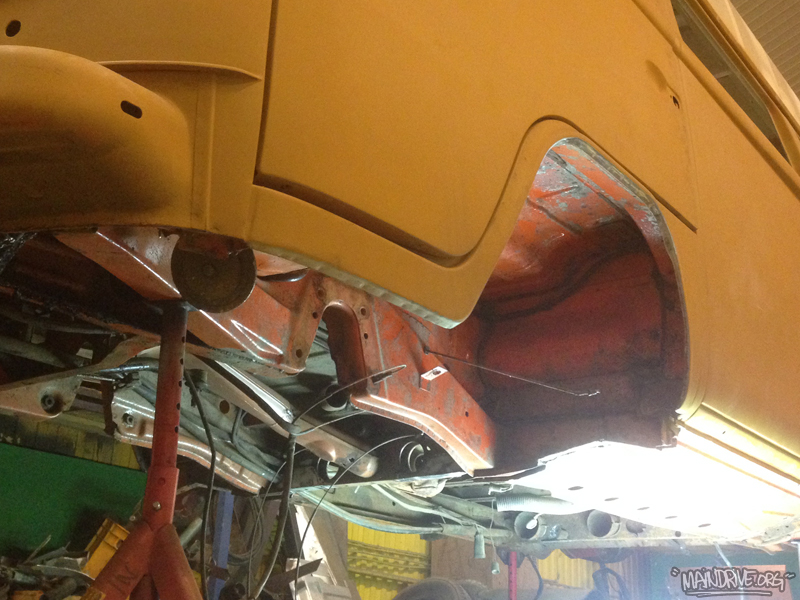
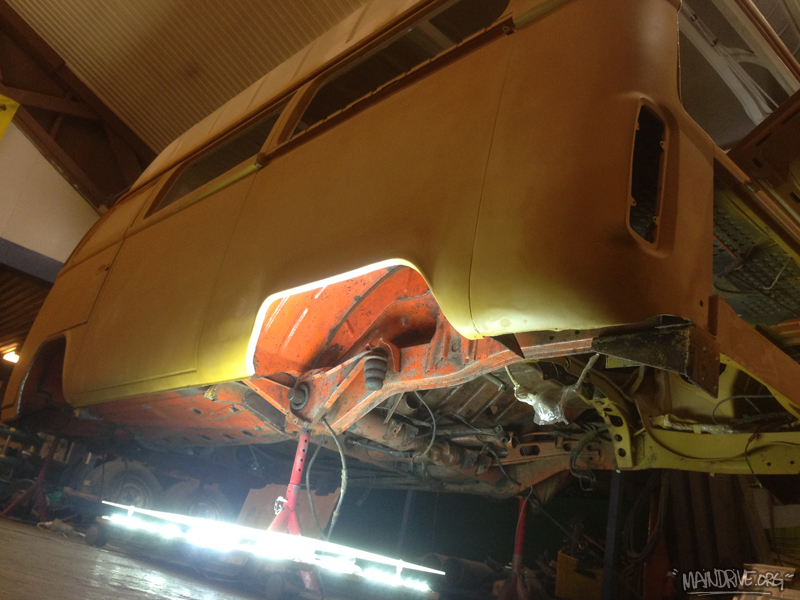
I started by removing the old crusty Eberspacher BA6 heater that was mounted in the center under the floor, mounted a new 90mm center pipe under floor instead (like on a ordinary Baywindow without the BA6 heater option). The new parking heater was the installed on the side of the new center pipe. It was a really tight fit, the height of the heater is 140mm and the space under floor was 145mm. I had to cut a 3-40mm notch out in one of the floor supports to make it even possible. The heater exhaust was wrapped in “header wrap” for less heat radiation and was routed out back to a muffler and then out in front of the left rear wheel. You don’t want to route the exhaust fumes out on the sliding door side of course! The fuel pump was mounted in a rubber holder in 40 degree angle on the frame of the bus, filter was put on outside for easier change in future. The air intake for the combustion chamber was routed back (don’t place it against wind/driving direction) and a filter bolted in the end. The air inlet to the heater fan is hooked up to the stock inlet pipe (from a hole under the rear rock n roll sofa). This means it will circulate warmer and warmer air, and don’t have to warm it up from ice cold outside air all the time. It will make it produce more heat too. The heater outlet is connected to a air flap (where I can choose where I want the hot air, front cabin or rear. I also made a extra heat pipe for the rear bed and top bunk, so you can feel the heat directly in the bed when you turn it on in the morning. 🙂 You can see the heat outlet in top bunk on the last picture. Stock is only rear floor otherwise. The small 10 liters diesel tank will be mounted under or behind the front passenger seat, this way you can easily see when it’s time to refill. It consumes only between 0,19-0,5 liters per hour. So on one tank it can run on full blast for about 20-24 hours before it time to fill it up again. Insulated all pipes from back/rear of the engine to all the way to the front cabin. Still have some electric wiring left to do before it all done. Can’t wait to test this beauty out!!
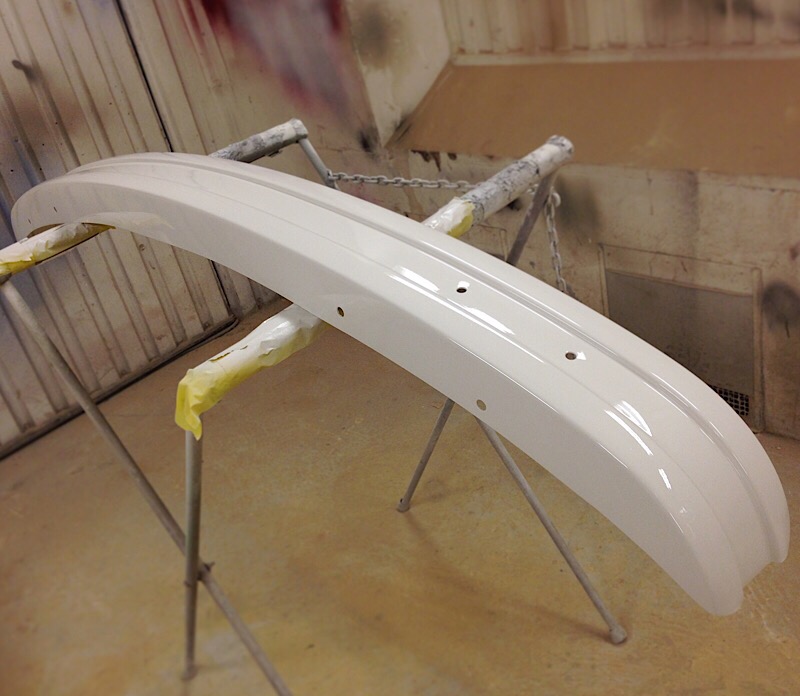
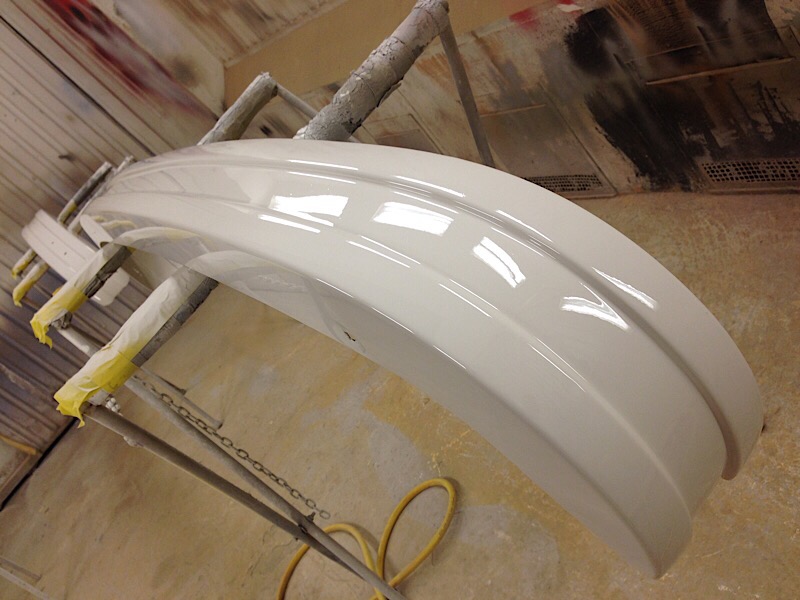
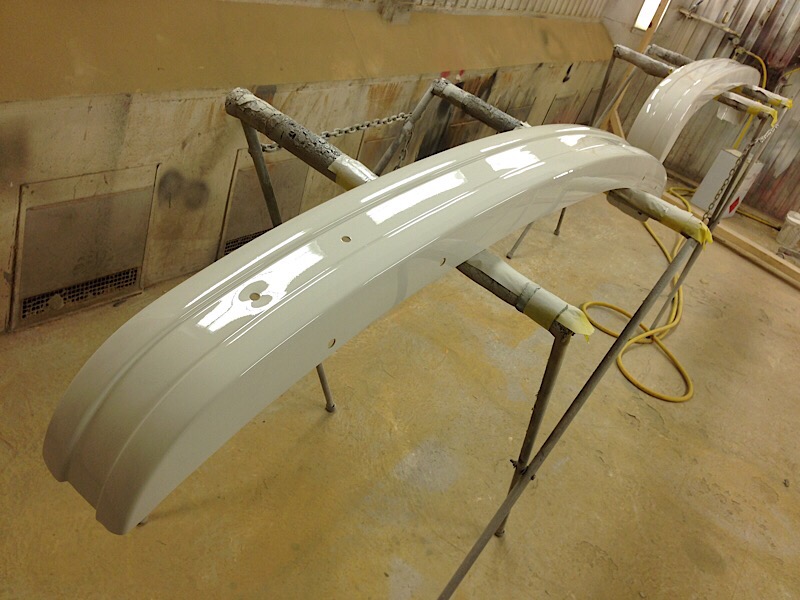
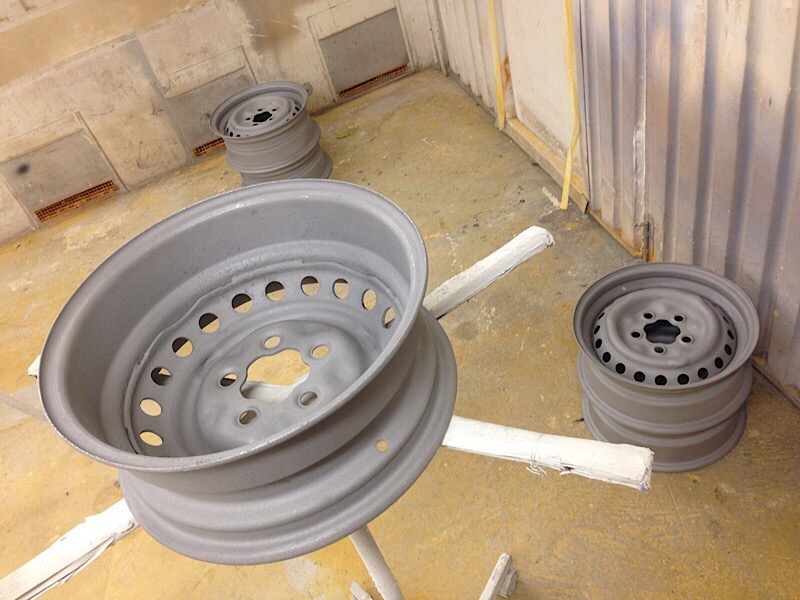
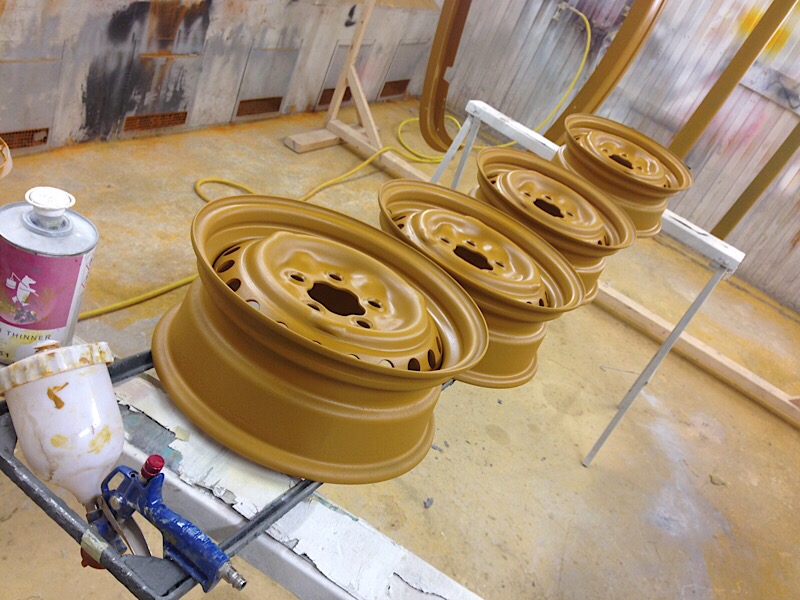
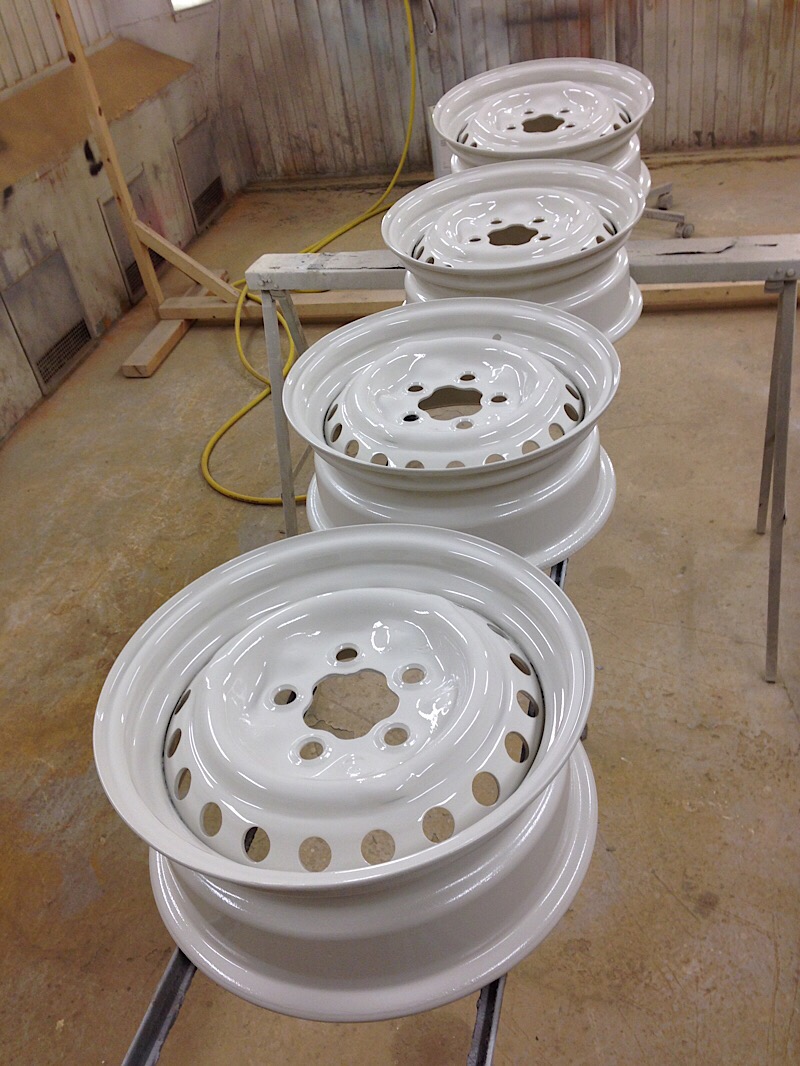
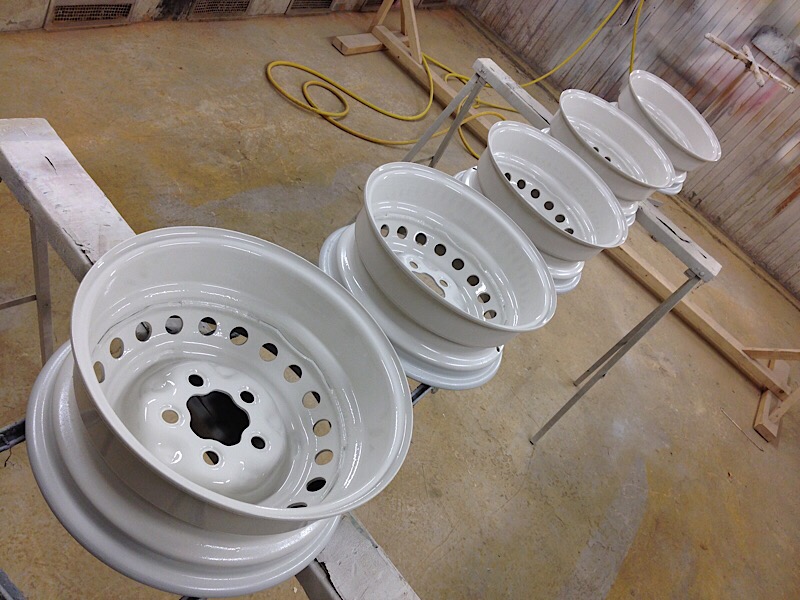
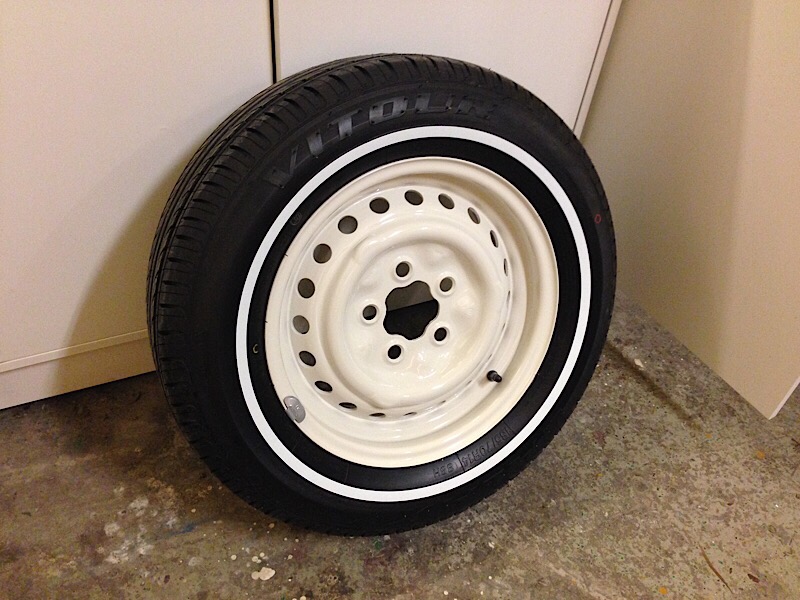
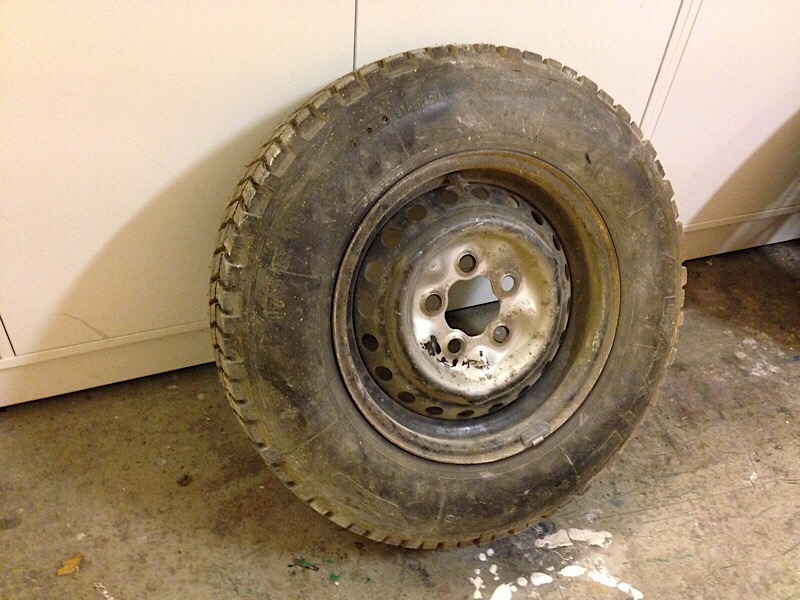
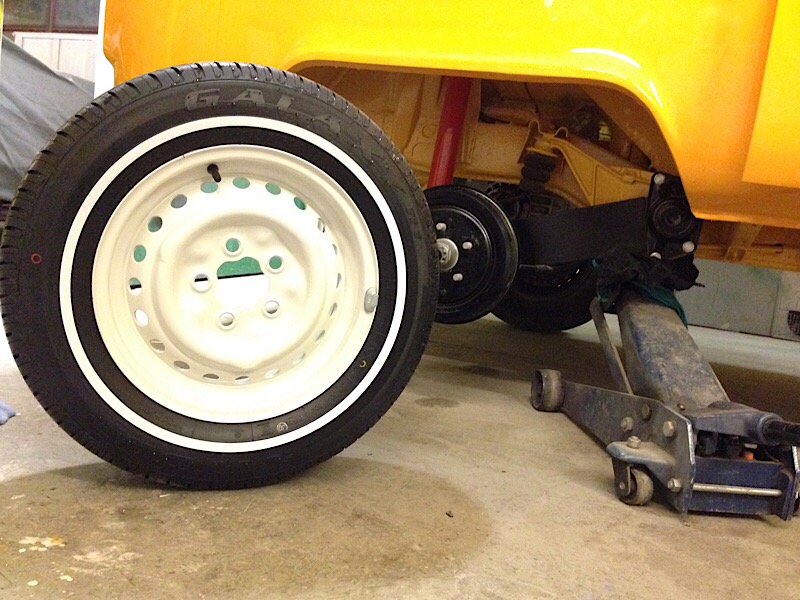
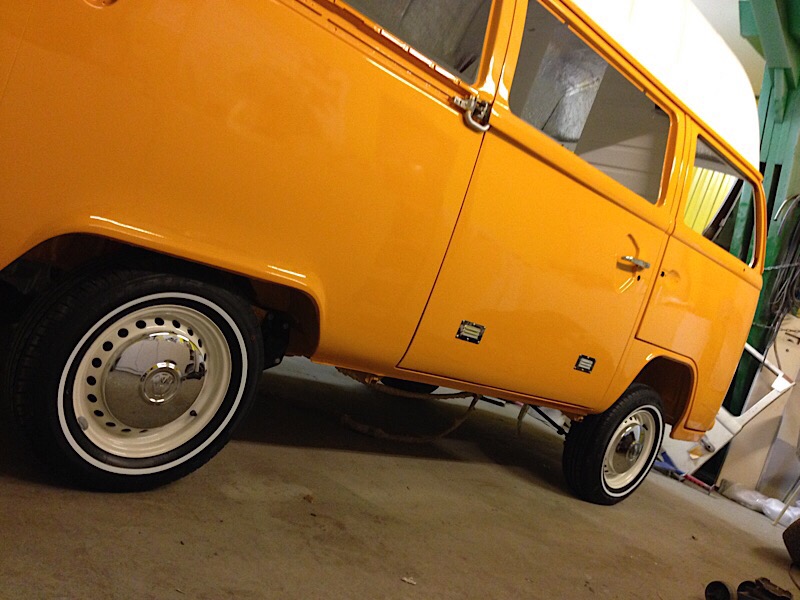
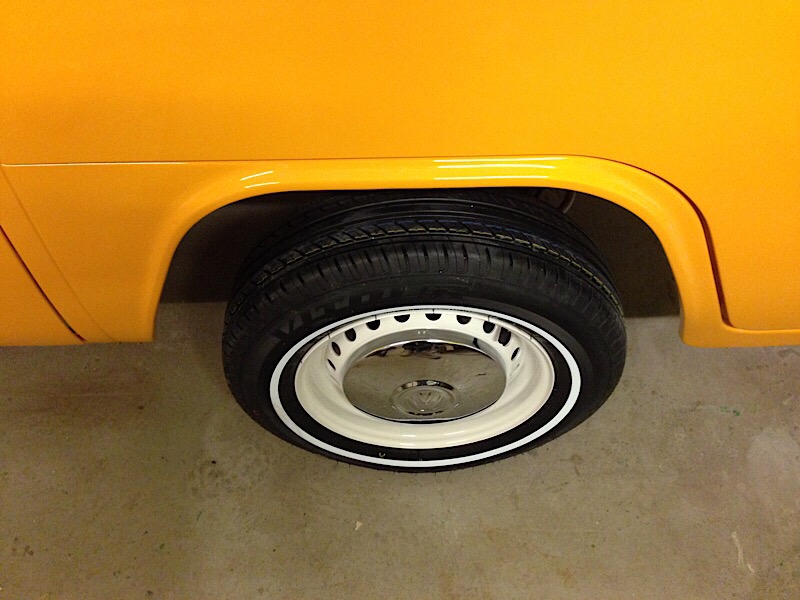
Piece by piece it’s coming together! I Have been fixing with the bumpers and wheels lately. It have all been sandblasted, welded, epoxyed, sanded, primered and painted in same white as the roof. Really starts to come together now, some light in the tunnel. But still lots left to do, here is some new pics…
#highroofbayproject

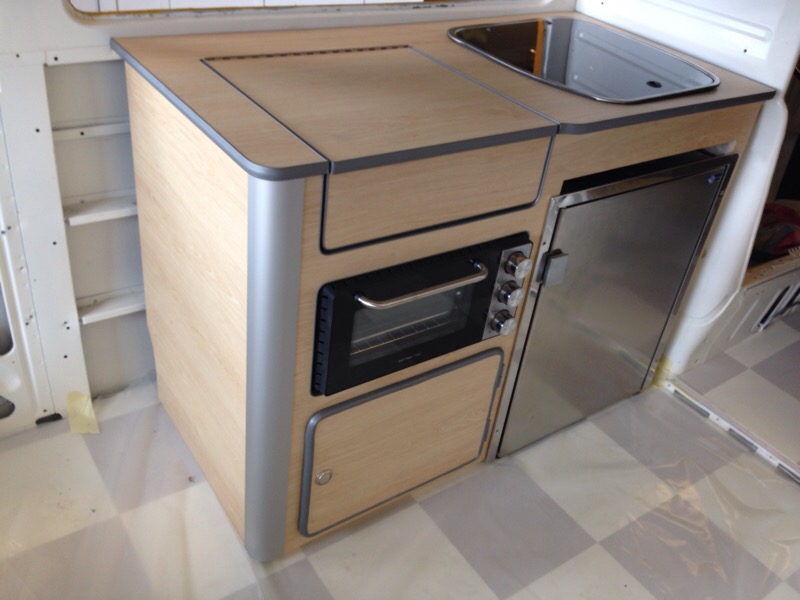
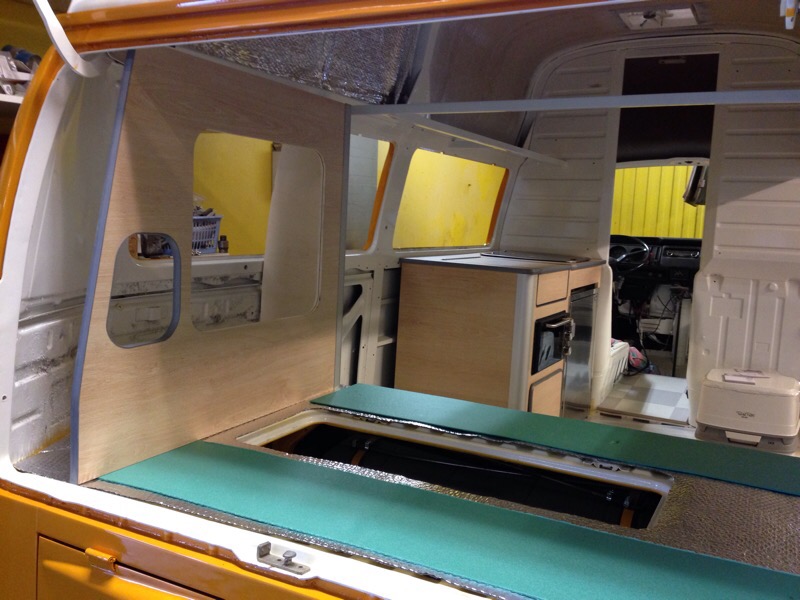
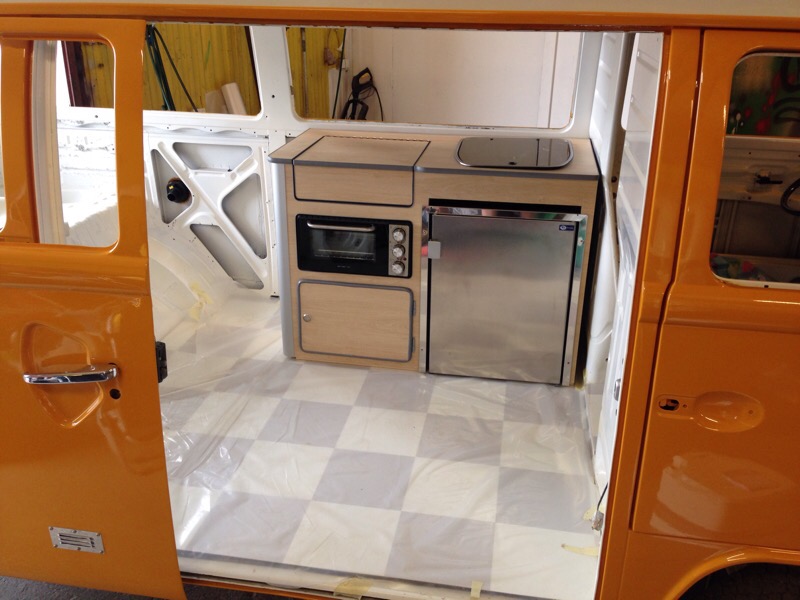
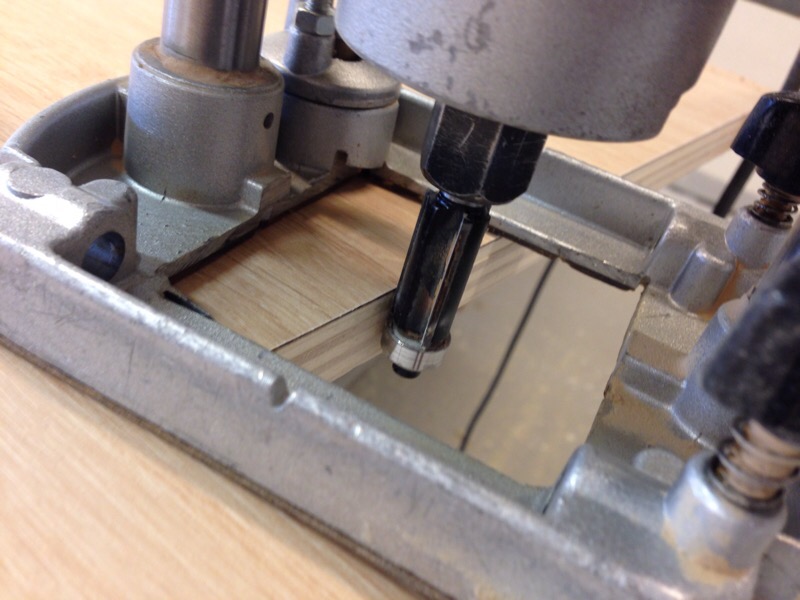
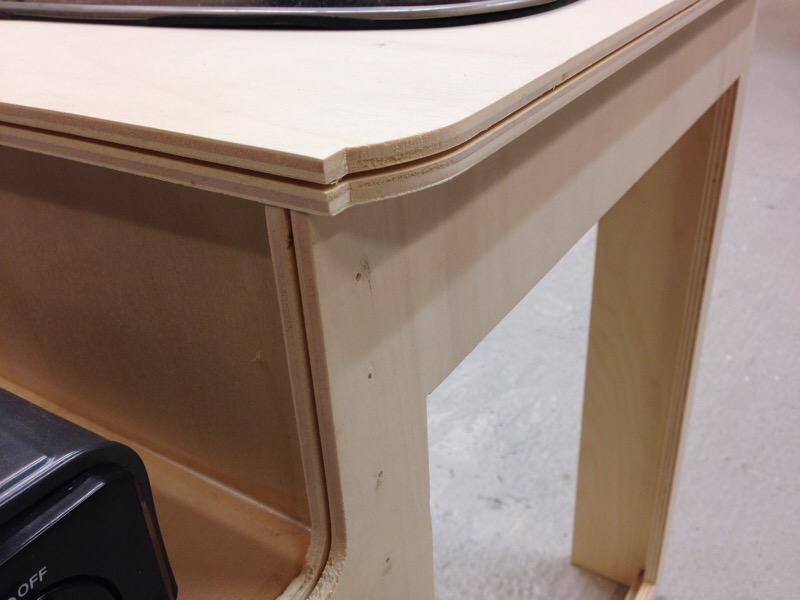
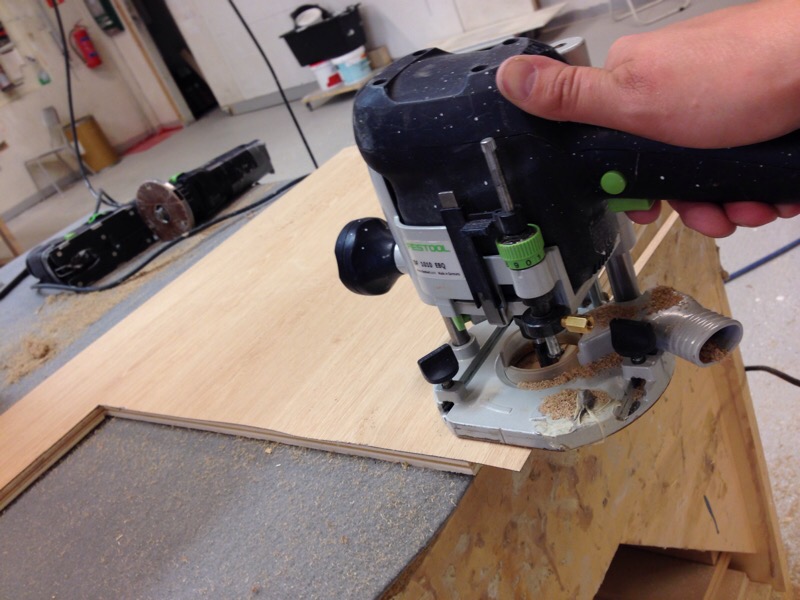
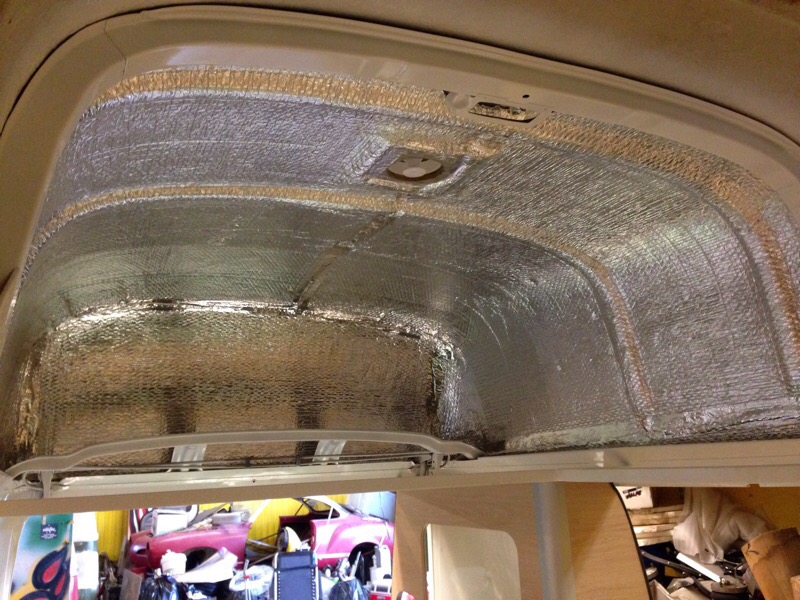
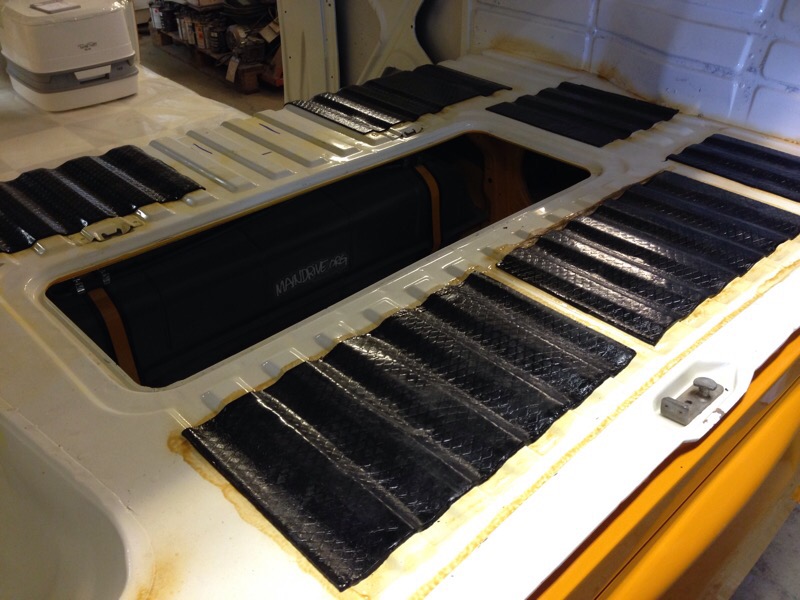
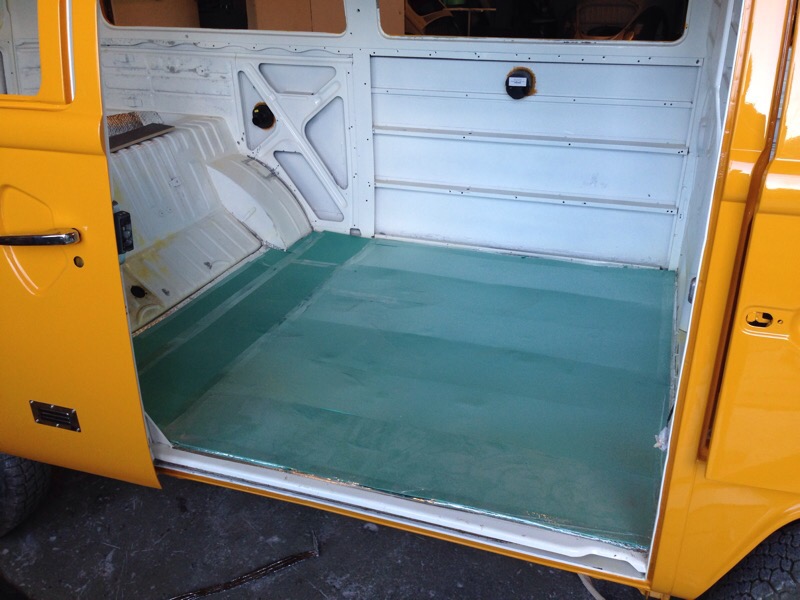
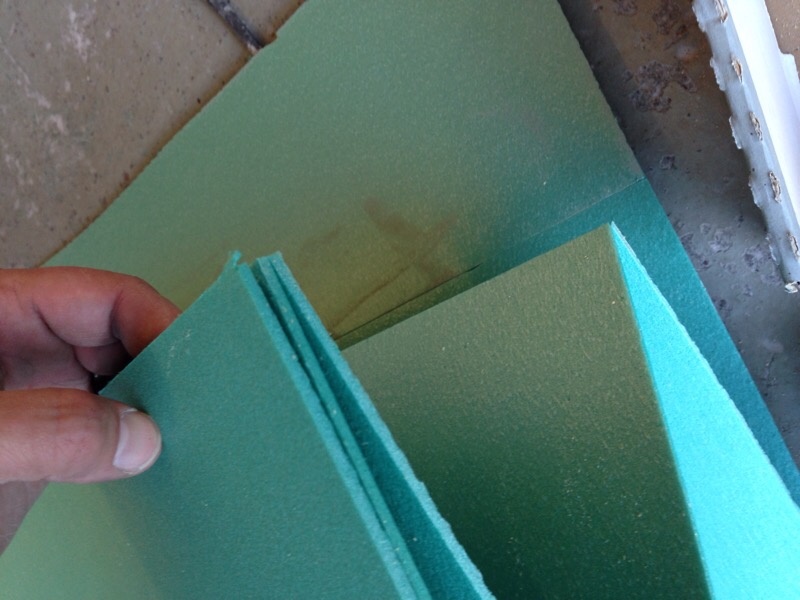
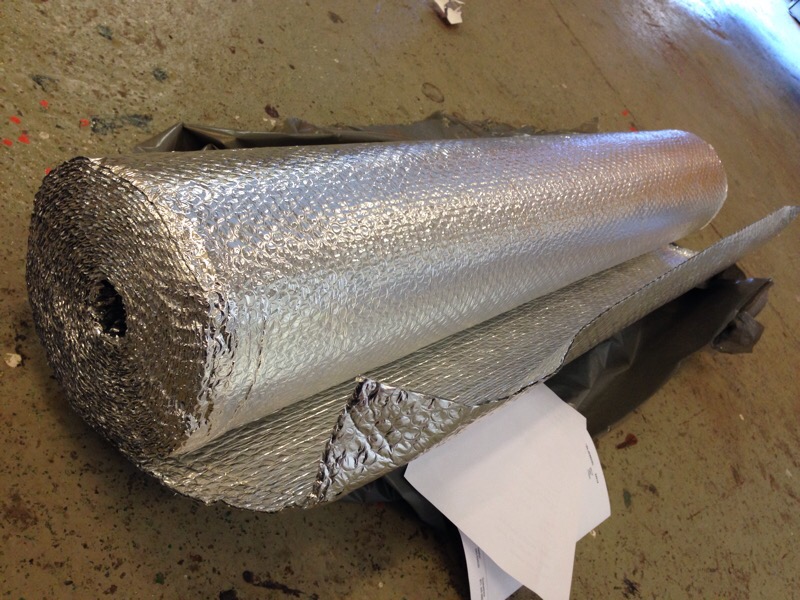
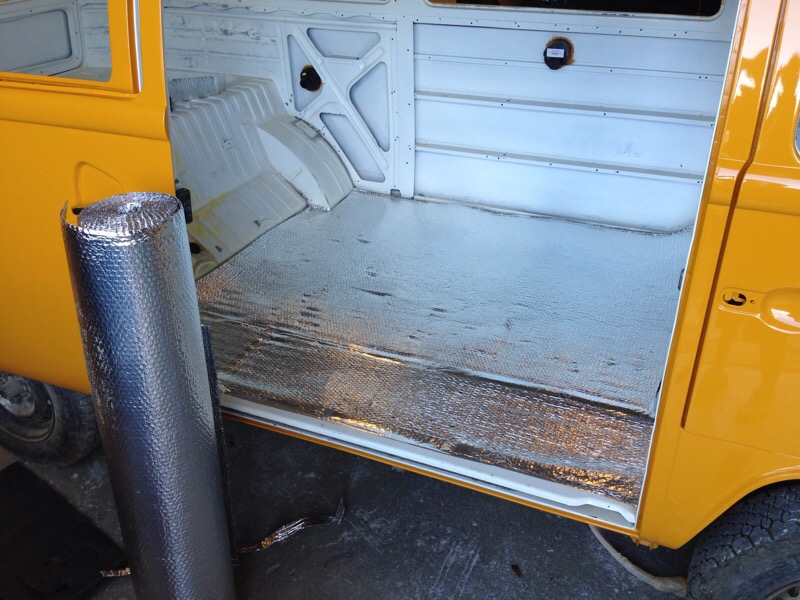
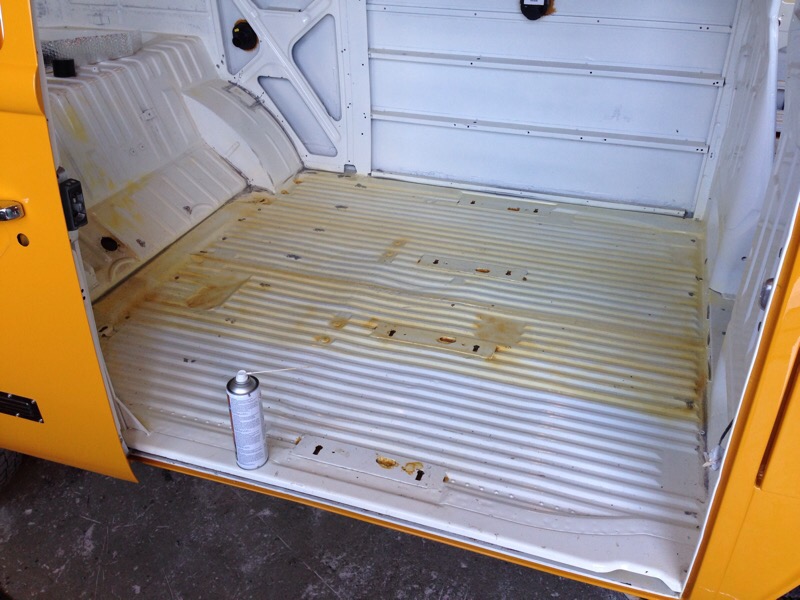
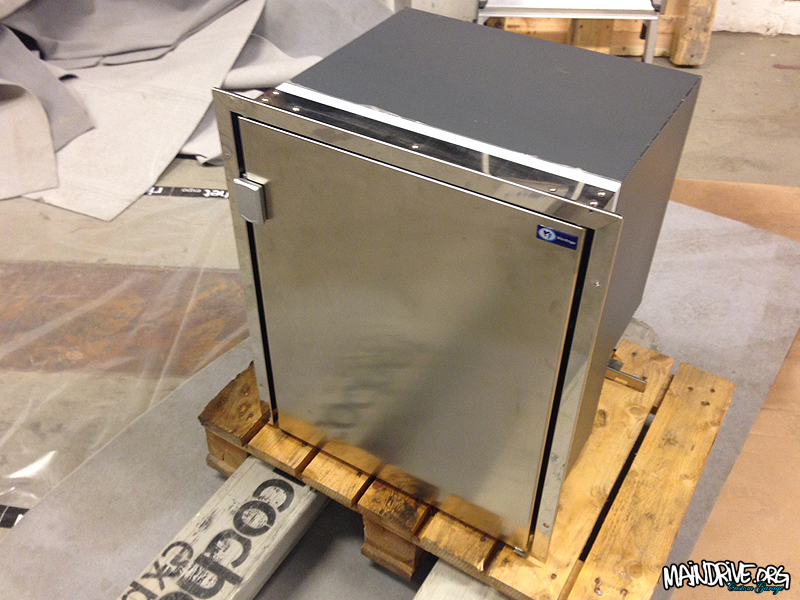
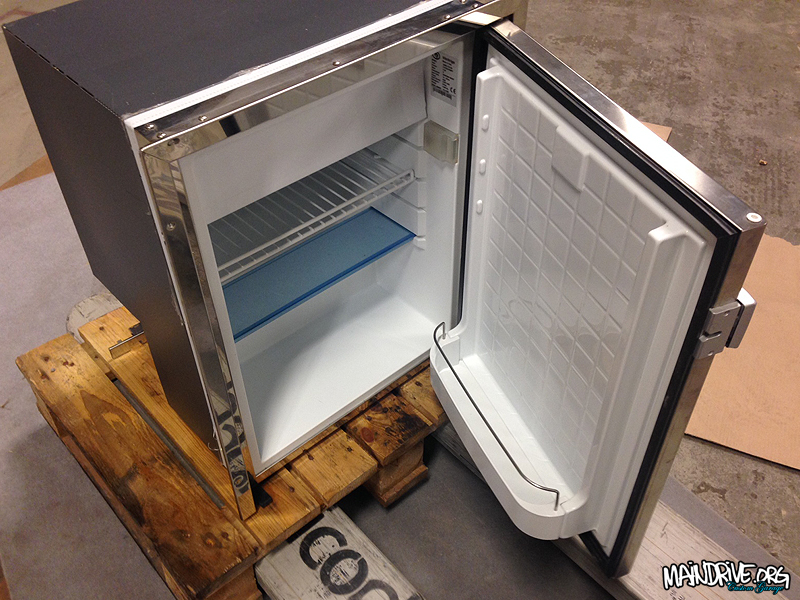
Have now started with the interior on the Highroof bus. Have put sounddeadning mats in floors and doors, sprayed it all with wax for rust protection. Then added insulation (Refectix) a material of aluminium with plasticcells of air in middle. NASA came up with this tecnology when insulating spaceships actually! After this I put some extra 5mm insulation foamboards (green) then 15mm marine plywood and then a new linoleum carpet in Classic checker pattern, went with light grey to match the grey details on furnitures. The furnitures itselfs is in Light Oak wood finish (laminate). I built it all in a special extra light plywood 15mm. This interior is gona weight nothing!! And thats great in a slow VW bus, all the stuff thats going to be loaded in the cabinets are heavy enought 😉 The kitchen pod/cabinet is featuring a new Vitifrigio fridge on 48 liters + 2 liter freezer. A new small owen in stainless that will be running on 240v (euro). The zink is from a newer crashed/parted out Knaus campervan I bought cheap online. The lid in top is hiding a gastove and the cupboard in bottom will be housing the greywater tank etc.
Still have plenty to do before I can start restoring the 1800cc AP engine.
More to come soon!
#highroofbayproject
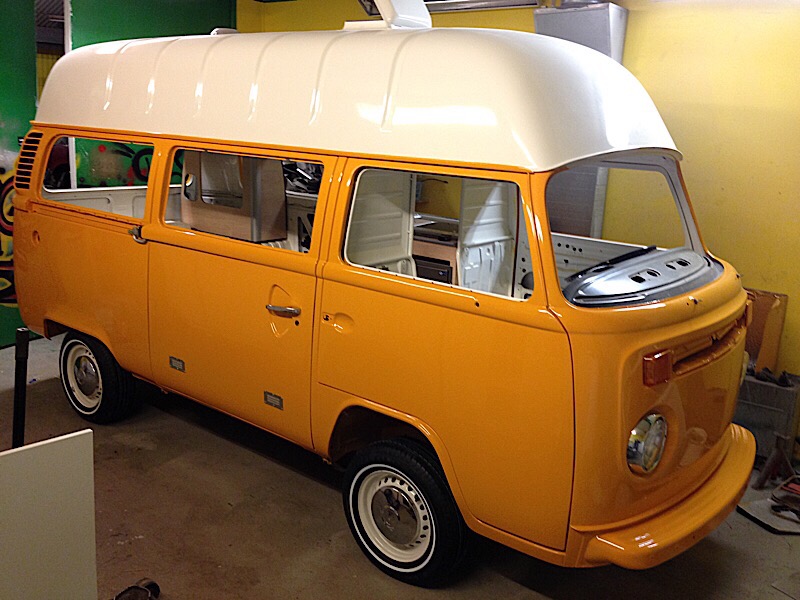
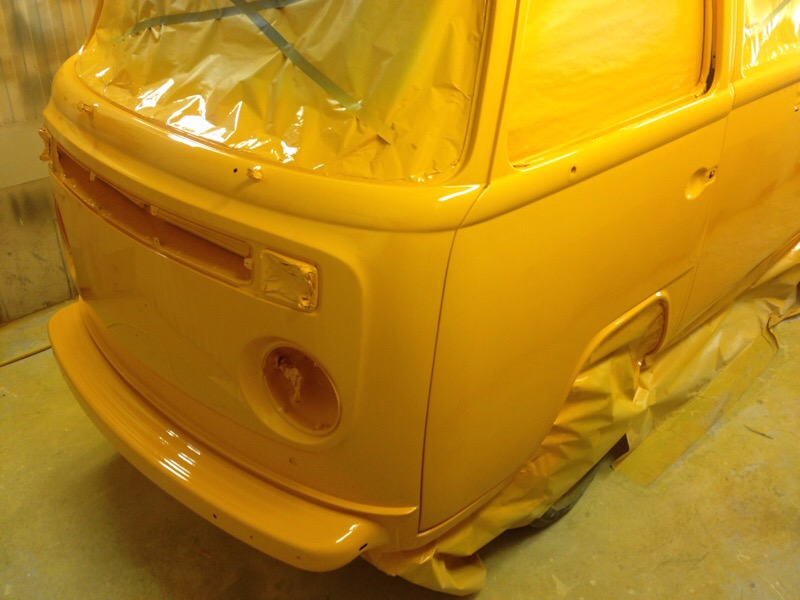
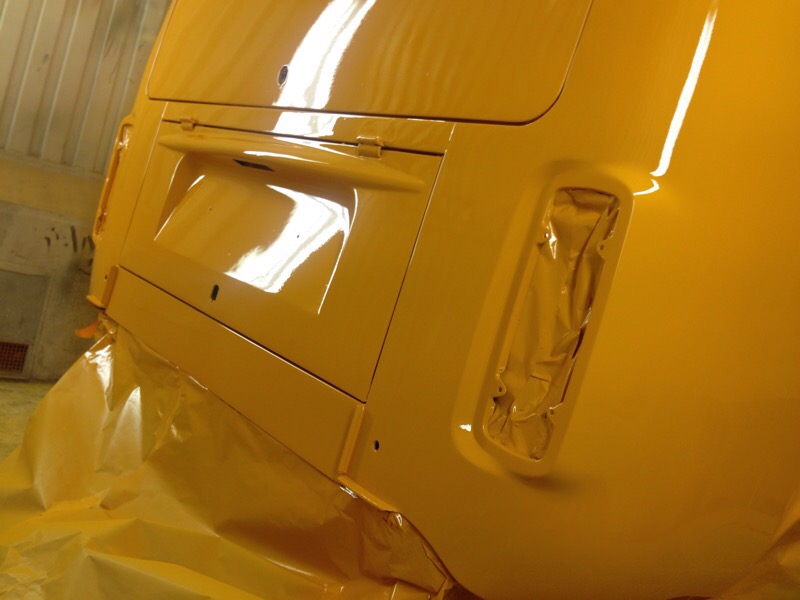
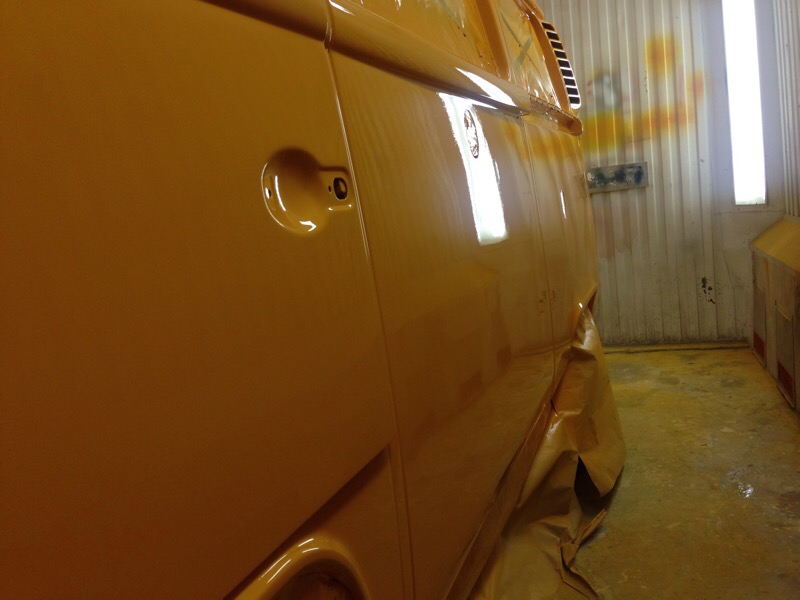
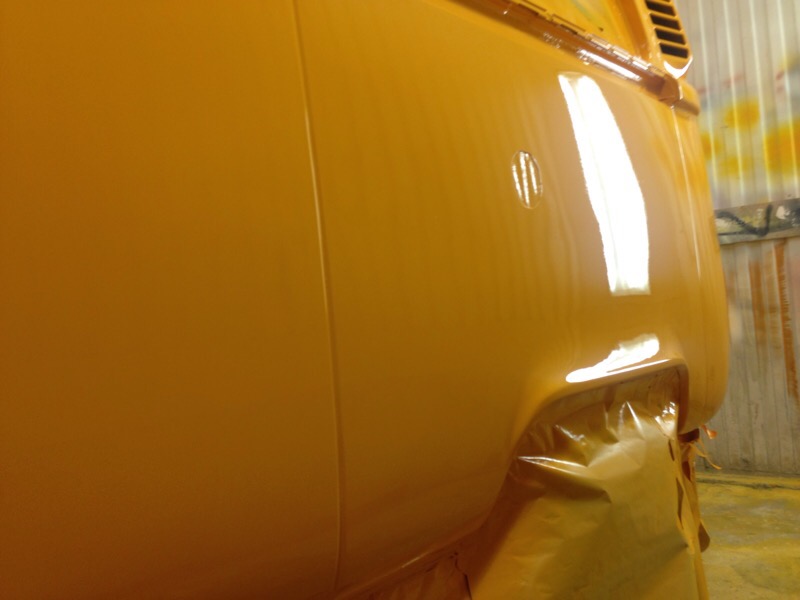
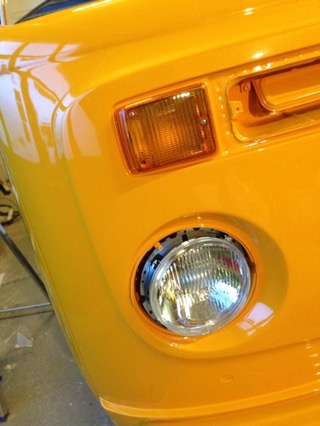
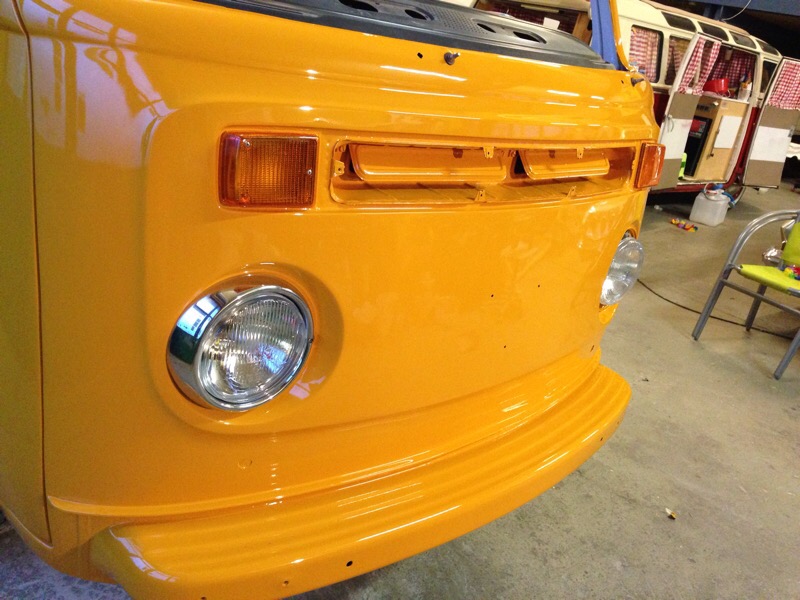
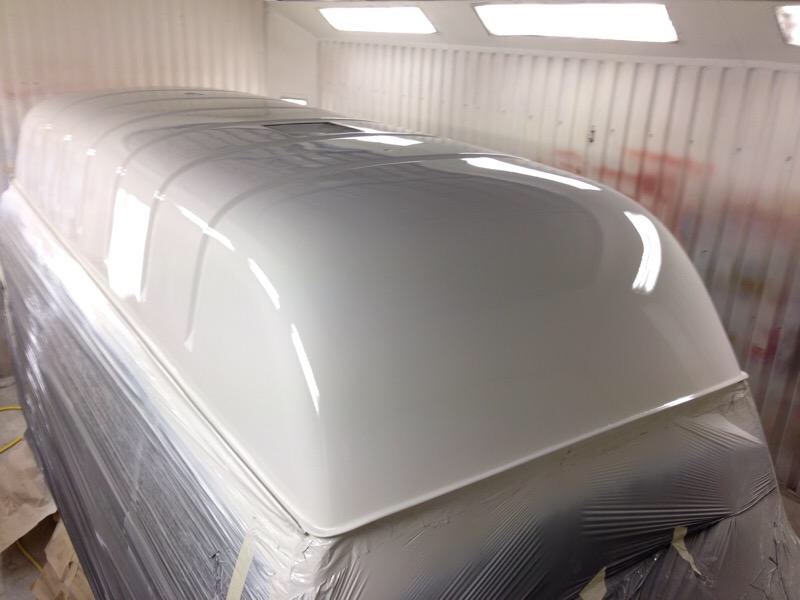
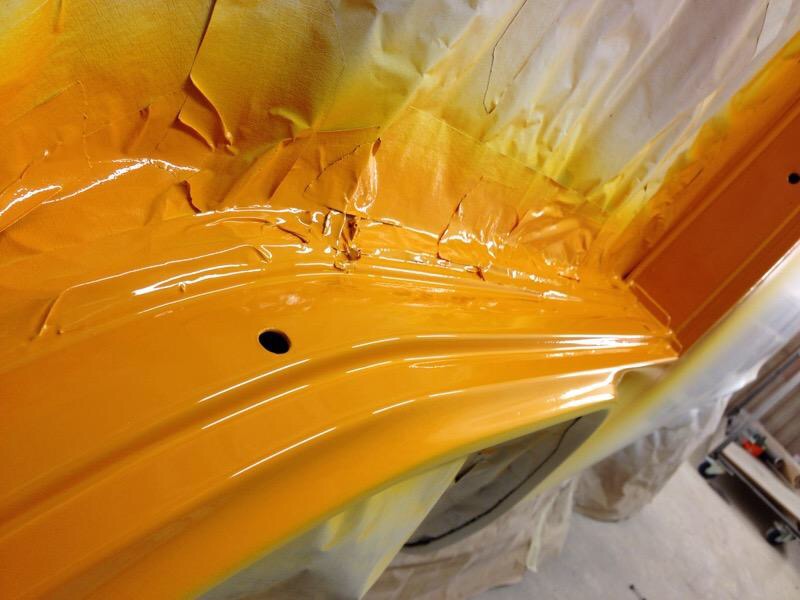
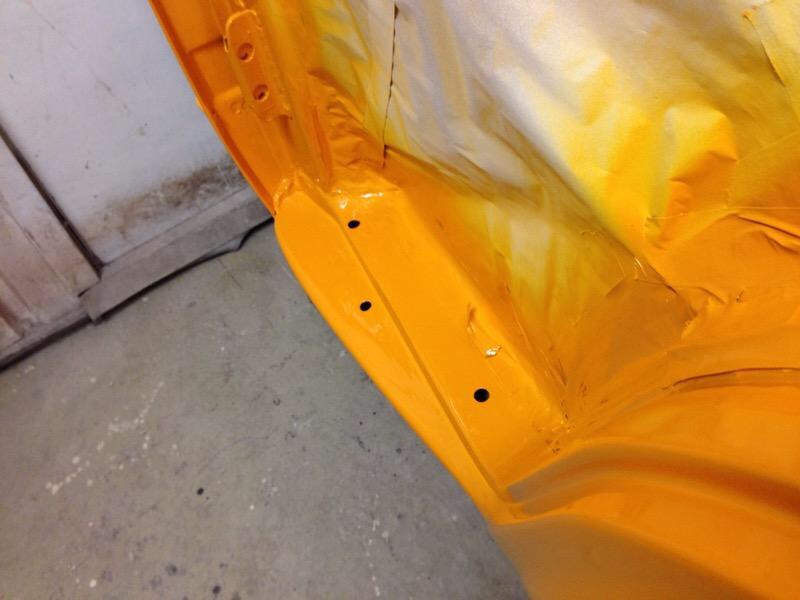
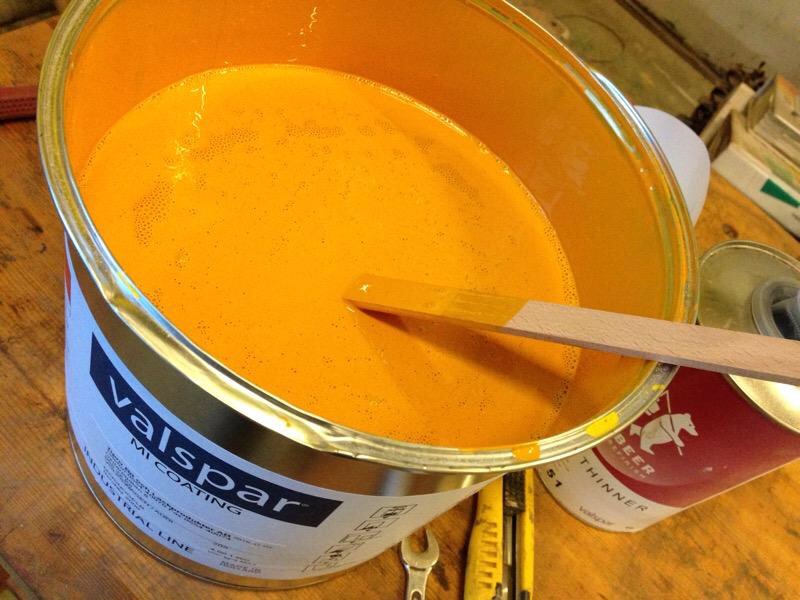
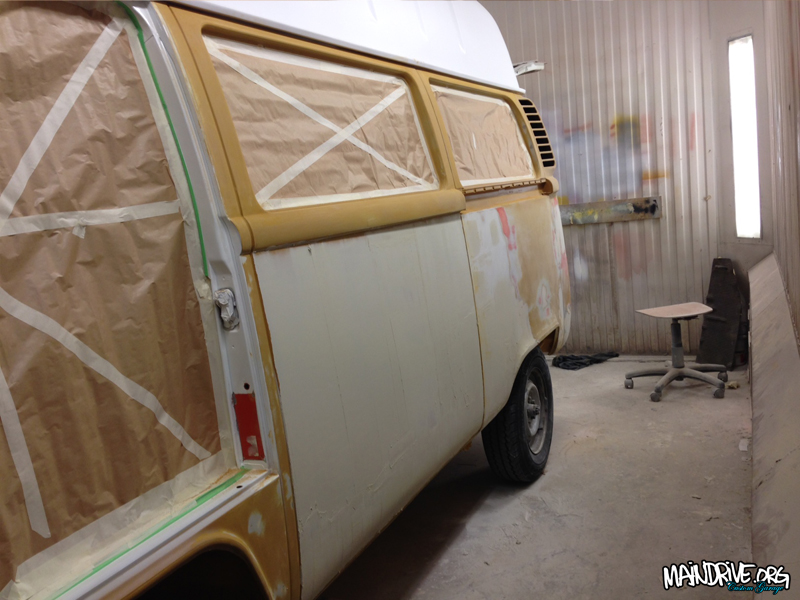
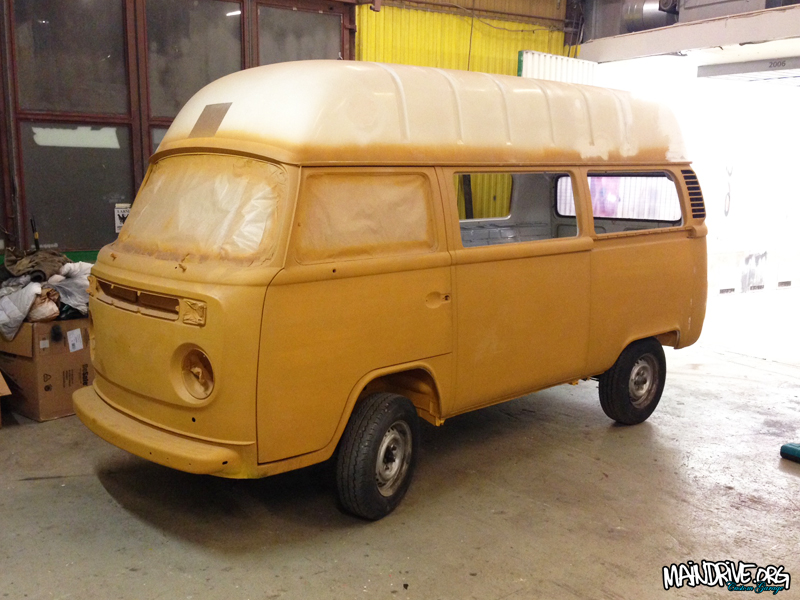
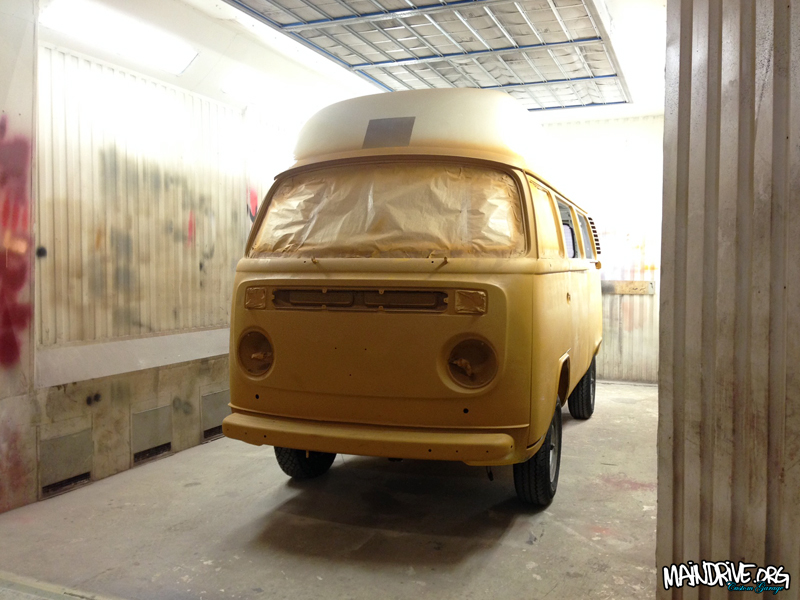
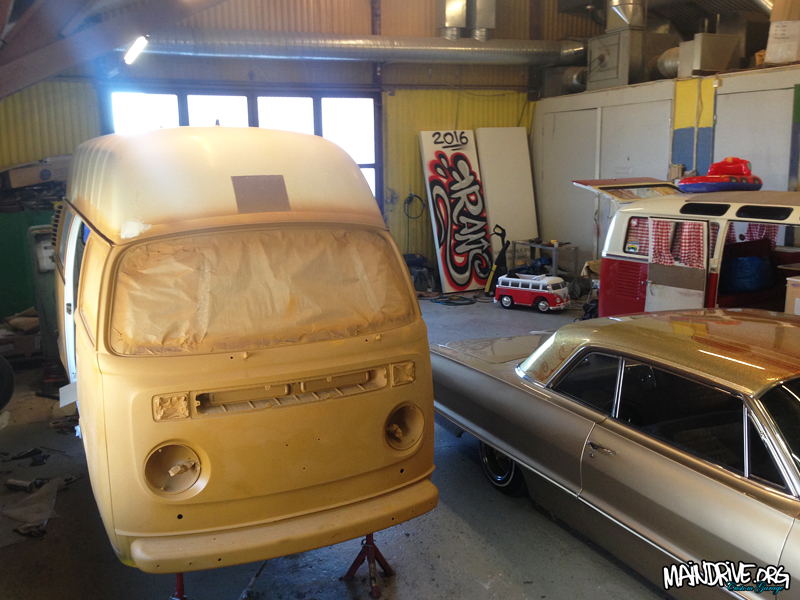
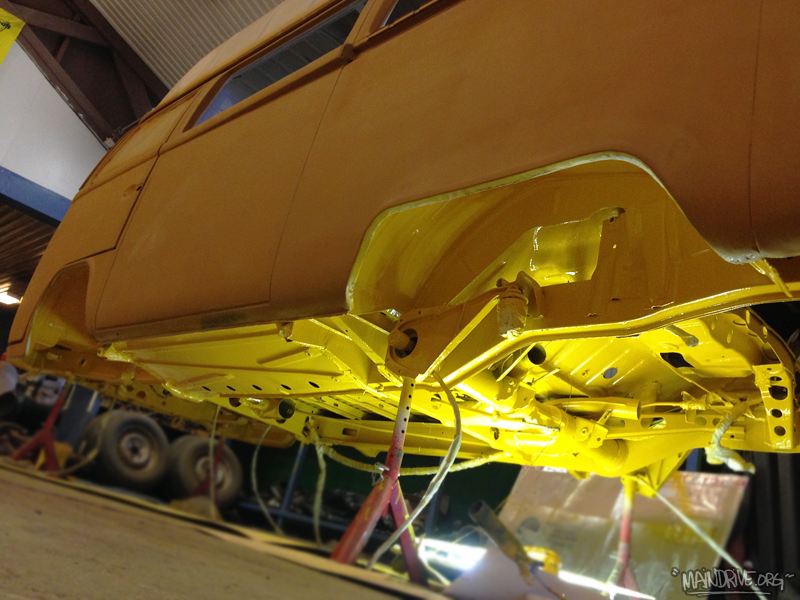
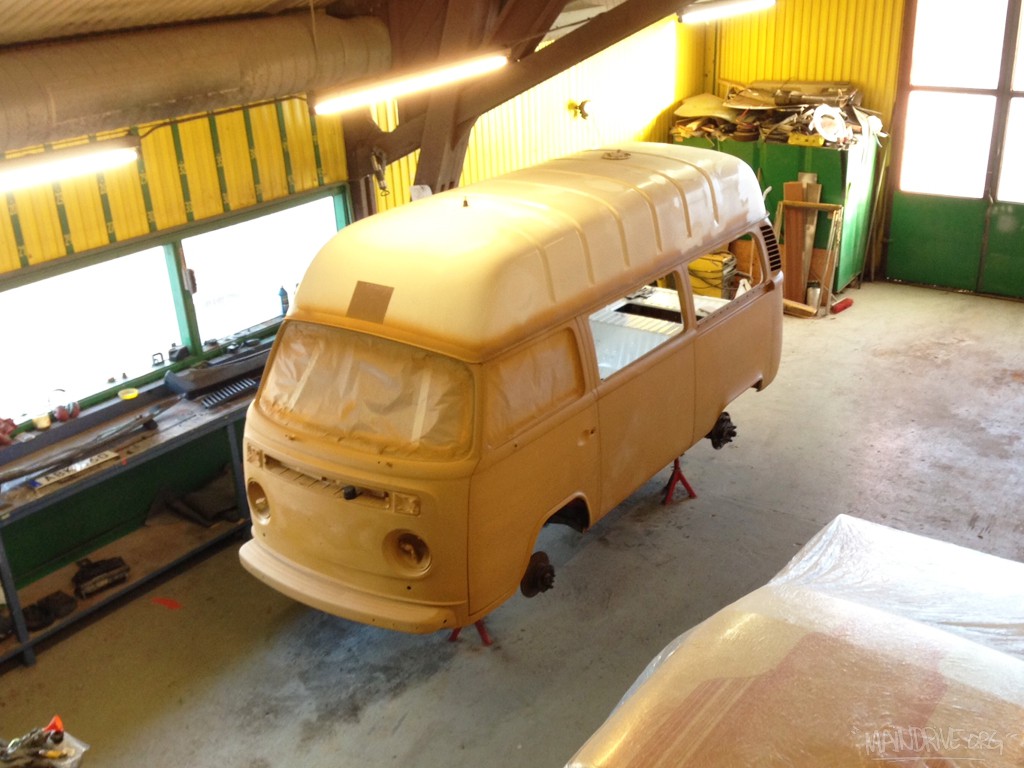
So the Highroof is now painted at last, in Marino Yellow VW L20a, period correct for 1975. It have been a ton of work and to get that yellow color to cover the bus needed to be painted 4times/coats. That because all yellow (and sometimes red) colors have less pigment than all other colors.
Now the fun can begin, mounting on all new parts like lights, handles etc! Next step will be to start with the interior and begin with insulation in walls and floor. Would be nice to have the most done on interior and exterior until fall so the winter can be focused on engine build and install etc.
More pics coming soon!
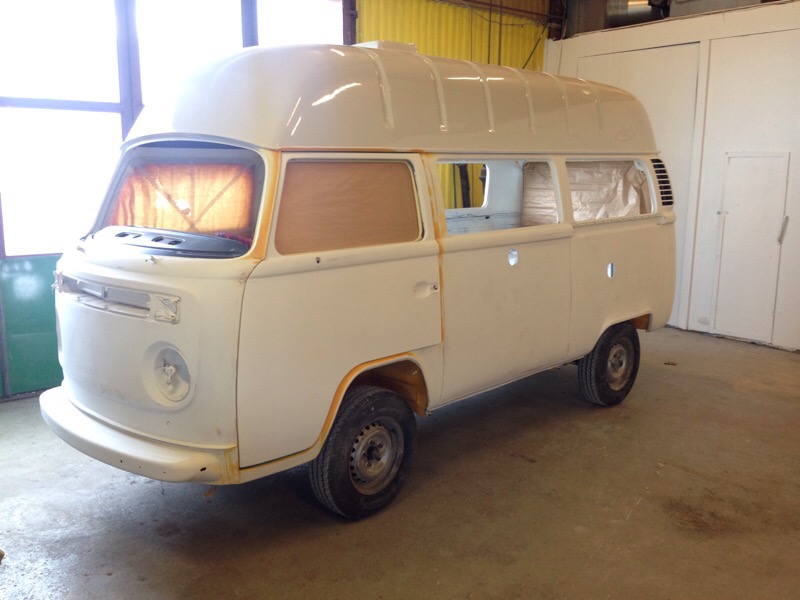


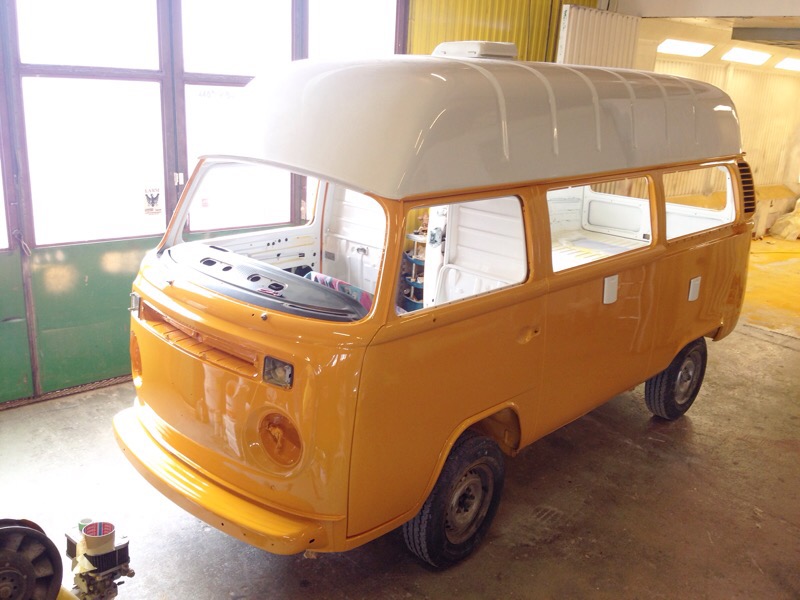


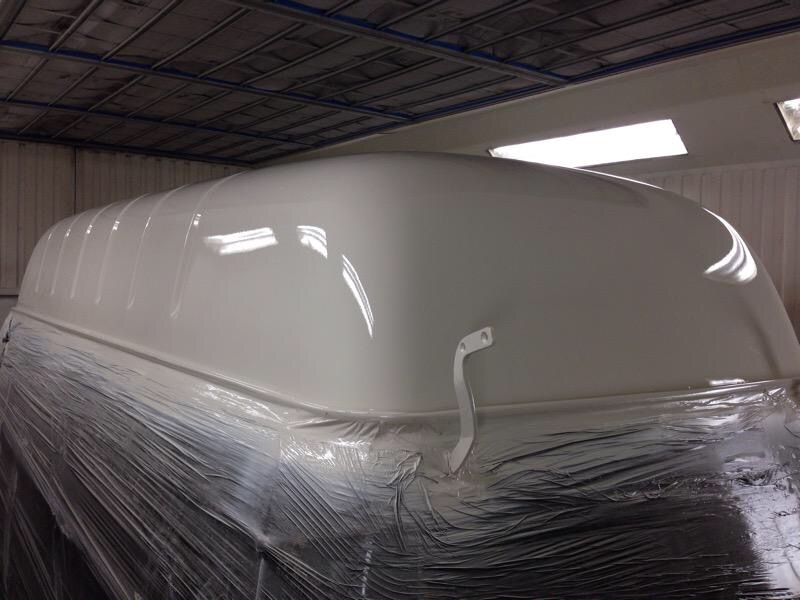
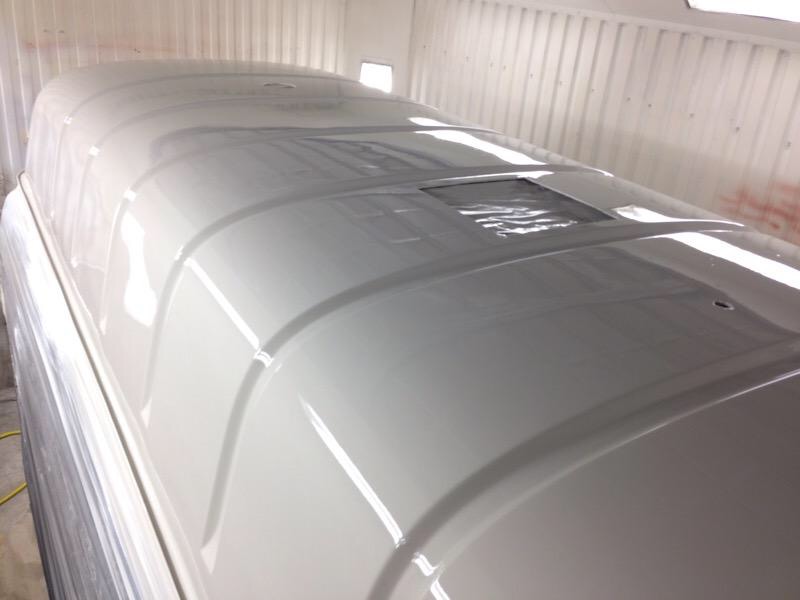
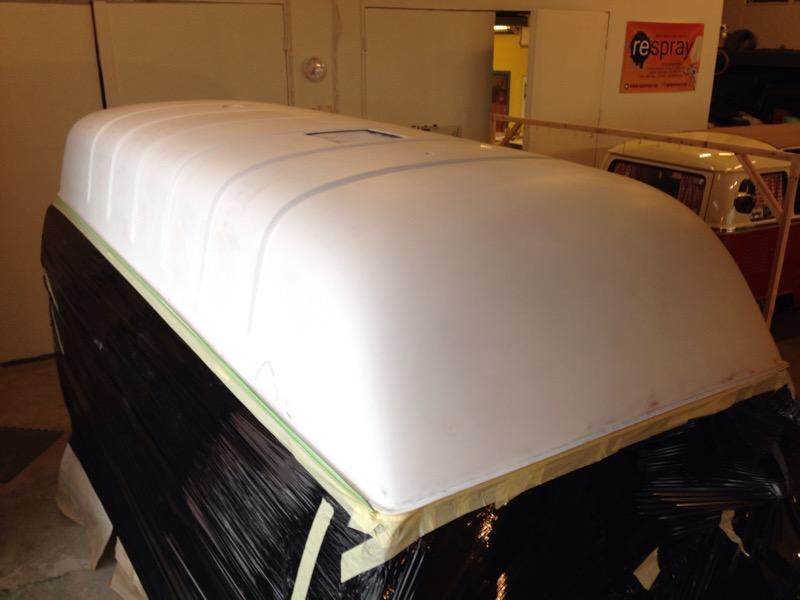
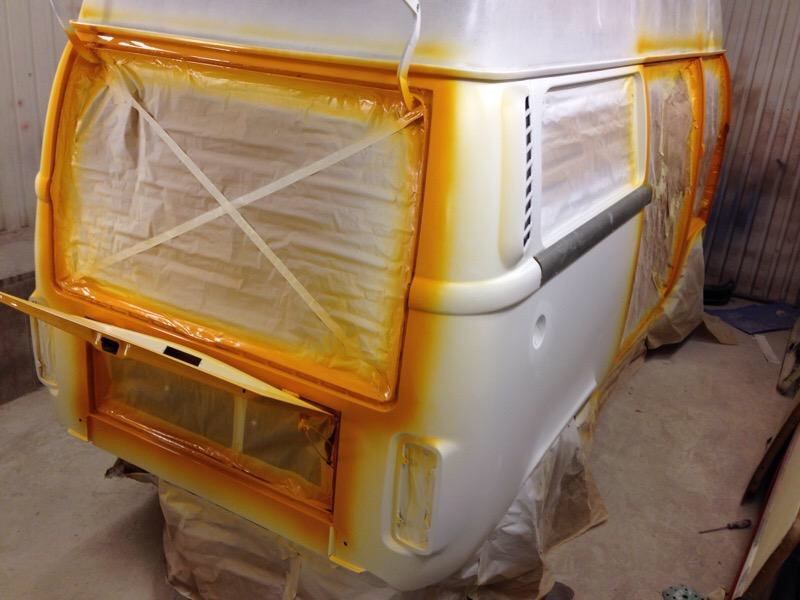
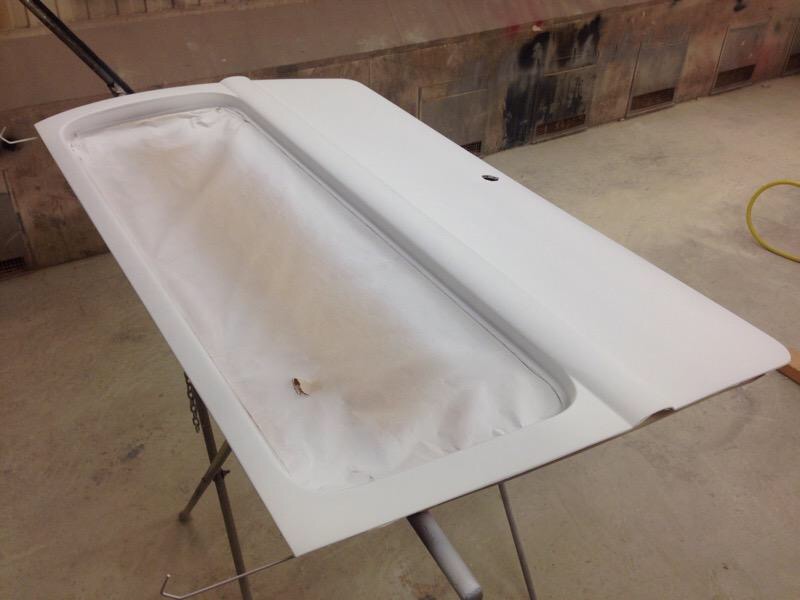
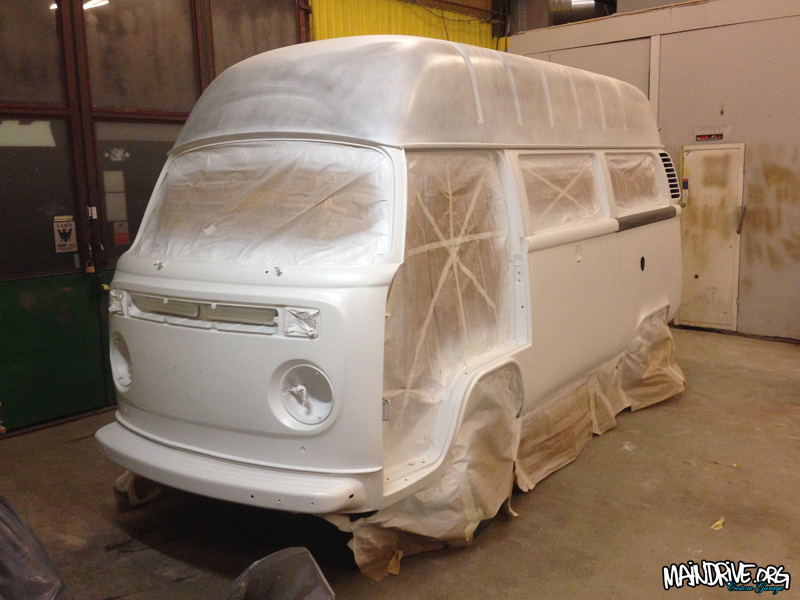
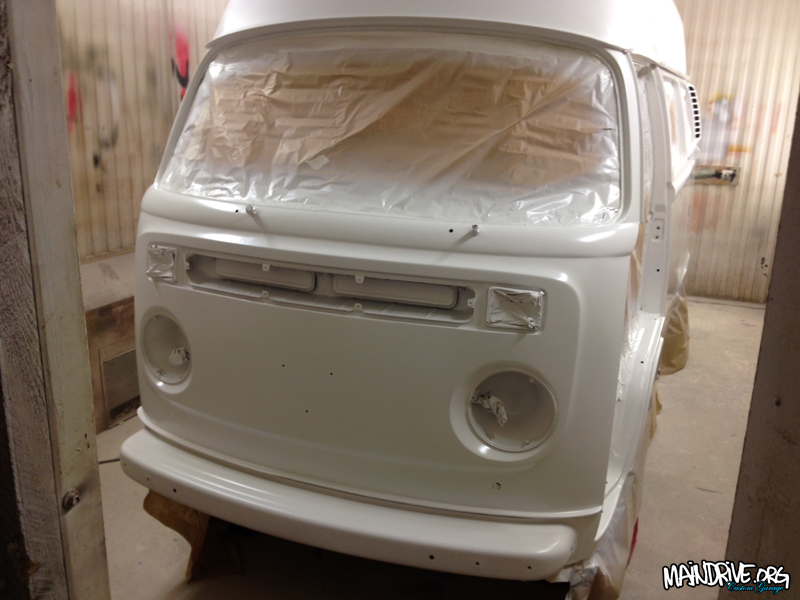
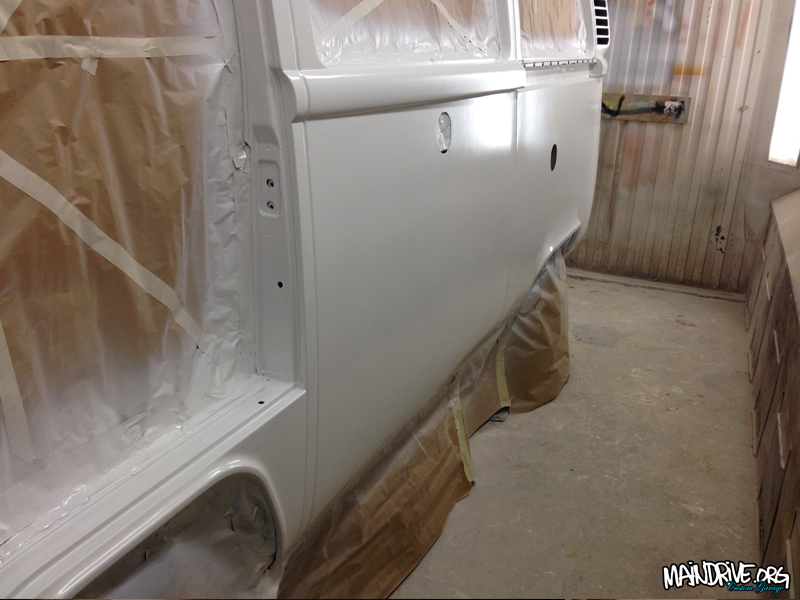
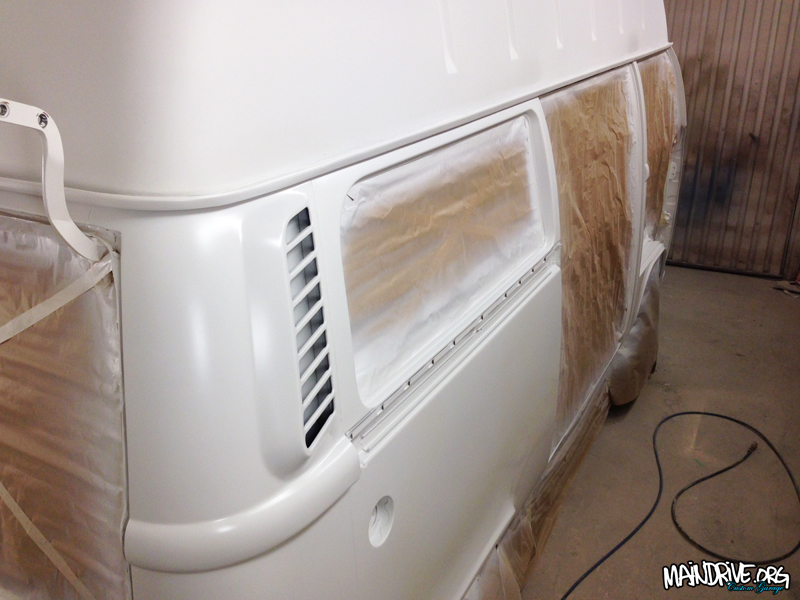
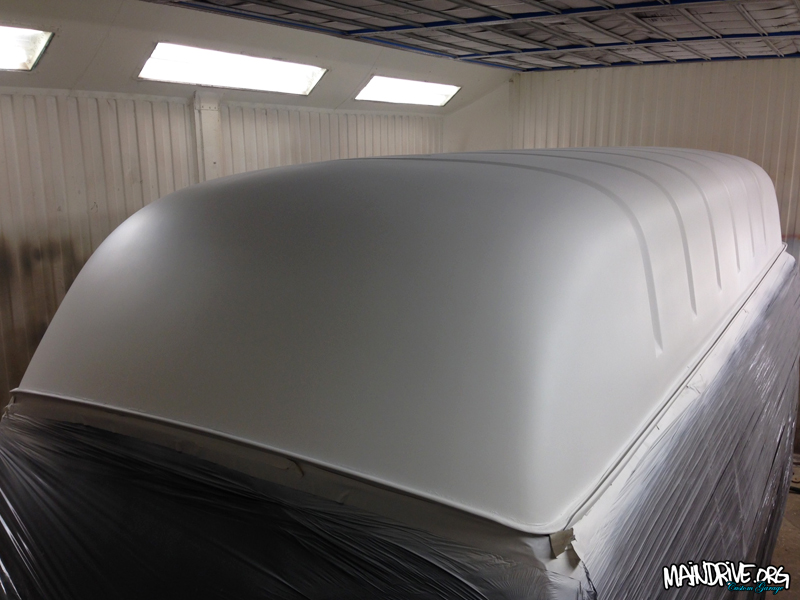
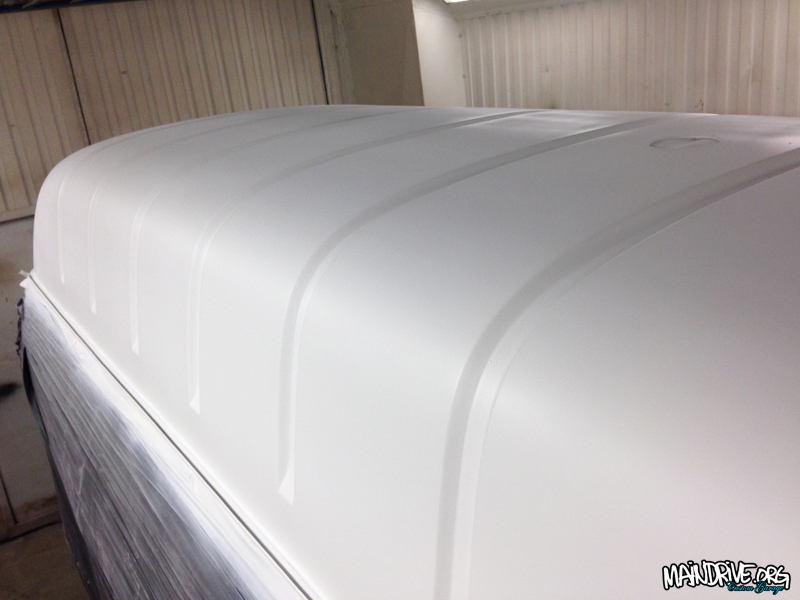
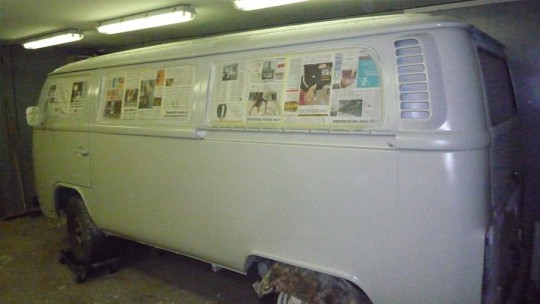
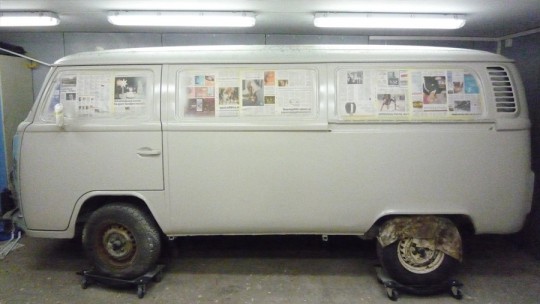
Lots of work have been done lately on the VW Baywindow Highroof! Whole roof have been finished in California White color. All doors and lids have been painted on the insides and then fitted back on the body. All panels are now sanded in 800grit and ready for toppaint in VW L20a Marino Yellow!
#highroofbayproject
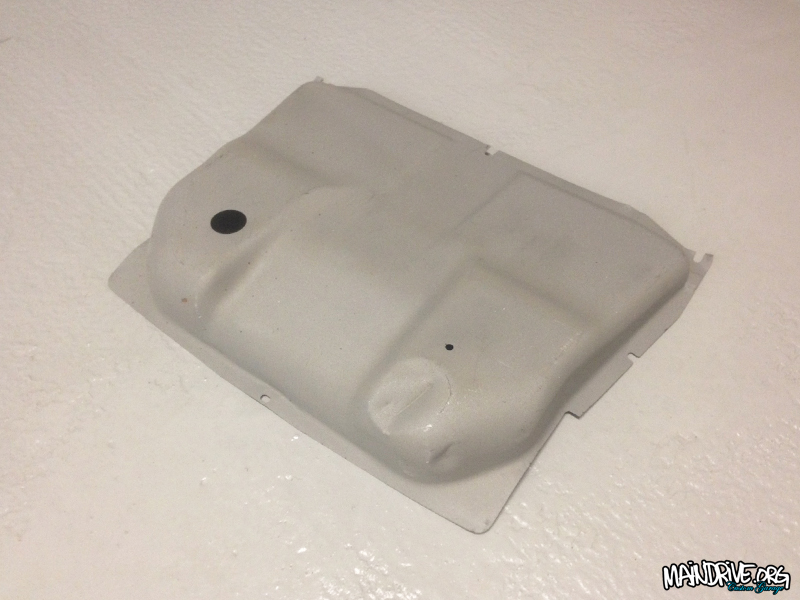
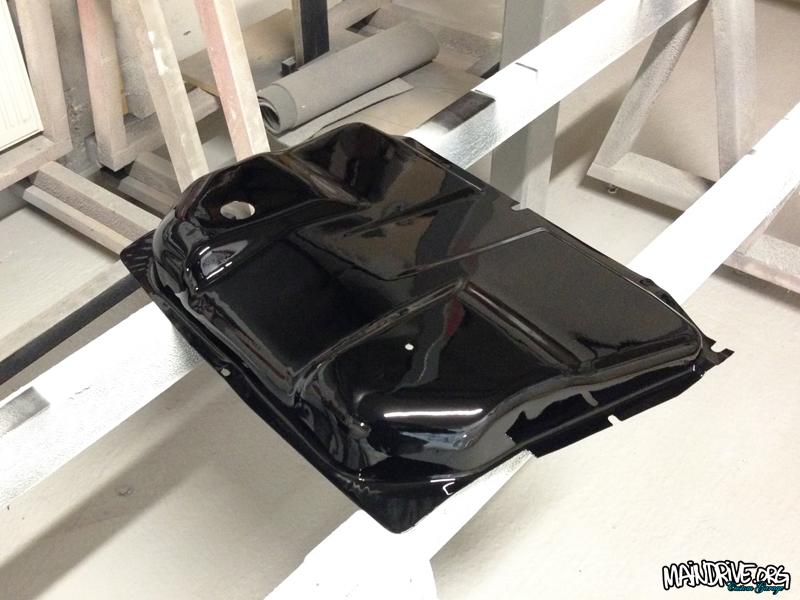
Have not got very much done lately. As my first son (1 year old) takes most of the time now. So that more important at the moment. But Im trying to push forward on the bus too, couple of hours after work and on weekends etc. Soon have all doors and lids in primer and then it all just needs a easy sanding and then its time for a paintjob! Have also sandblasted the fueltank cover and bellypan and got them painted and ready too. Hope to start rebuild of the 1800cc Type 4 engine in begining of February also!
More to come, but thats it for now, here is some pics…
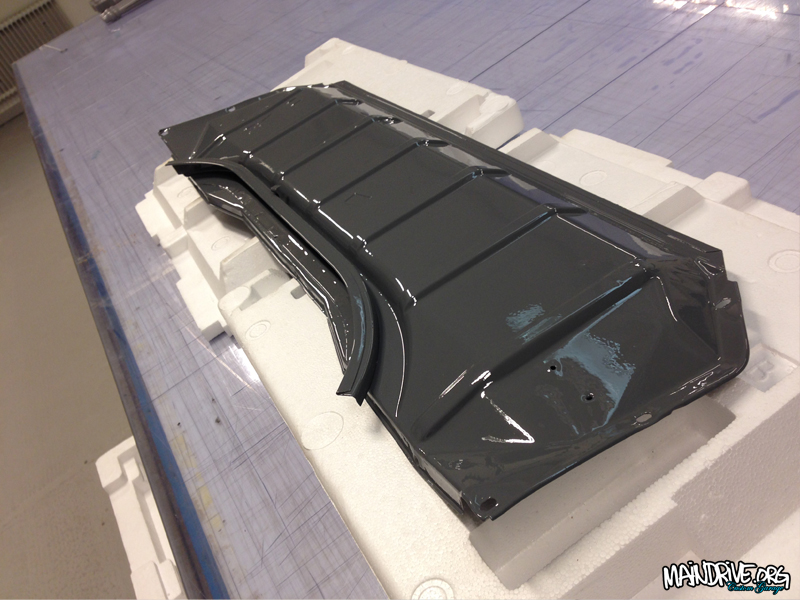
Blasted and epoxyprimer, ready for topcoat in VW factory greyish
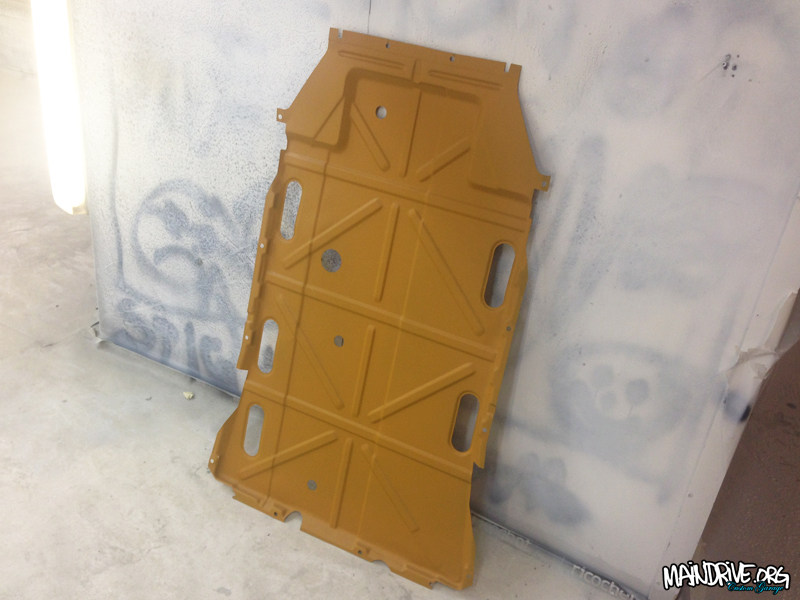
Baremetal then yellow epoxy/zinc primer
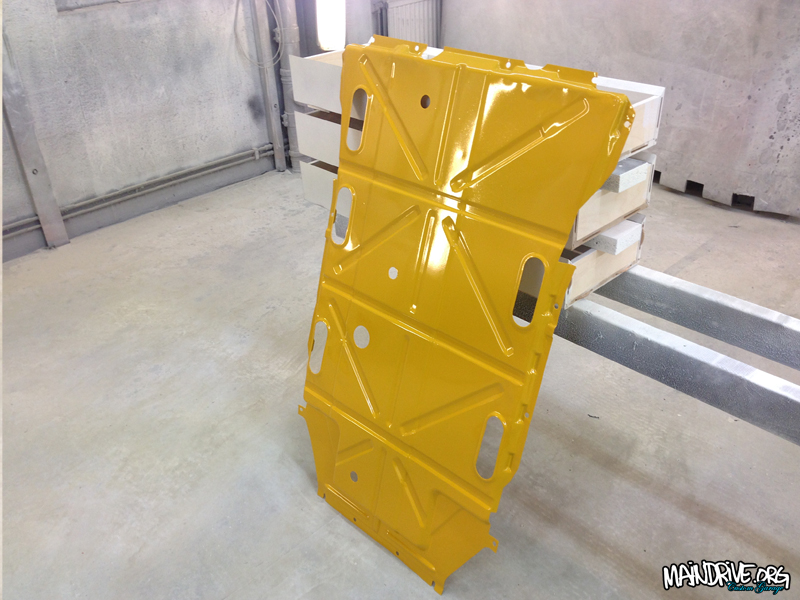
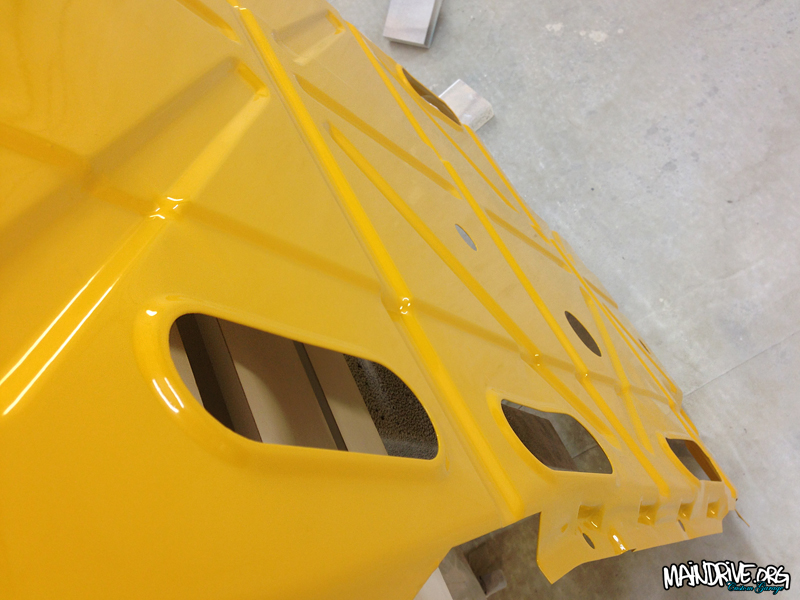
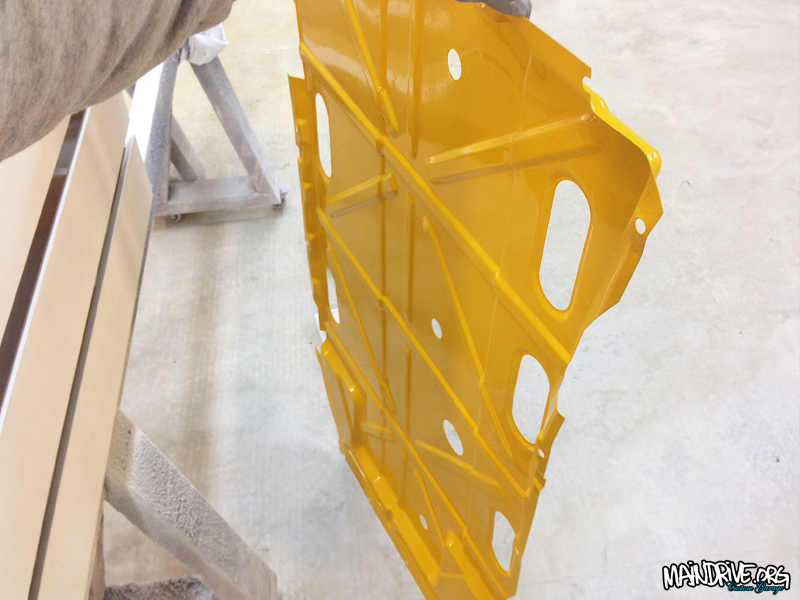
Topcoat in VW L20a Marino Yellow with 2K polypaint with elastic characteristics. So the stones wont chip the paint. The gloss on the elastic is a little less, but this panel is under the car and you normaly never see it anyway.
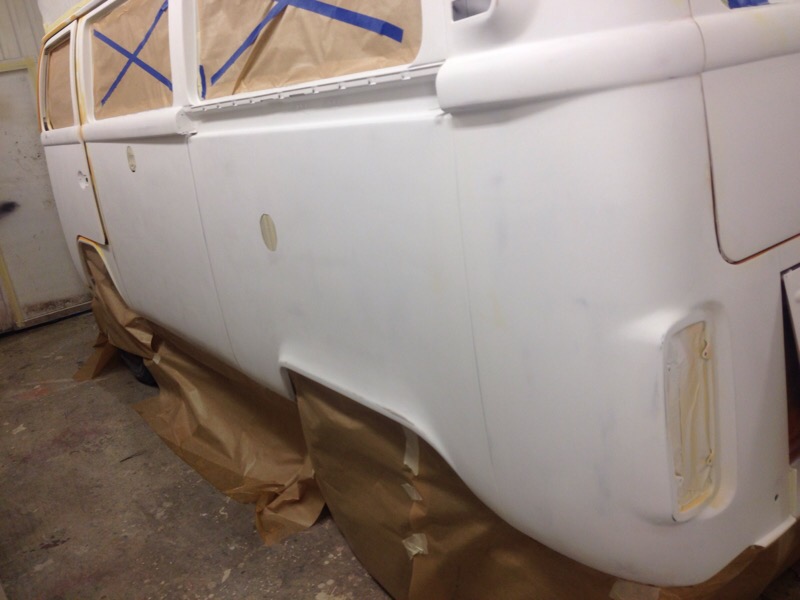
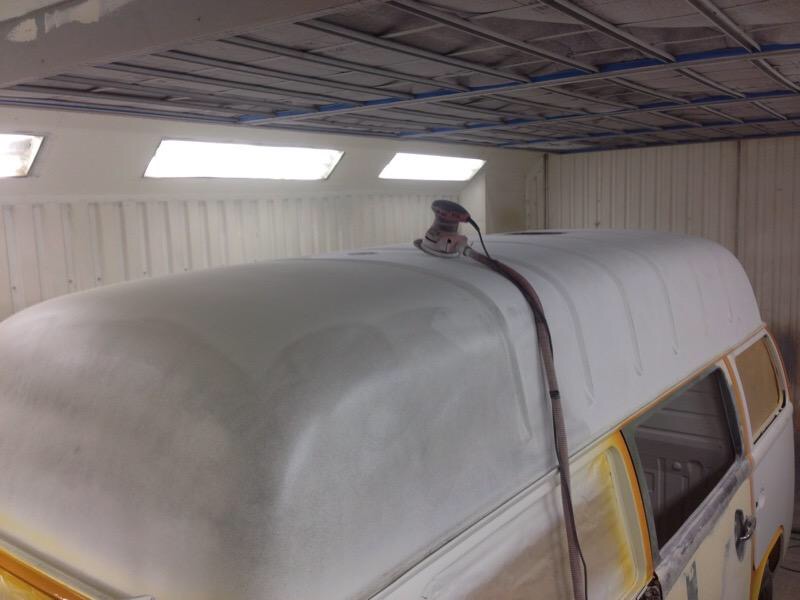
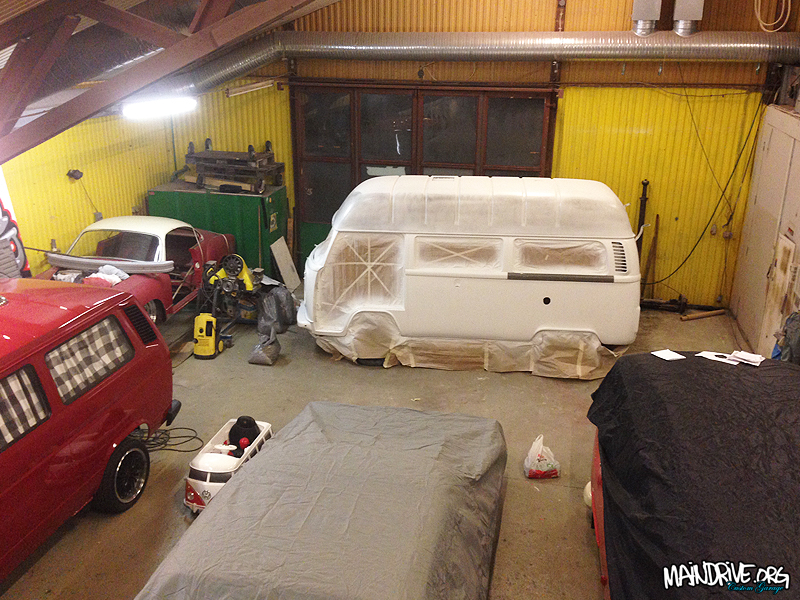
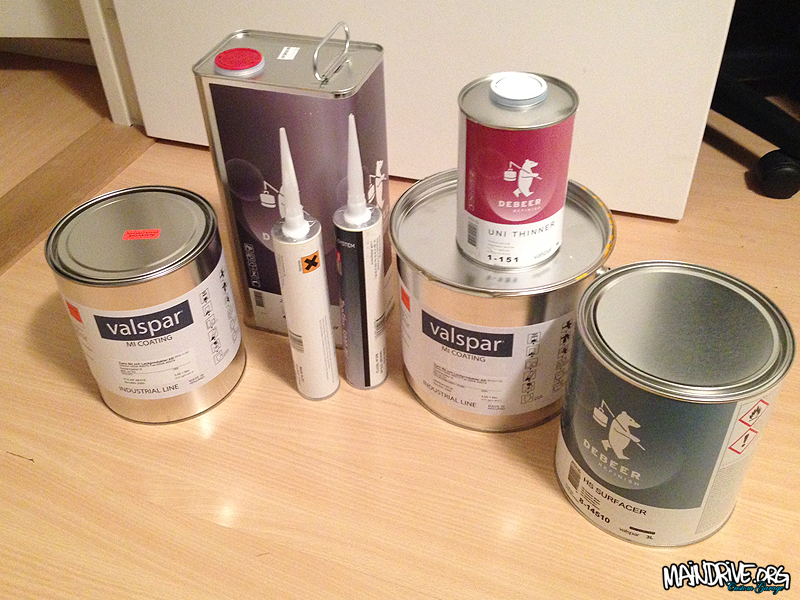
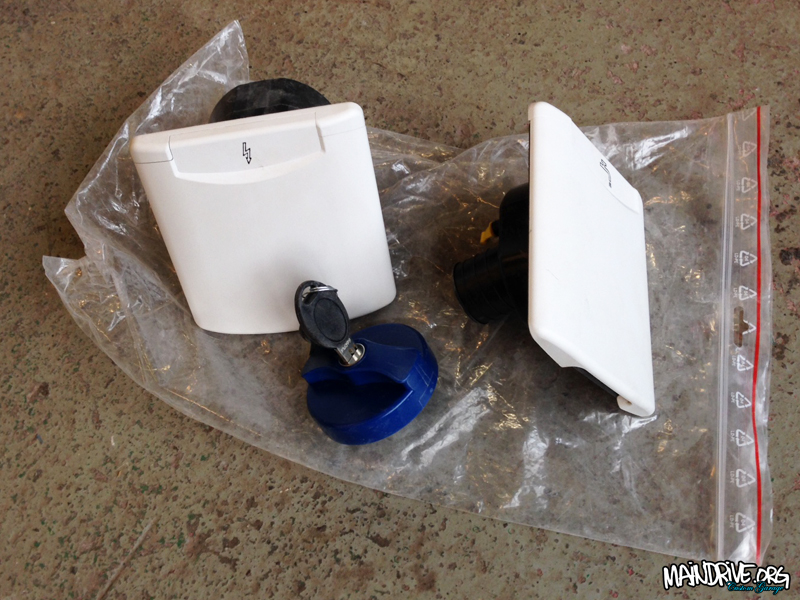
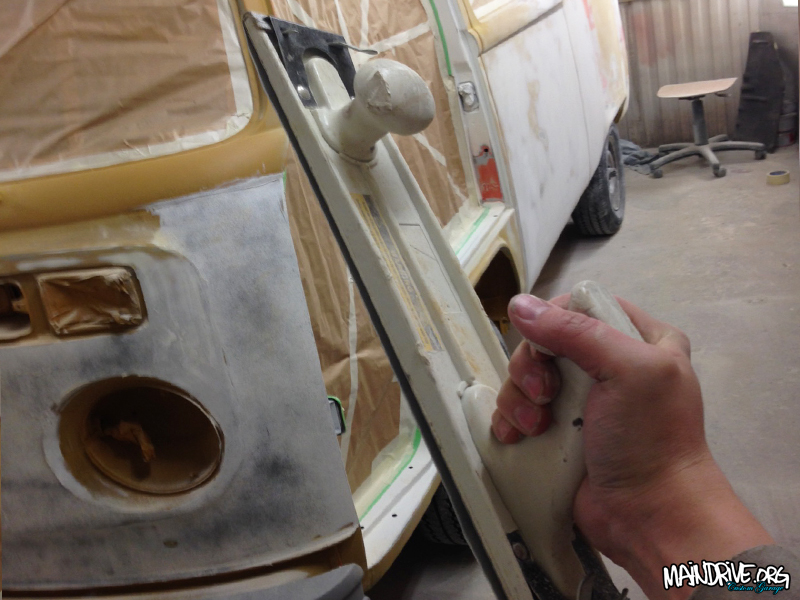
Slow with updates? Thats because I have been busy doing bodywork on the Highroof bus. A very boring, dusty and time consuming work. But now its in surffacer/filler/primer and ready for more sanding again, and hopefully thats it before paint. Paint for roof (white) and body (VW L20a Marino yellow) is bought. Still have all the doors and lids to do also! Got some new parts too, new lids for electric 240v hook up and fresh watertank filler with lock. A Vitrifrigio C60 fridge in stainless will chill the drinks and food nicely, its 60 liters and 10,5 liter is freezer. Danfoss compressor of course!
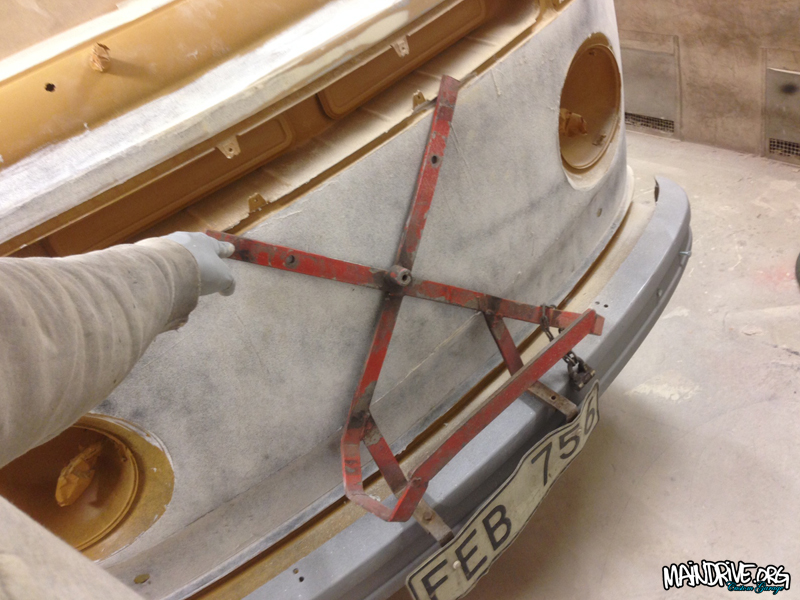
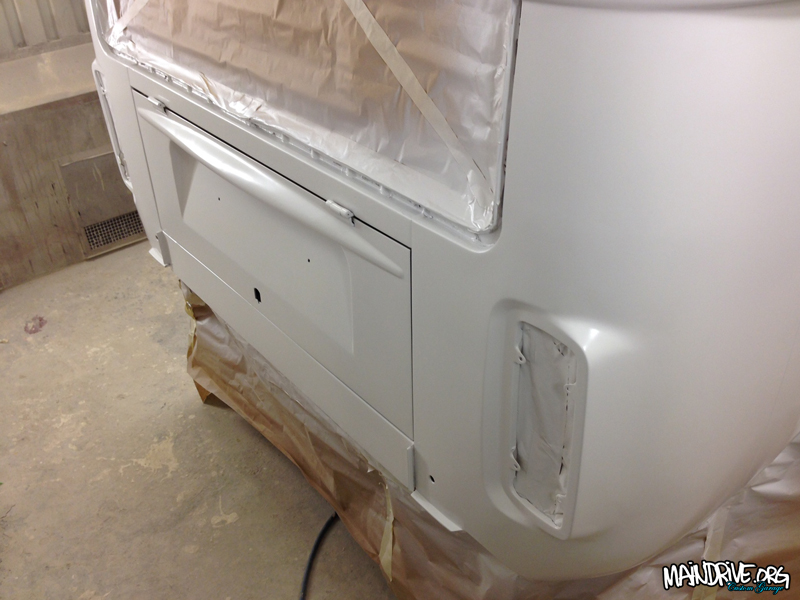
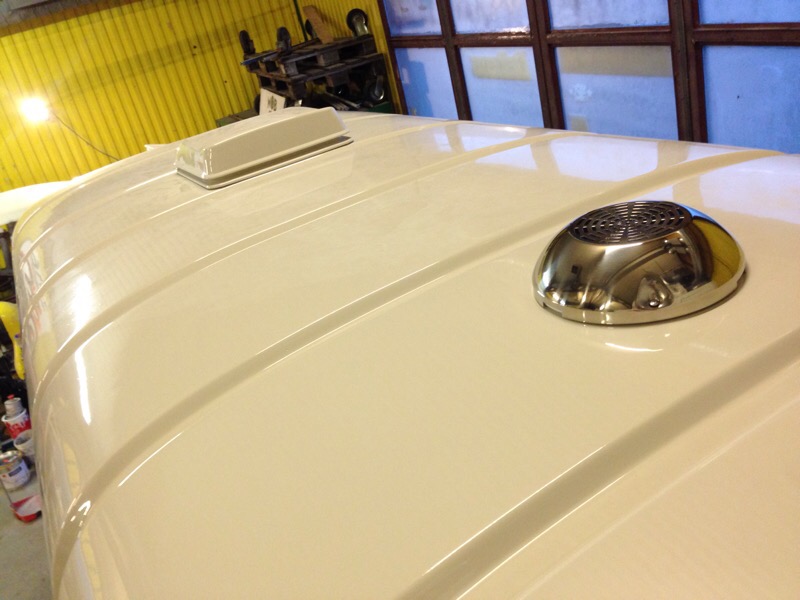
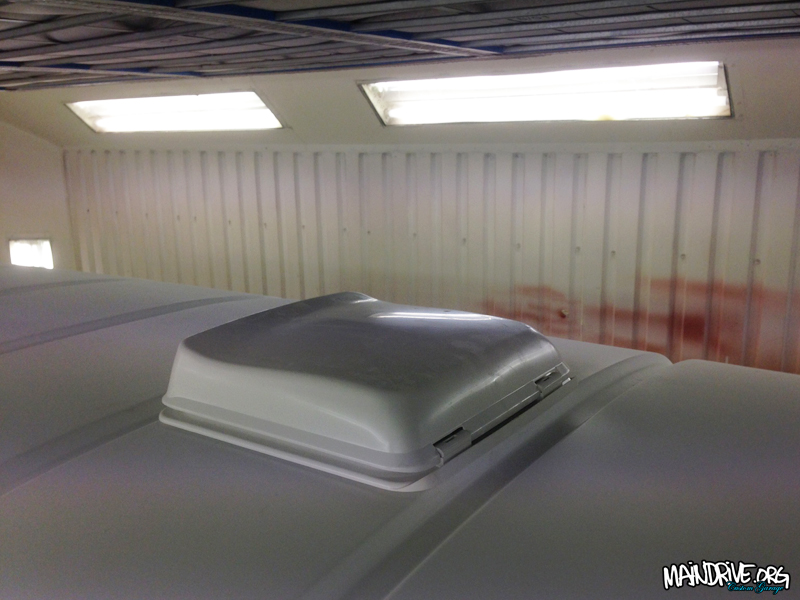
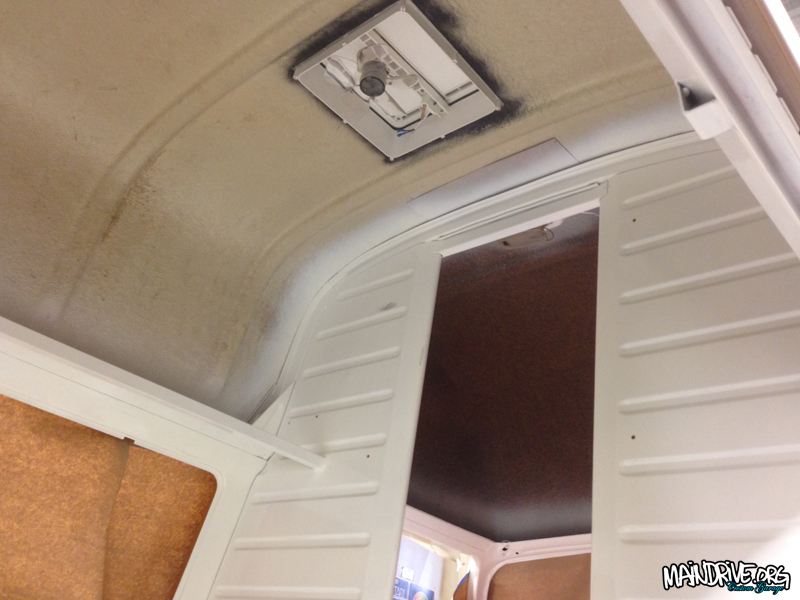
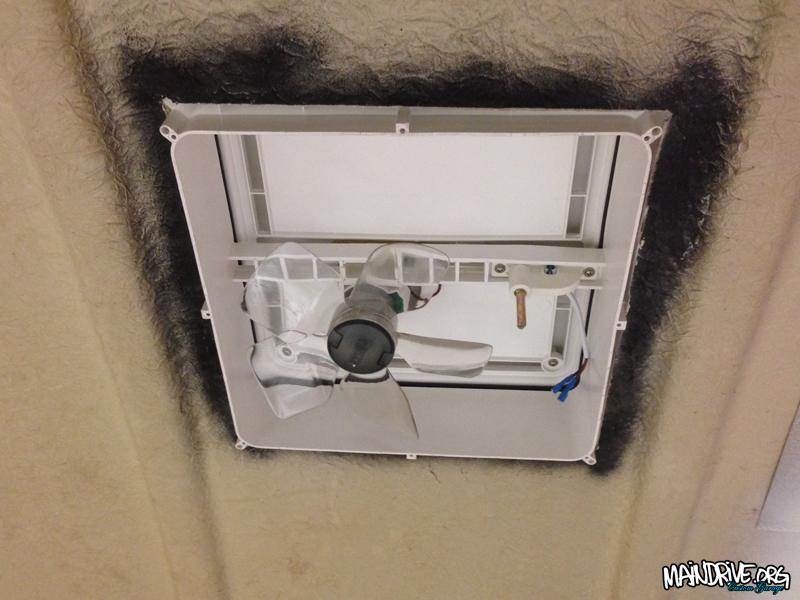
Test fitted the Fiamma Turbo Vent 28×28 on the bus, better before than after paint! It has a built in fan on 12v that can blow out or in fresh air. Will be nice on warm summer days and night I think.
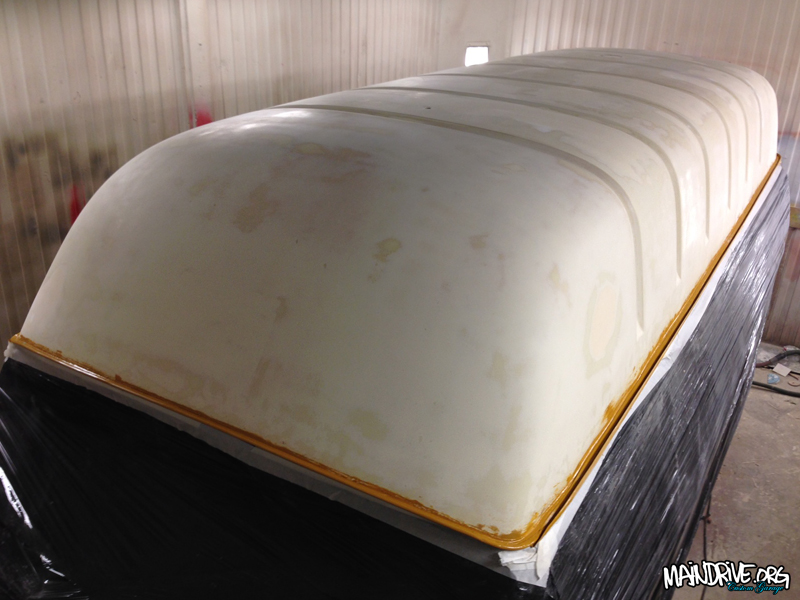
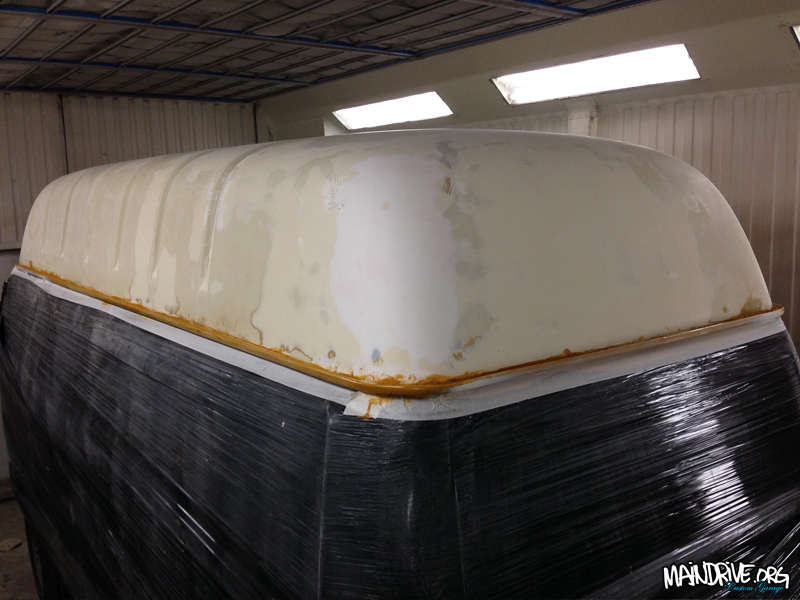
After a weekend of work on the bus roof its now in primer! Finally. It needed a ton of work, was alot of gelcoat cracks that needed to be sorted. And the left rear corner of the roof had been hit earlier in the bus life and needed to be fixed up nicer. Will test fit a new Fiamma rooflight/ventilation and then I can continue with the bodywork on rest of the bus. Looking forward to paint! But still a long way and lots of hours left…

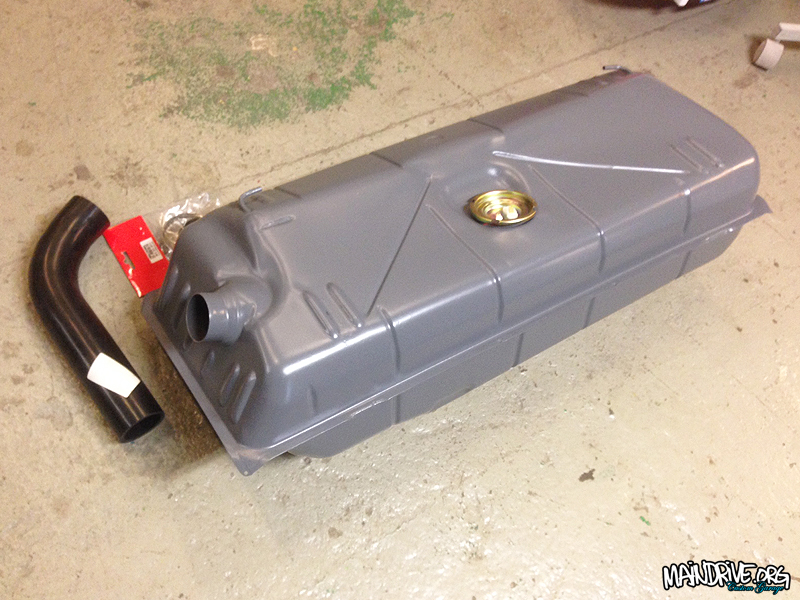
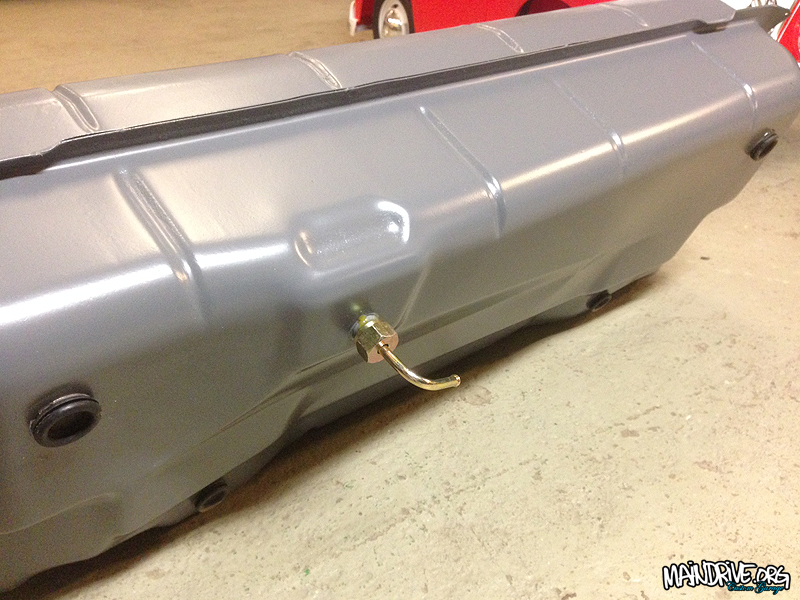
Here is some news on the build. Got the fuel tank installed today. With new fuelfiller neck, feeder hose, sender unit, tap and filter. Also replaced all rubber hose connections for the tank ventilation. Next time I will start bodywork on the huge roof…lots of fun…
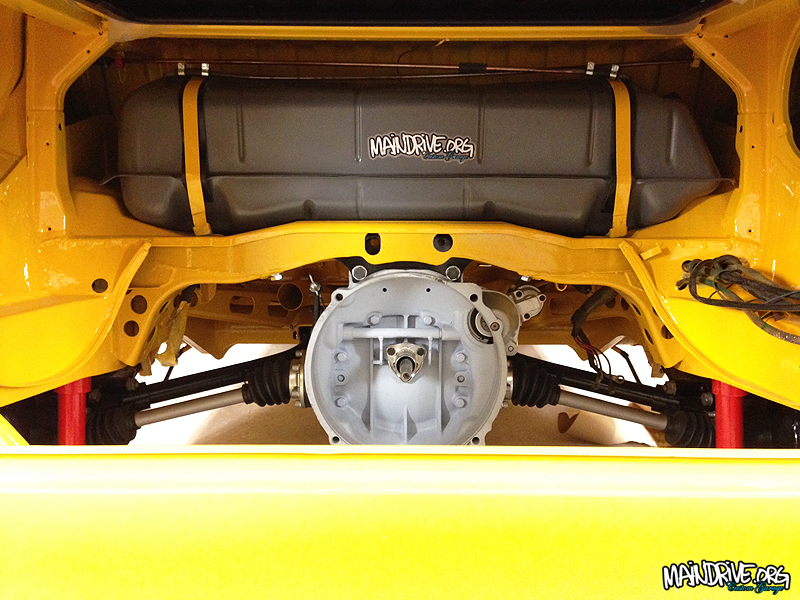
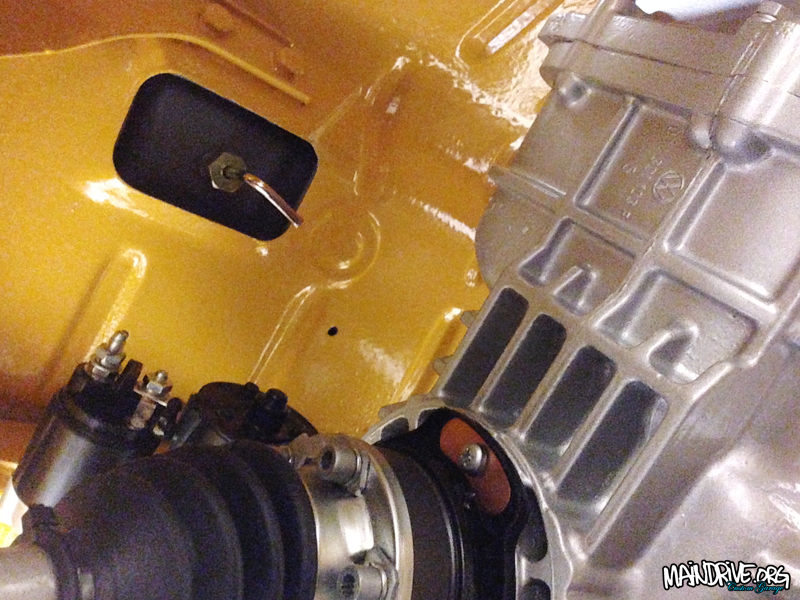
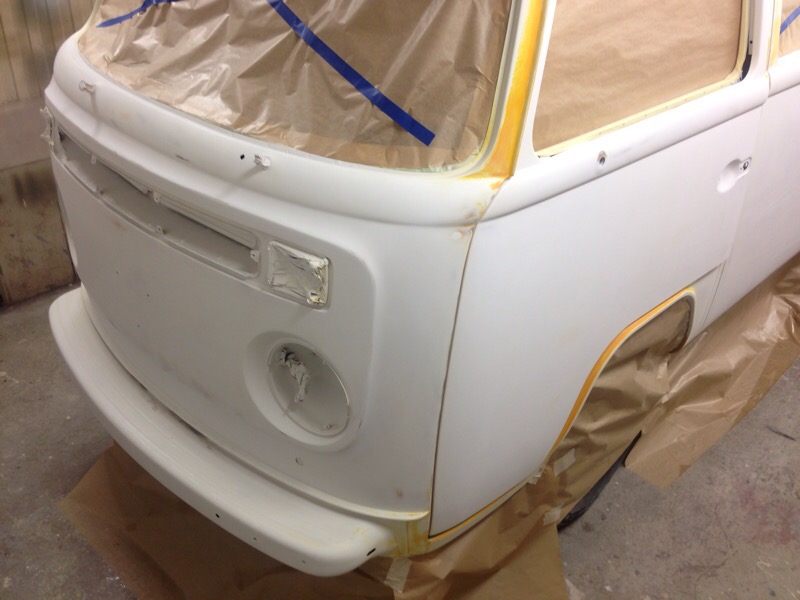
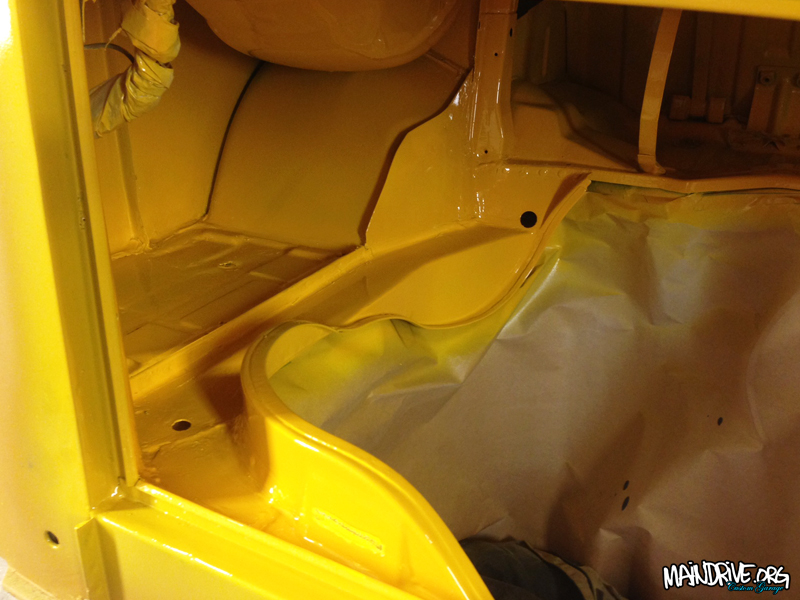
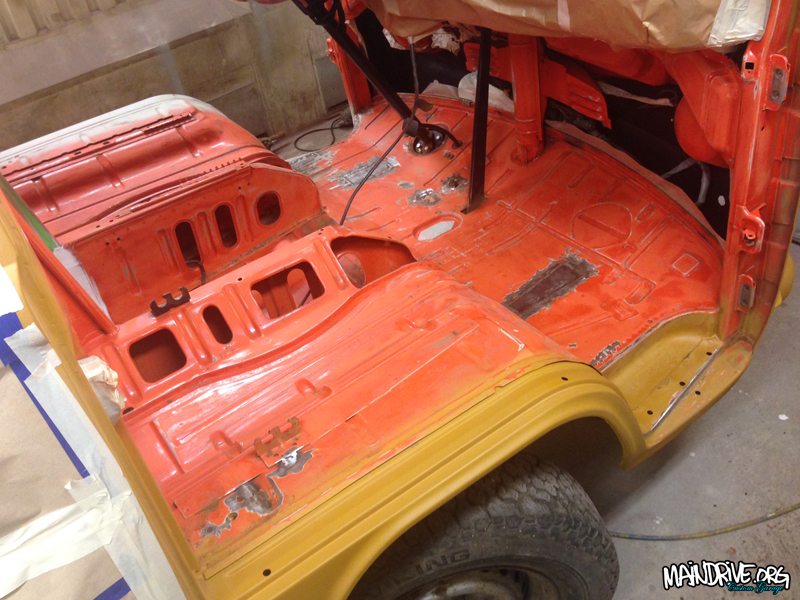
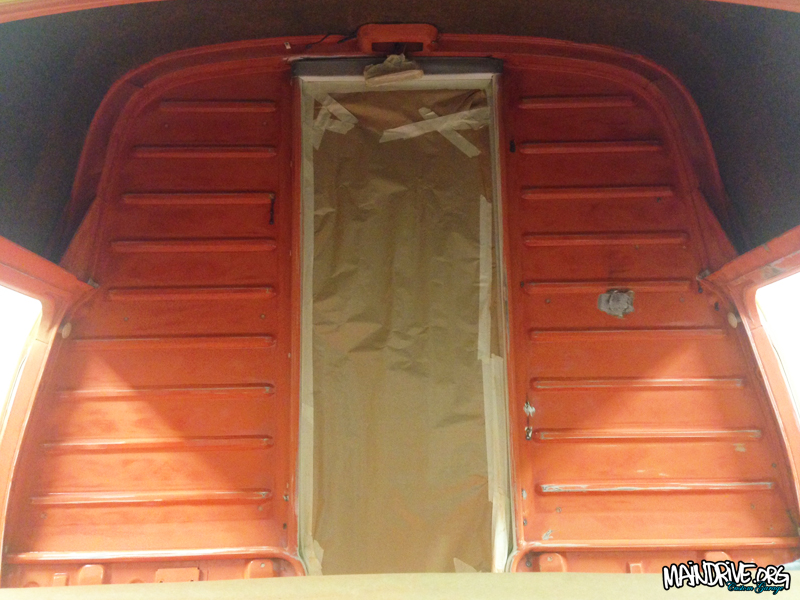
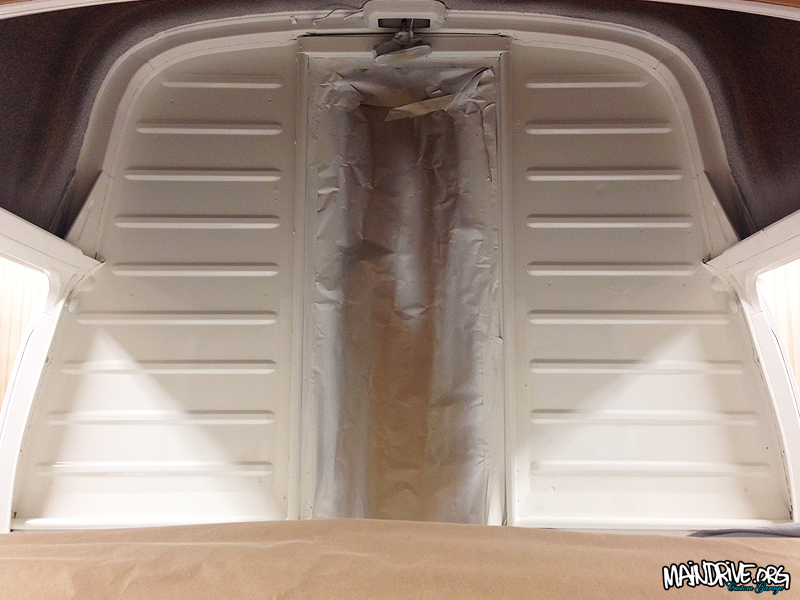
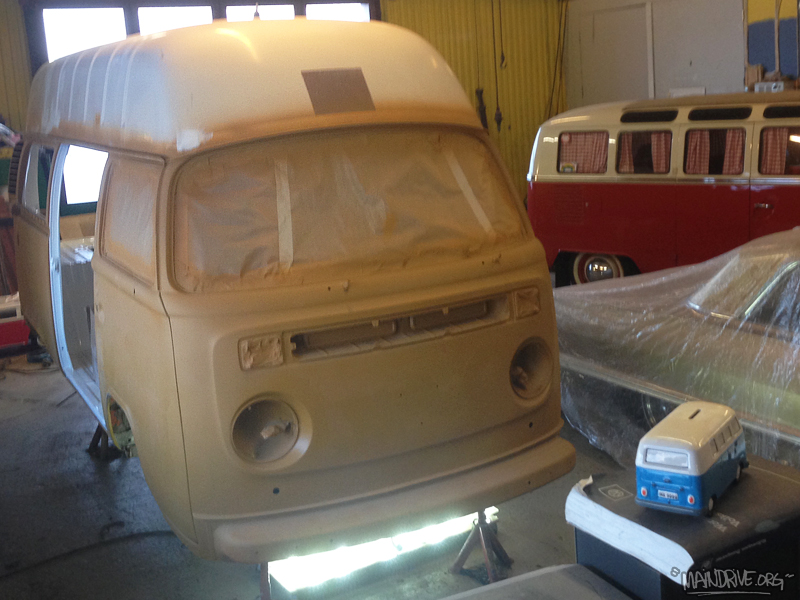
The engine bay is now ready for the fueltank and later on the 1800cc+ type 4 engine (need to be rebuilt first) to be installed. Today the whole front cab of the bus got sanded down (mostly by hand), front doors removed, masked, seamsealed, prepared for primer and then topcoat in Off White color in 2 layers. Most of this wont be showing when all sounddeadning materials and carpets are in place later but good to have a clean surface for glue and its also nice to know its clean and protected under the carpets.
Next up is; top section of dashboard needs to be removed to paint it in semi-gloss Deepblack (easier to do when windscreen is already out). After this I can start with the outside body of the bus and make it ready for paint. Here is some new pics…
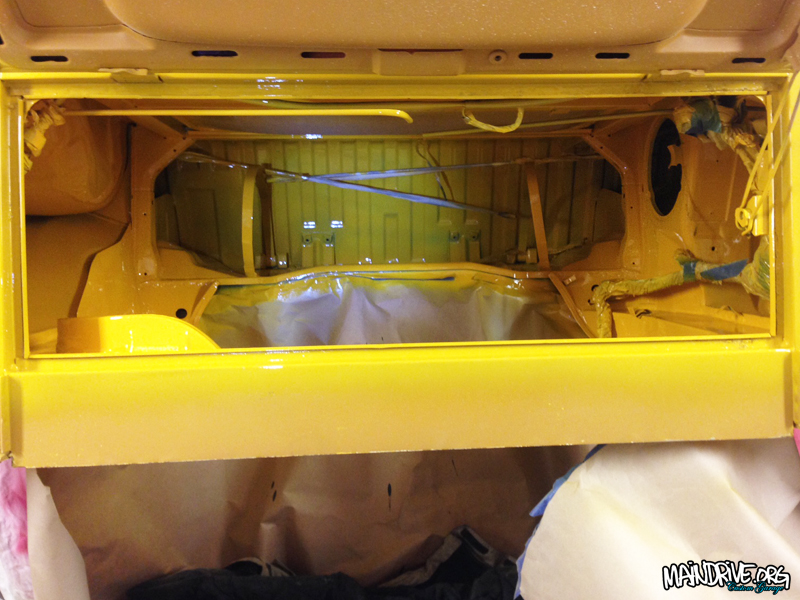
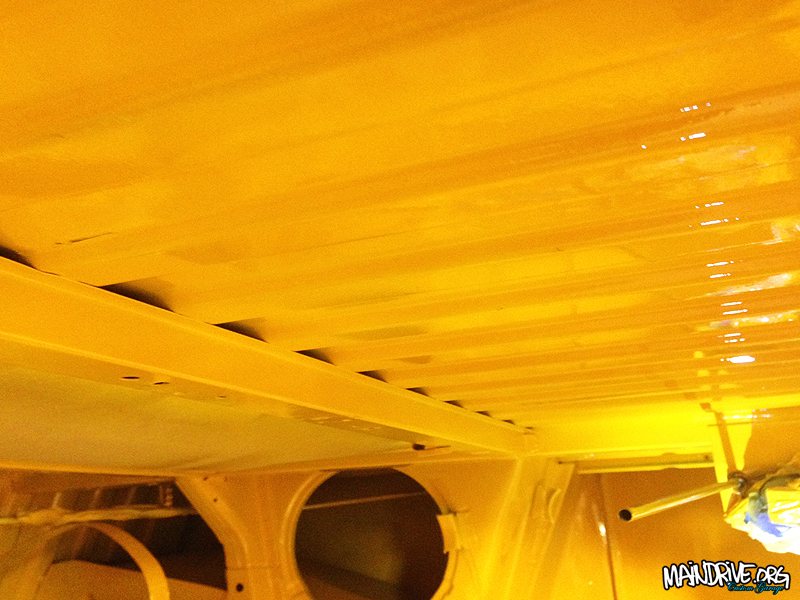
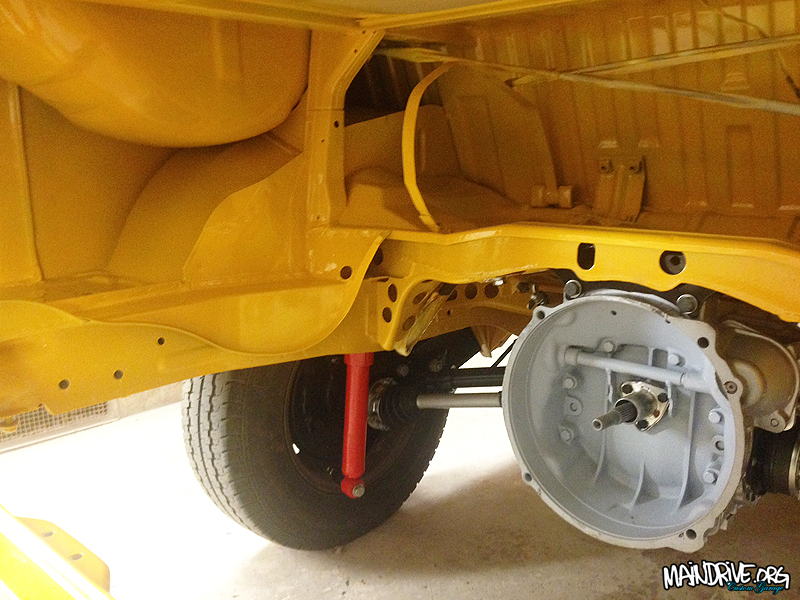
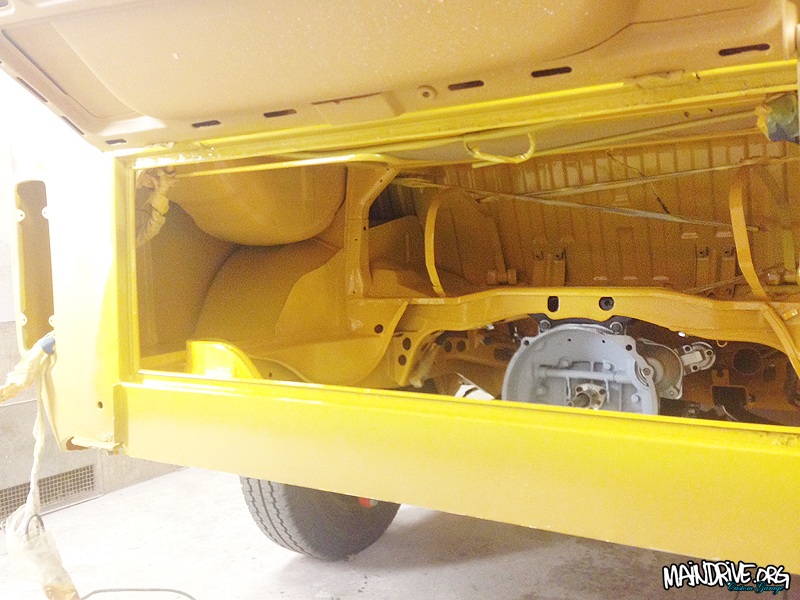
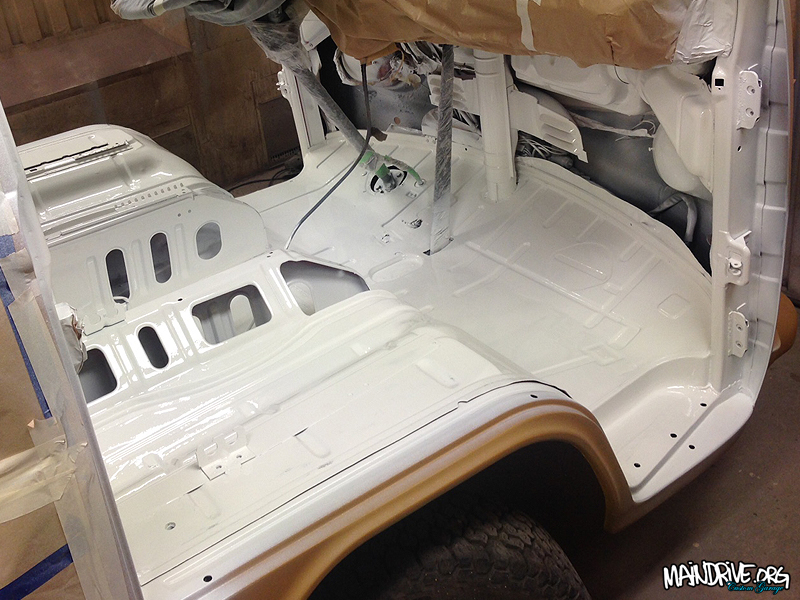
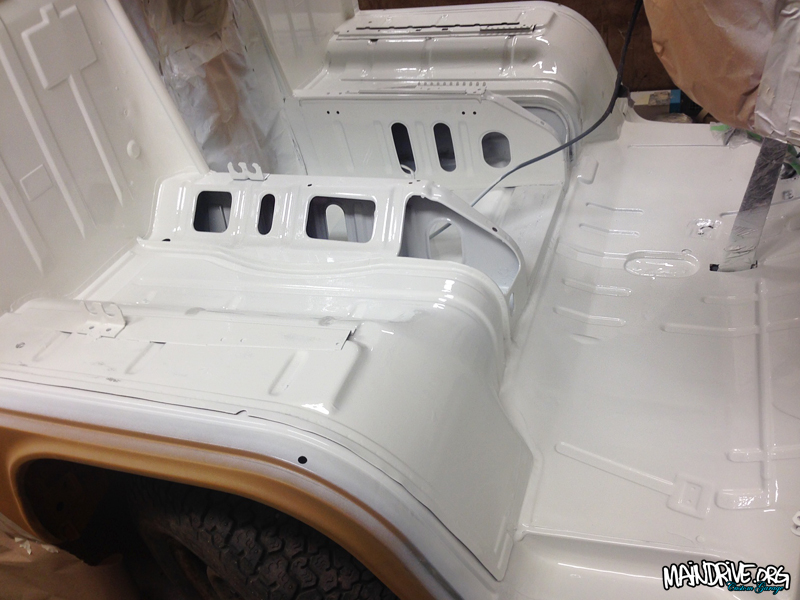
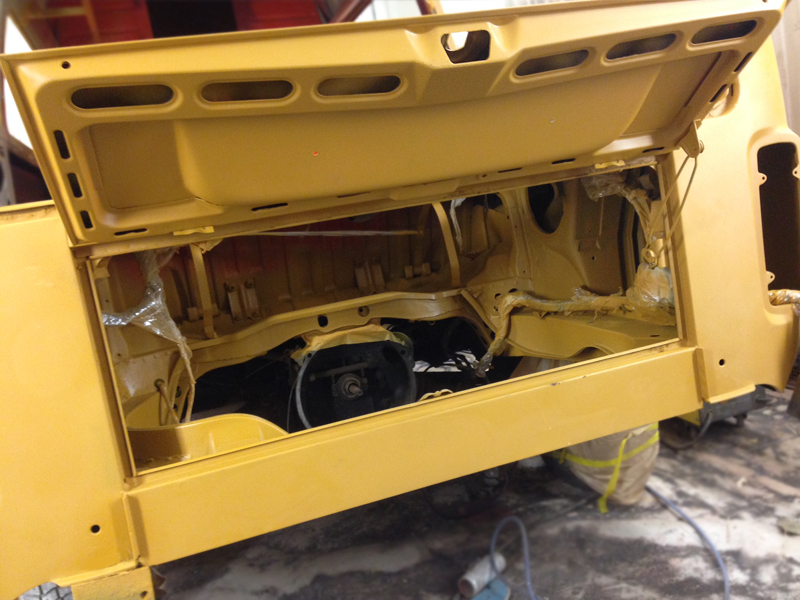
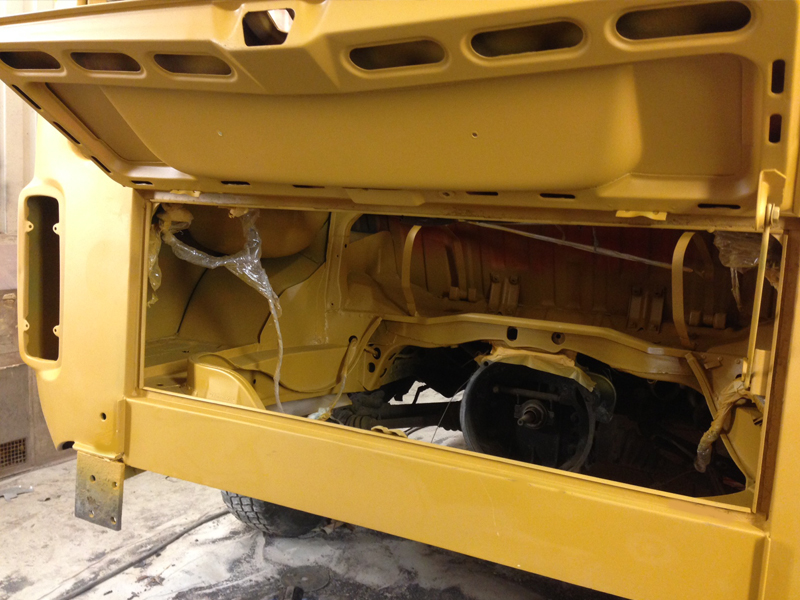
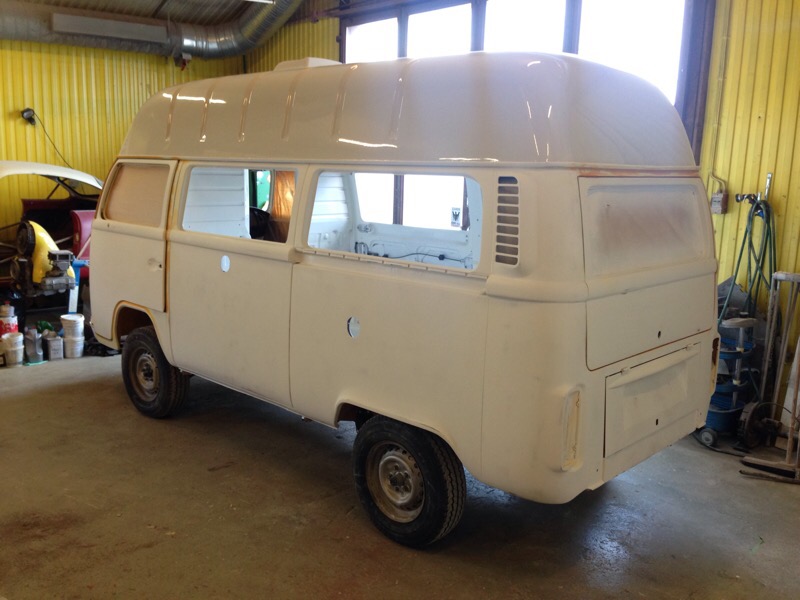
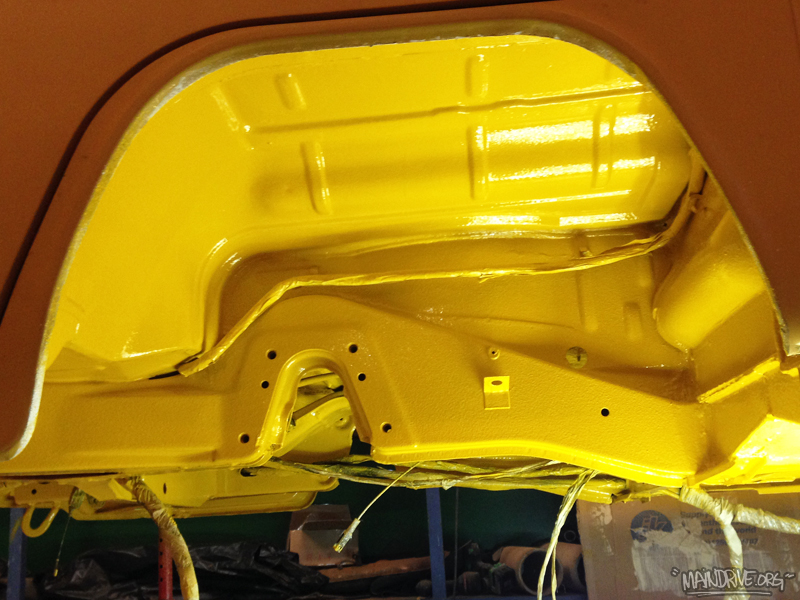
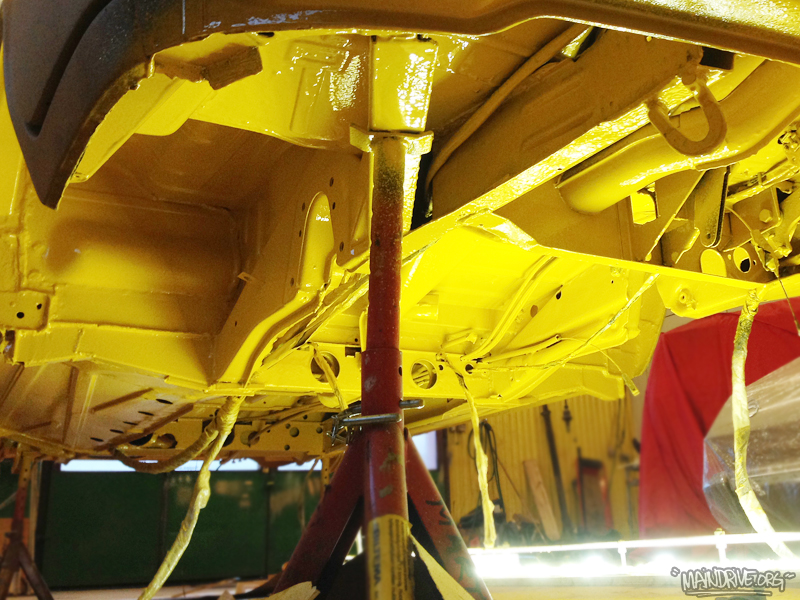
Yeah! The bus is now rolling on its own wheels again, after been standing like a empty shell in the air for 7 months. Still need to route new brakelines and brakehoses, and bleed the whole system. Must also restore the factory installed Eberspracher BA6 heater that are going to be installed under the center floor. But now its time to start with paint and body. The engine compartment and front cab need to get painted in VW L20A Marino yellow first, then I can start working on the outside. Lots of work still left to do, but much have been done on places you normally dont see…

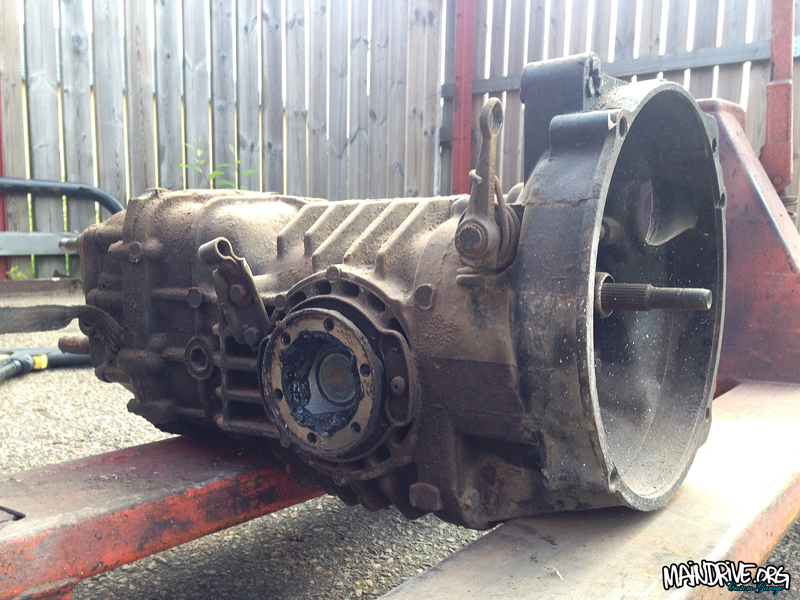
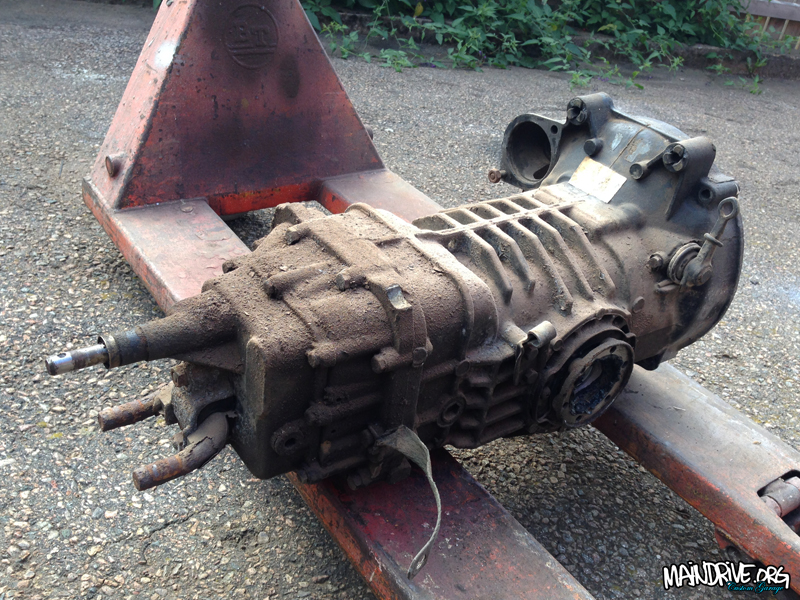
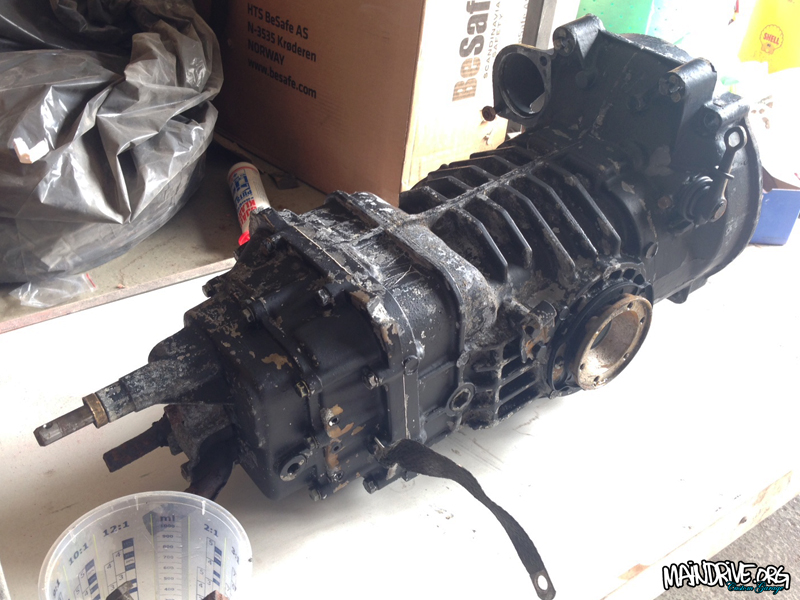
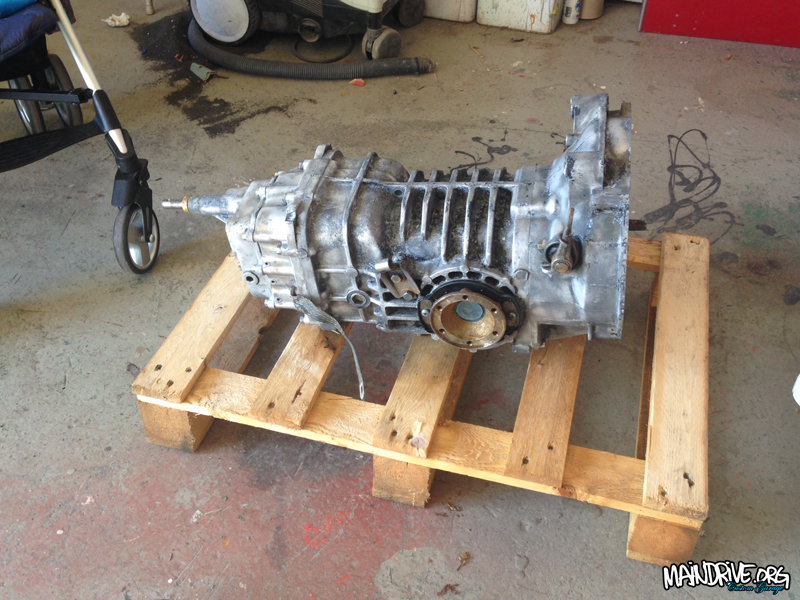
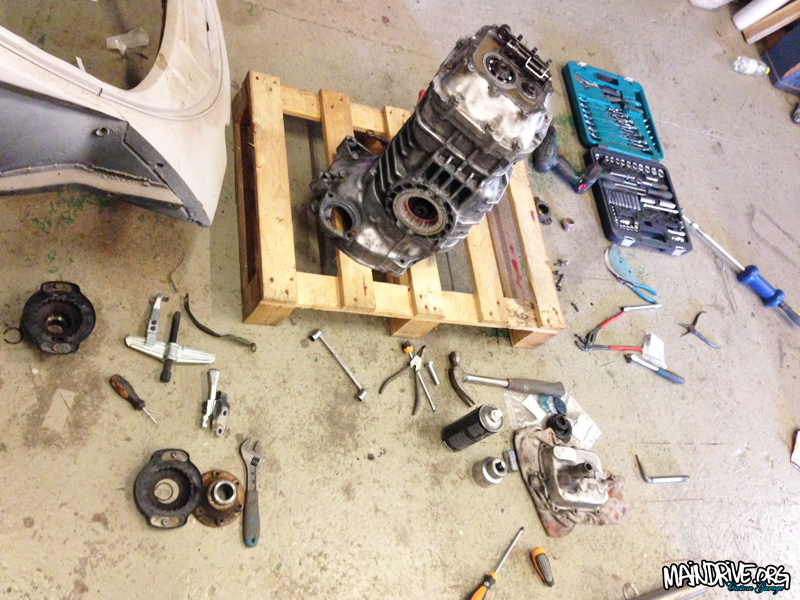
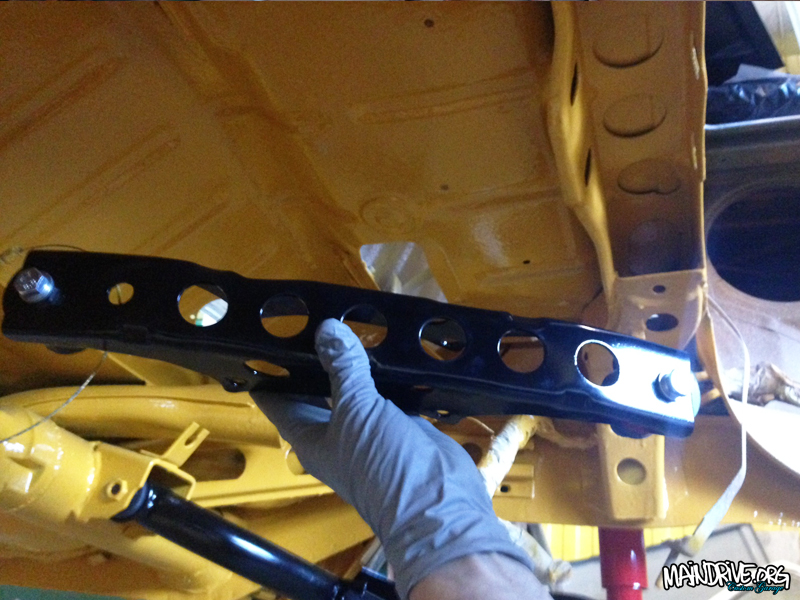
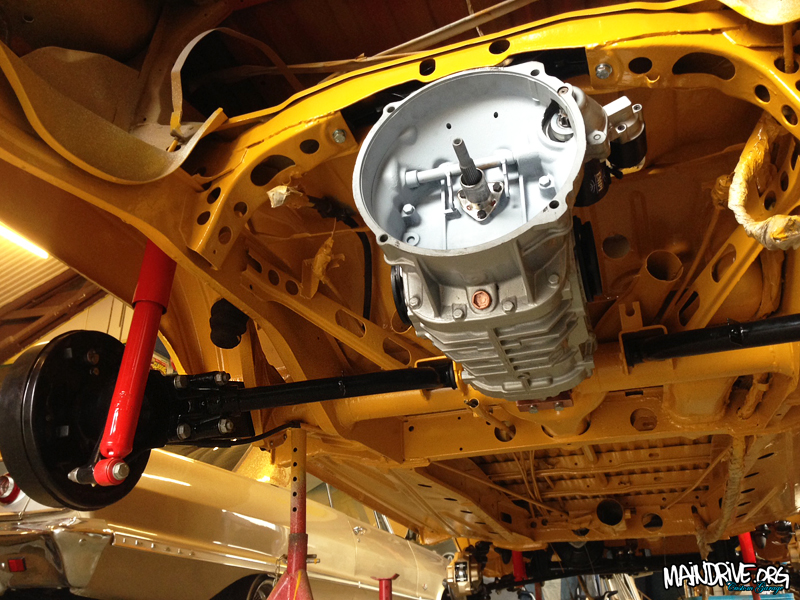
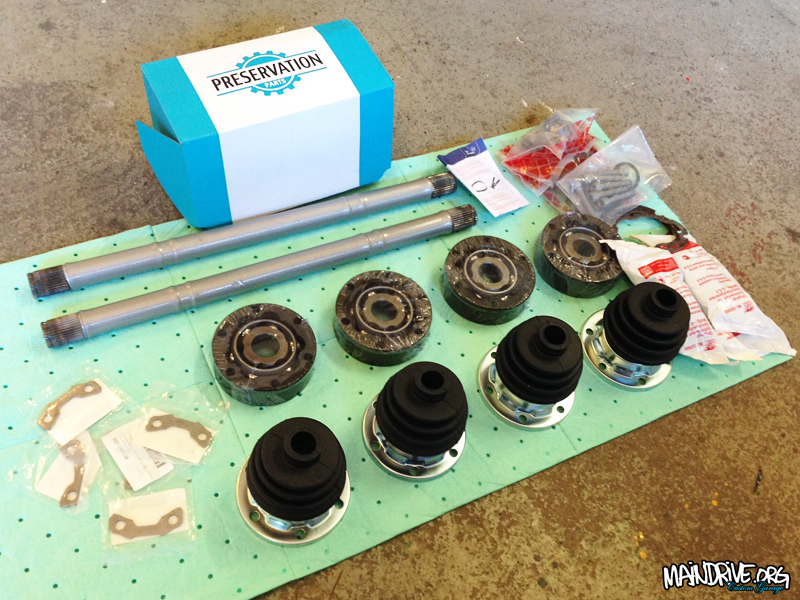
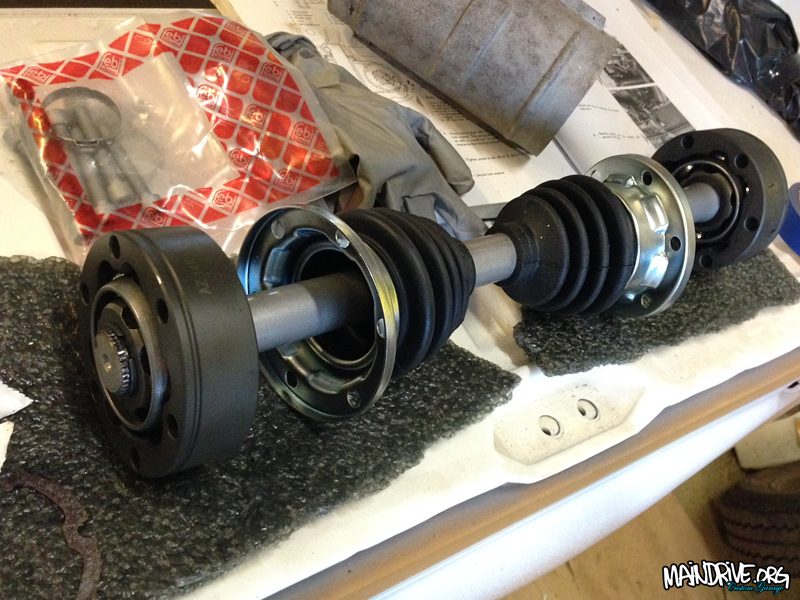
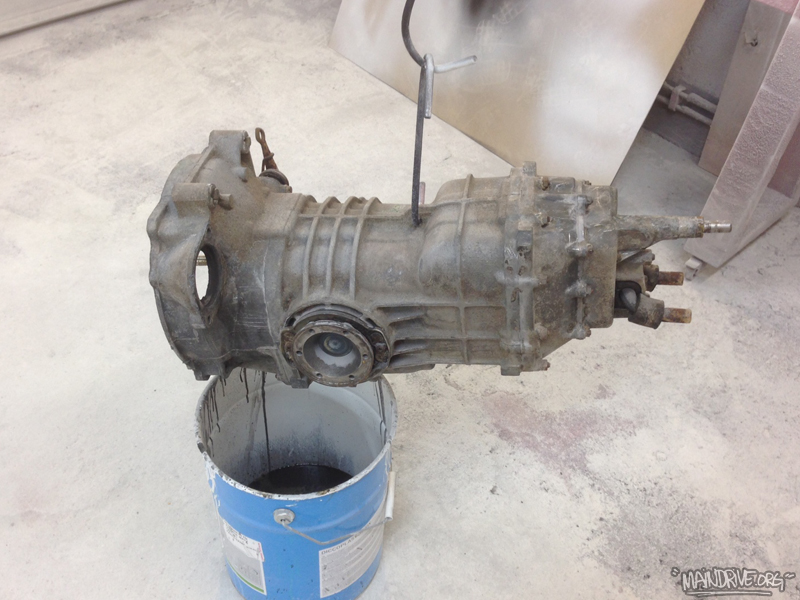
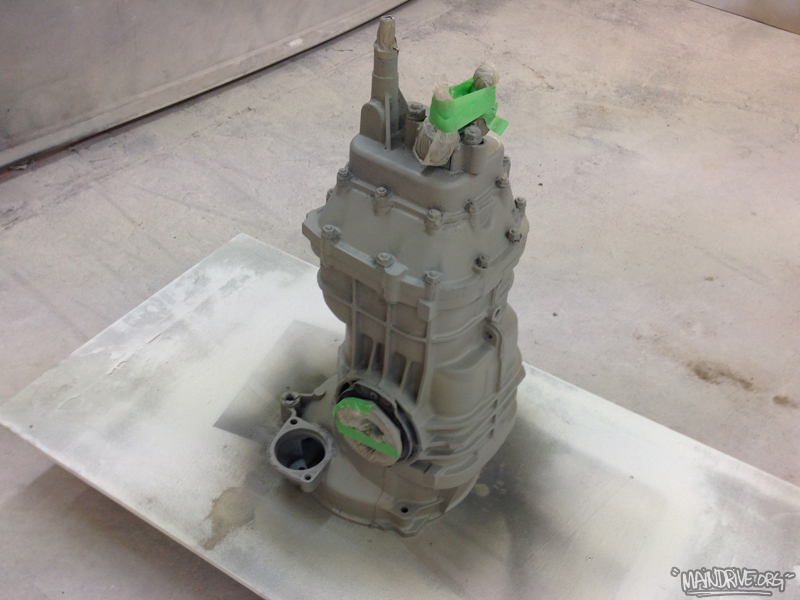
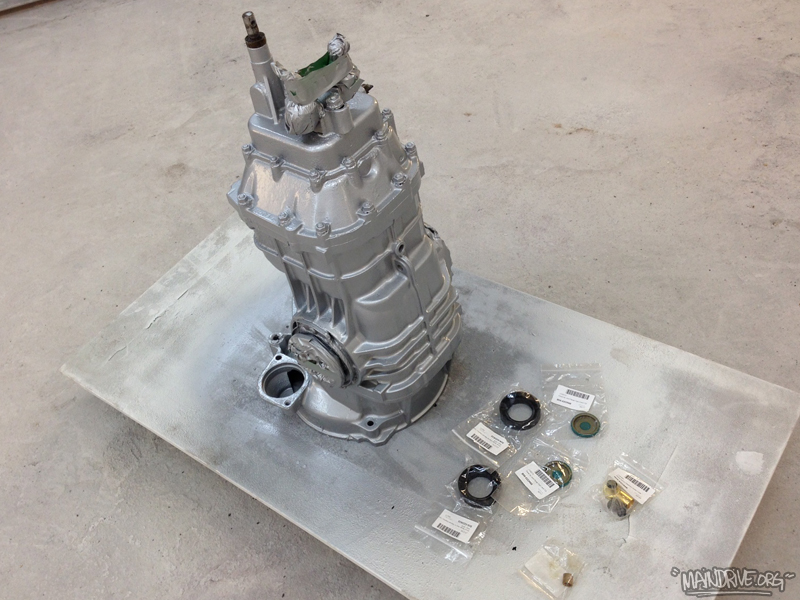
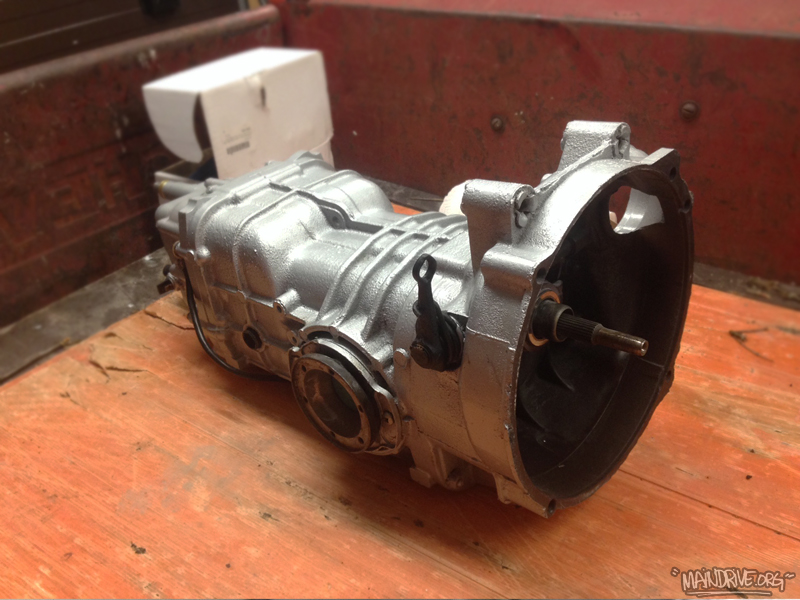
Have been working on the transmission and driveshafts lately. Had a pile of new parts from Just Kampers waiting for it. The tranny was in very good shape and have been restored by VW (exchange parts) in the 1980s. But it still needed alot of work to look good again. Highpressure washed the case 3 times, to remove dirt and old oil. Drained the oil and it still looked nice (good sign)! Then 3 coats of paintremover was added so the black paint could be peeled off the case. Degreased it one more time, wirebrushed and sanded it making it ready for paint. A coat of primer for aluminium/etch was layed down and then 3 coats of 2K silvermetallic paint on top.
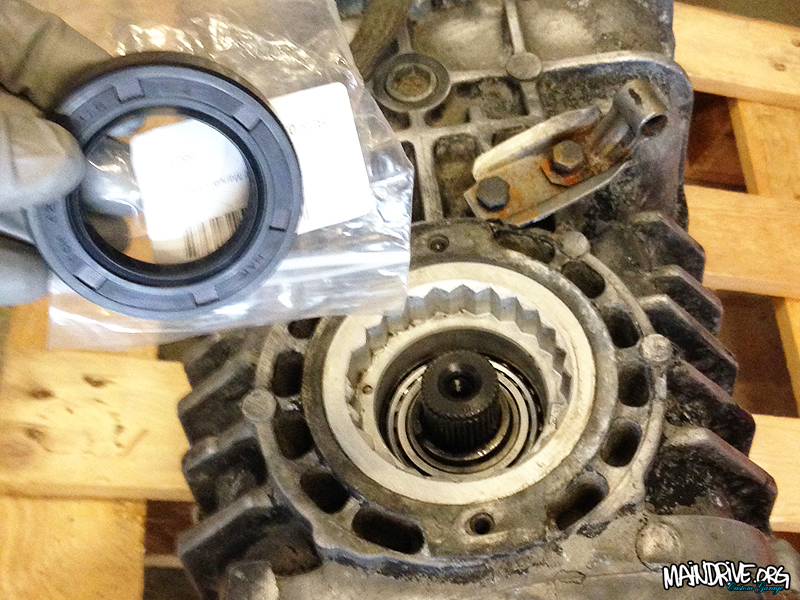
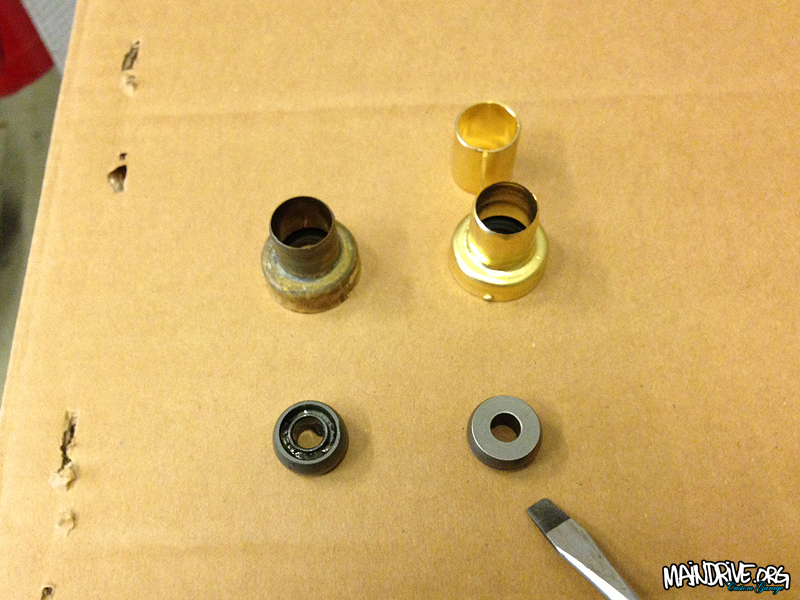
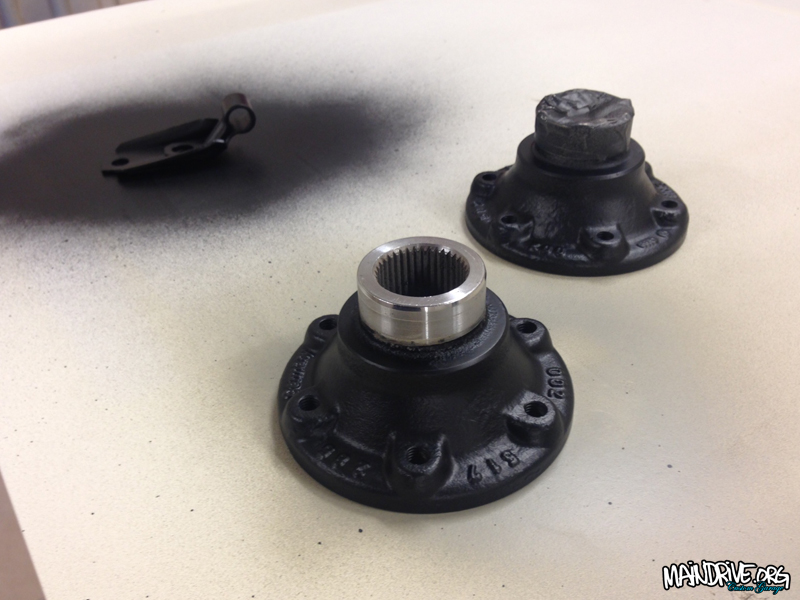
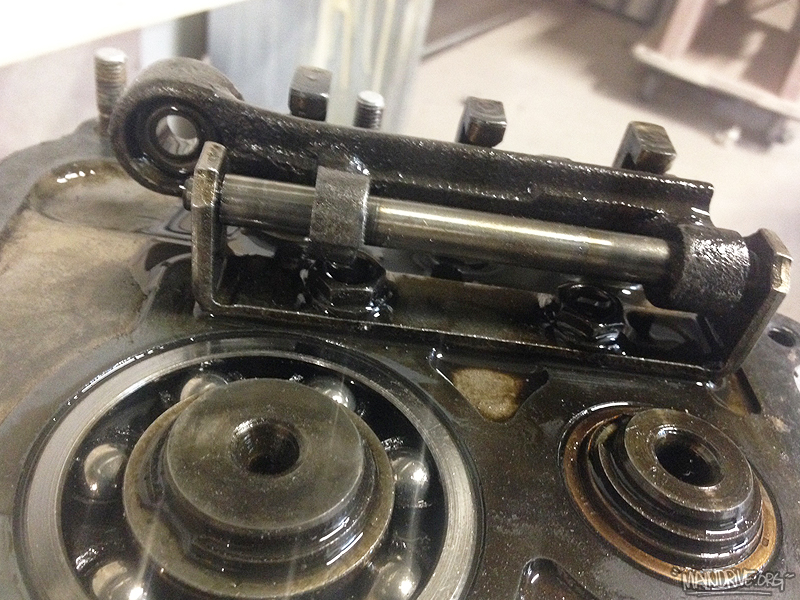
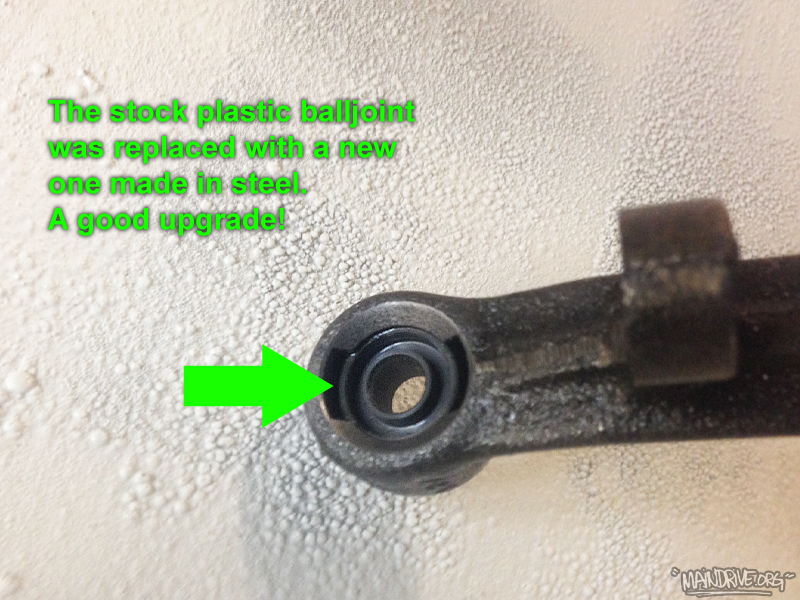
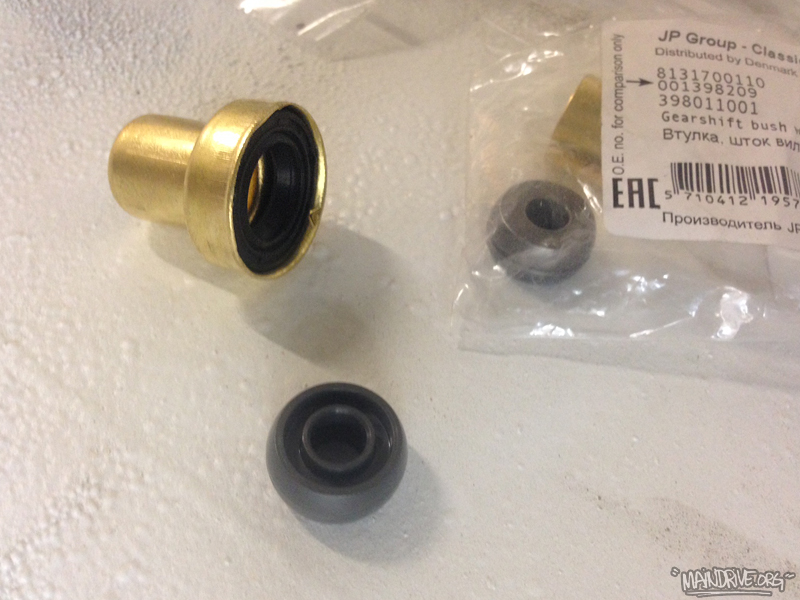
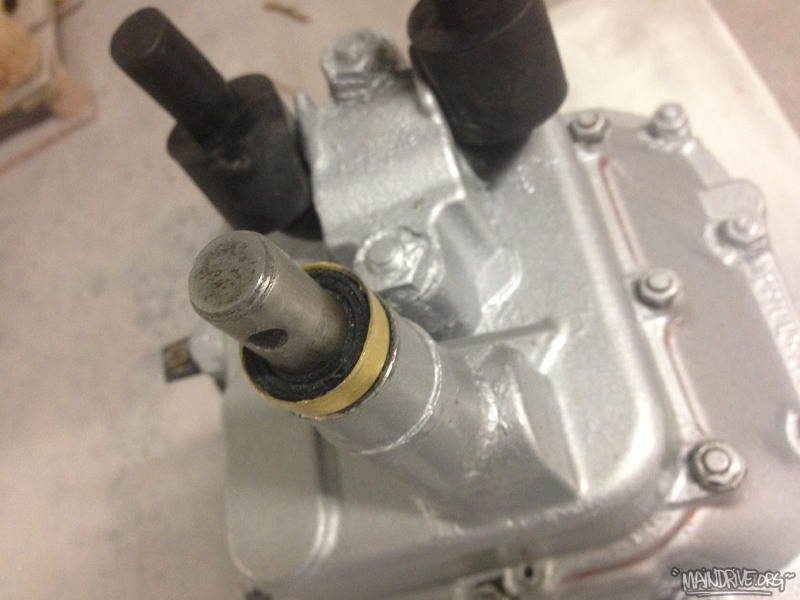
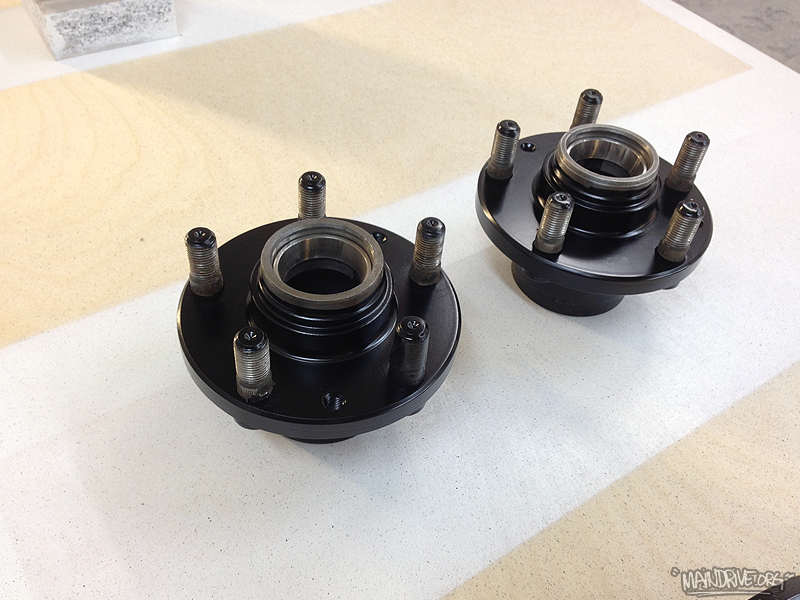
A new mainshaft oil seal was added, and both driveflange/shaft seals too. The nosecone got a new reamed bronze bushing and oilseal for the shiftleveler. Also the small plastic balljoint in the end of the shiftlever (the one that pushes gears) was replaced to a new made of steel, and will last a life time instead of a brittle plastic part that was before. The shiftrod feels very accurate and precise now, no more sloppy gearshifter! This is also a popular upgrade on VW race transmissions. Driveshafts and hubs was sandblasted and painted. New groundcable to chassi. New clutchwire. New gaskets, rubberboots and CV joints installed. New startermotor + bushing mounted too. New trans mounts upper and lower. And then the transmission was filled up with new fresh mineral API-5 grade transmission oil that VW recommended on these 002 cases. This oil is extra good to the special metalparts like syncro rings etc. Not aggressive like other grades can be to these old transmissions. Here is the pics…
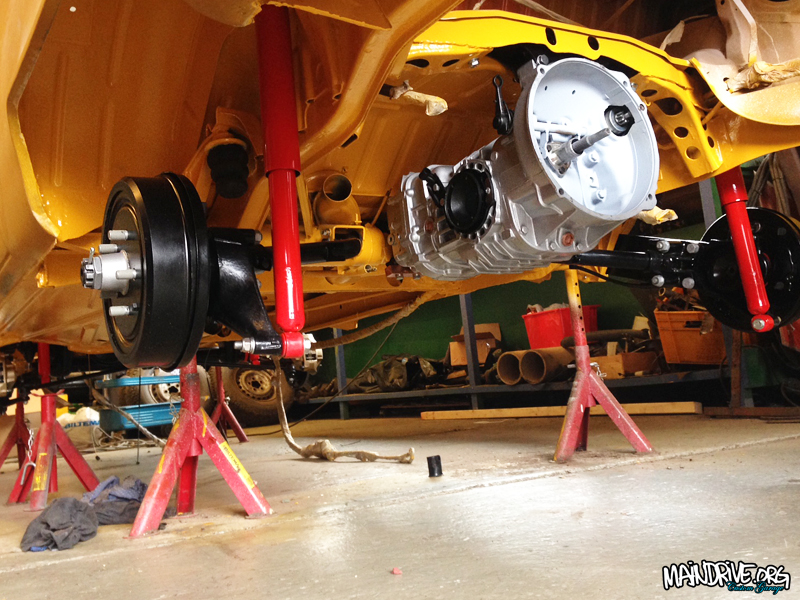

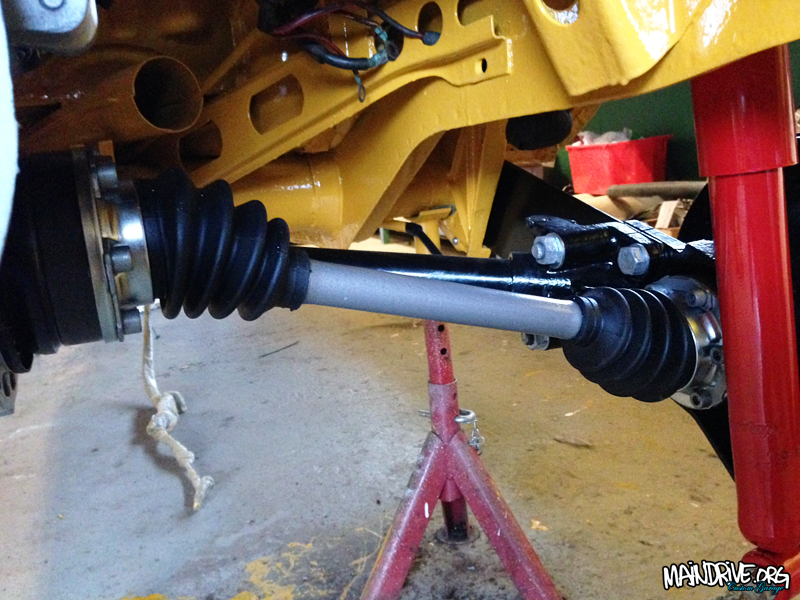

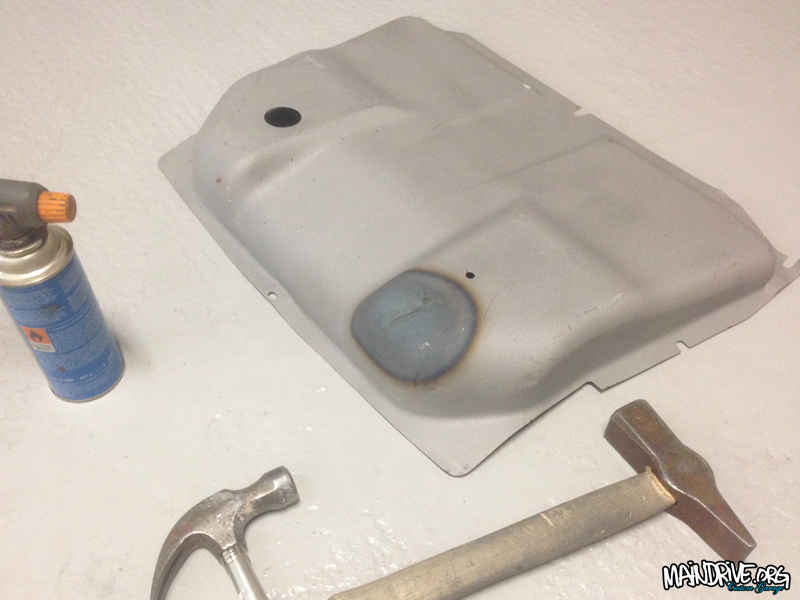
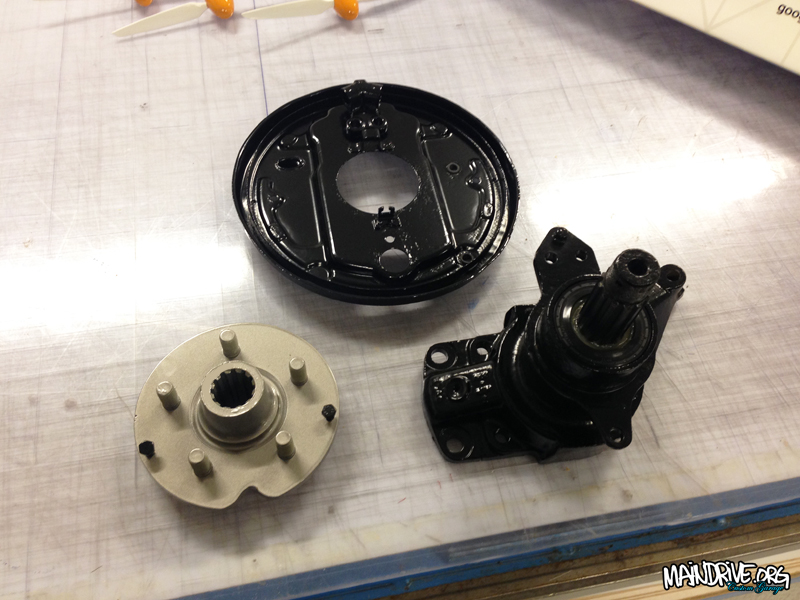
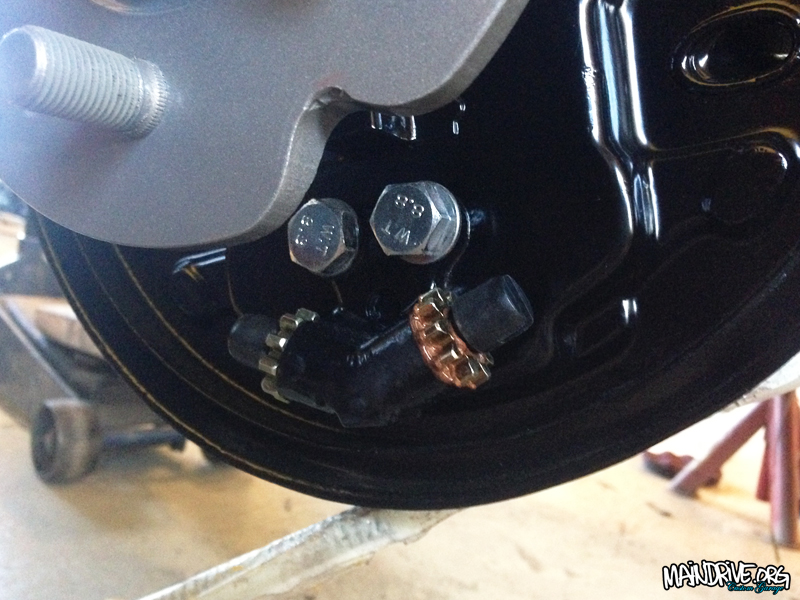
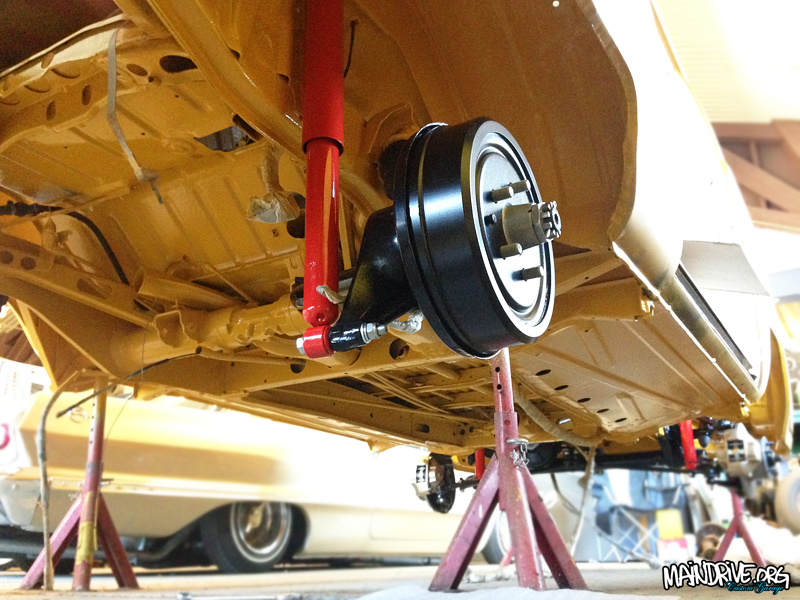
Started to get the other side done, blasted, painted and new bearings and seals. Waiting on some new parts from JustKampers and hopefully I can put the bus back on its own wheels this weekend for first time in 6 months. Also fixed the rusted and dented up front floor cover, blasted and painted ready to be installed when all wires and brakes are fixed.
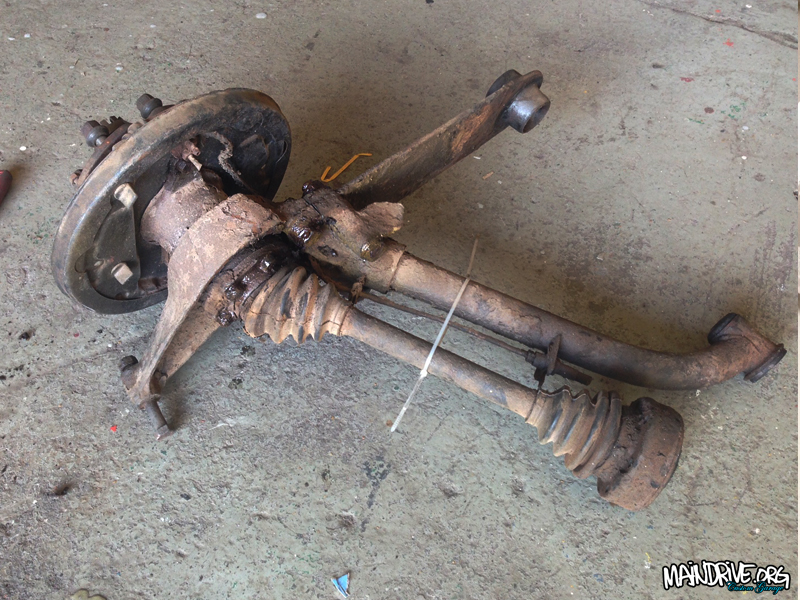
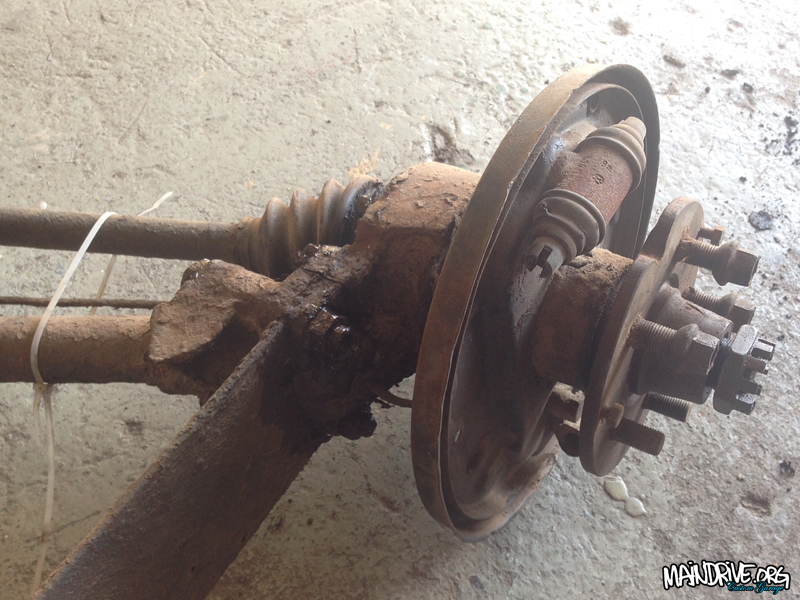
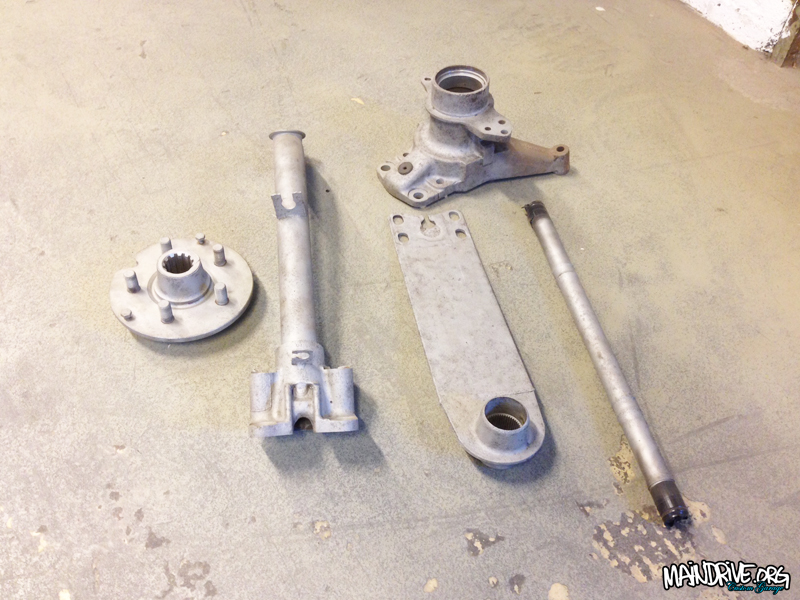
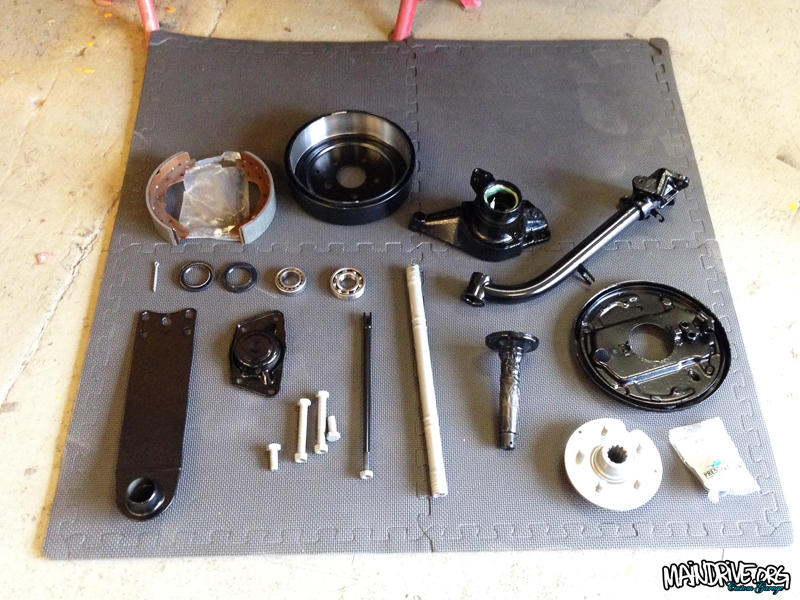
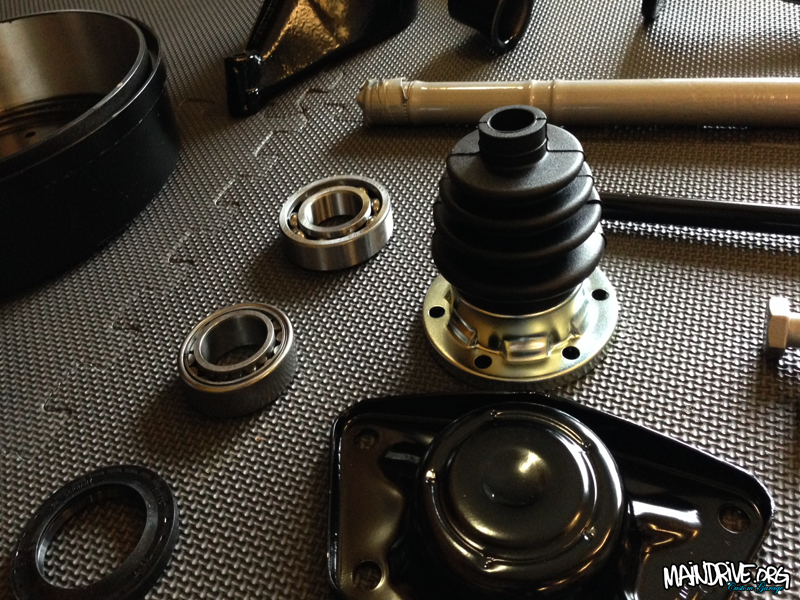
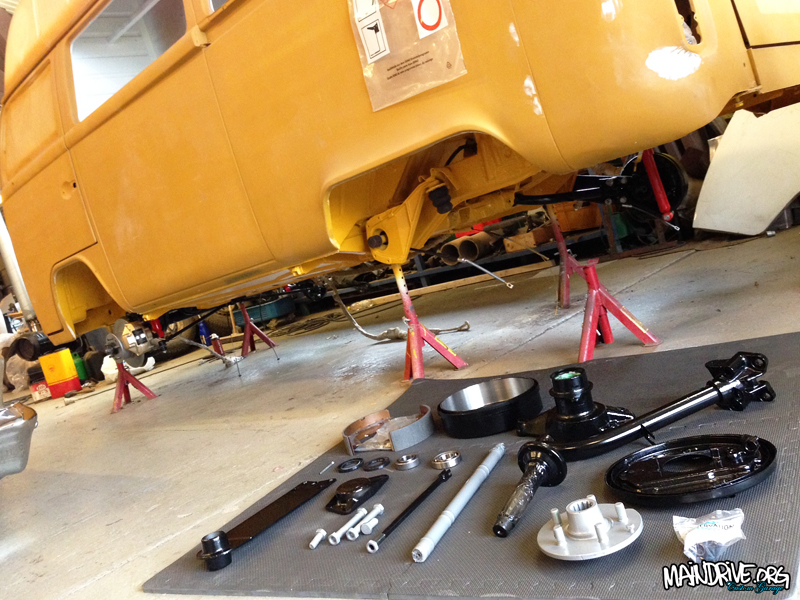
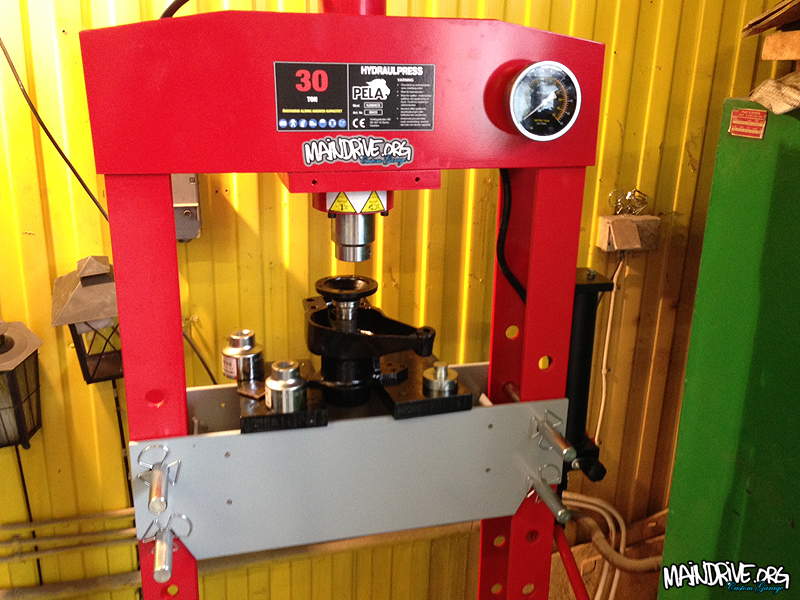
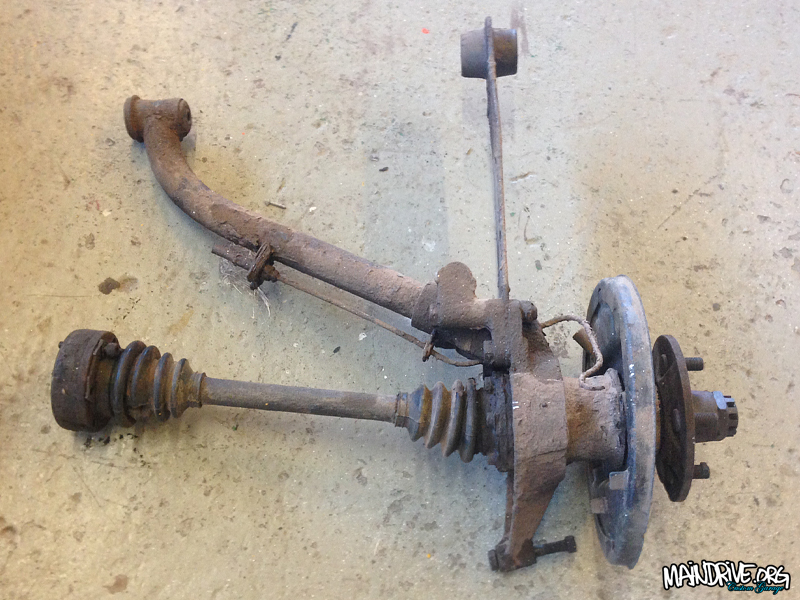
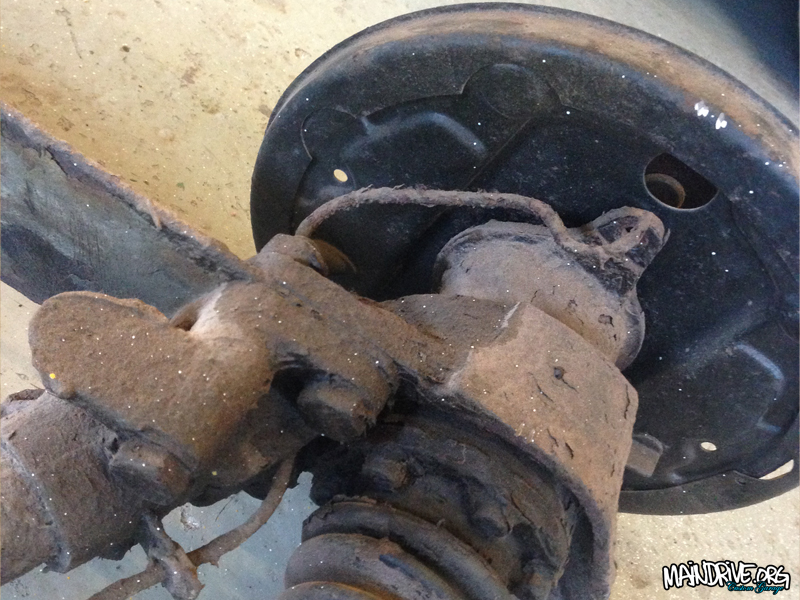
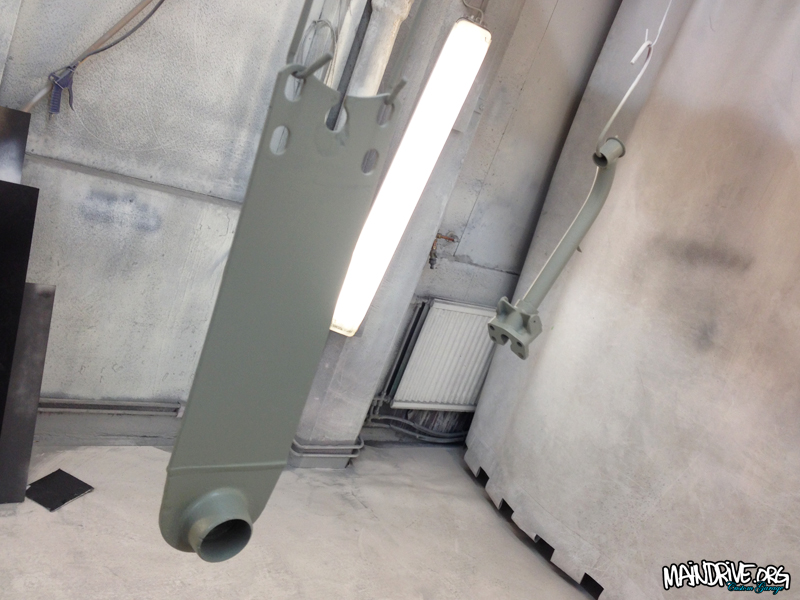
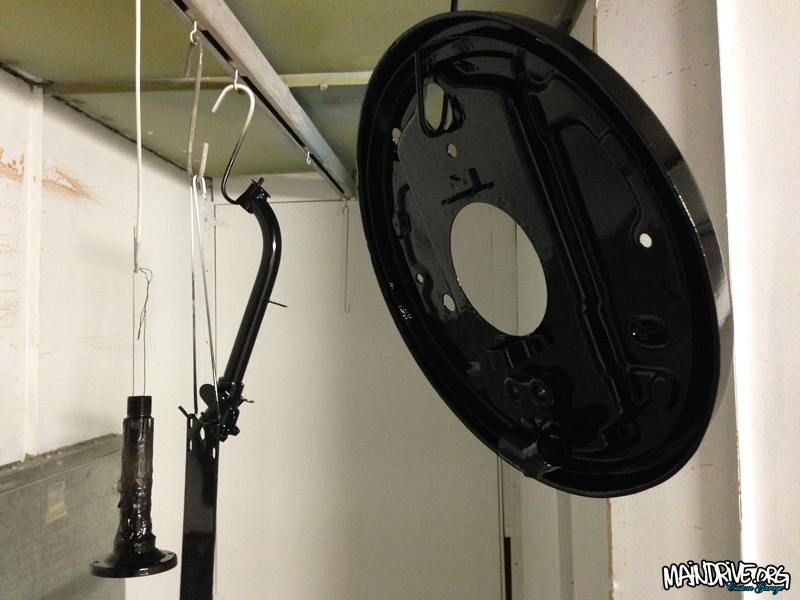
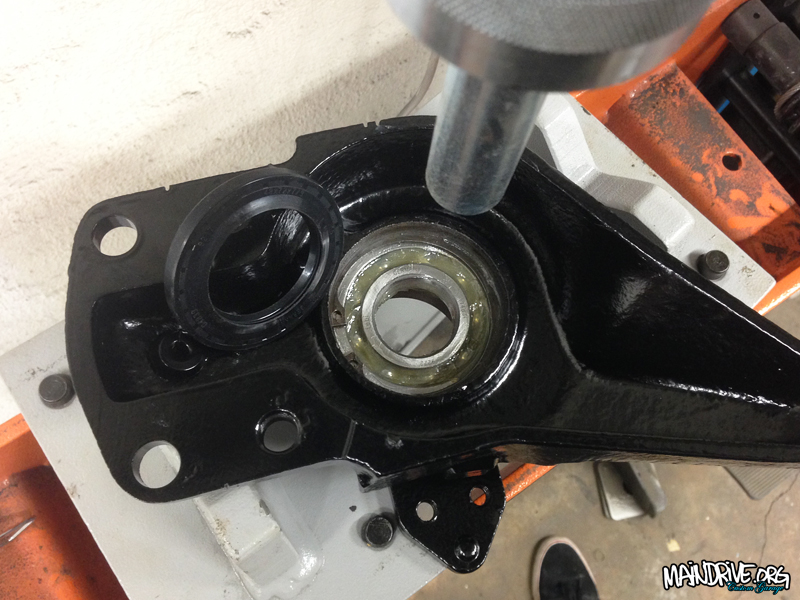
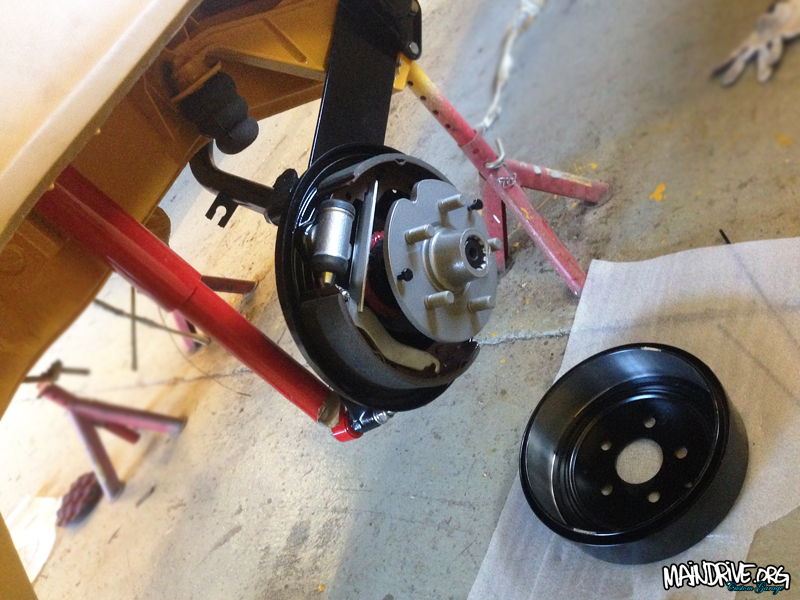
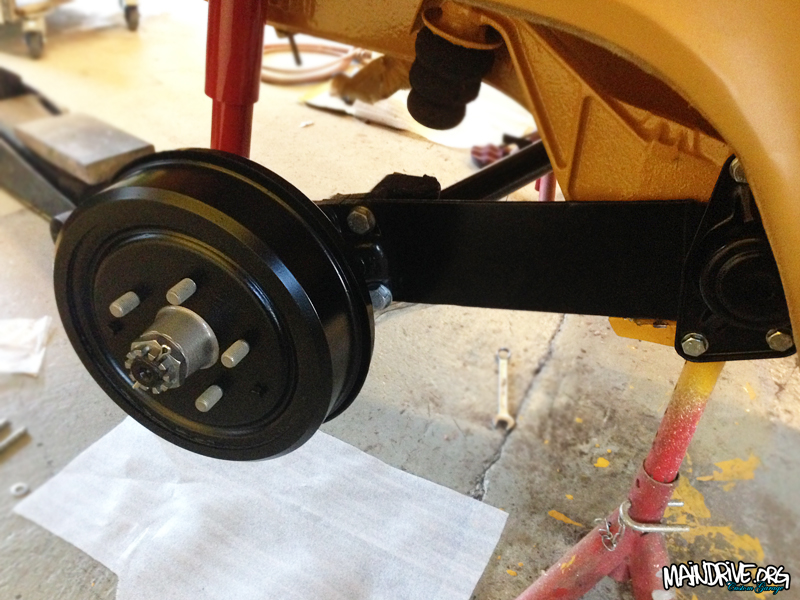
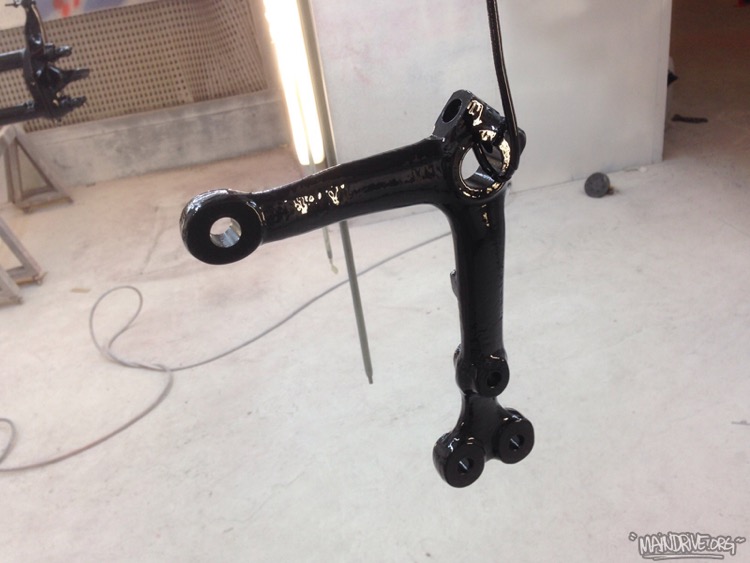
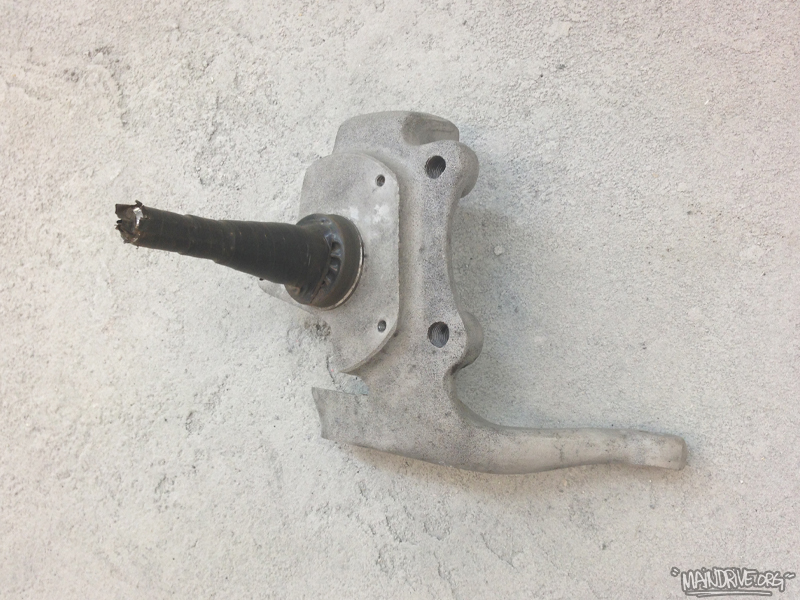
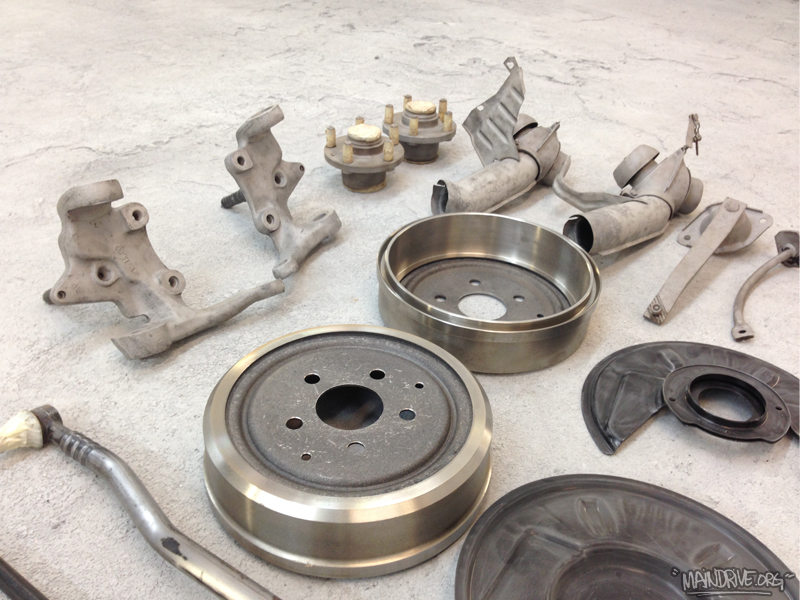
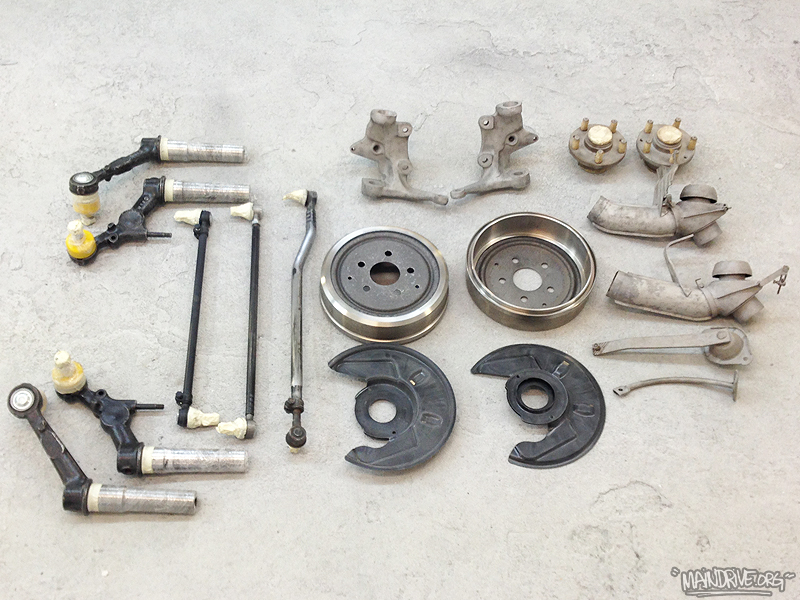
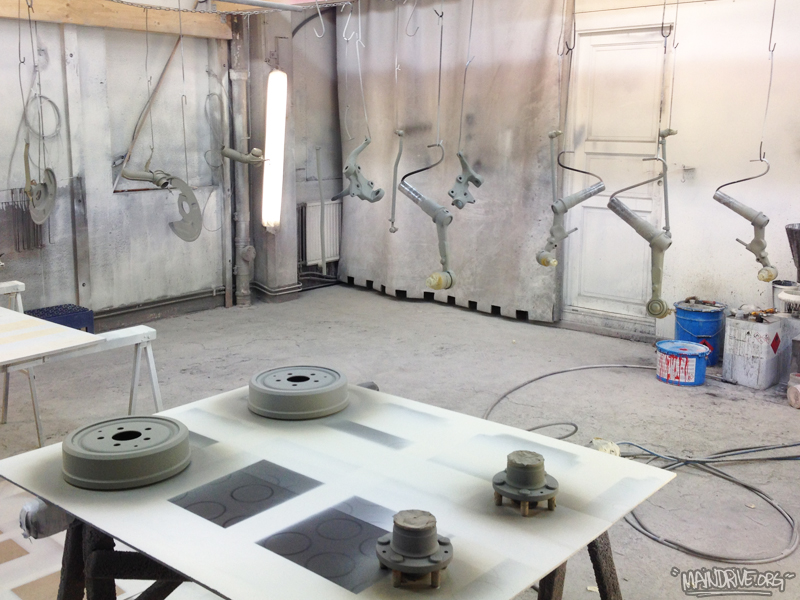
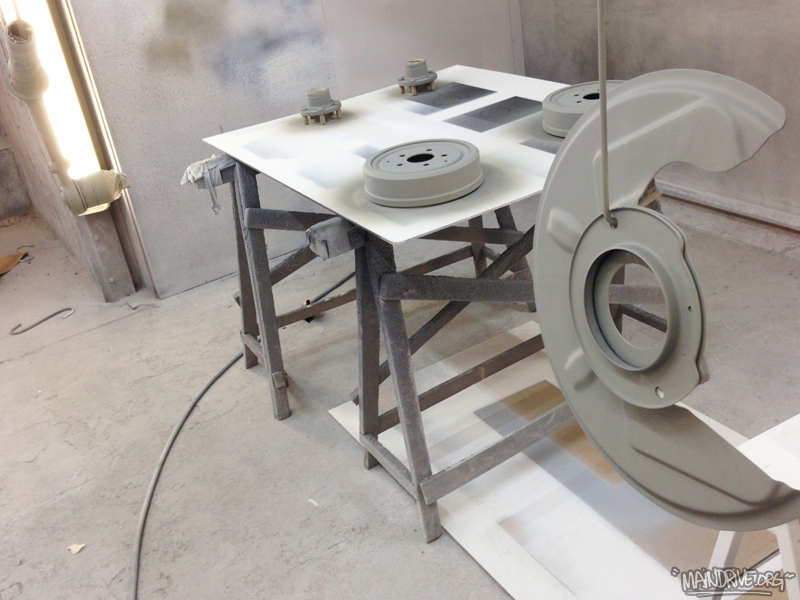
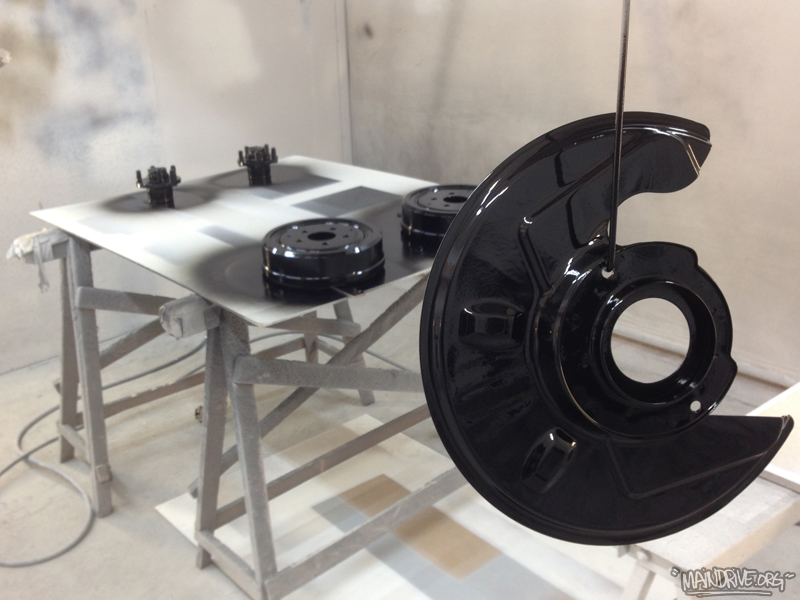
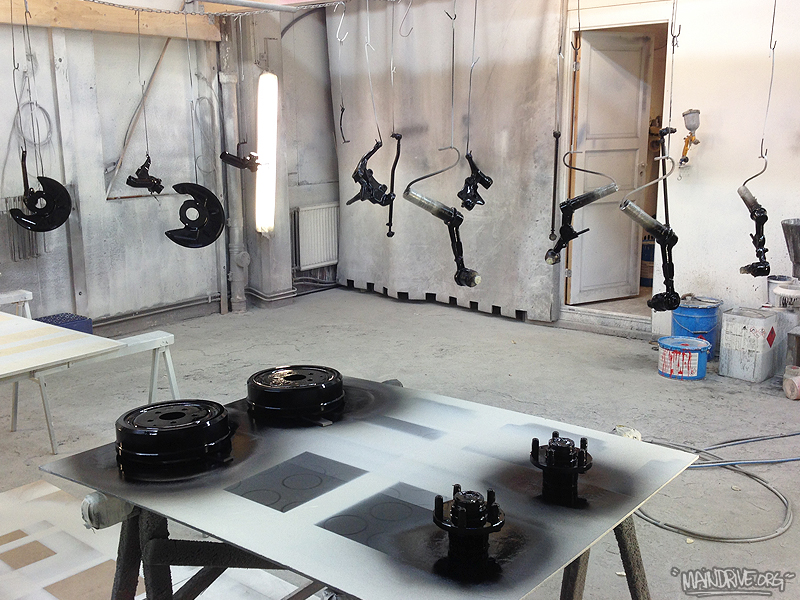
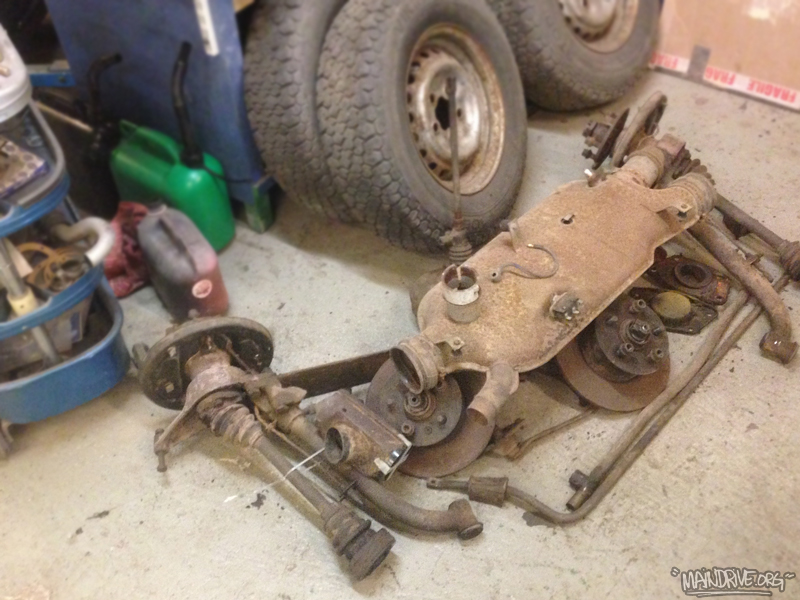
Have now started with the rear end of the bus, hope to soon have it rolling on wheels again, after 6 months in the air. Dismantled the rear IRS trailingarms, removed all old bearings and seals, cleaned it up and sandblasted everything. Then all parts was coated in zinc primer and the Deep black satin finish paint. All new wheelsbearings and seals pressed in, new bushings everywhere and also nuts/bolts. All new brakeparts and brakedrums too. One step closer…
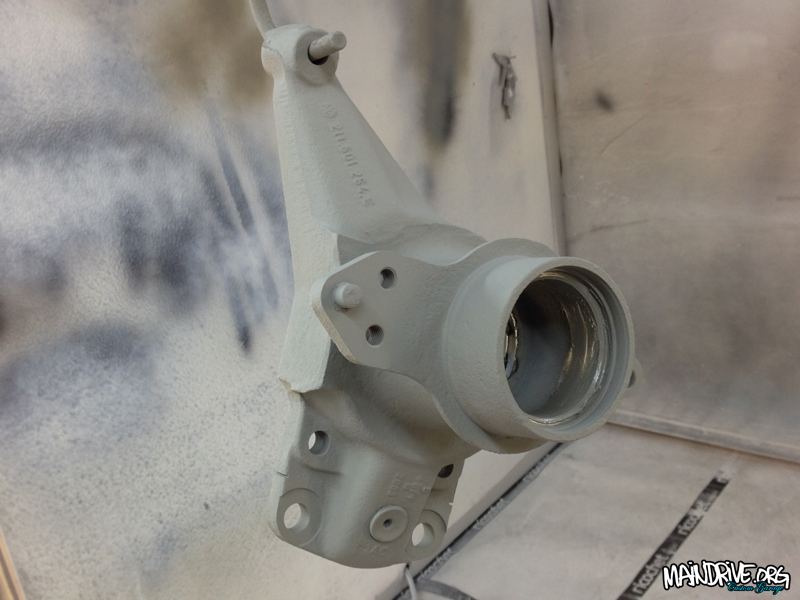

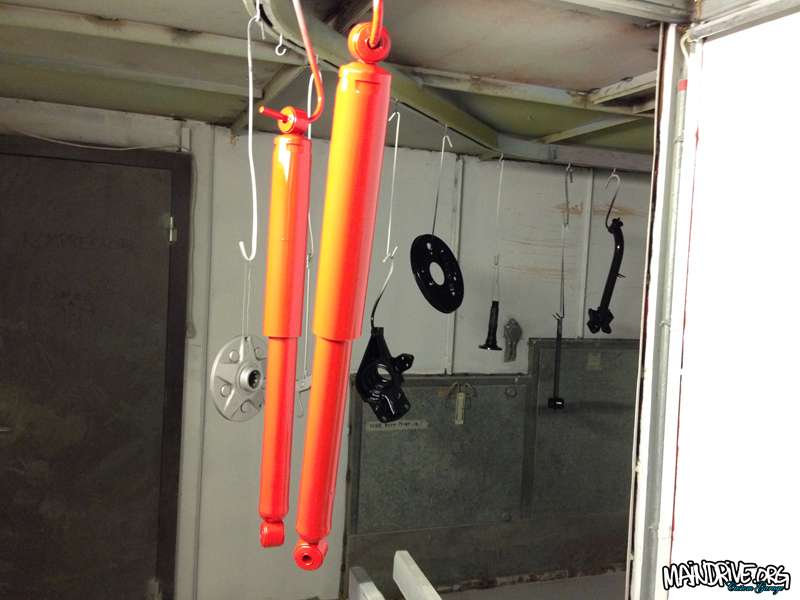
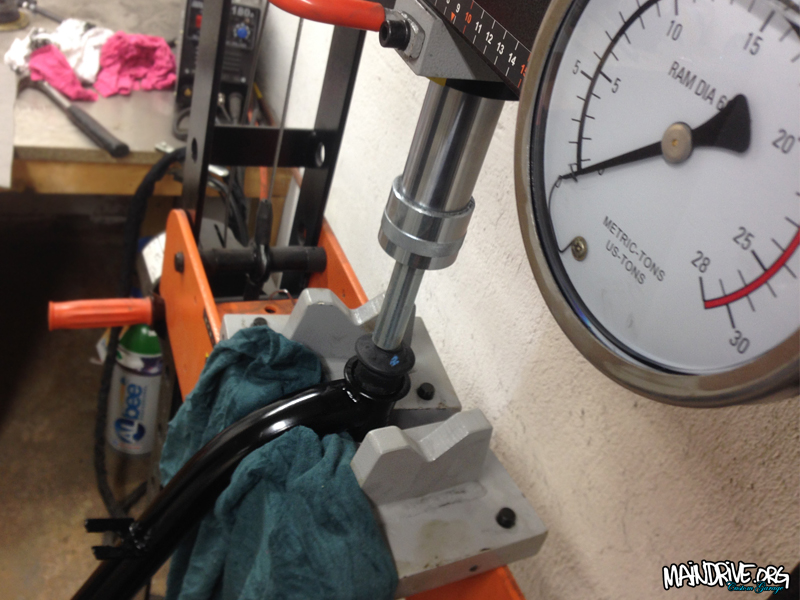
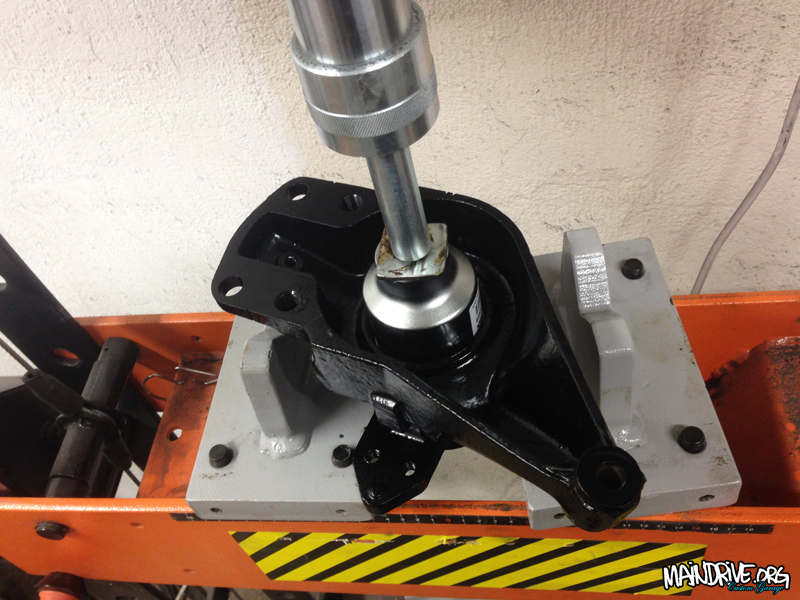

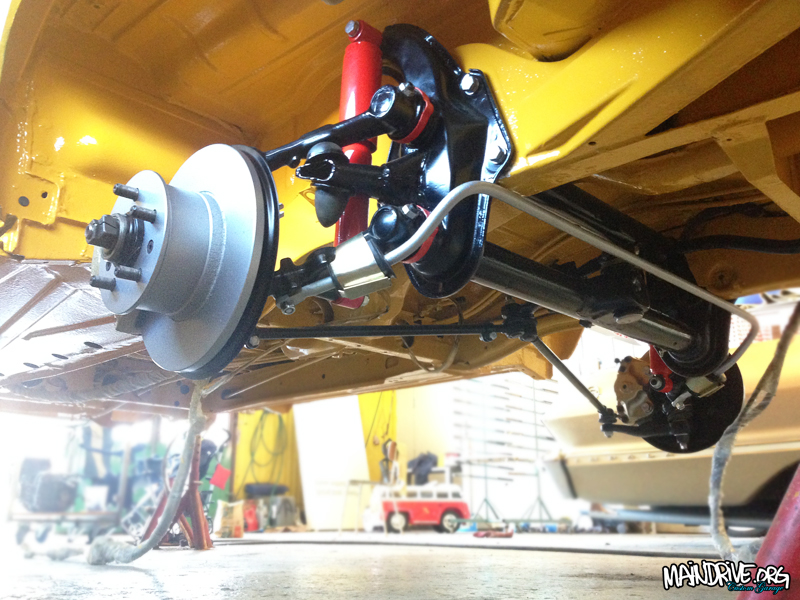
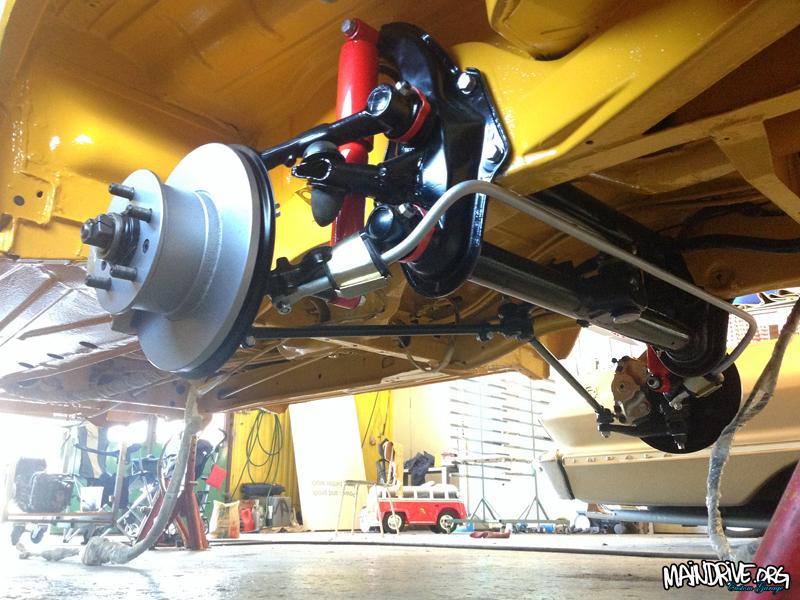
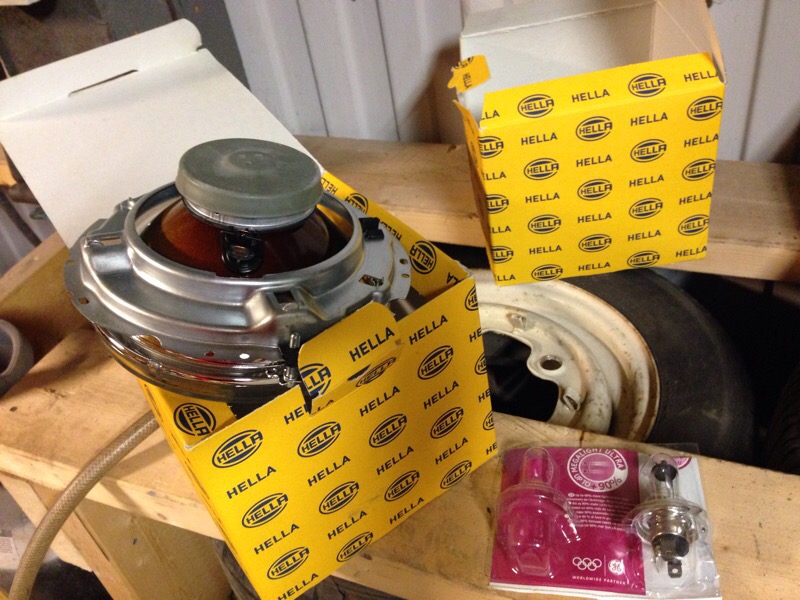
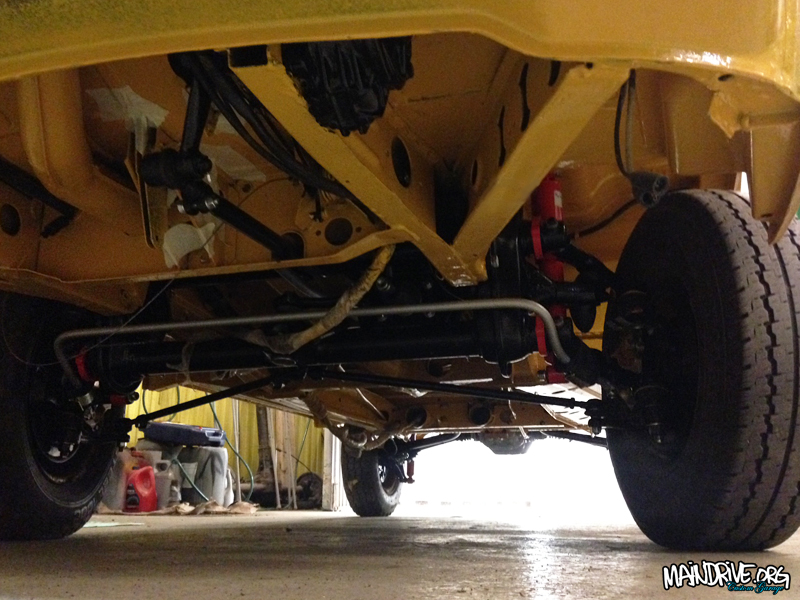
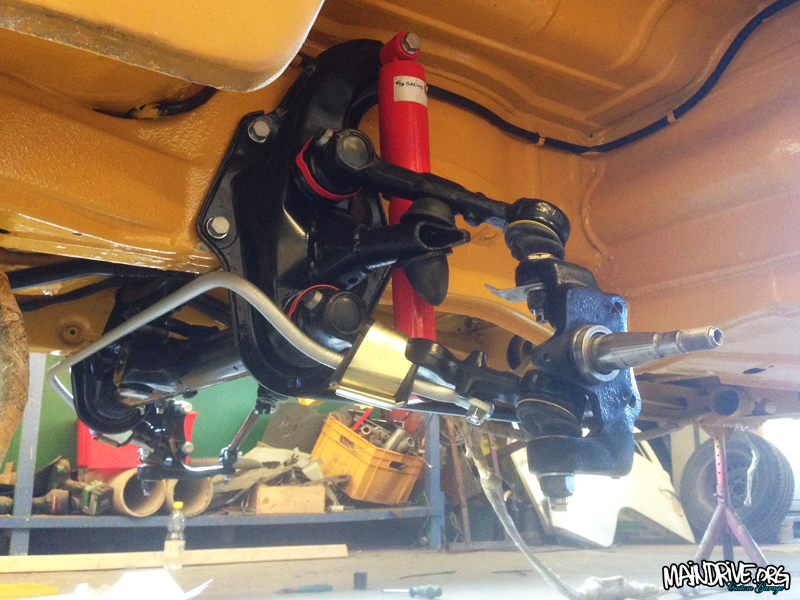
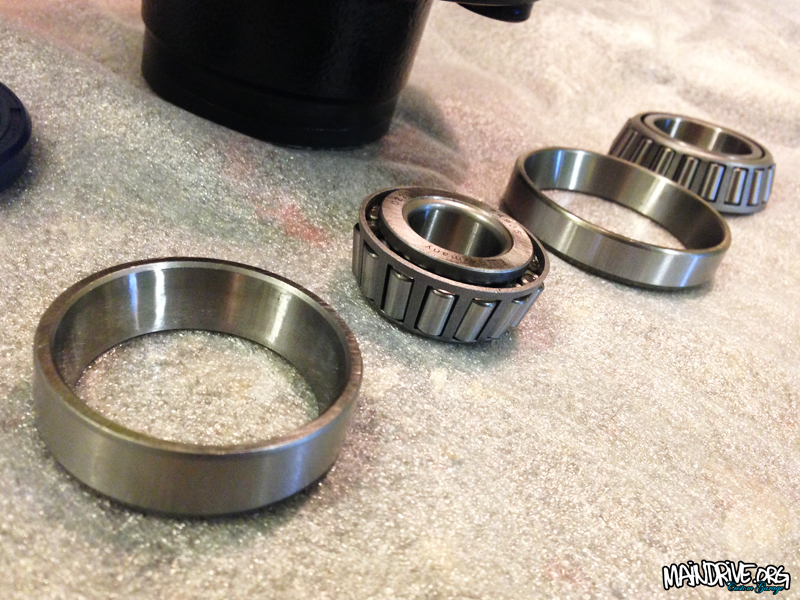
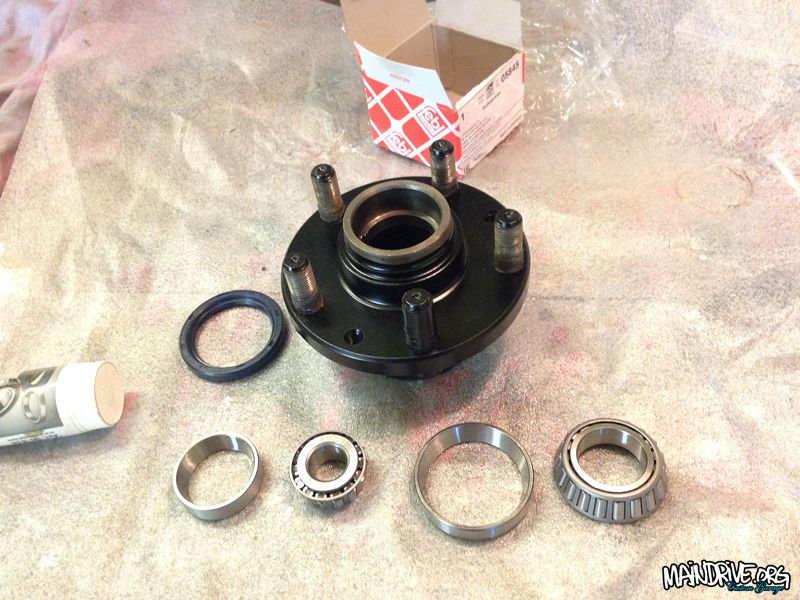
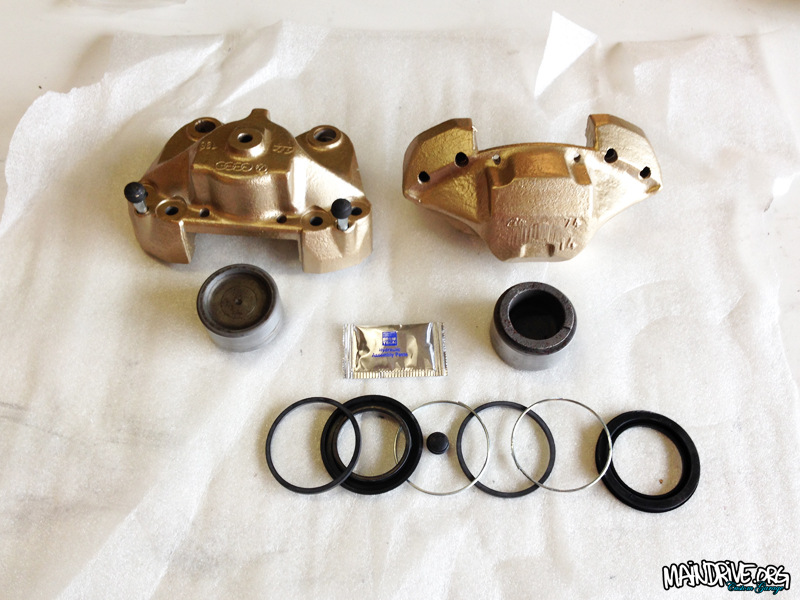
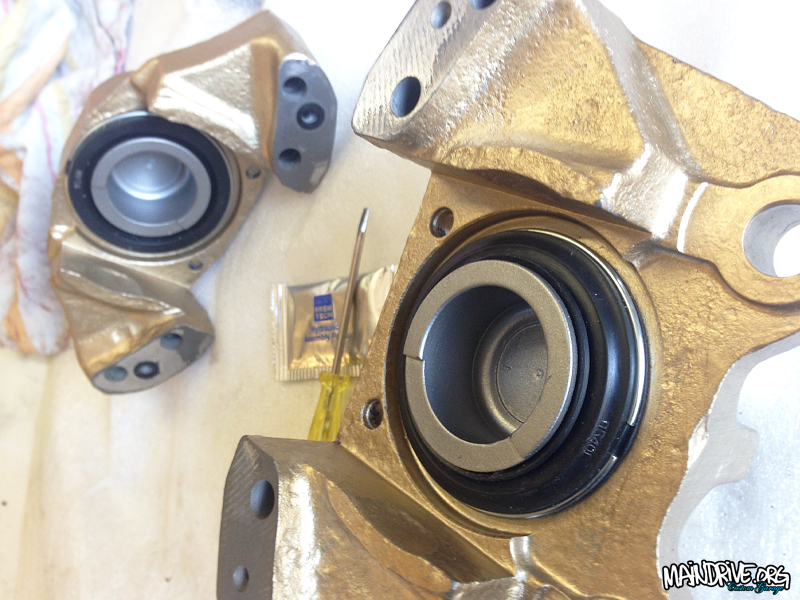
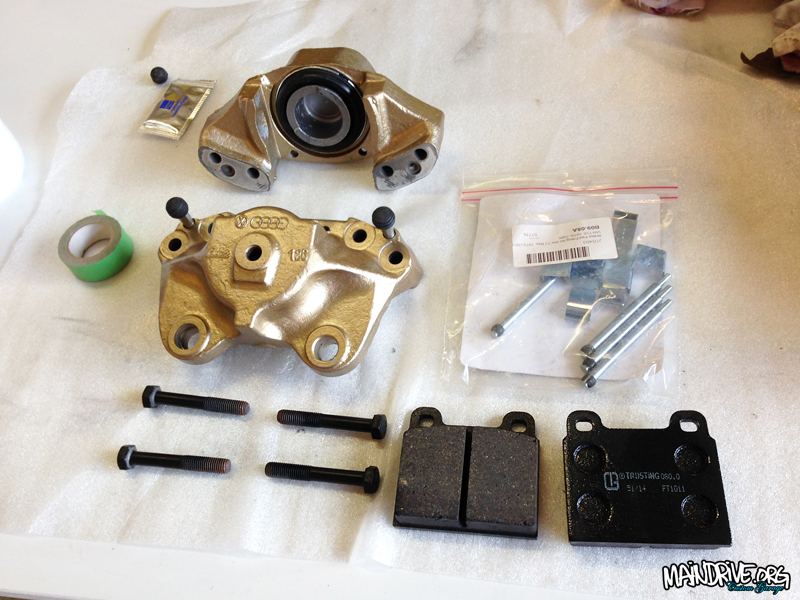
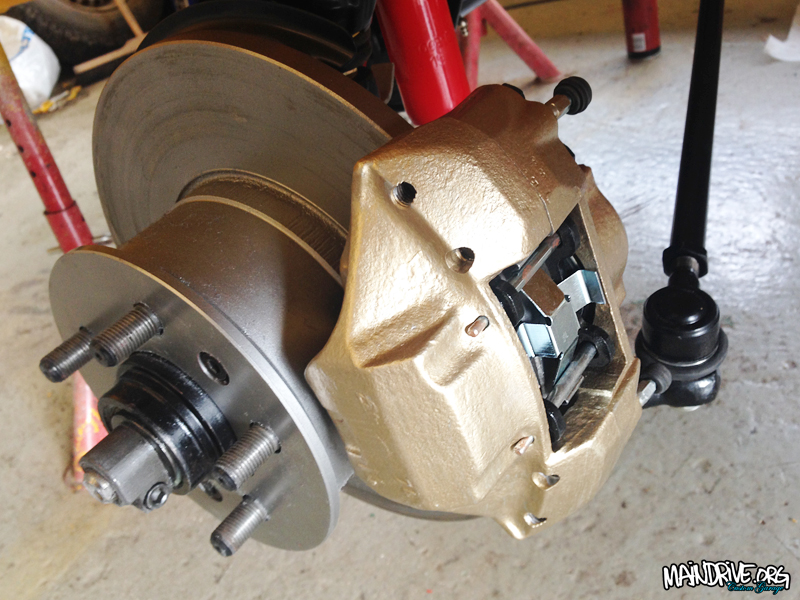
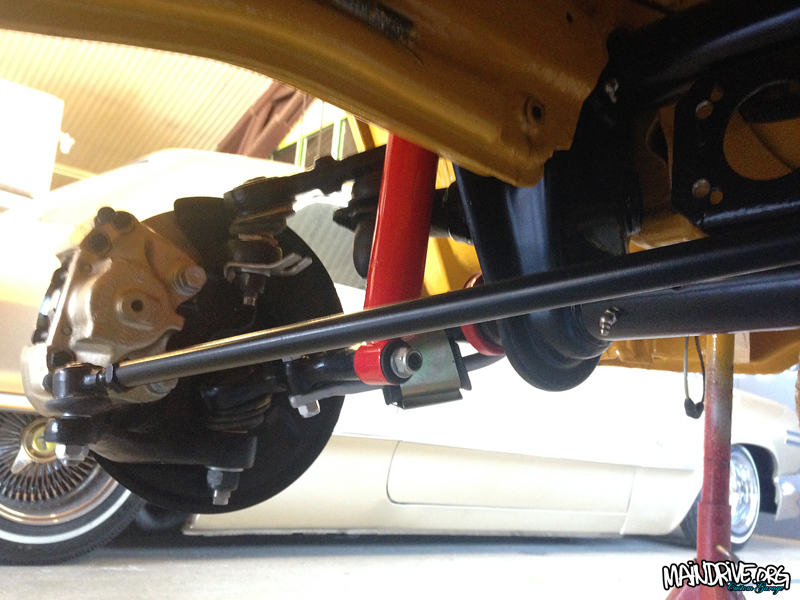
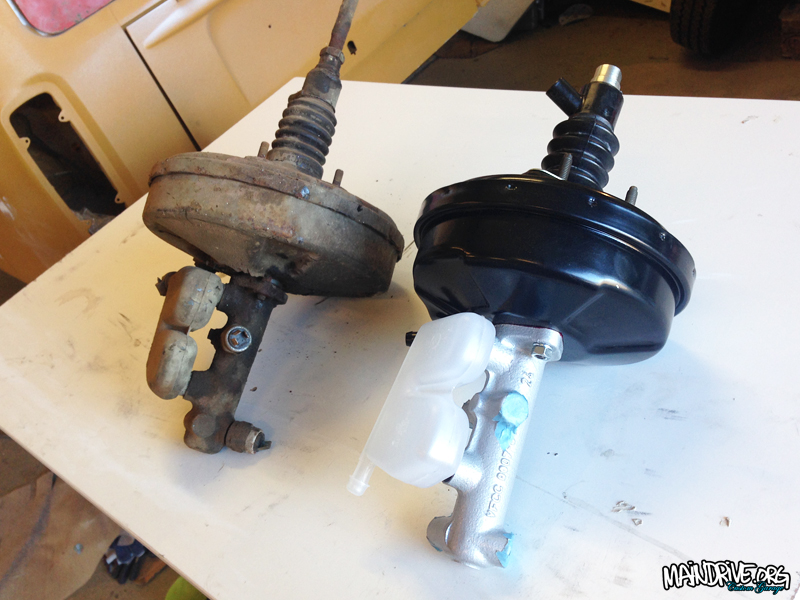
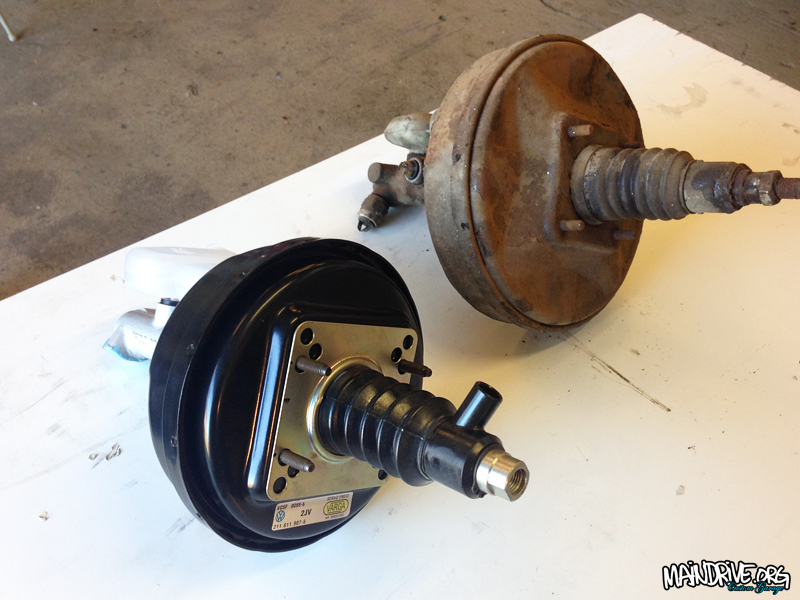
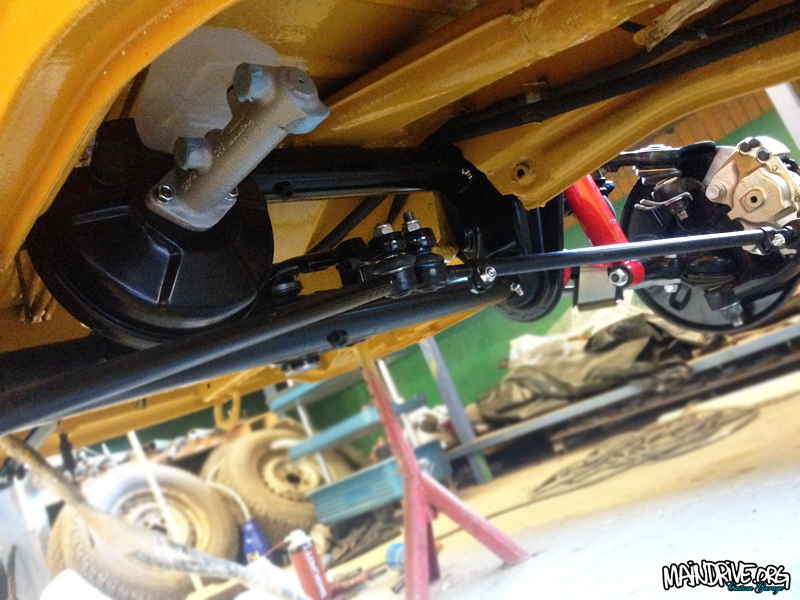
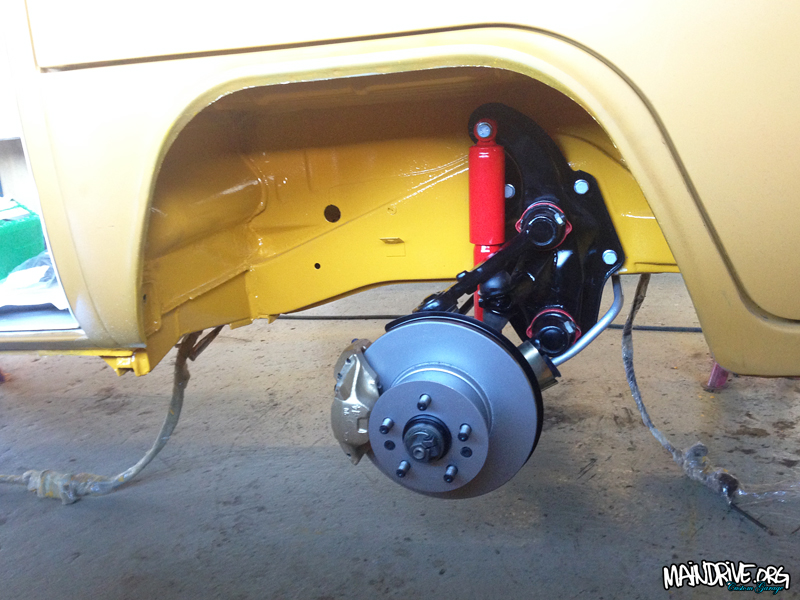
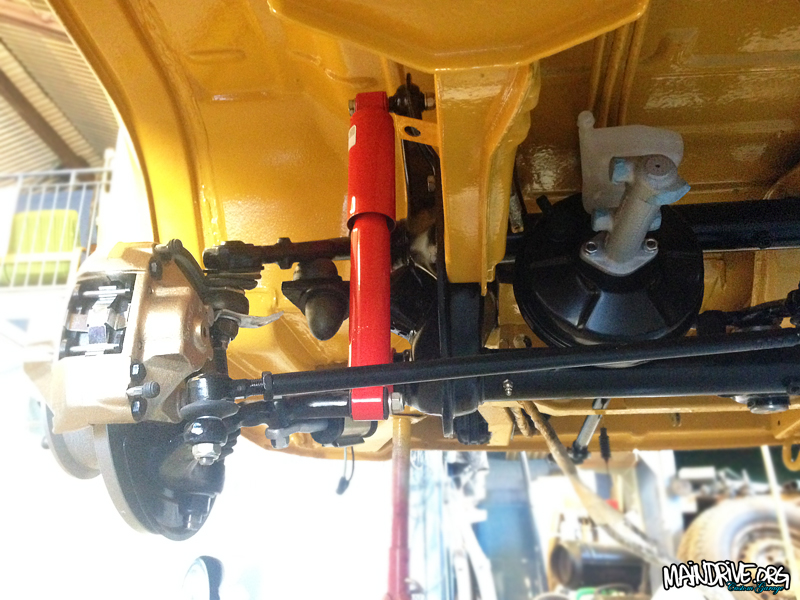
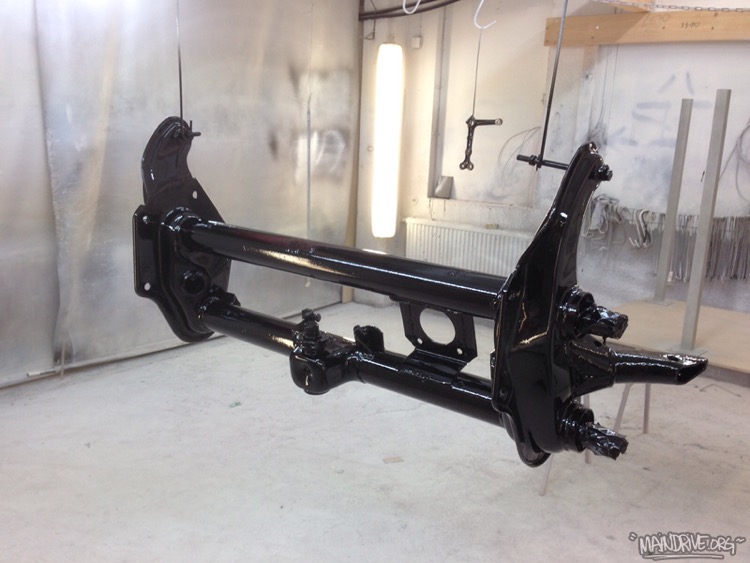
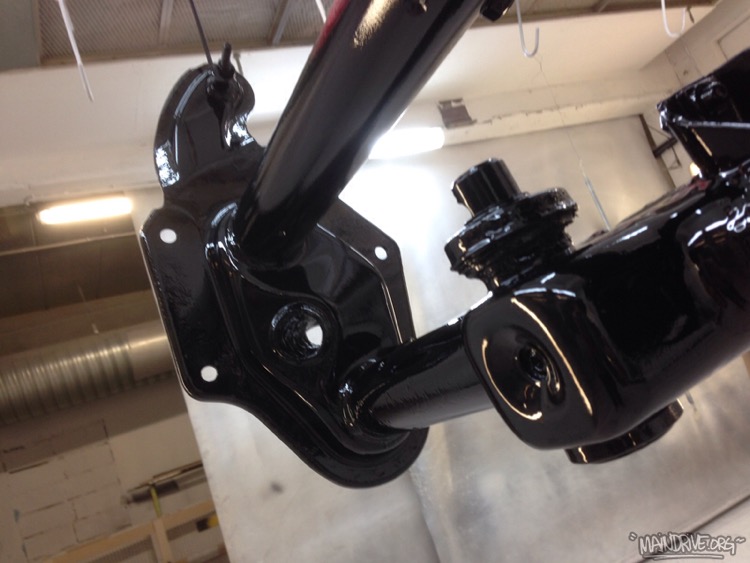
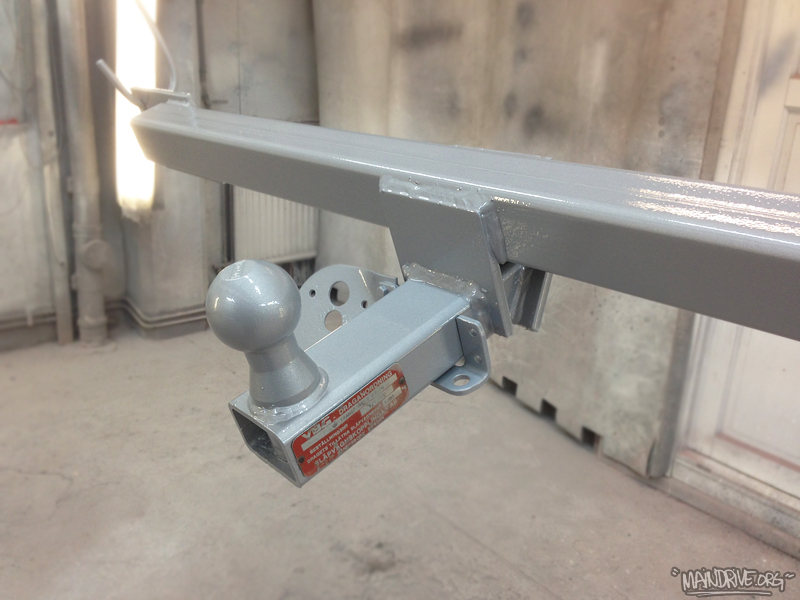
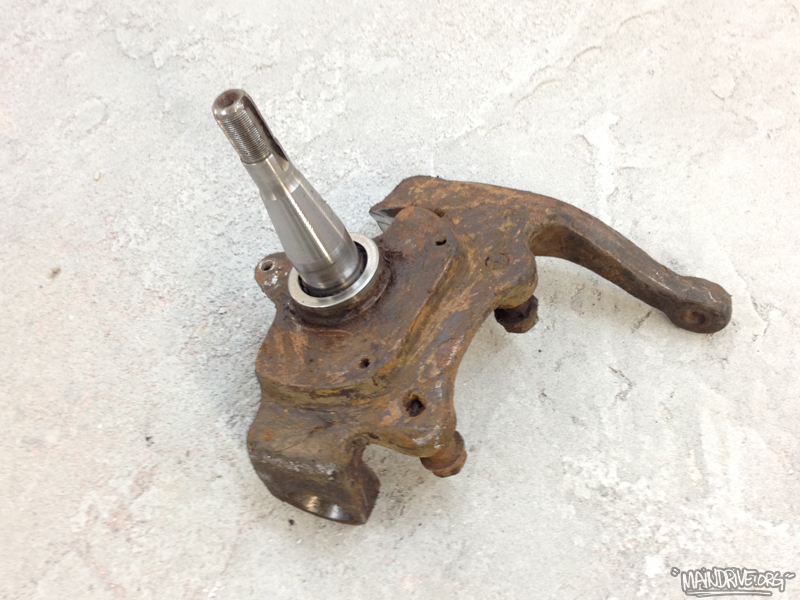
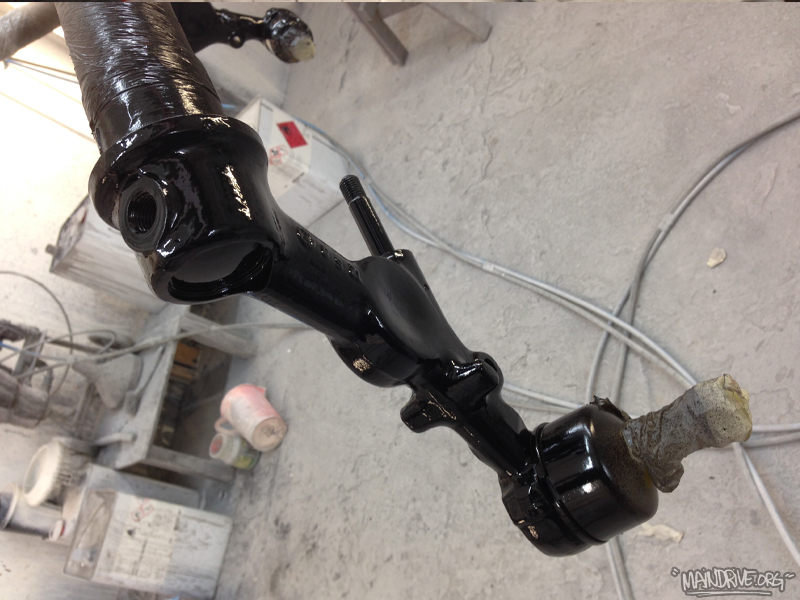
Have finally got some stuff done on my own project, Baywindow Highroof 1975. The frontend is all done, just need to mount the new brakelines etc. The sandblasted and painted beam have all new needlebearings, new centerpin/arm bushings, new grease zerks, torsionarms have new balljoints, new swaybar bushings, new shocks, new steeringdampner, new tie rods and draglink, steeringbox is adjusted (no more play) got new oil too and a new rubber/steeringplate. Wheels bearings are new and packed with fresh grease, new brakediscs, new speedocable and brakecalipers have been blasted, and have all new seals and pistons, brakepads etc. New masterbrakecylinder and new brakebooster is in place too. Basicly every nut and bolt are new on this car!
Here is some new pics…


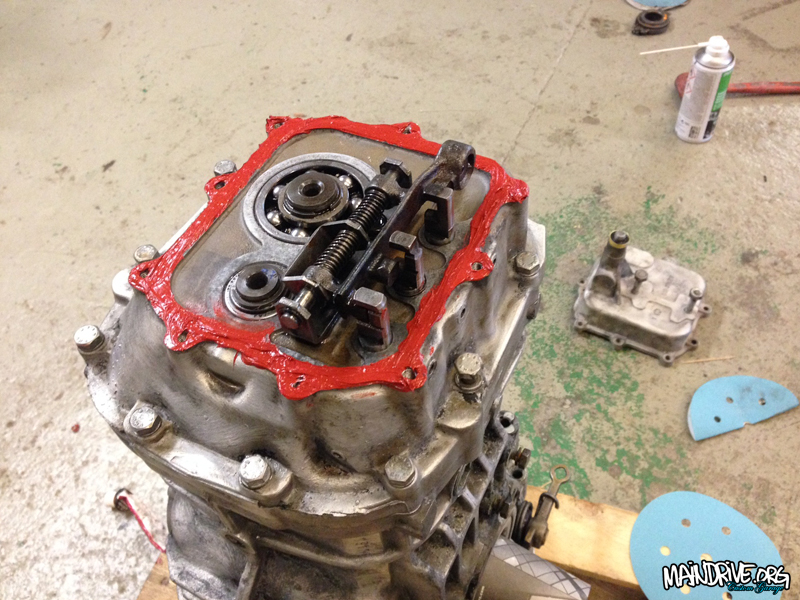
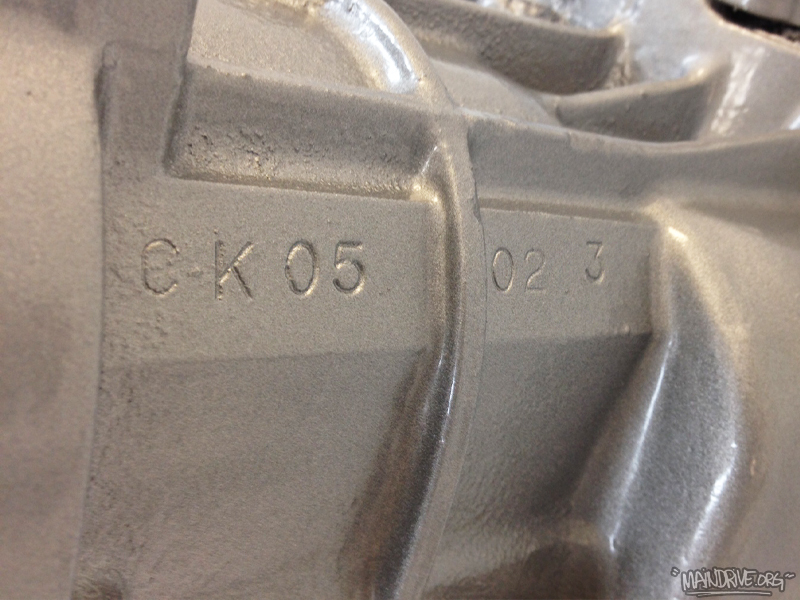
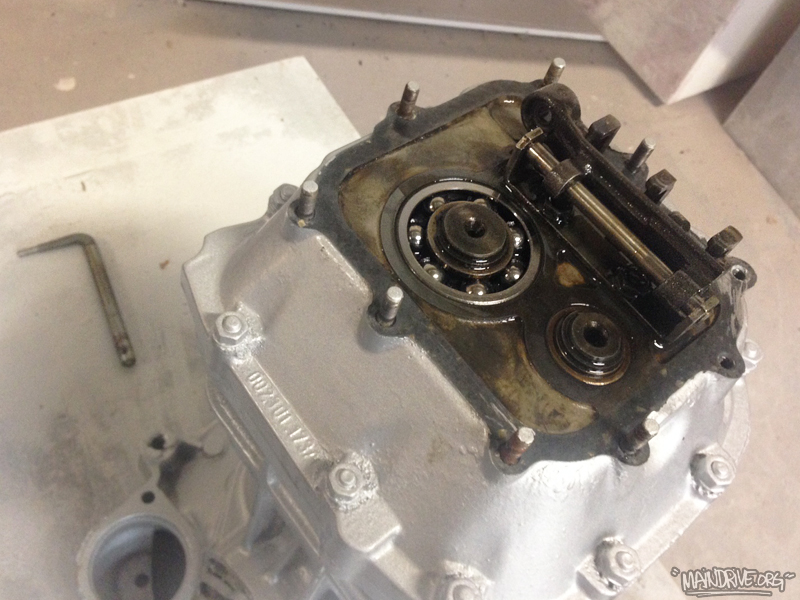
Stephans VW Bay project moves on and here is some pics from the transmission overhaul made last week here in the garage. The transmission is a 002 case, 3 rib from late 1973. Code CK. The Baywindow buses are famous for their poor gearshifts. If you have a sloppy gearstick on your bus, first check all bushings in the gearlinkage that runs thru the floor from front to back. If the shifting still is bad, then its possible that the gearleveler balljoint (made in plastic) inside the nosecone is worn out. I replaced this balljoint on this tranny for one made in metal instead, so it will last for ever! The magneticplugs was cleaned, oil drained, all gaskets and seals new and then a coat of fresh paint. Now its ready to be bolted back in the bus again.
Been in Barcelona, Spain with the family on a vacation and just got back home. Nice to see some sun instead of snow! 🙂 Going to start put together the front beam axle this week. I have all the new parts from JUSTKAMPERS waiting for it, and hopefully have it bolted back up in the frame on the bus. More pics coming soon!
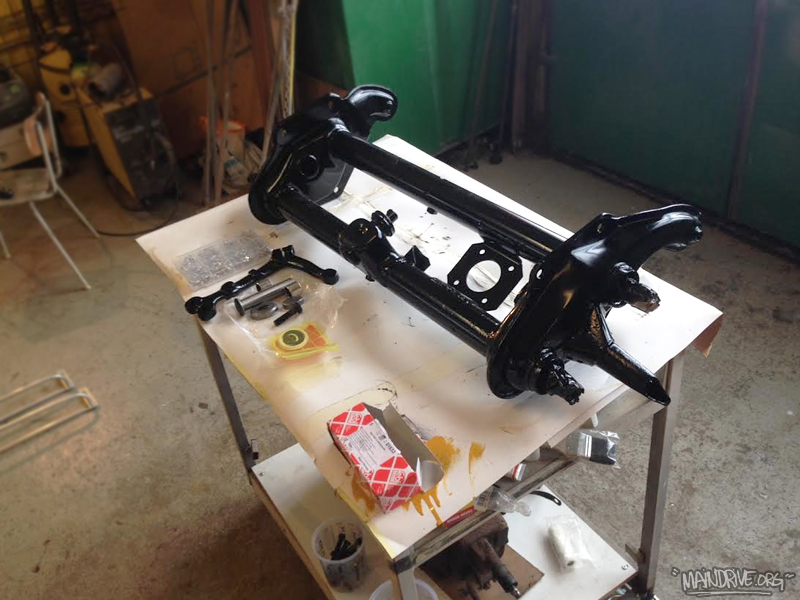
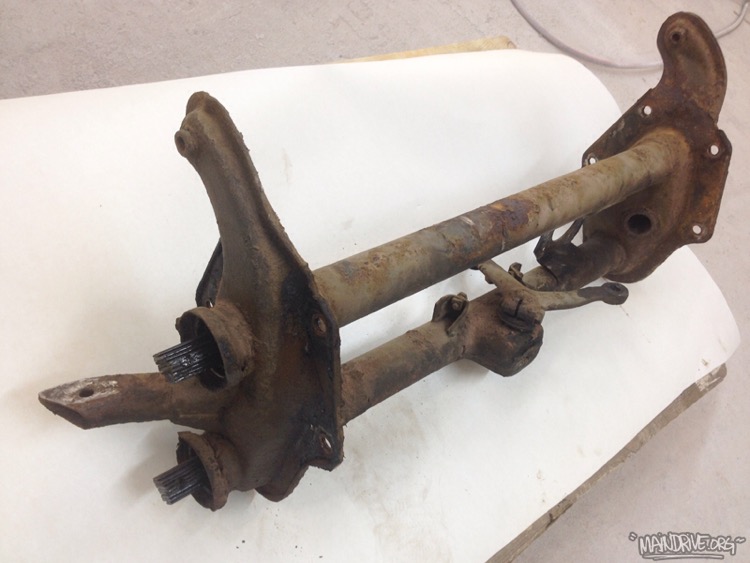
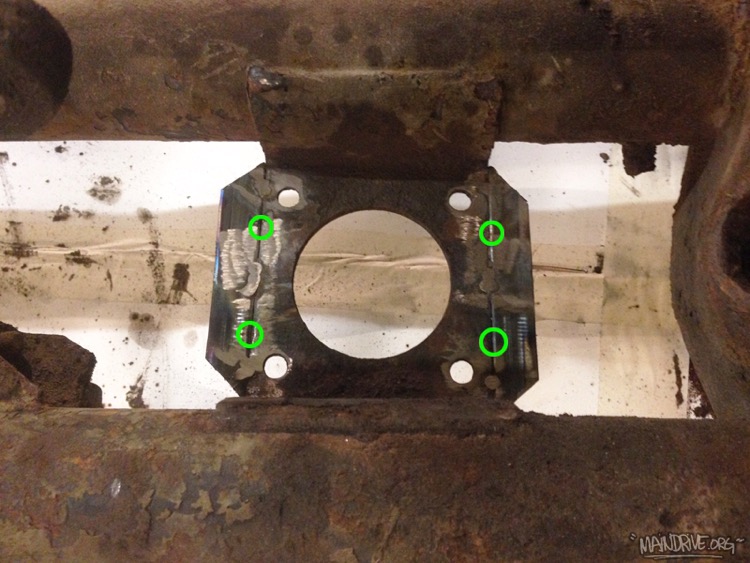
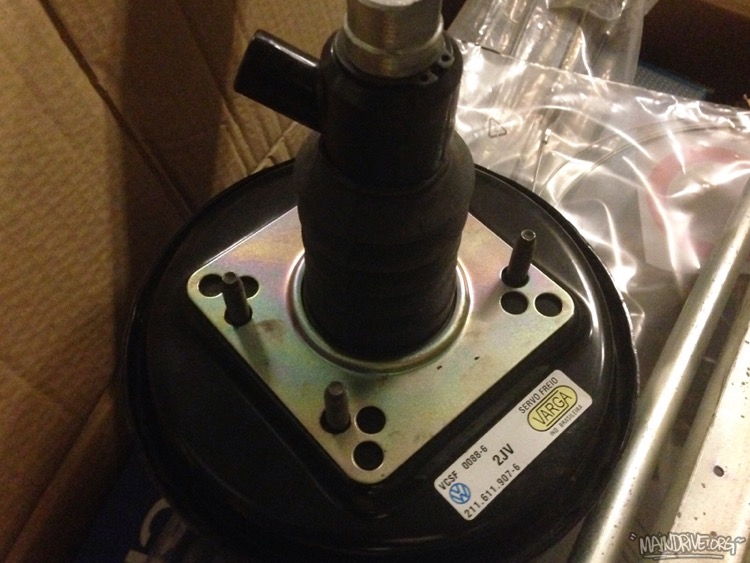
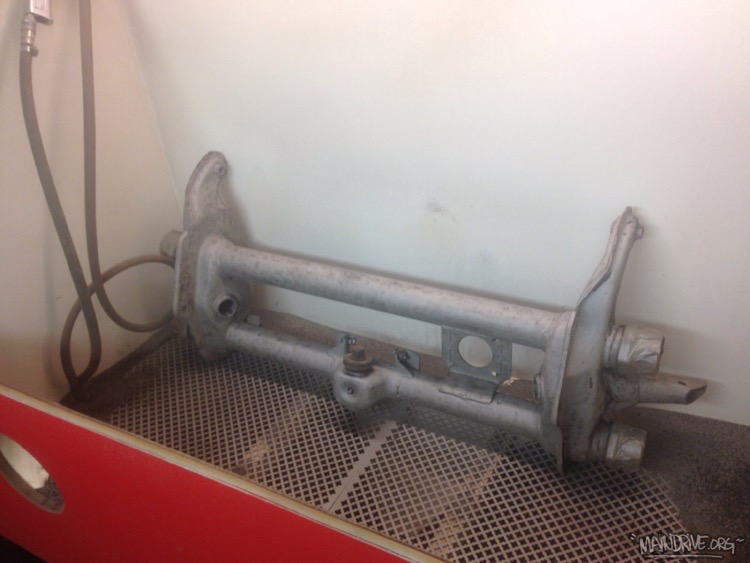
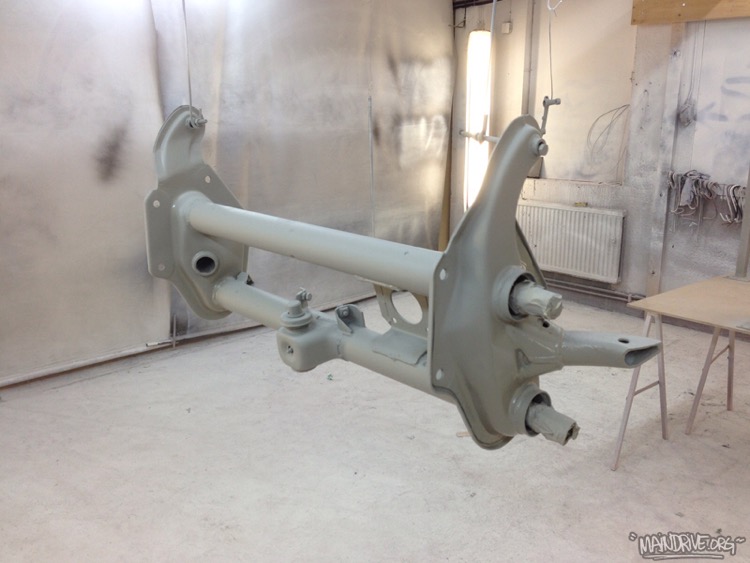
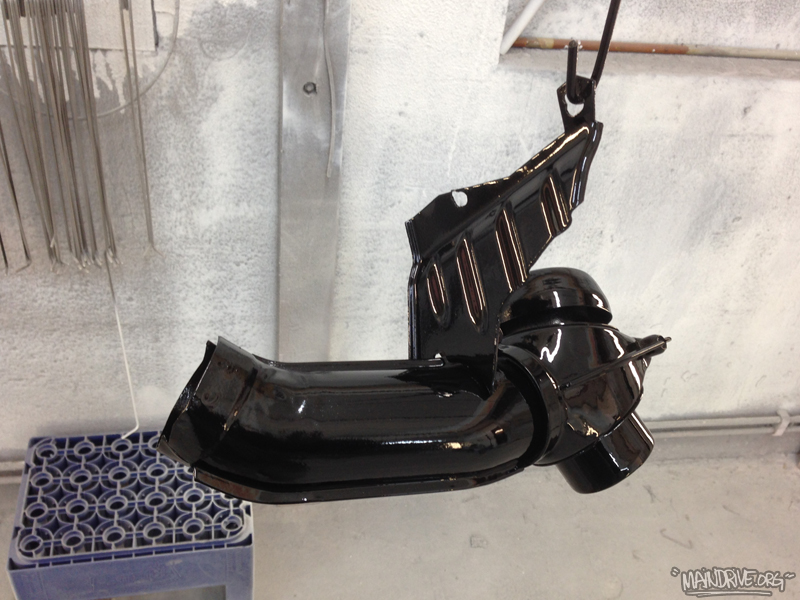
The front beam/axel have been sandblasted and painted in Deepblack paint. Also modified the servo/brakebooster bracket so a new modern Brazil Bay booster will fit on the old Bay beam. The bracket was made 30mm extra wide, because the bolt pattern is little diffrent on the new servo. Doing this you just have to pay 140euros for a new servo instead for the original 400euros(!).
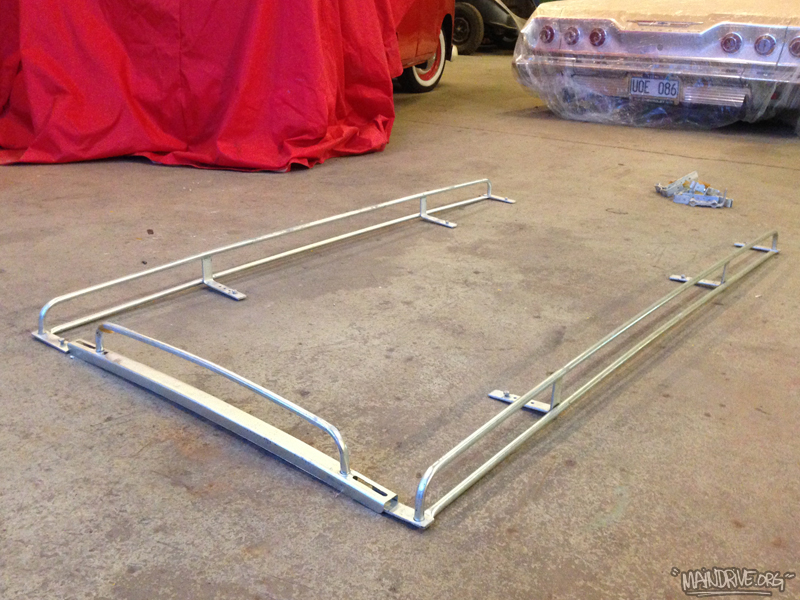
Some more progress made on the Highroof bus. More parts have been sandblasted and painted during the week. The chassi is finally painted too, after months of hard work. 2k polyurethane paint with elastic attribute. Good if you dont want to have stonechips in the paint later on. Cant wait to start bolting on all the new parts on the shiney chassi, no more dirty work! Also got a NOS 1960-70s roofrack that will get modified to fit on the highroof, perfect for the future solarpanels etc. Got a spare BA6 Eberspacher burner too, will be good to take parts from when I start the restoration of the original one. Here is the pics…
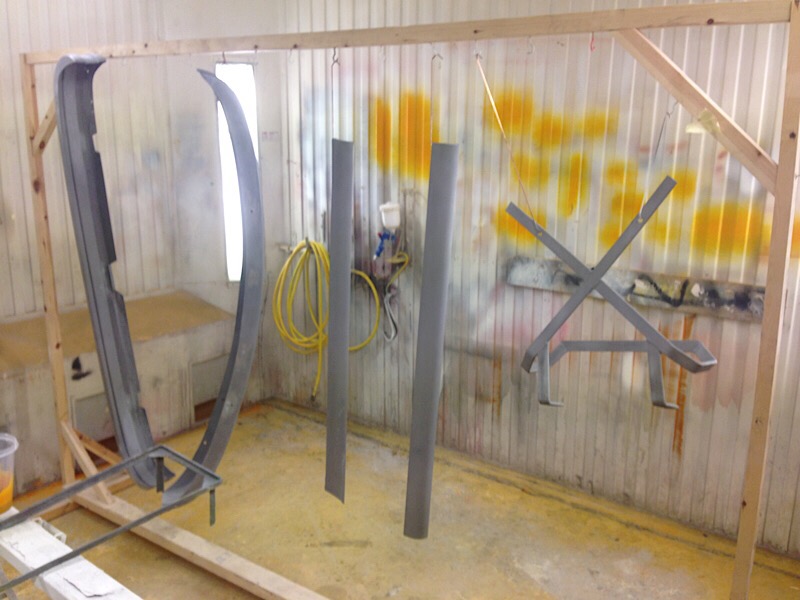
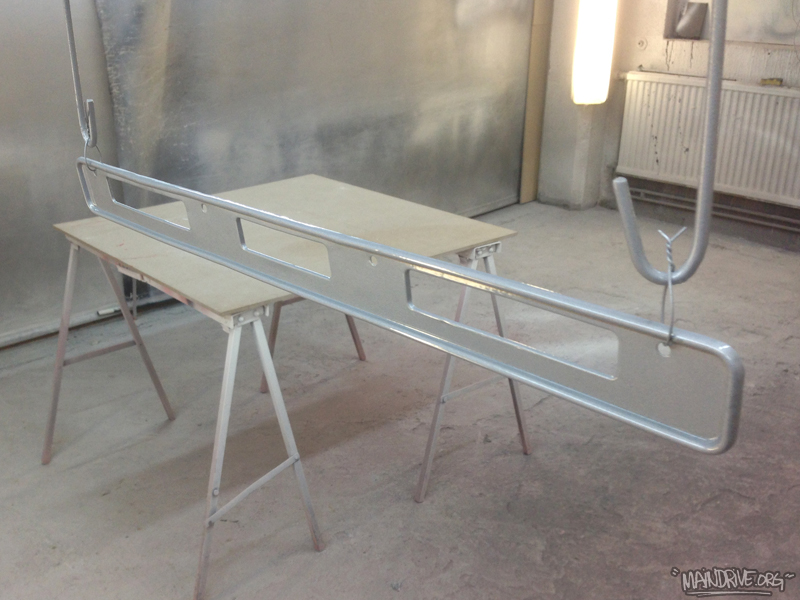
 Sandblasted and painted silver metallic. RAL9006.
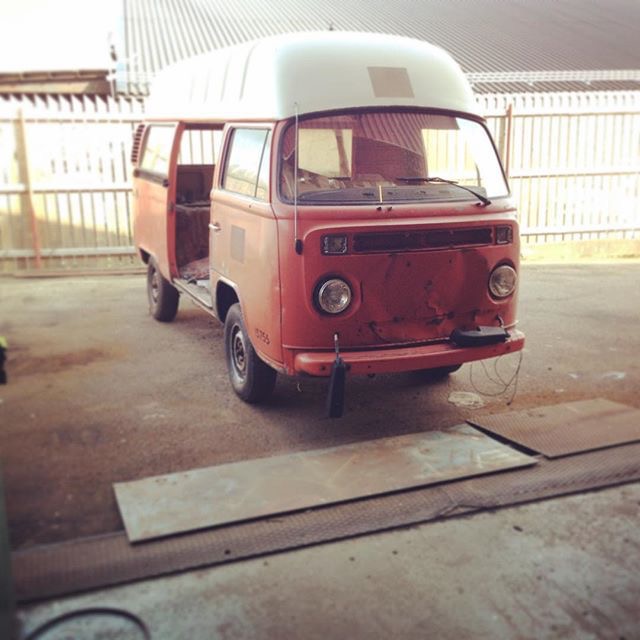
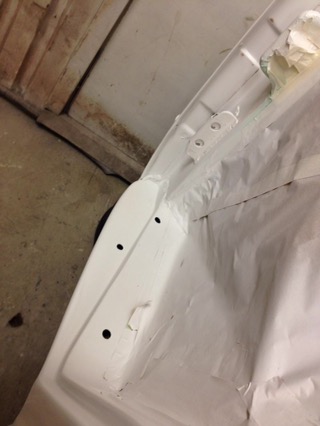
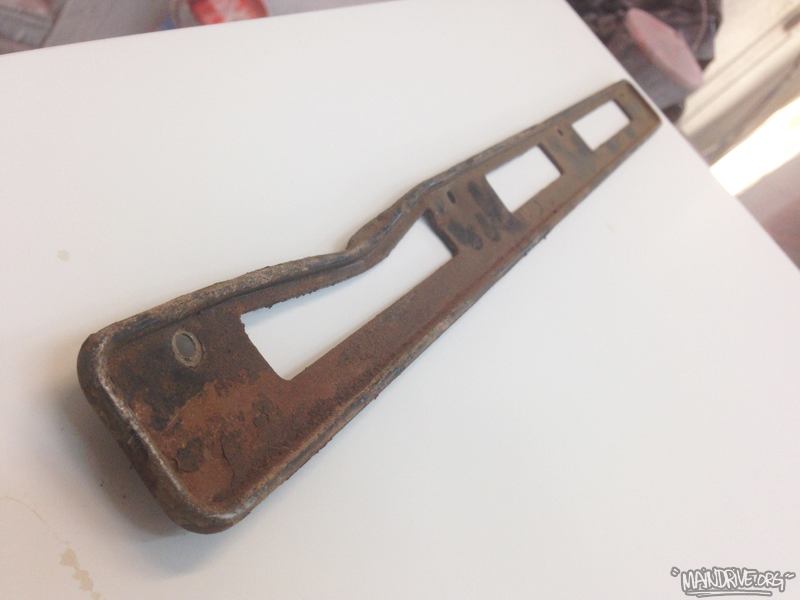 BEFORE.
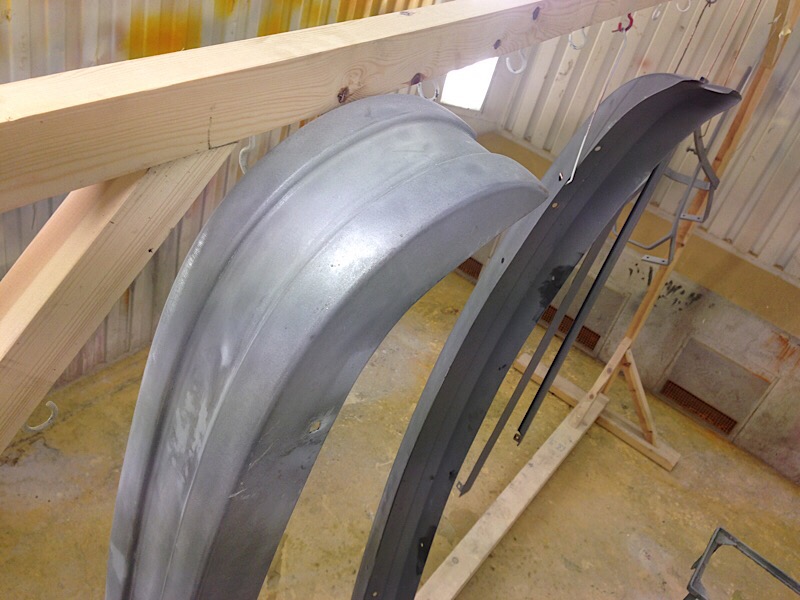
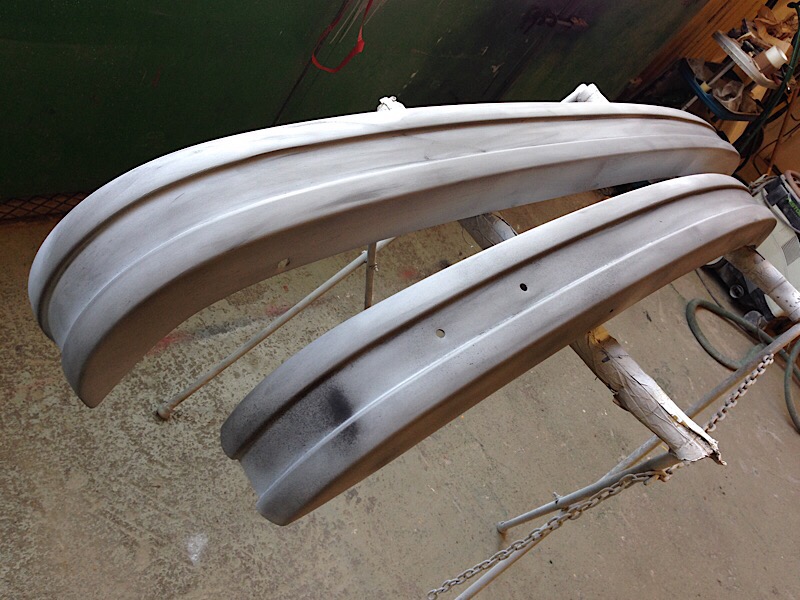
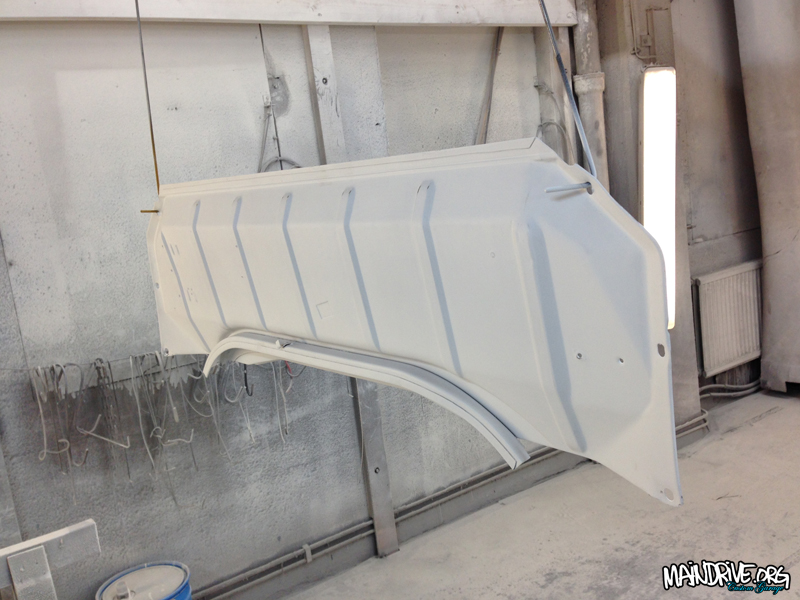
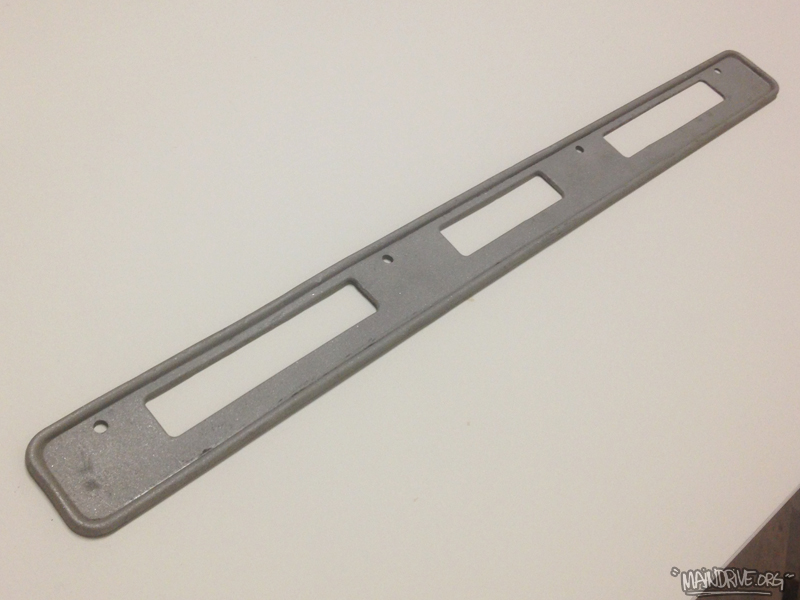 DURING. Straightned out and sandblasted baremetal
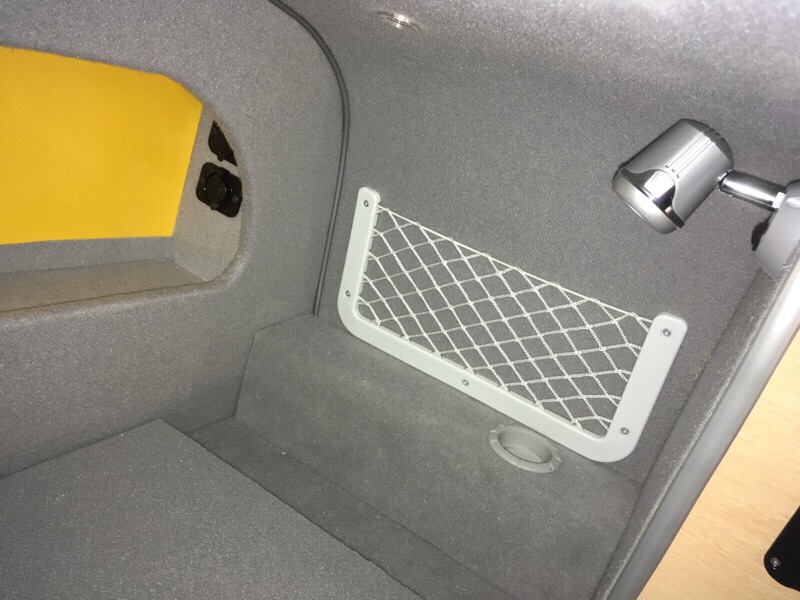
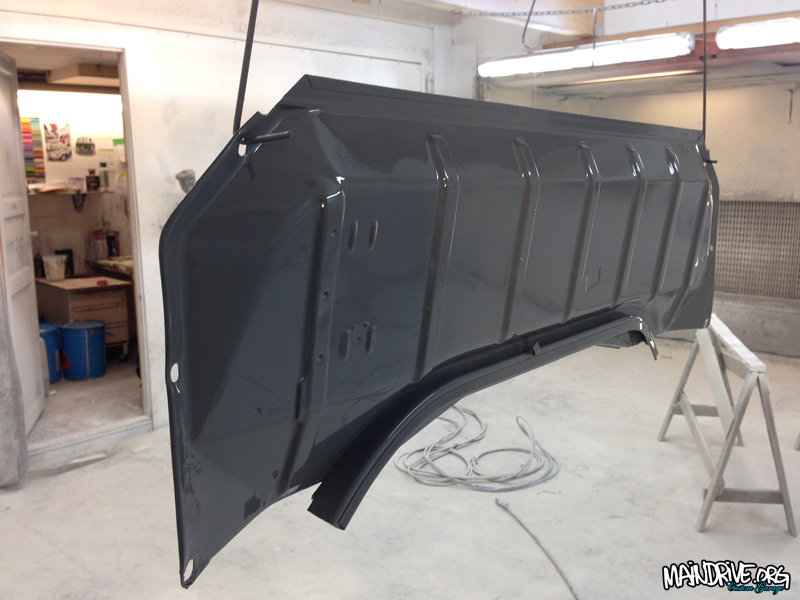
 AFTER. Painted, also made a custom mesh in stainless for it but forgot to take photo.
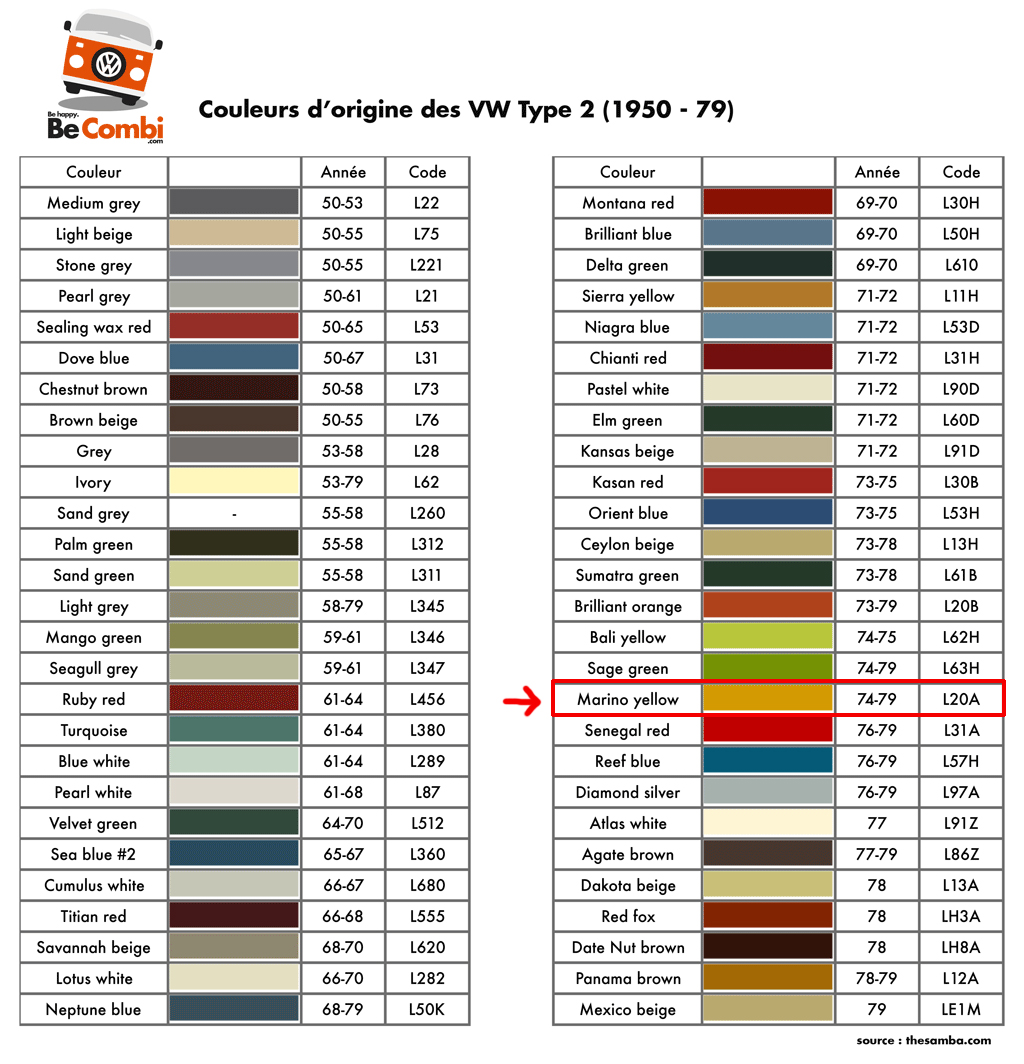
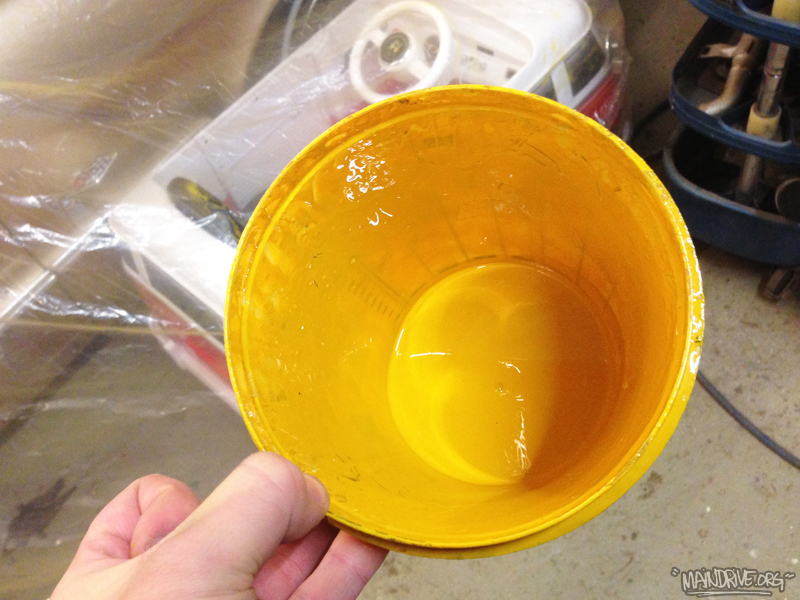 Marinoyellow VW L20A period correct.

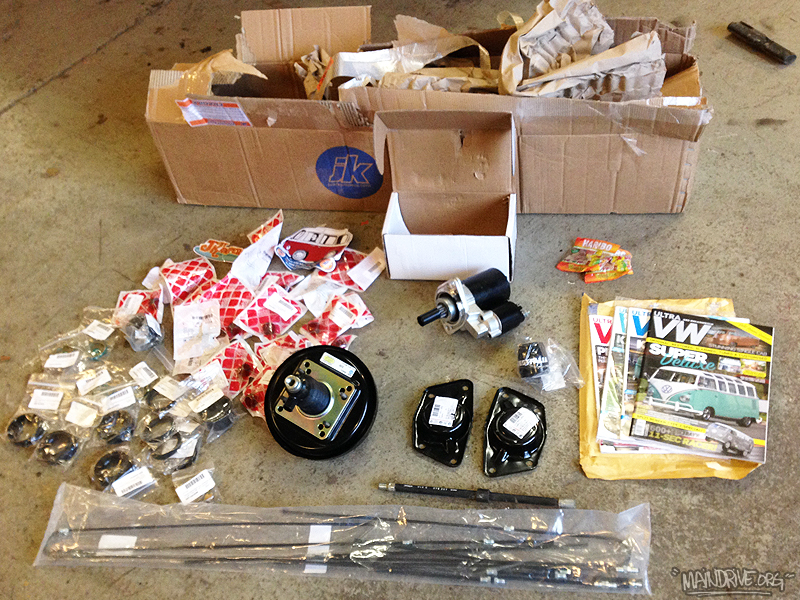
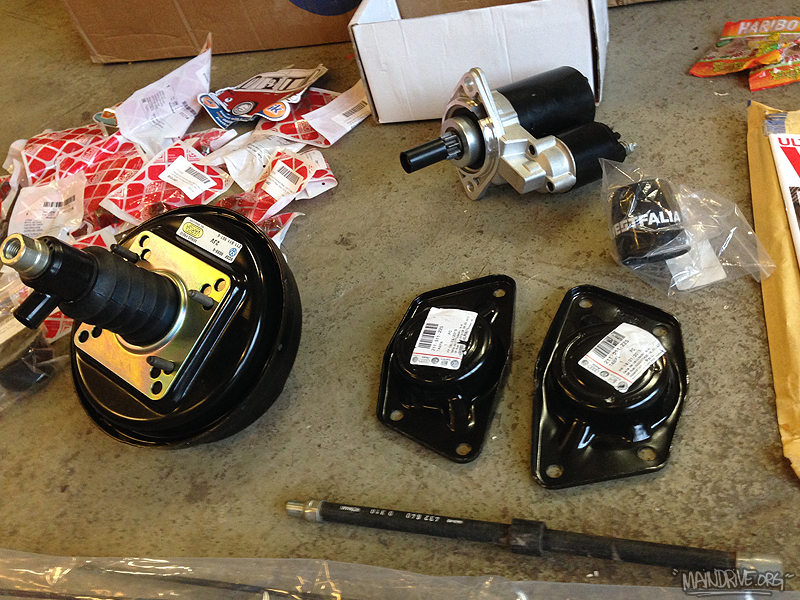
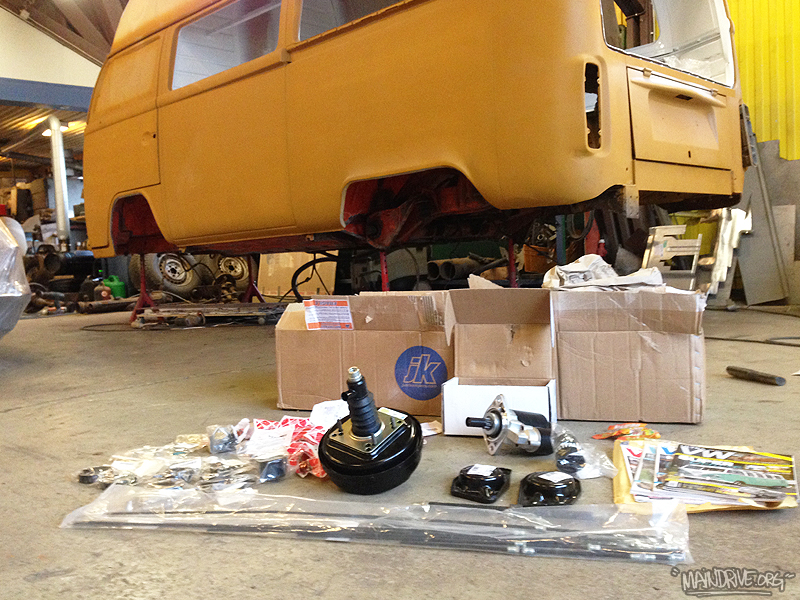
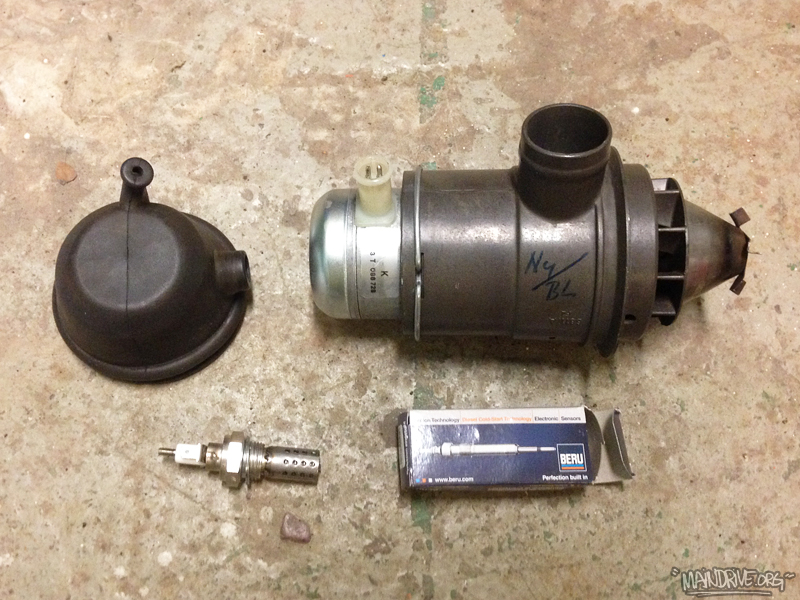
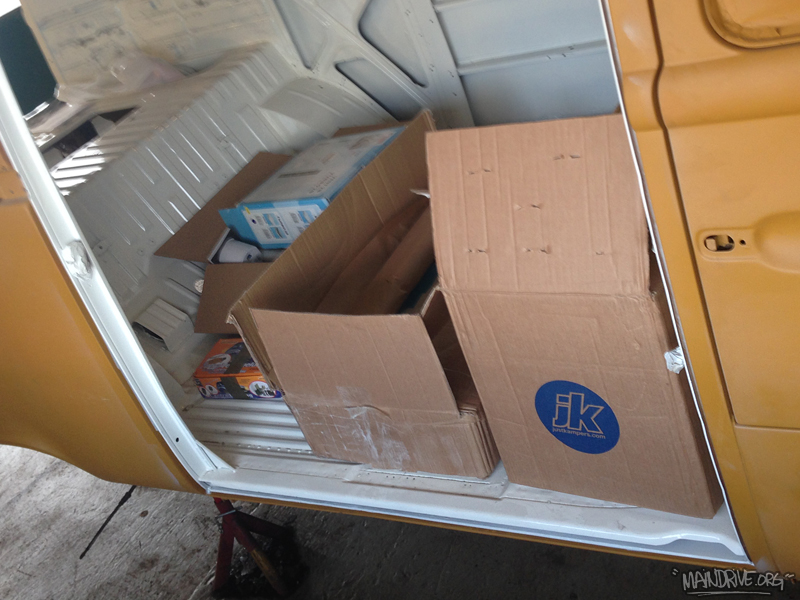
Have sandblasted alot of parts in the new cabinet, so nice to have. No need for waiting on the mediablasting company any more. Just put it in the box and go! Got a box full of new parts from Justkampers.com yesterday too. Brakeservo, starter, all brakepipes, front beam seals, 4 torsionarms with new pressed in balljoints, transmission gaskets and seals etc. Also scored a NOS Eberspächer combustion/airpump for the BA6 heater. Found a supplier in the UK of new BERU glowplugs for BA6, the GZE201 plug replaces the old (original) BZE22. Have anyone tried the new GZE201? Let me know how it worked: info@maindrive.org
Have scraped and cleaned all of the chassi during the last 2 weeks. Hope to push on further with the chassi this week and weekend and get it primered, seam sealed, undercoated and painted in body color. After that the chassi is ready to get all the new parts bolted on! More coming soon…


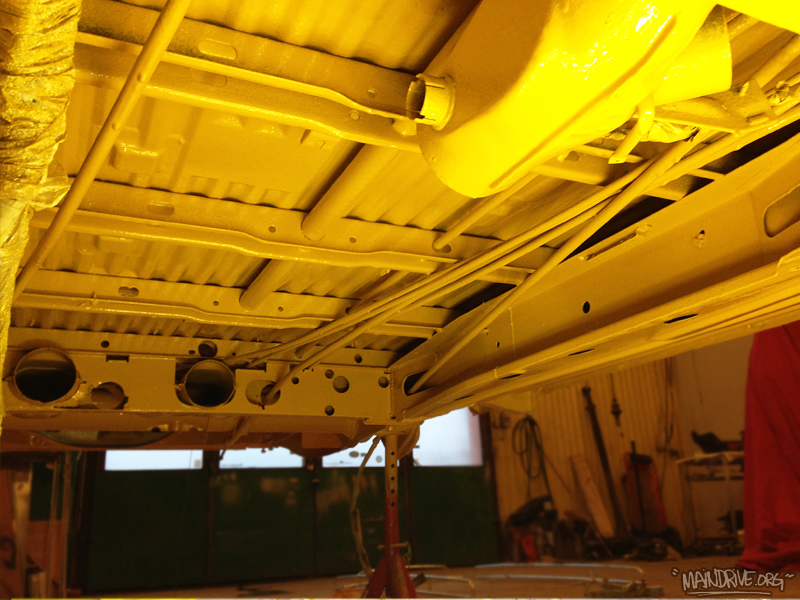
Doing some really boring work on the Highroof Baywindow at the moment. Specially when it’s -20 celsius outside. Removing all of the old undercoating. Work that takes alot of blood, sweat and tears and is not showing much later, but good to know it’s like new under also. Only going to drive it on the summers anyway. Next time I can start sanding the chassi and lay a coat of rust protection (epoxy primer). Then add a new layer of fresh undercoating, that sort thats possible to paint over. So when it have dried for some days I can paint all of the underside in top color, VW L20 Marino yellow. Ready for all the new parts, wires, hoses, grommets, bearings, bushings, balljoints, steering rods, brakelines, servobooster basicly every nut and bolt!
When the chassi is painted and ready I can start restoring the frontbeam, transmission and get the Eberspächer BA6 working again. A really good and clever heater, much better then the older BN4 ones. Will be nice on chilly mornings in the spring!
Still looking for some parts if someone have for sale? NOS parts for BA6 is intresting, like sparkplugs (BZE22) etc. Also looking for a pair of the slider rail metal covers (held with 2 screws). Engine cooling thin and heatexchangers is missing. Send me a mail on: info@maindrive.org
Chassi parts that are going to be sandblasted and painted/restored.
No more undercoating. Just some wires and tubes that needed to be removed before sanding and primer. Here you can see factory grey primer and the orange overspray from body. When I am done with this chassi it will be better and nicer than it was from factory for sure.
Color on chassi will be the same as on the body, original VW color, L20A Marino yellow. Period correct.
Can’t wait to start bolting on new parts on the painted chassi!
A short TV-serie from the UK. Traveling around in a Baywindow in Devon and all around the country. You can see them all on Youtube for free!
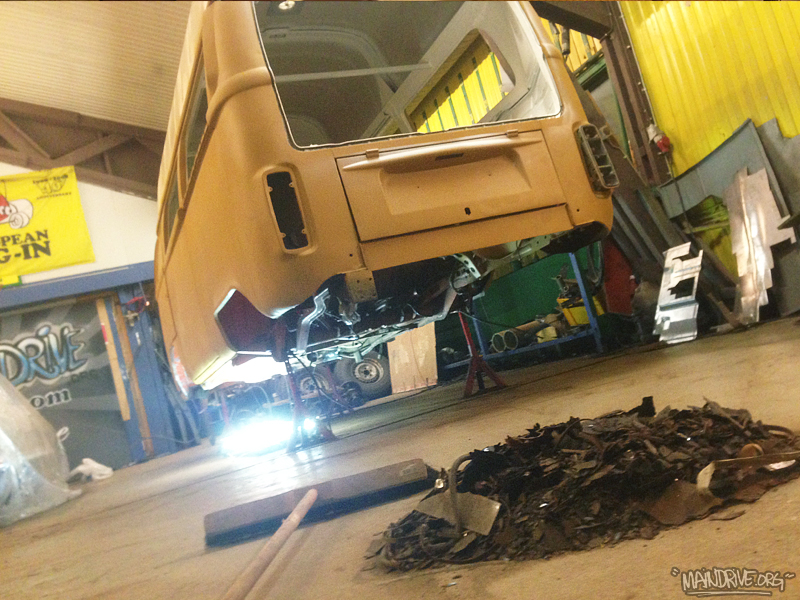
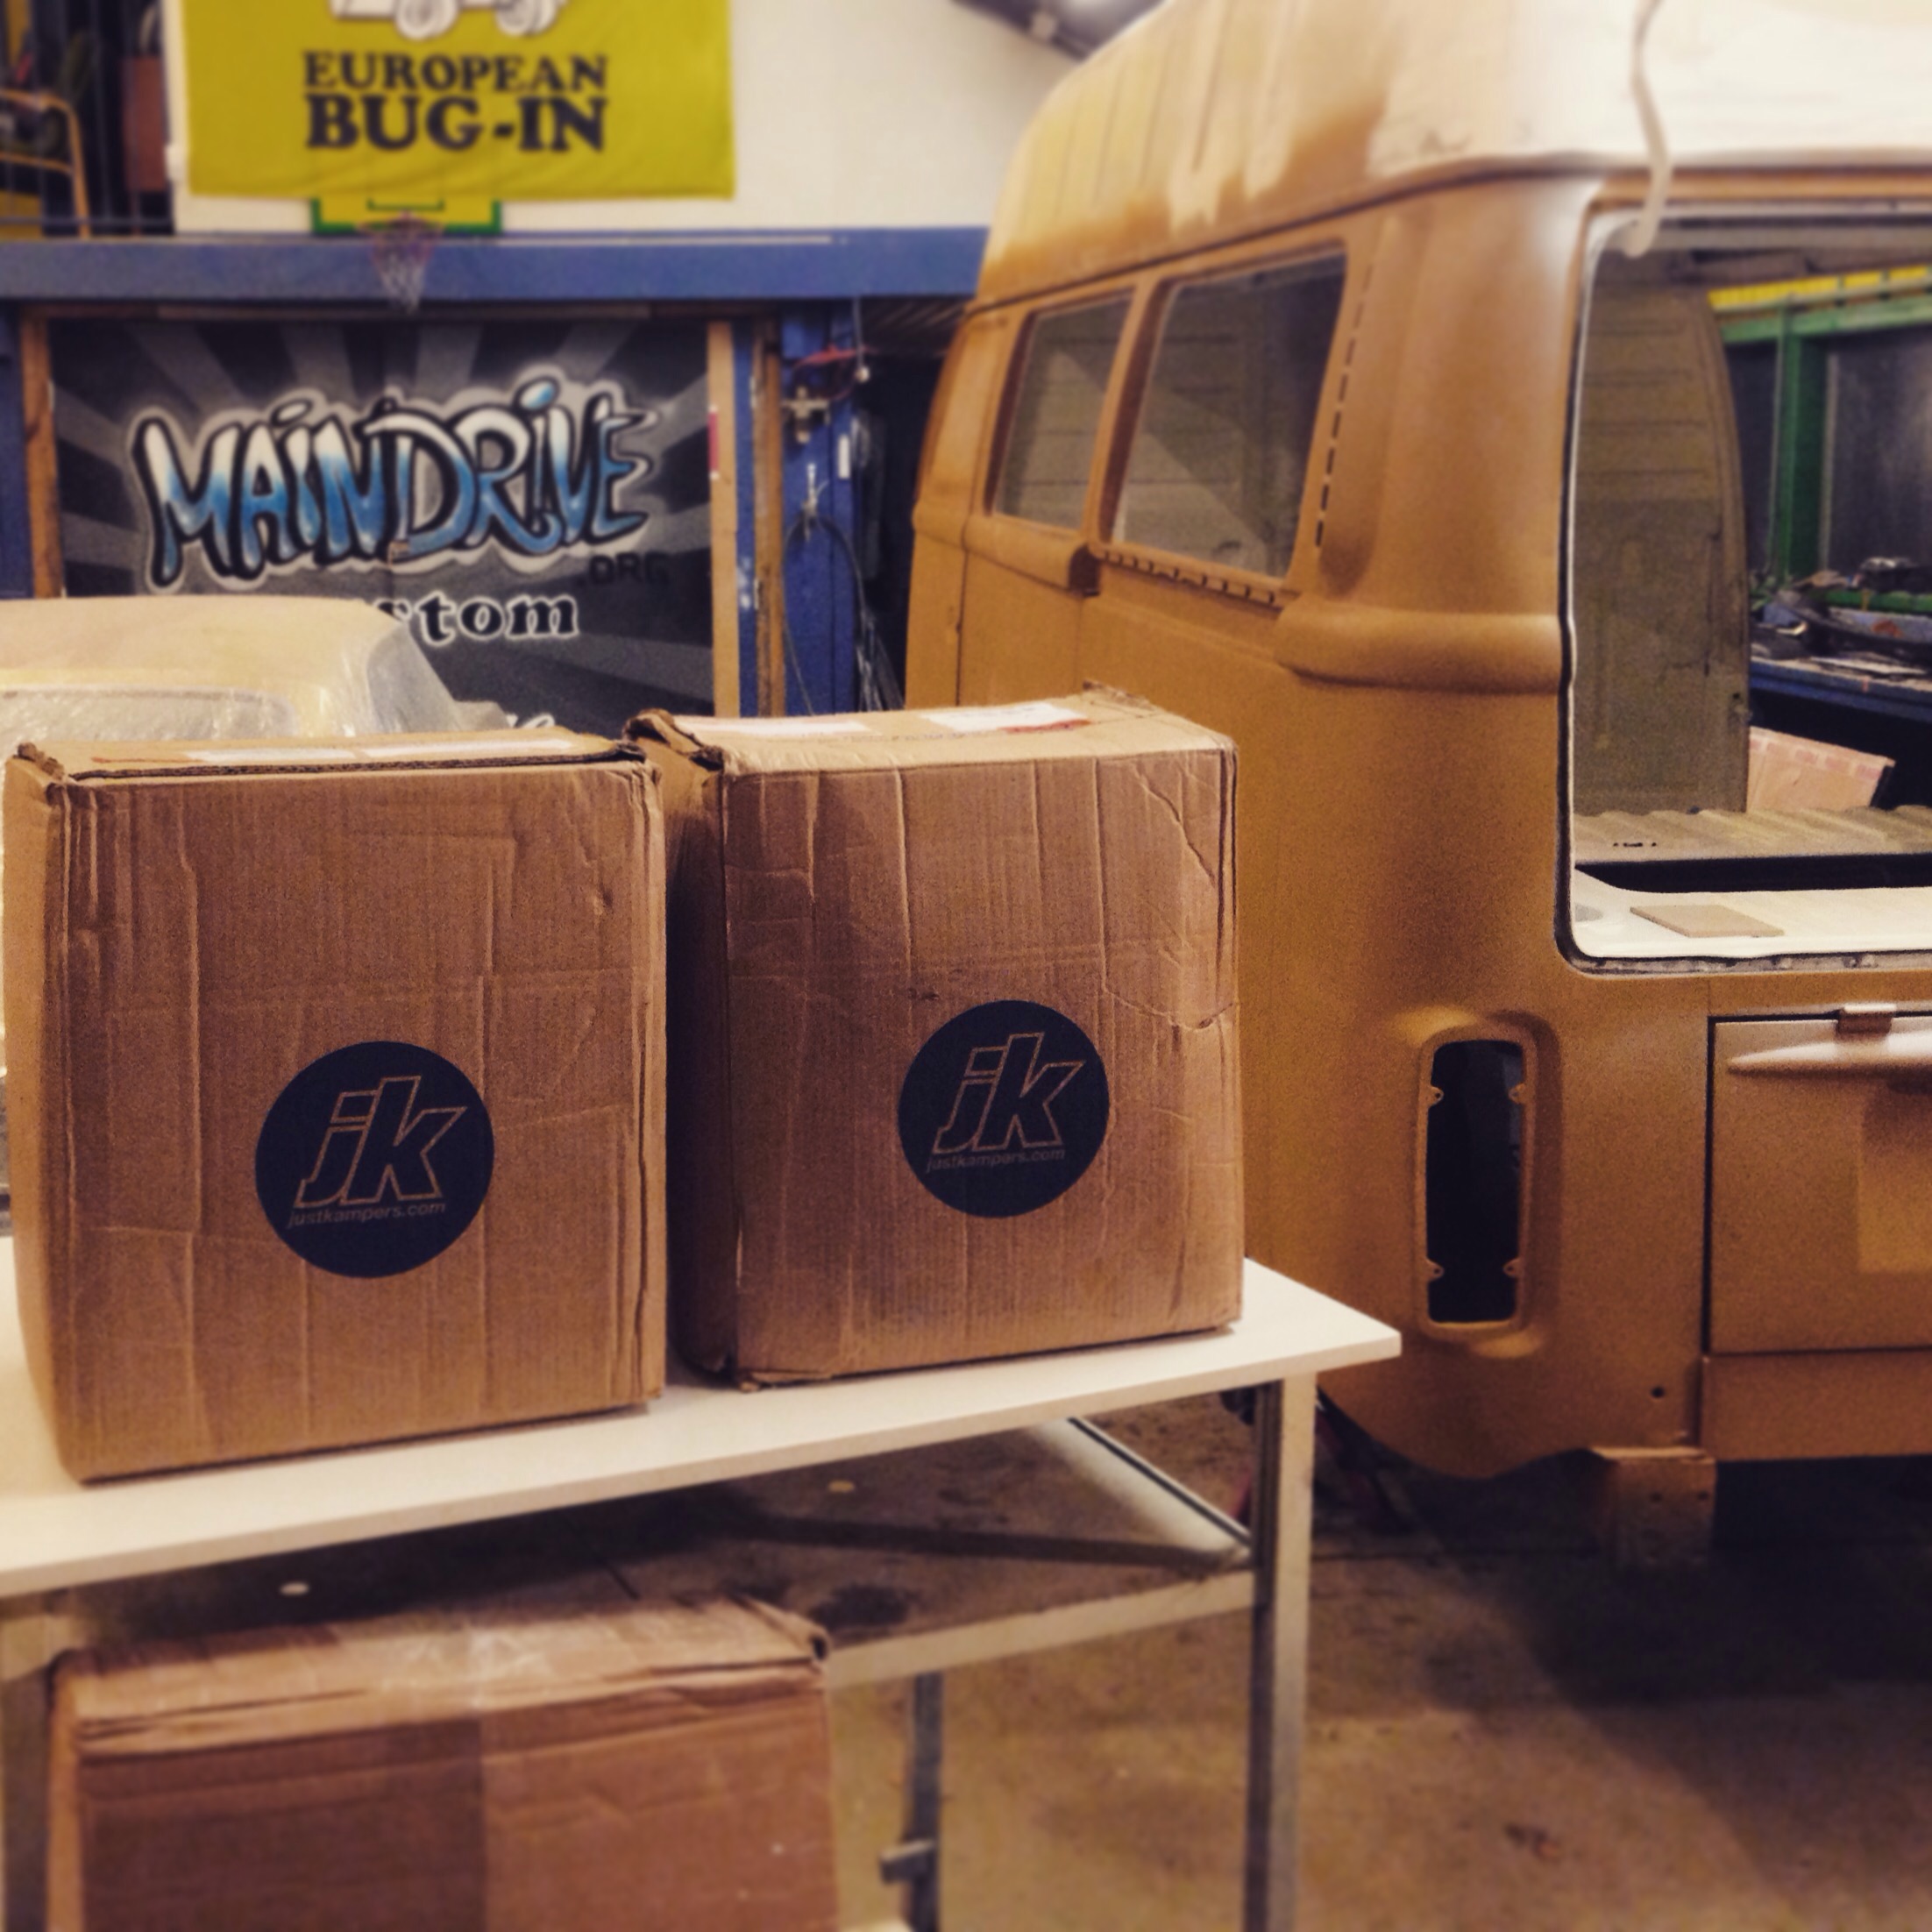
Got loads of brand new parts from Justkampers today. Wow what a quick delivery! Basicly a new bus chassi in parts. Removed front beam, torsionarms and brakes. I think every nut and bolt had to be cut, they were froozen stuck! But it dosen’t matter everything going to be replaced with new parts anyway. Need to remove all chassi parts for sandblasting and painting!
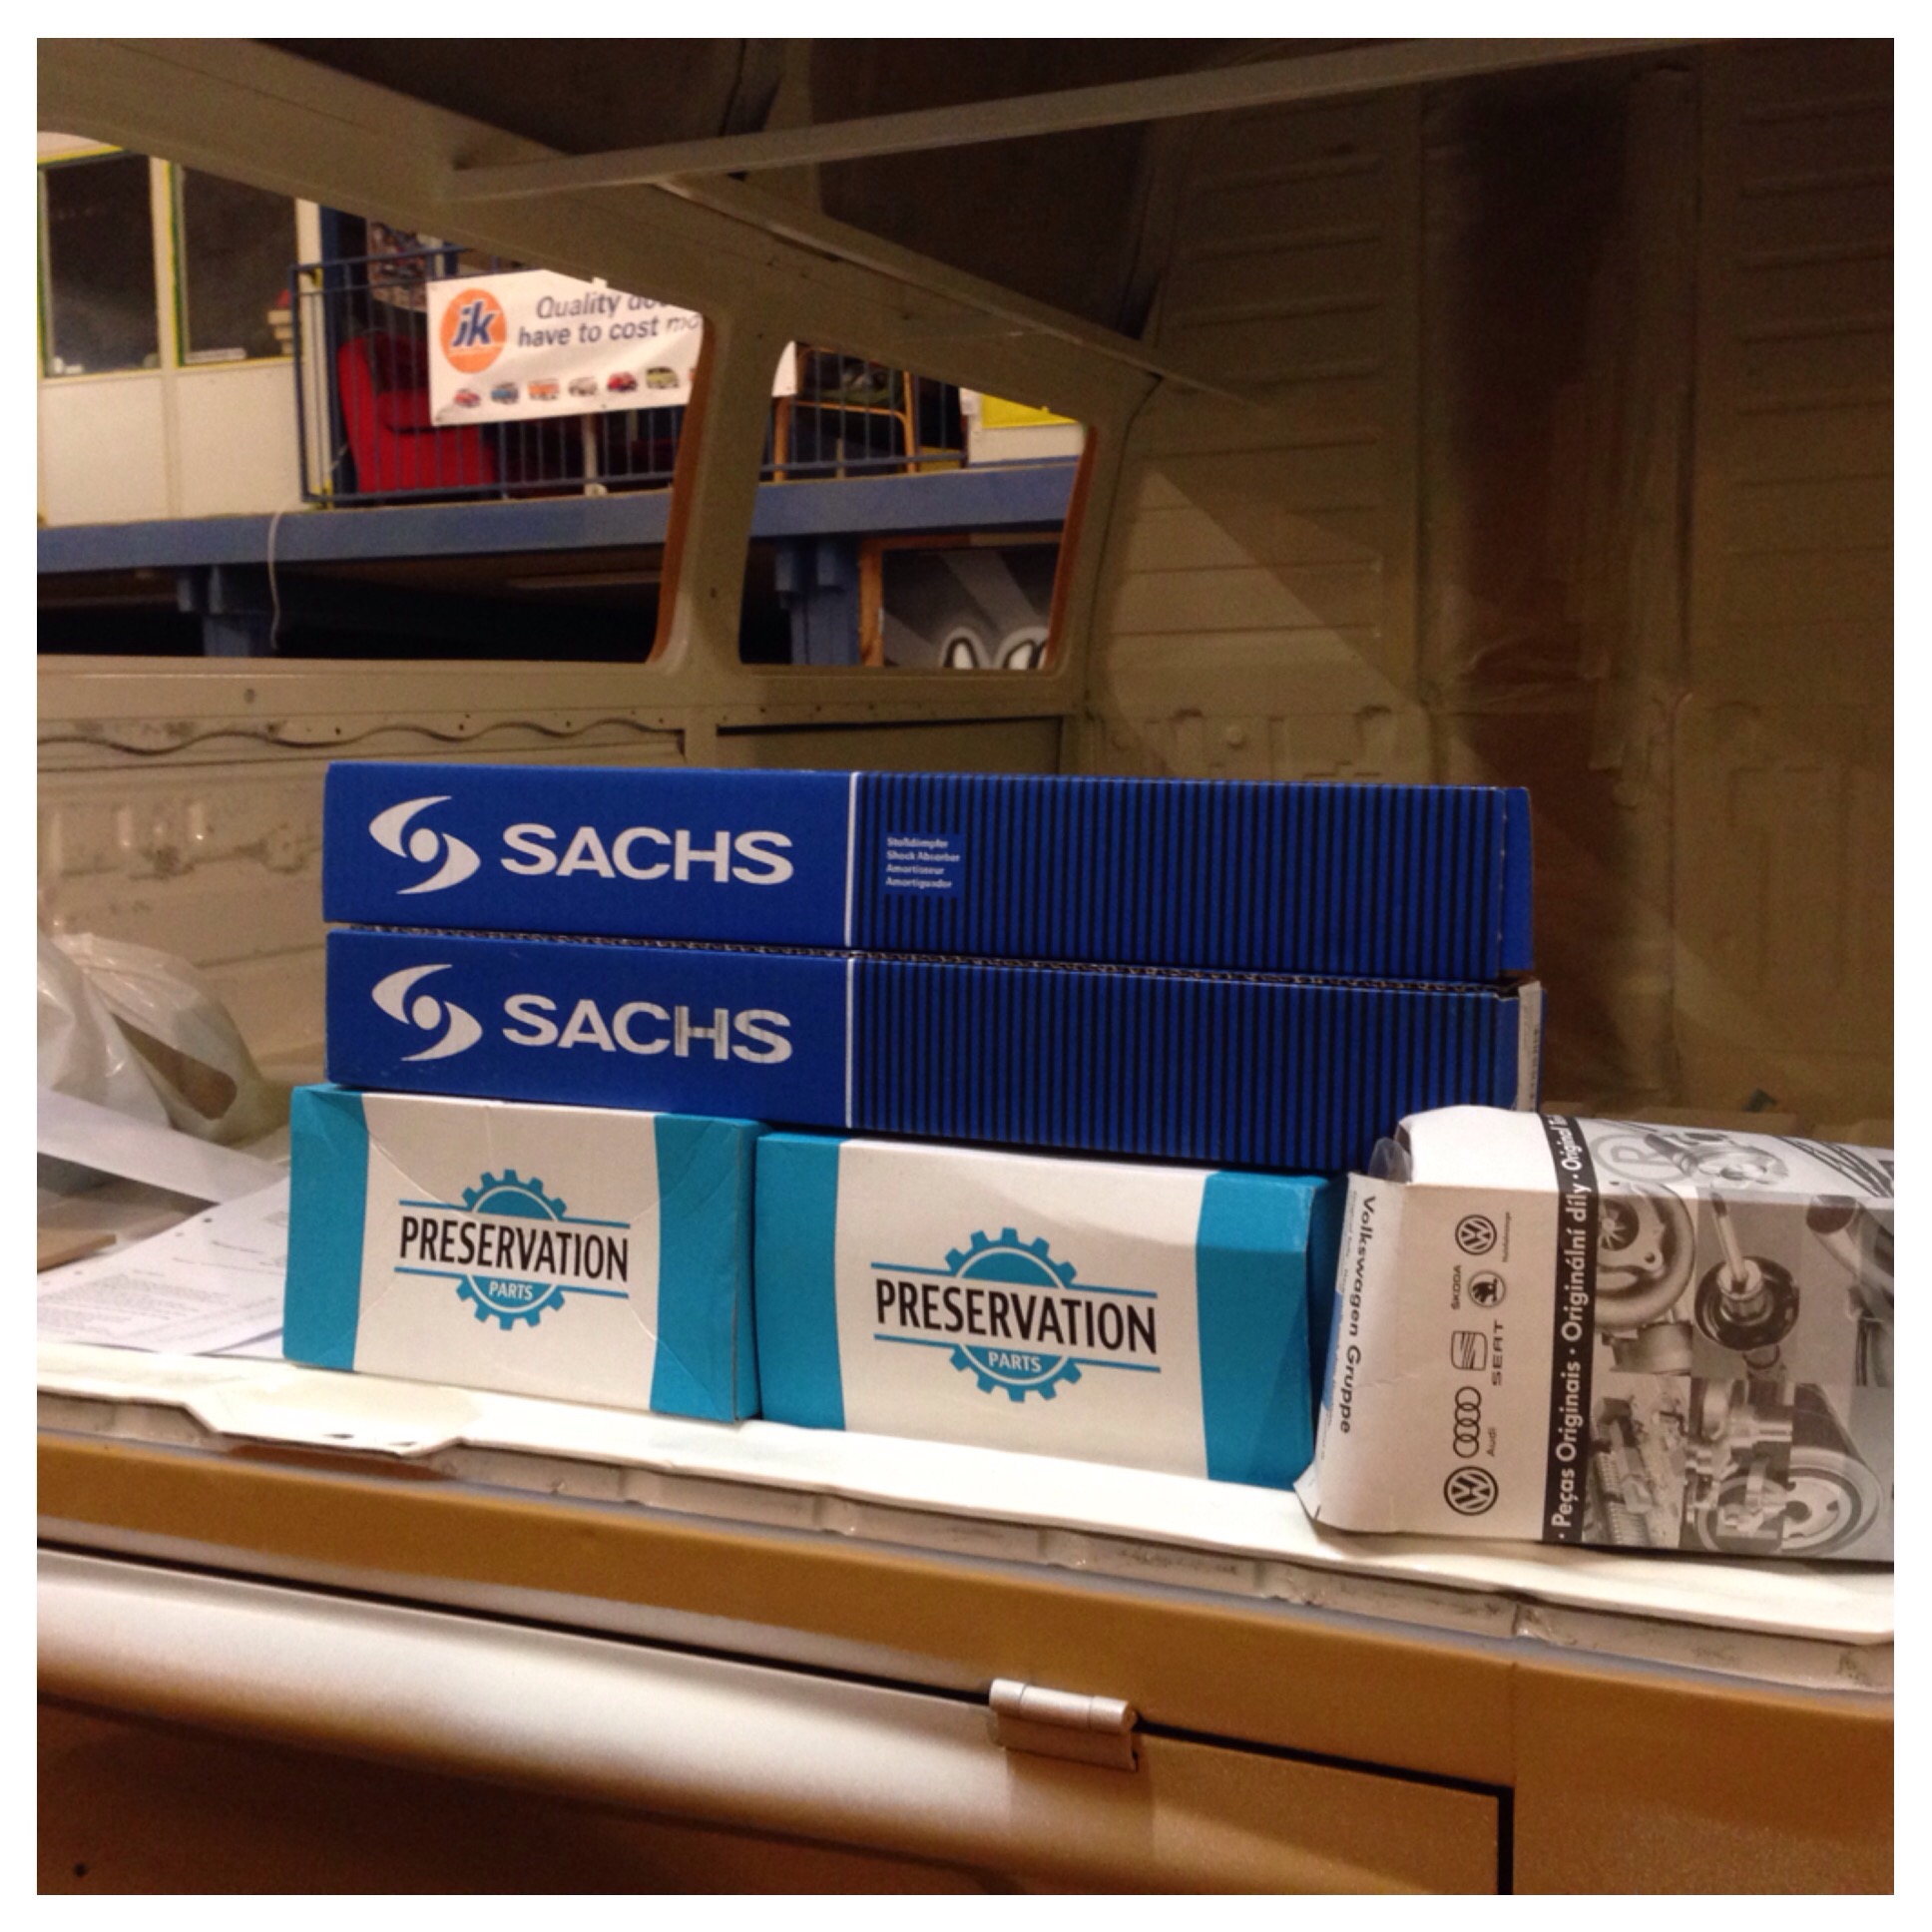

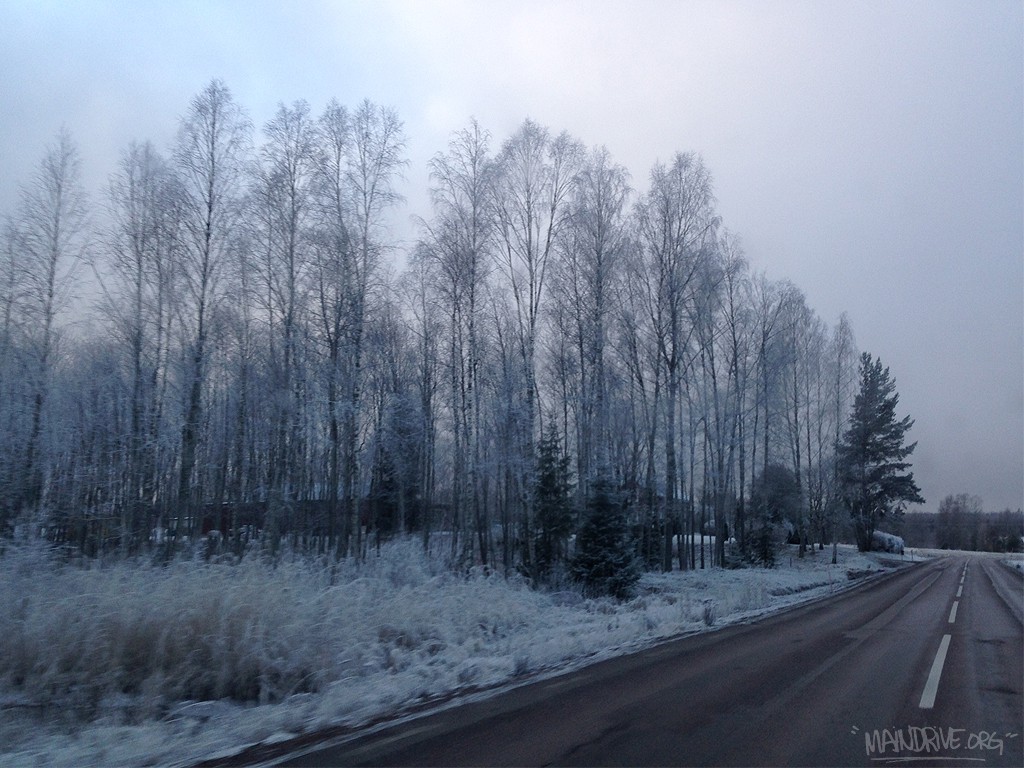
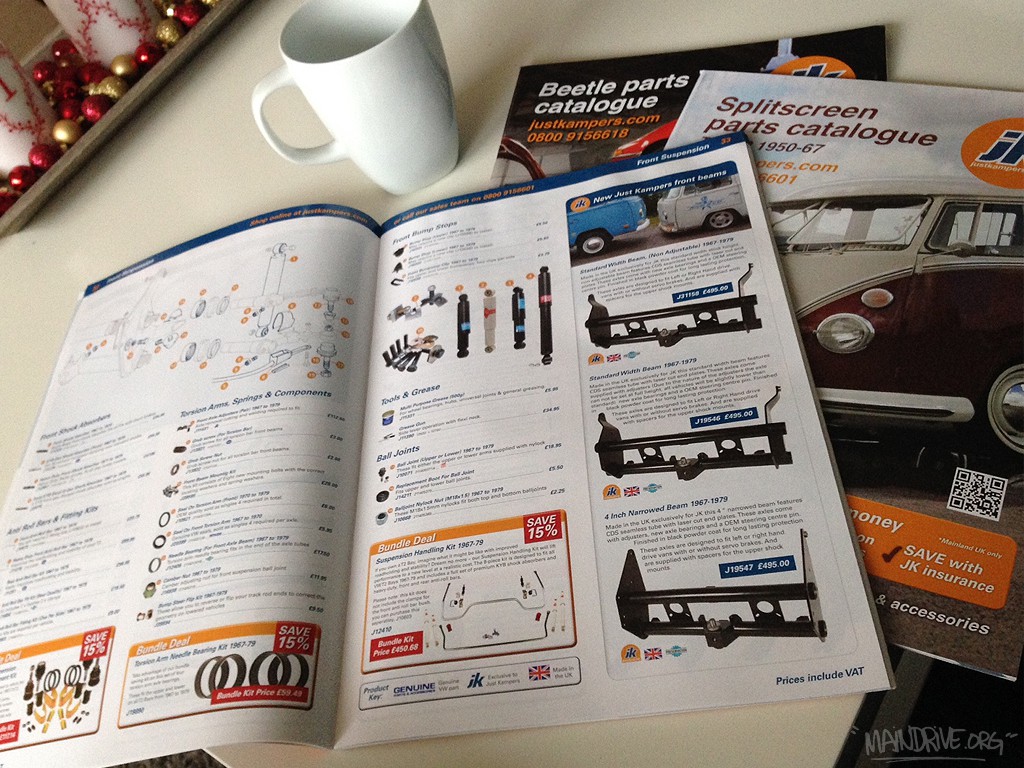
Yeah the winter season is definitely here. It’s -10 celsius (14 Farenheit) outside here in Sweden. But days like that are perfect for ordering new VW parts with a cup of coffee in the other hand. Im making a loong list of new parts for the Baywindow Highroof project and also new window rubbers etc for the VW T3 transporter. After 10 years of building VW’s I finally found a serviceminded VW part store that have great quality on their stuff too!
Im now buying all my new parts from JUSTKAMPERS instead. They are based in the UK but ships worldwide, cheap shipping prices and have the best service you will ever find from a VW shop. I can really recommend these guys, take a look at their website here!
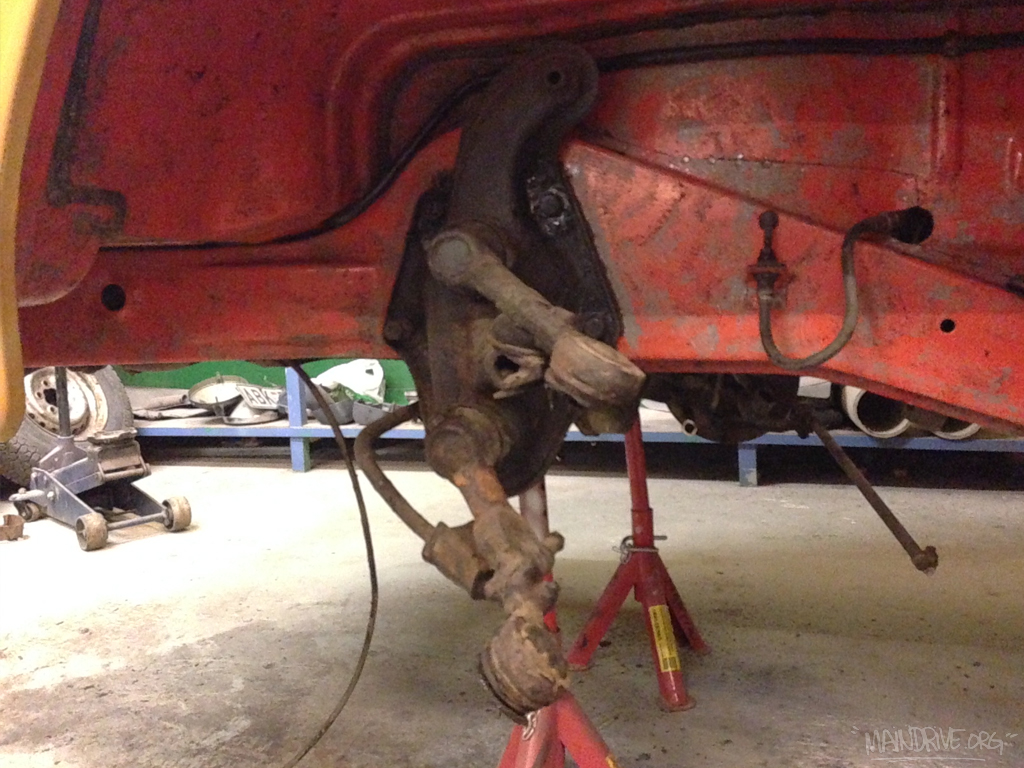
I also got some stuff done on the Highroof, removed all brakes, masterbrakecylinder, booster, steeringrods etc front beam soon ready to get dropped down and put on the table for some restoration (new needle bearings, balljoints, bumpstops, kingpin bushings etc). Hope to get started on the metalwork on Benny’s T3 soon also…

Stephan’s Baywindow have come a long way. Painted in primer tonight. The 2.0L engine have been overhauled as well and is soon ready to be installed. Question is; what color is it going to be?
The engine bay was blasted out during the week and tonight it was time to paint it all in 2K epoxy primer/sealer for rust protection. Looks clean already!