The sliding door handle on my 1983 VW T3 bus have been very hard to move/open the last 2 years and now it finally gave up and wouldn’t open the door anymore. But inside still worked fine. I thought first the wire inside the door had jumped off, but it was a lot worse!!
But was cheap and easy to repair, took me about 1 hour and the door is like new now! Time well spent!
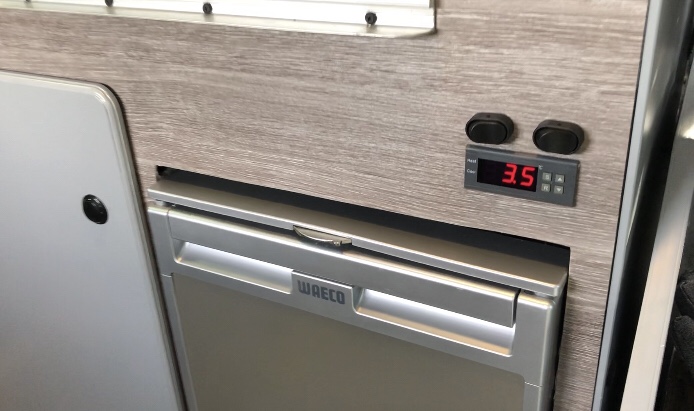
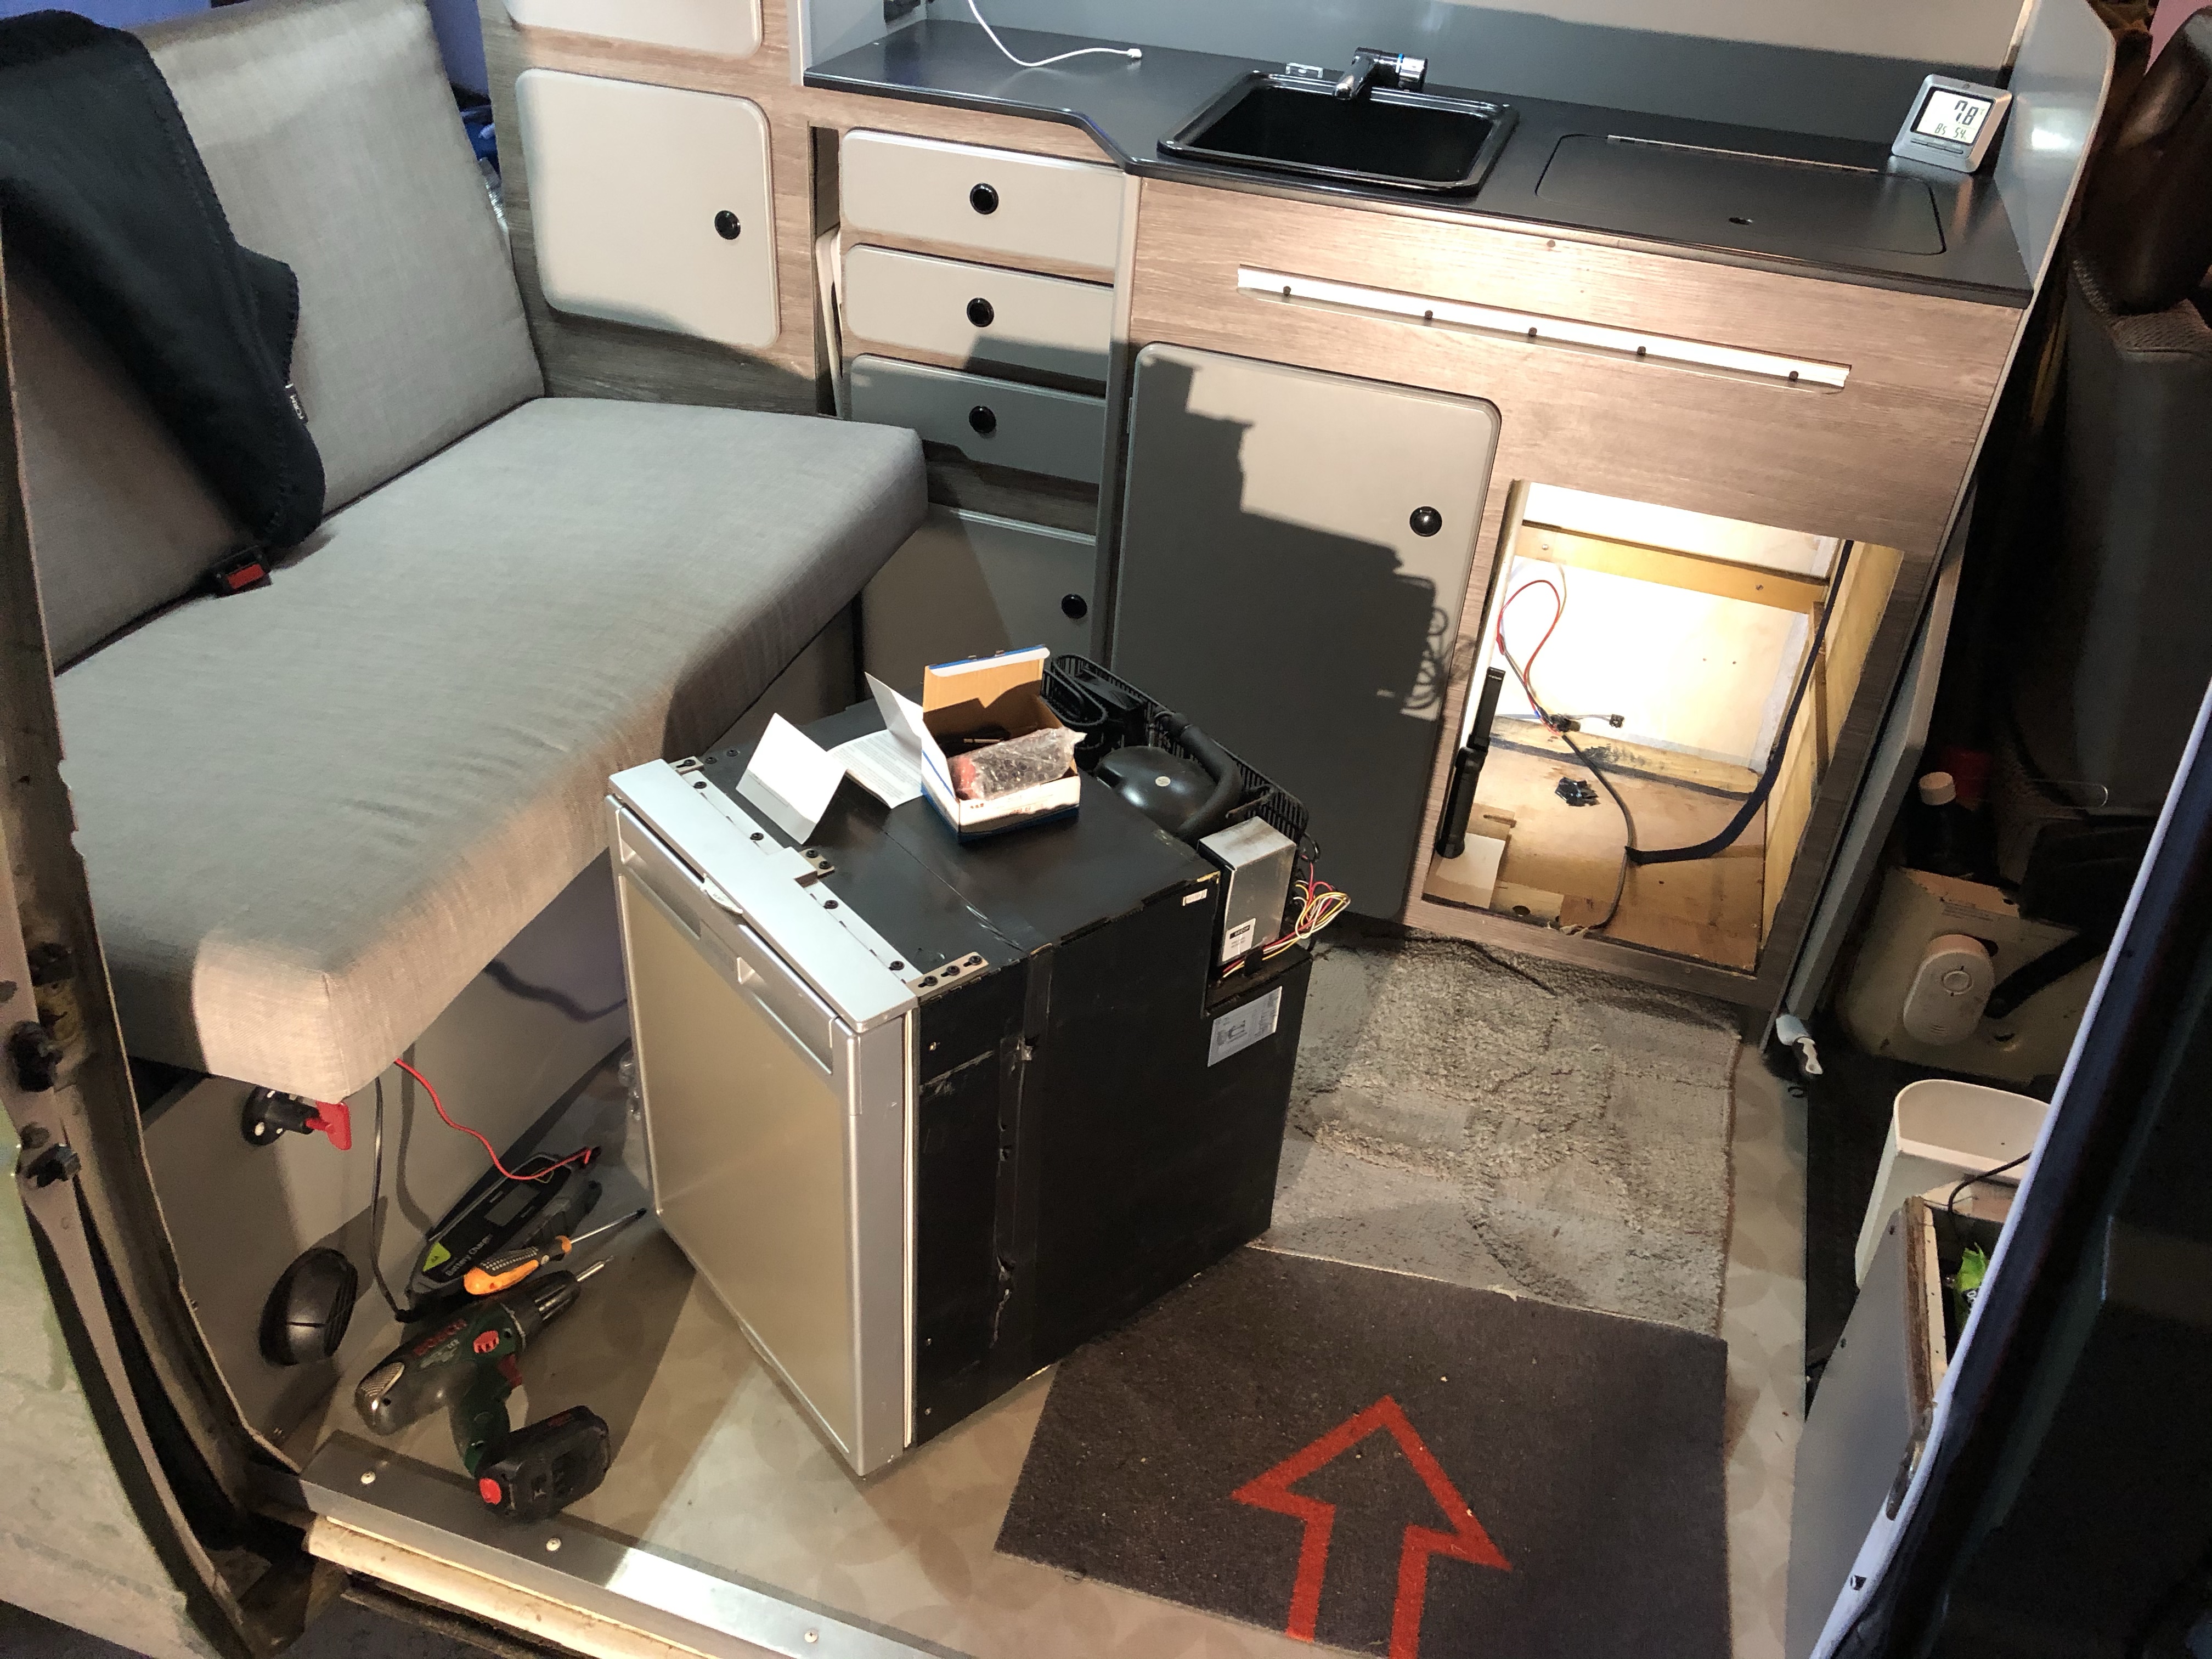
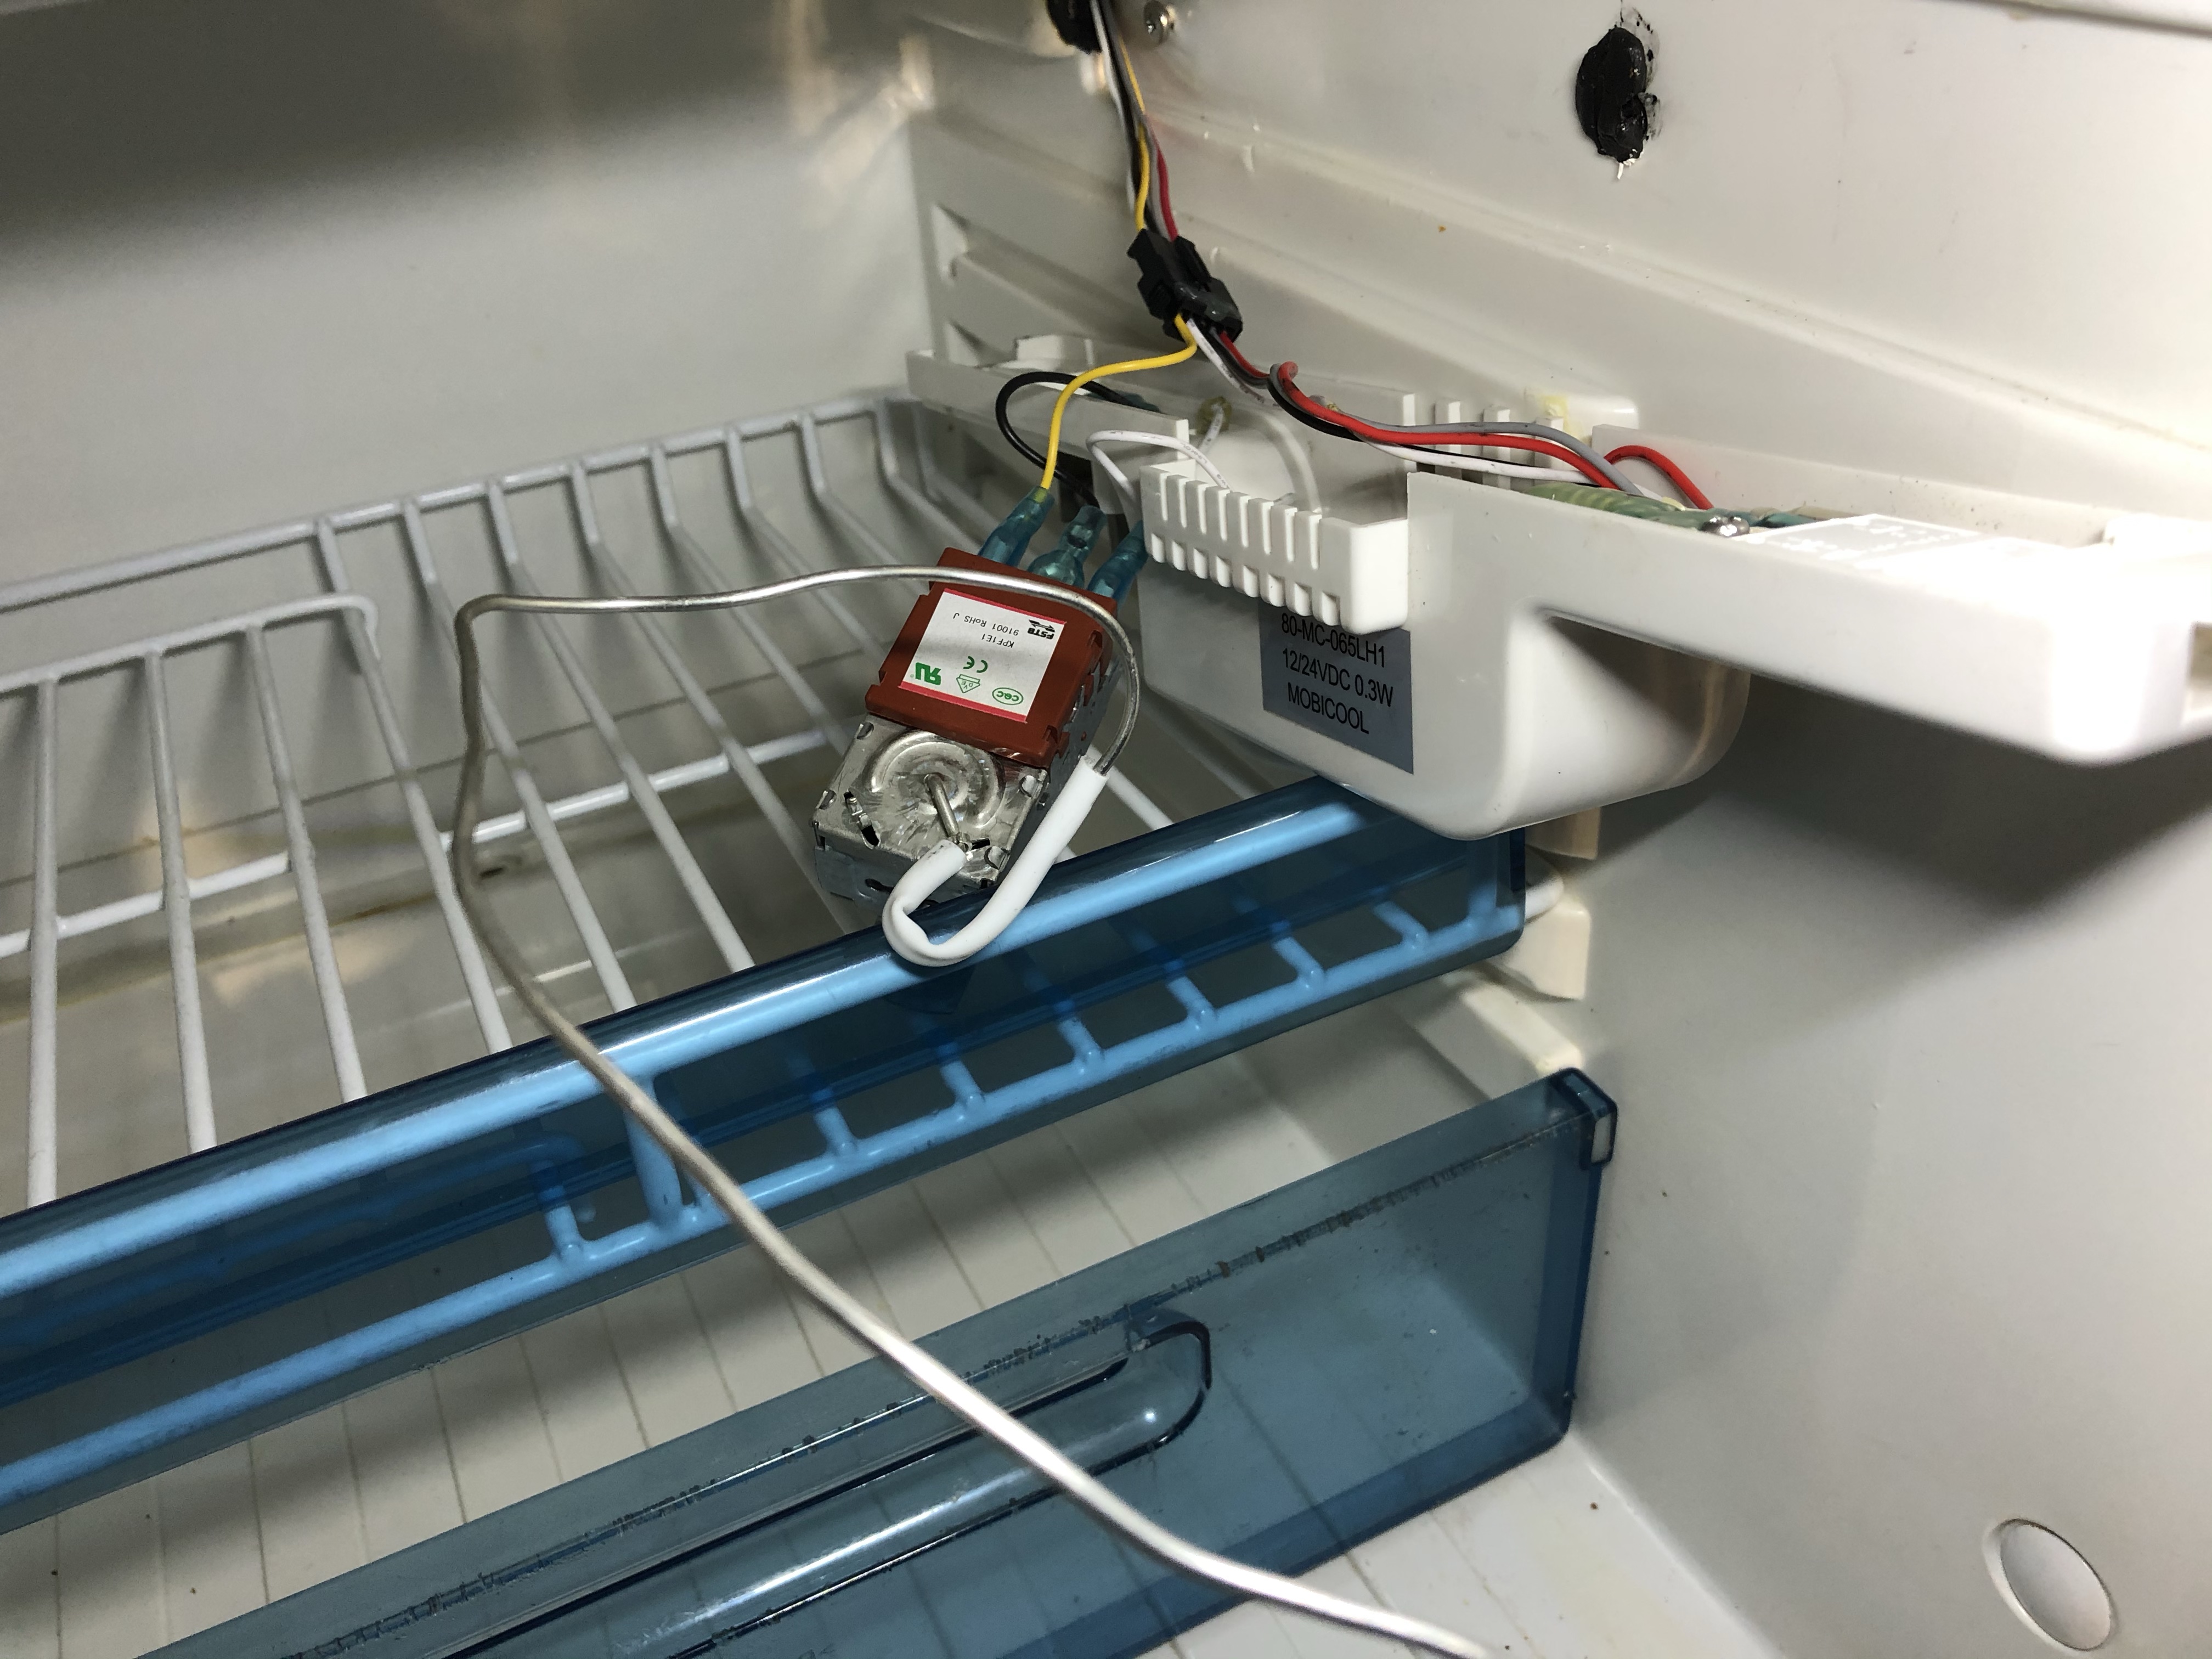
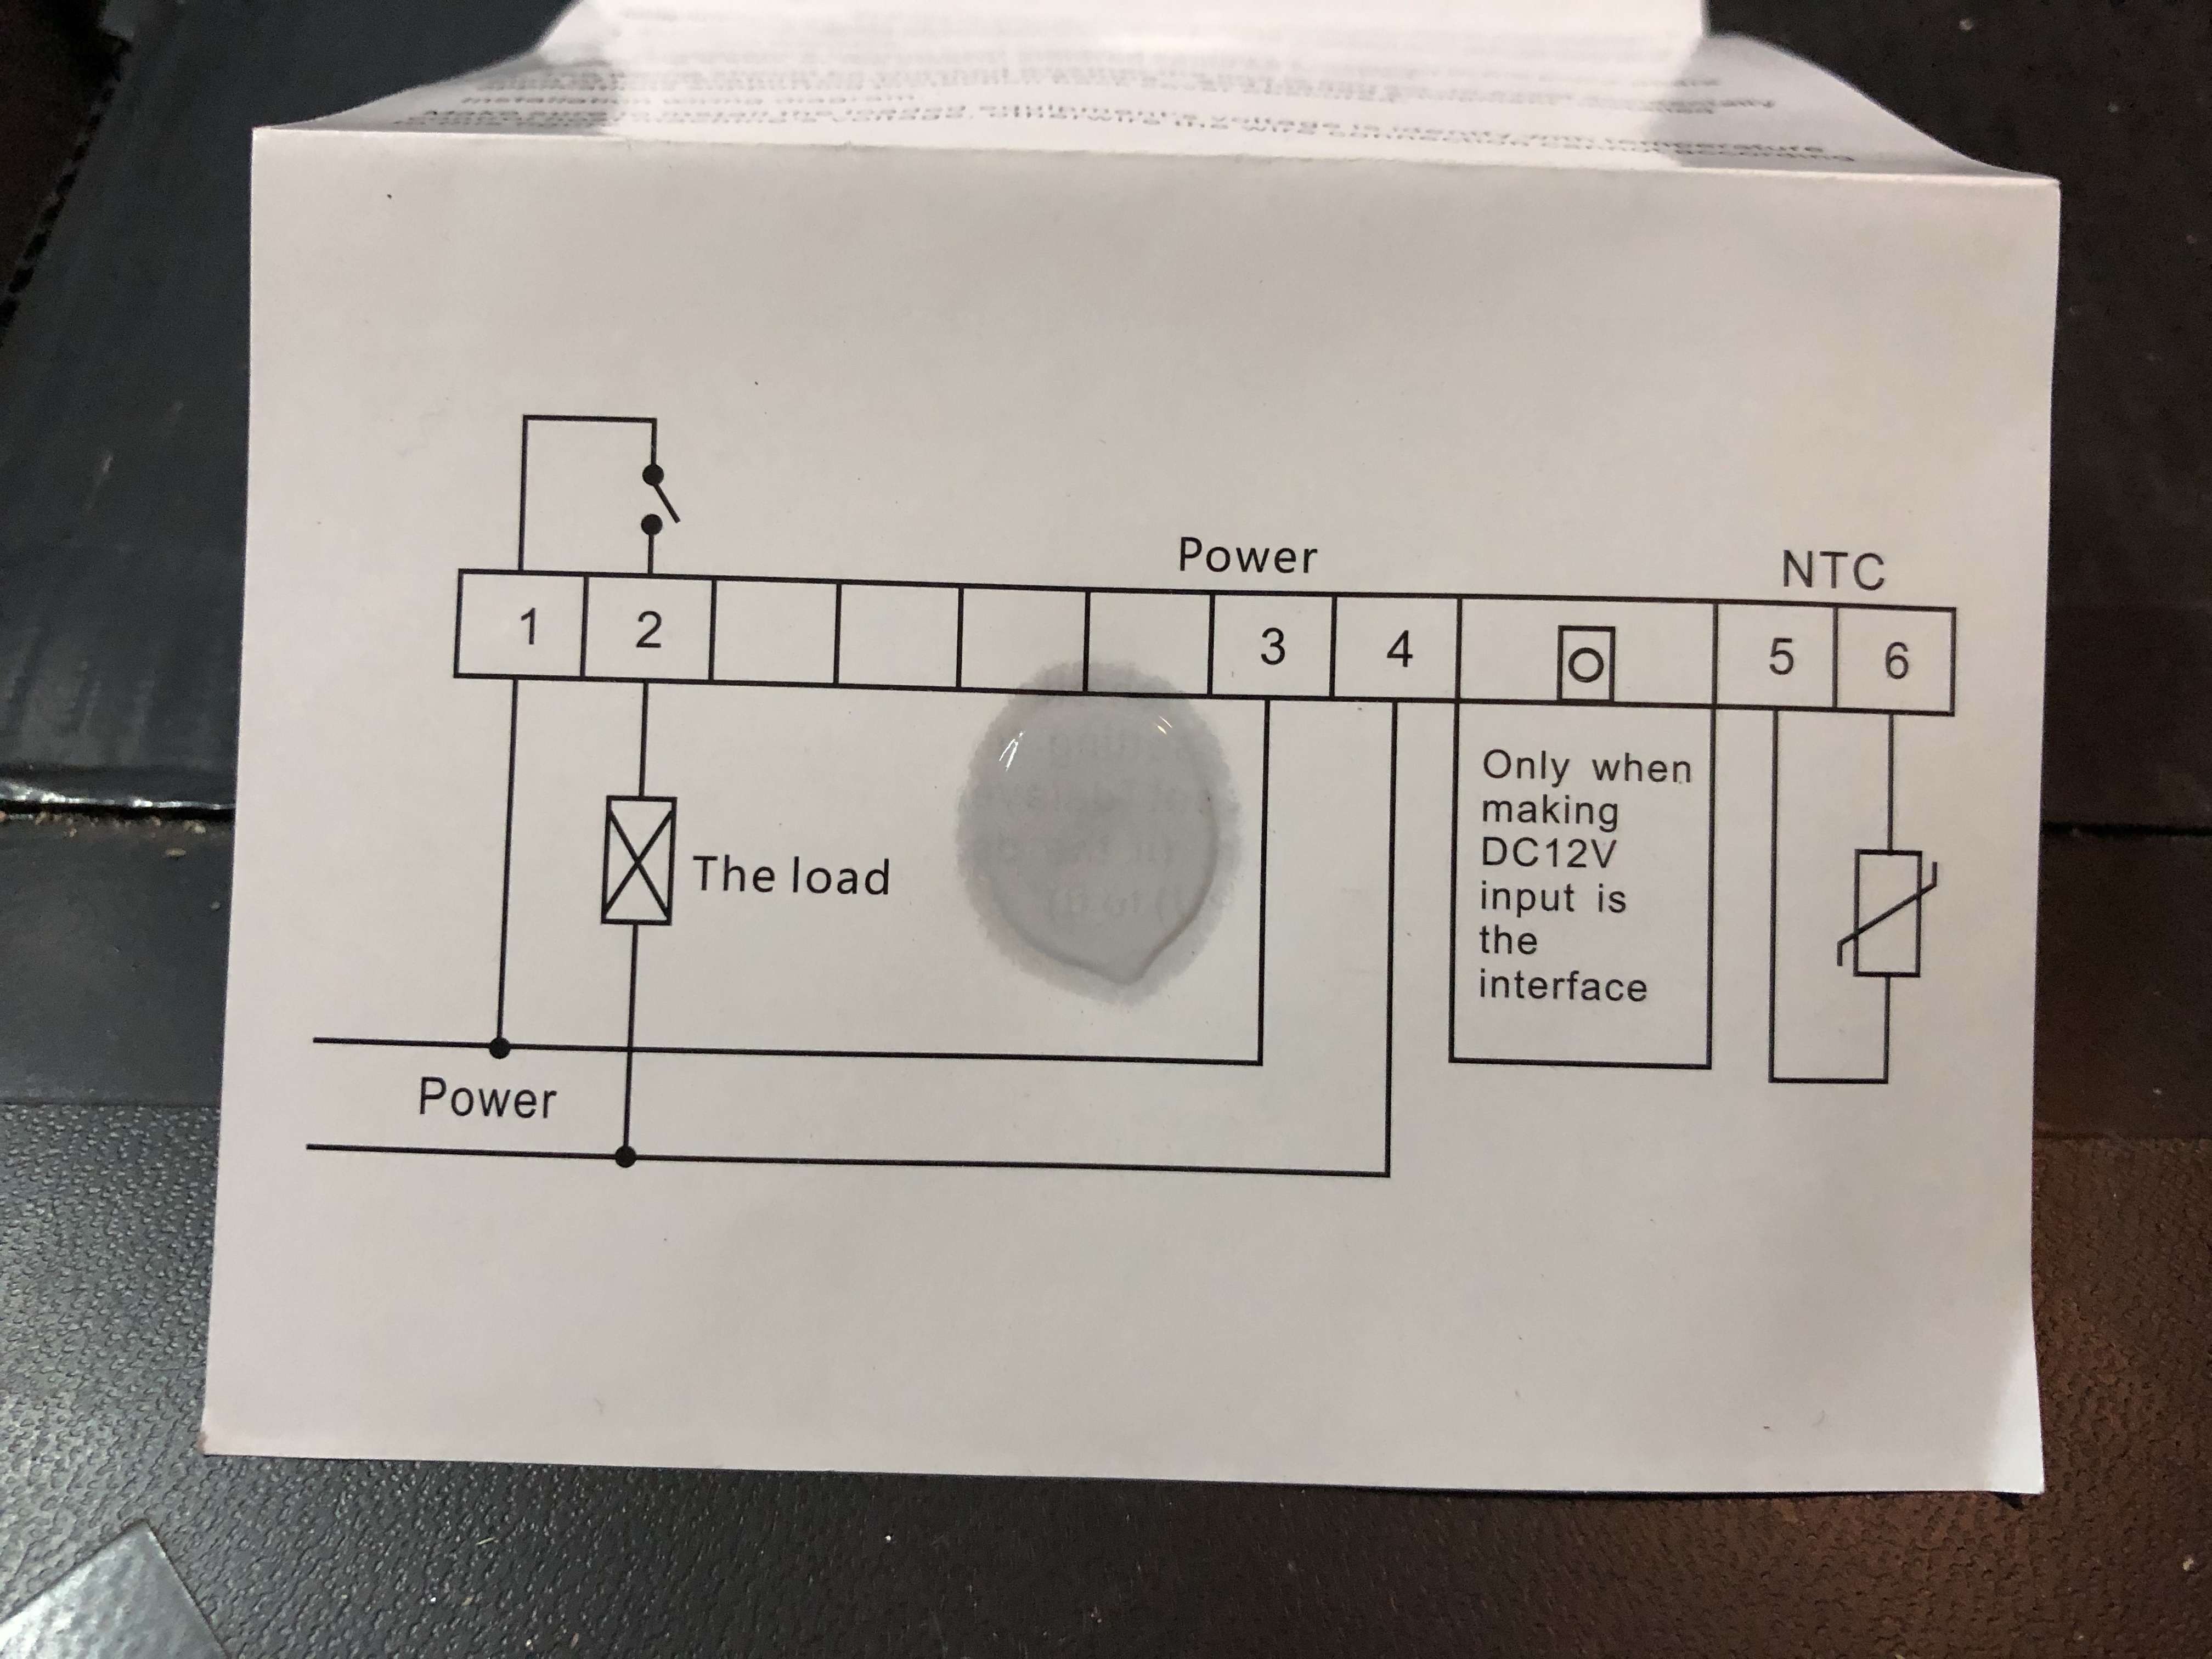
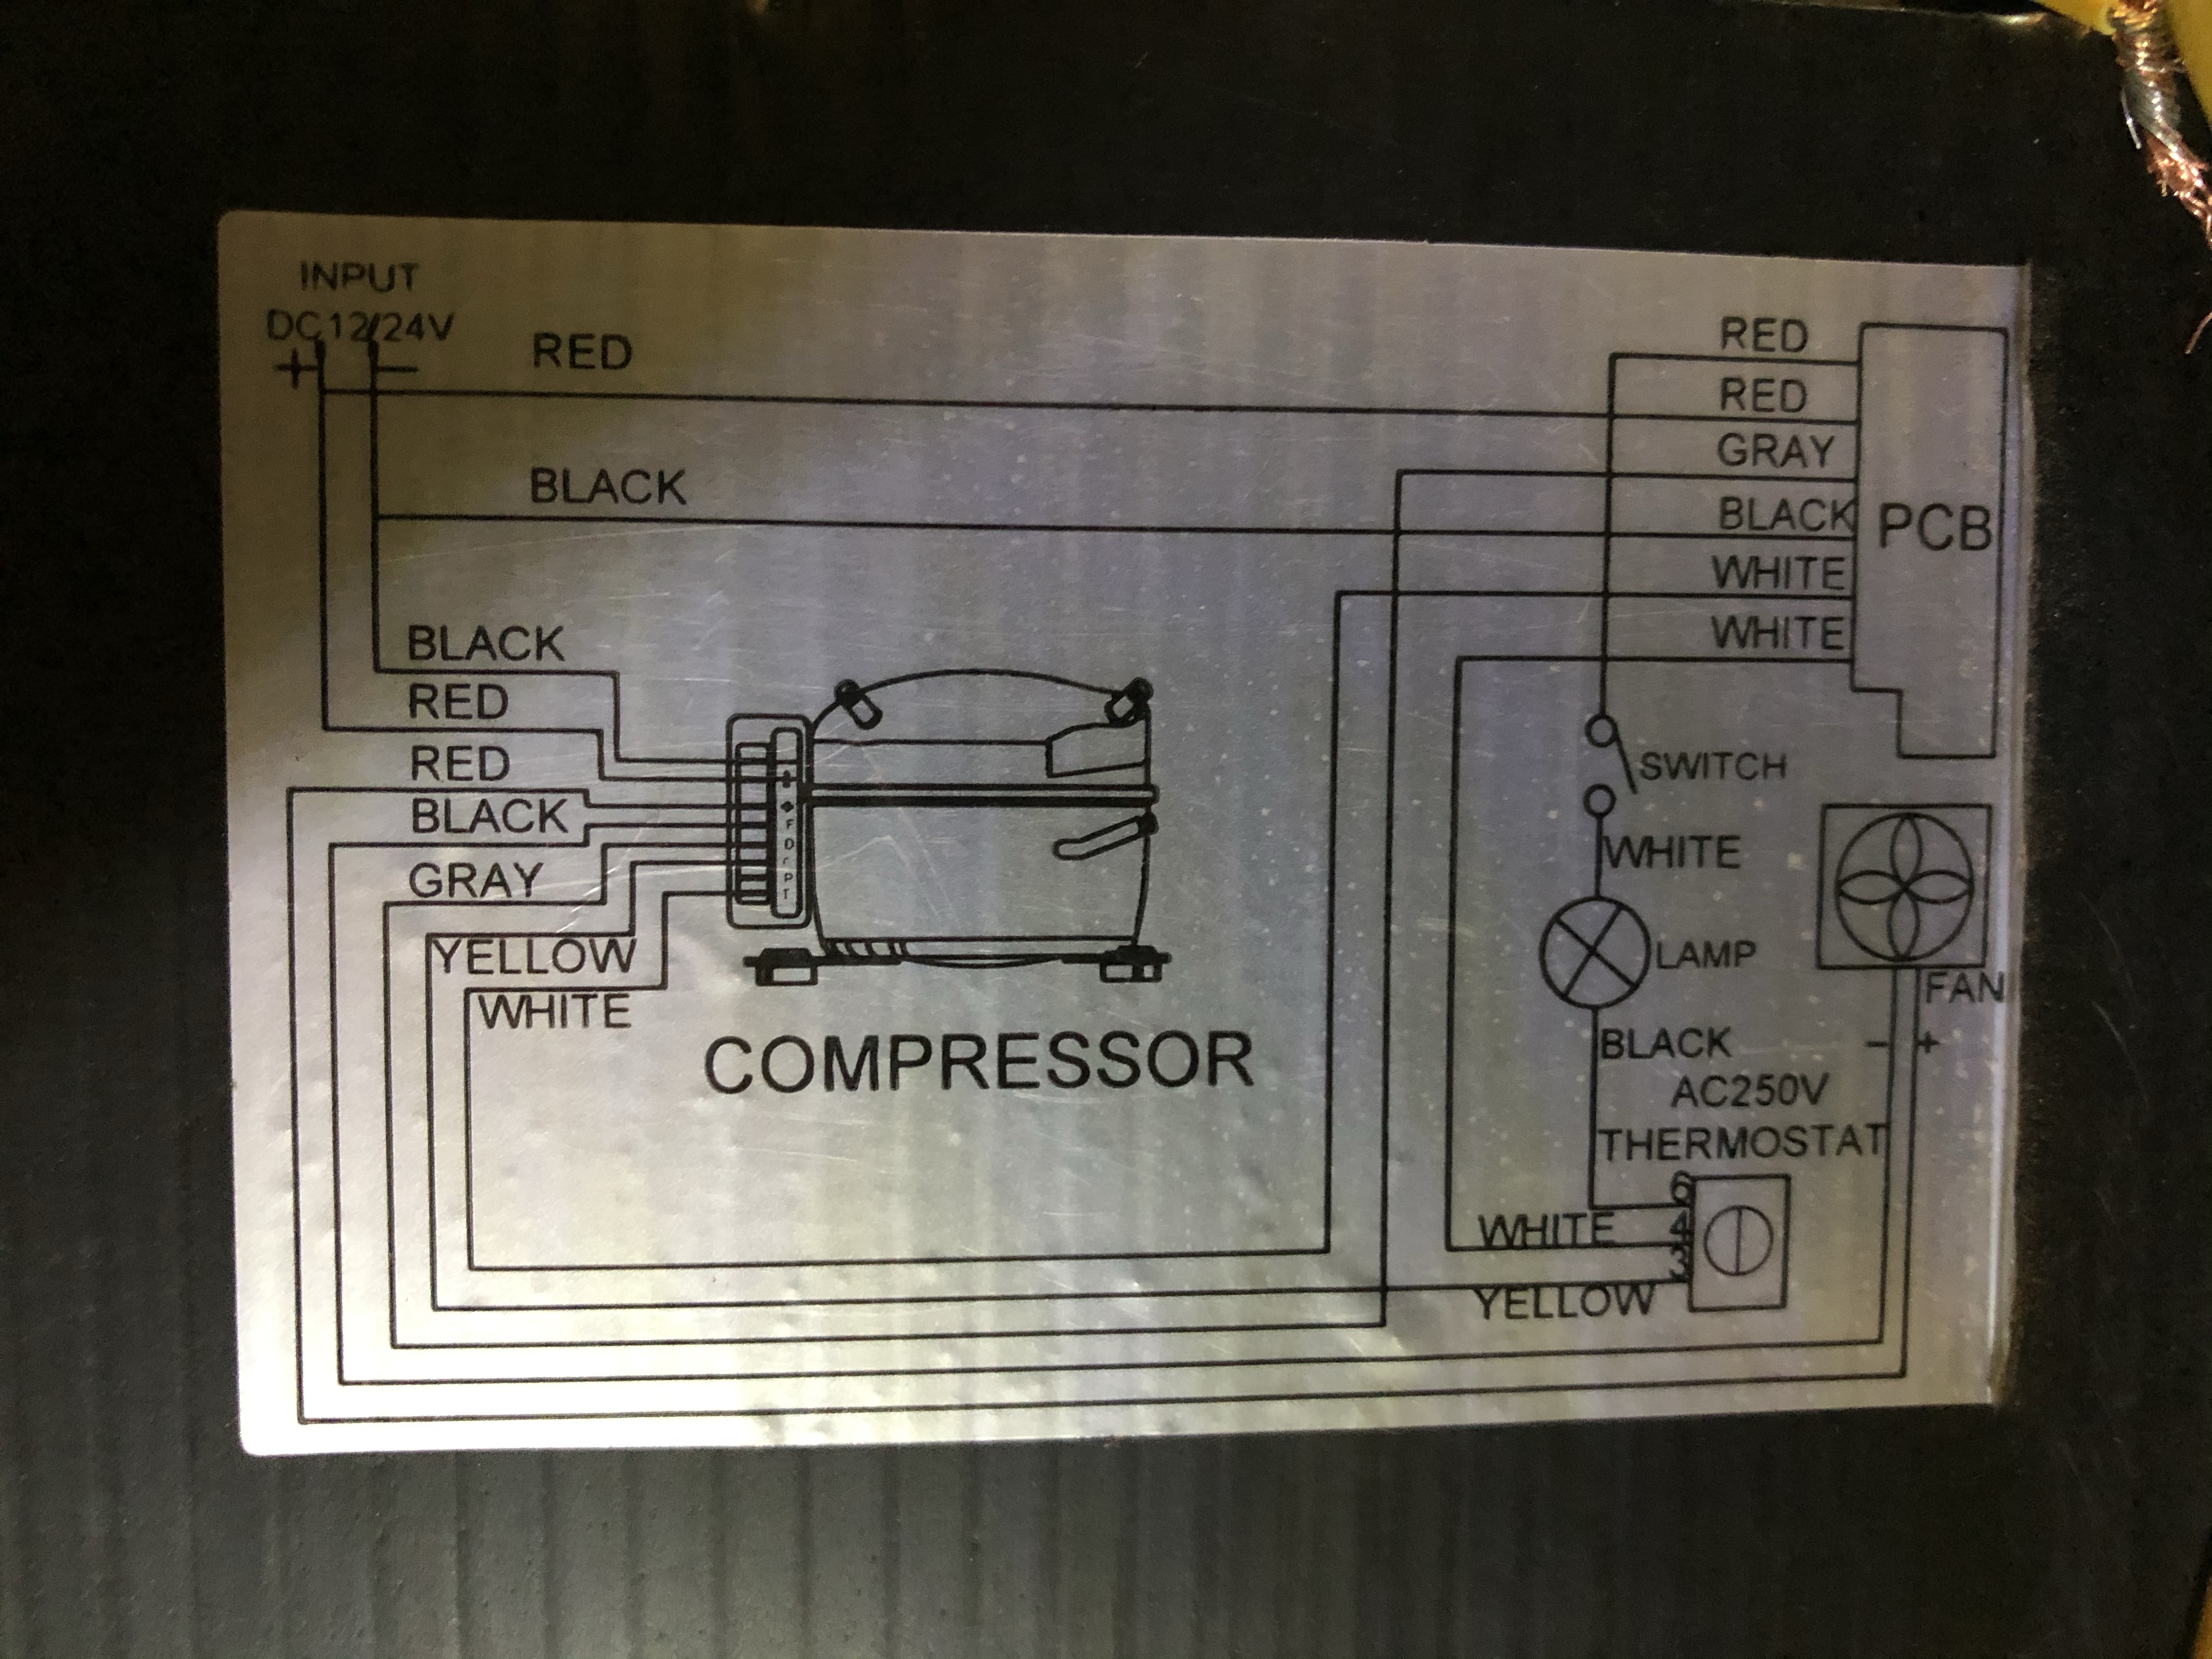
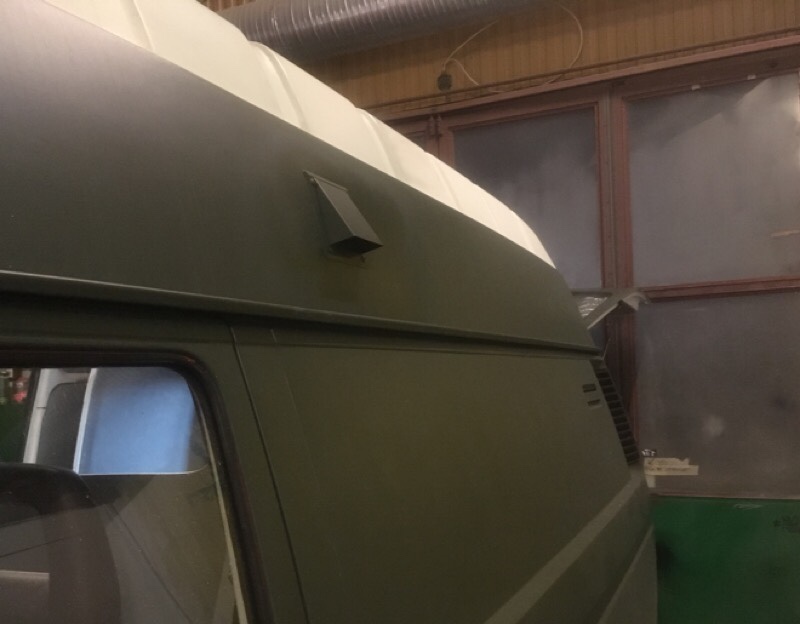
The fridge problem started last summer, and since it still cools and runs (could be used) the problem have not been fixed until now. The issue was that I just runs and runs until the battery’s was empty. So I changed to a new Waeco thermostat. But it was still behaving the same. Next thing to replace then would be the fridge controller unit and would cost around 300euros to buy as new spare part. A new fridge around 600+euros.
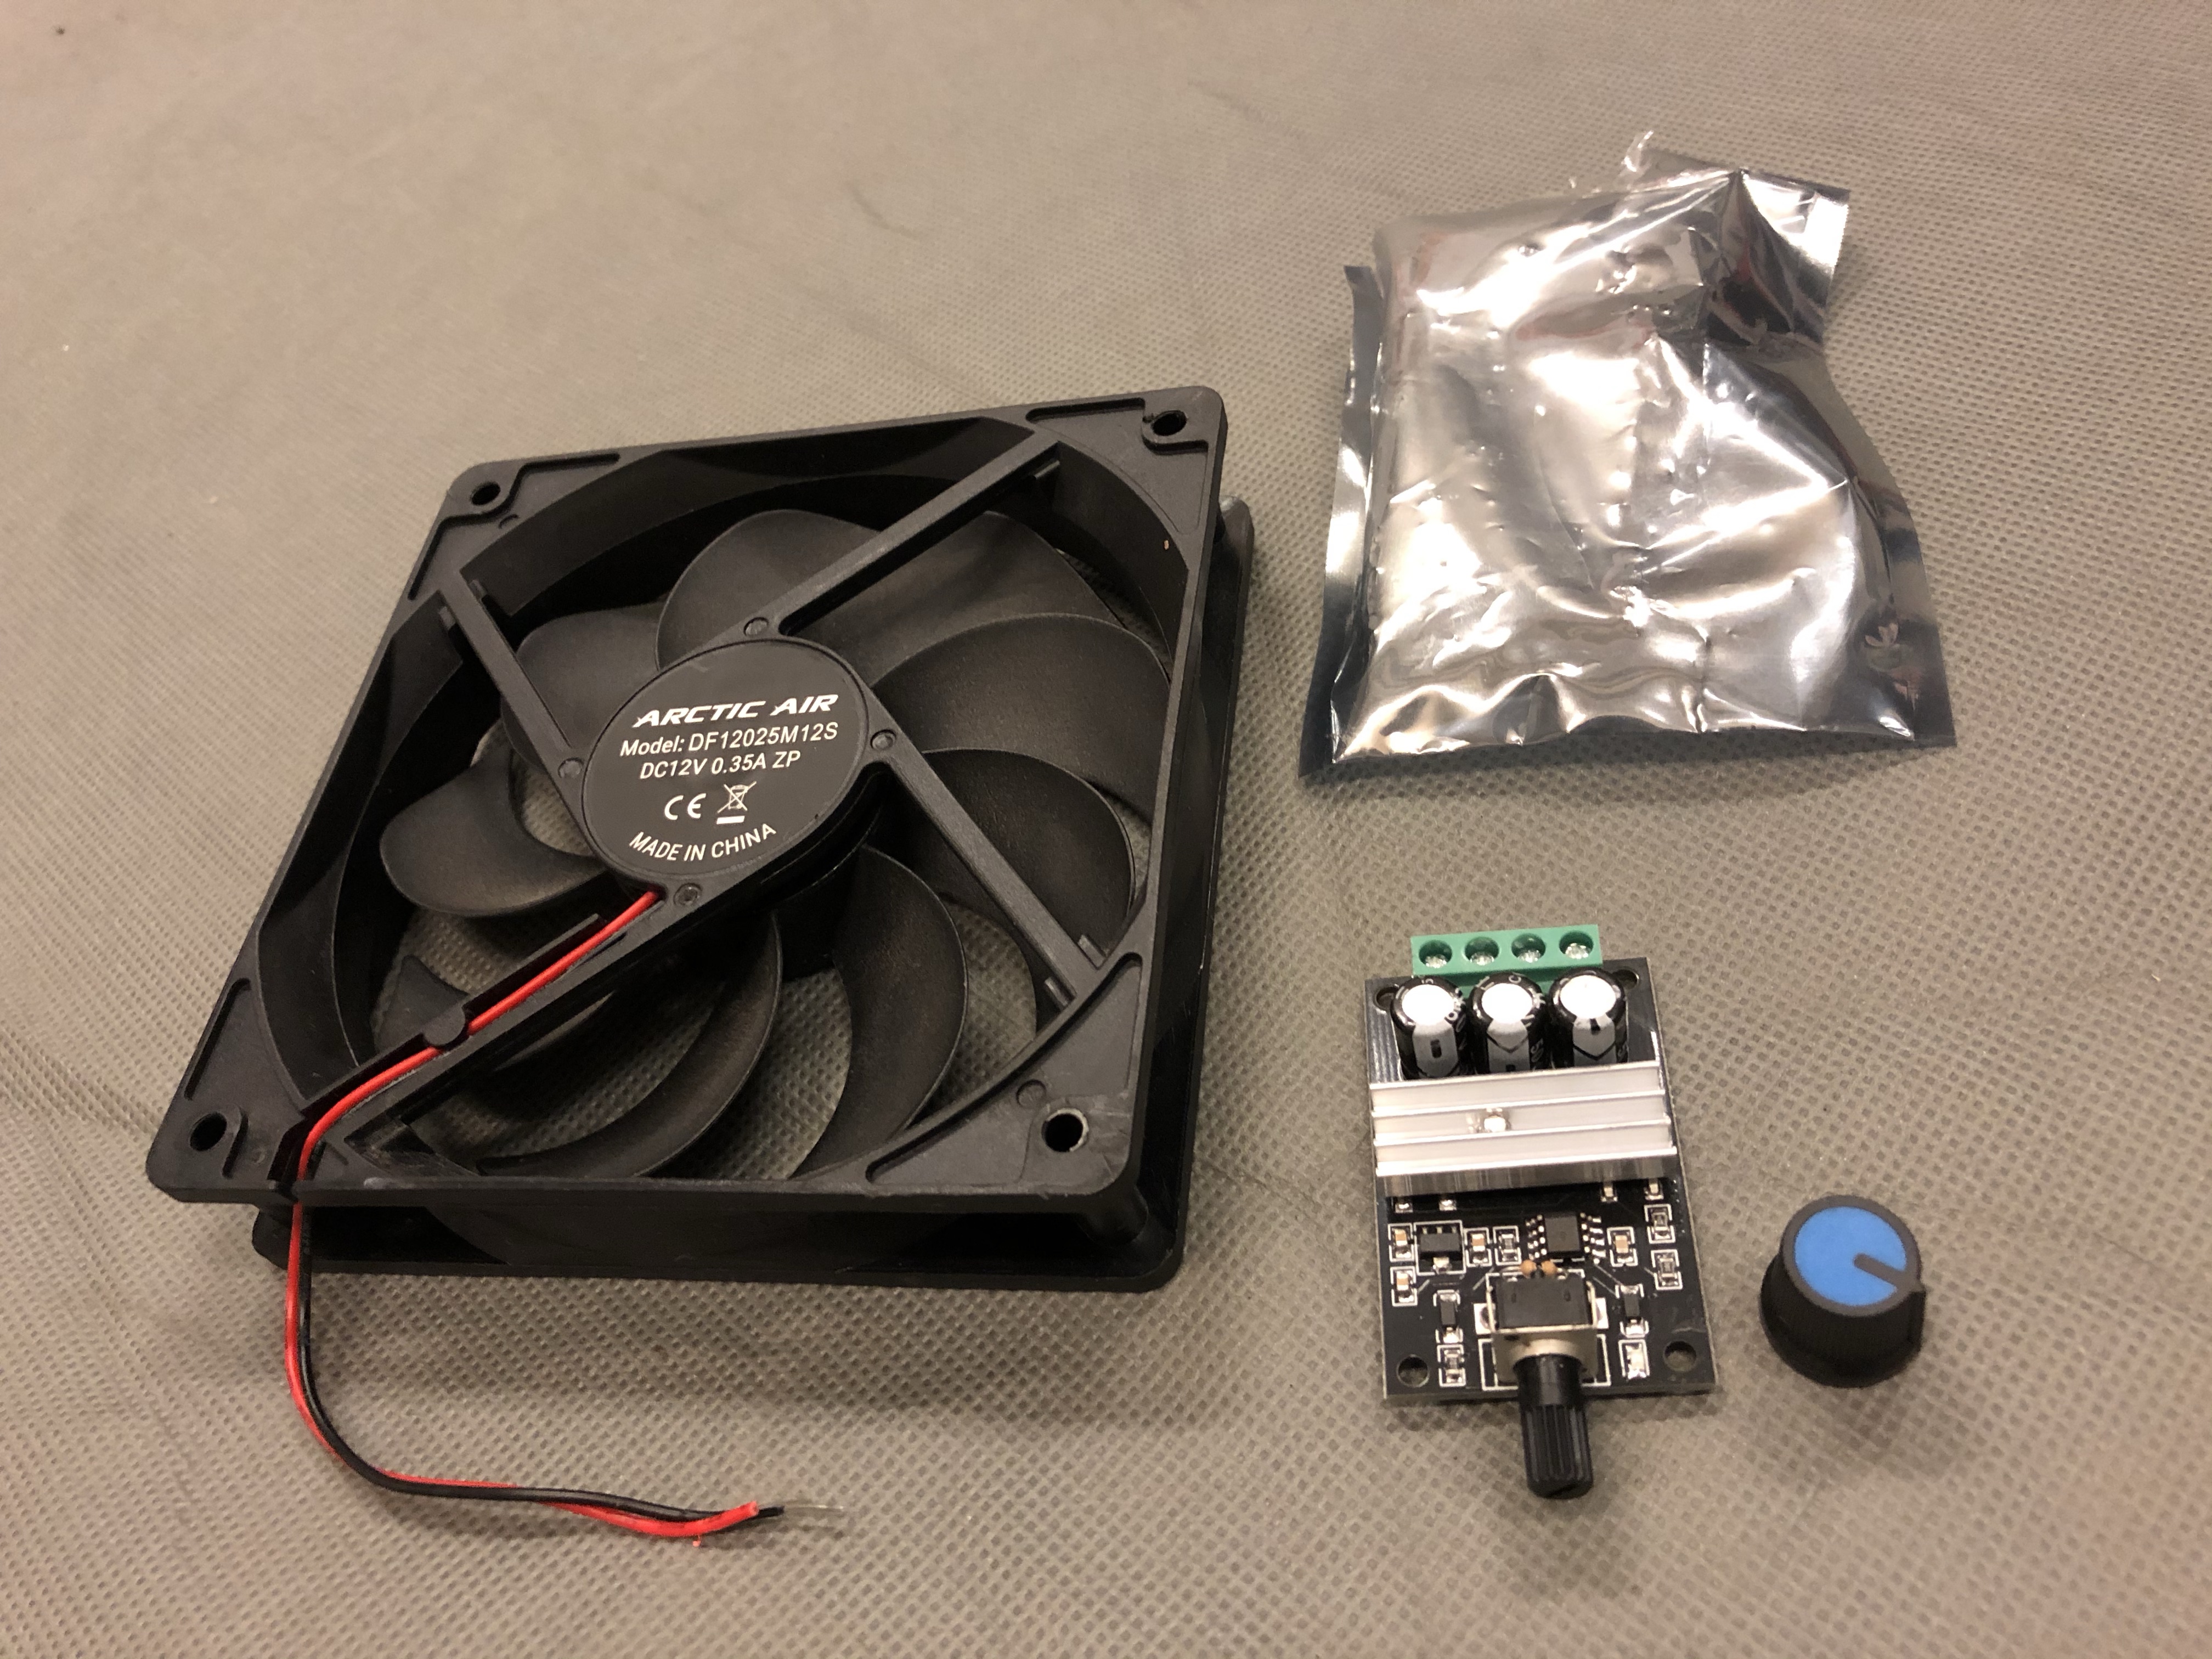
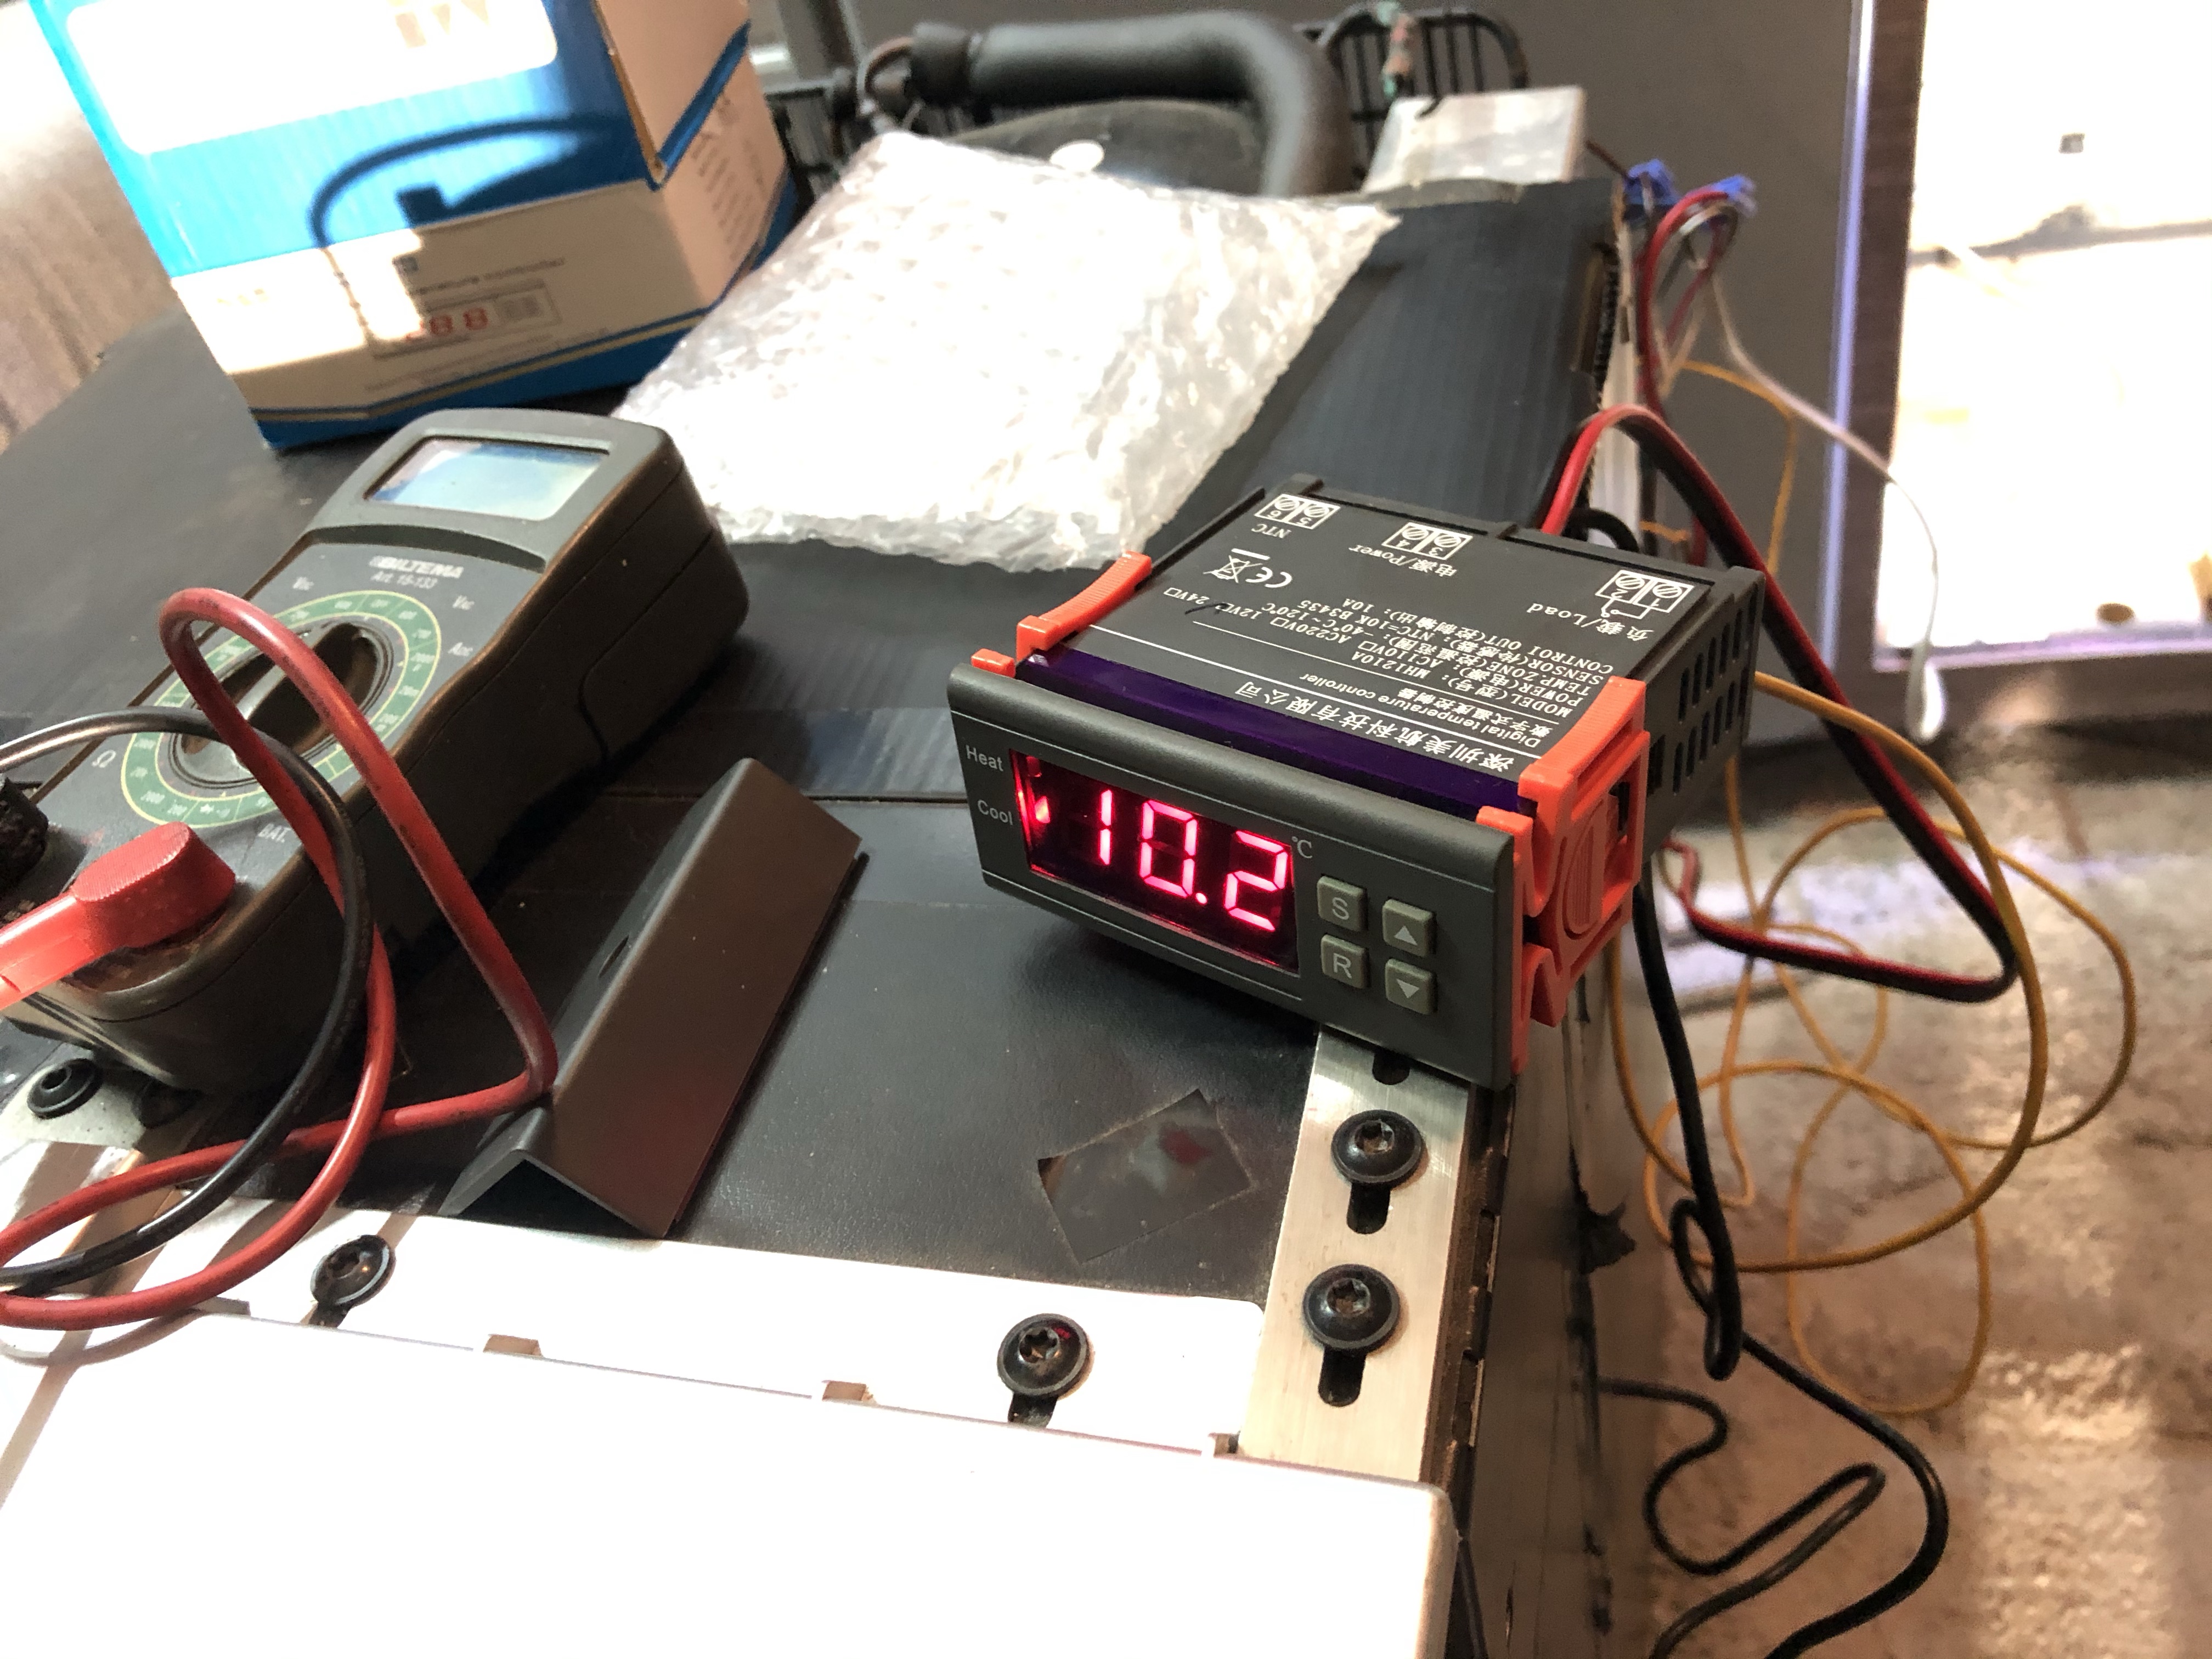
Instead I bought a 20euros universal digital temp controller and wired it in, replacing the old mechanical thermostat. It now works great, keeps the temperature more stable and uses less energy. I can even see the present temp inside the fridge on the display, and I can now change temp settnings without open the fridge door (and letting all cold out). If you have the same problems with your Waeco or Dometic 12v fridge I can really recommend to upgrade to a digital thermostat instead ? I also added a extra computer fan for better ventilation inside the cabinet on hot summer days, compressor will be happy 🙂

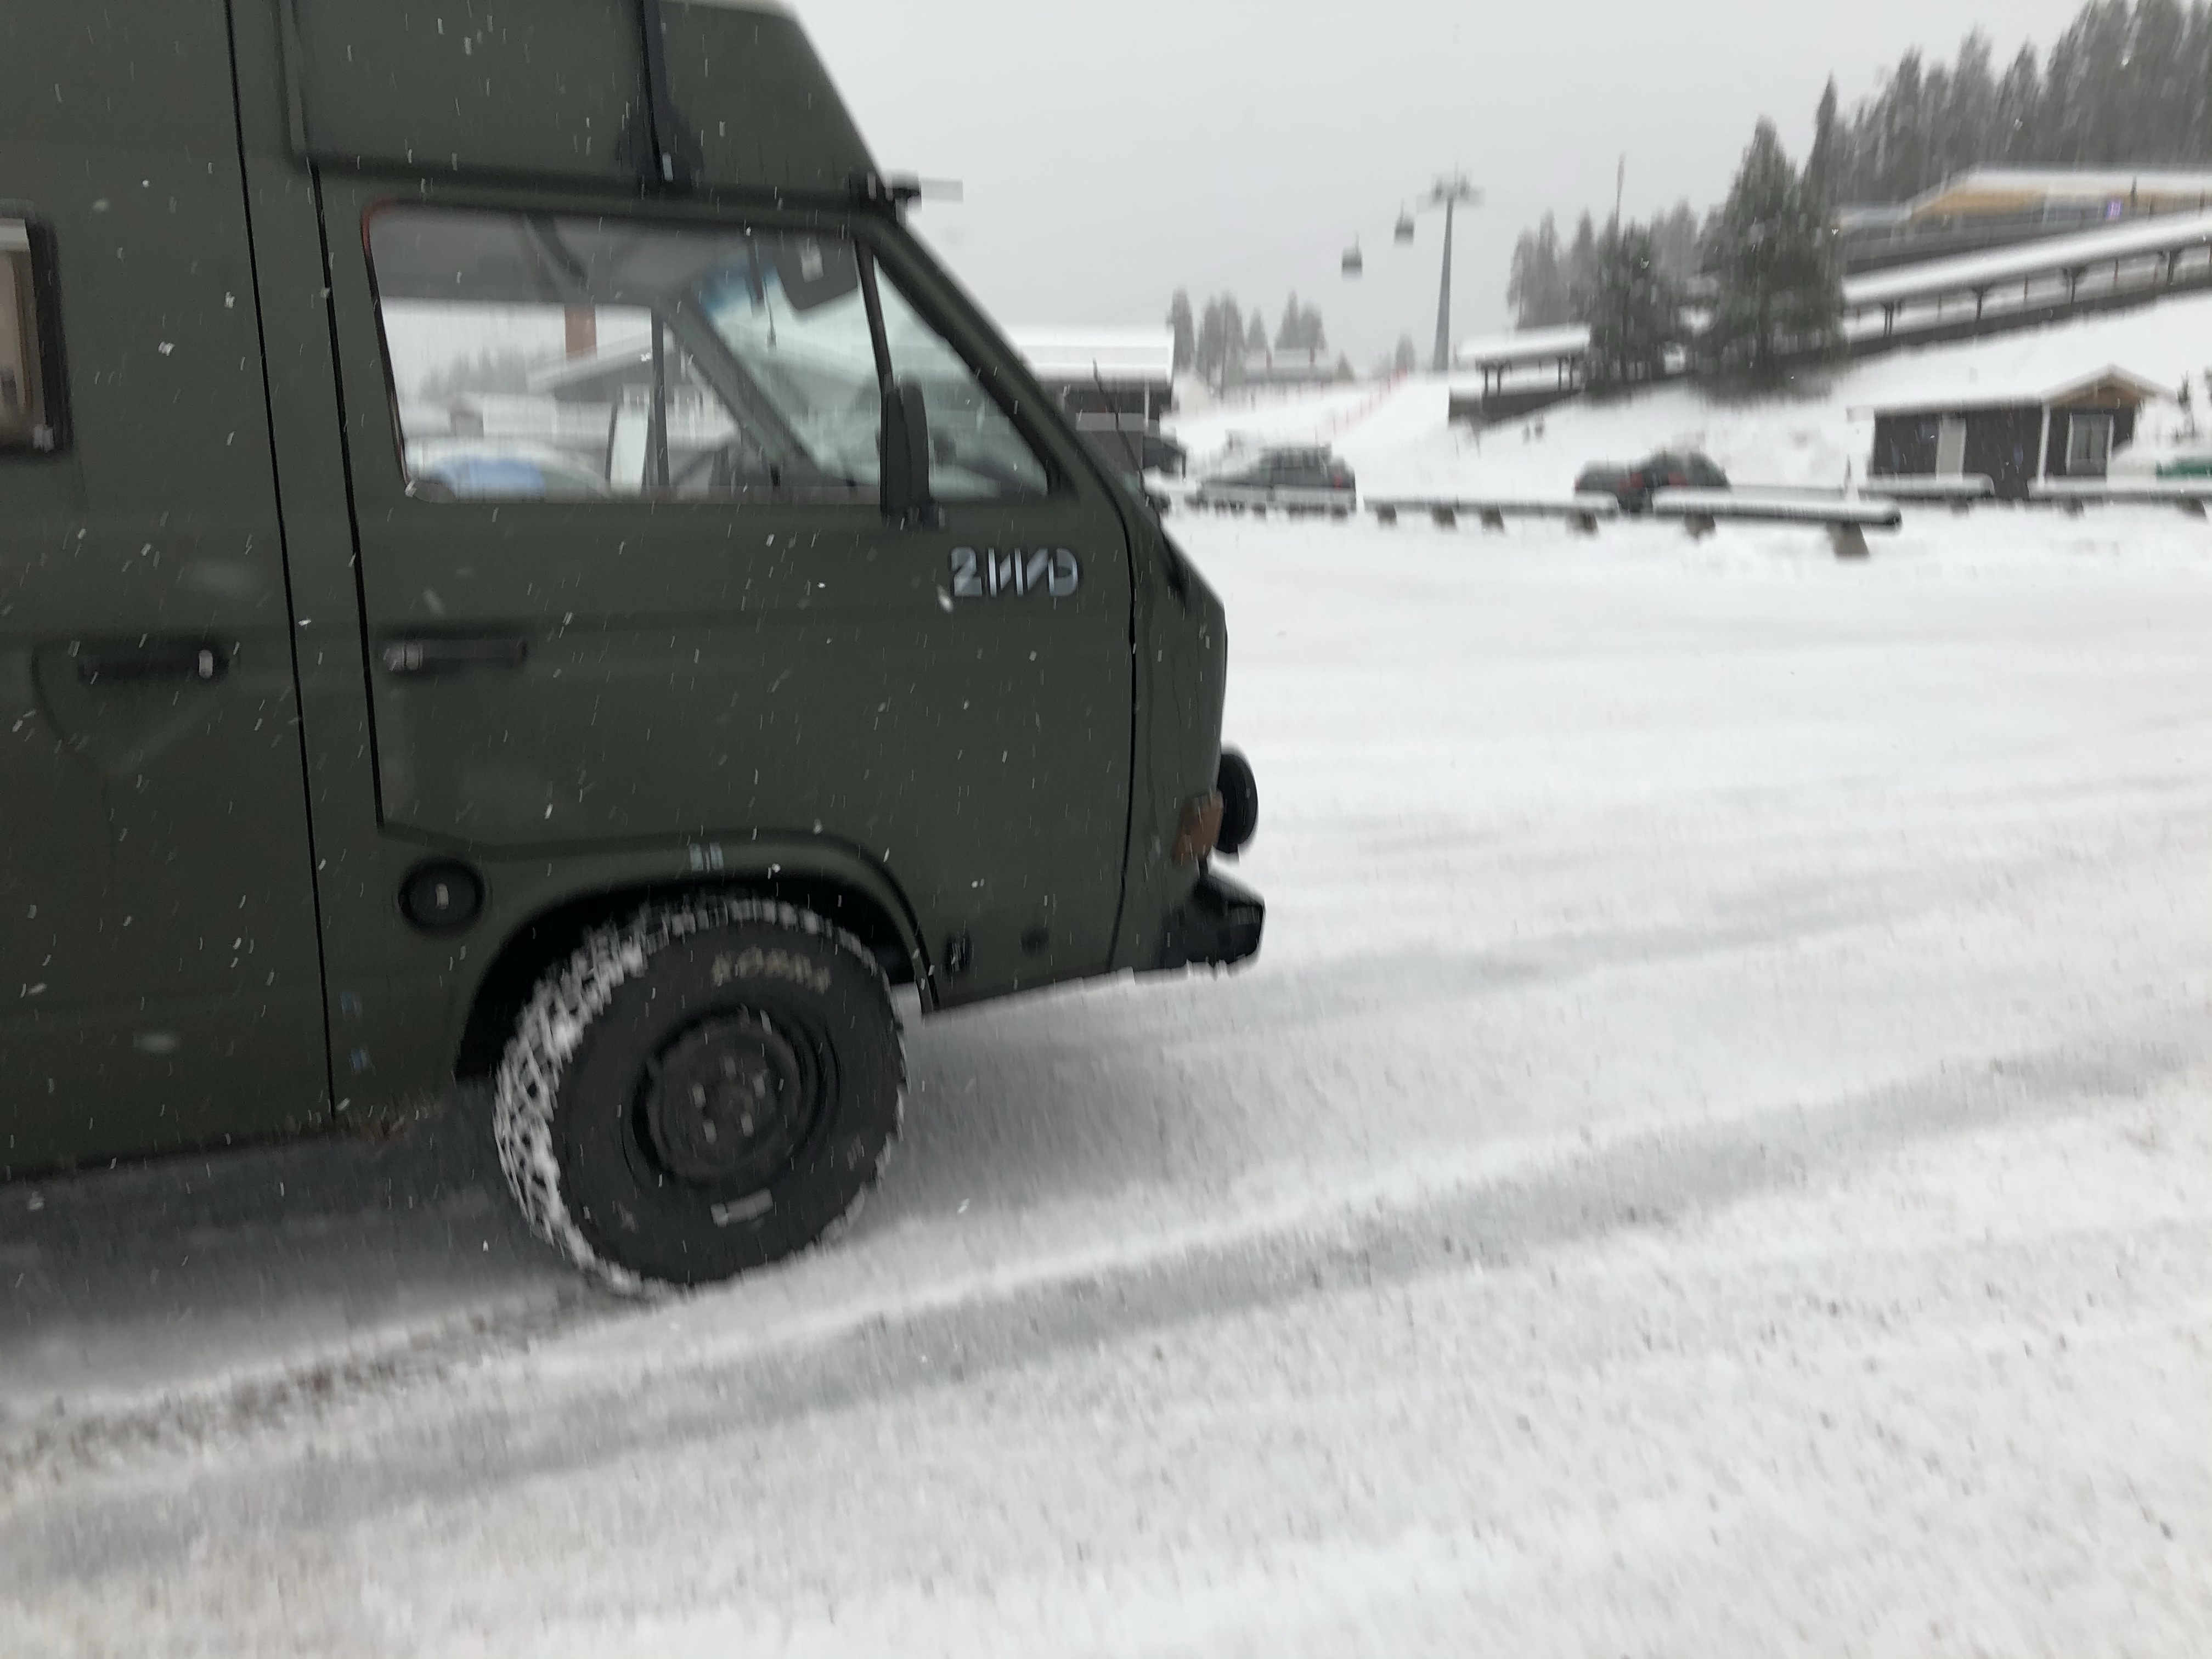
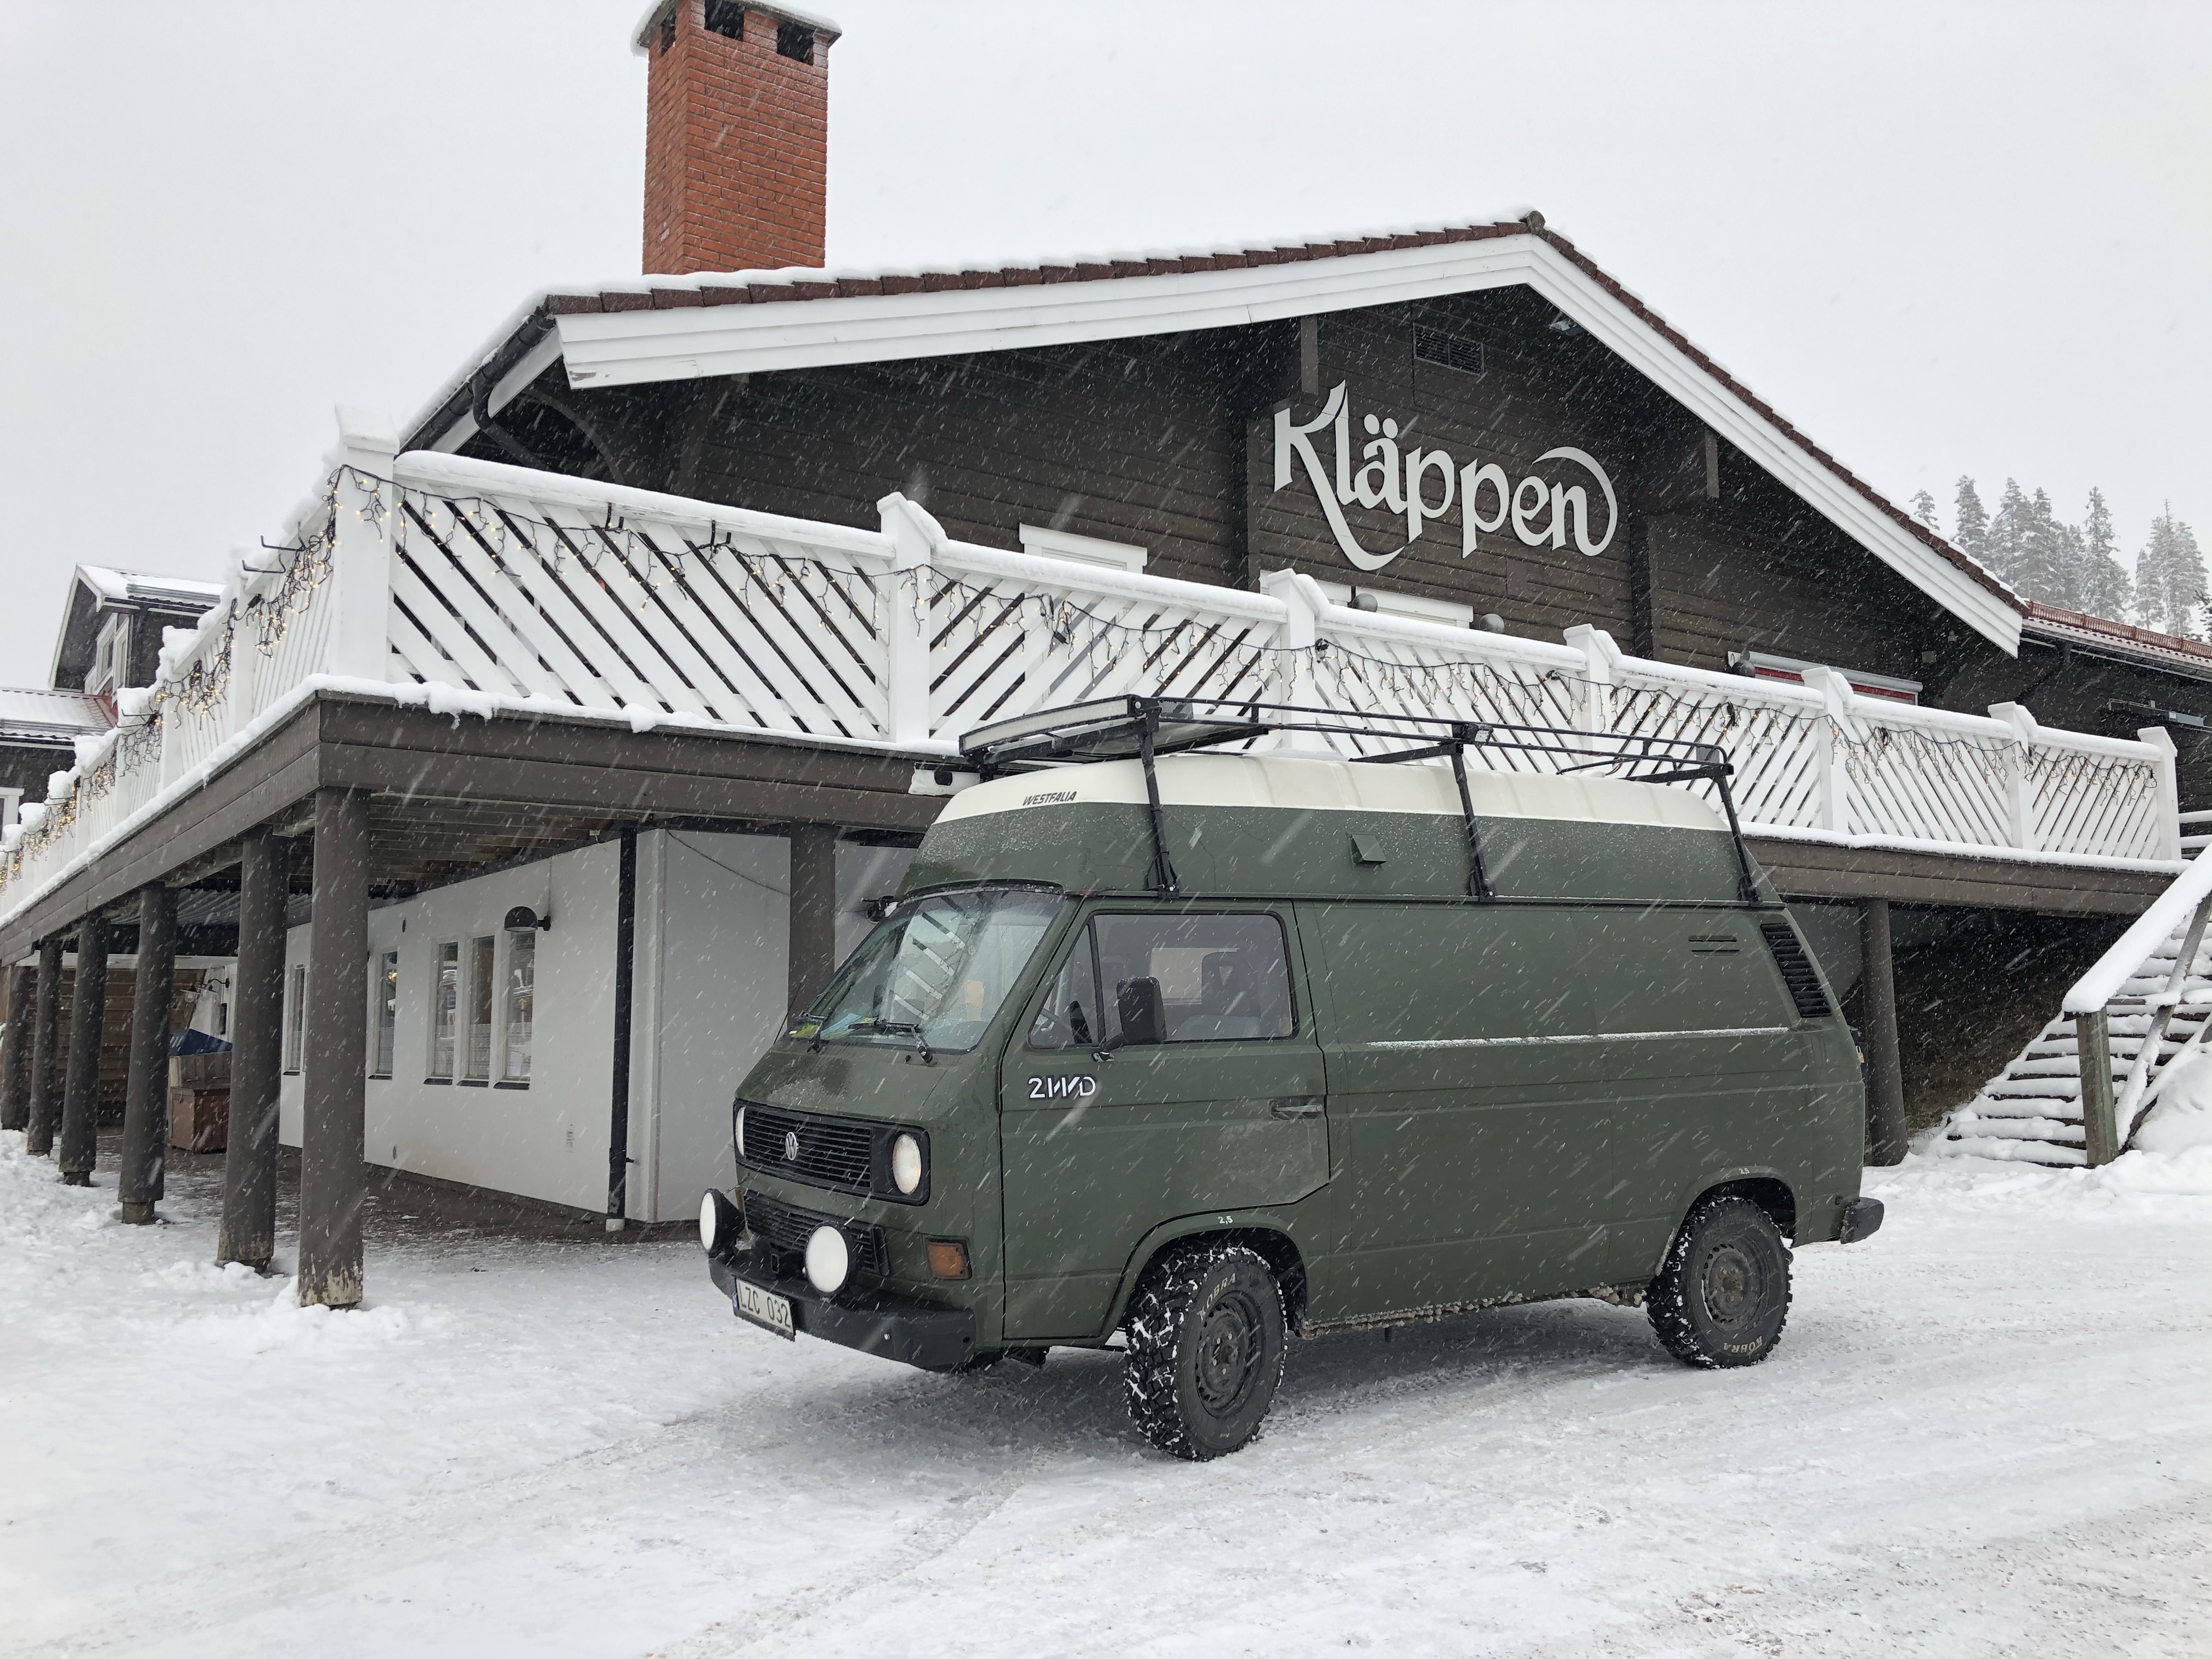
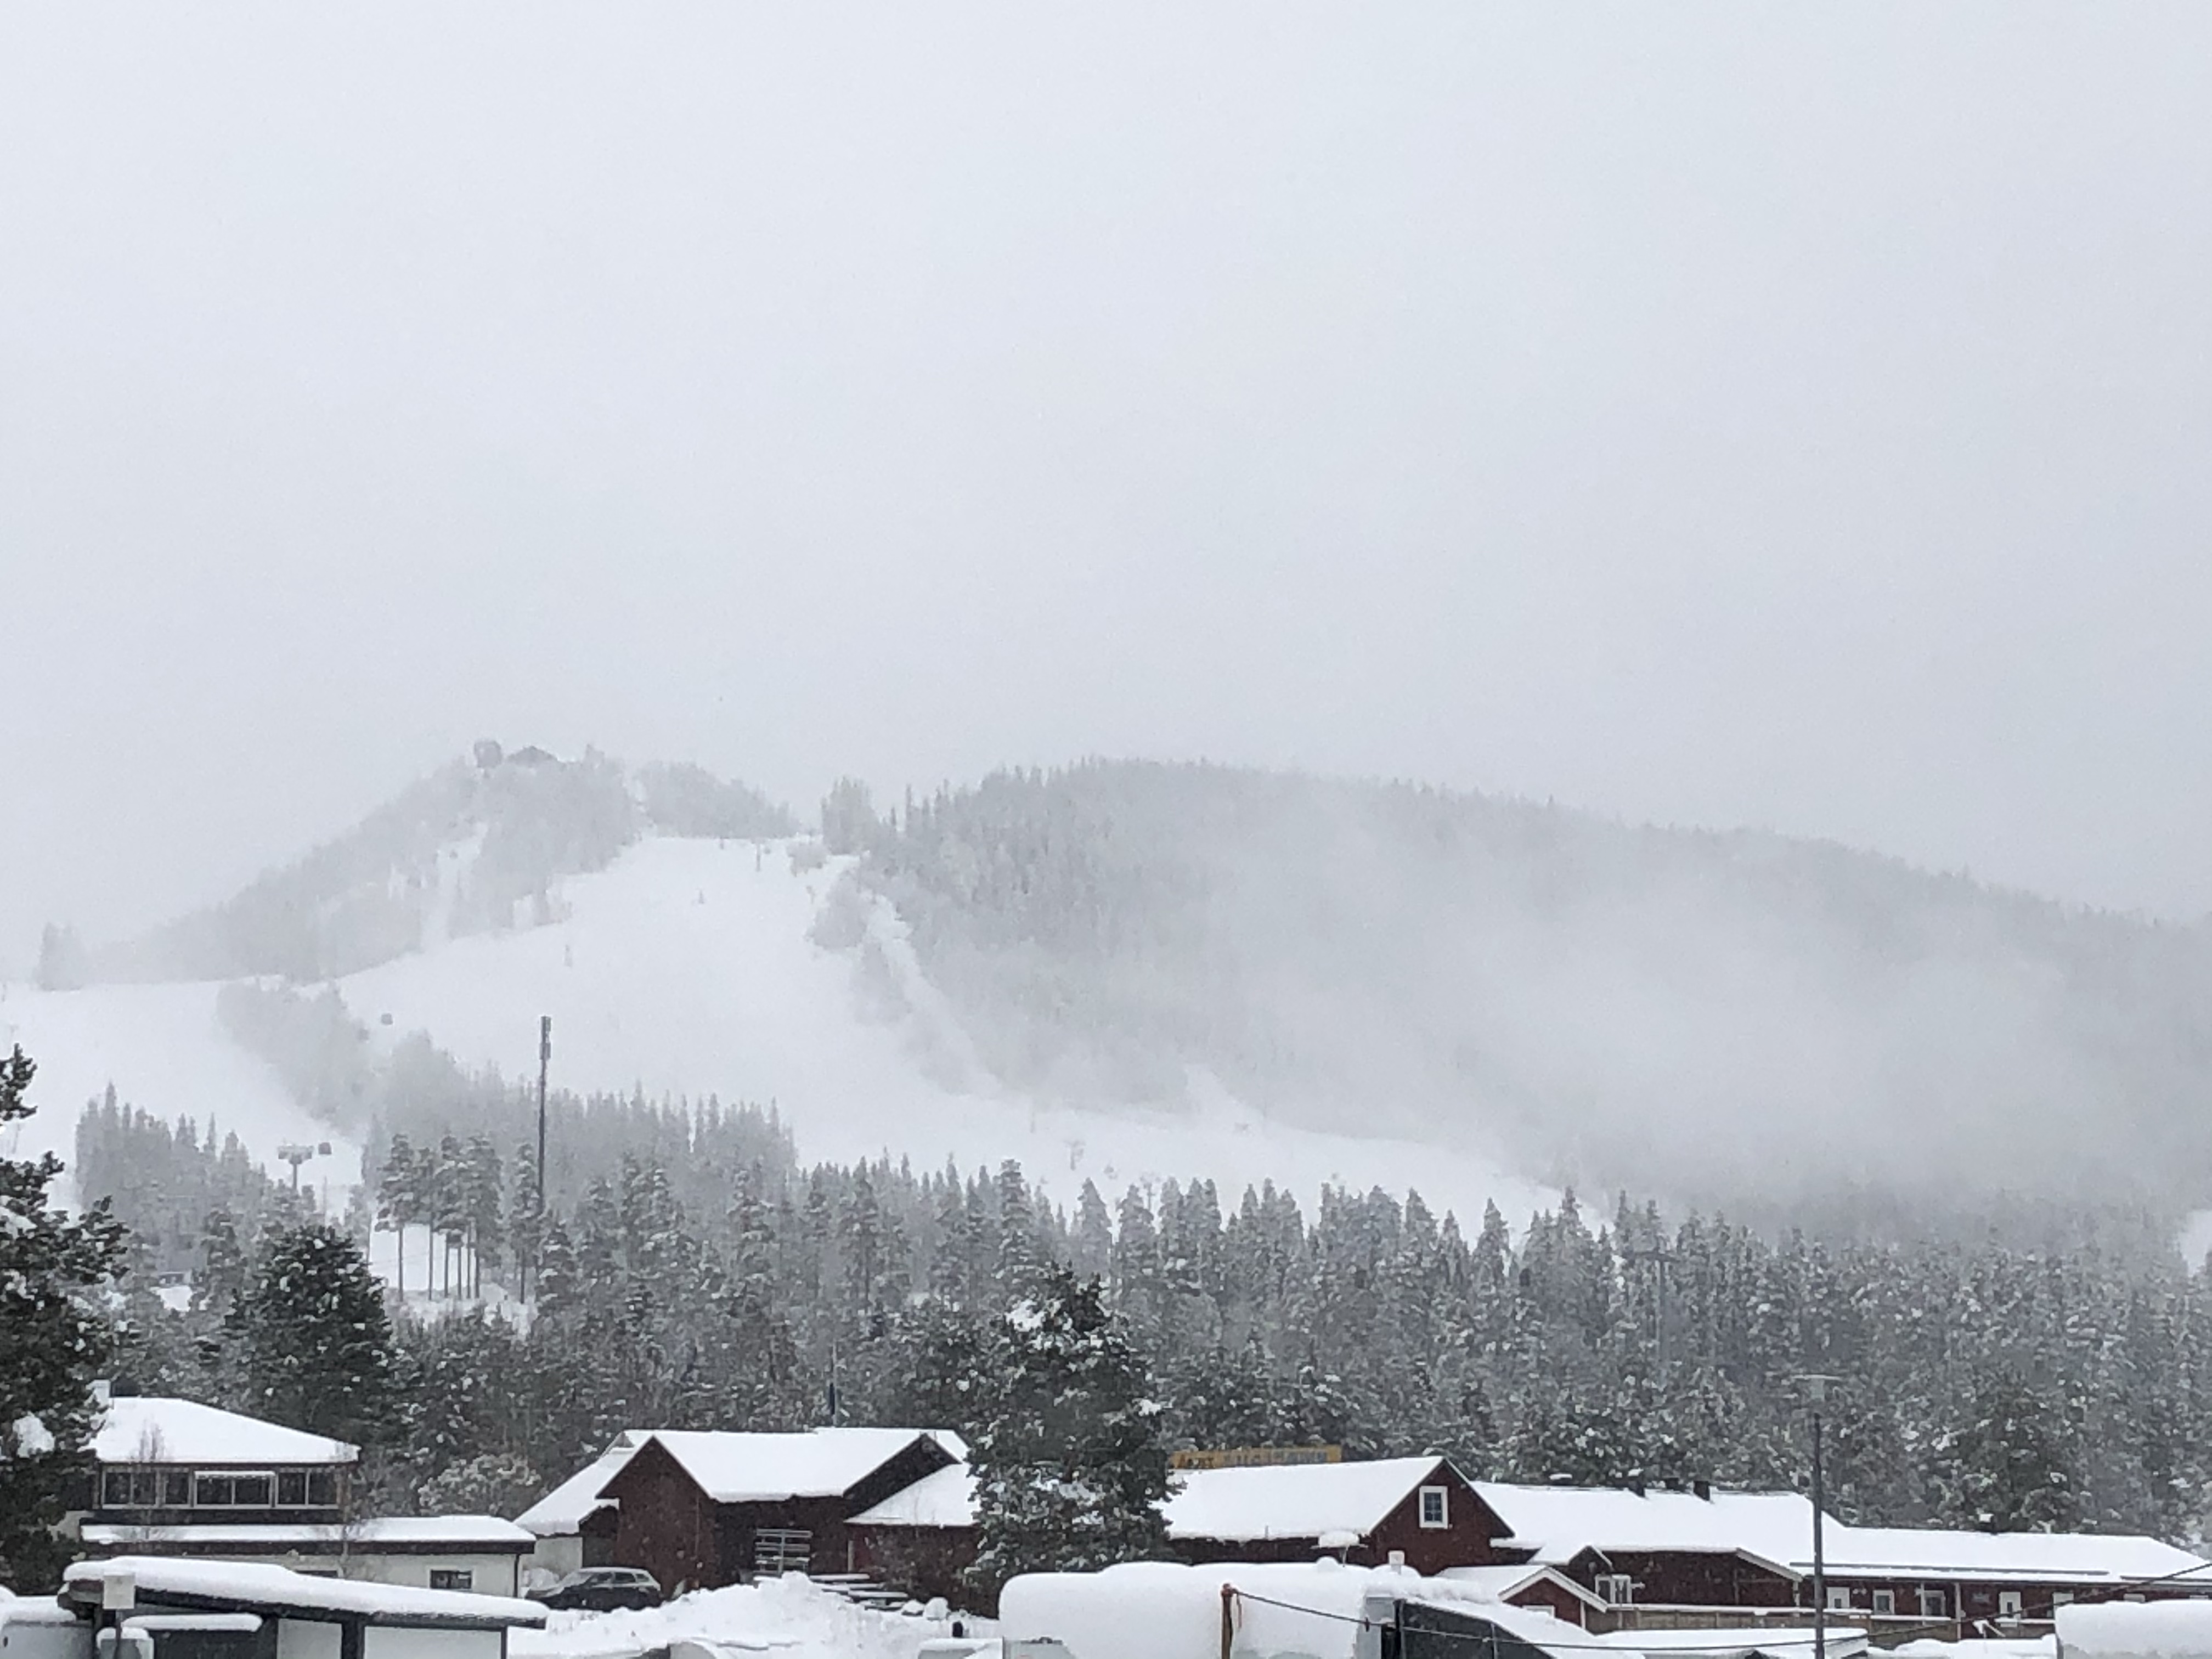
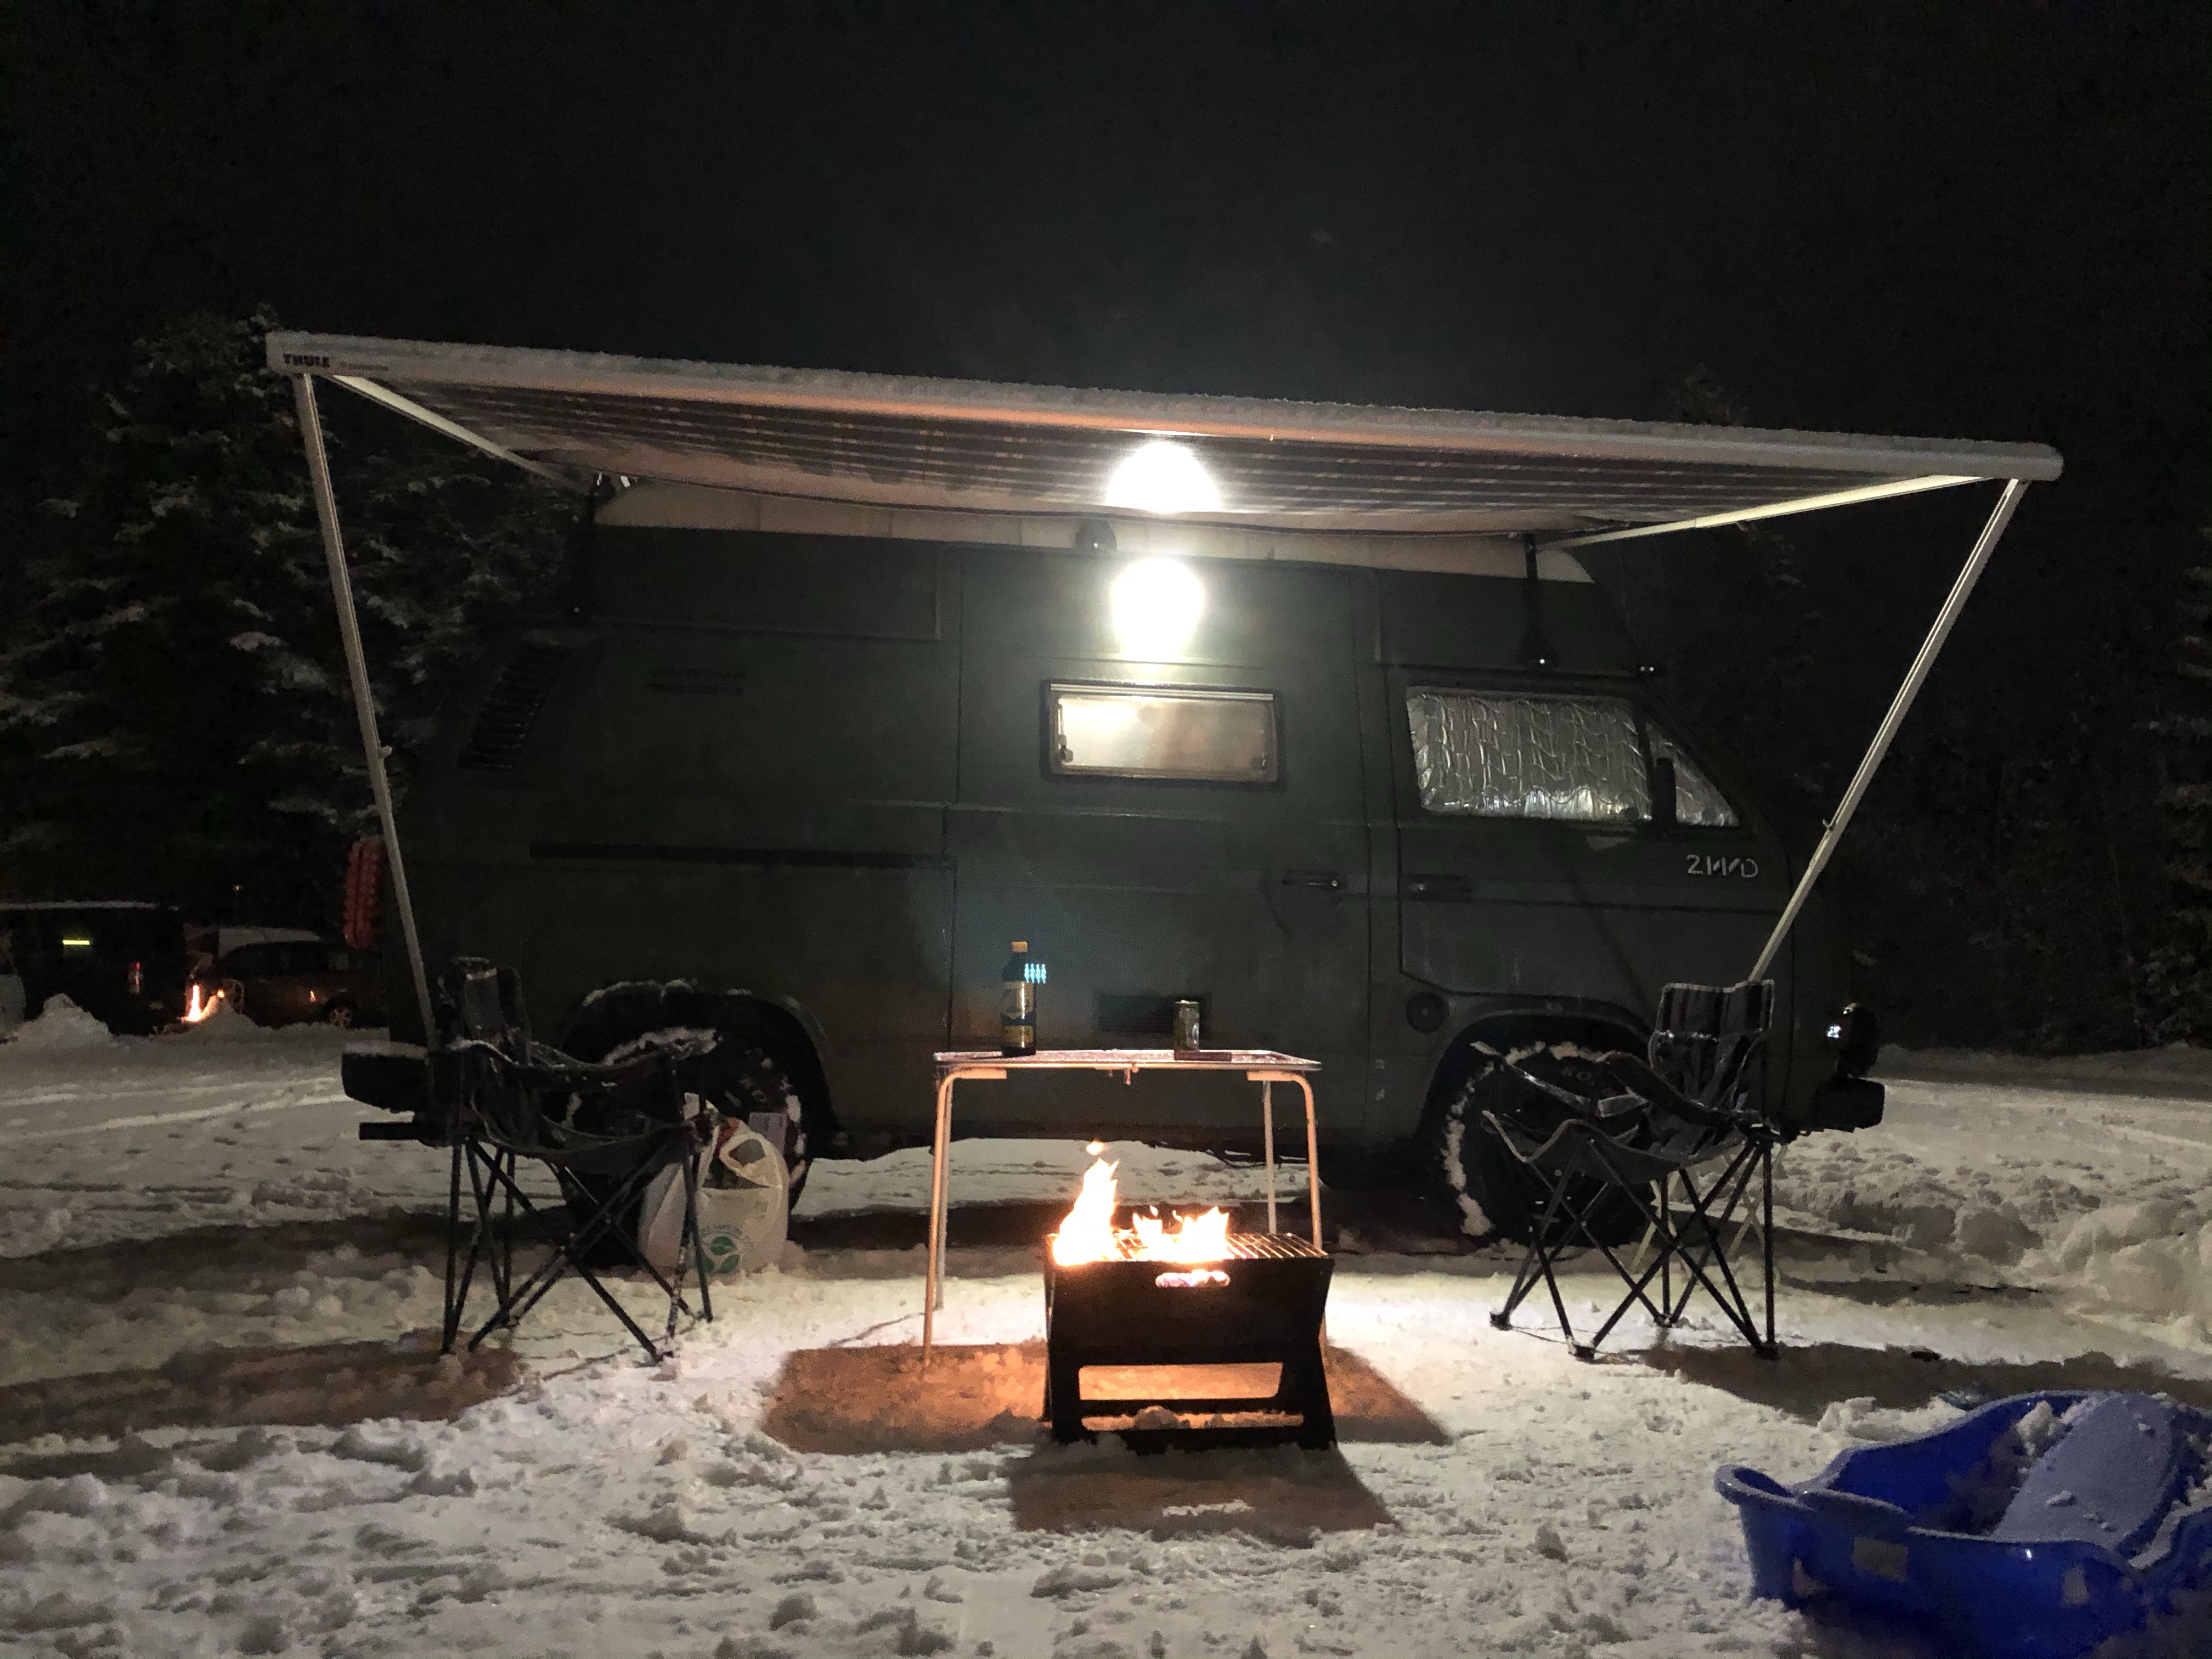
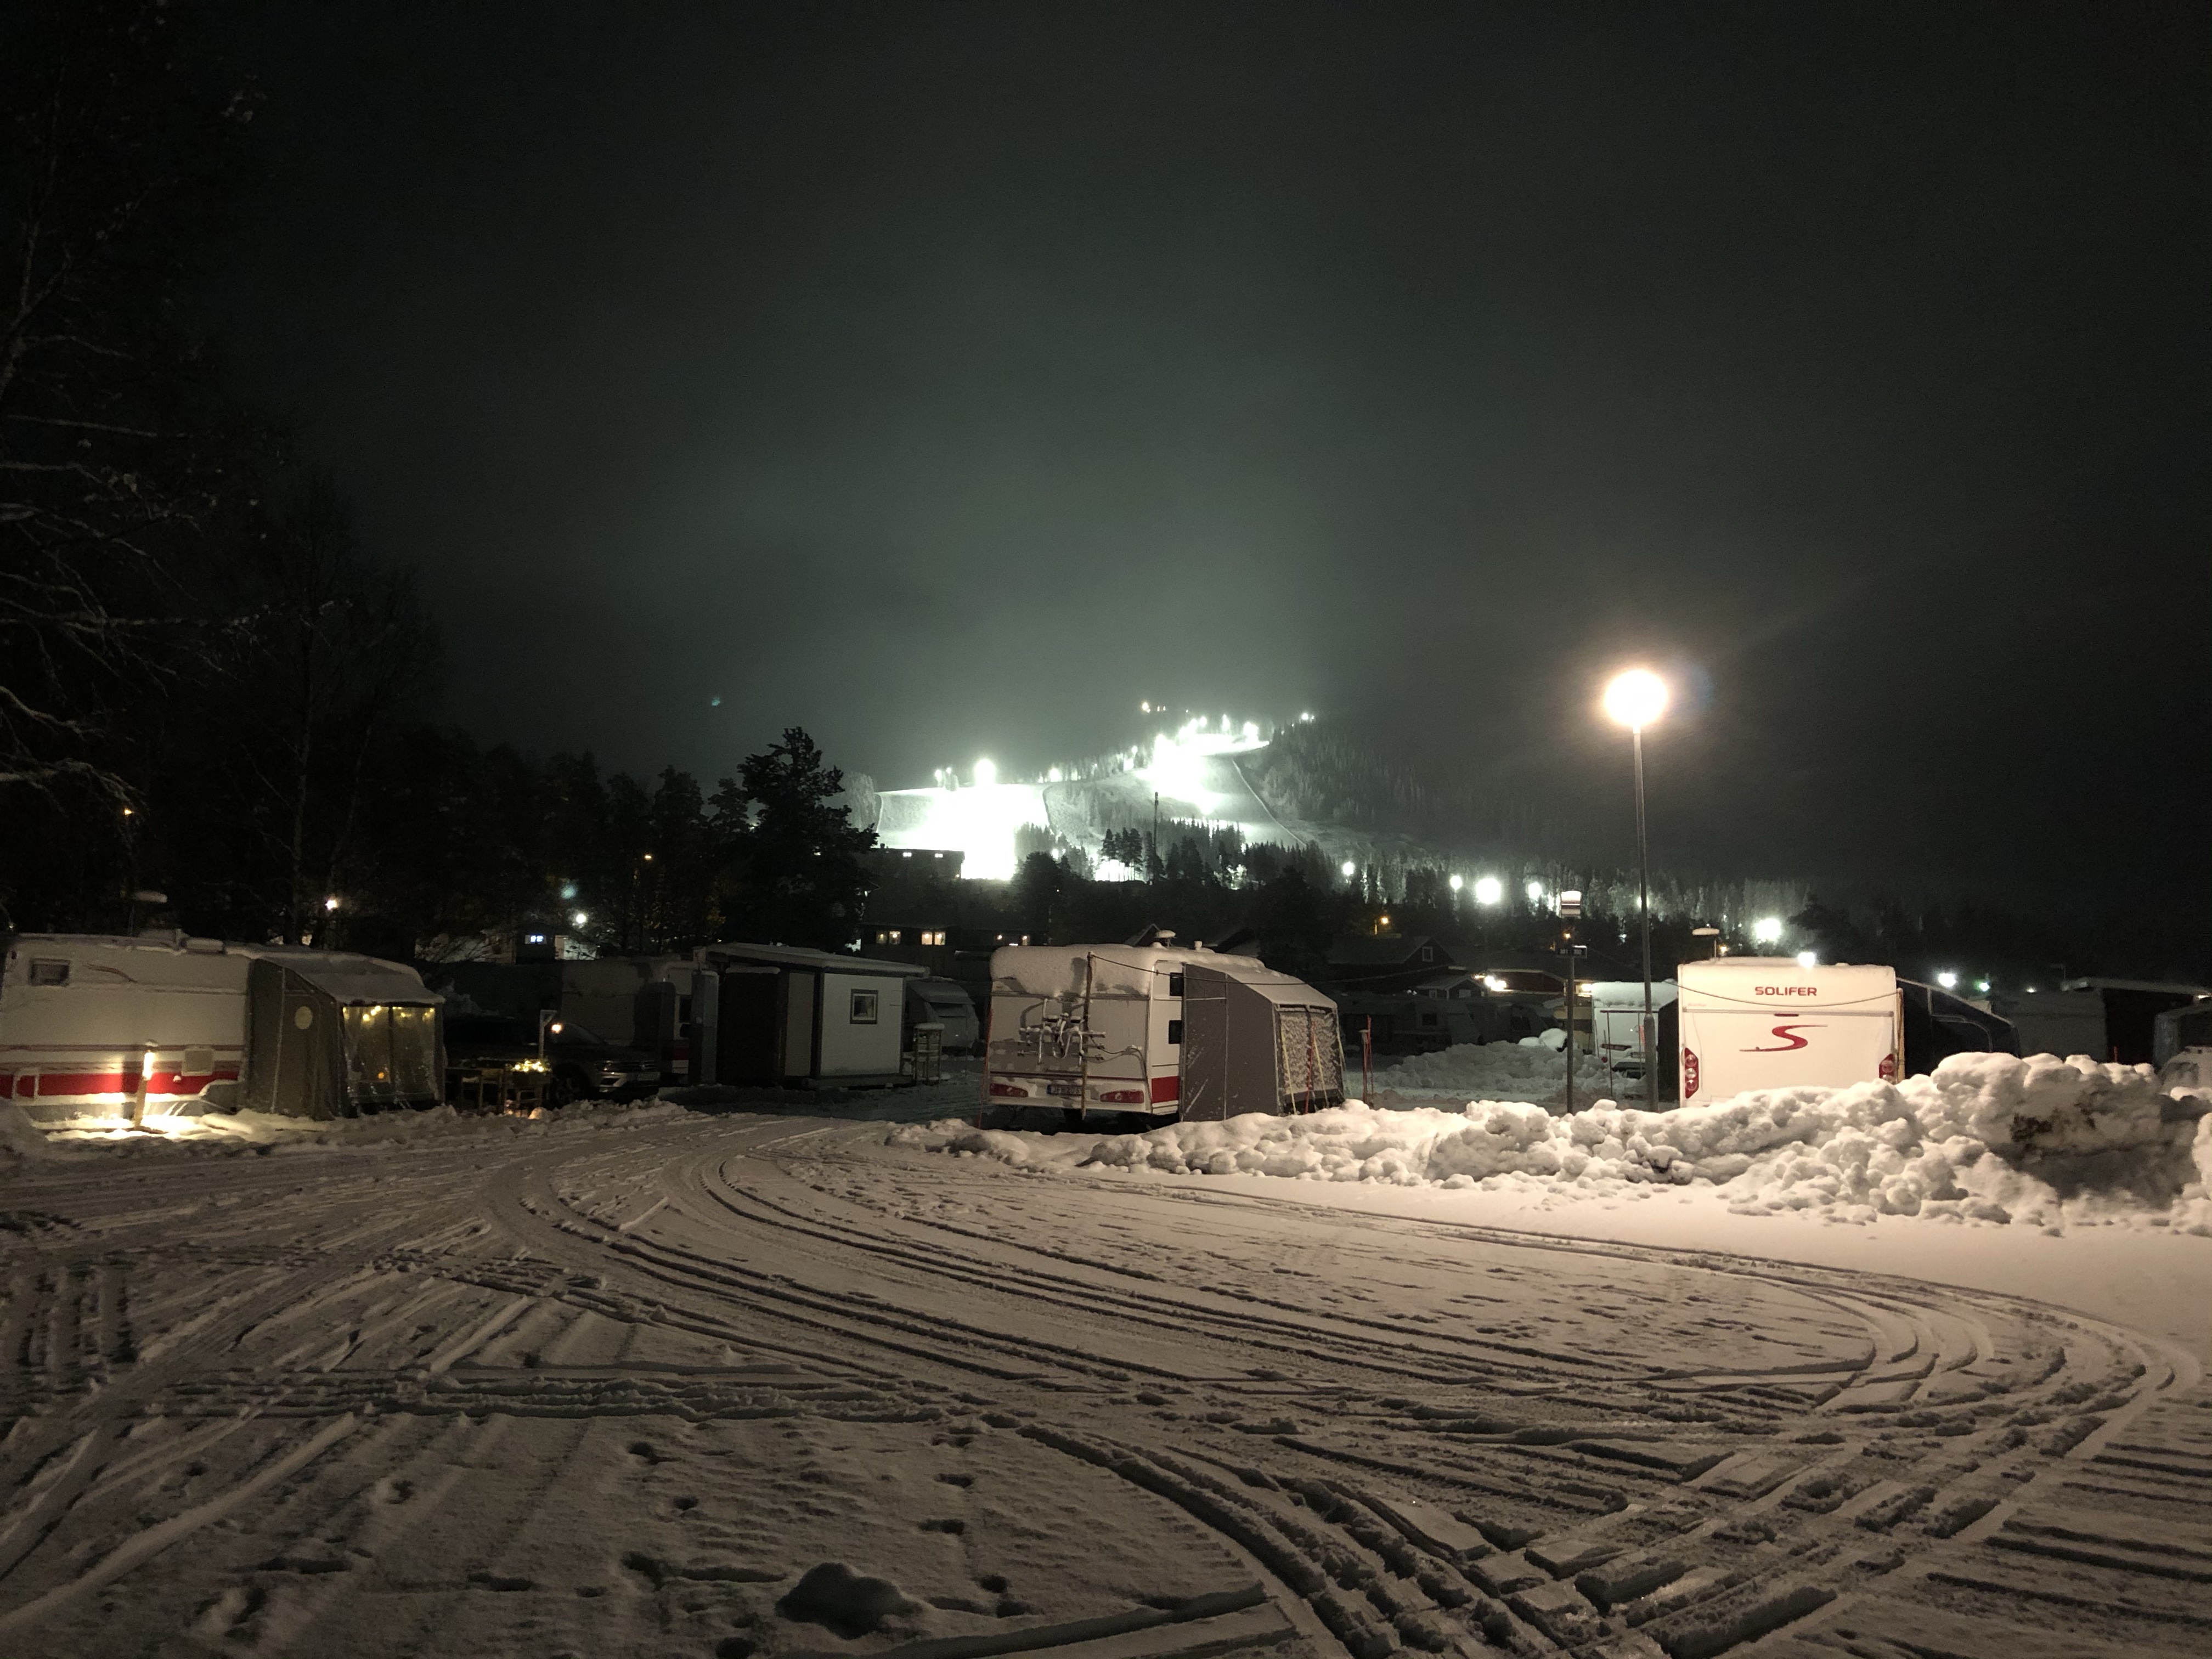
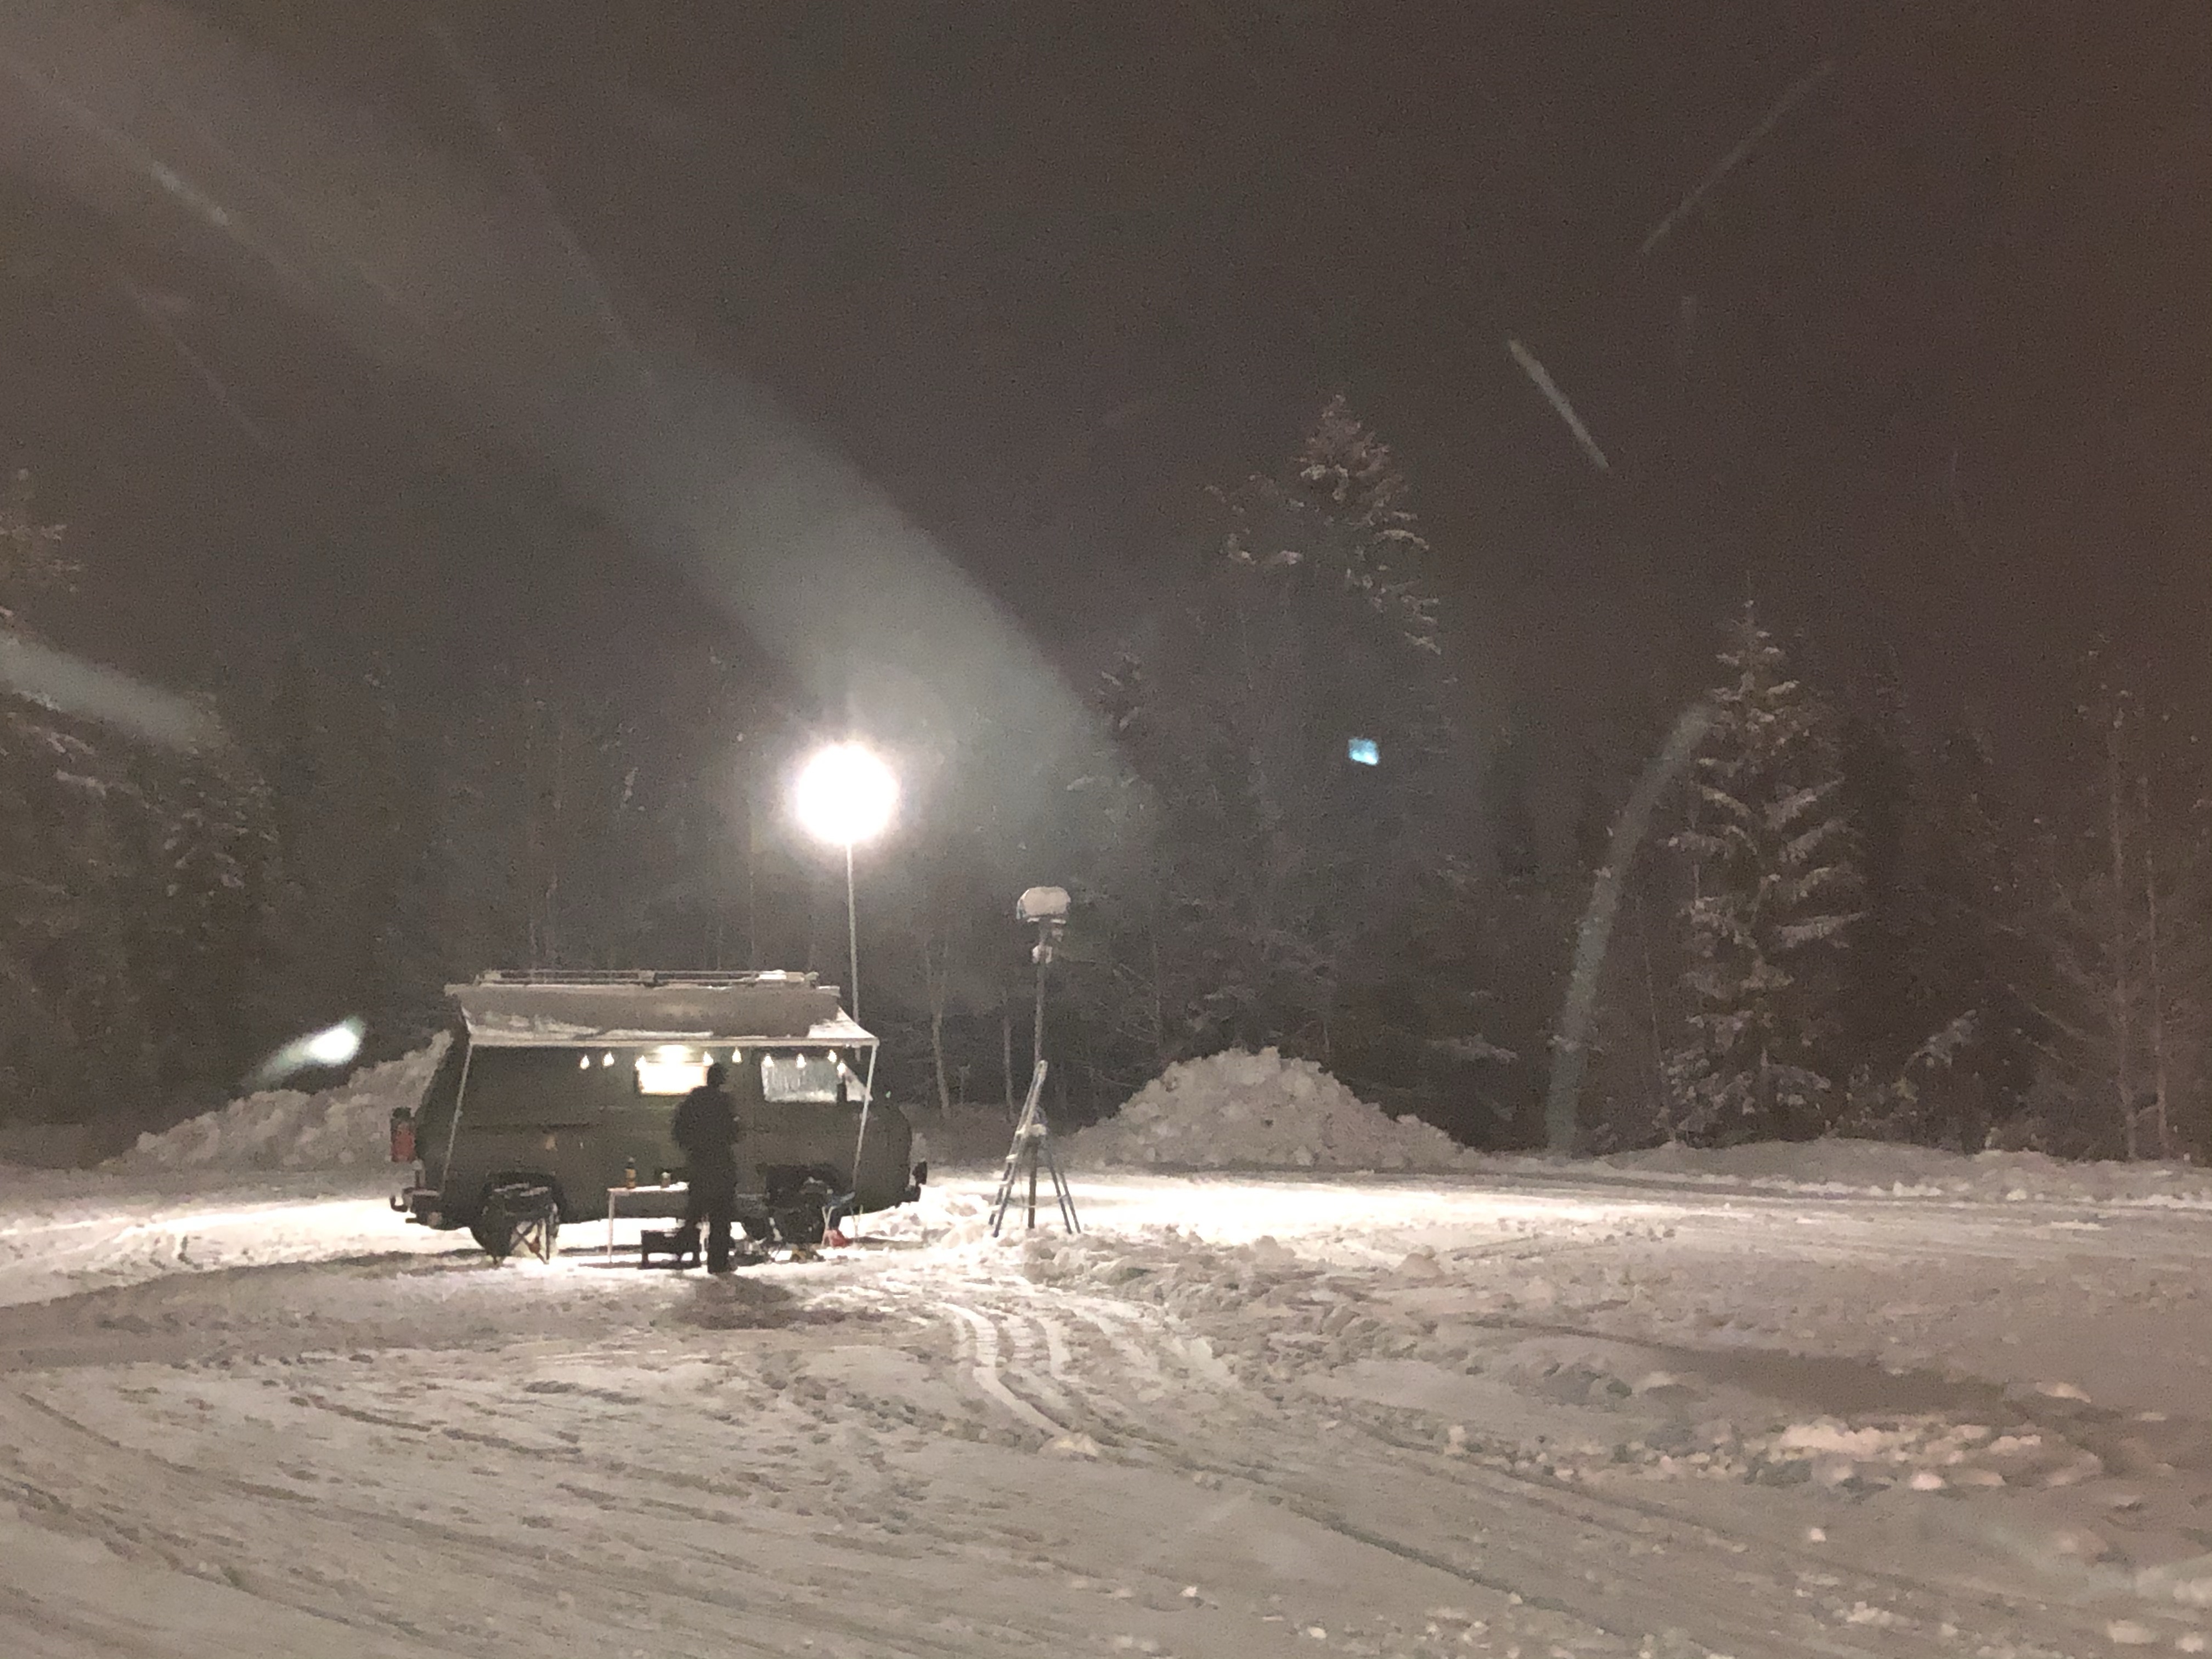
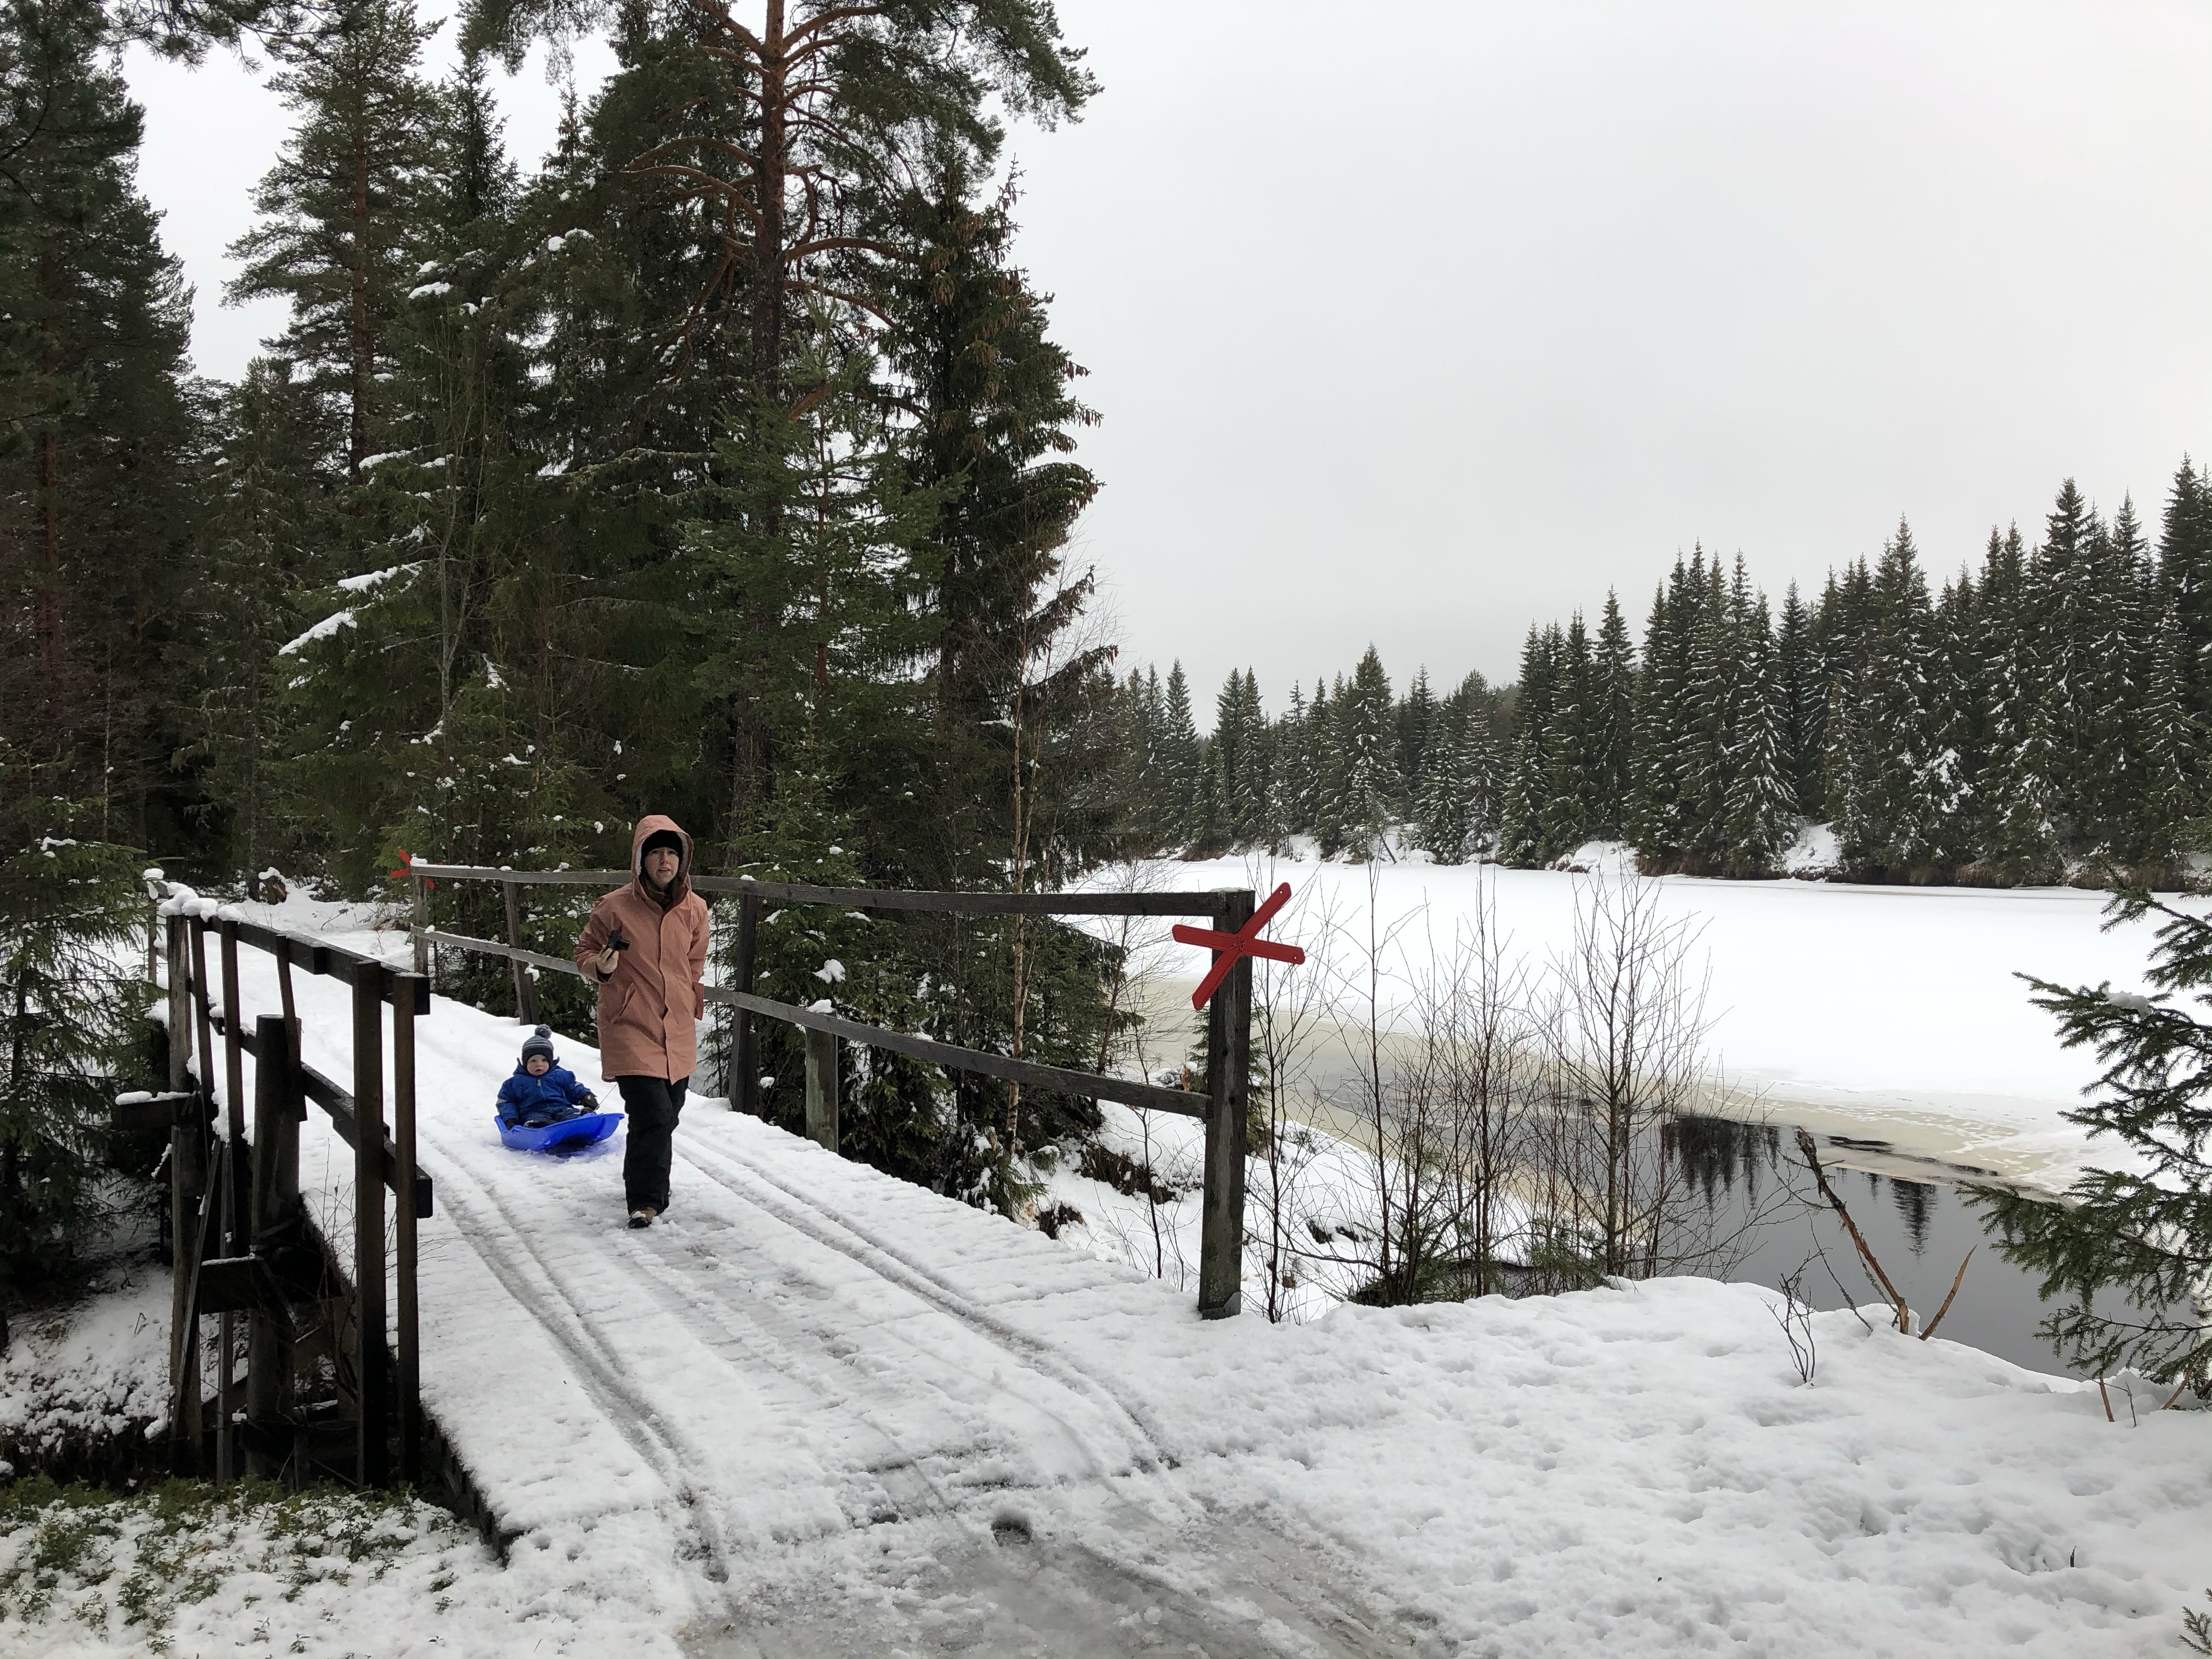
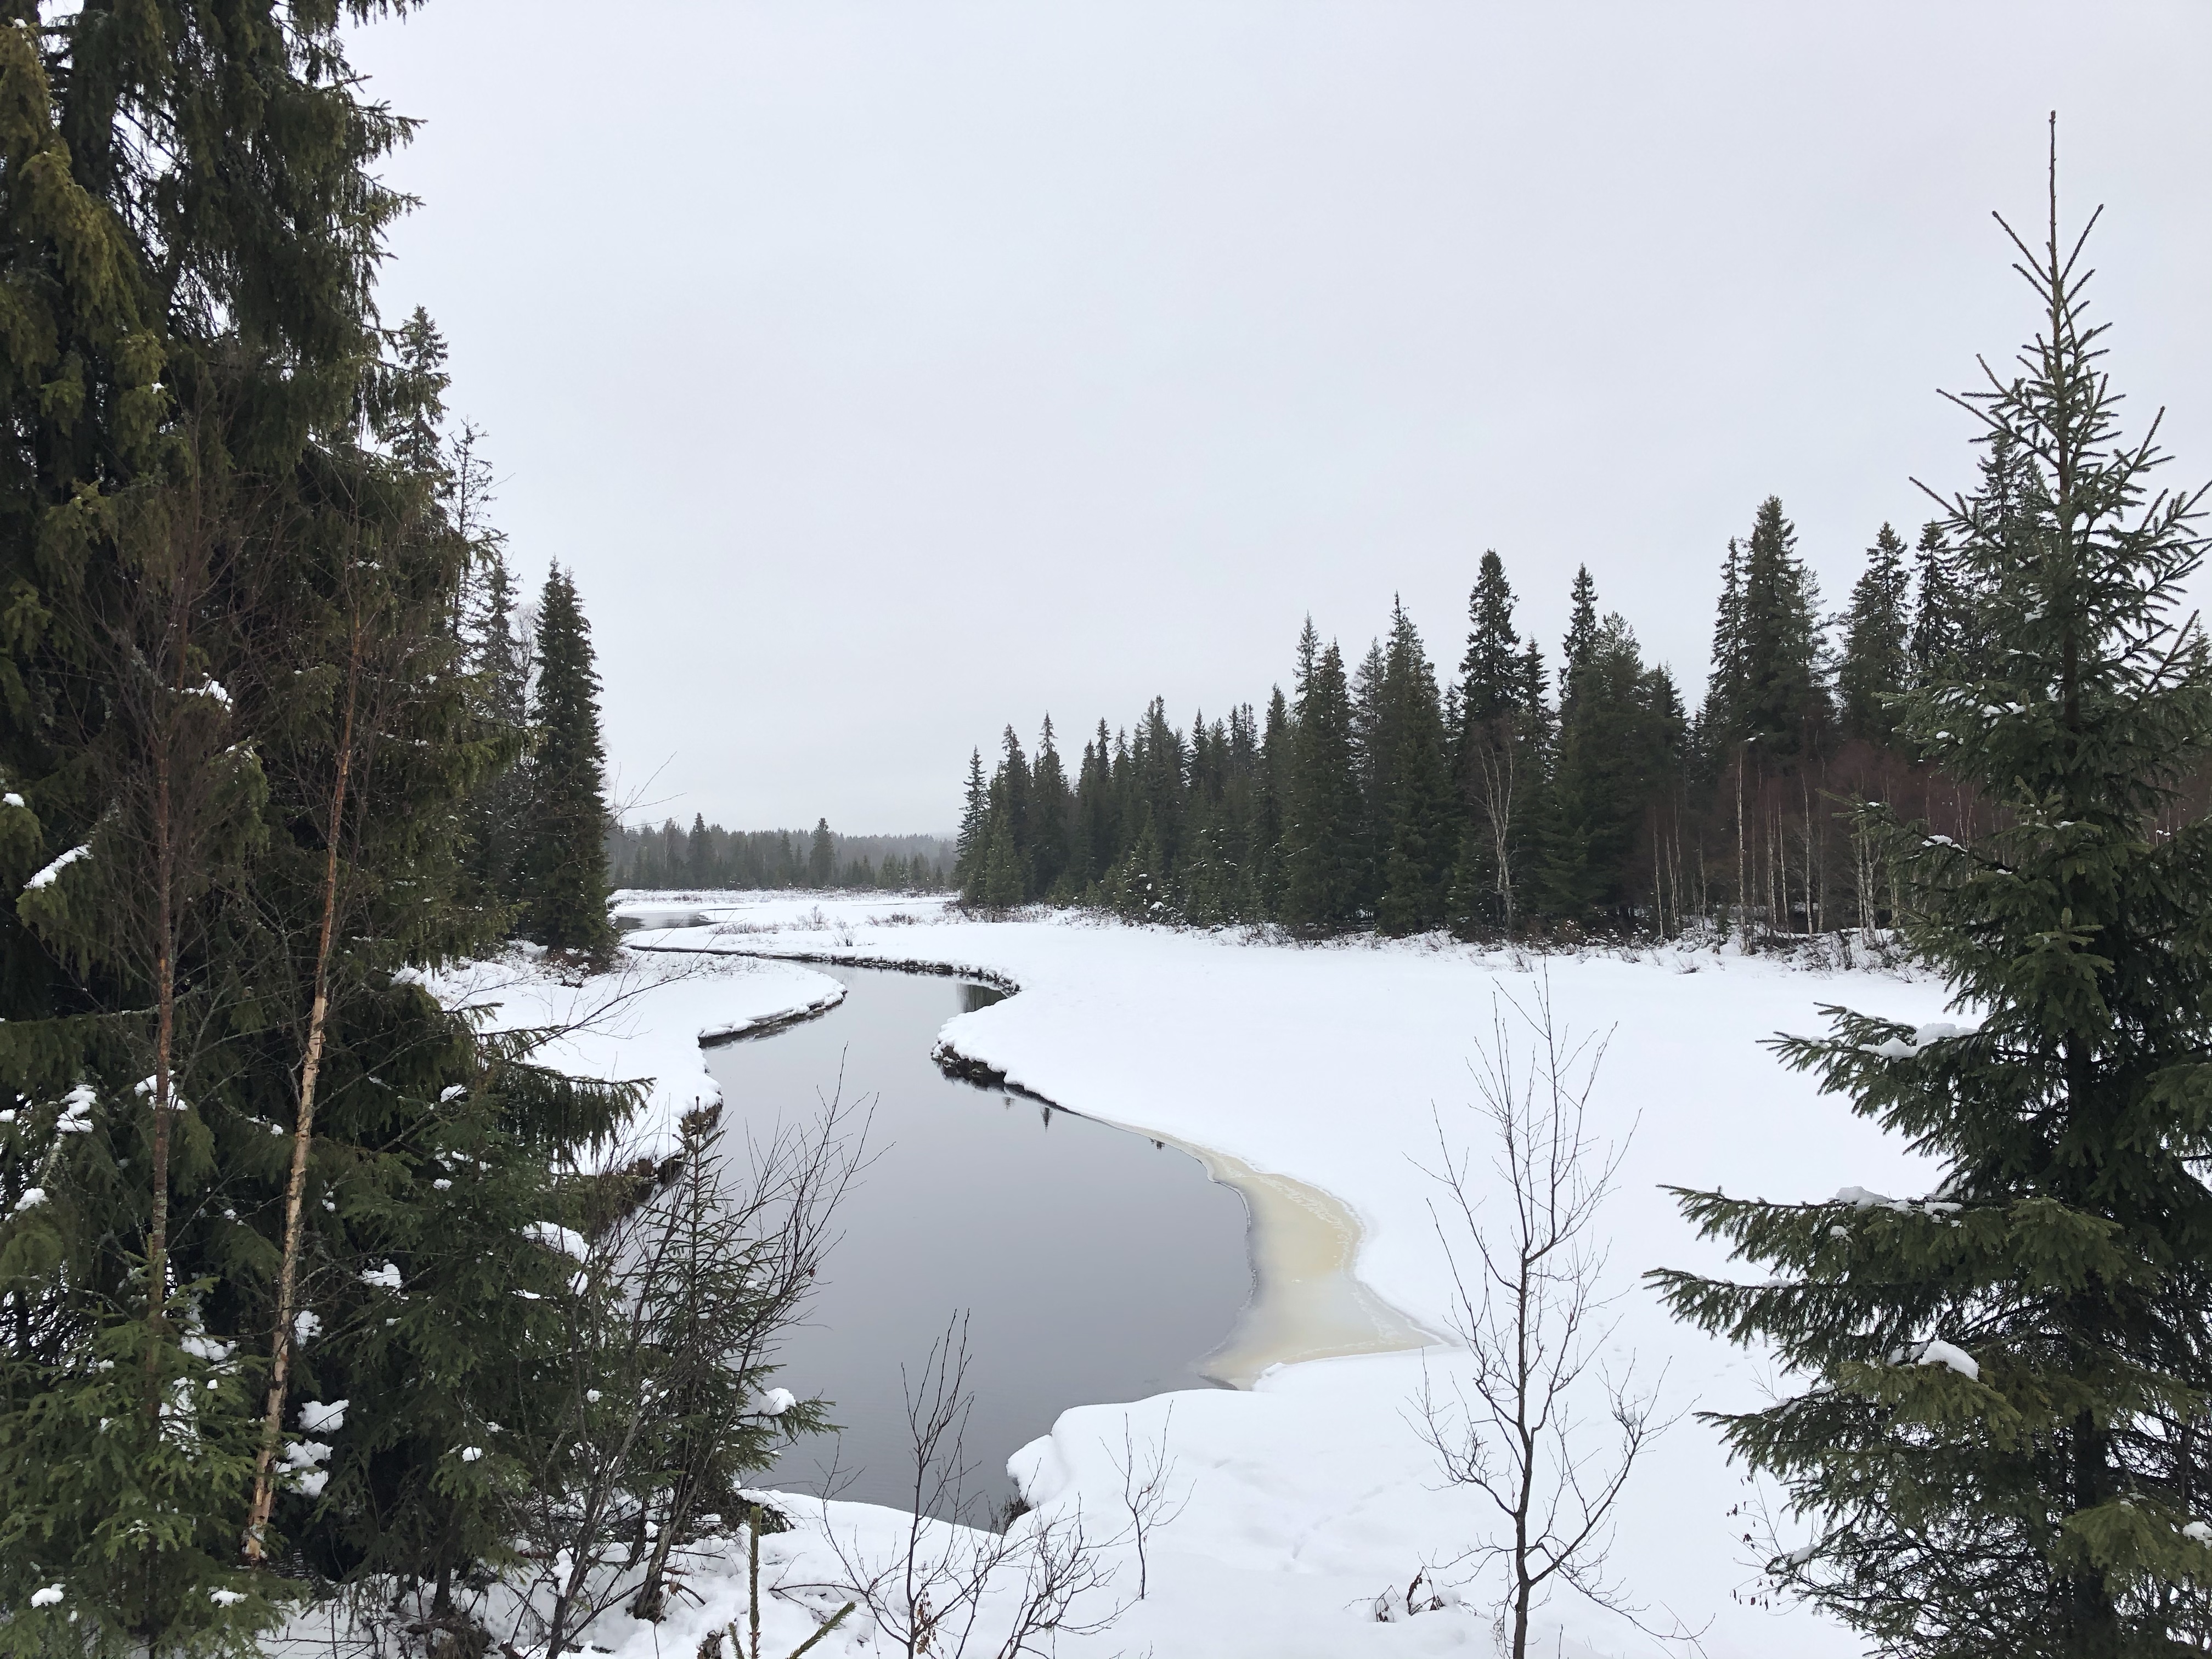
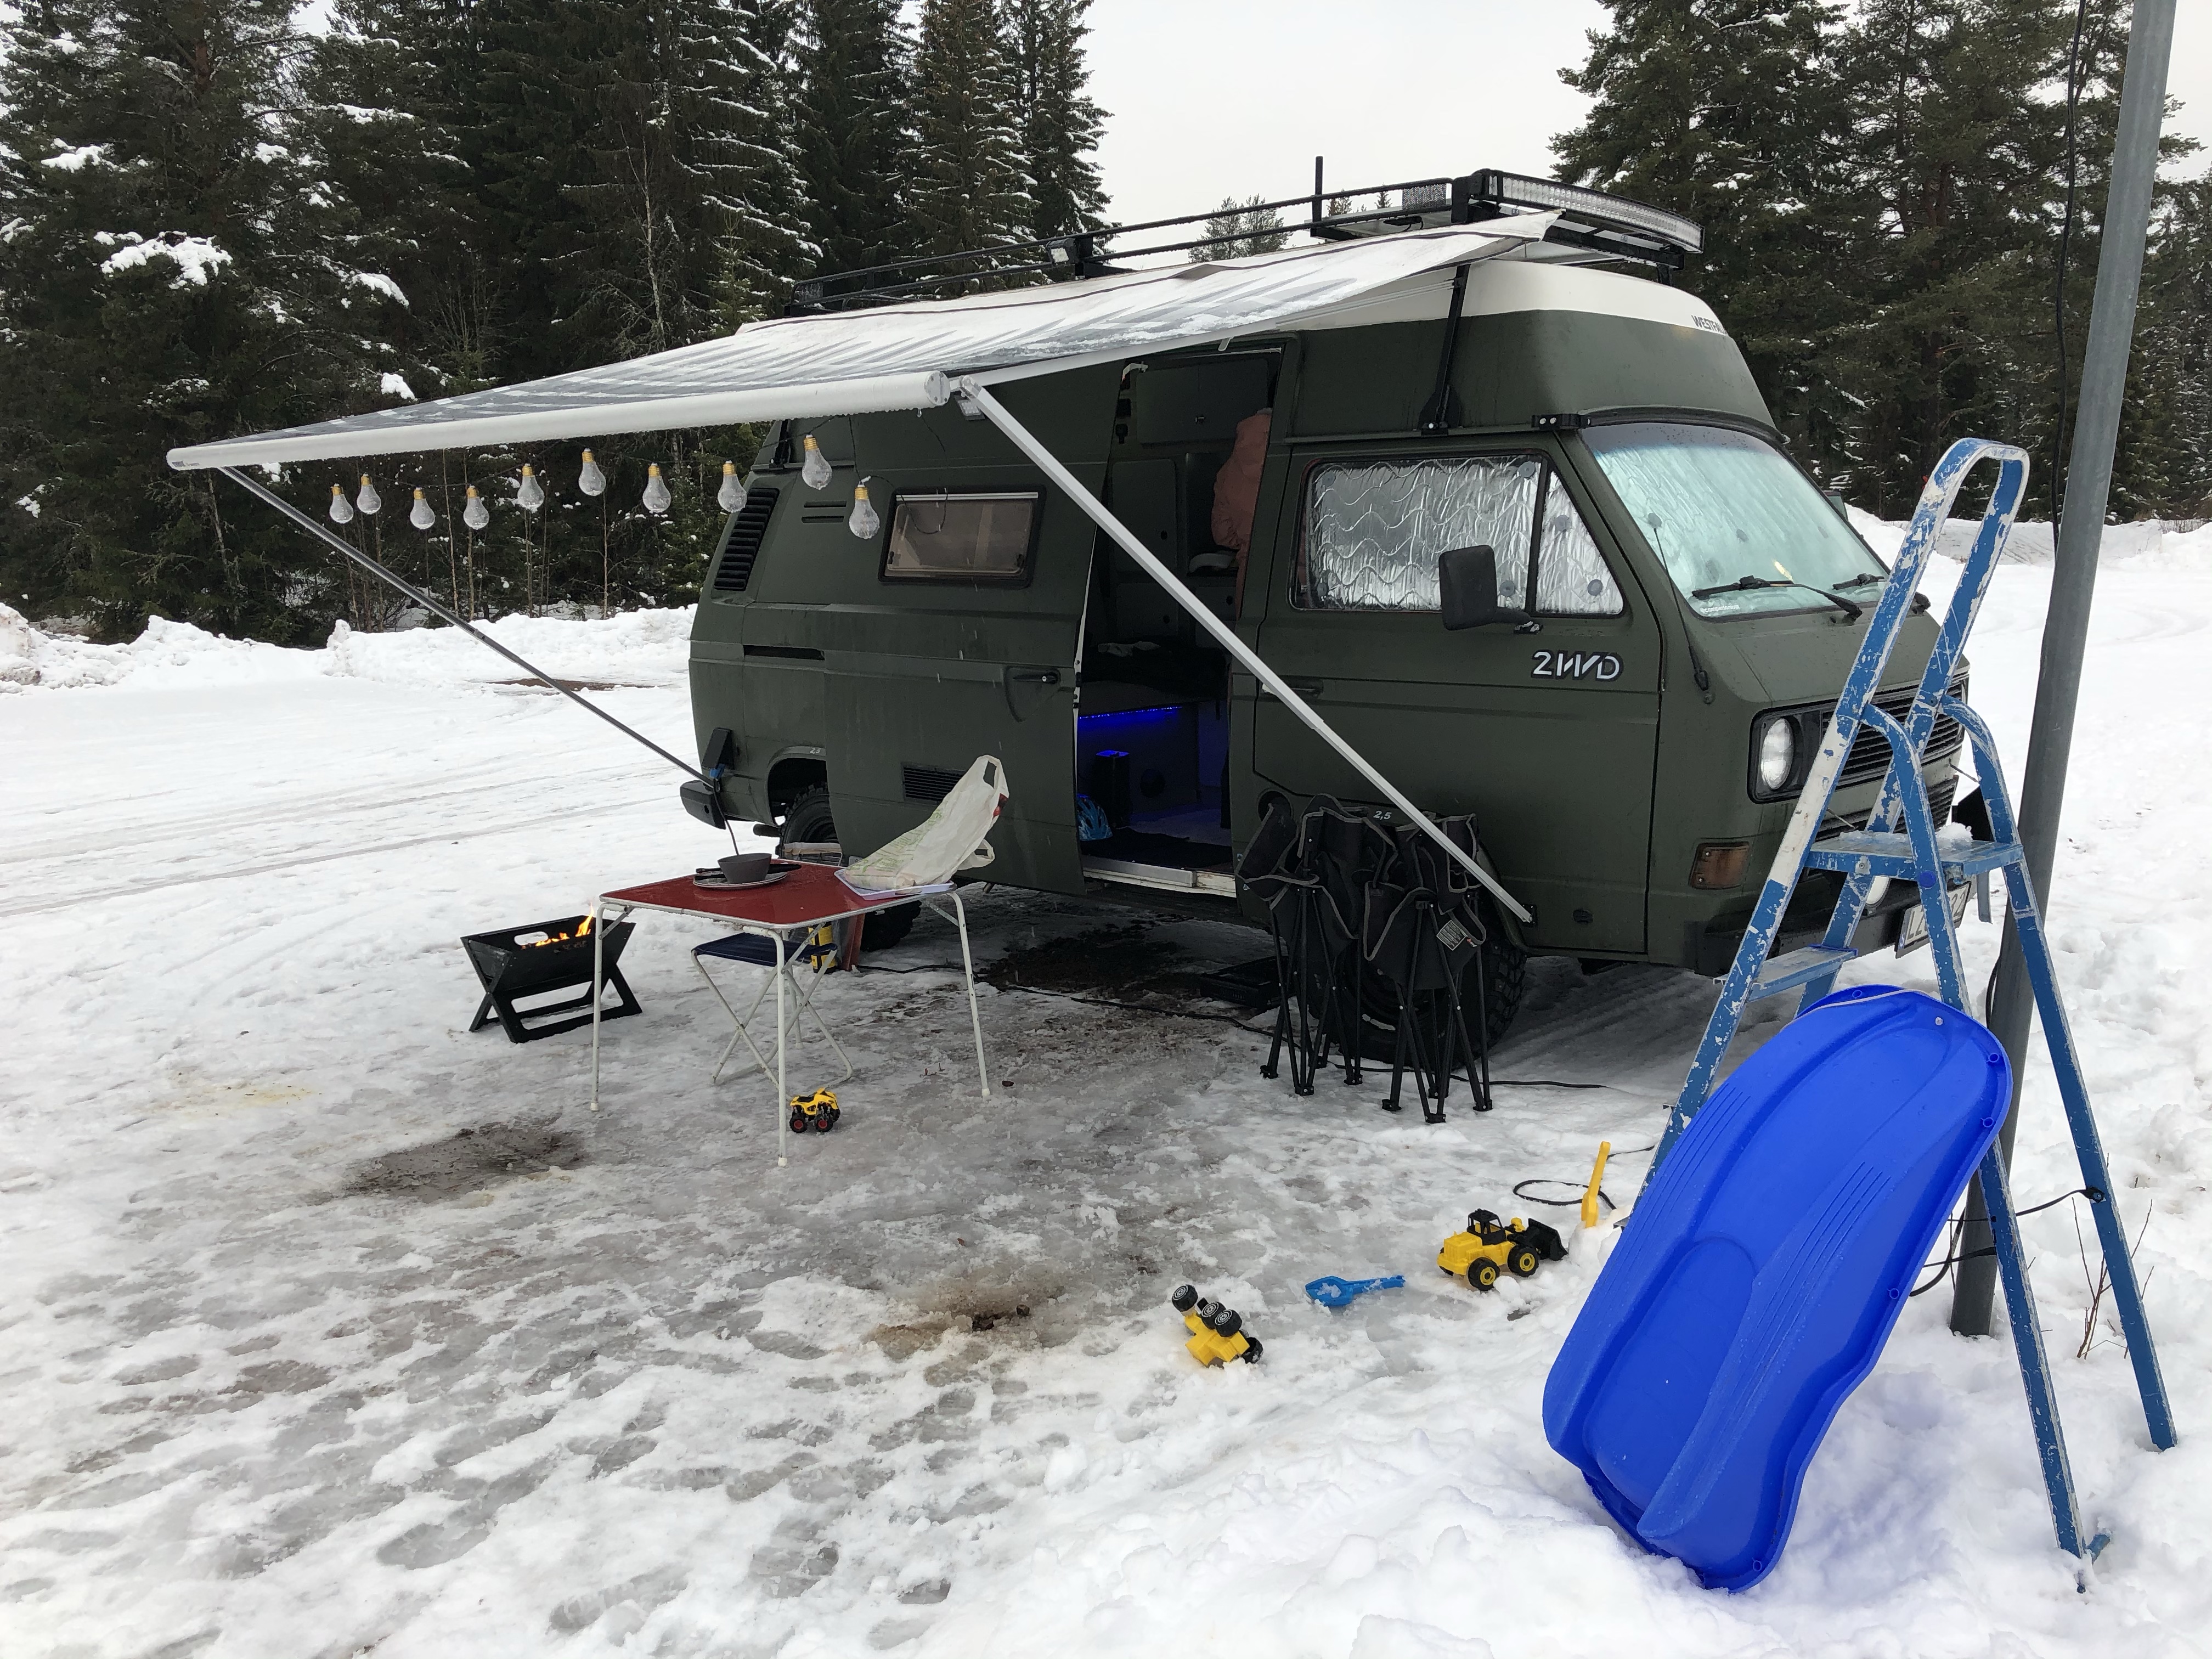
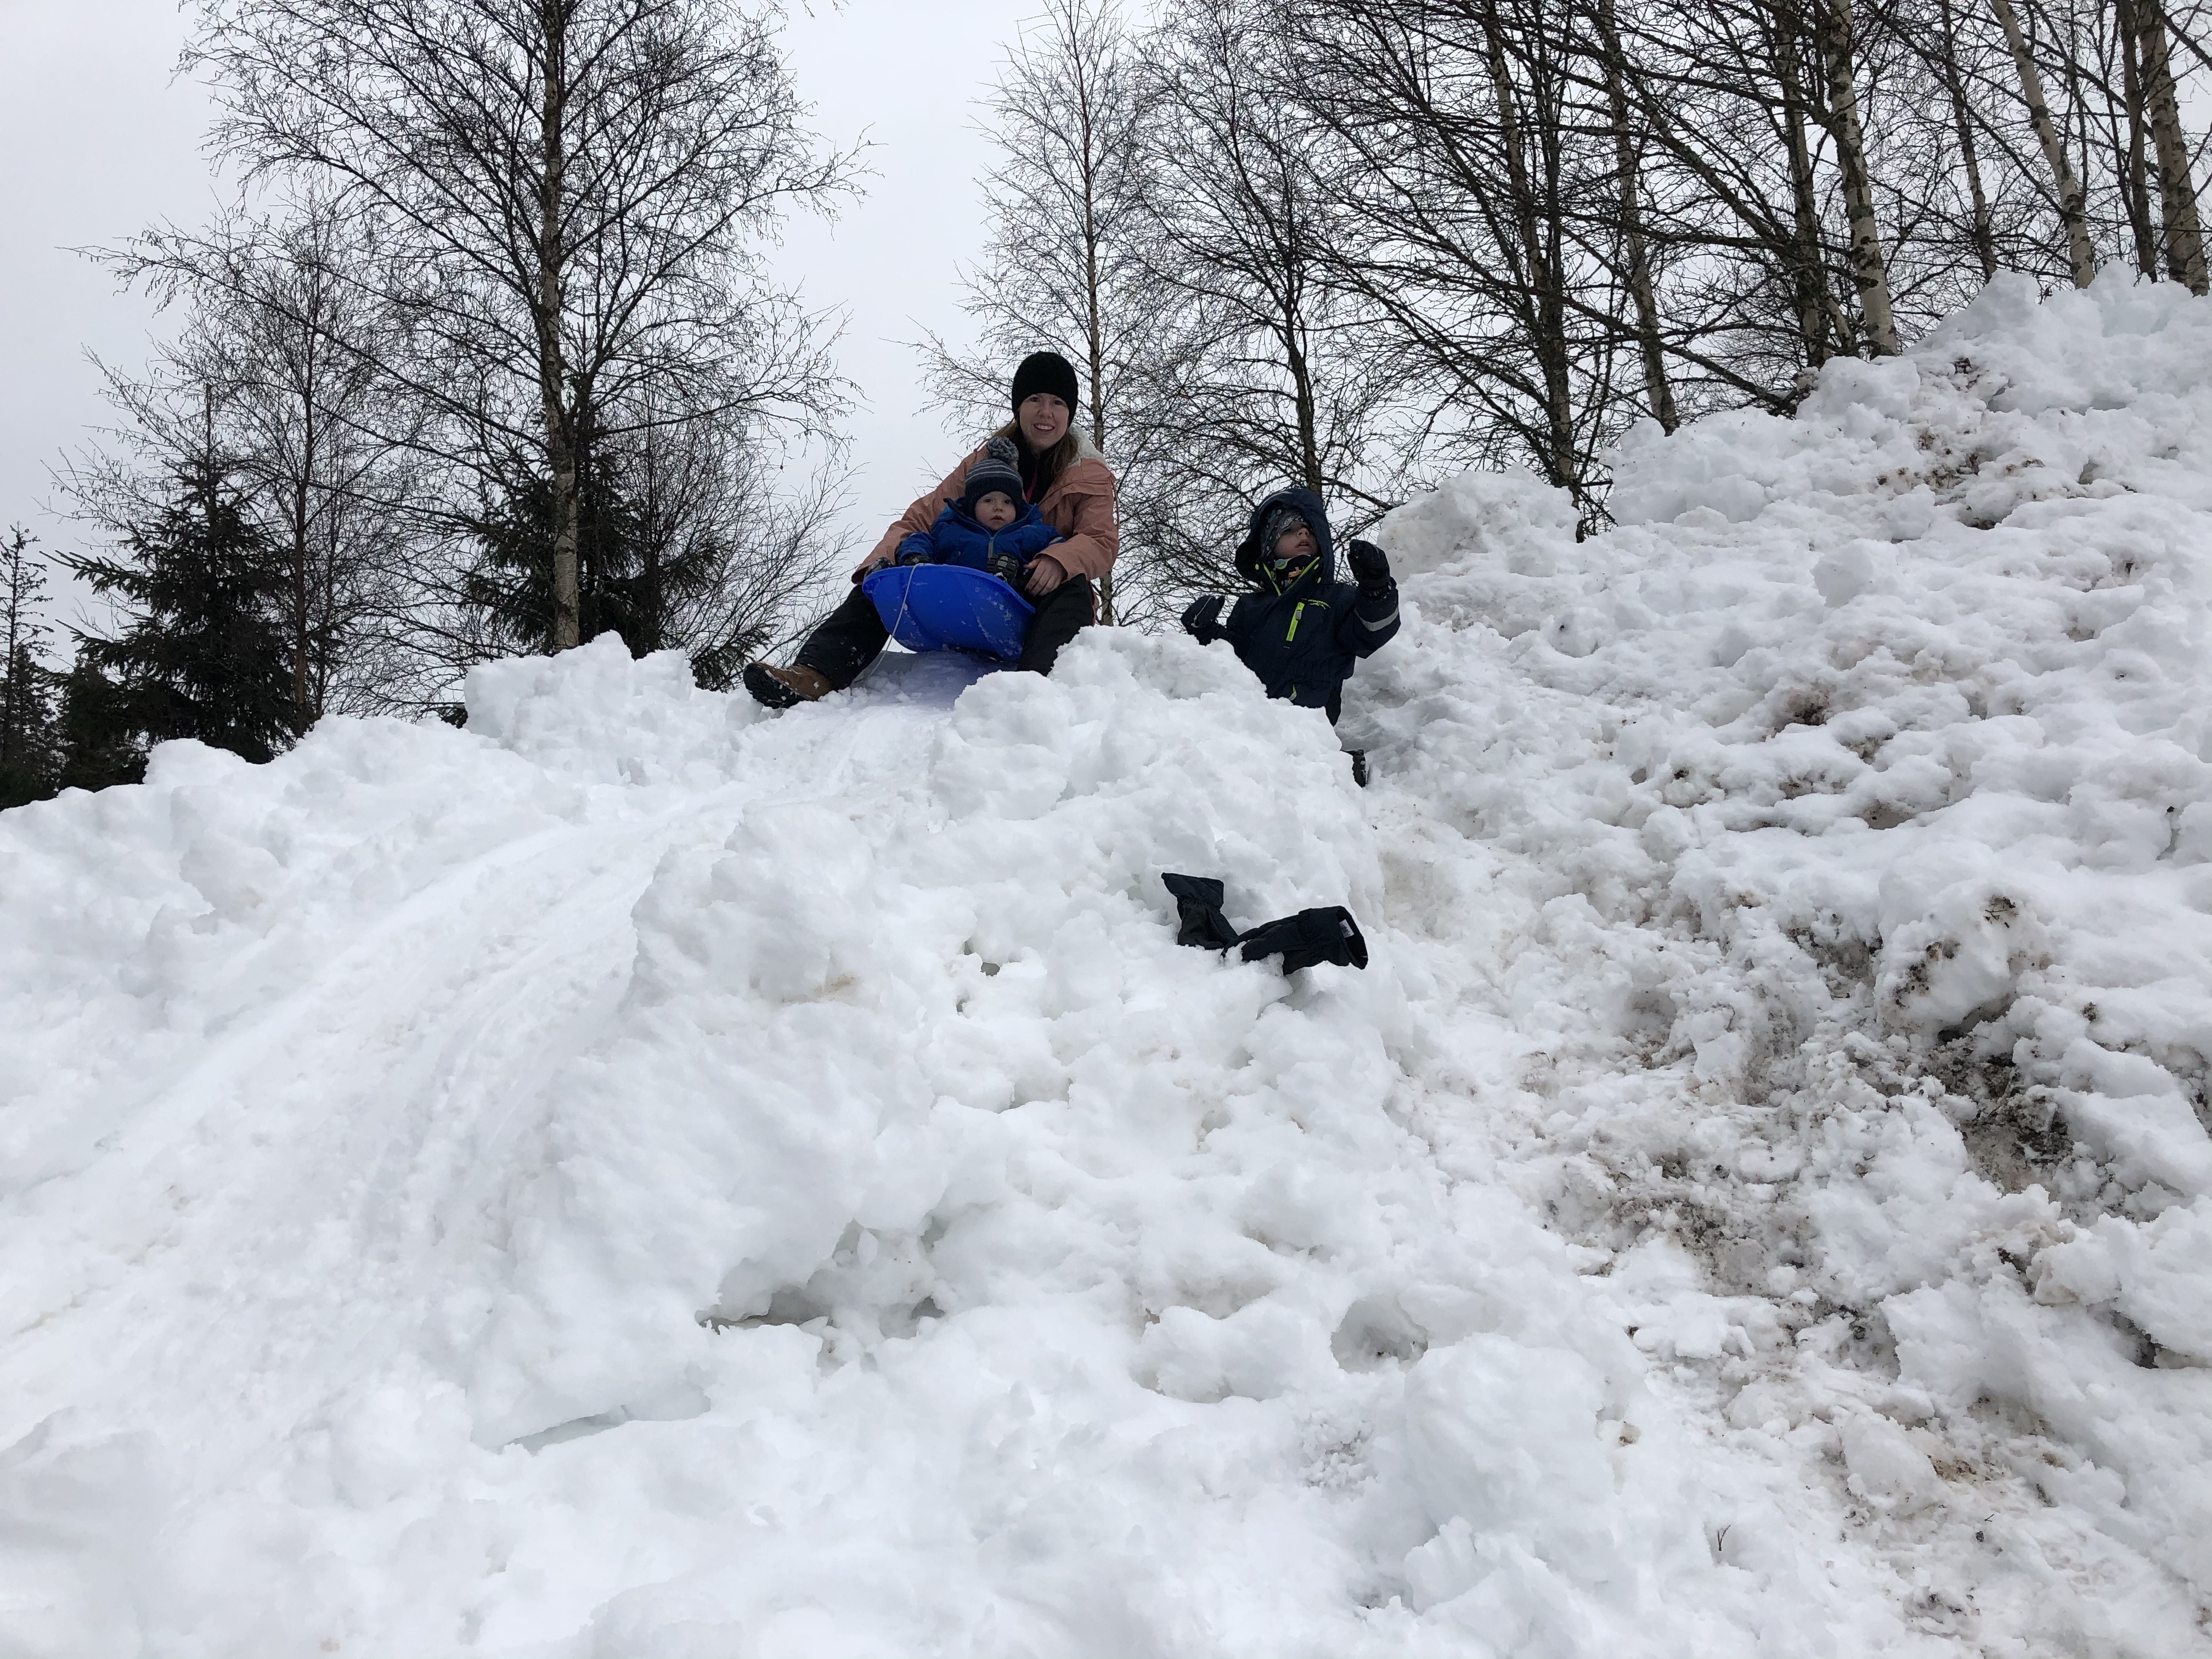
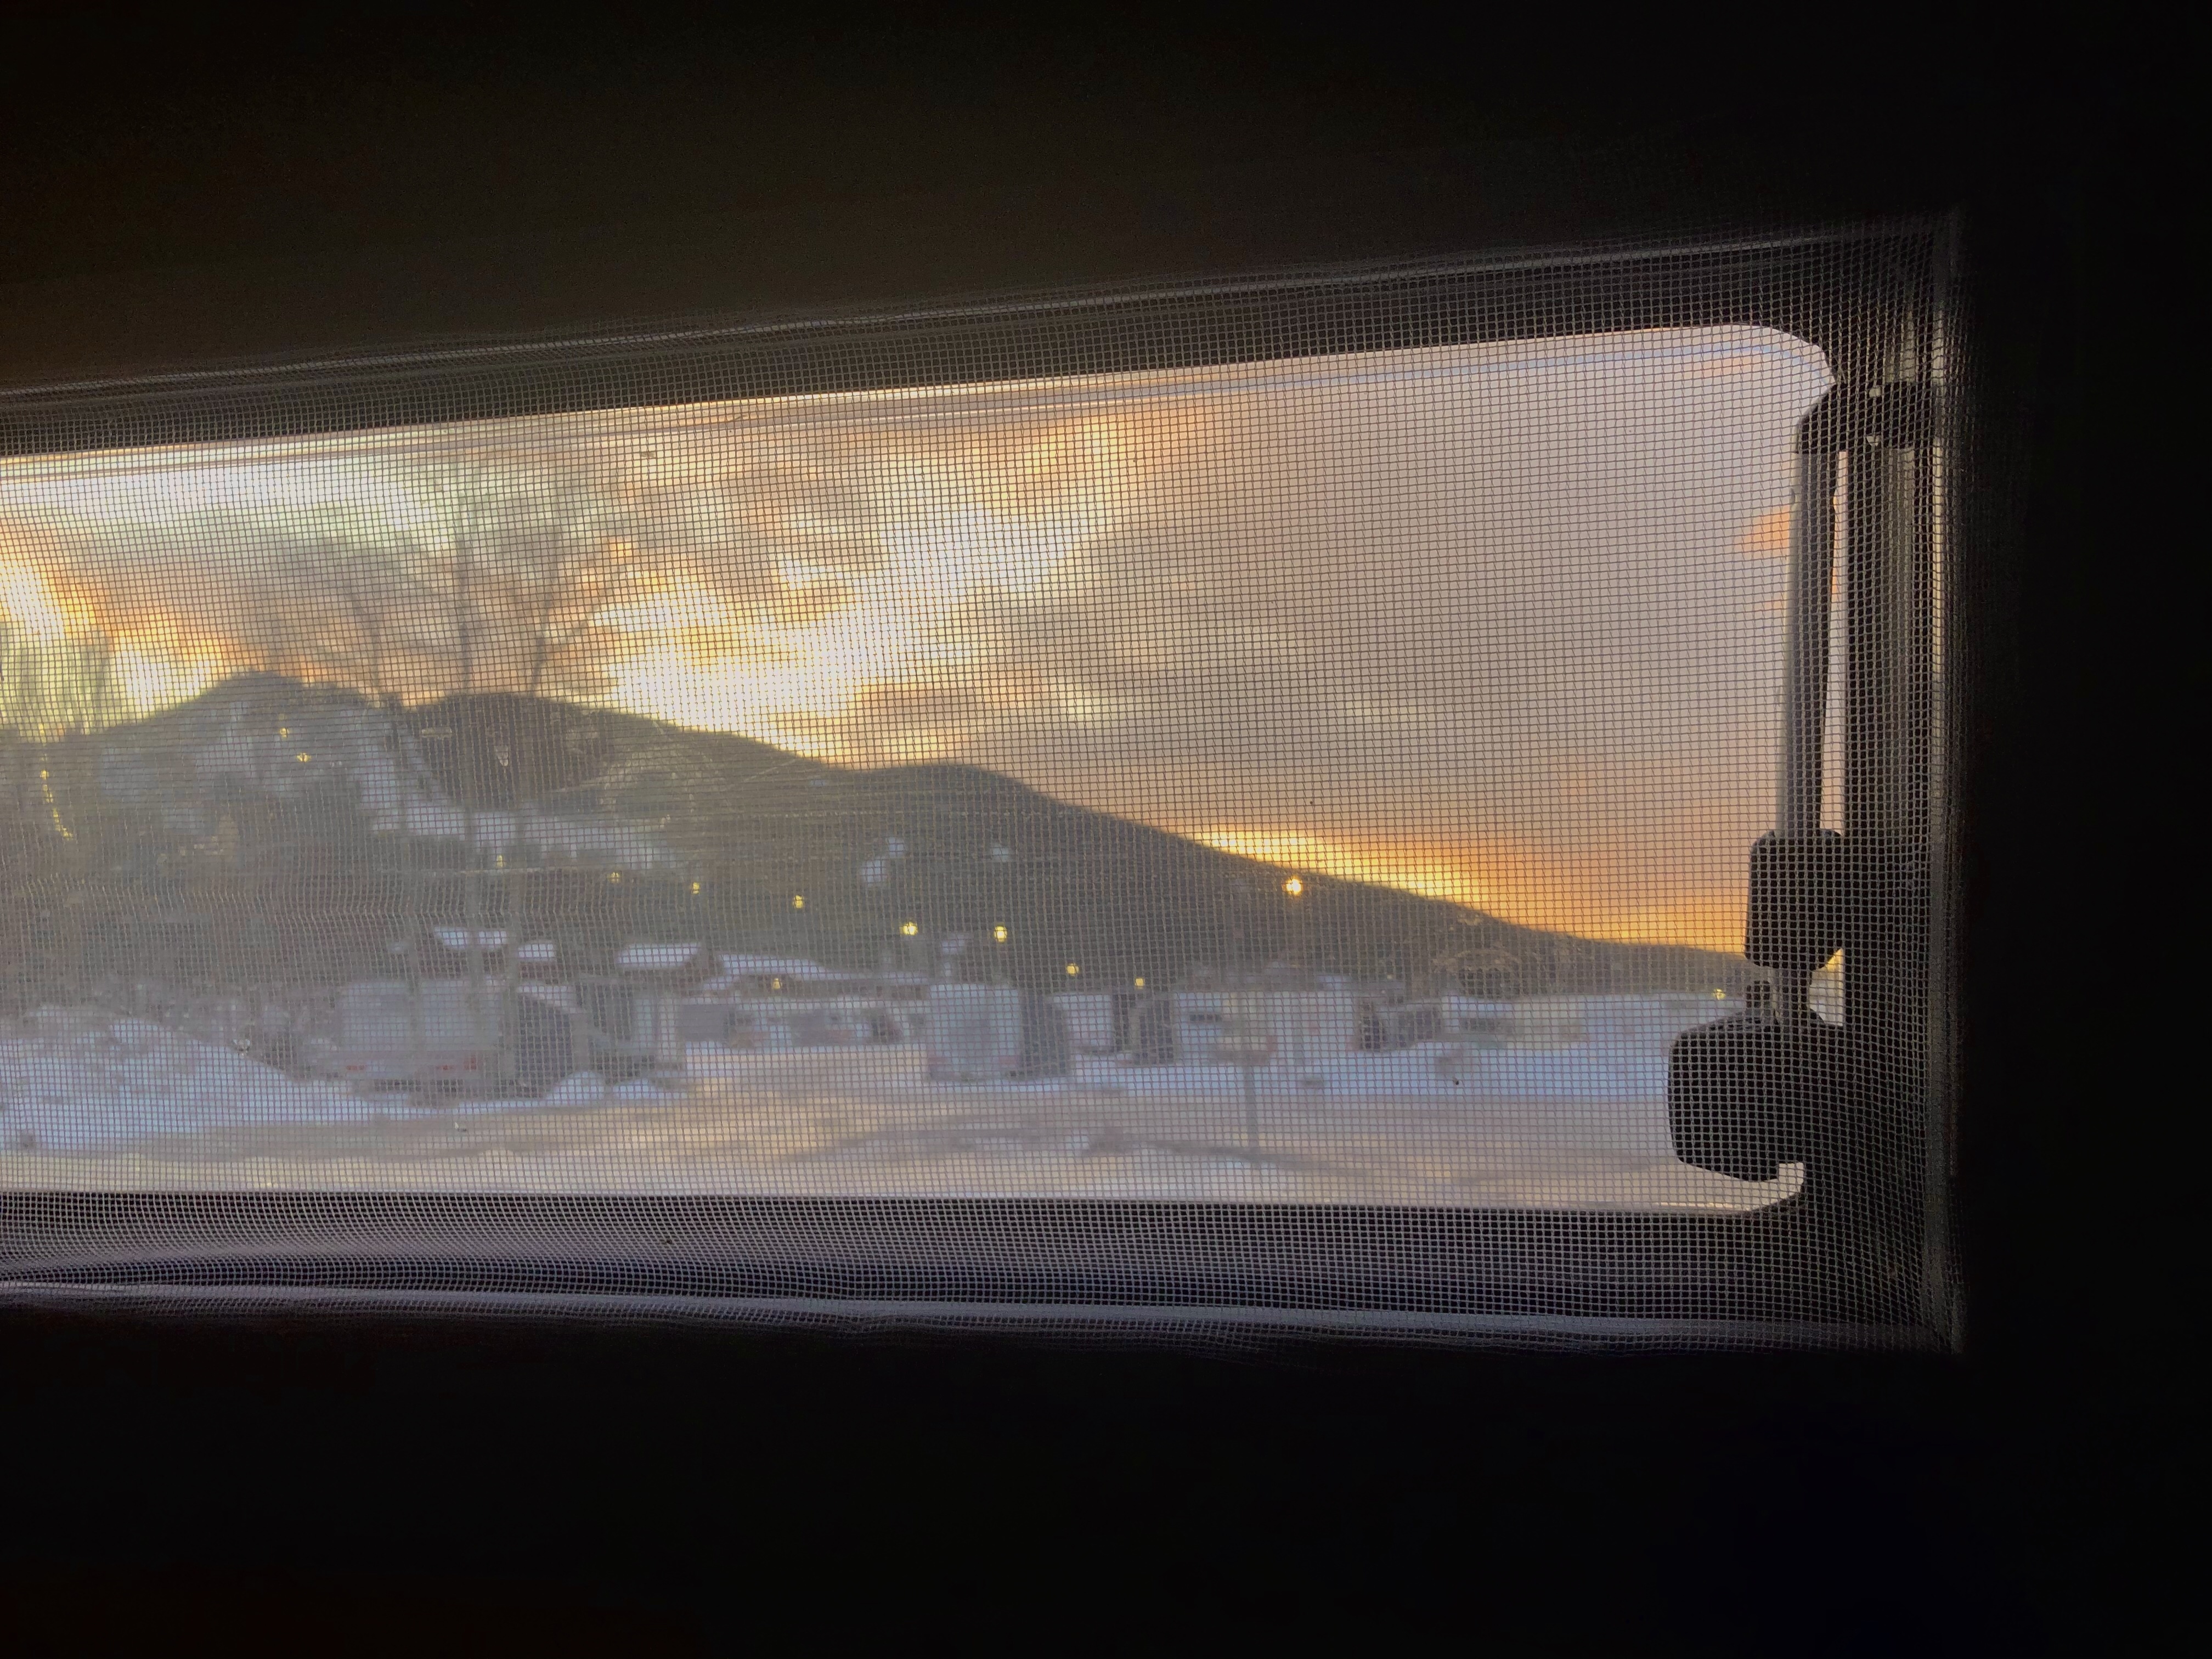
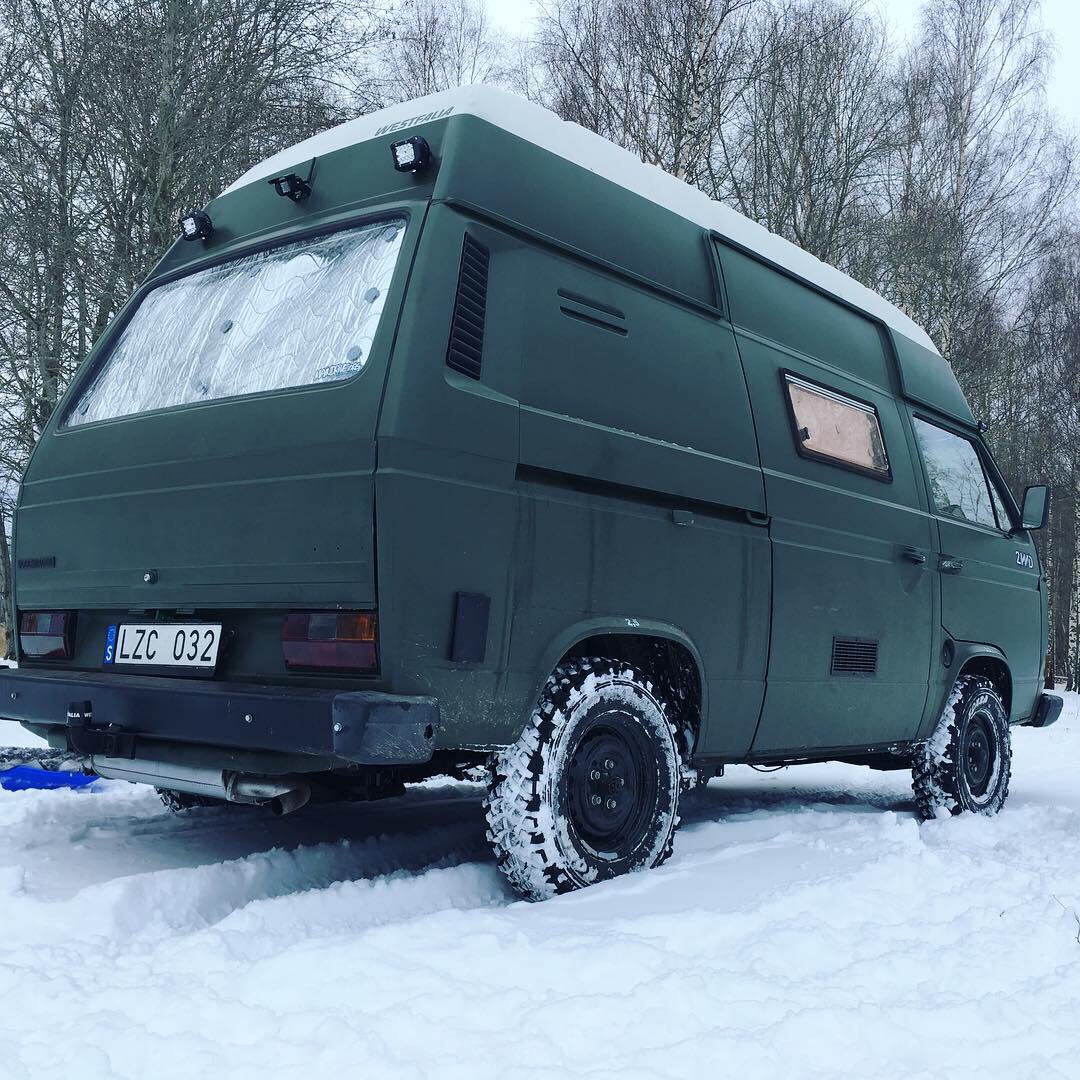
Early start of the camping season 2020!Usually at this time of year we have a lot of snow and temperatures around at least -10 Celsius. But not this year, almost no snow at all and temperatures around +10. So we decided to drive higher up in Sweden to find some snow, mostly for the kids but also to try some winter camping. We drove 300km to Kläppen in Sälen, Dalarna here in Sweden.
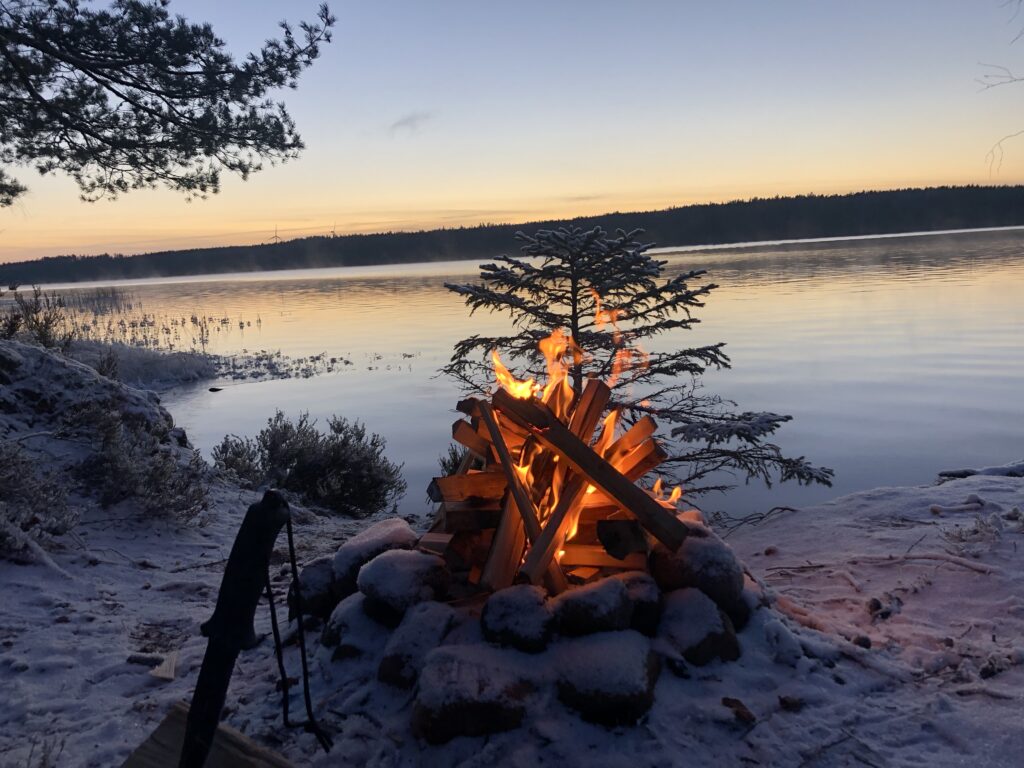
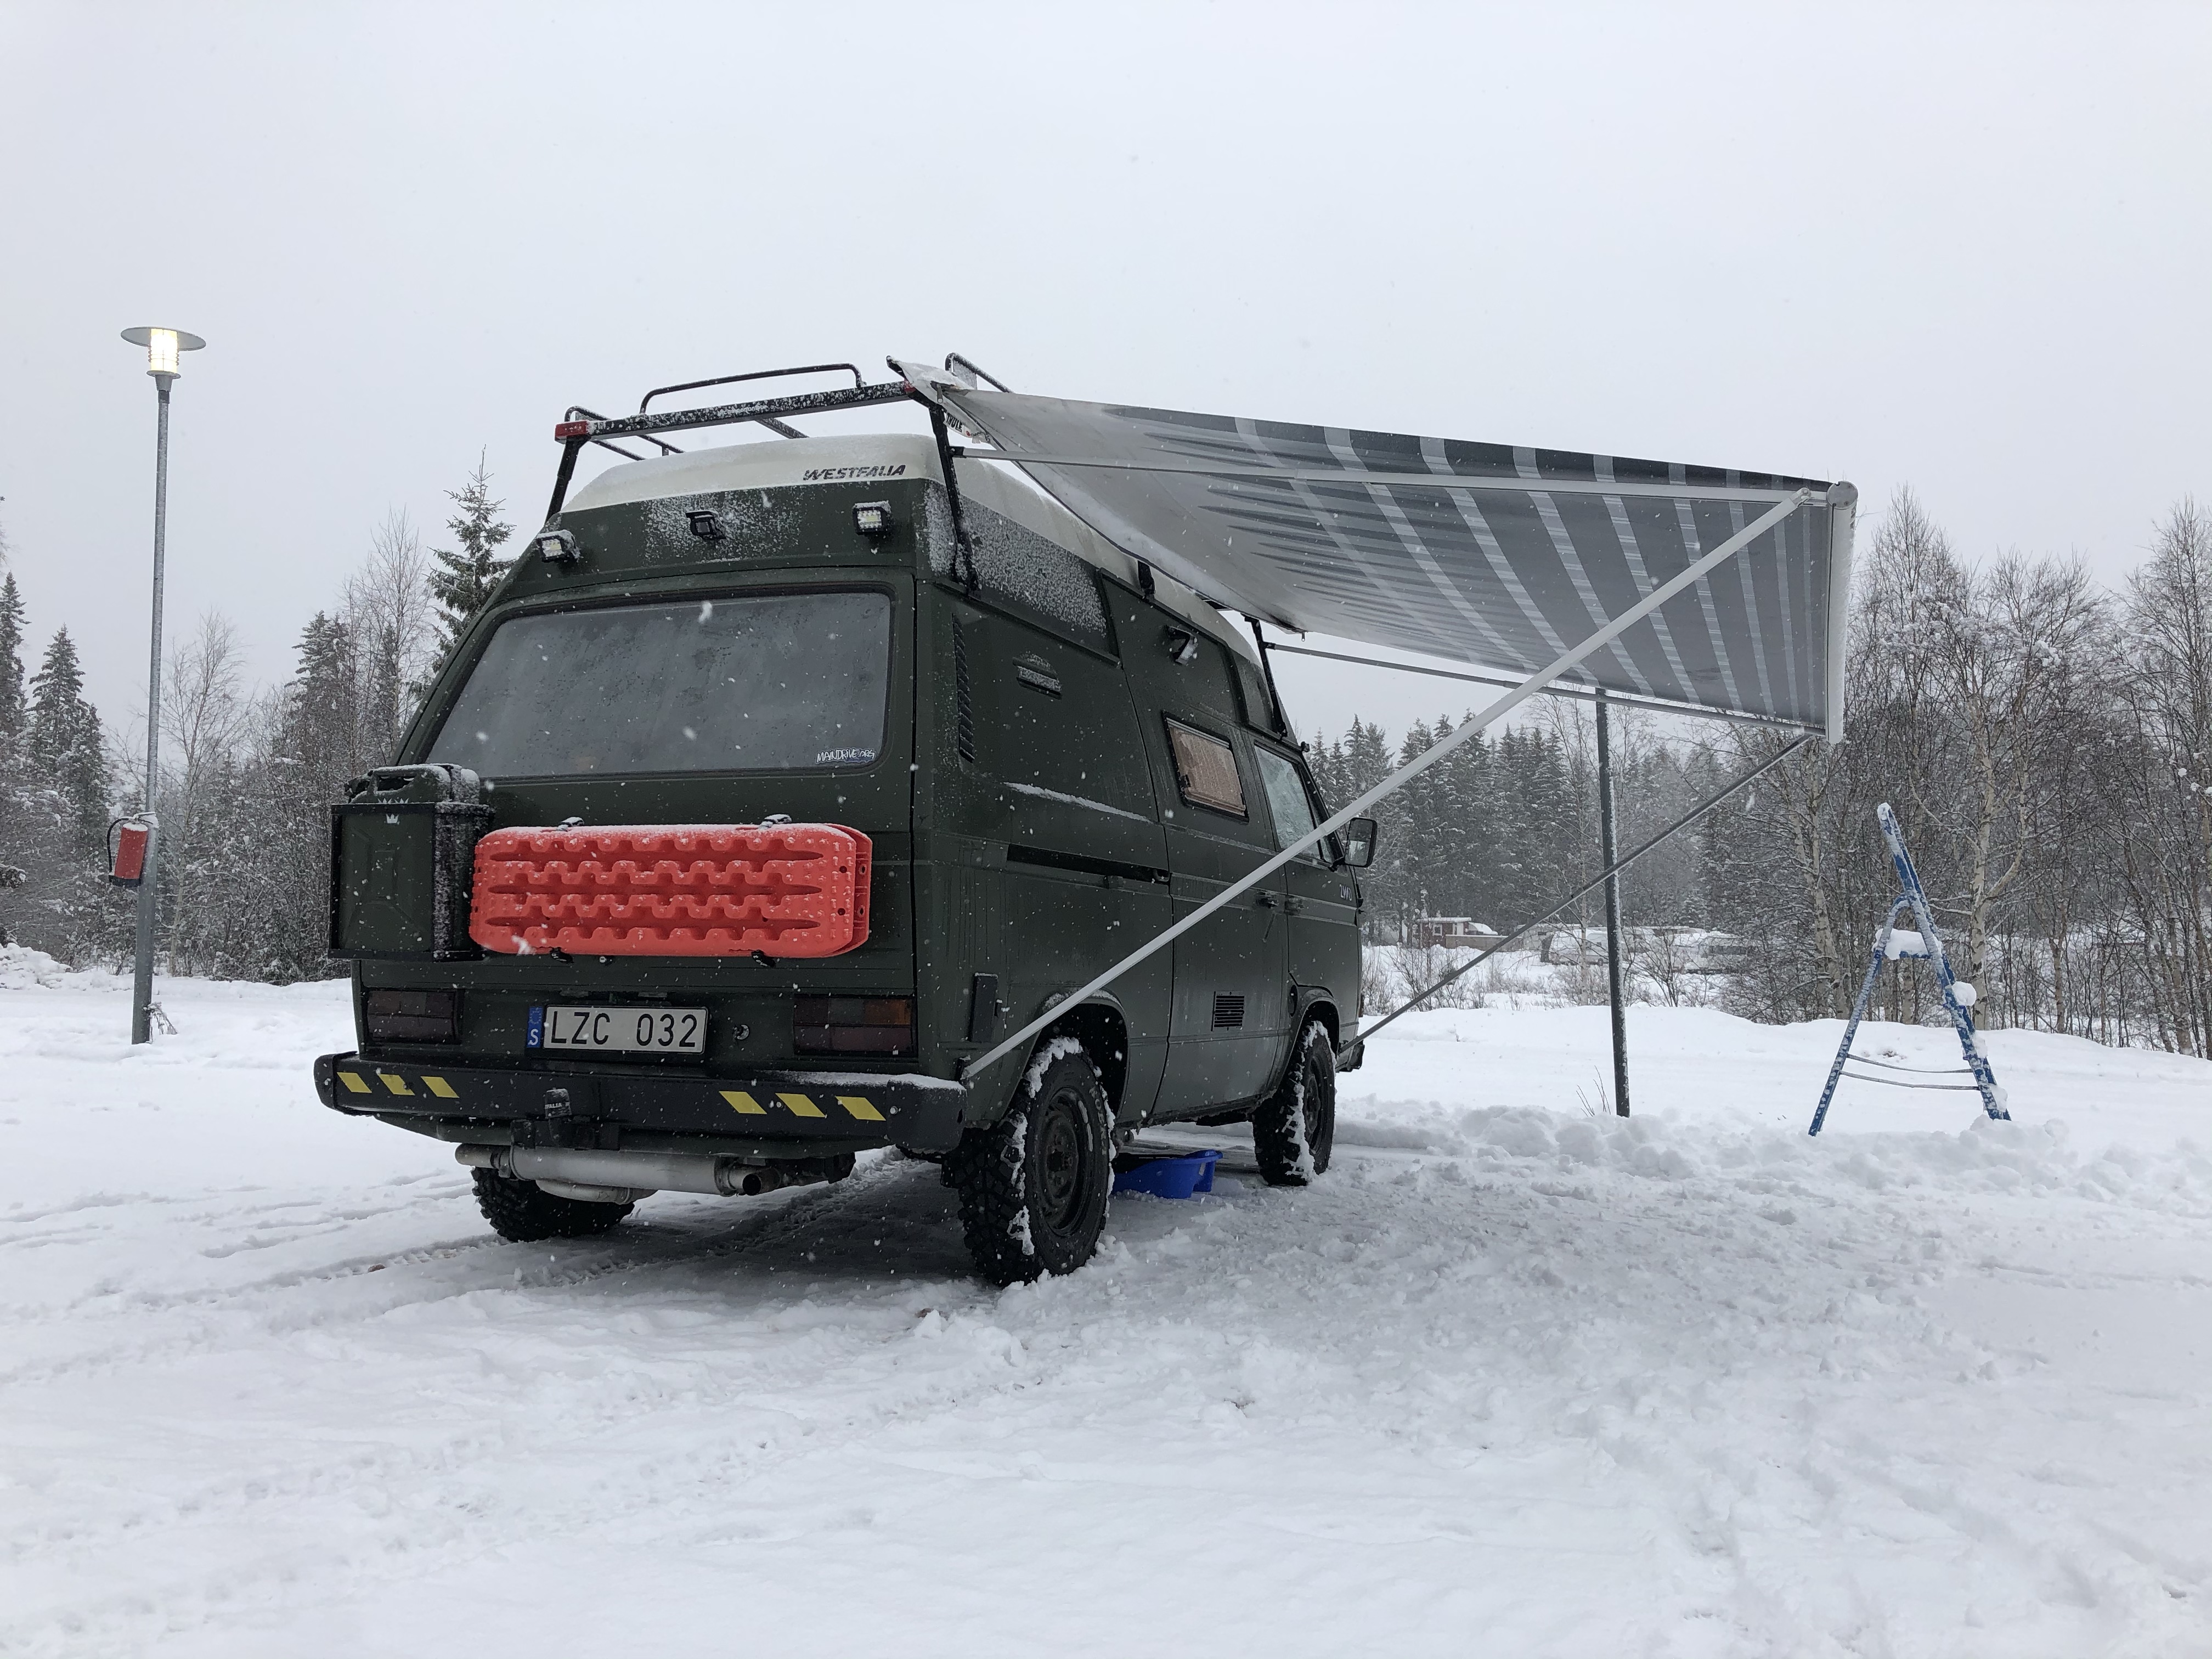
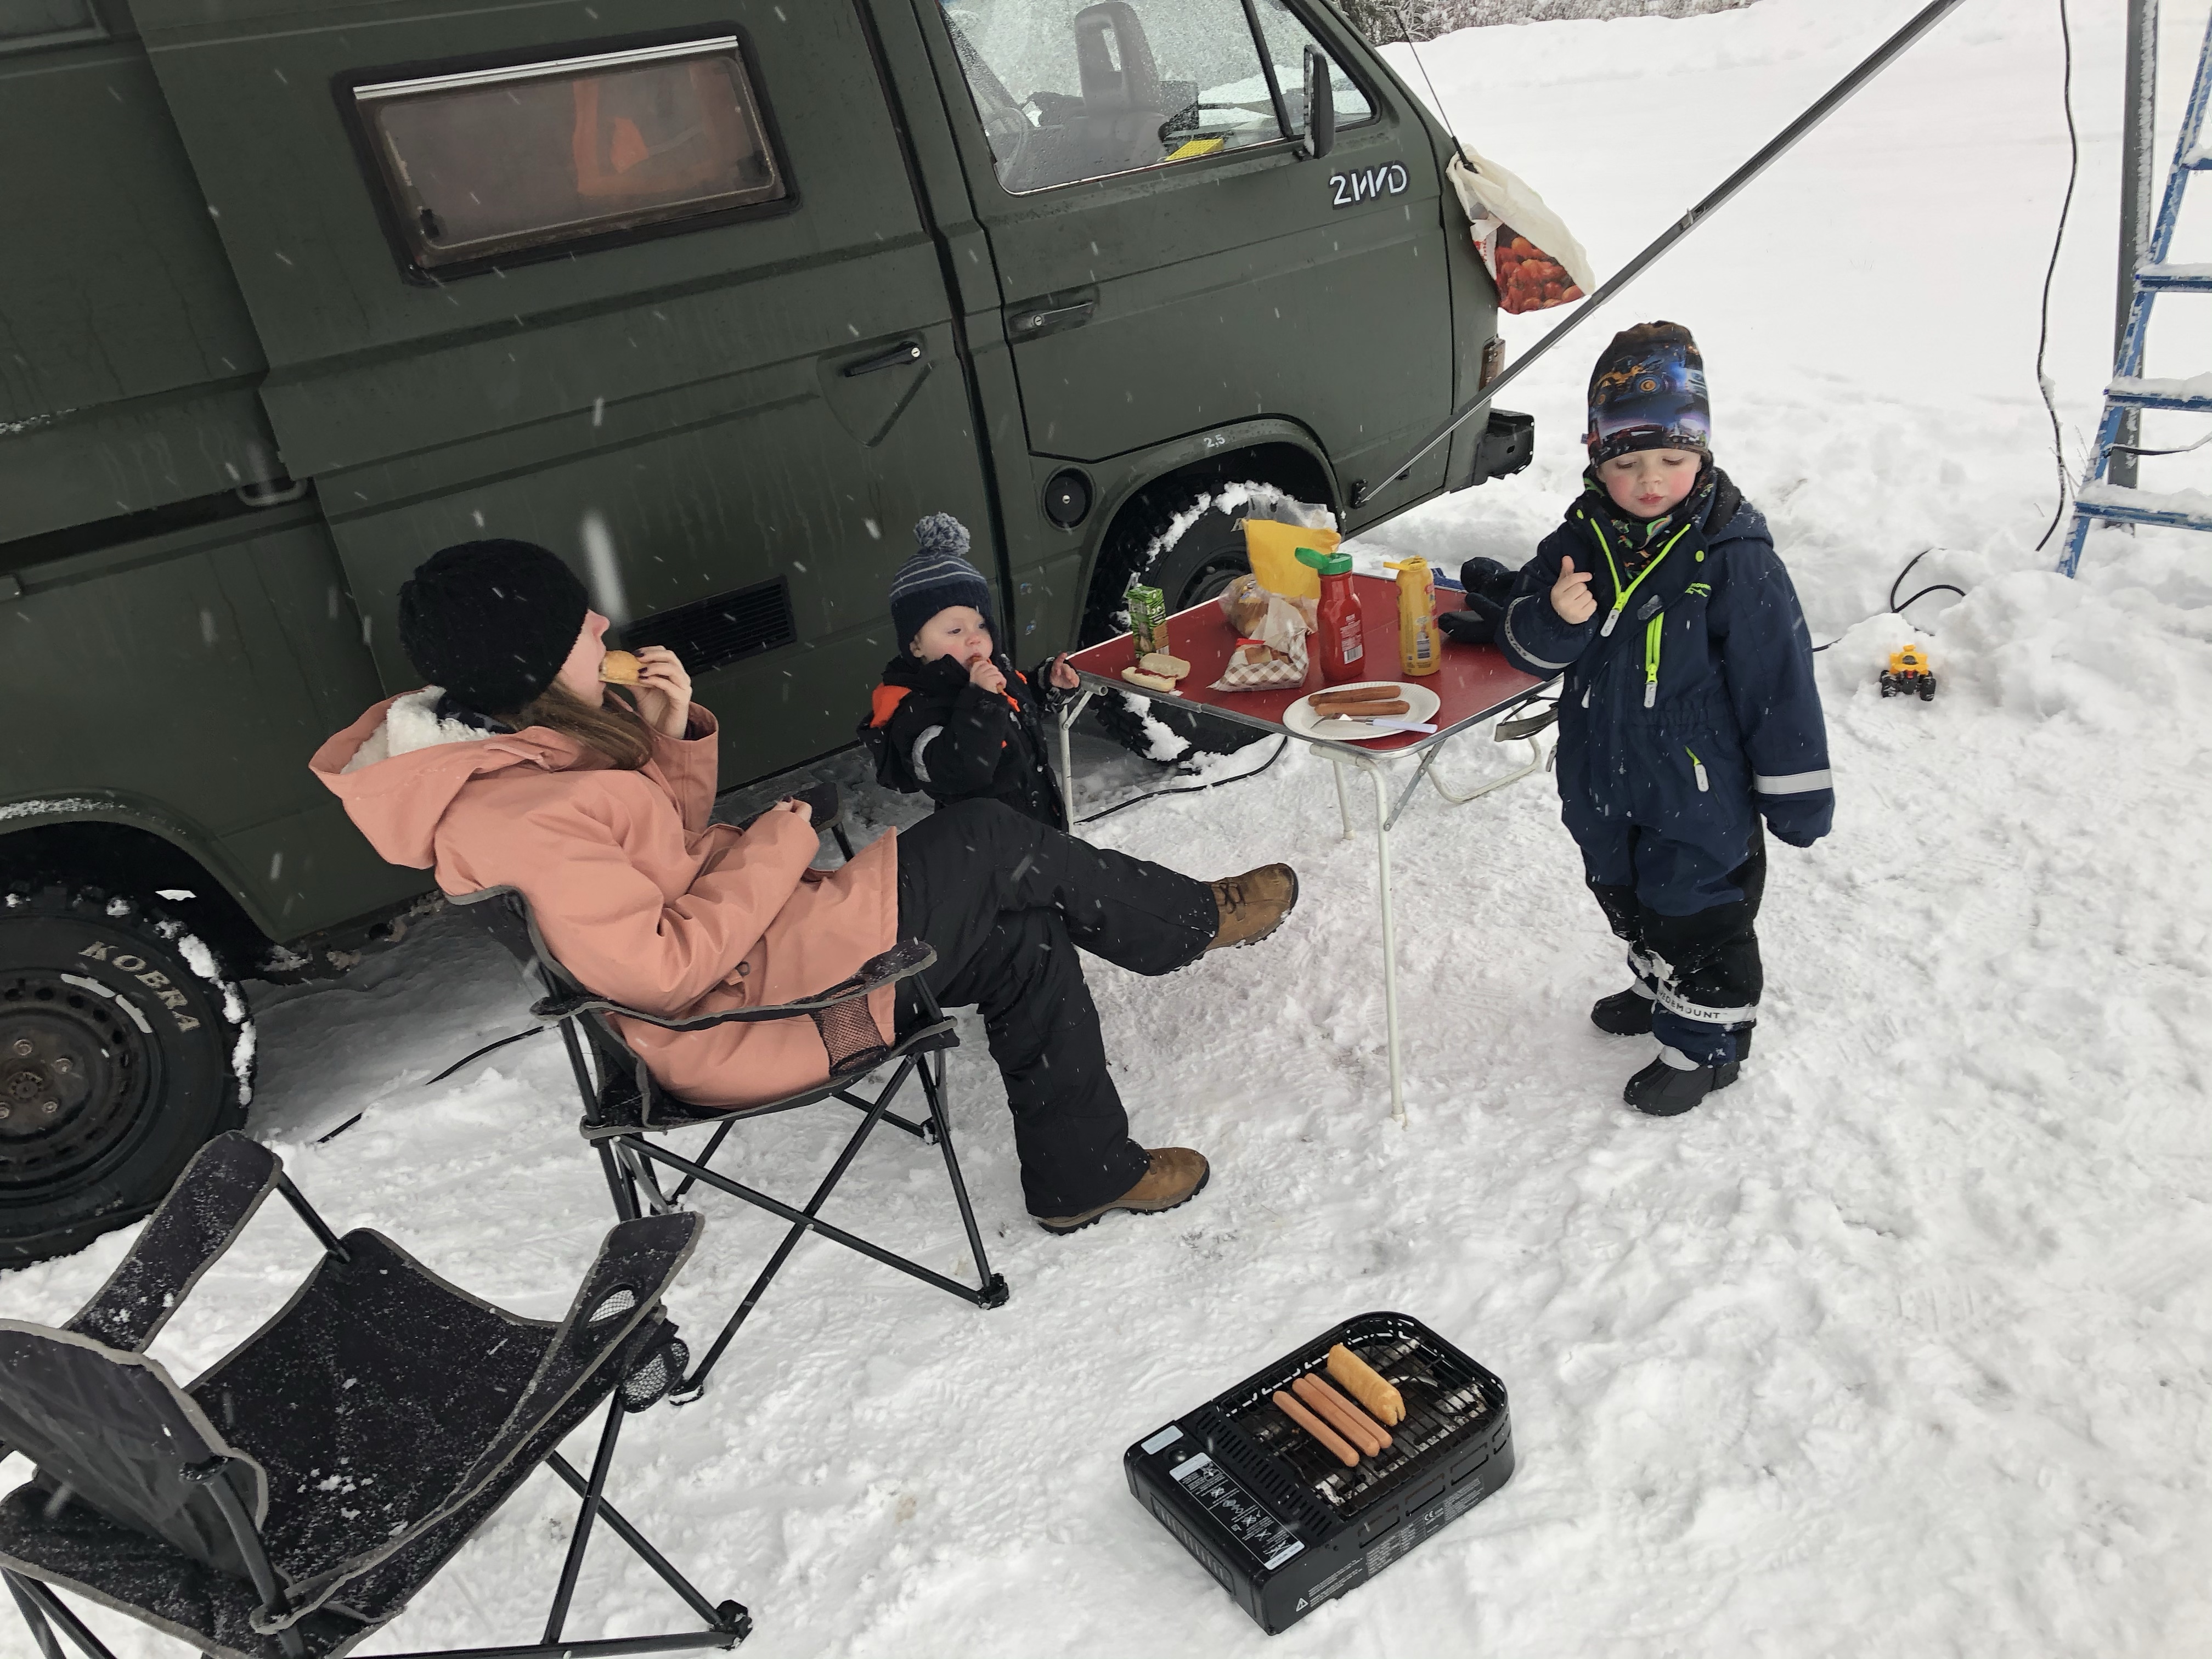
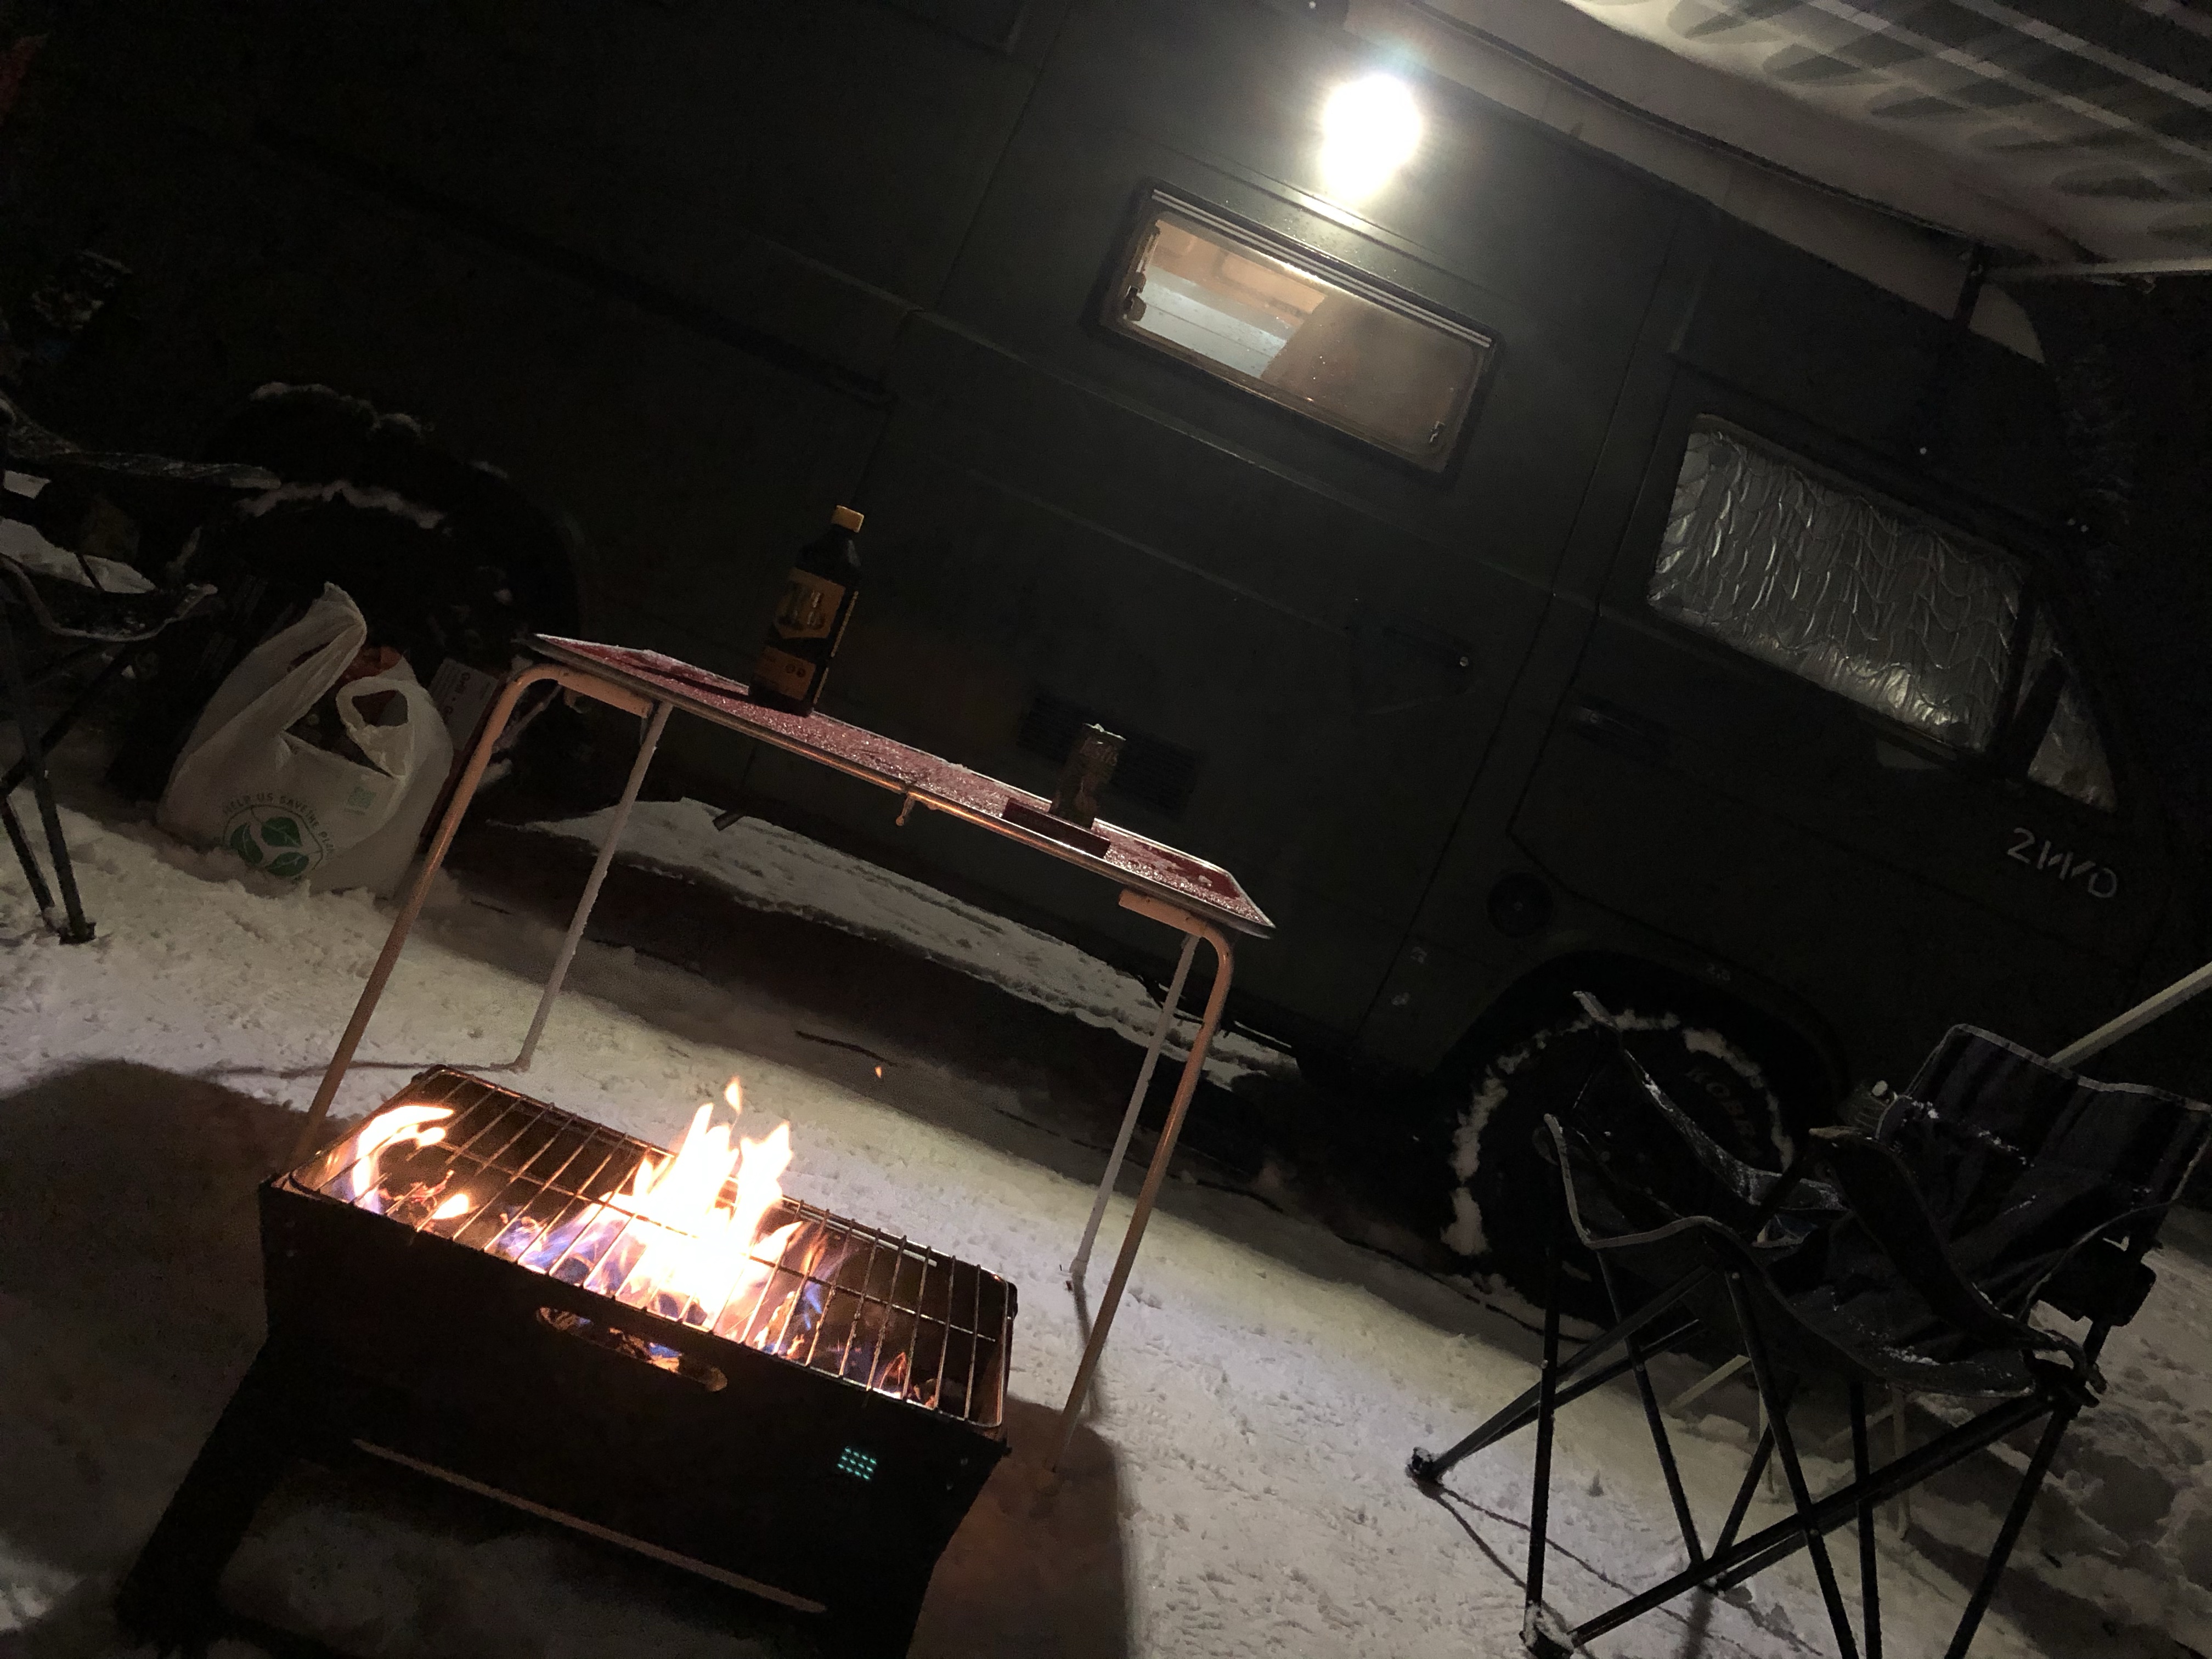
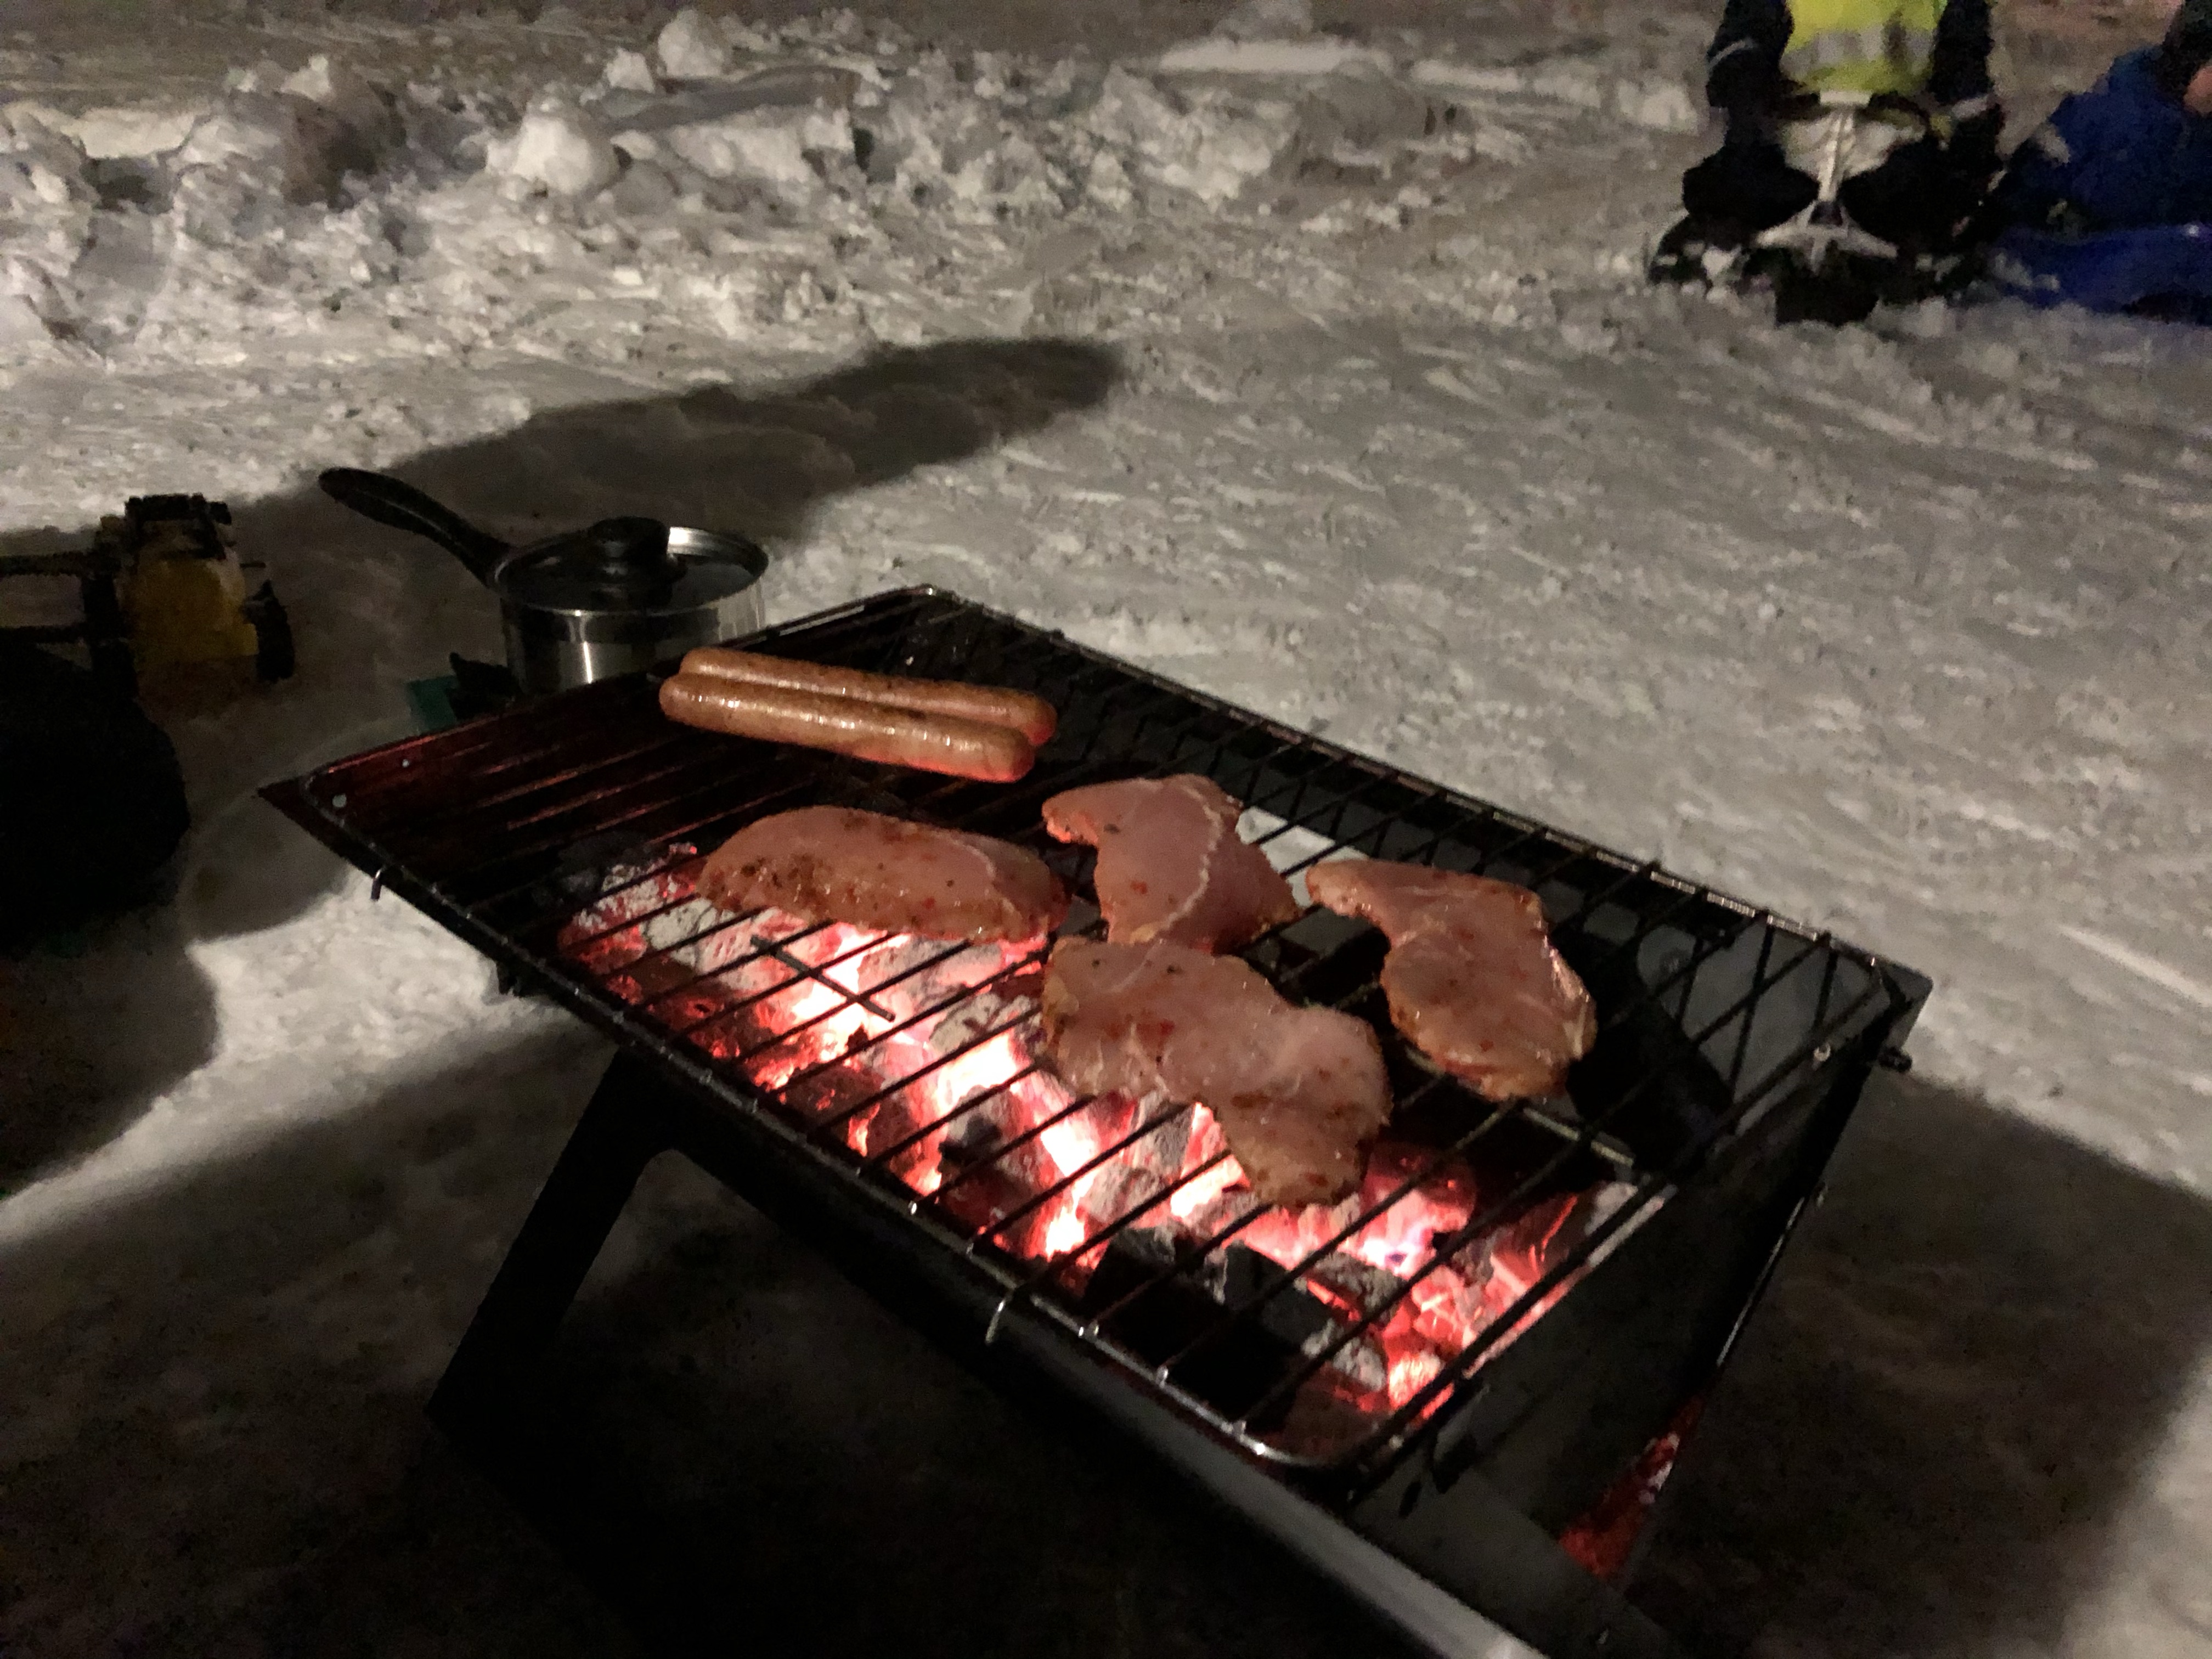
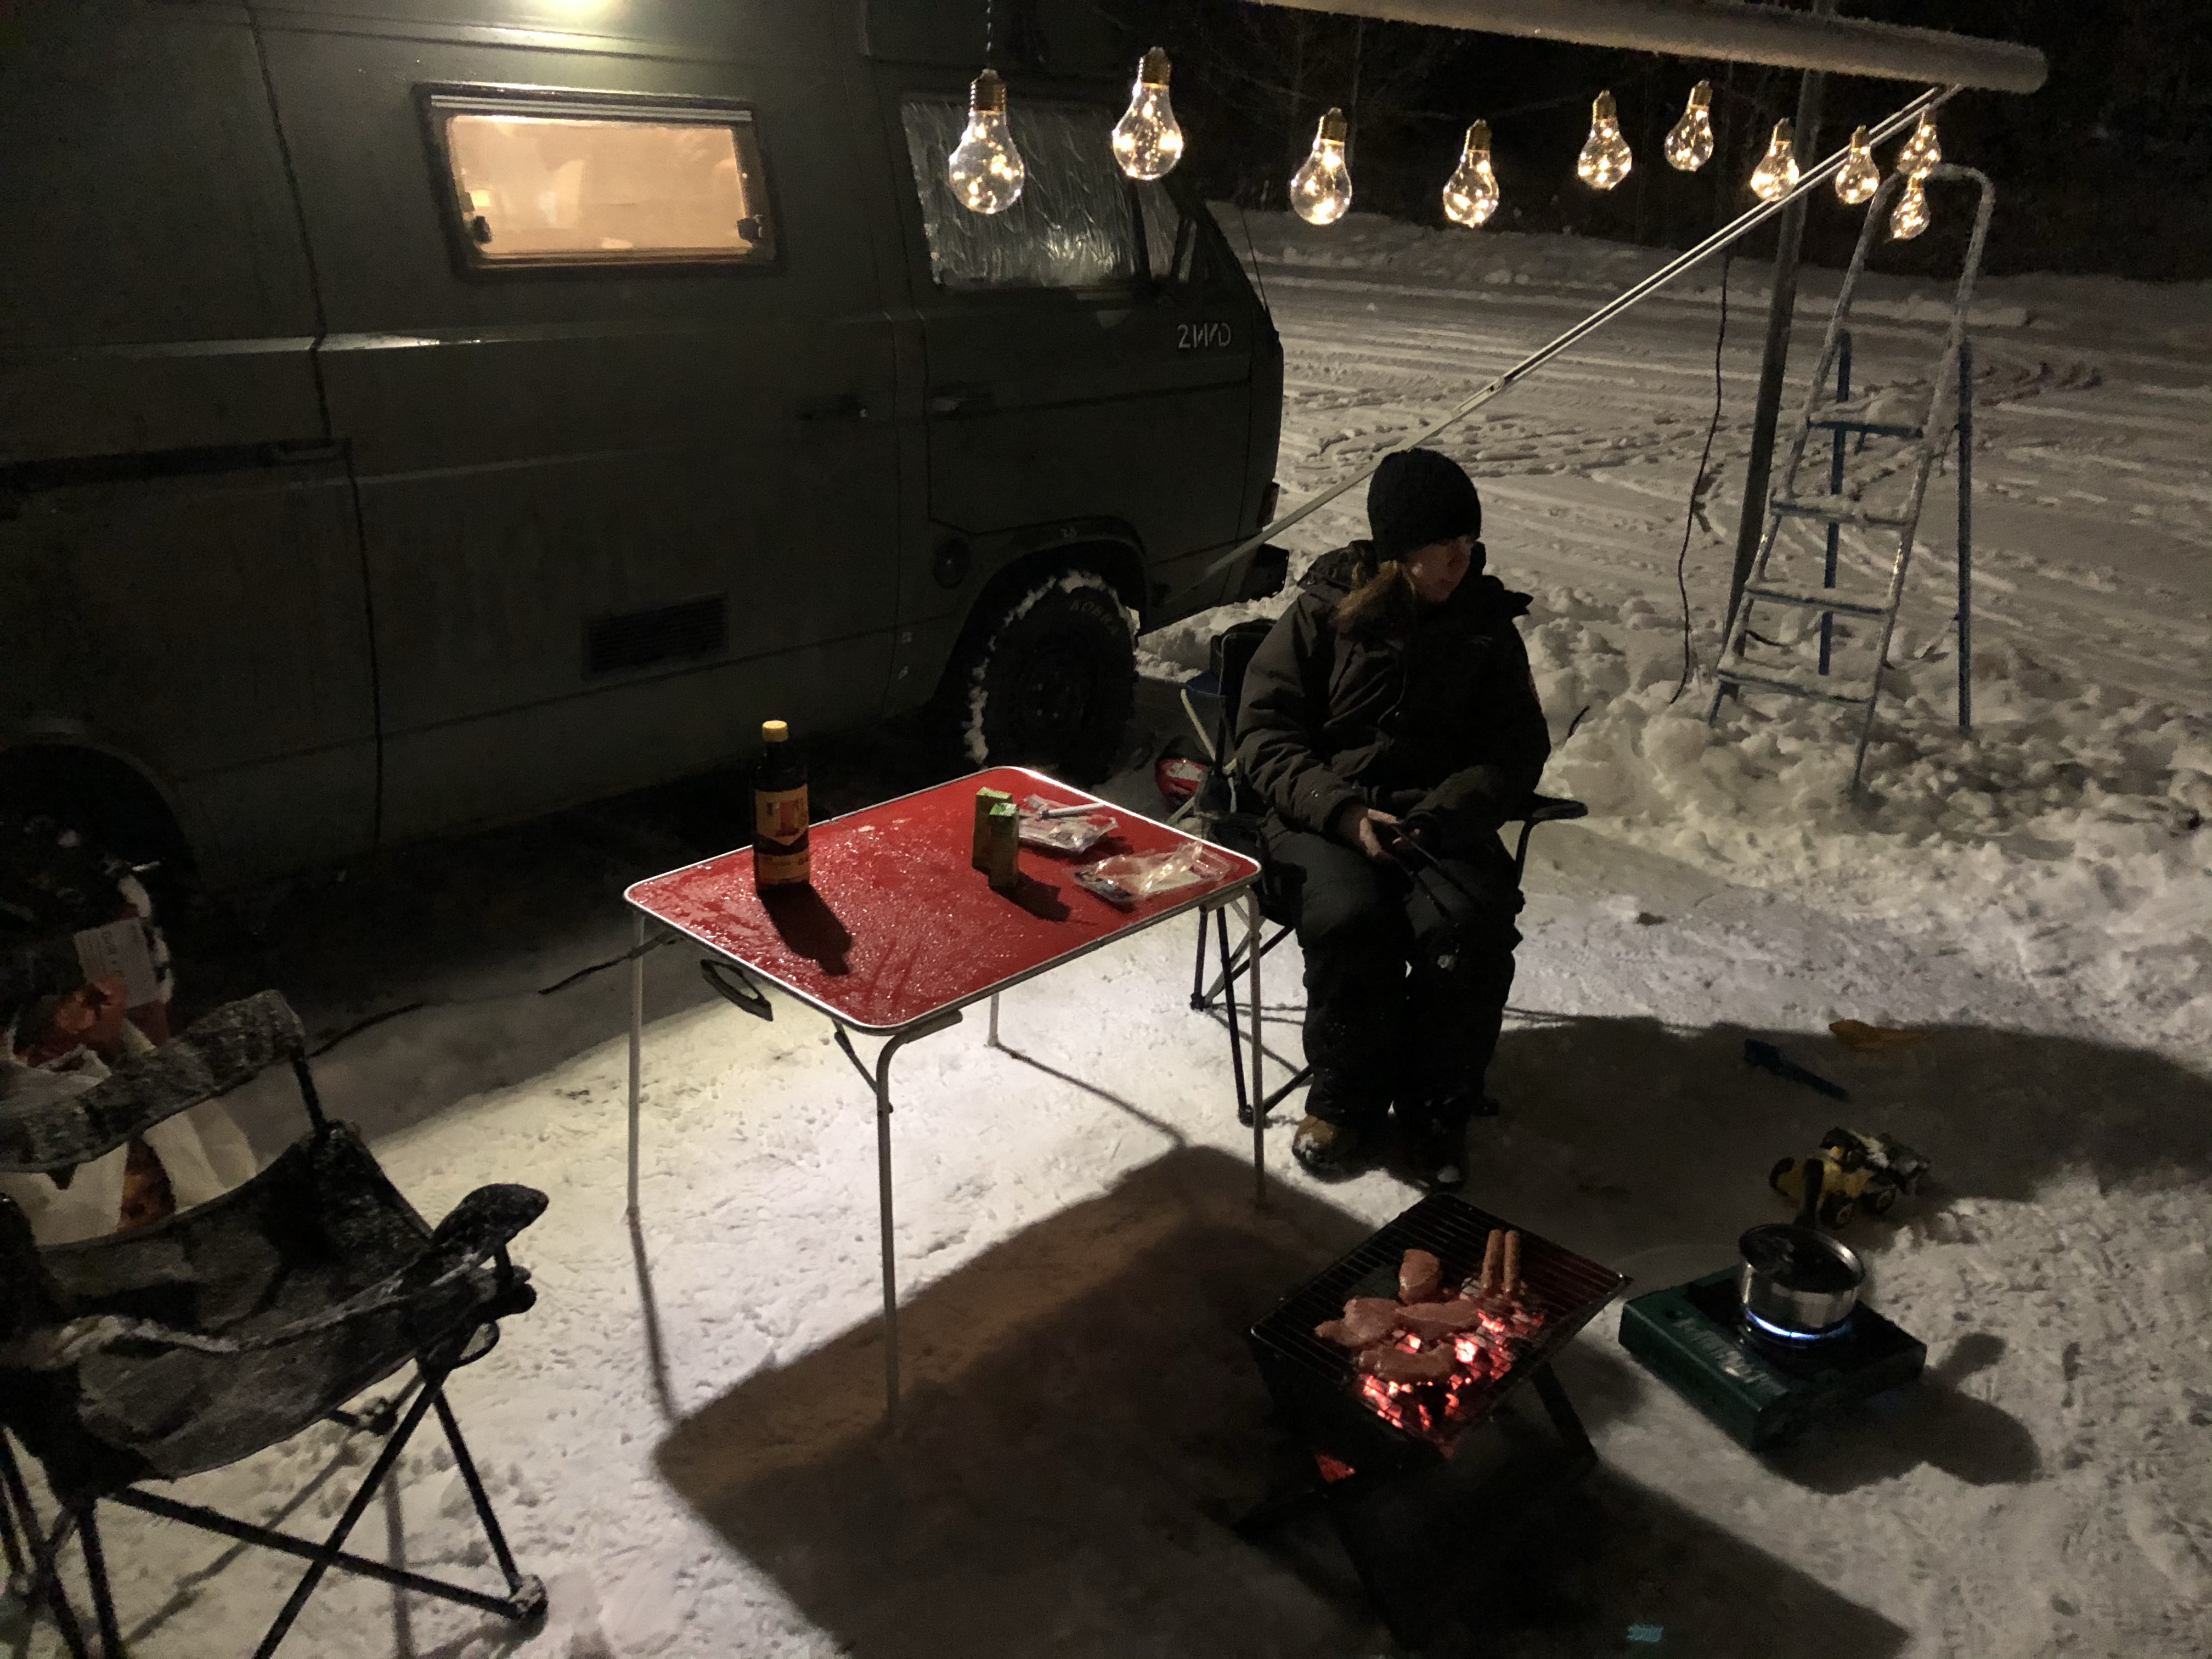
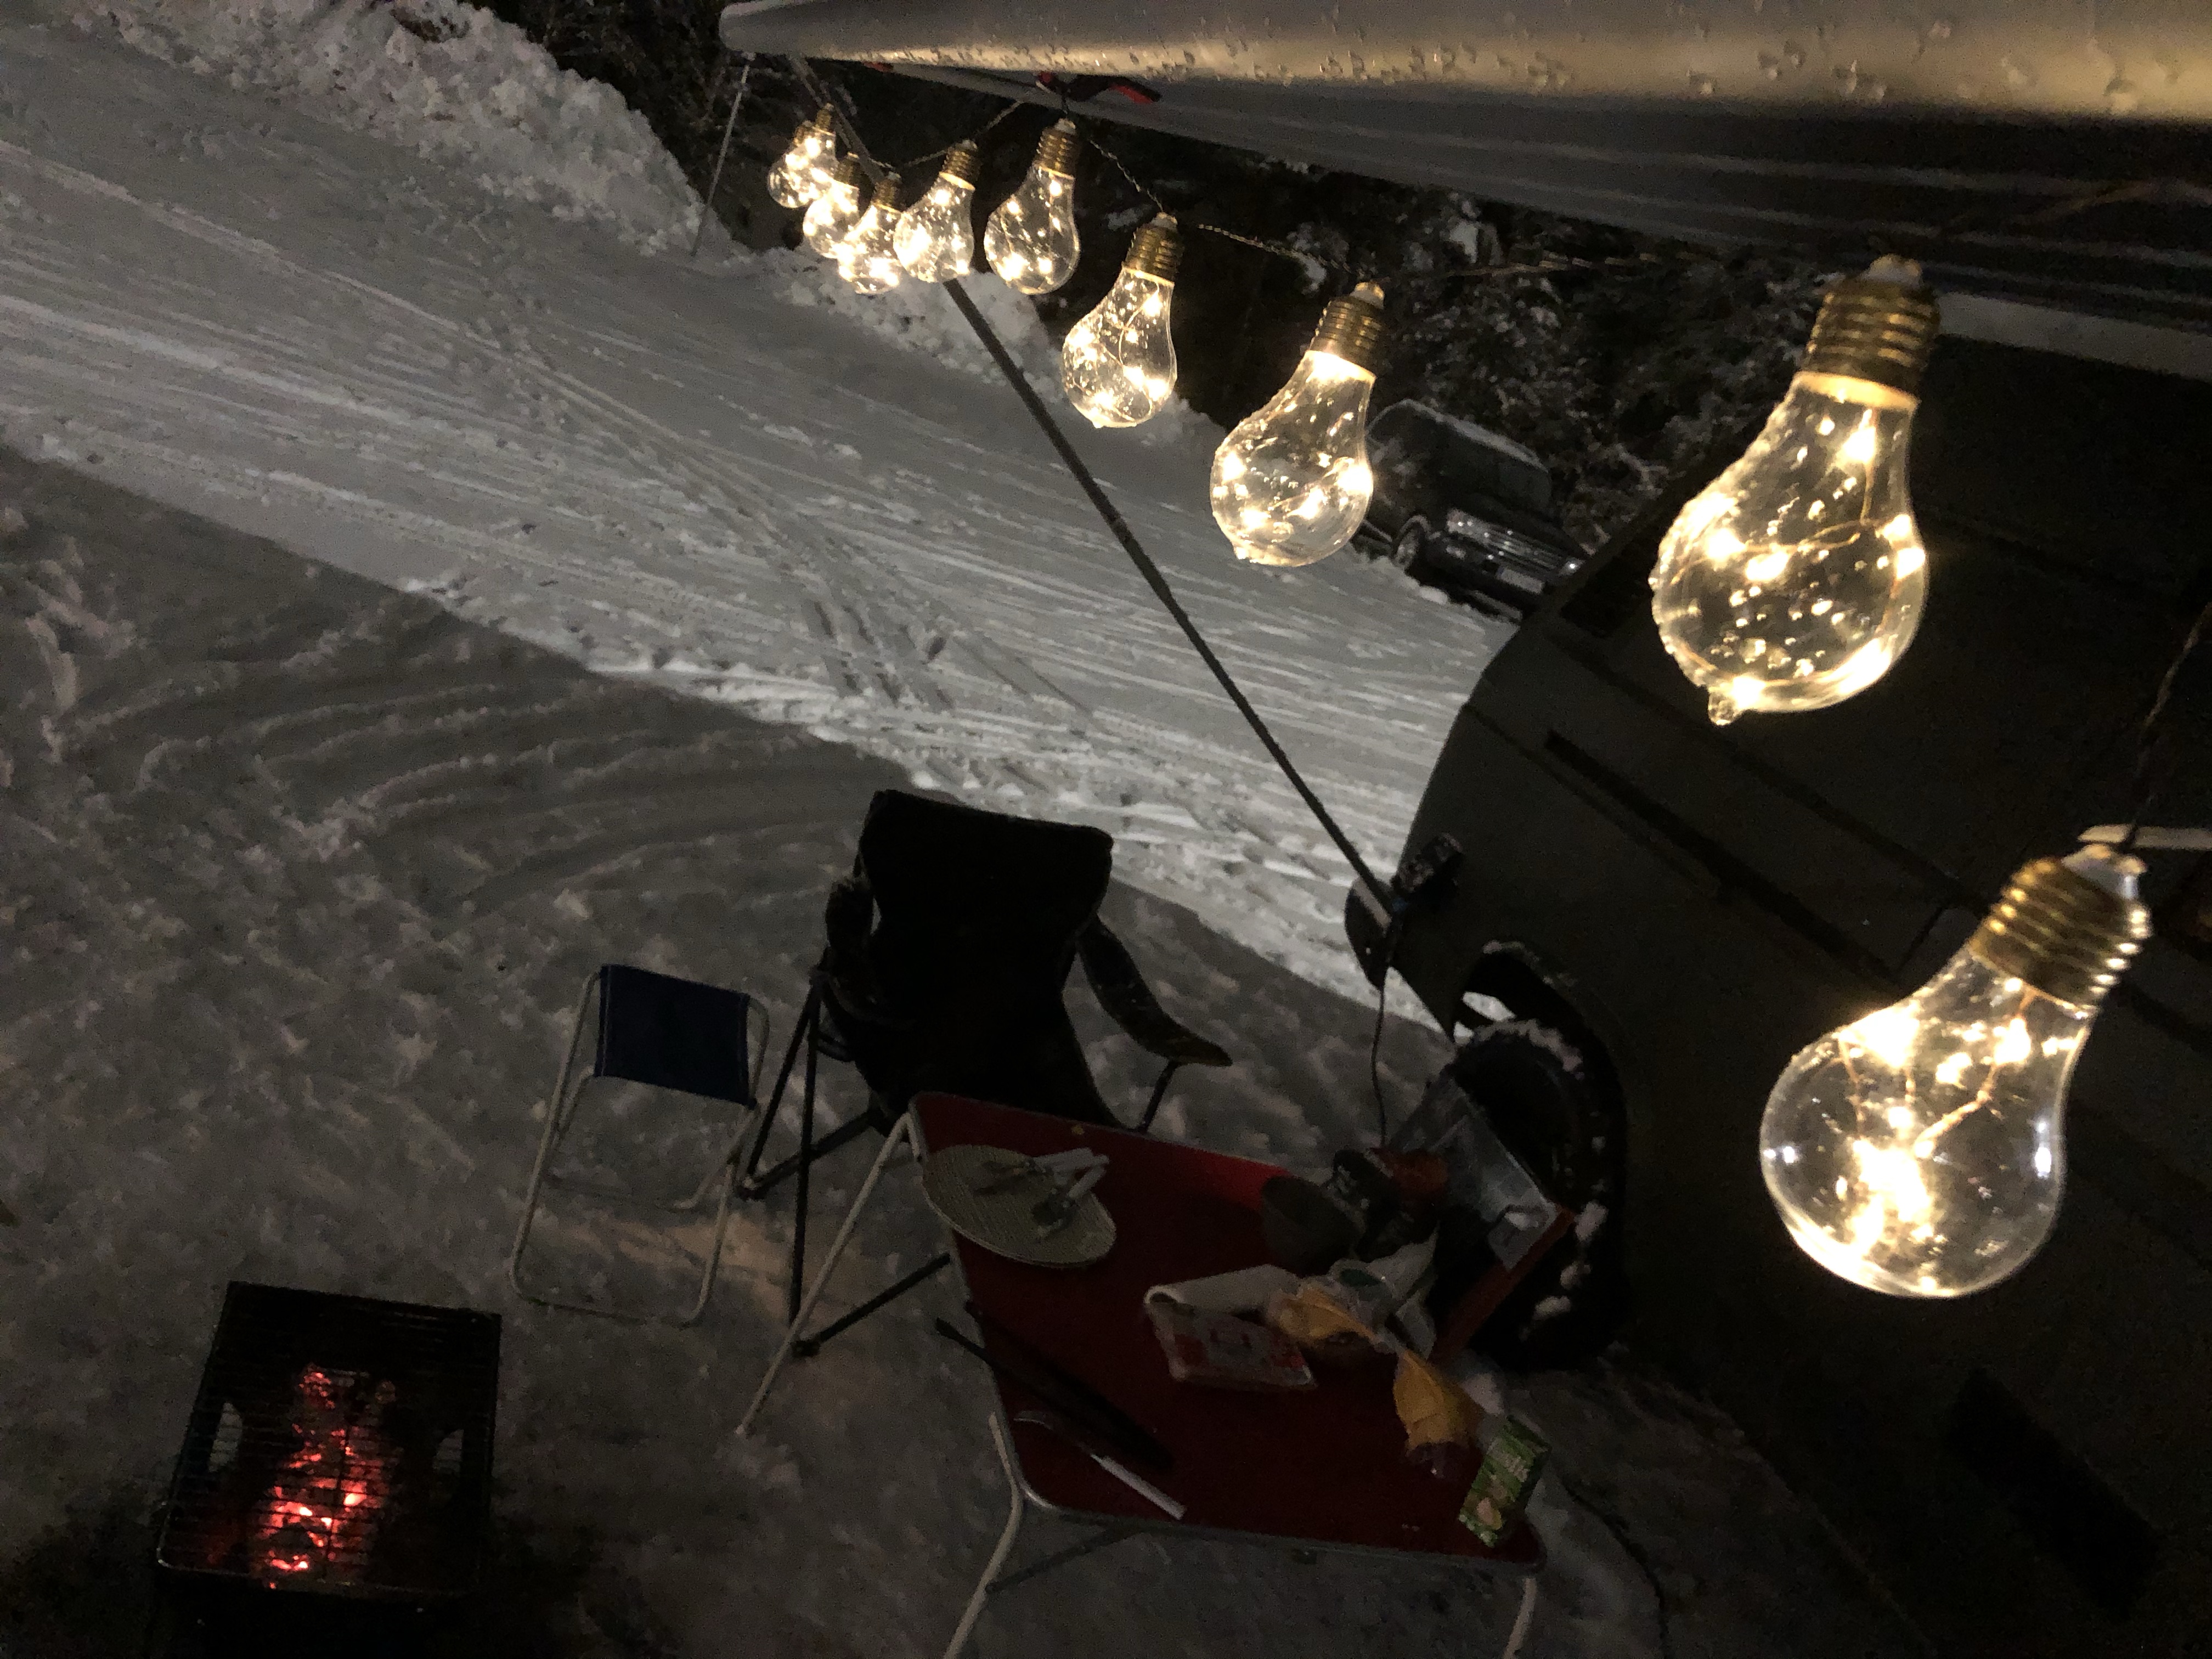
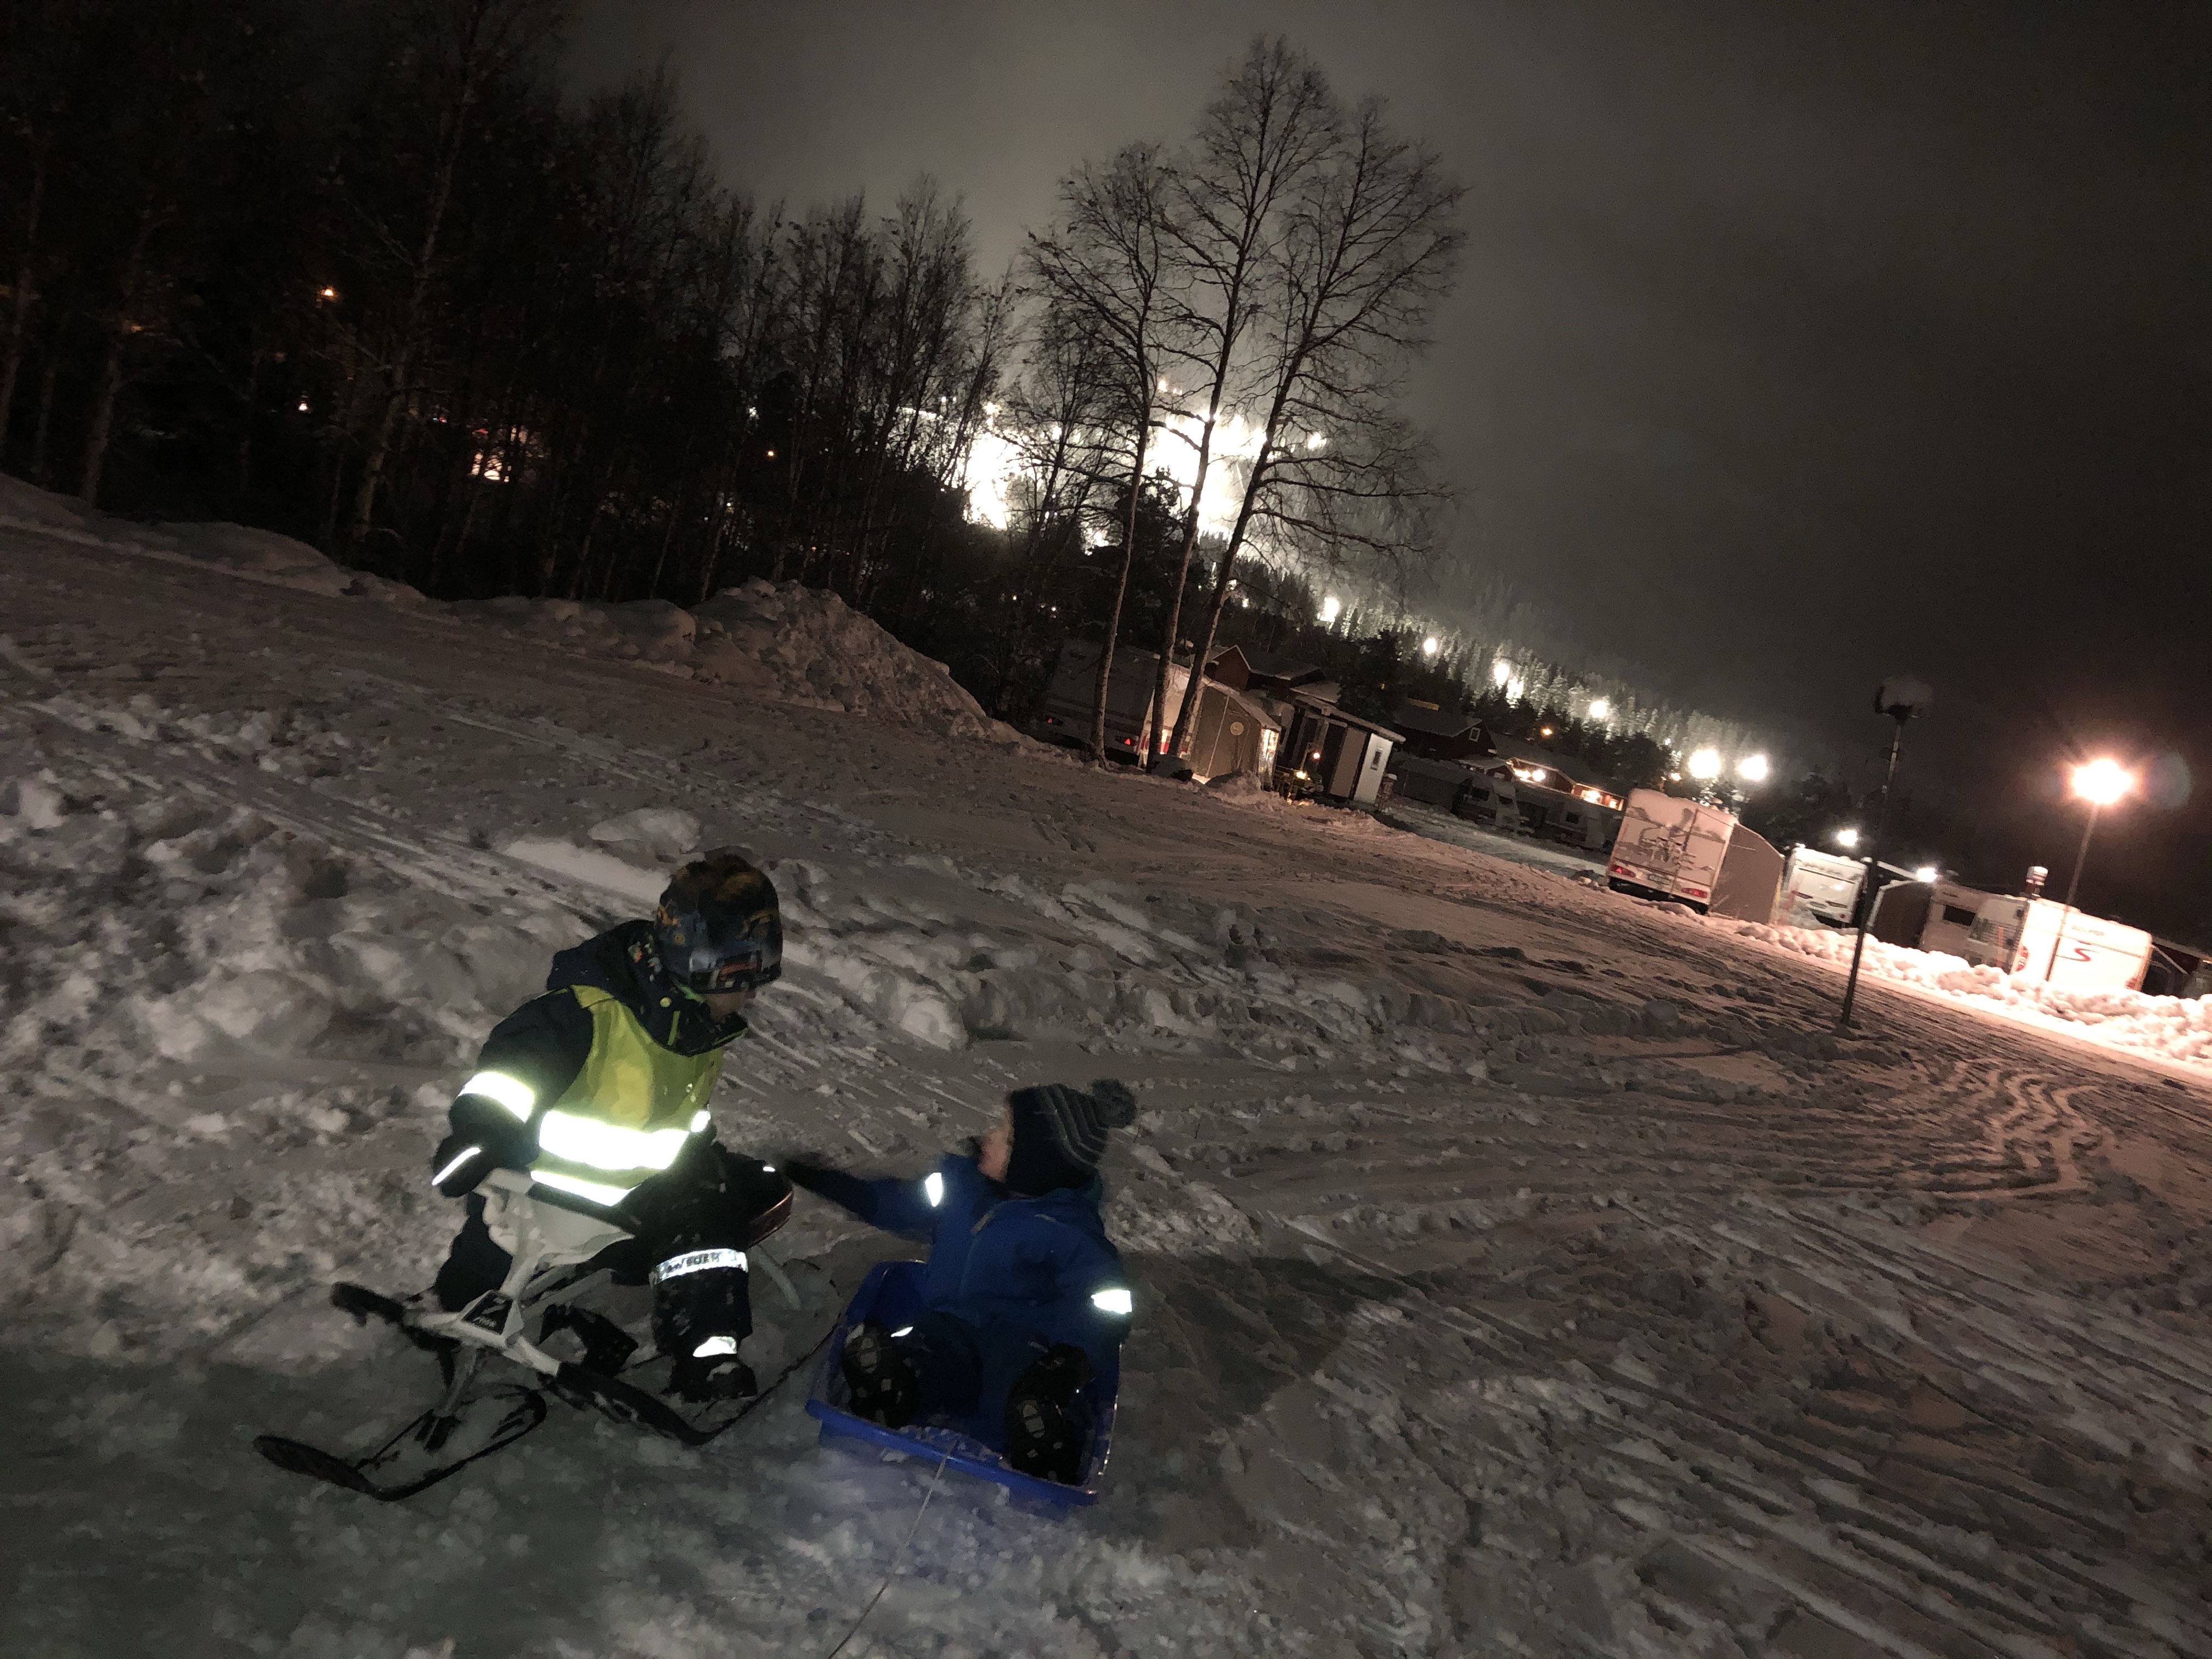
Everything worked fine, bus handled the snowy roads very well and heat was no problem at all, the bus i very well insulated in floors, walls and roof. Dieselheater worked awsome too during the days. We had lots of fun in the snow, had a campfire grilled some meat and had a good time inside the warm bus, playing games and watching TV. We had a constant inside temp of 23-26+ celsius inside the bus.
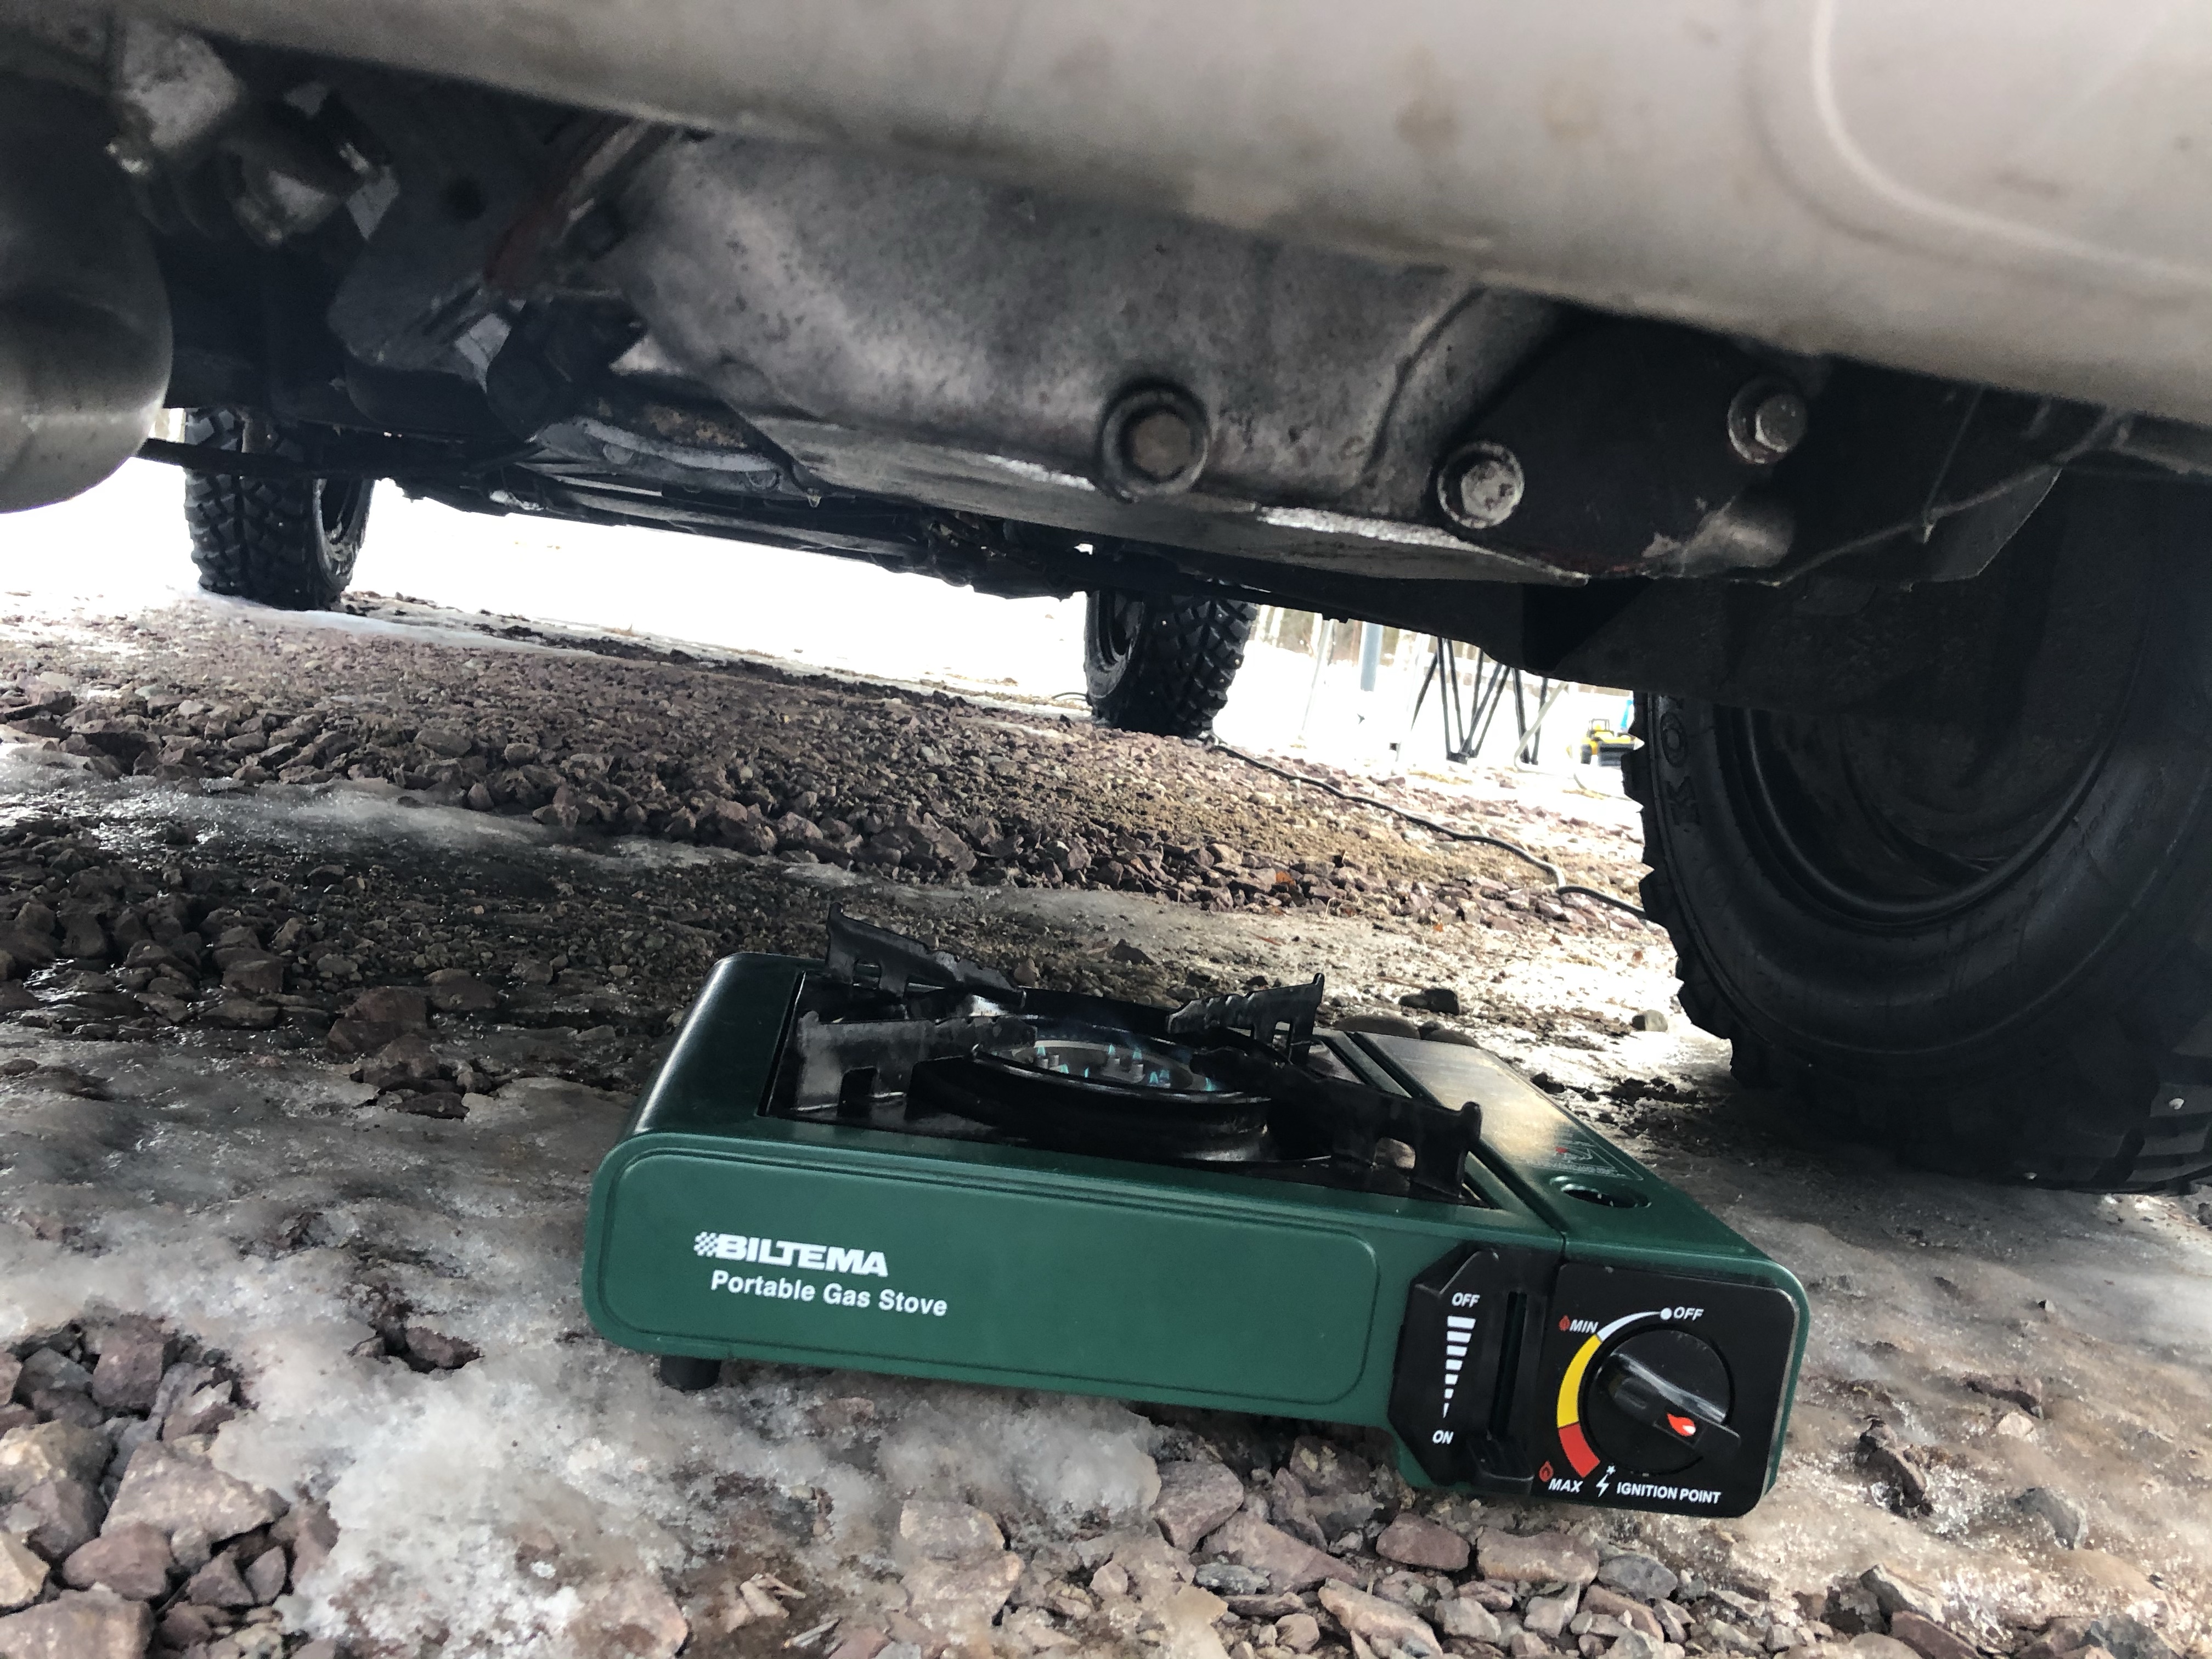
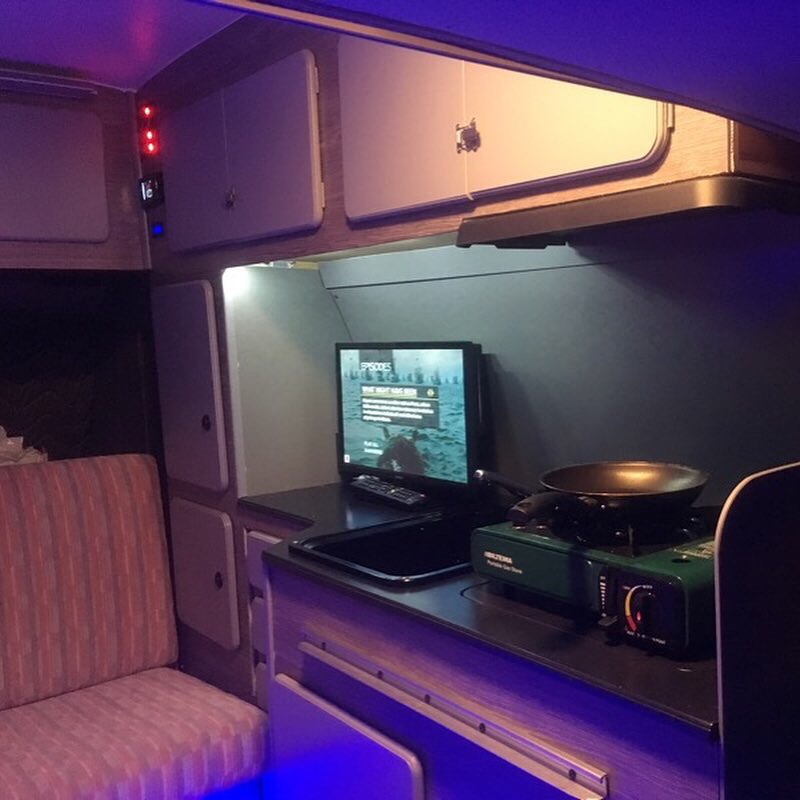
Here is some pics, the last picture is me using the kitchen stove as a engine heater 🙂
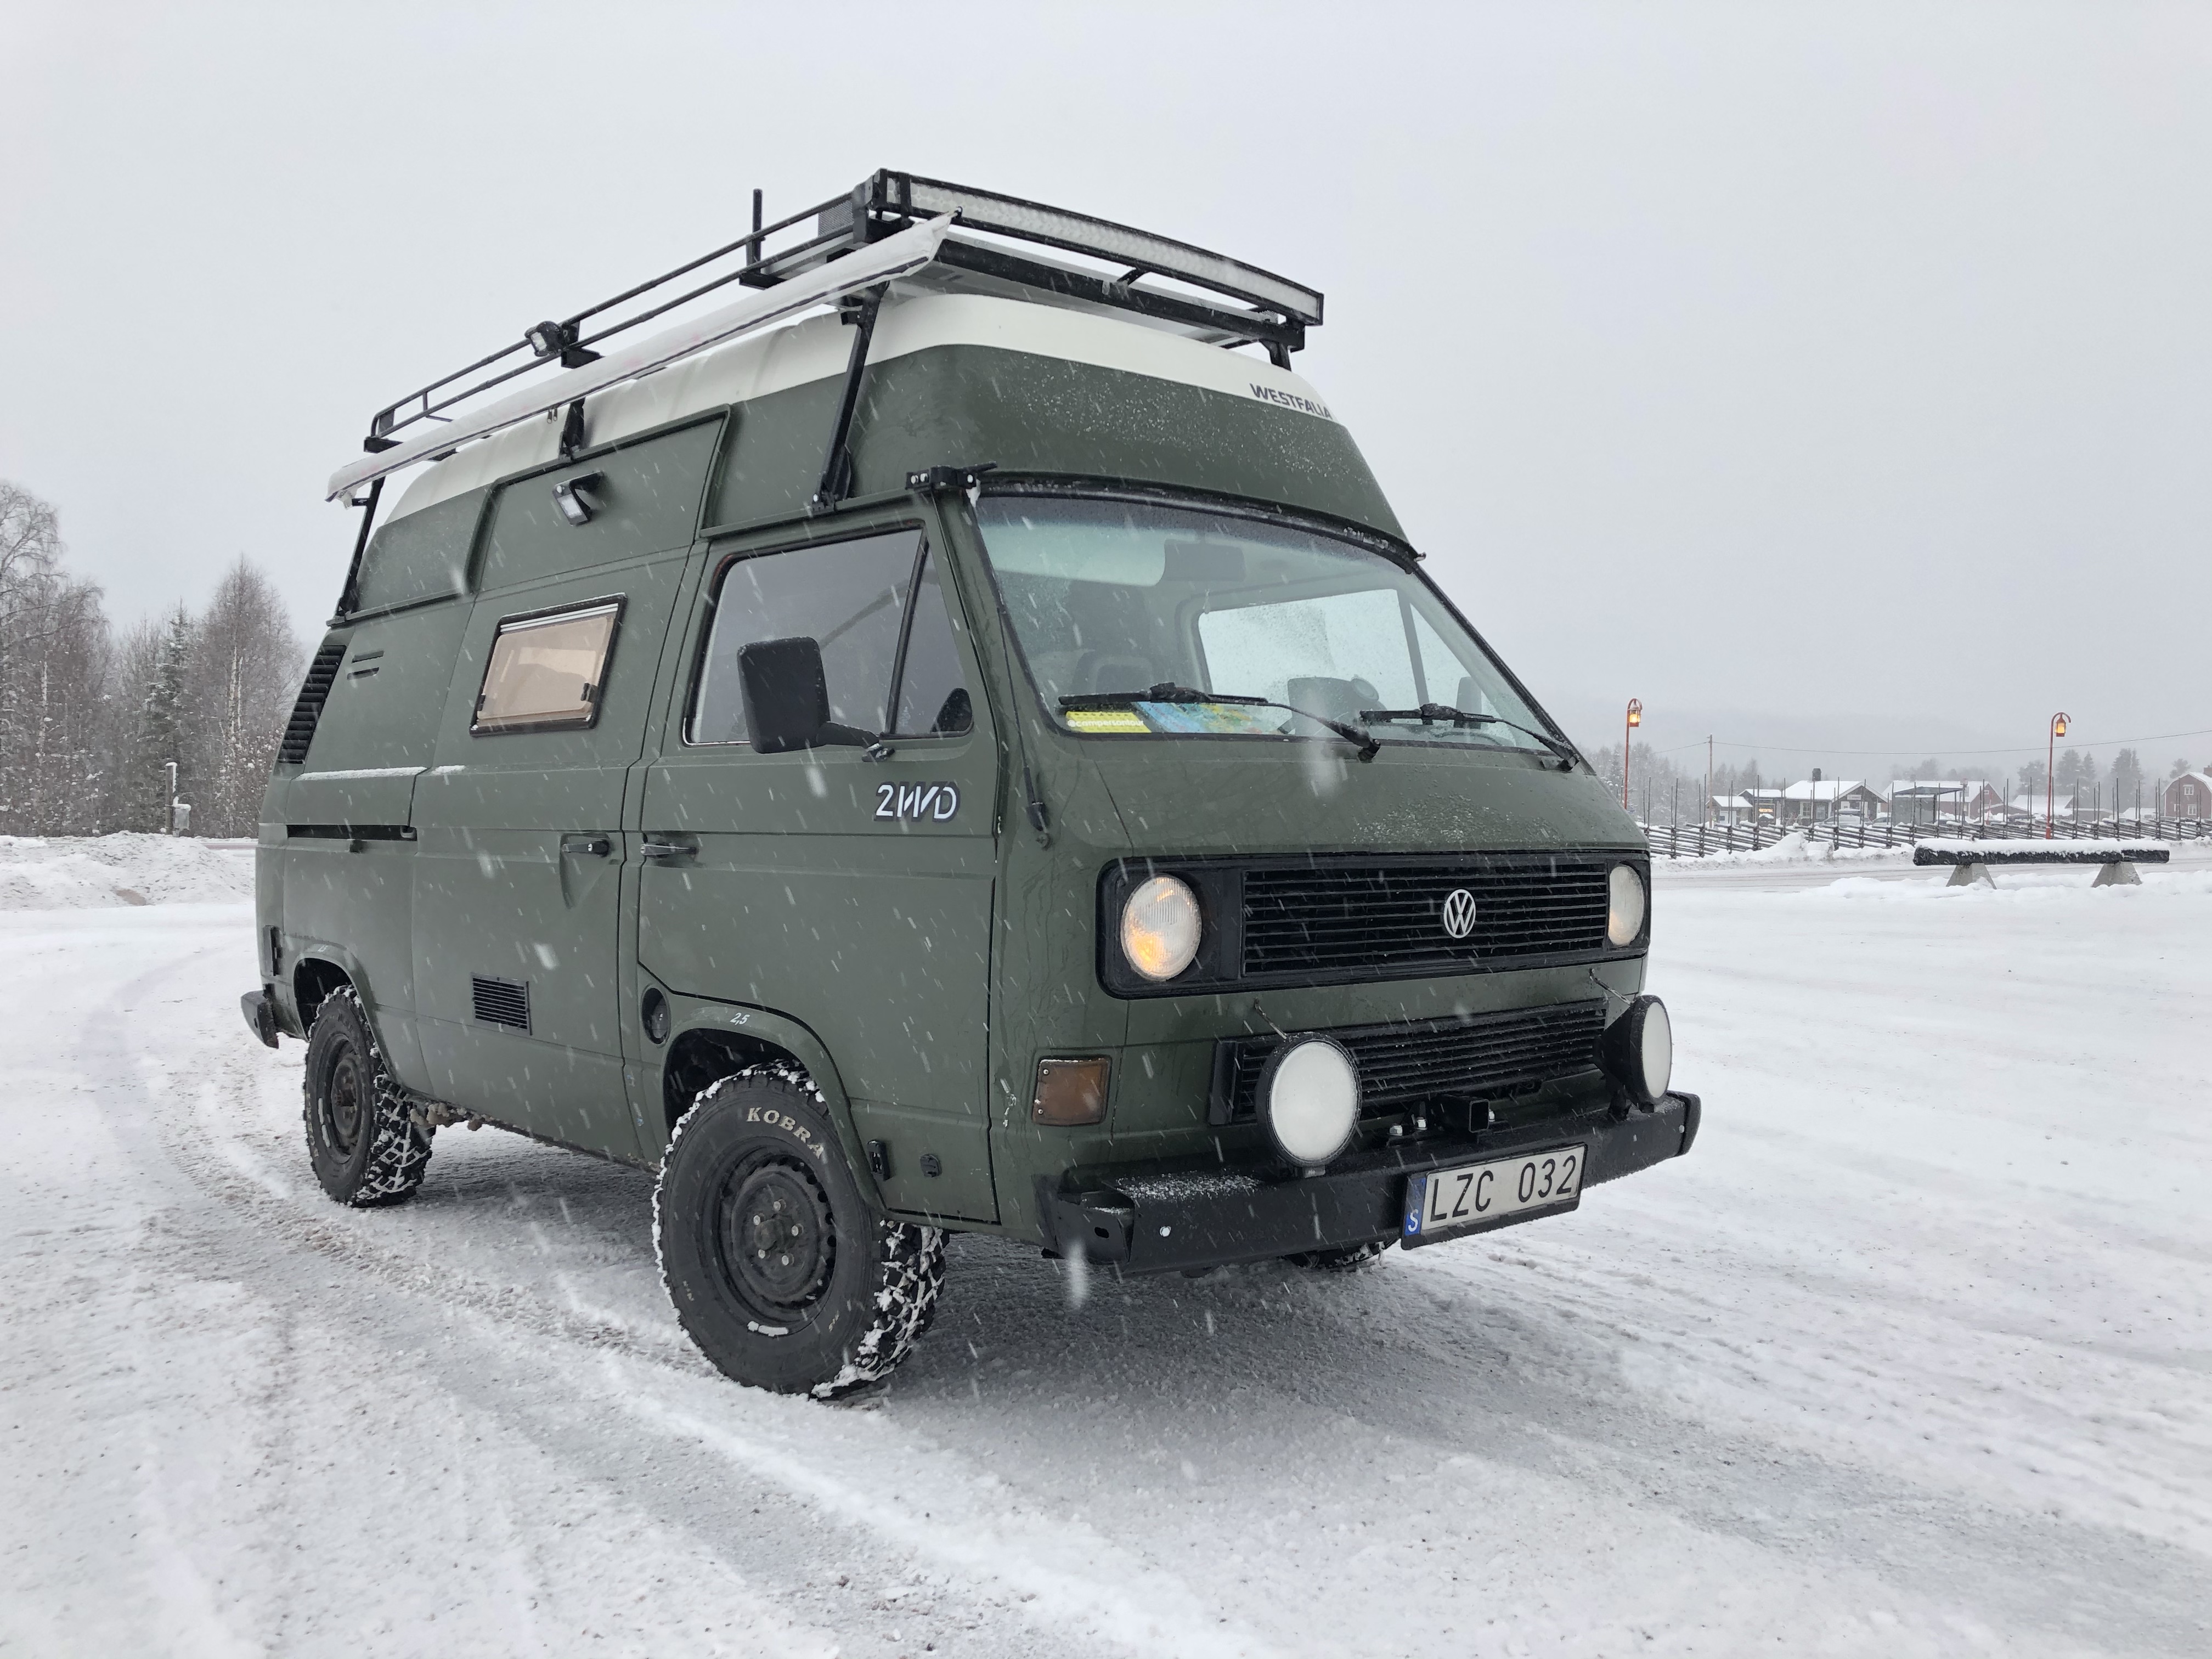
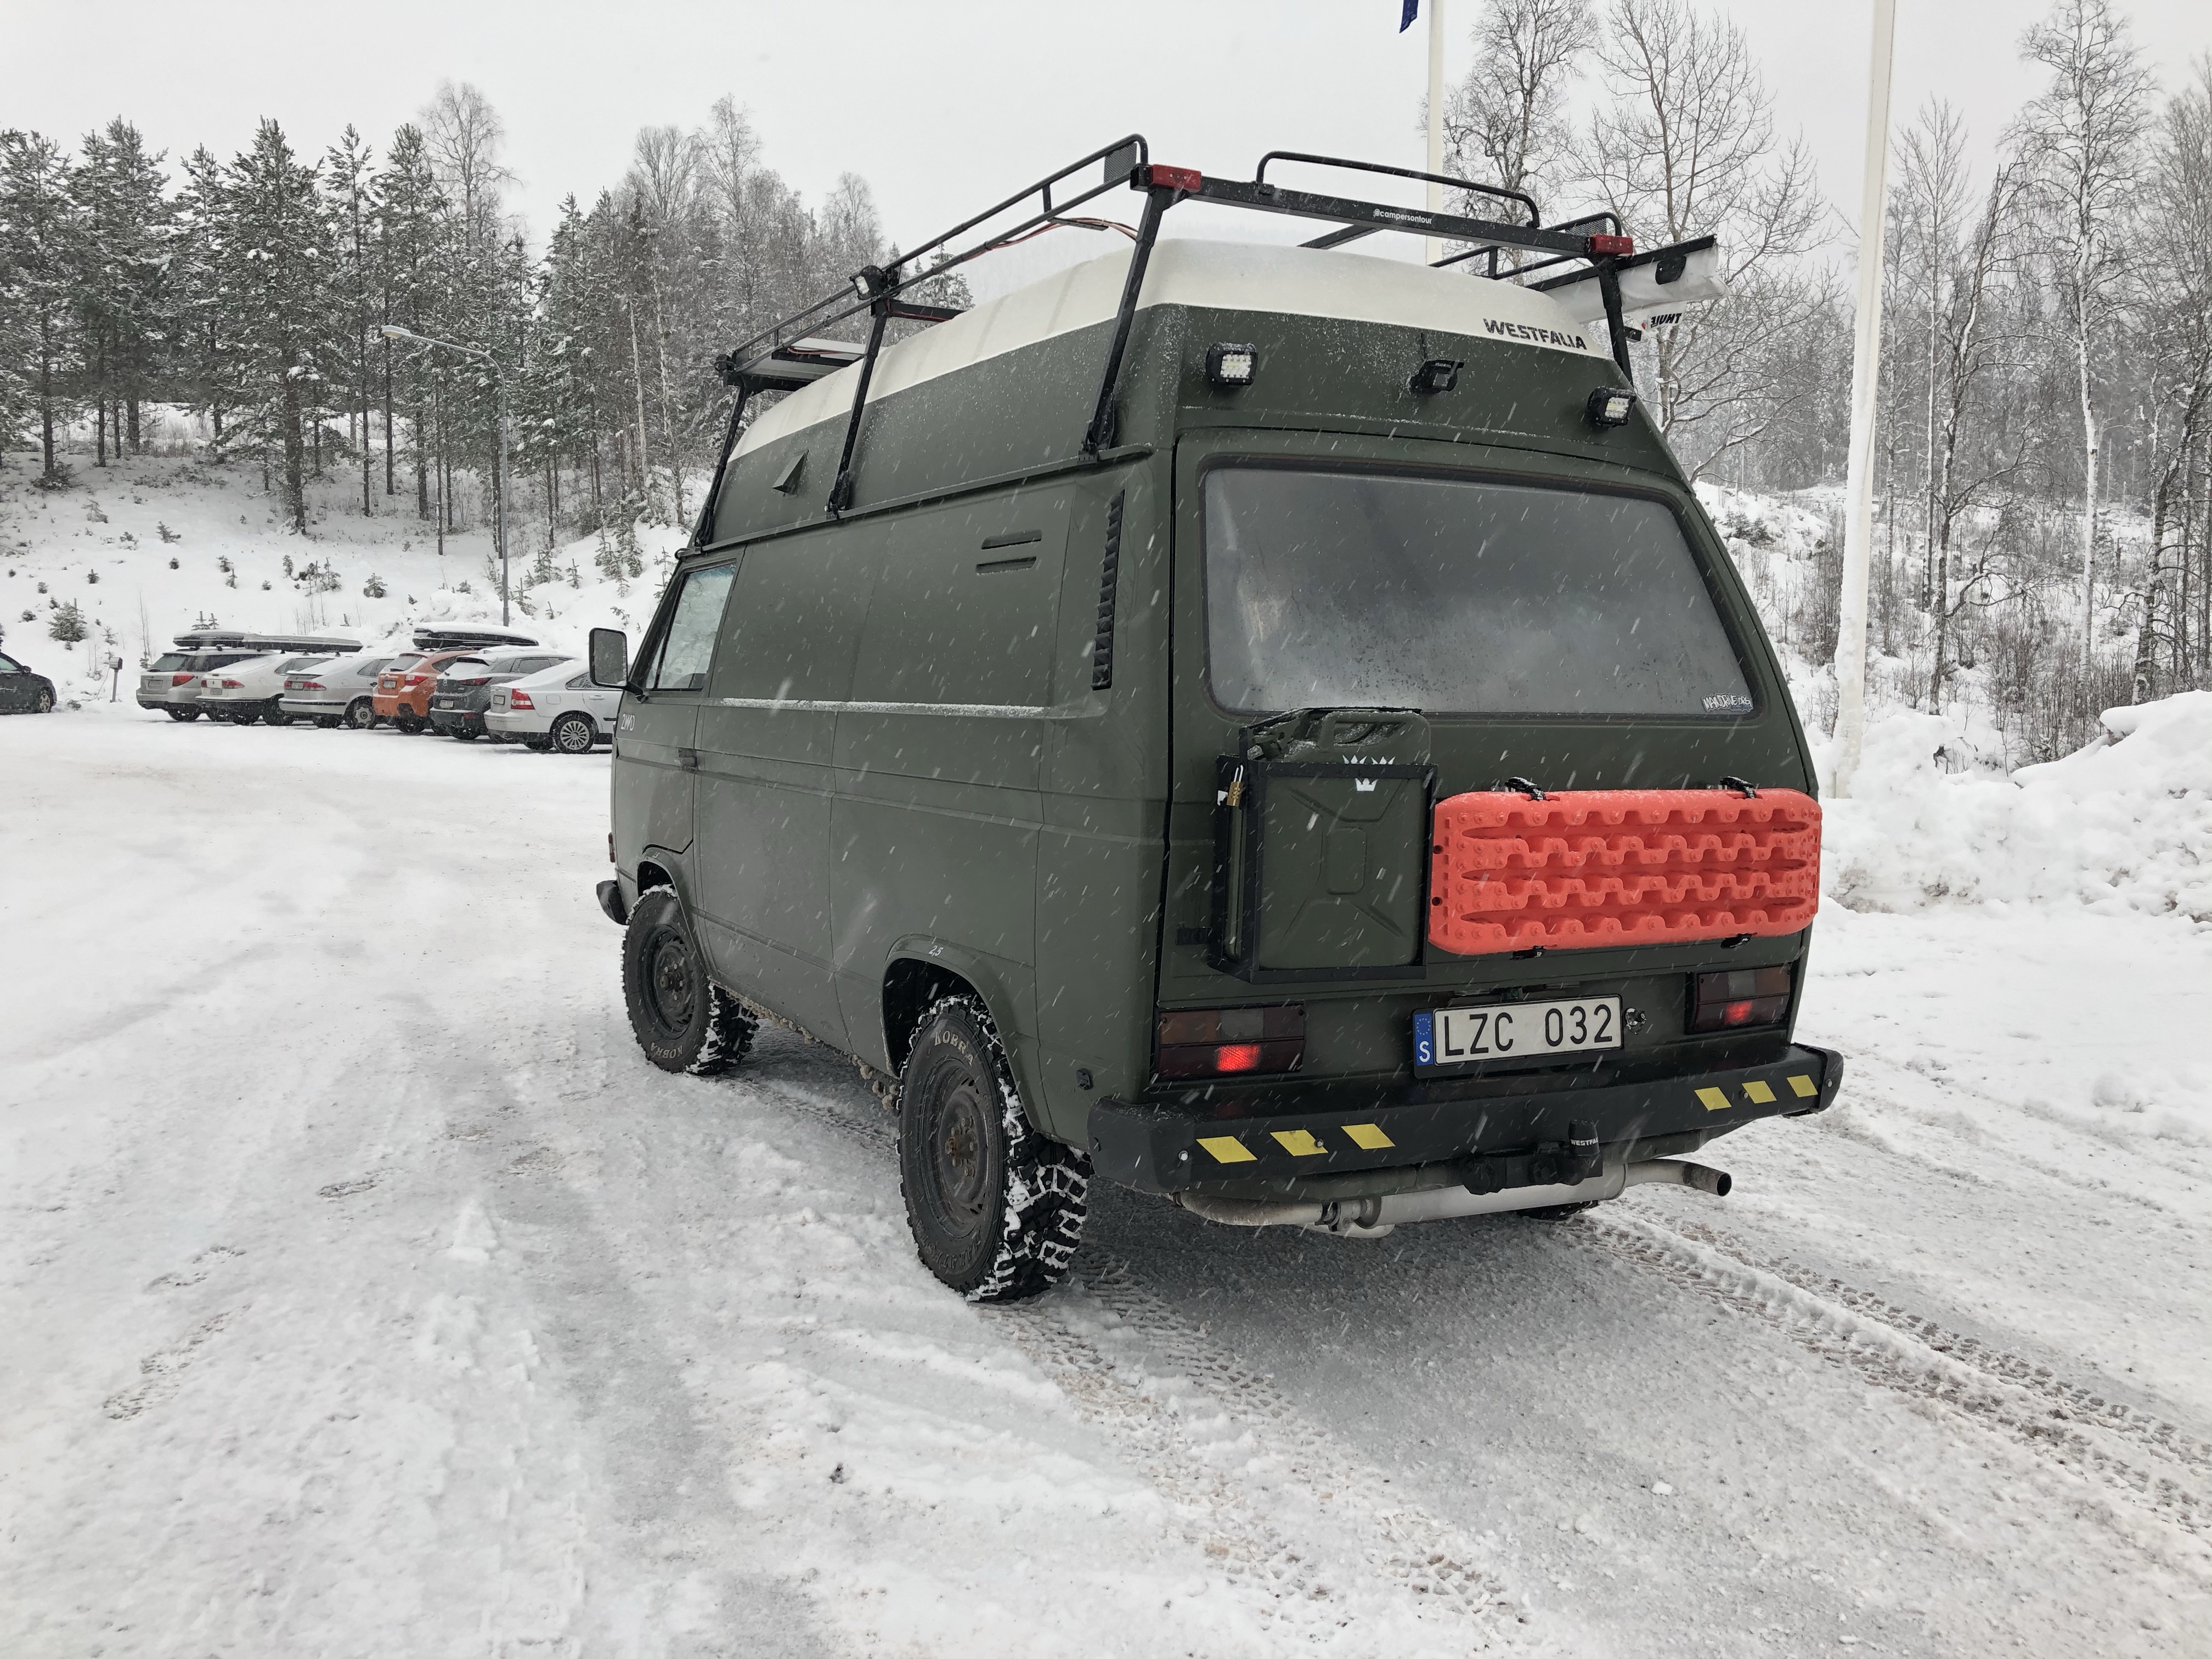
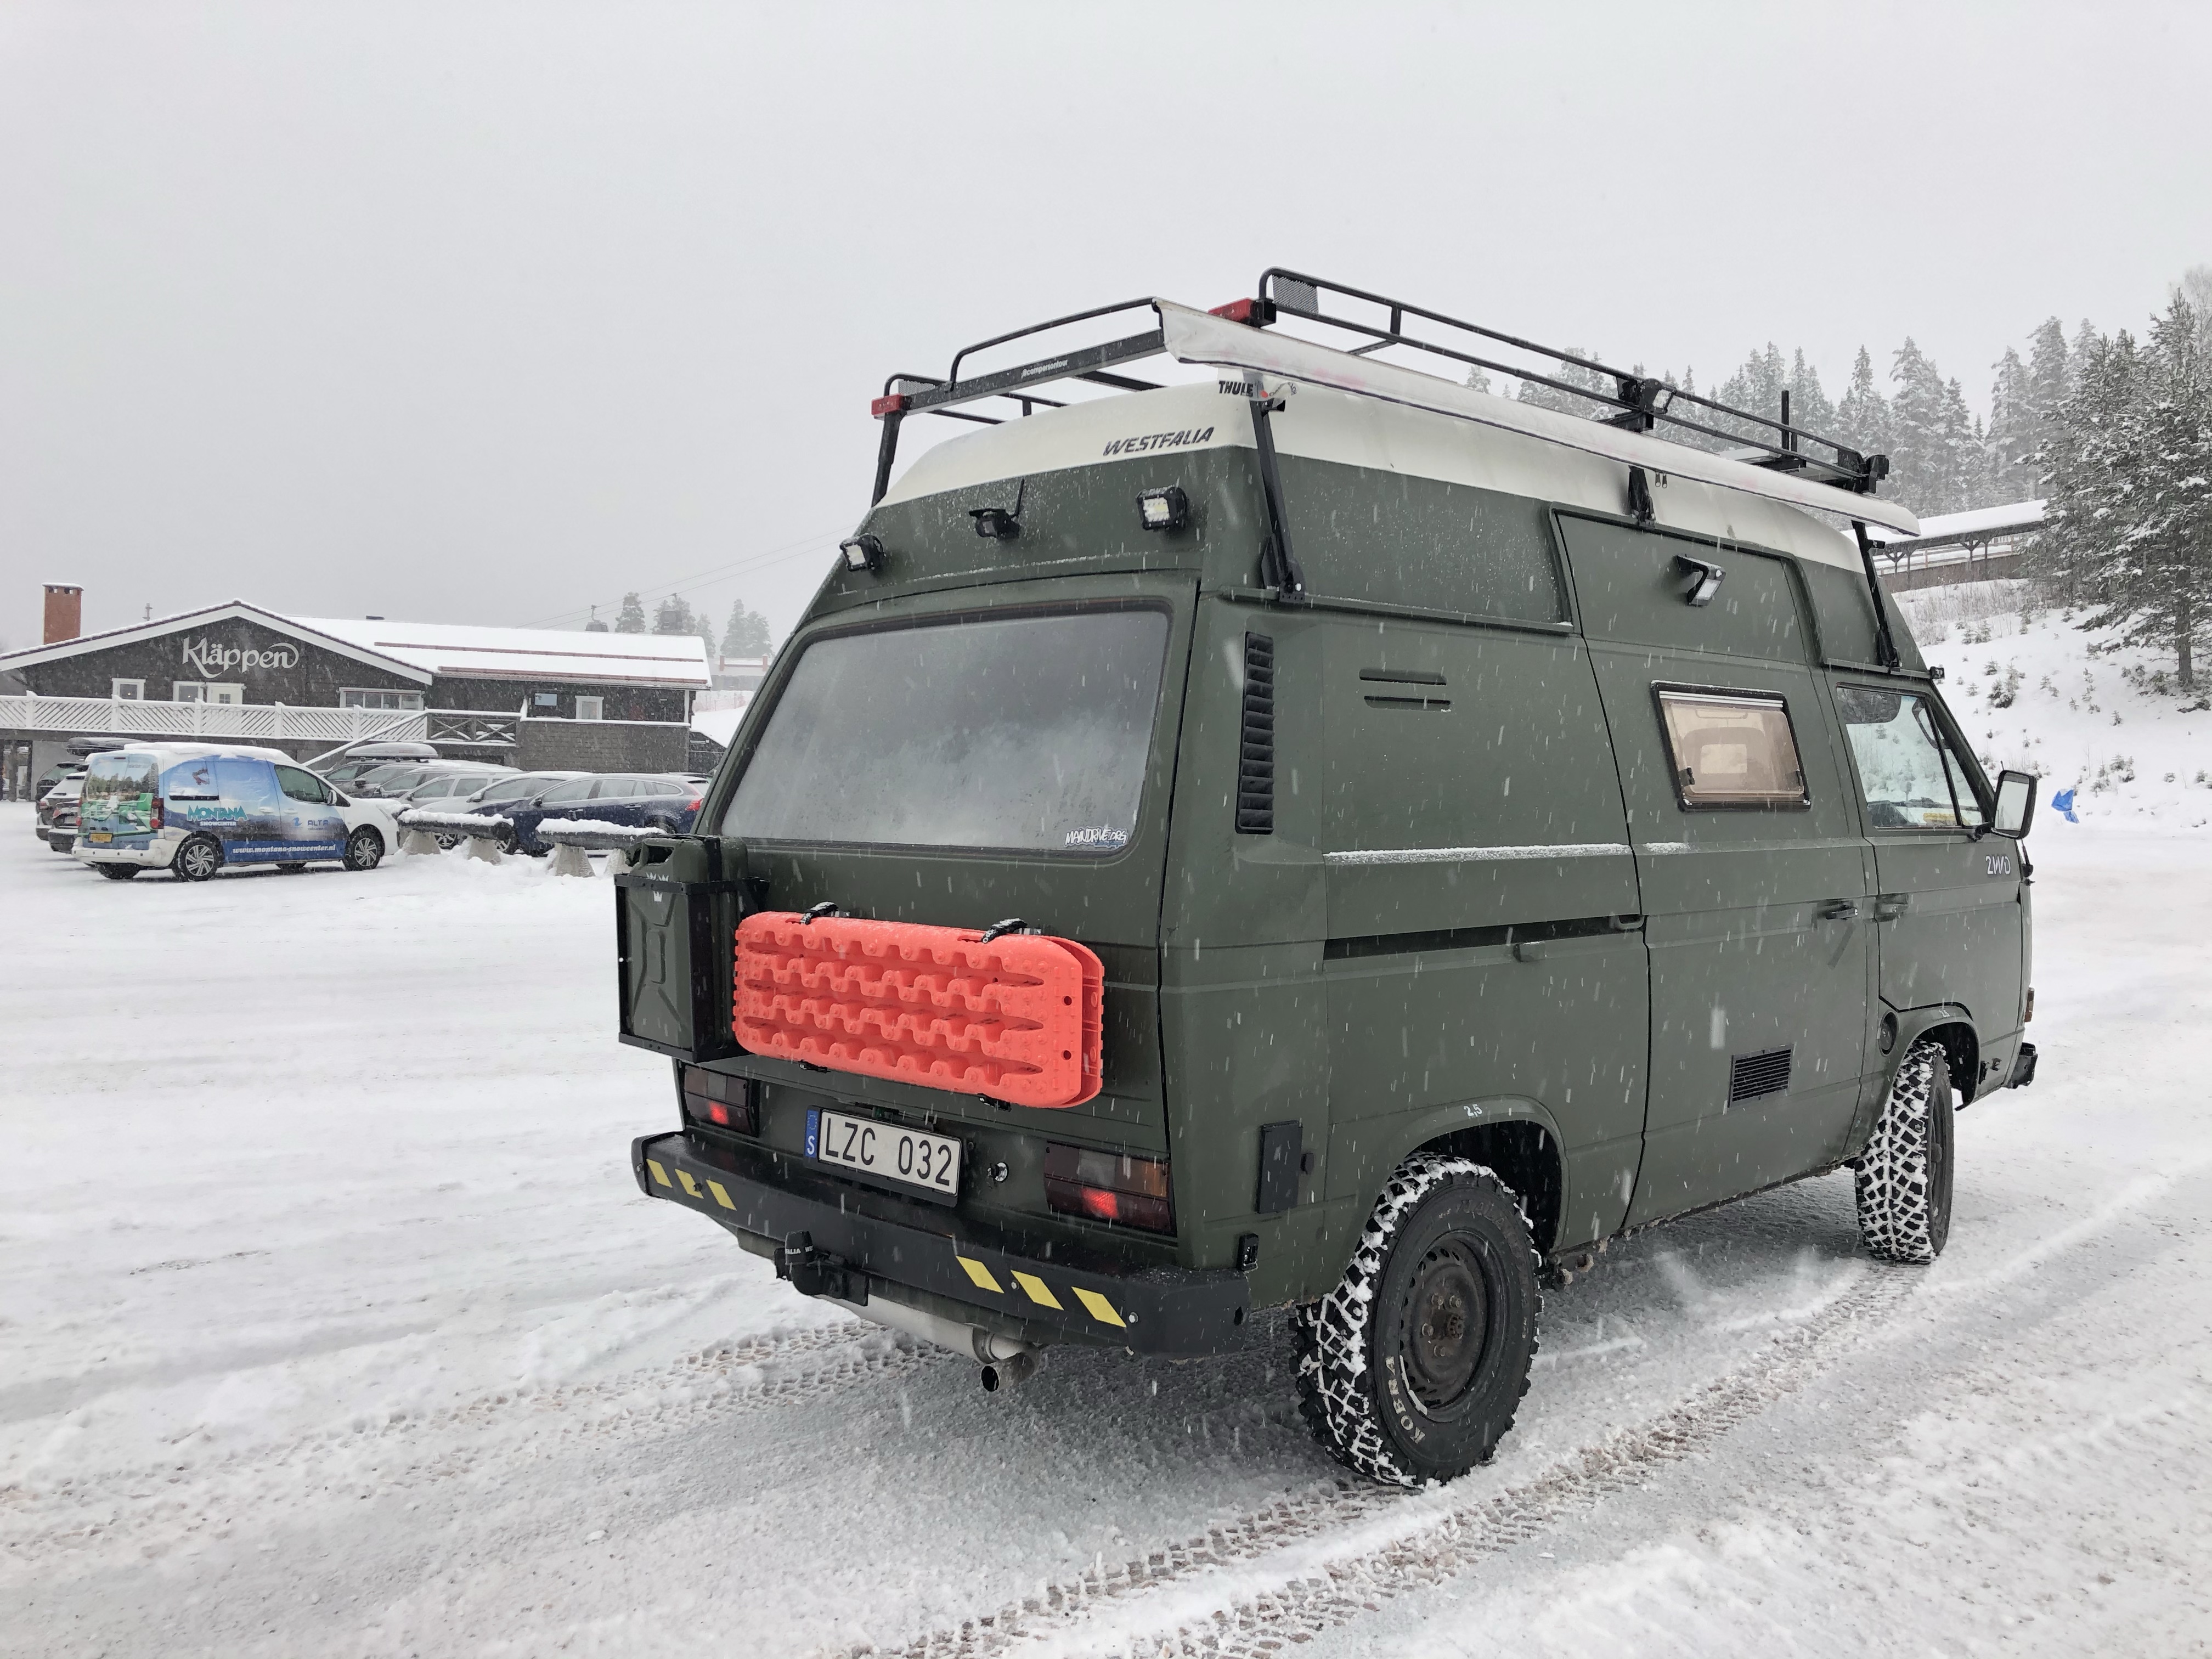

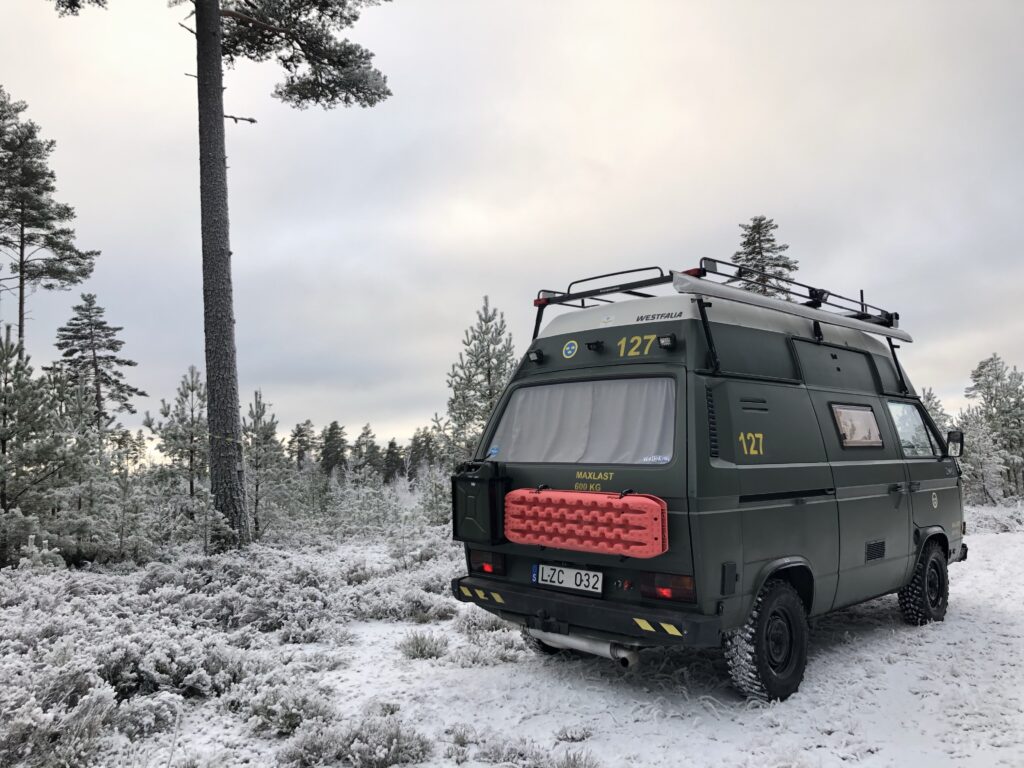
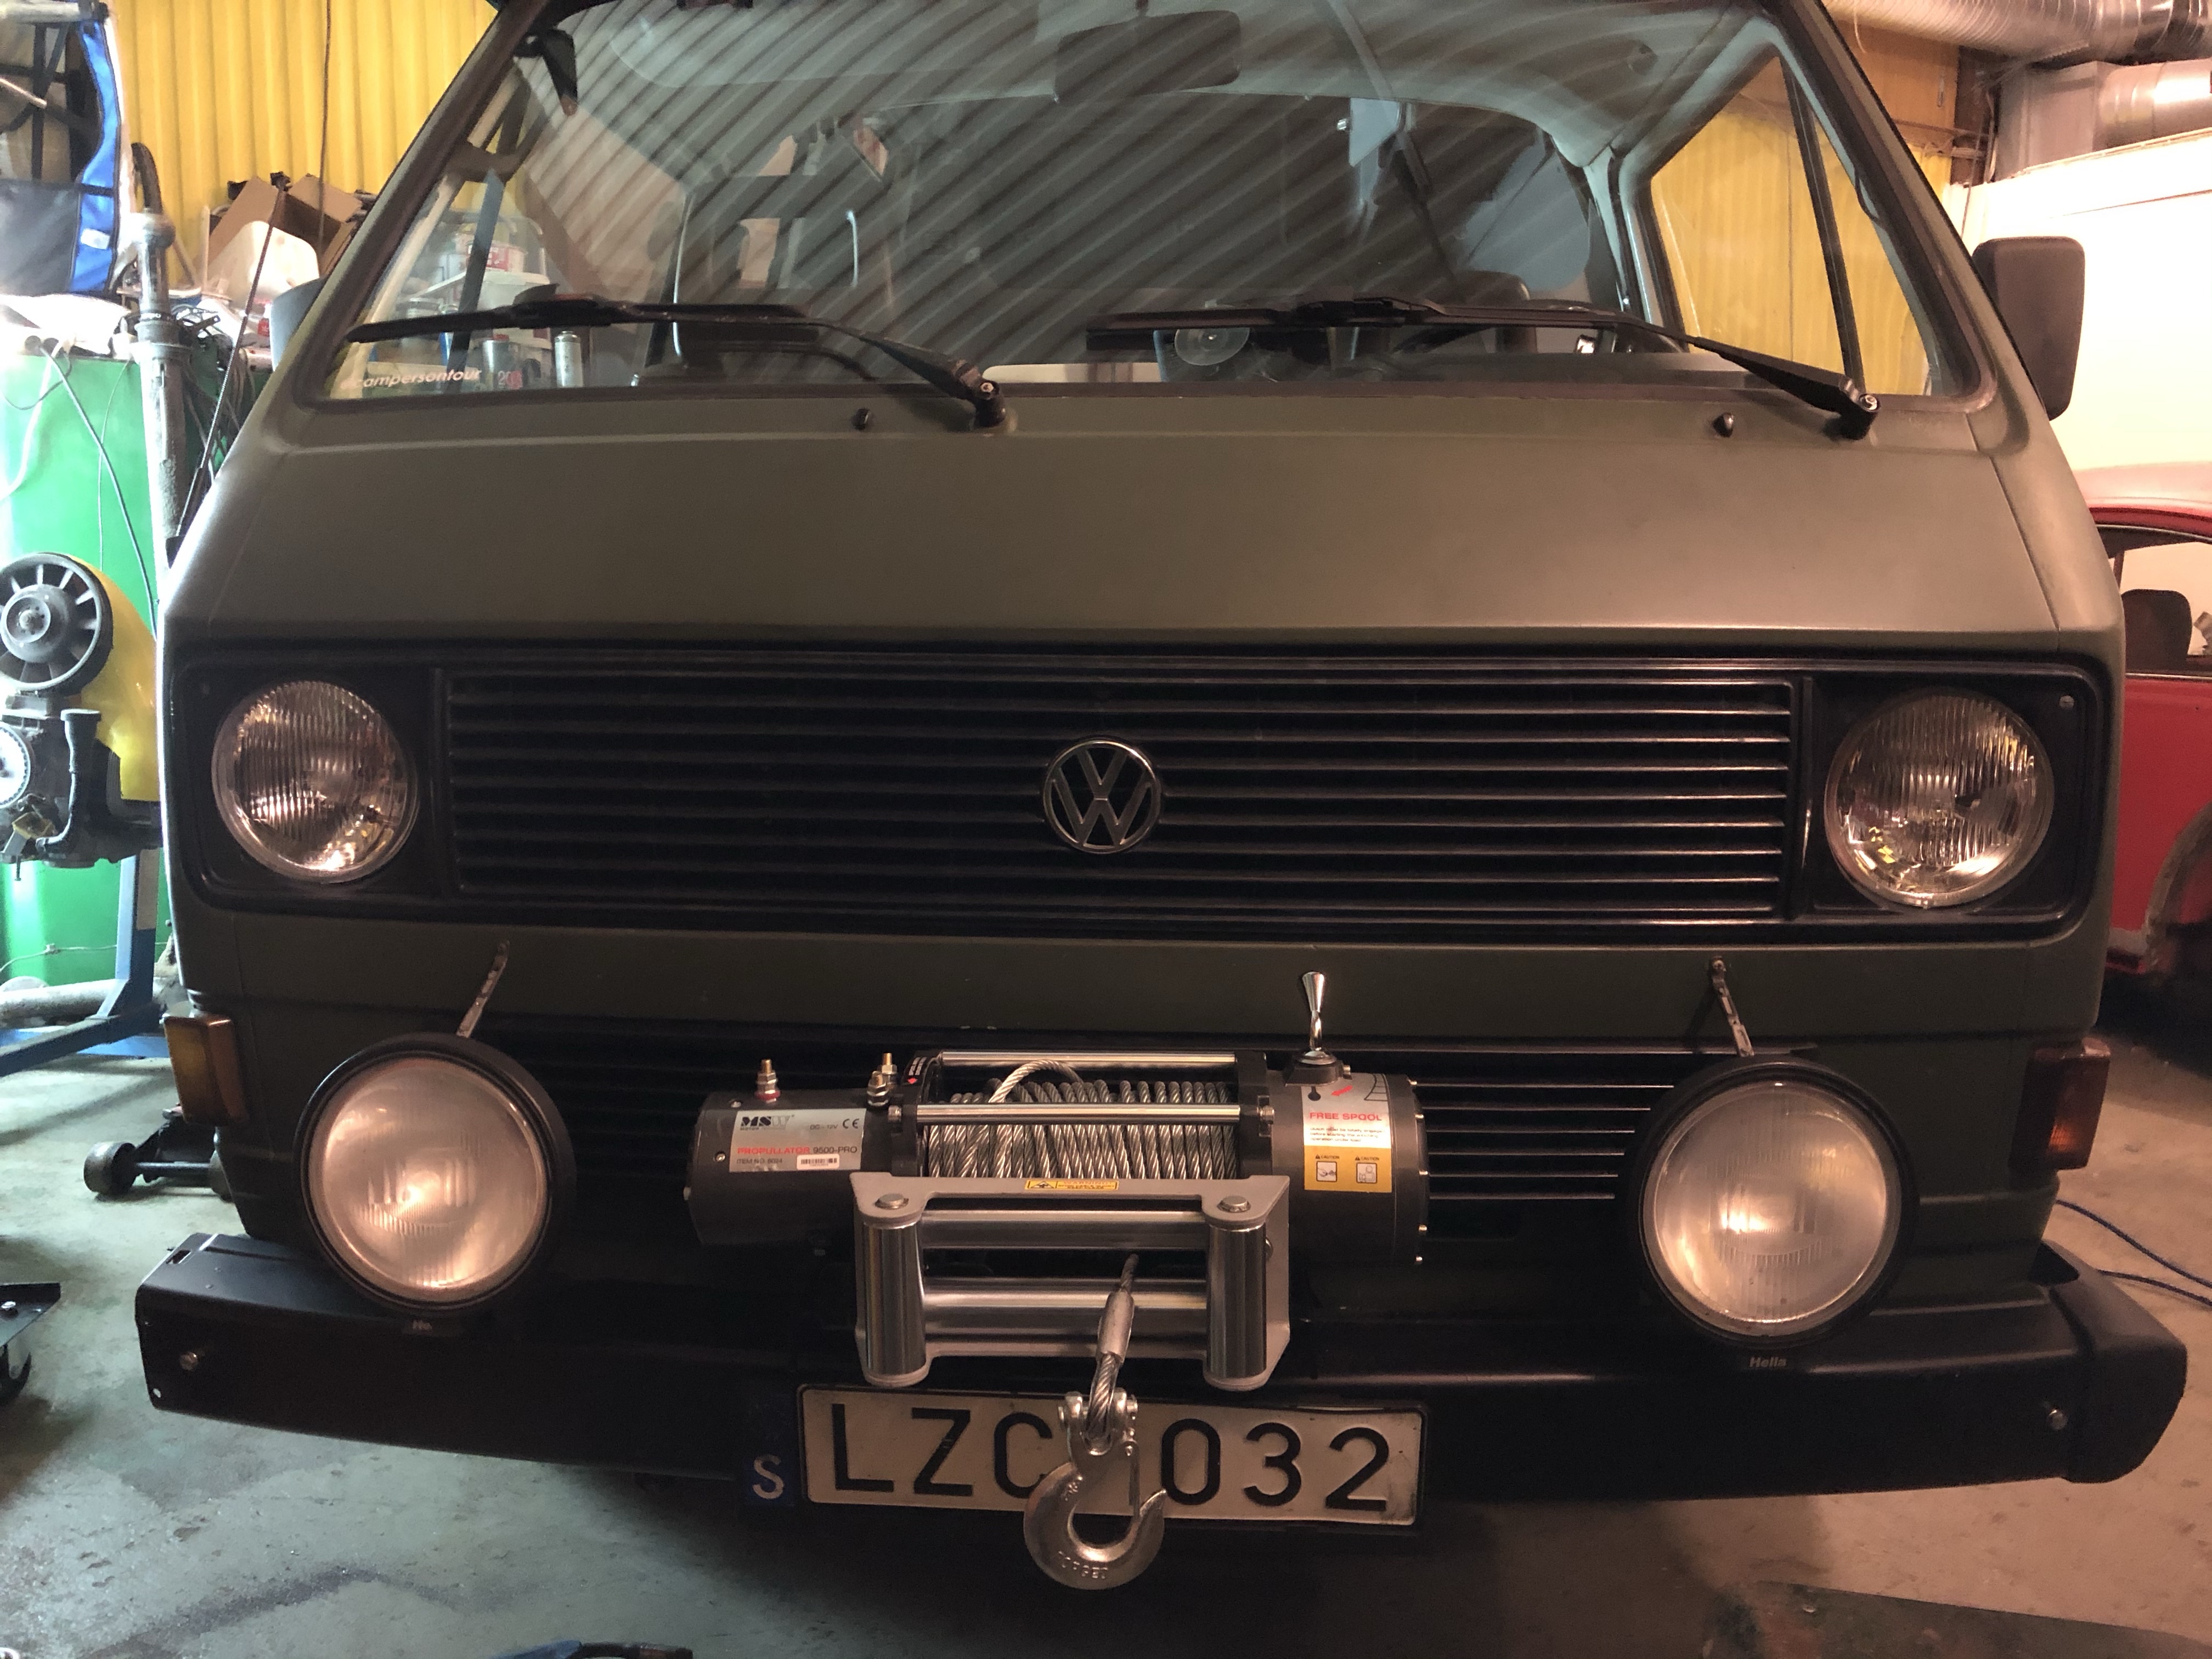
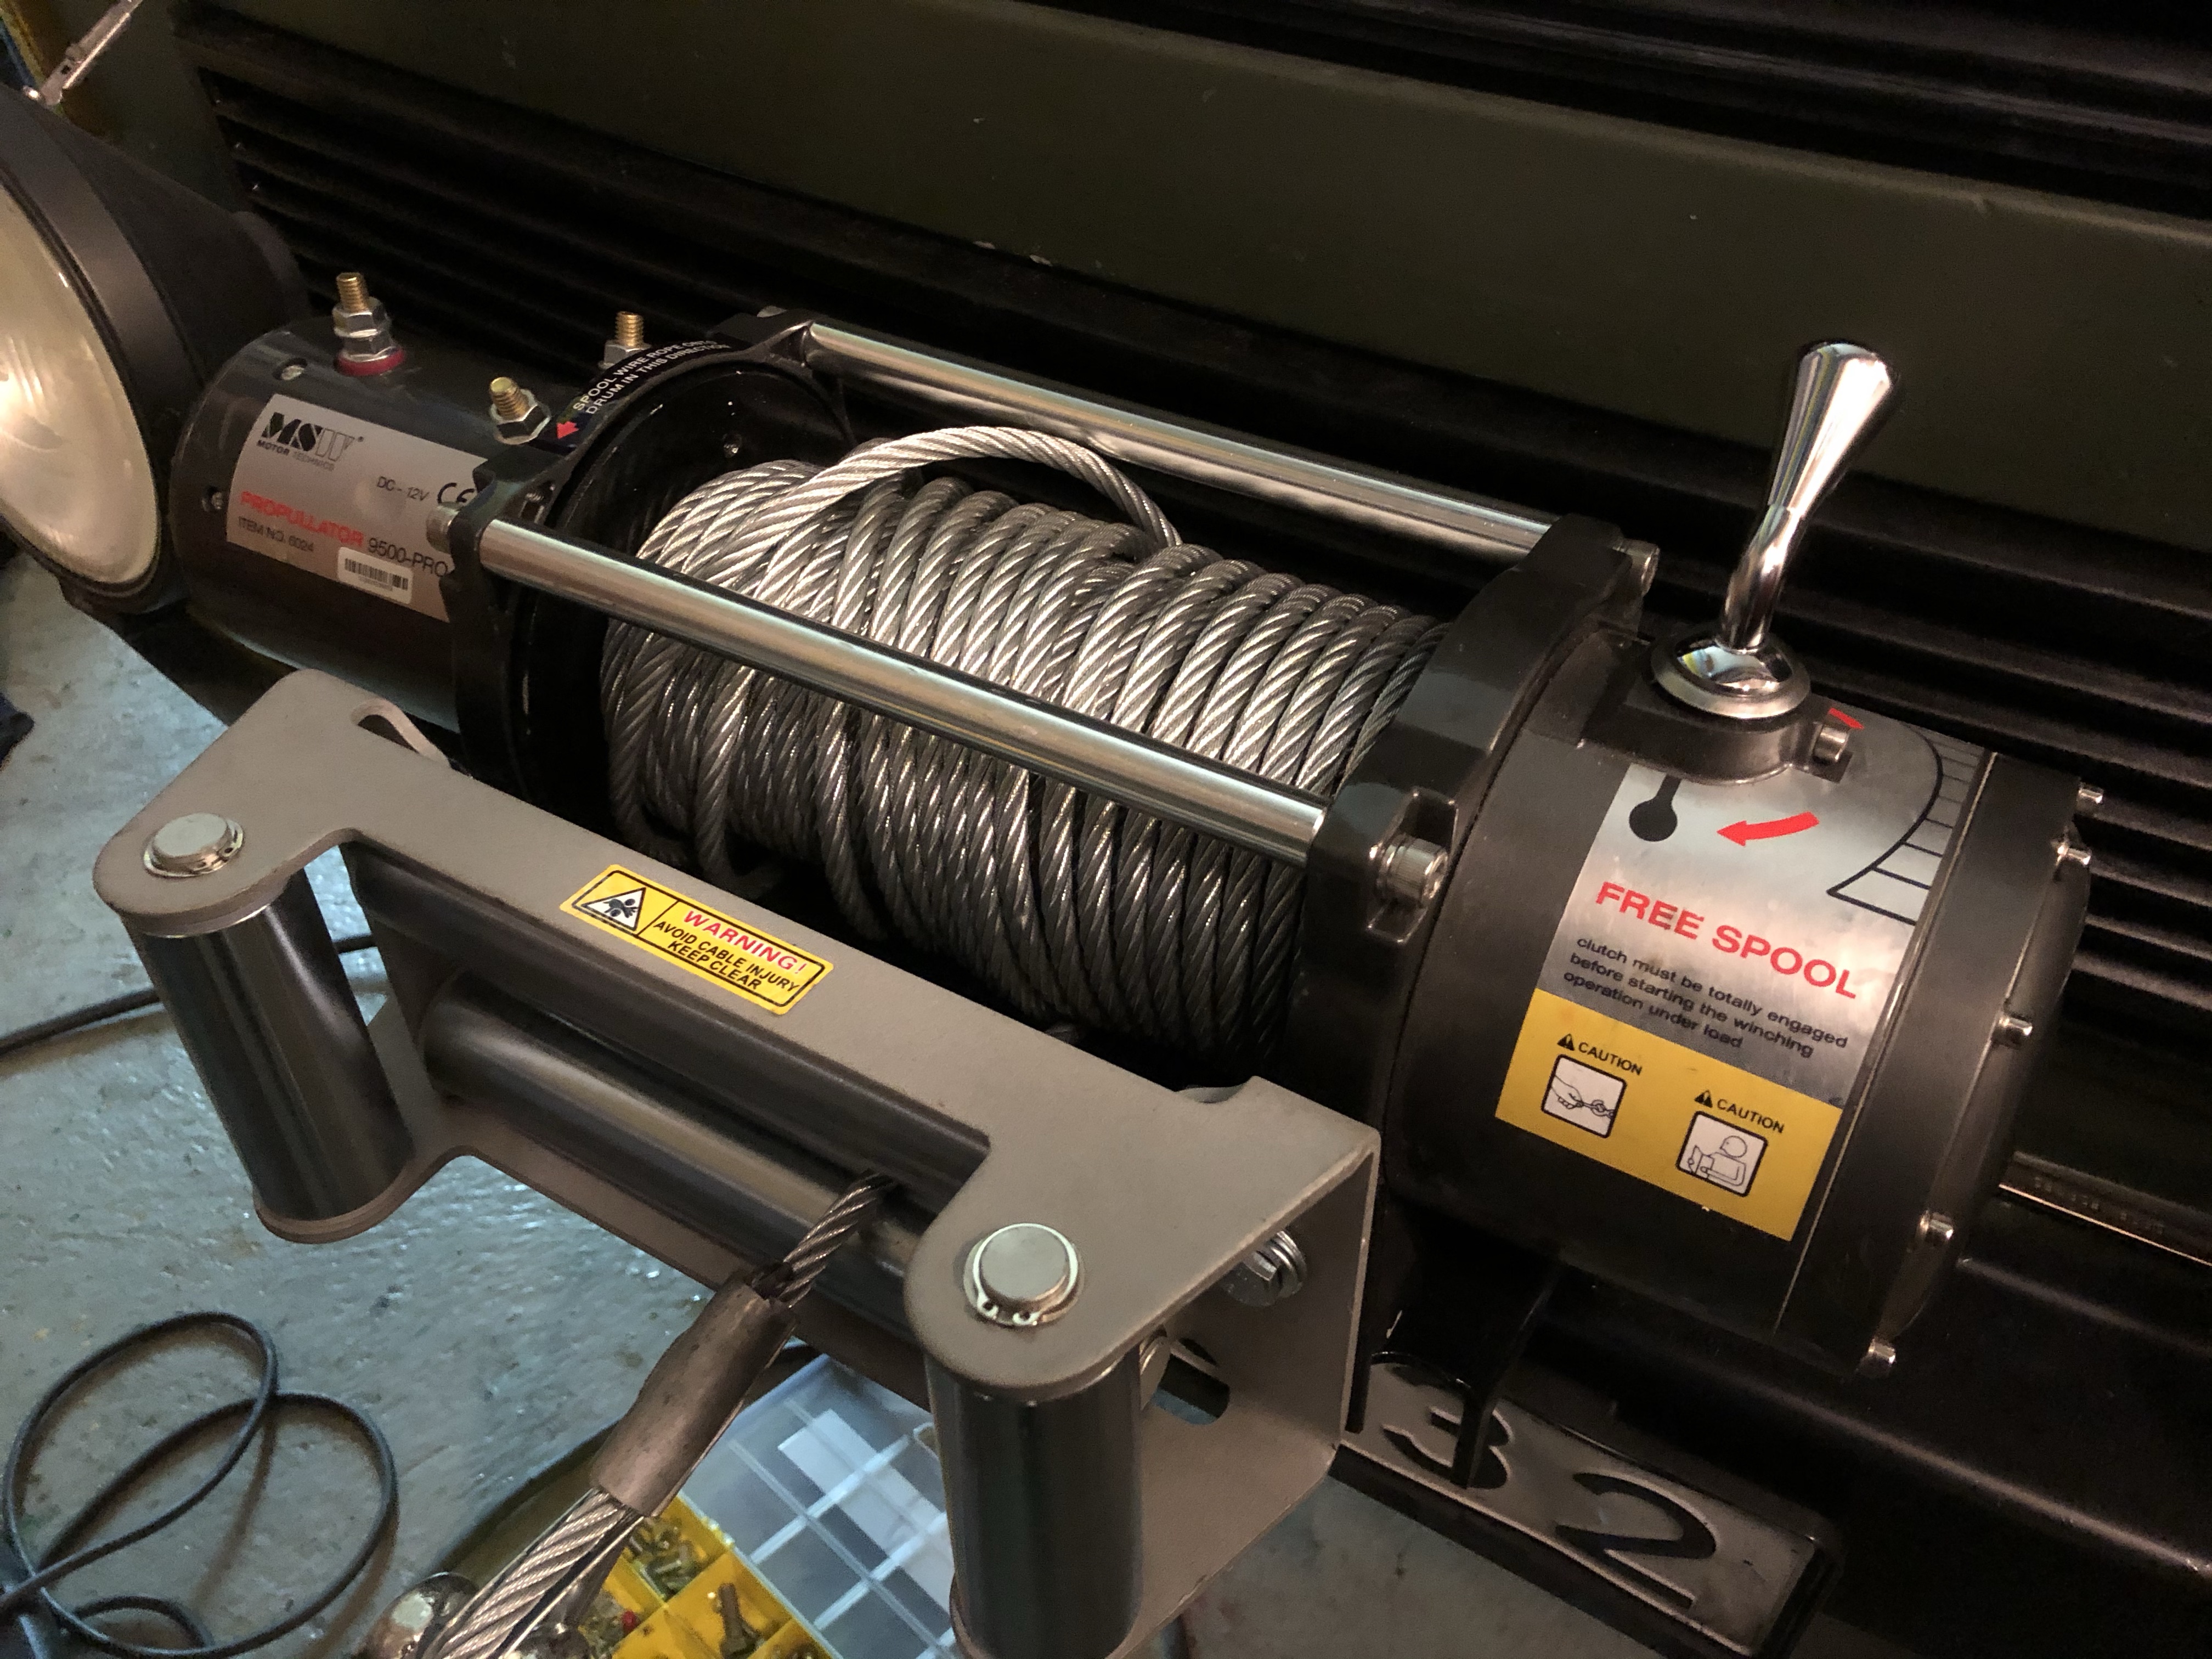
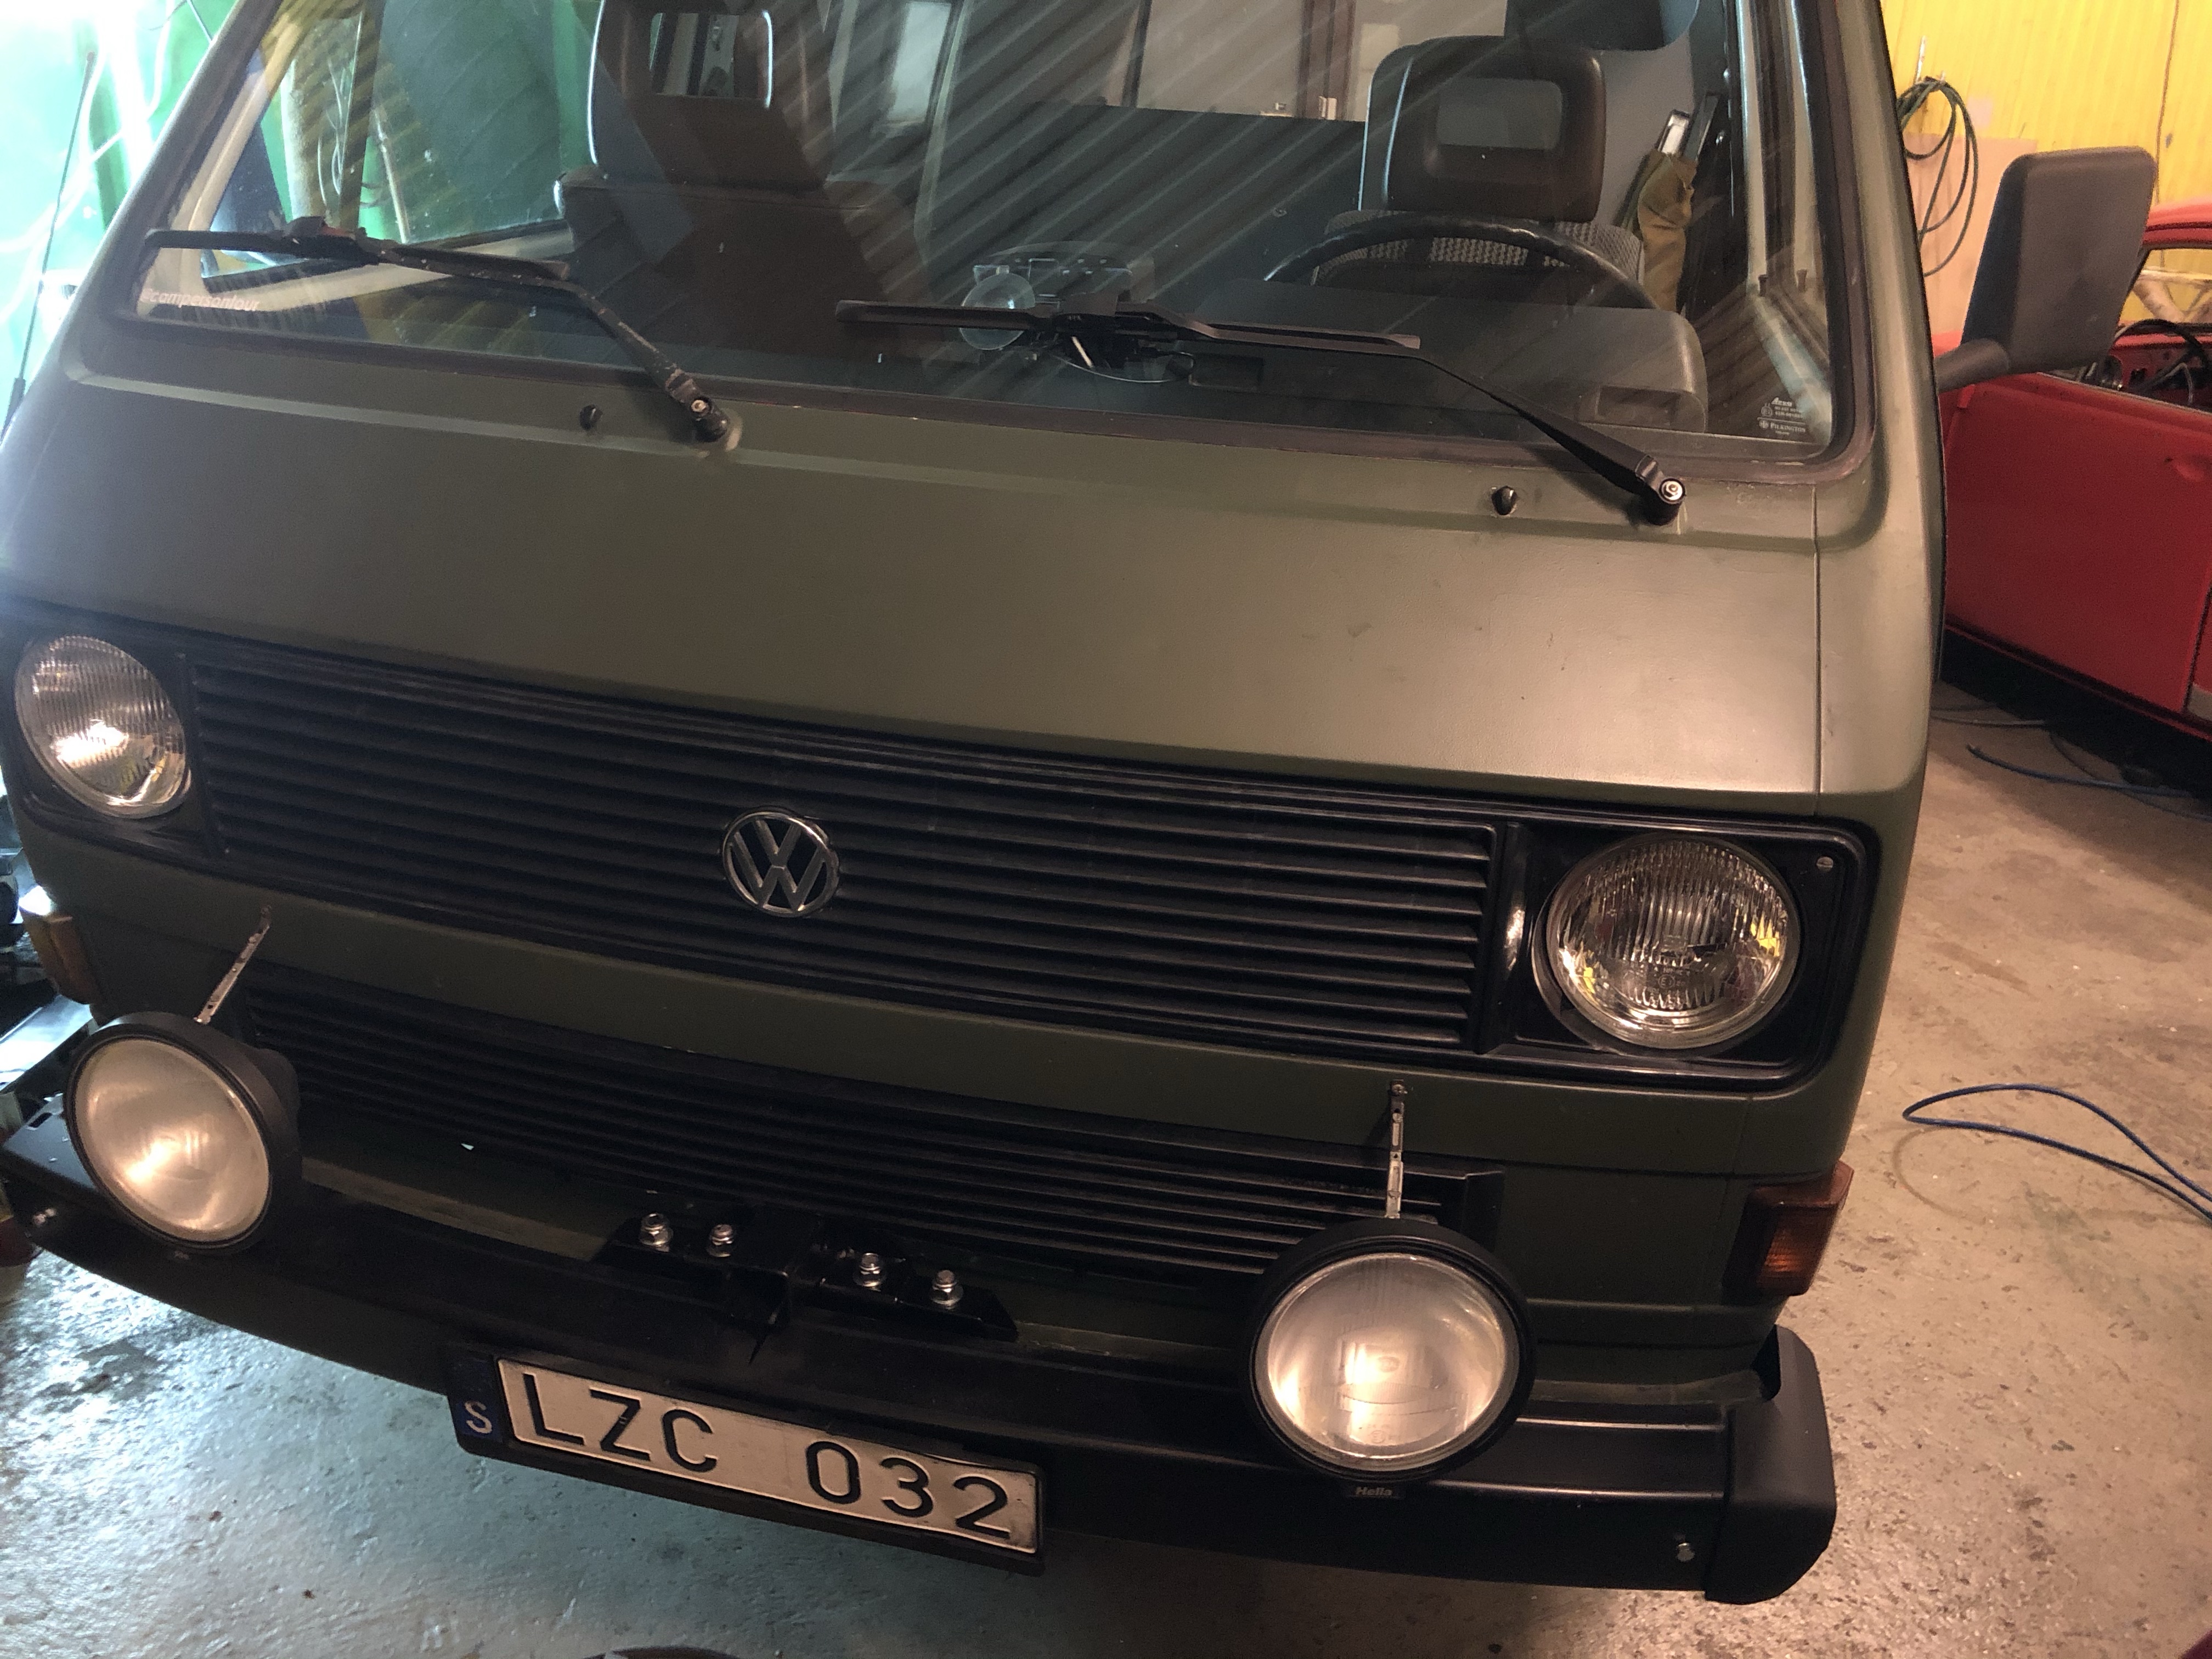
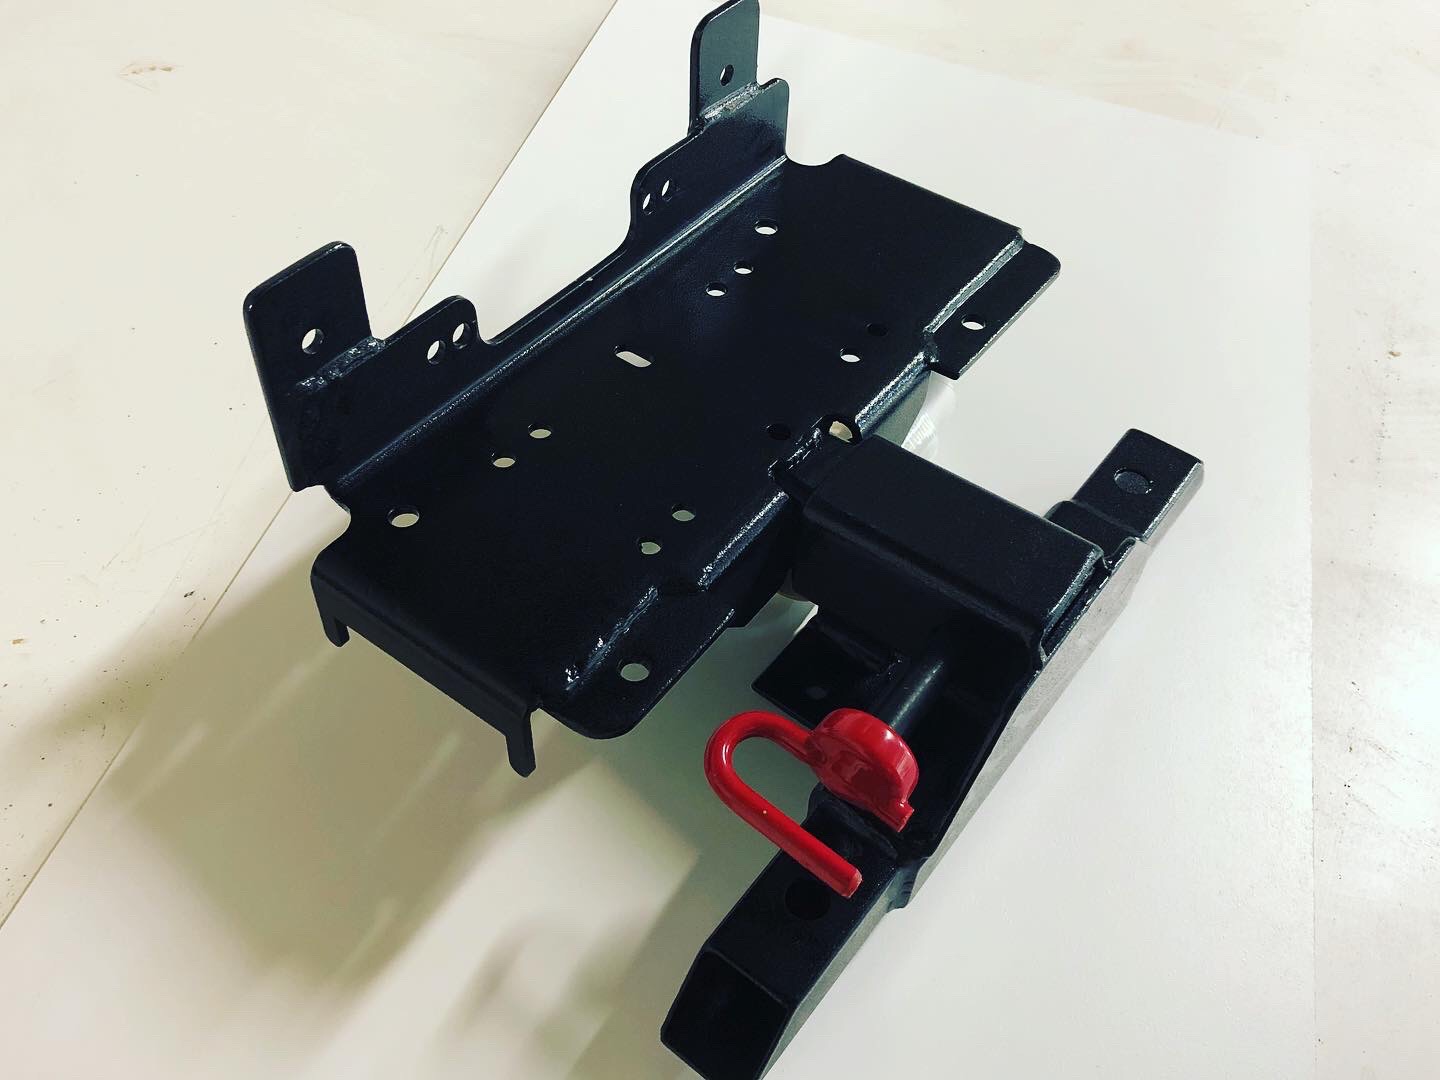
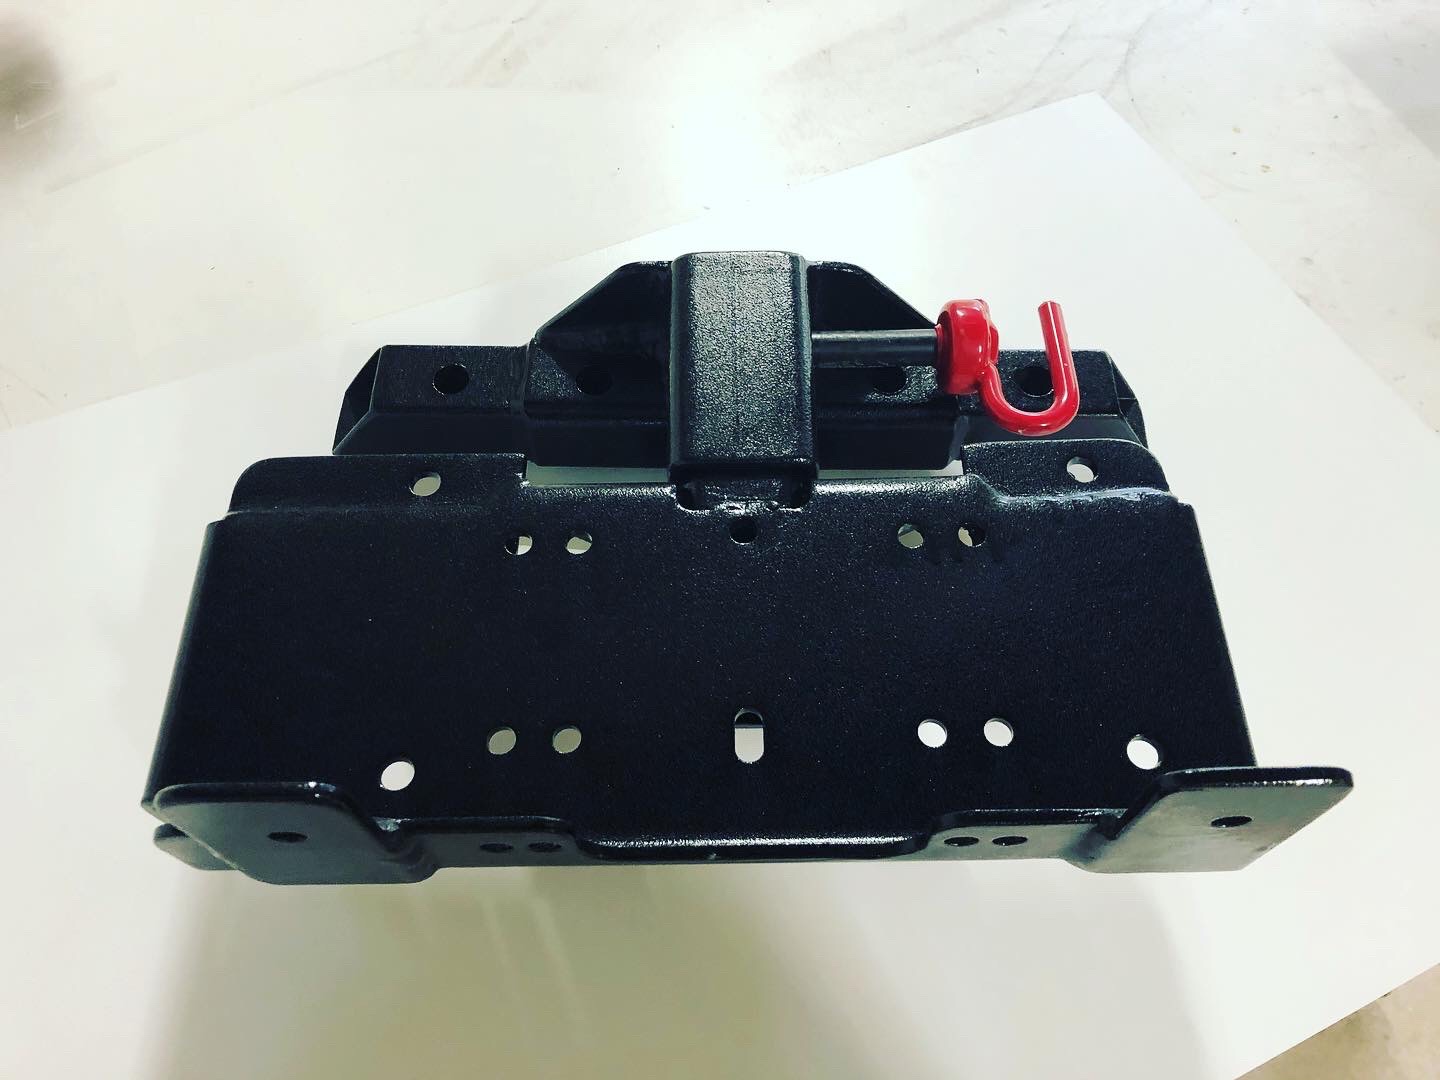
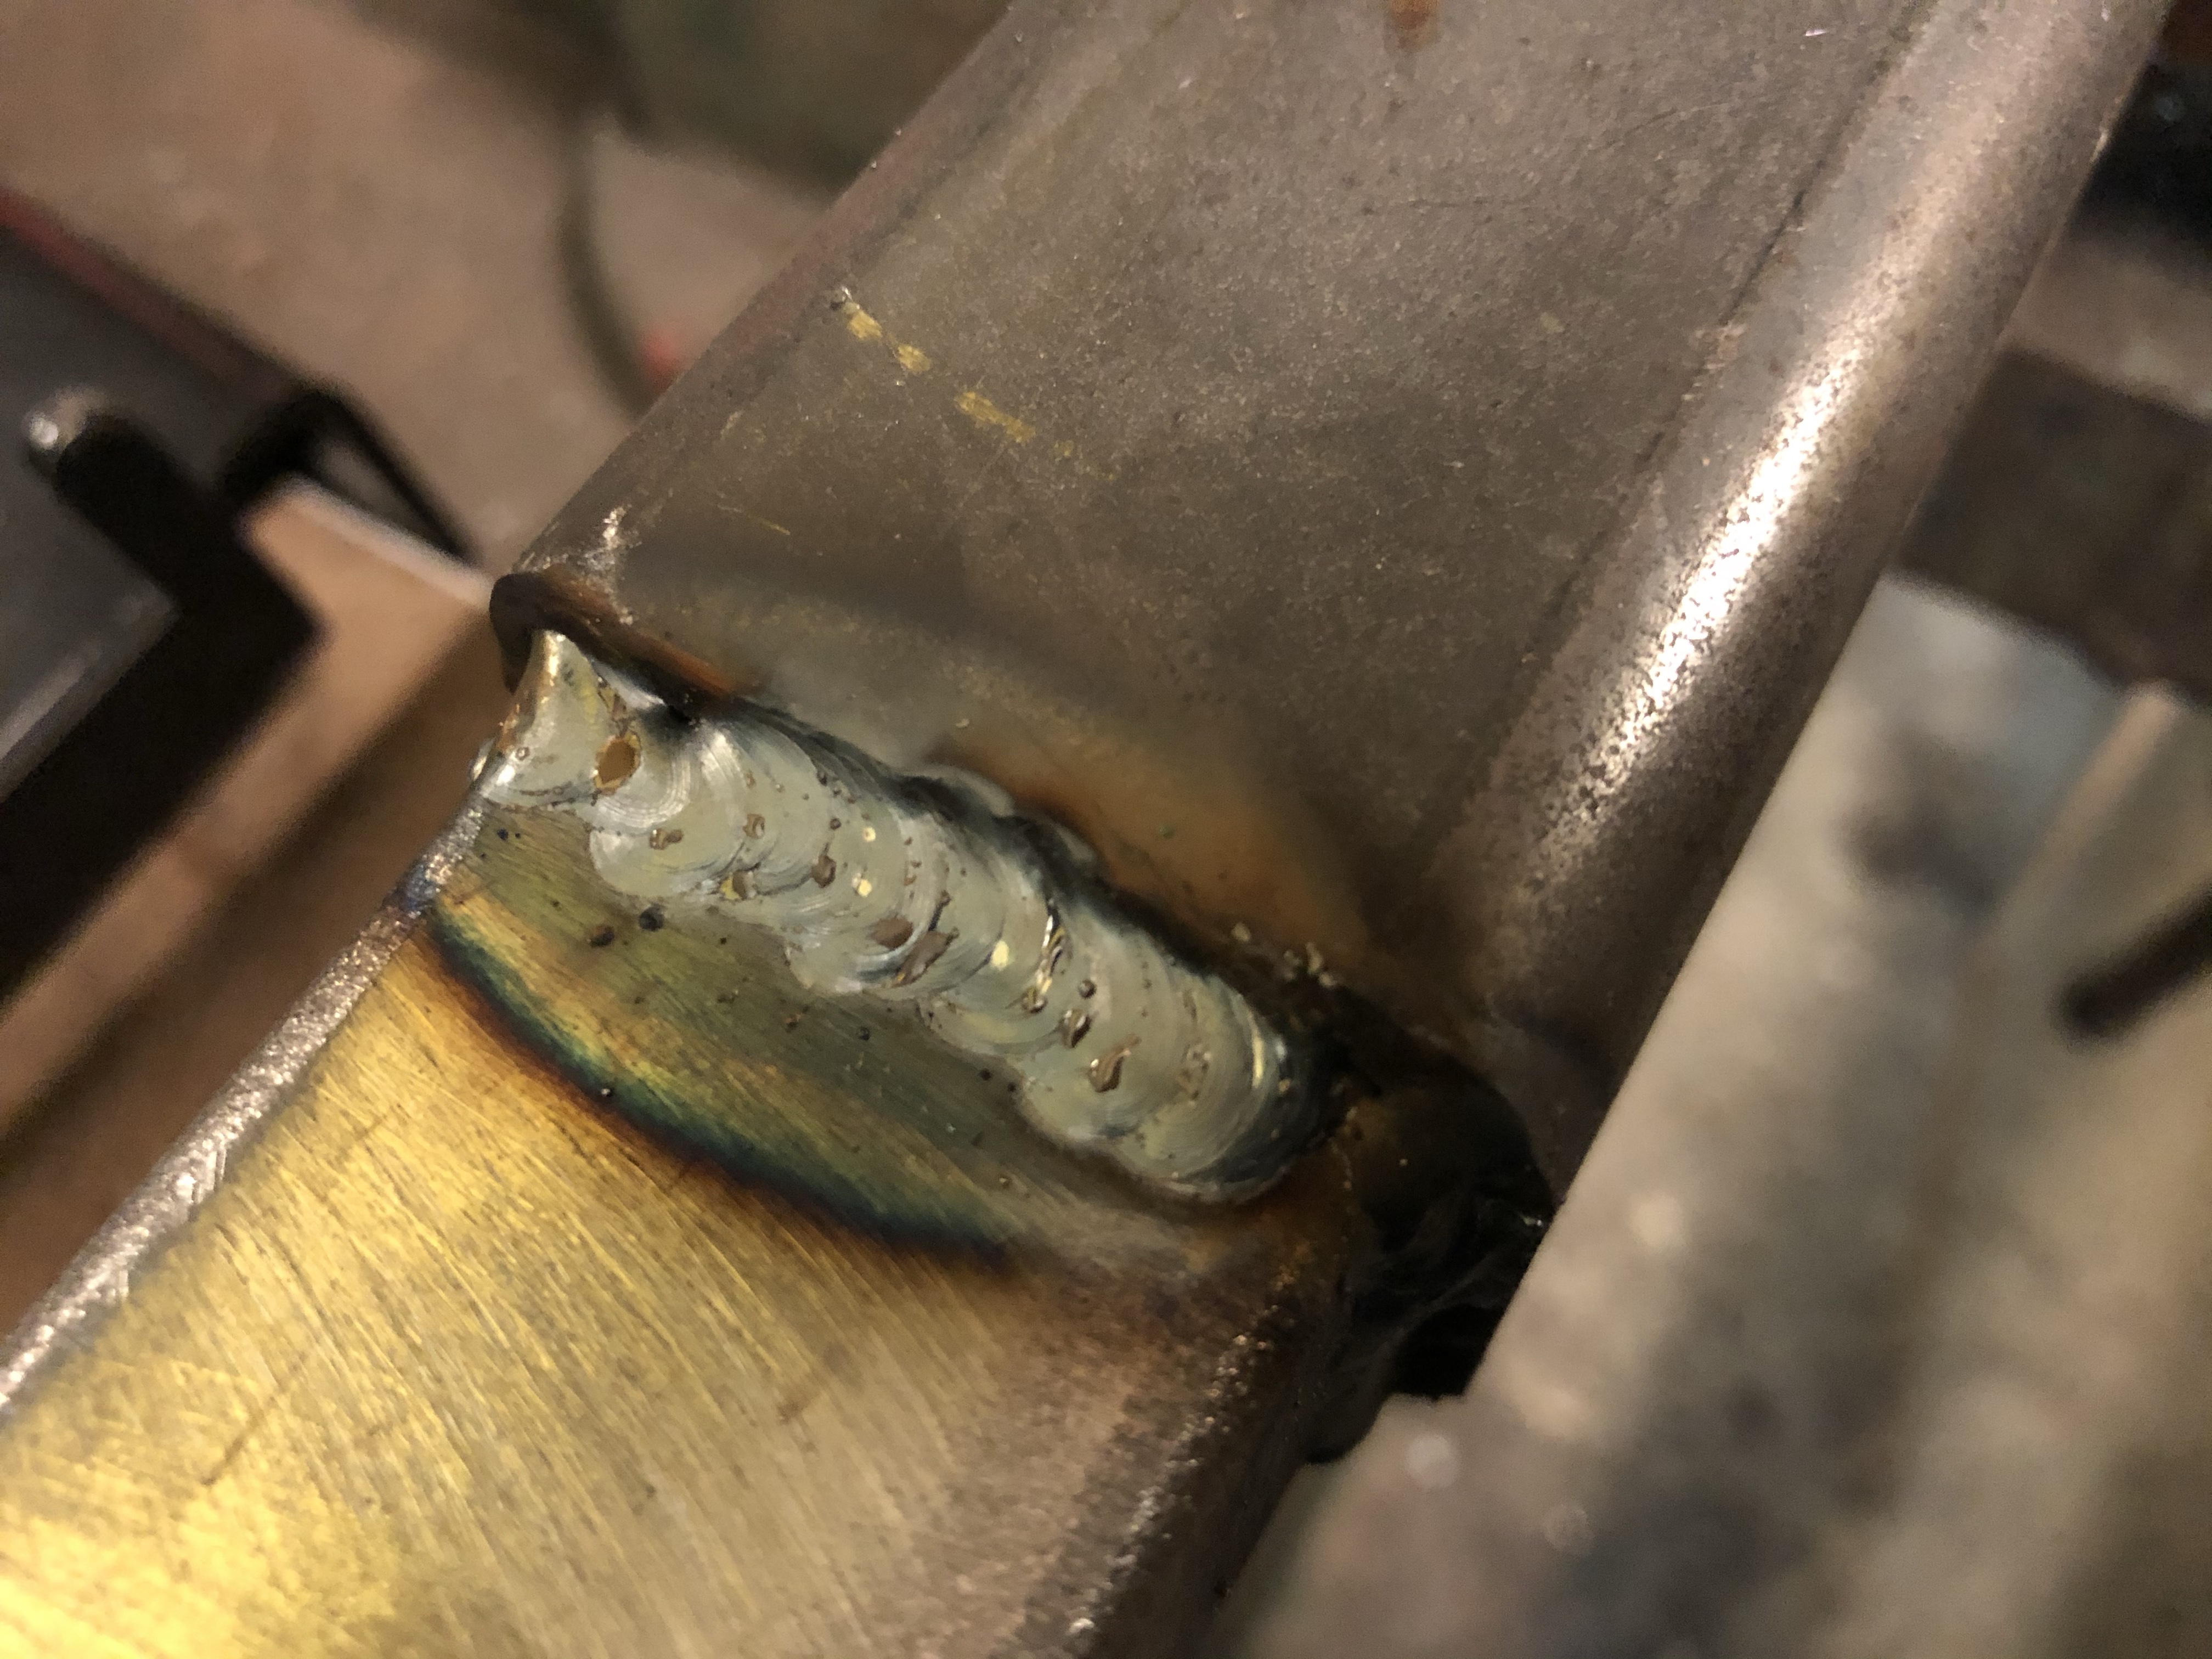
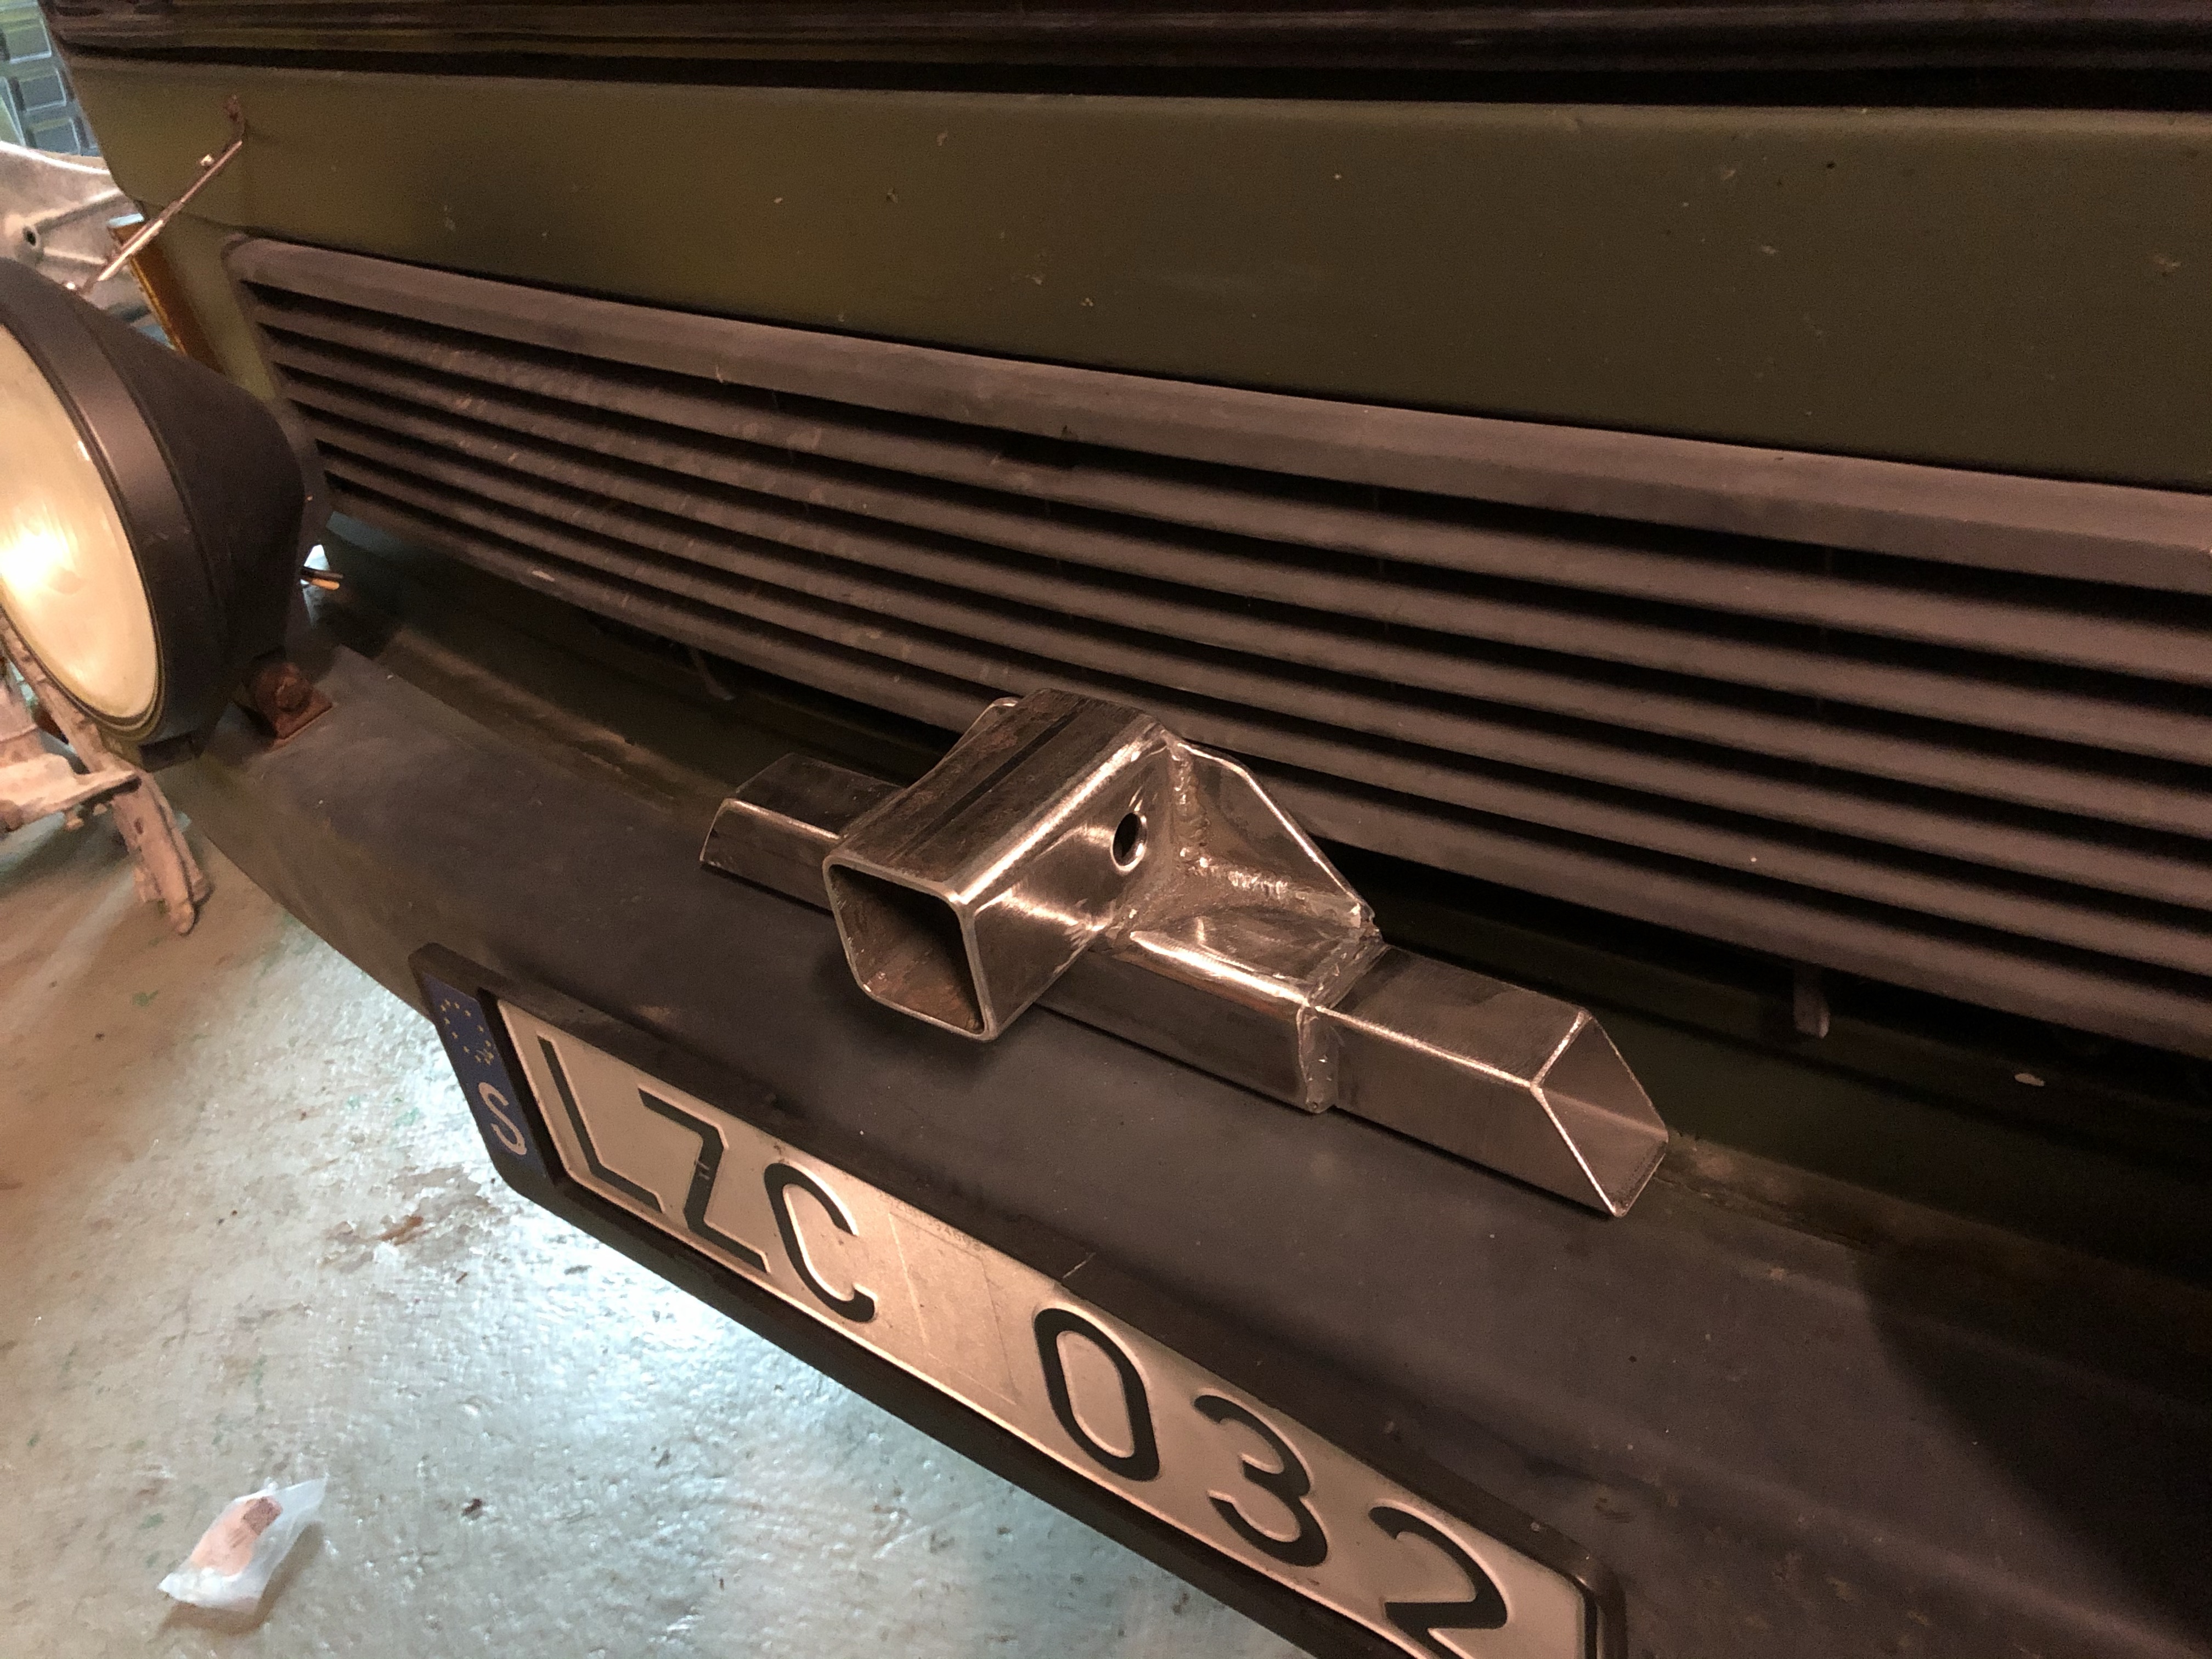
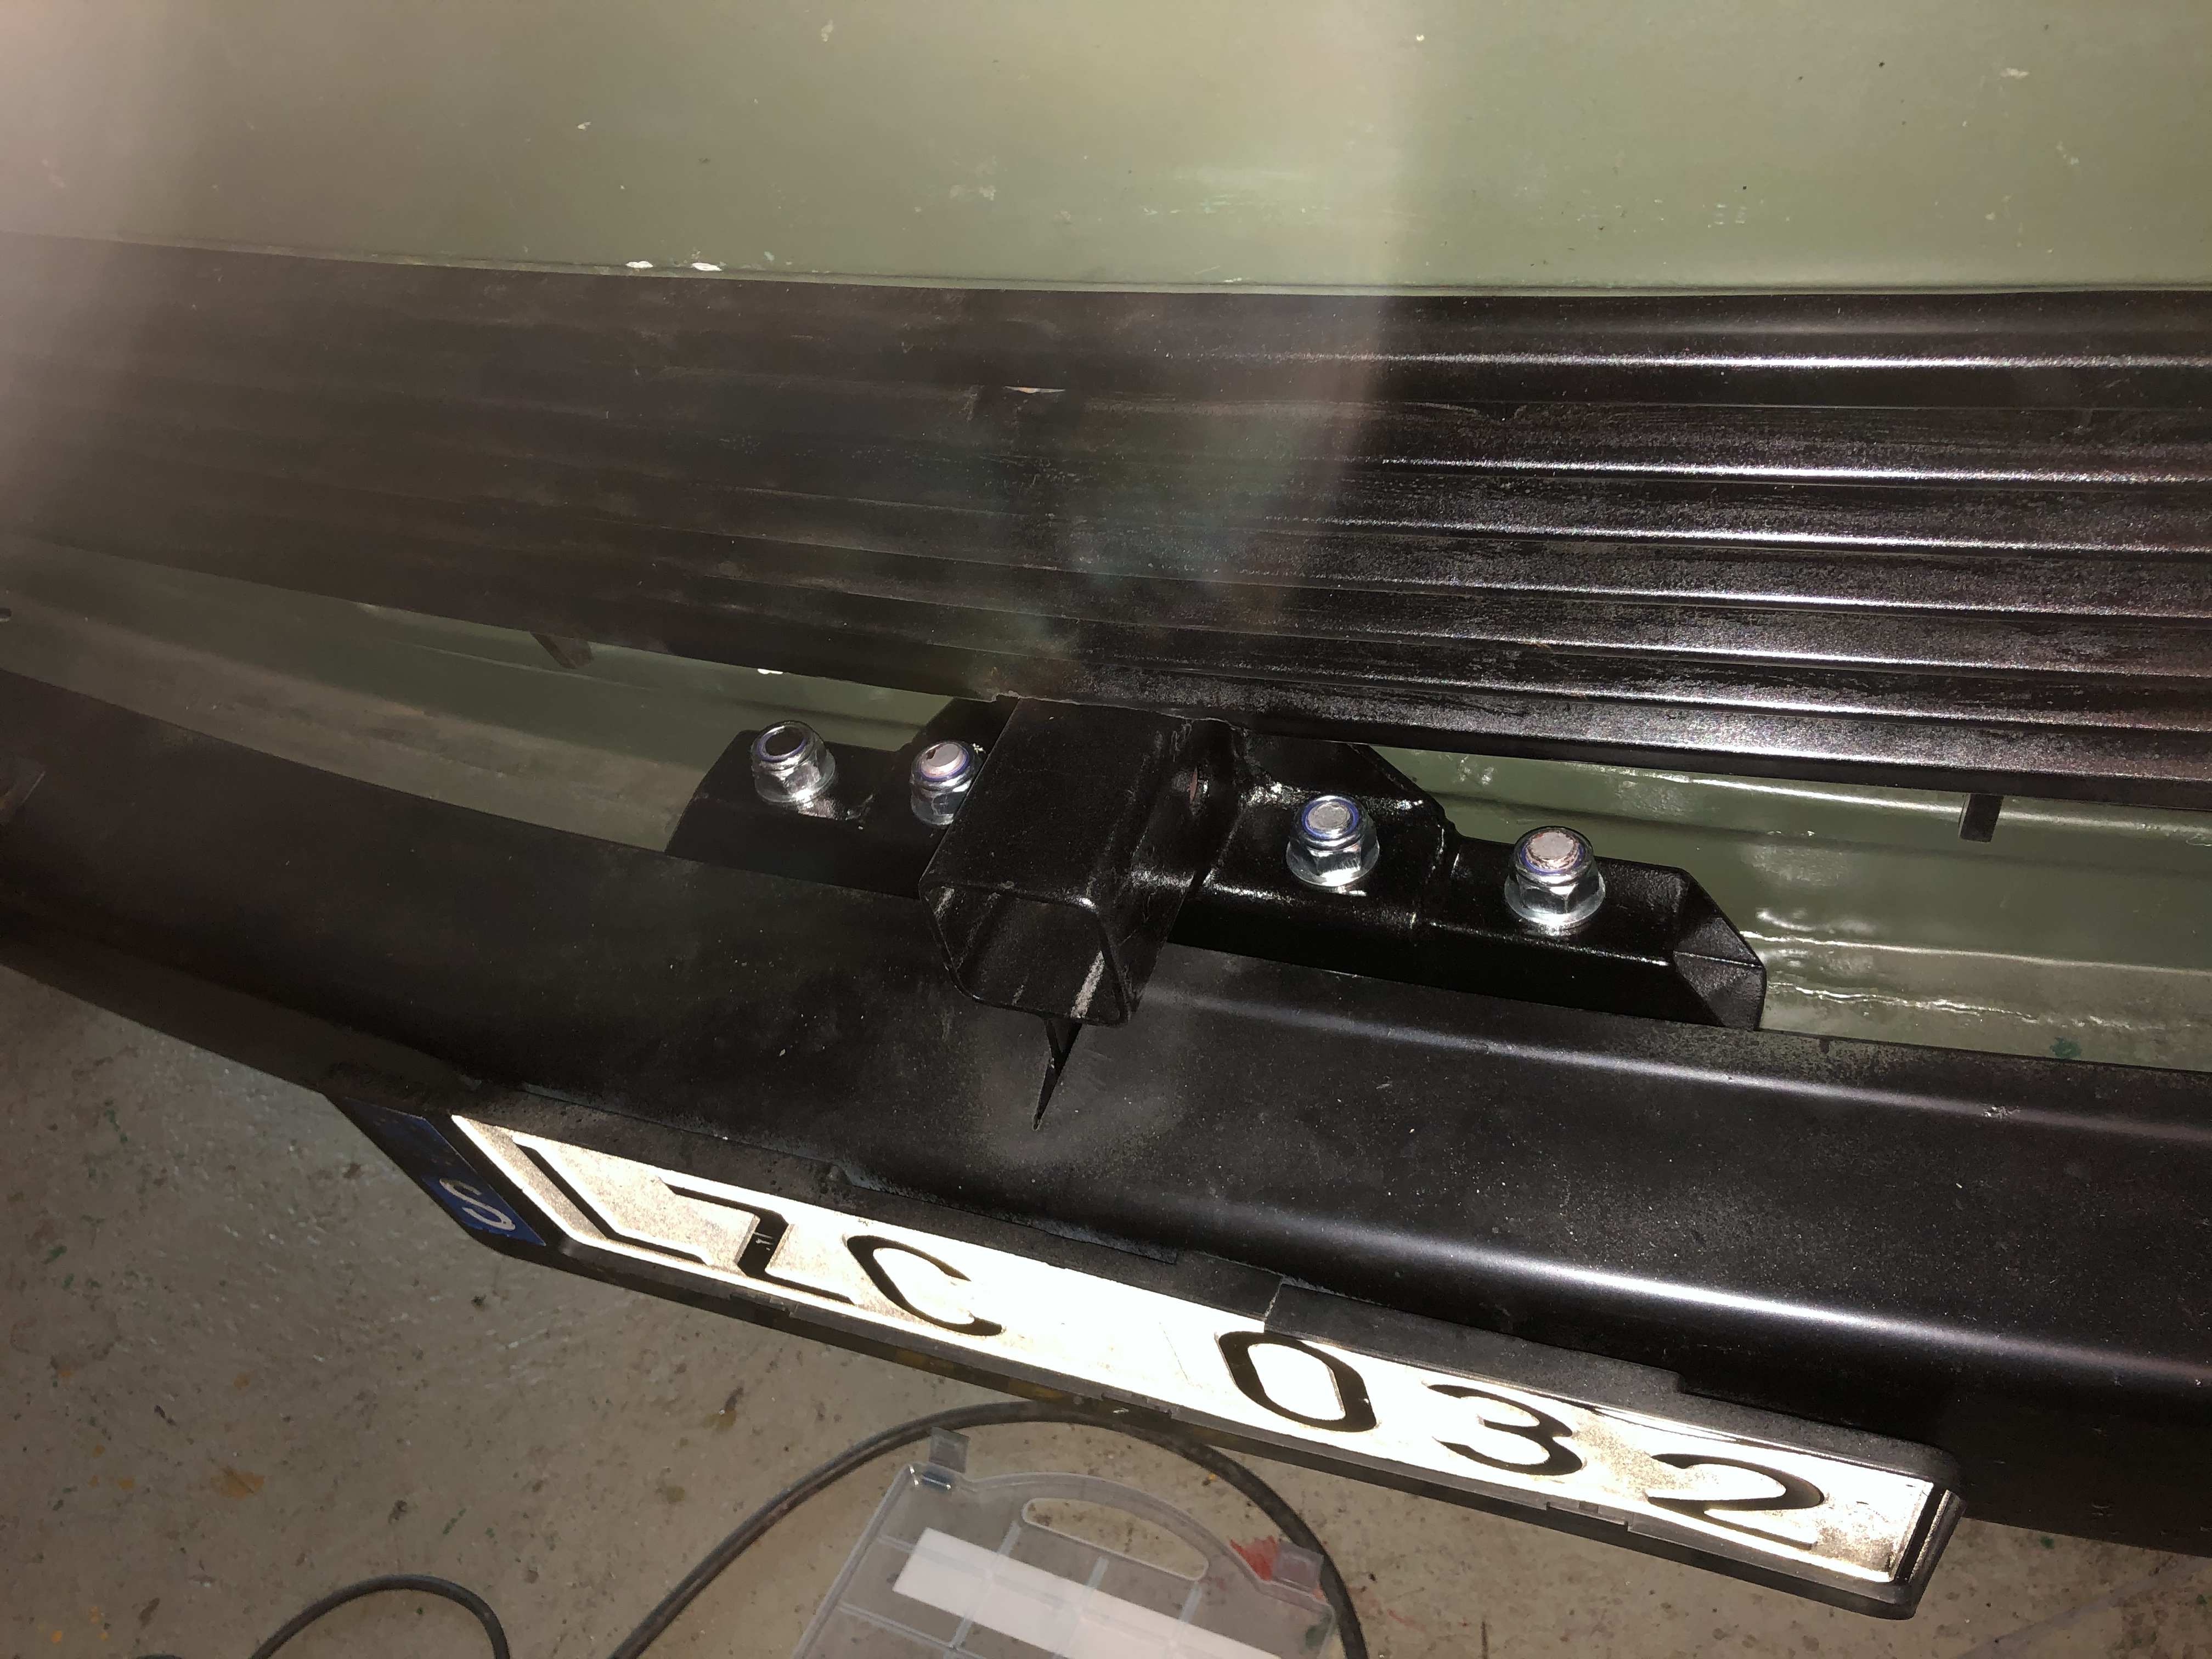
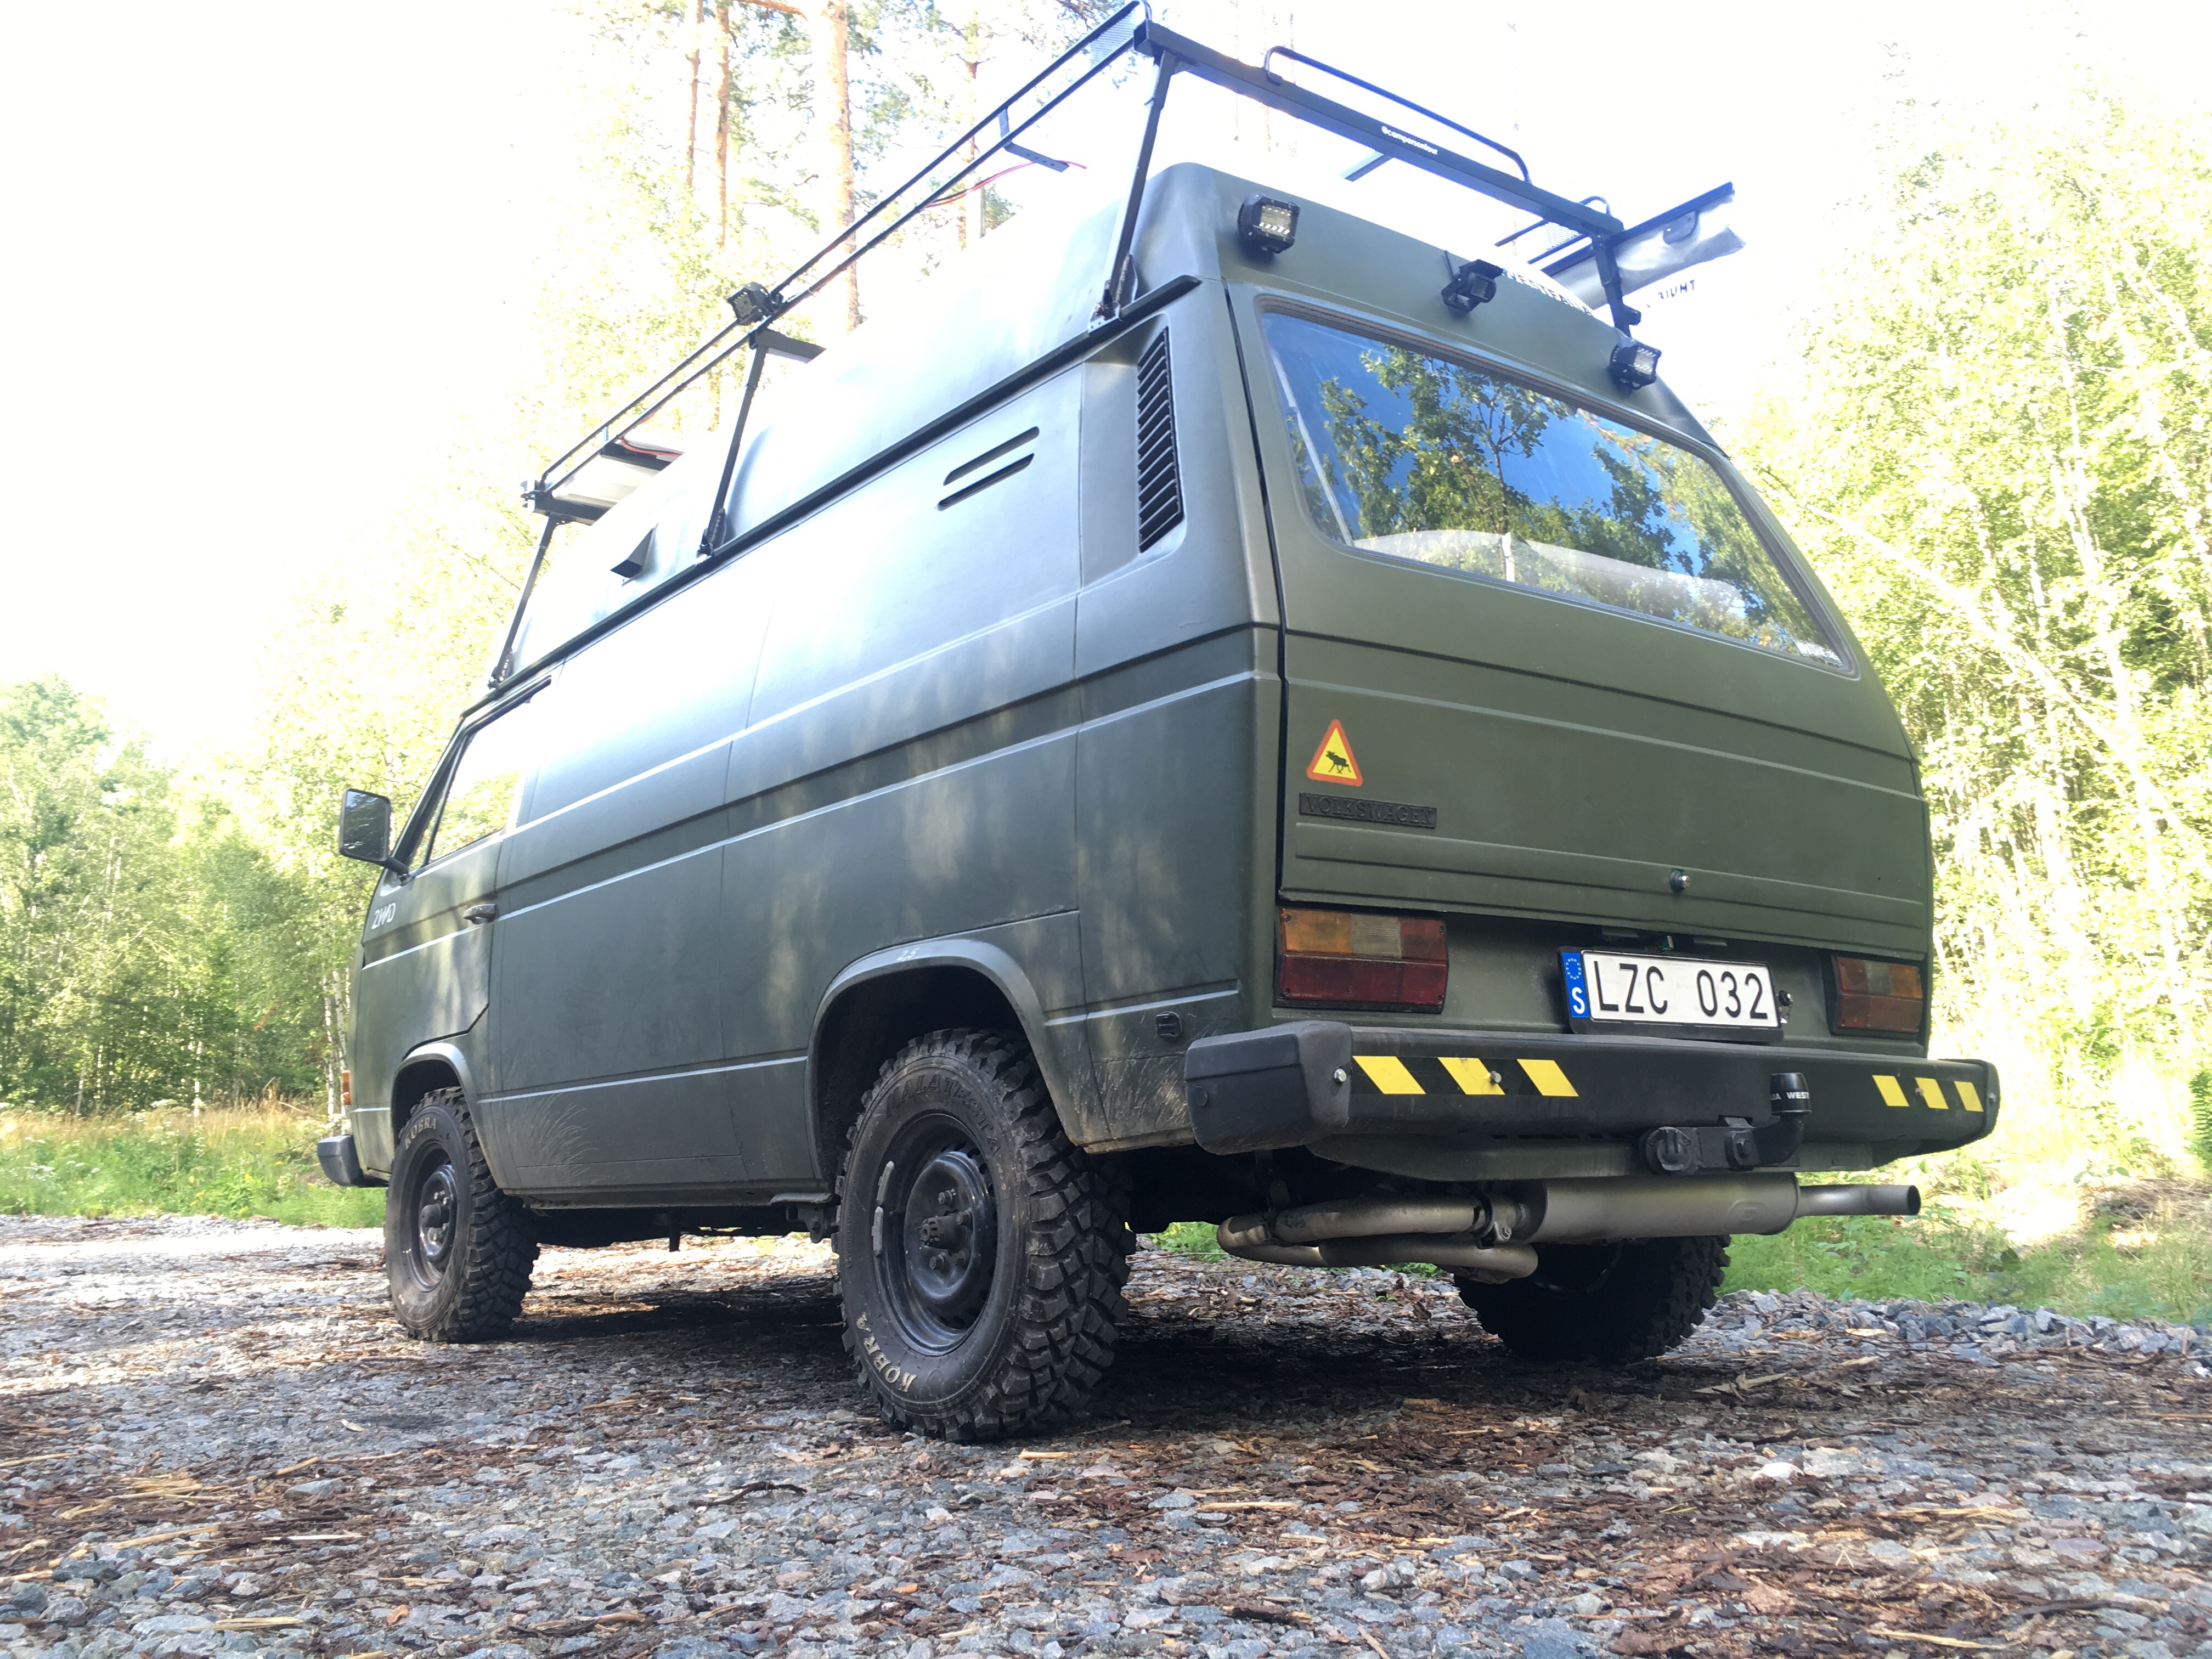
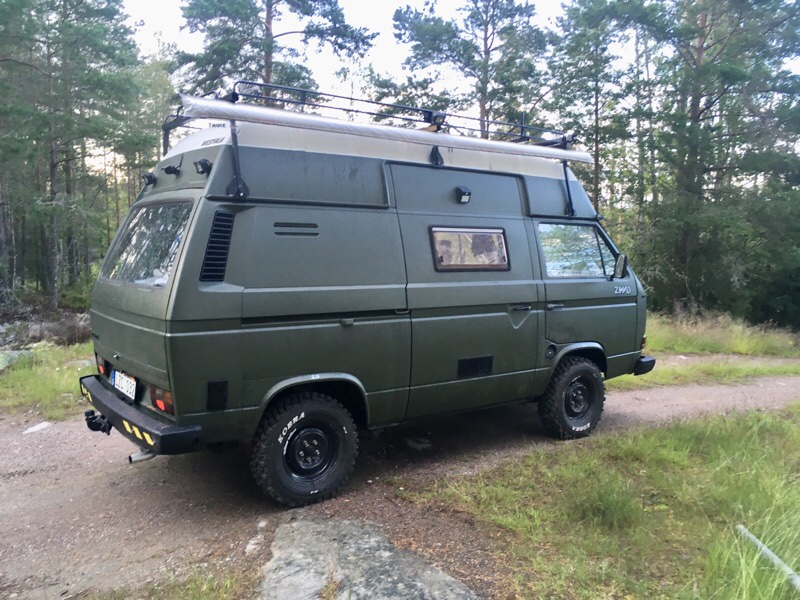
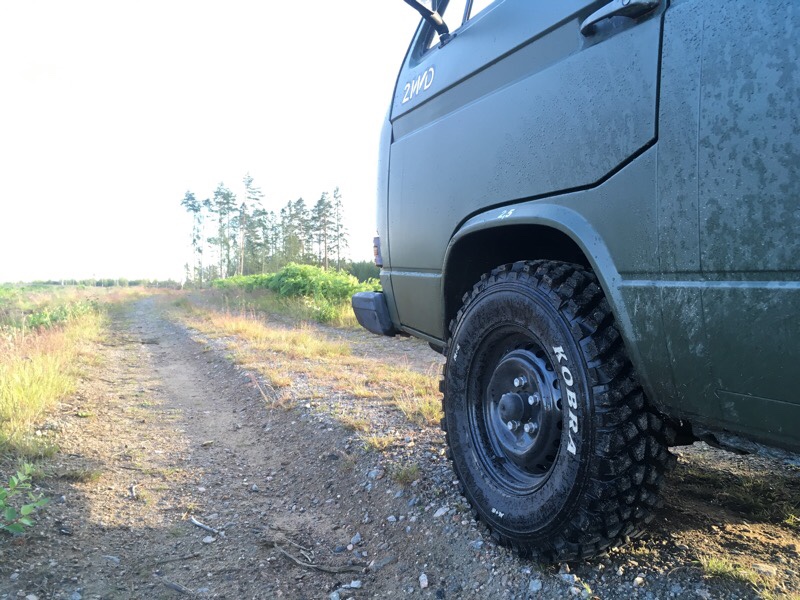
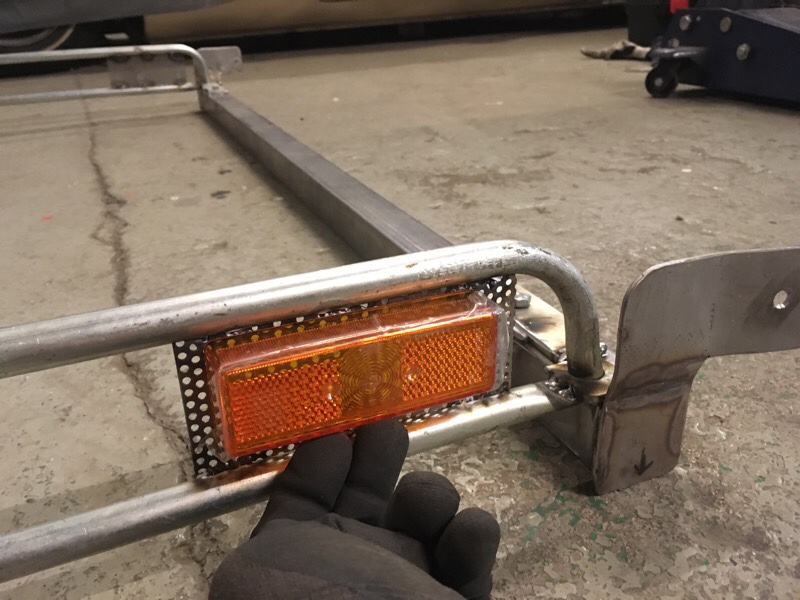
The T3 army camper now have a winch with a pulling power of over 4-tons! I made a own bracket so I can remove the winch quick when I not need it or move/mount it to the rear of the bus. Because if you drive down a ditch with the front first, what use do you have then if the winch is mounted solid to the front end? Now with this bracket I won’t have that problem. This makes it more flexible. A winch is also good to have for removing bigger trees that have been fallen down on over small backroads etc

How to put chains on a VW T3 Vanagon
Please subscribe!
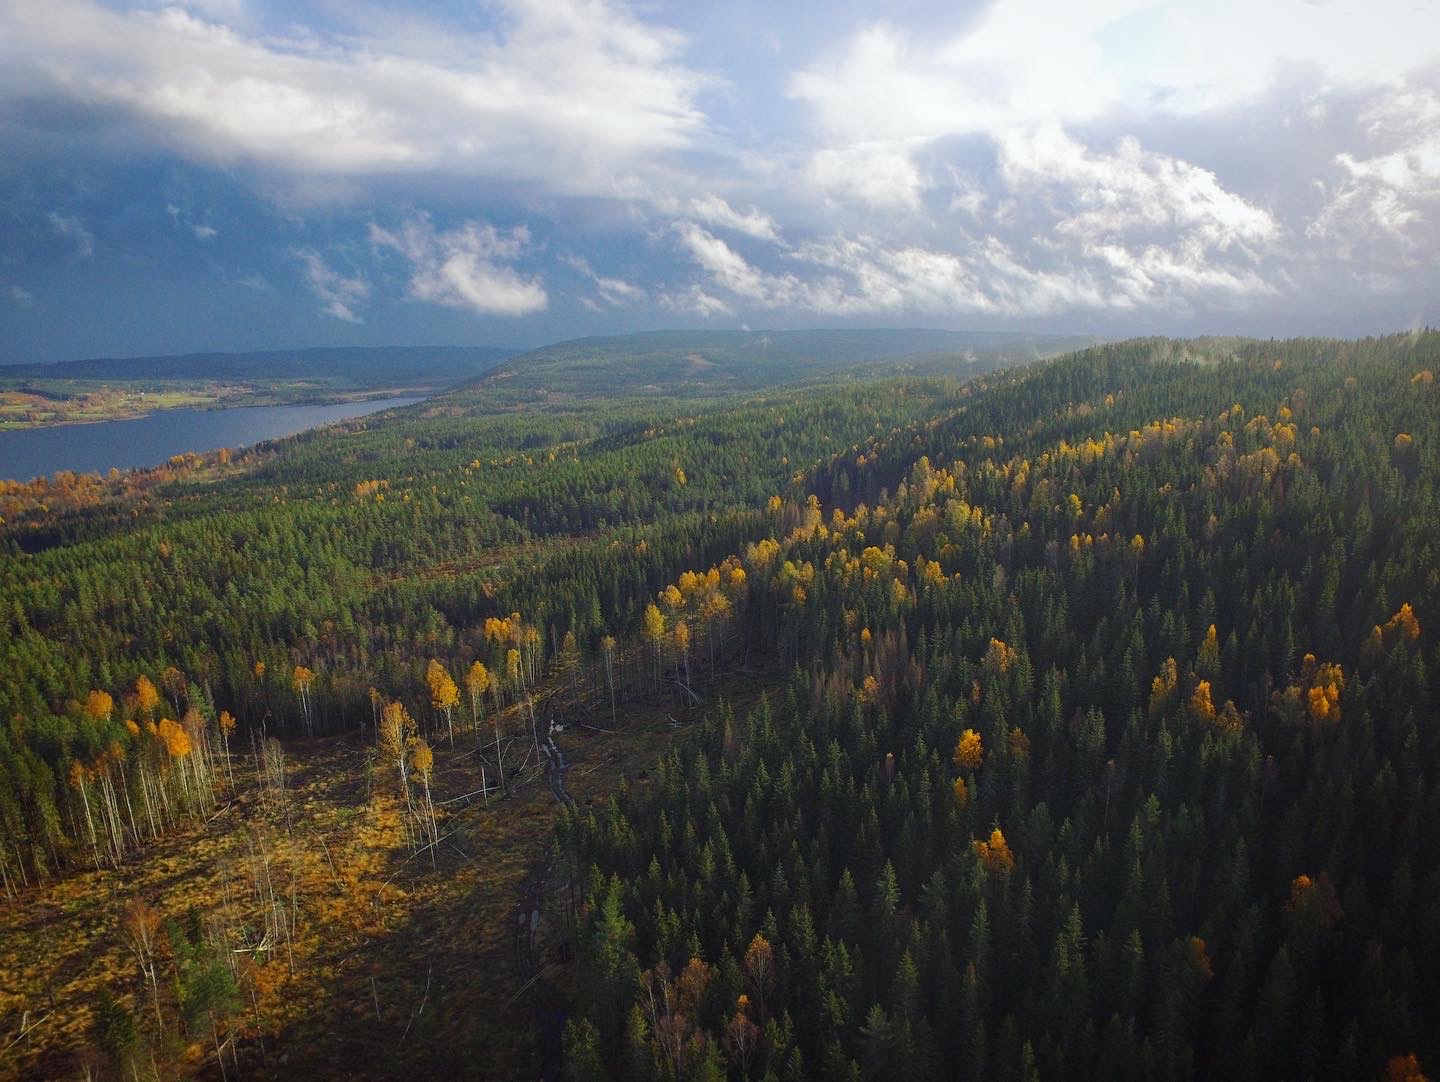
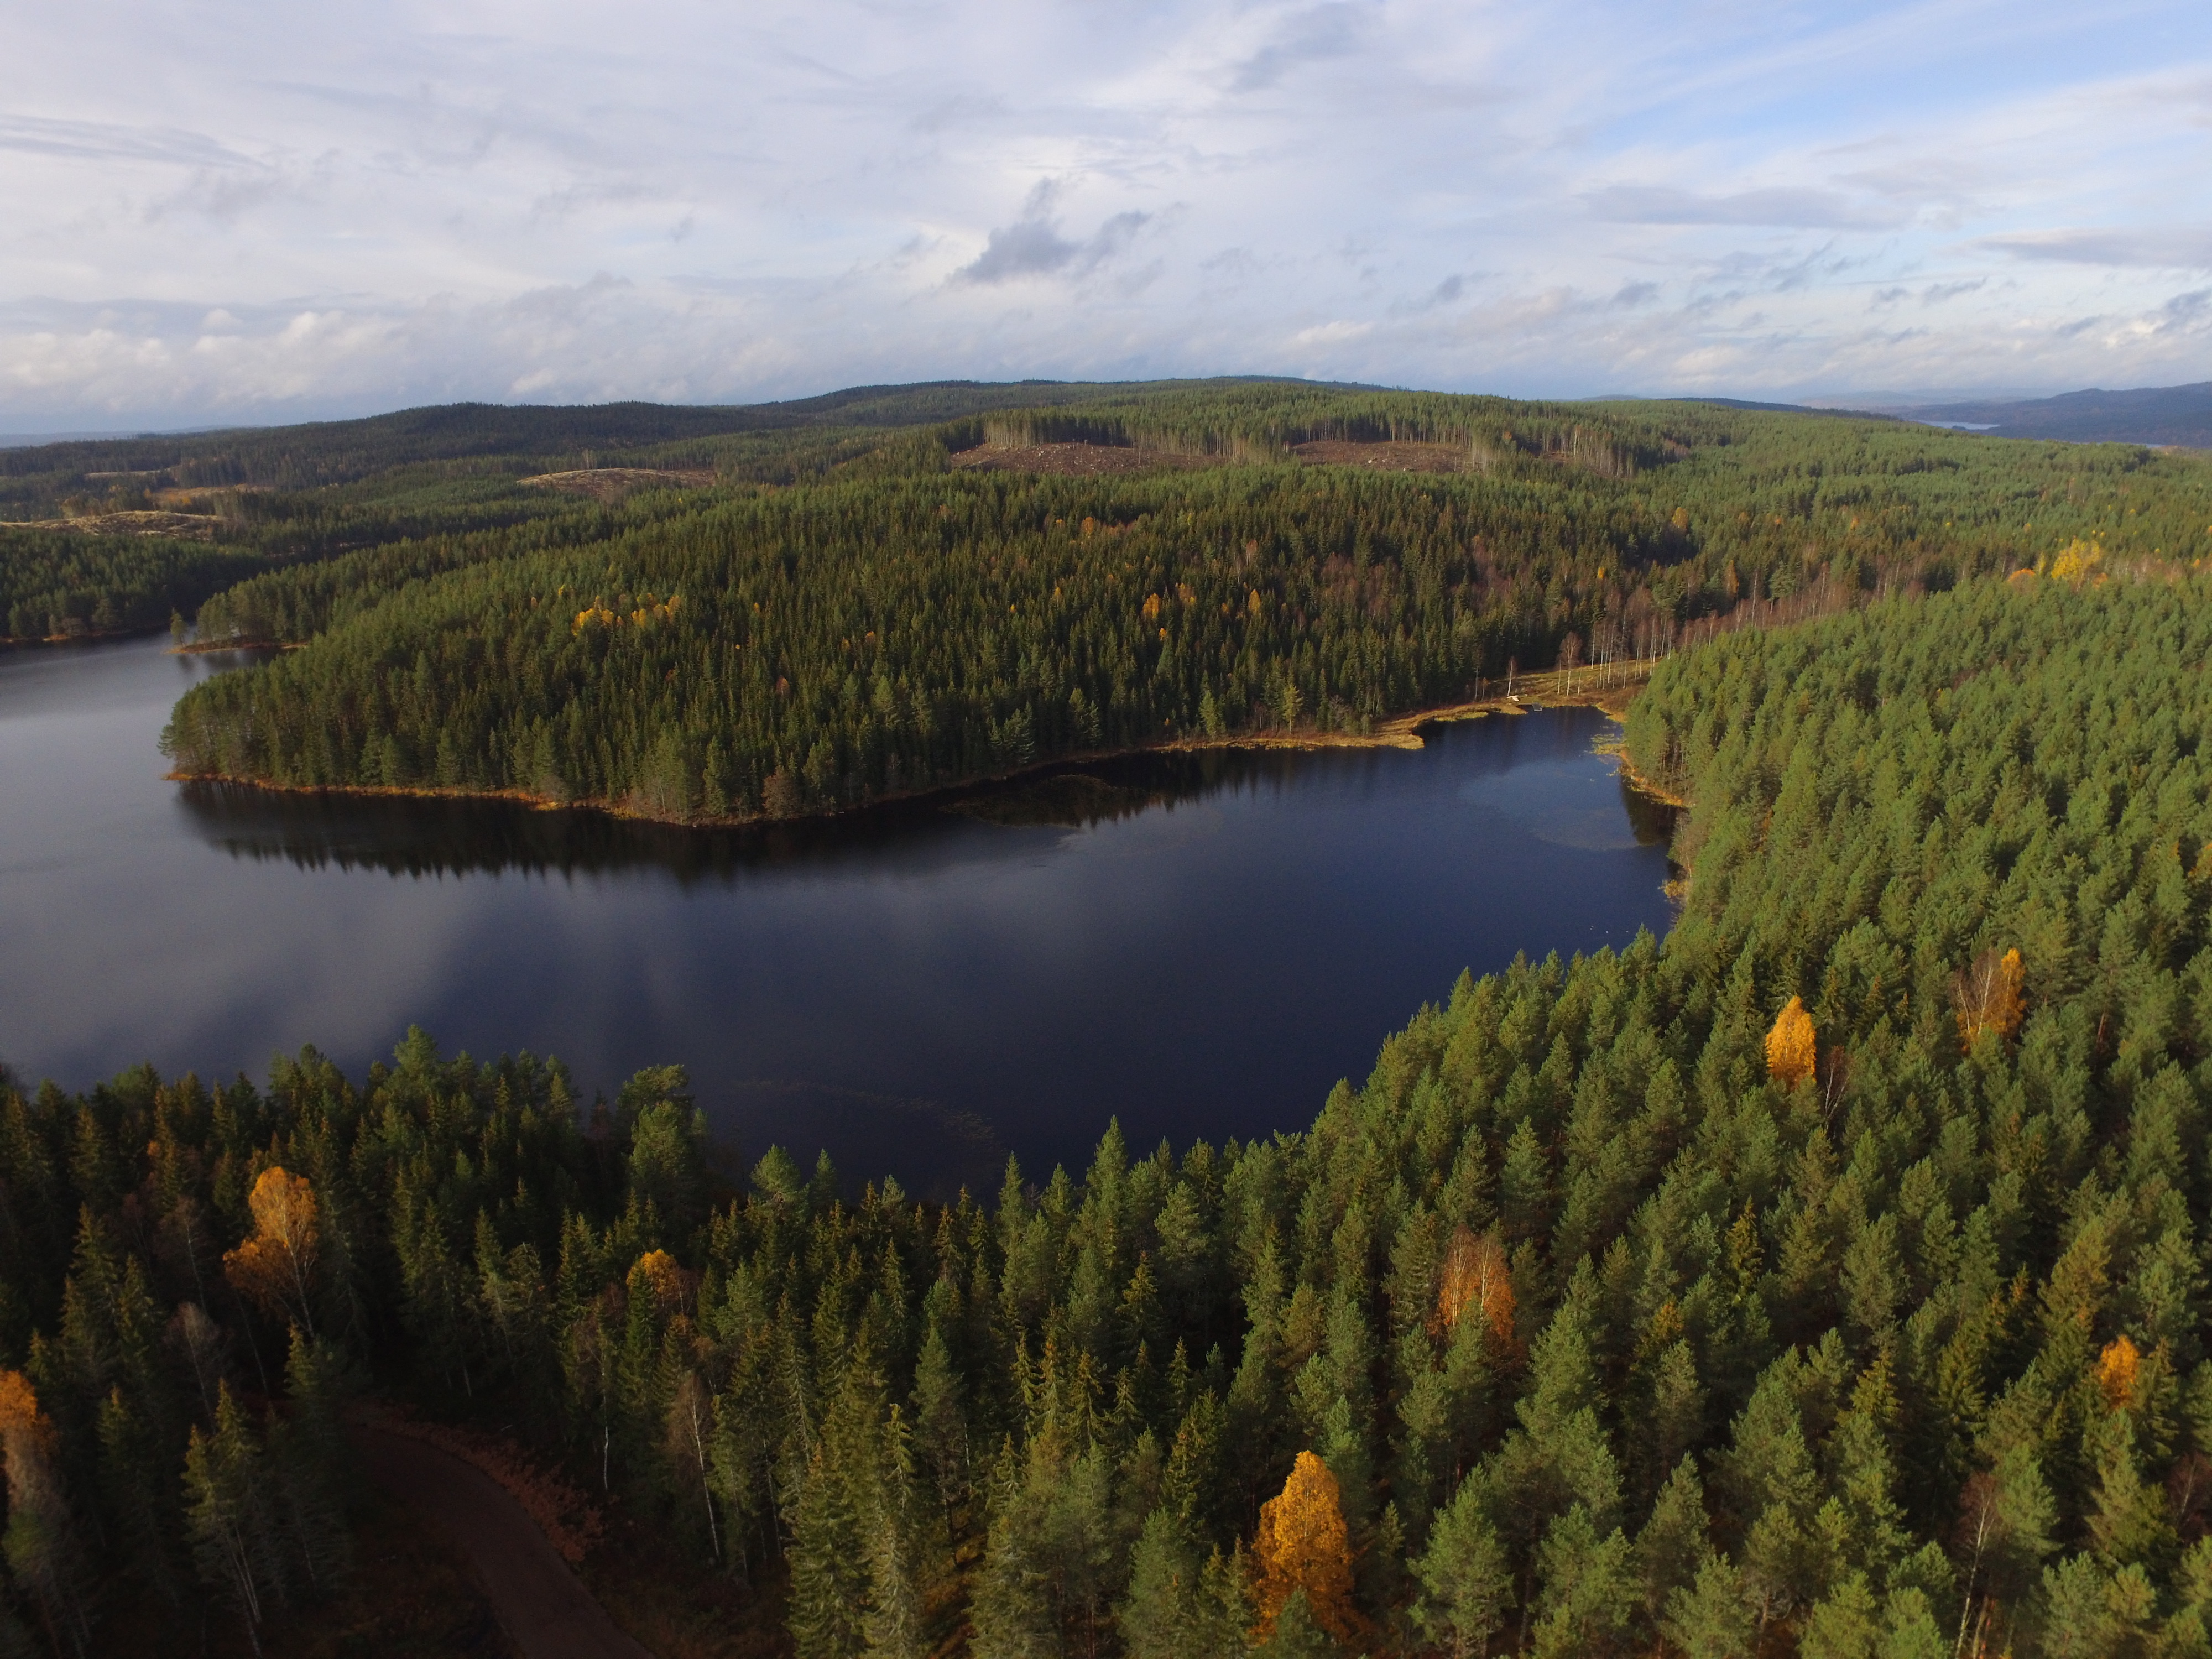
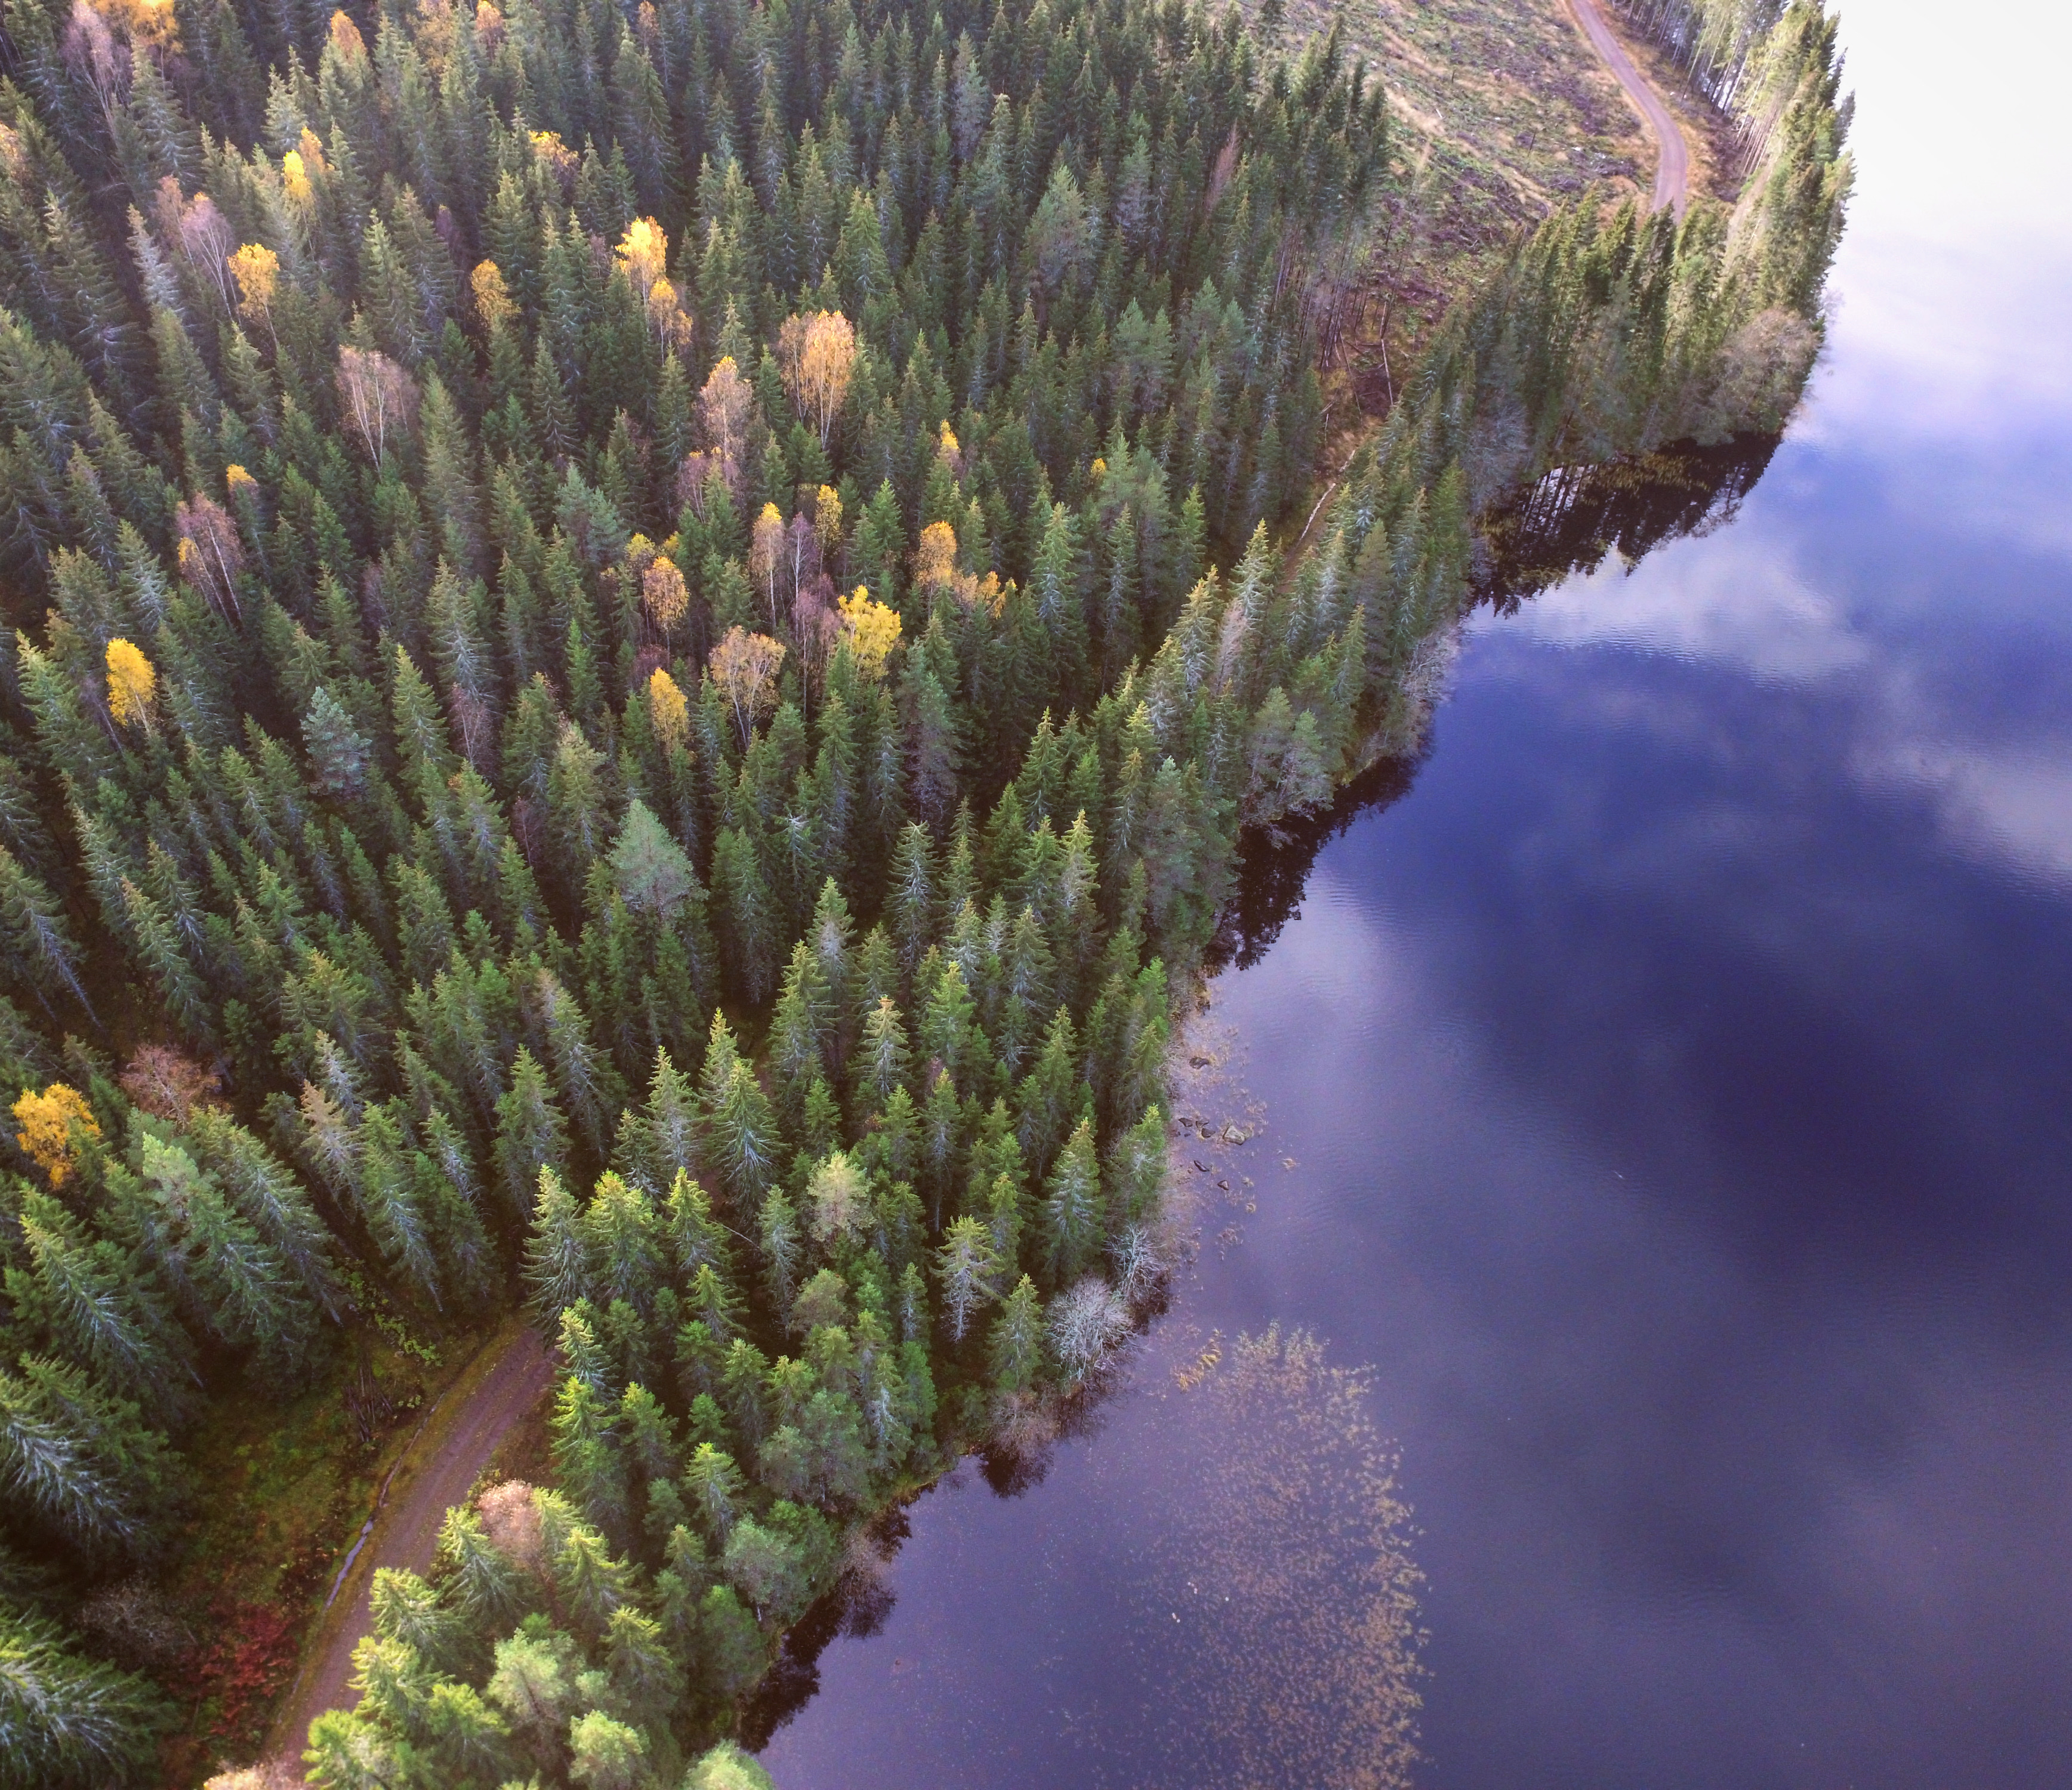
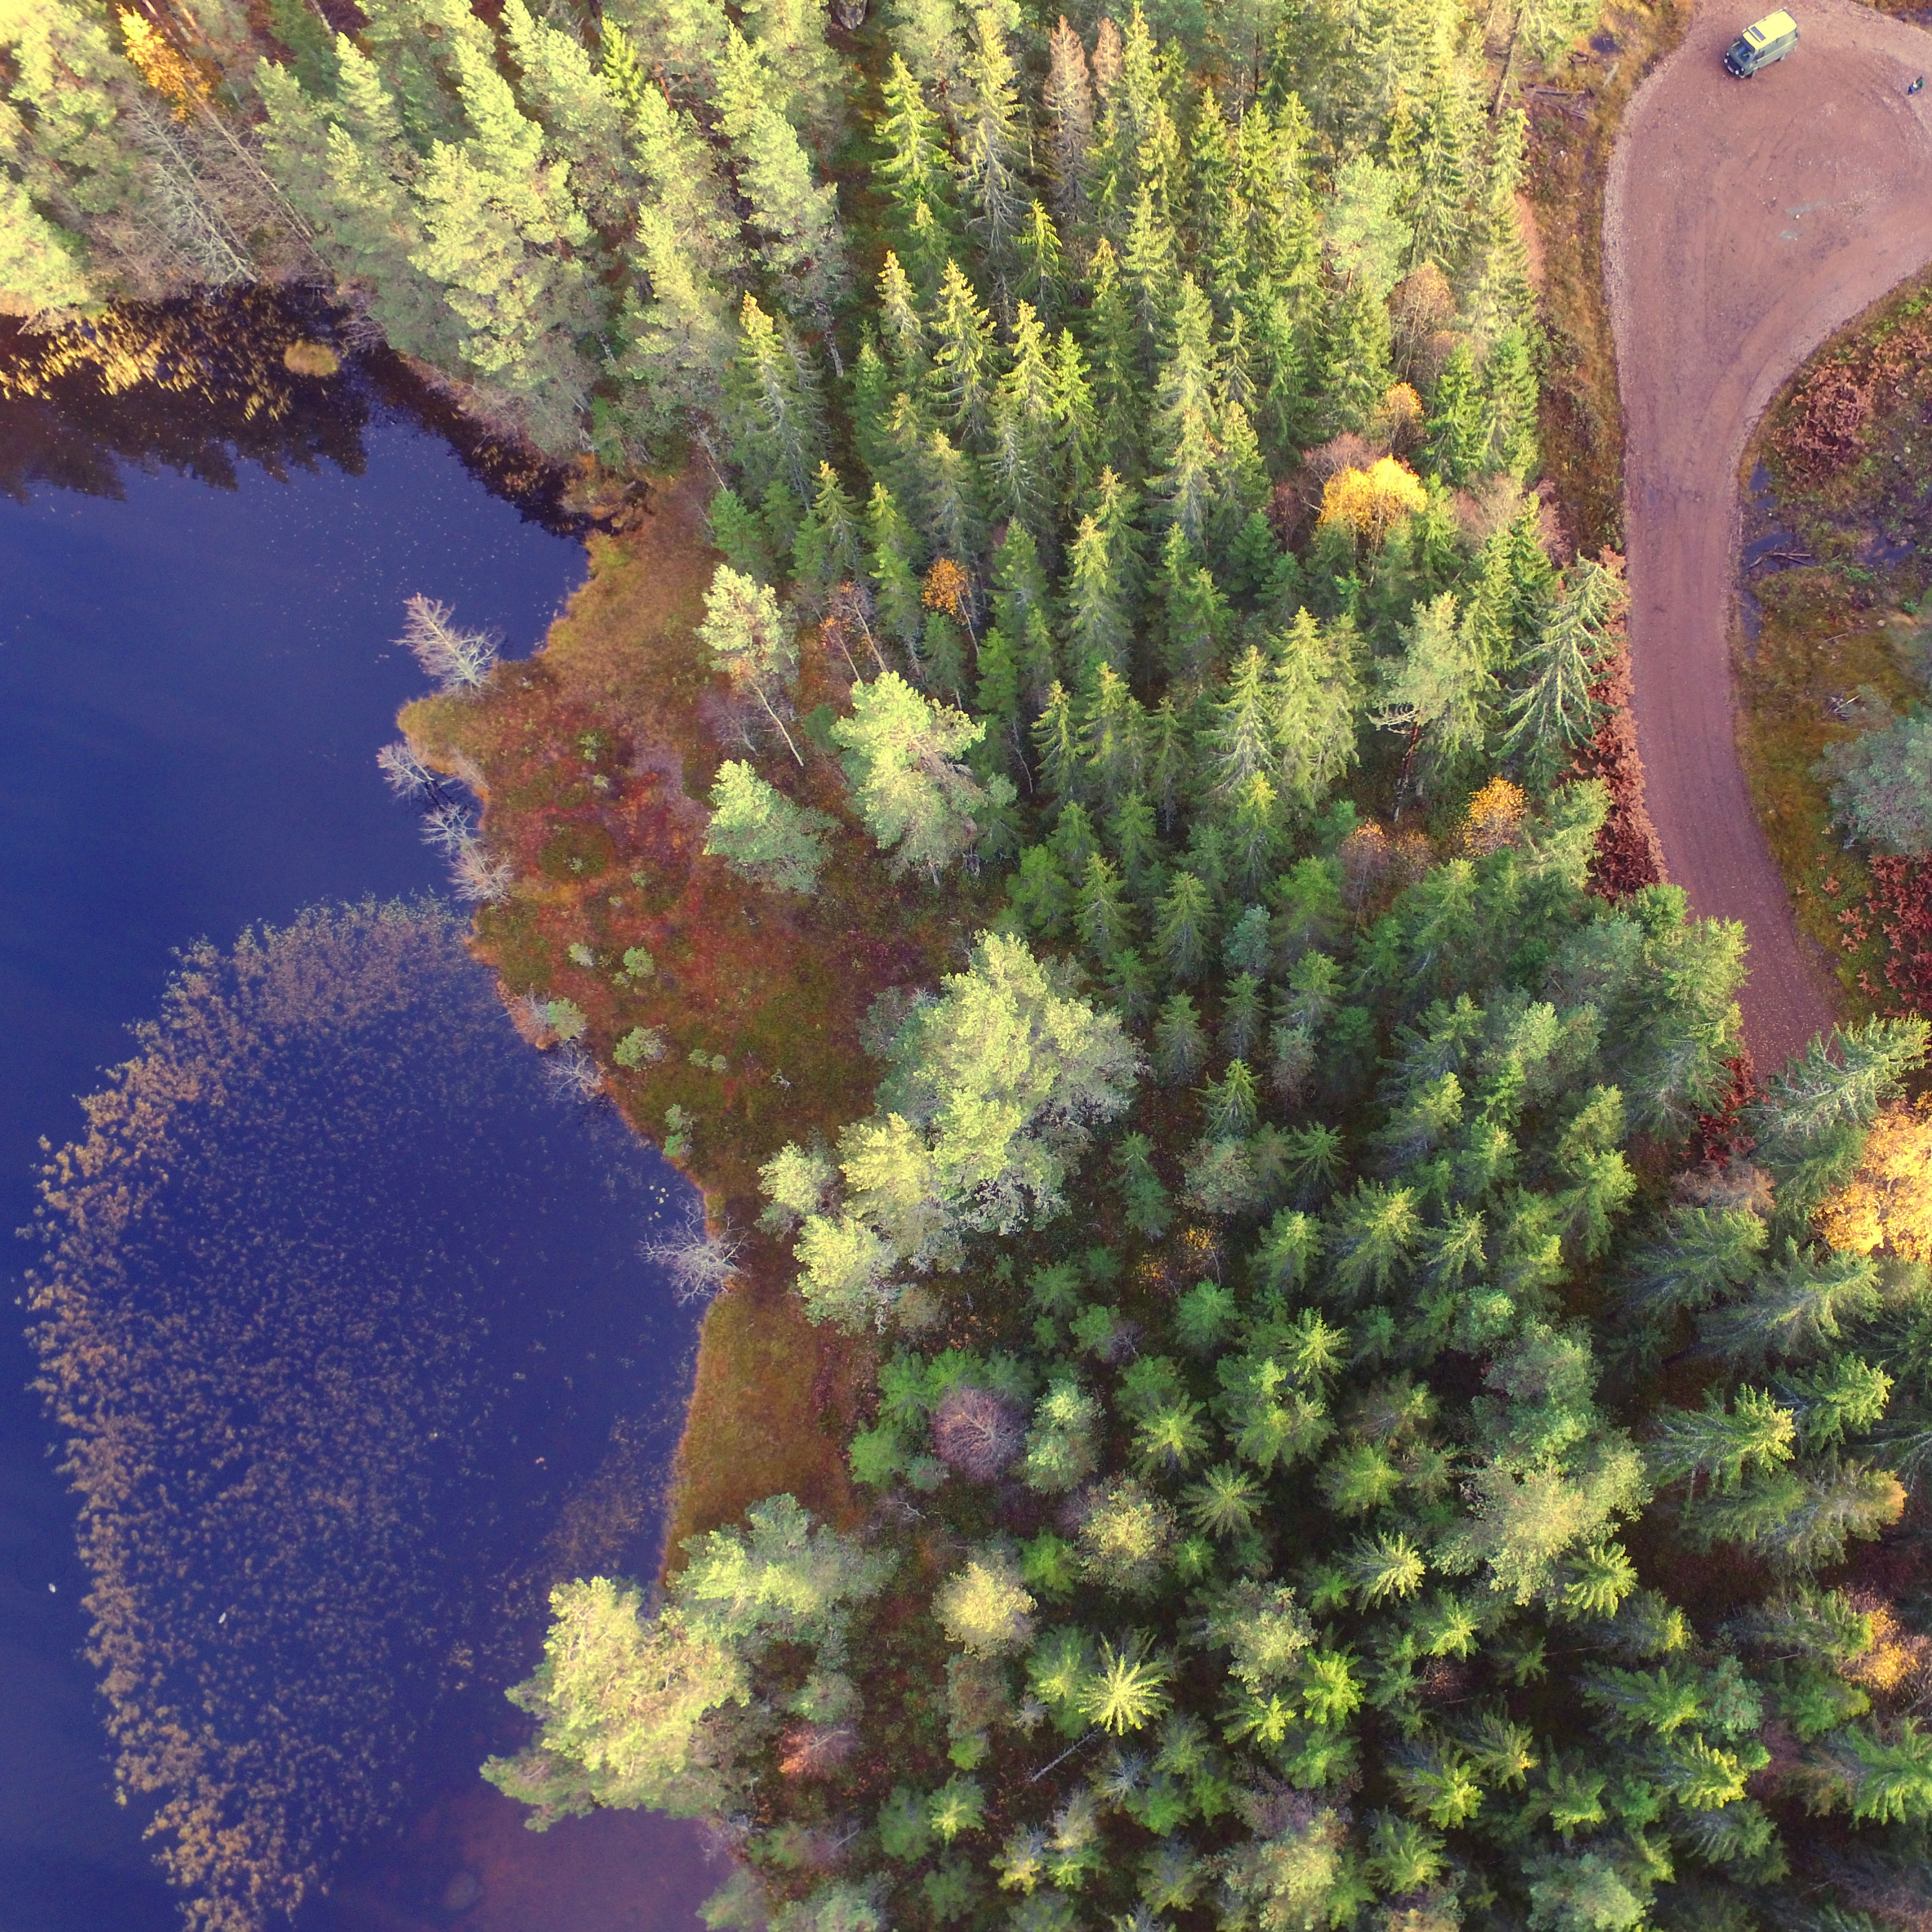
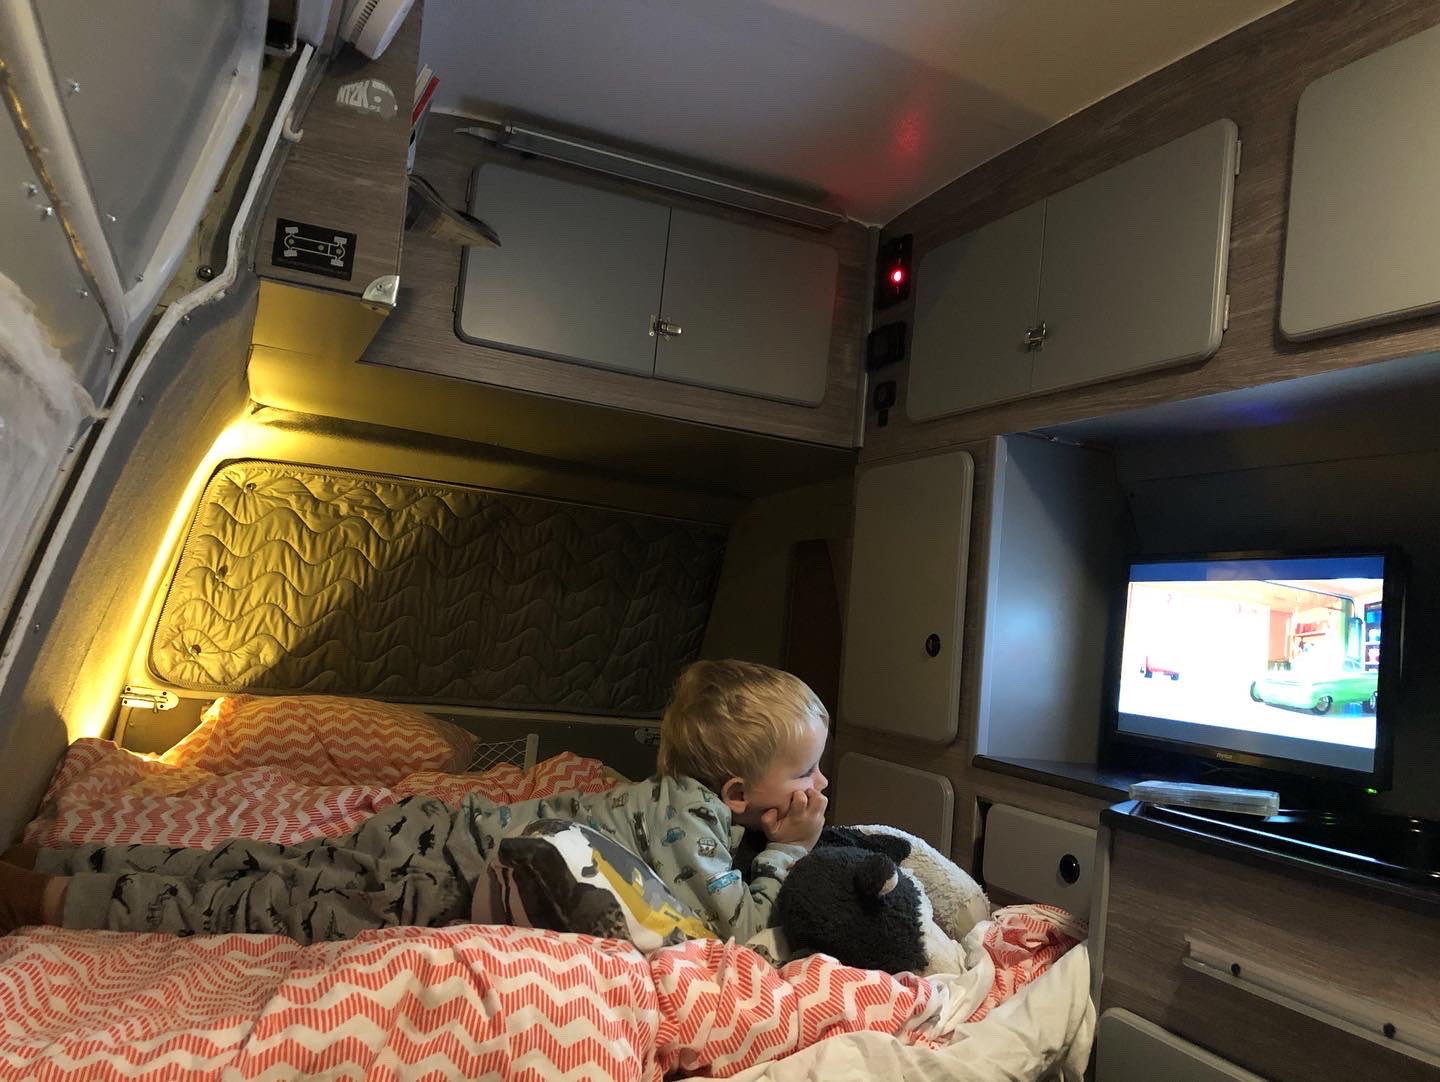
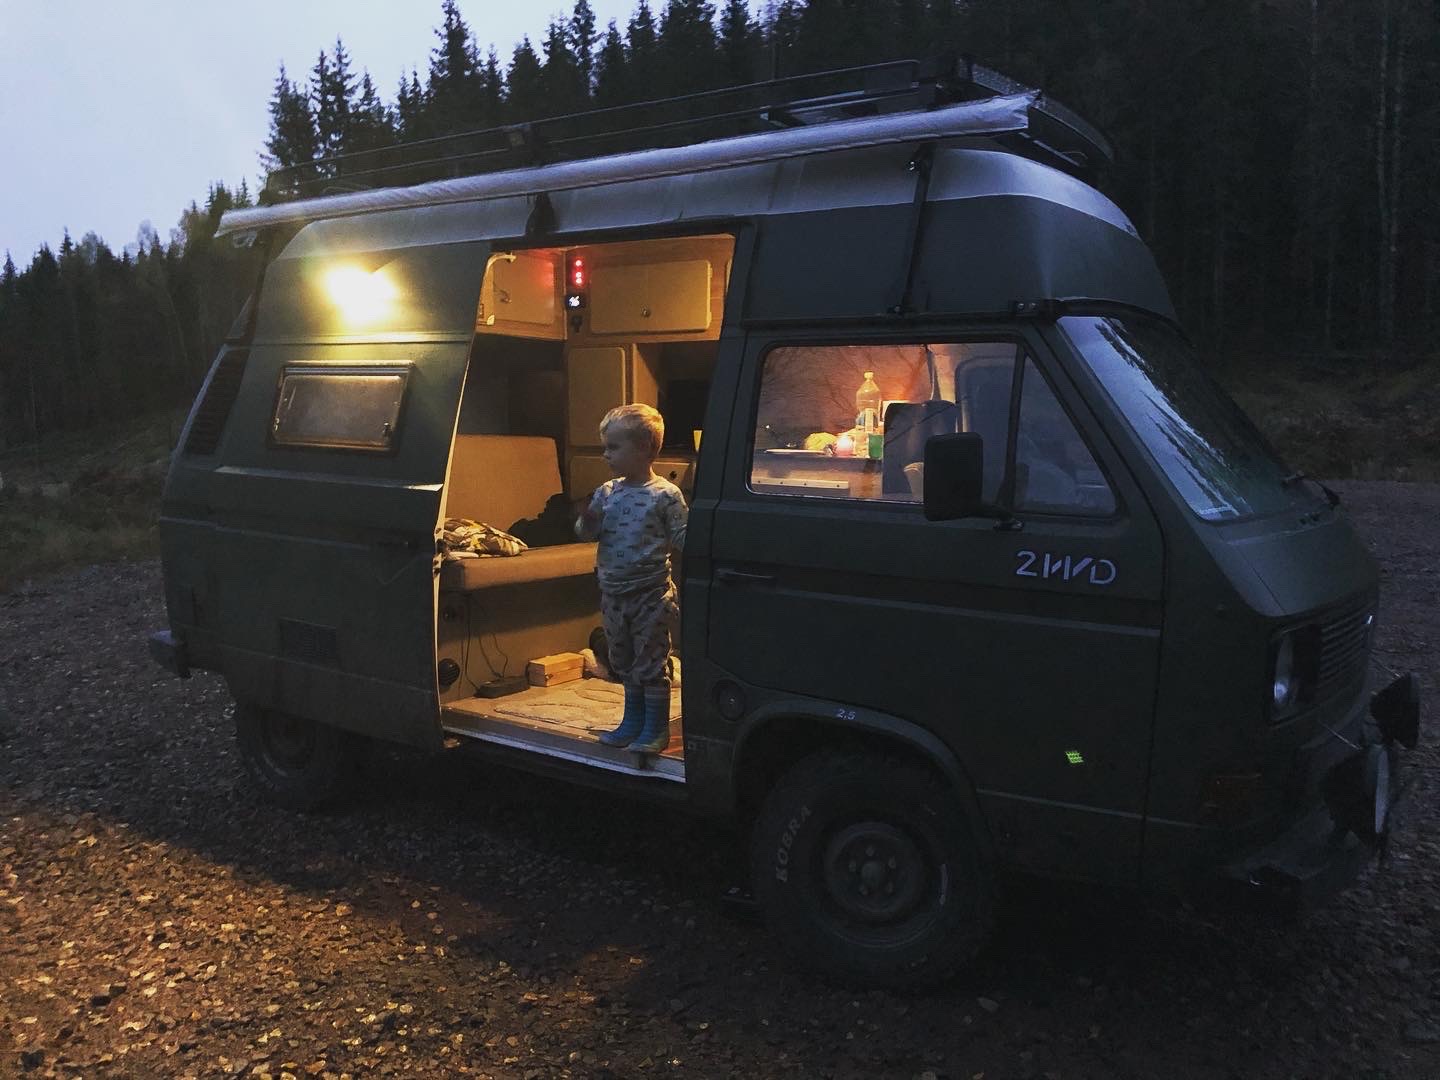
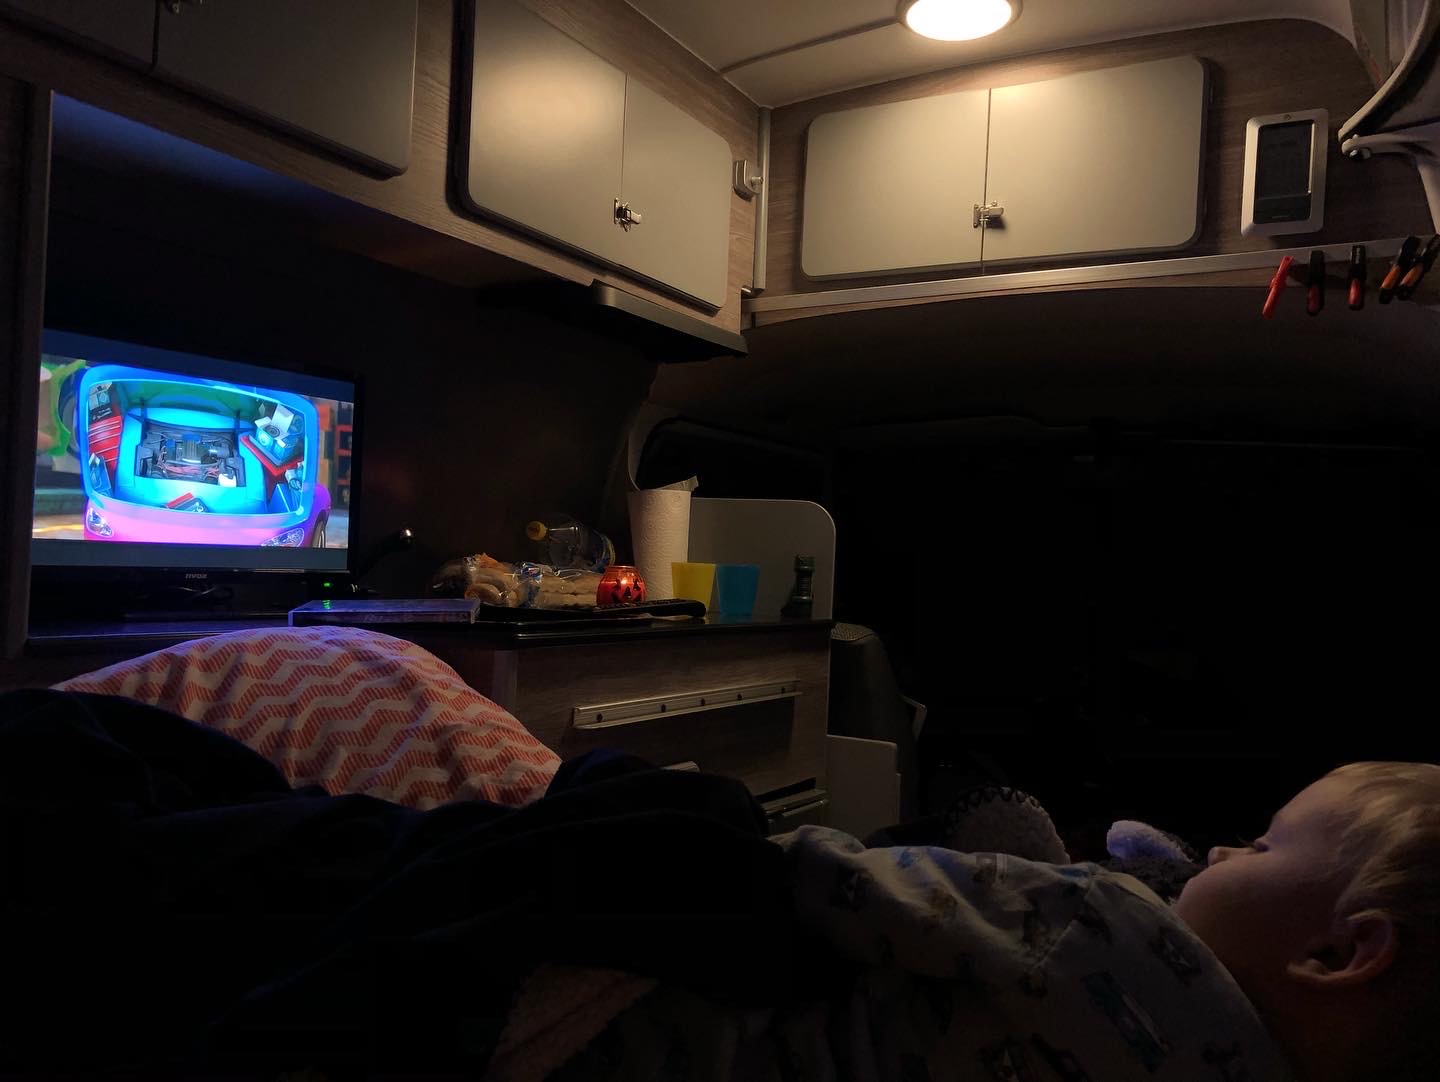
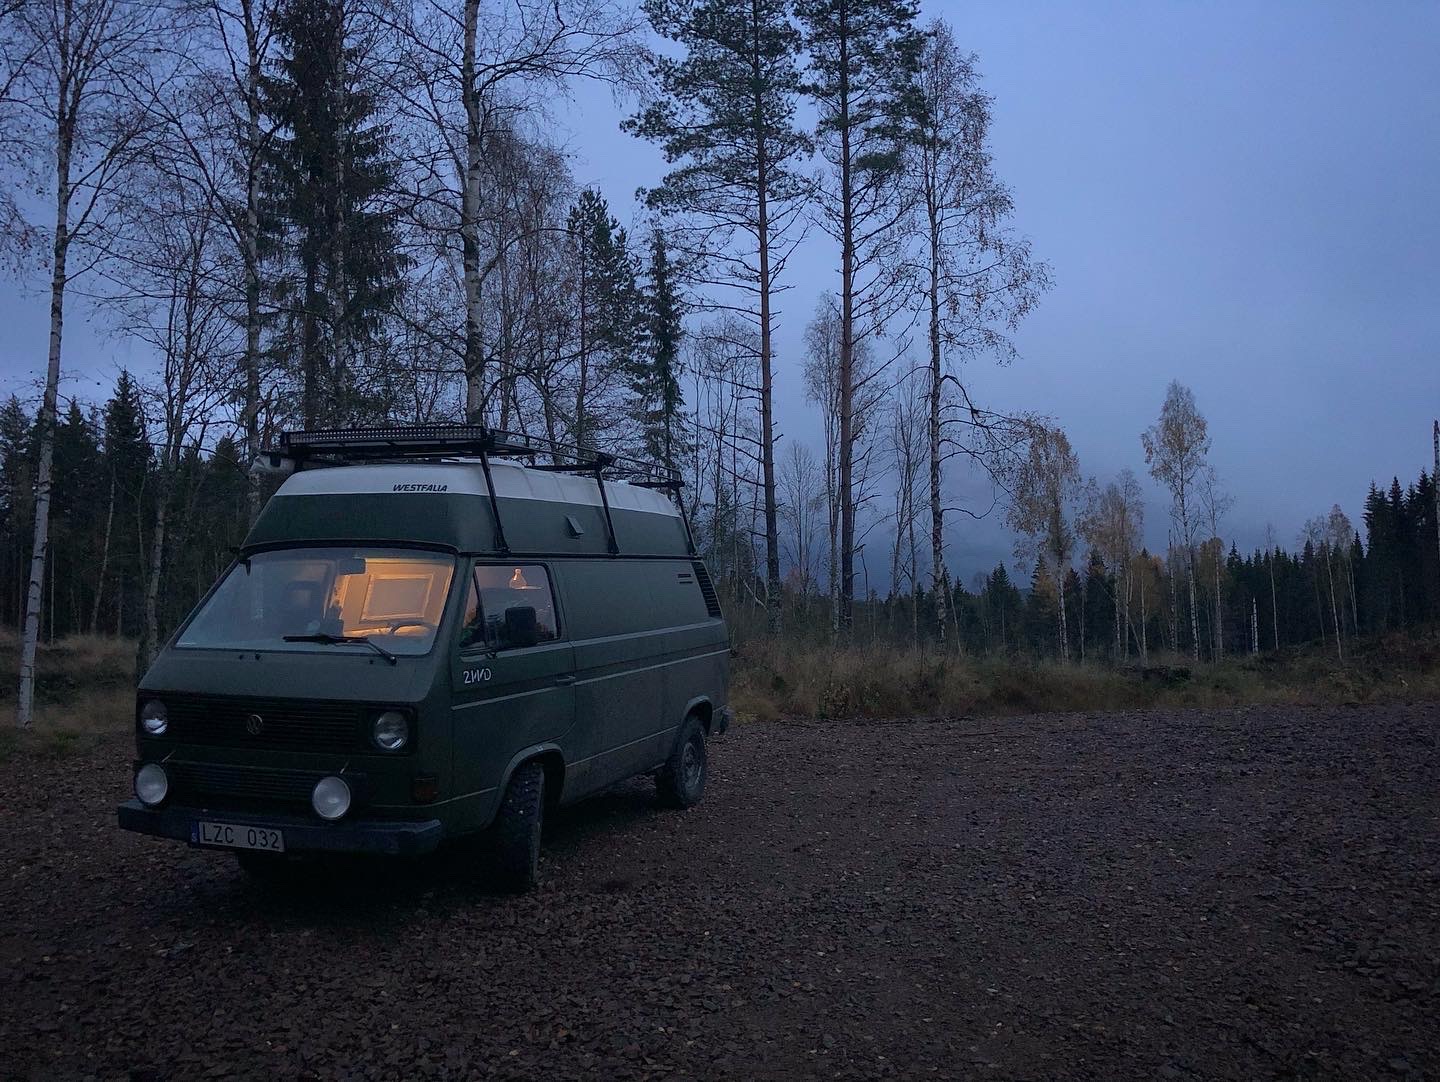
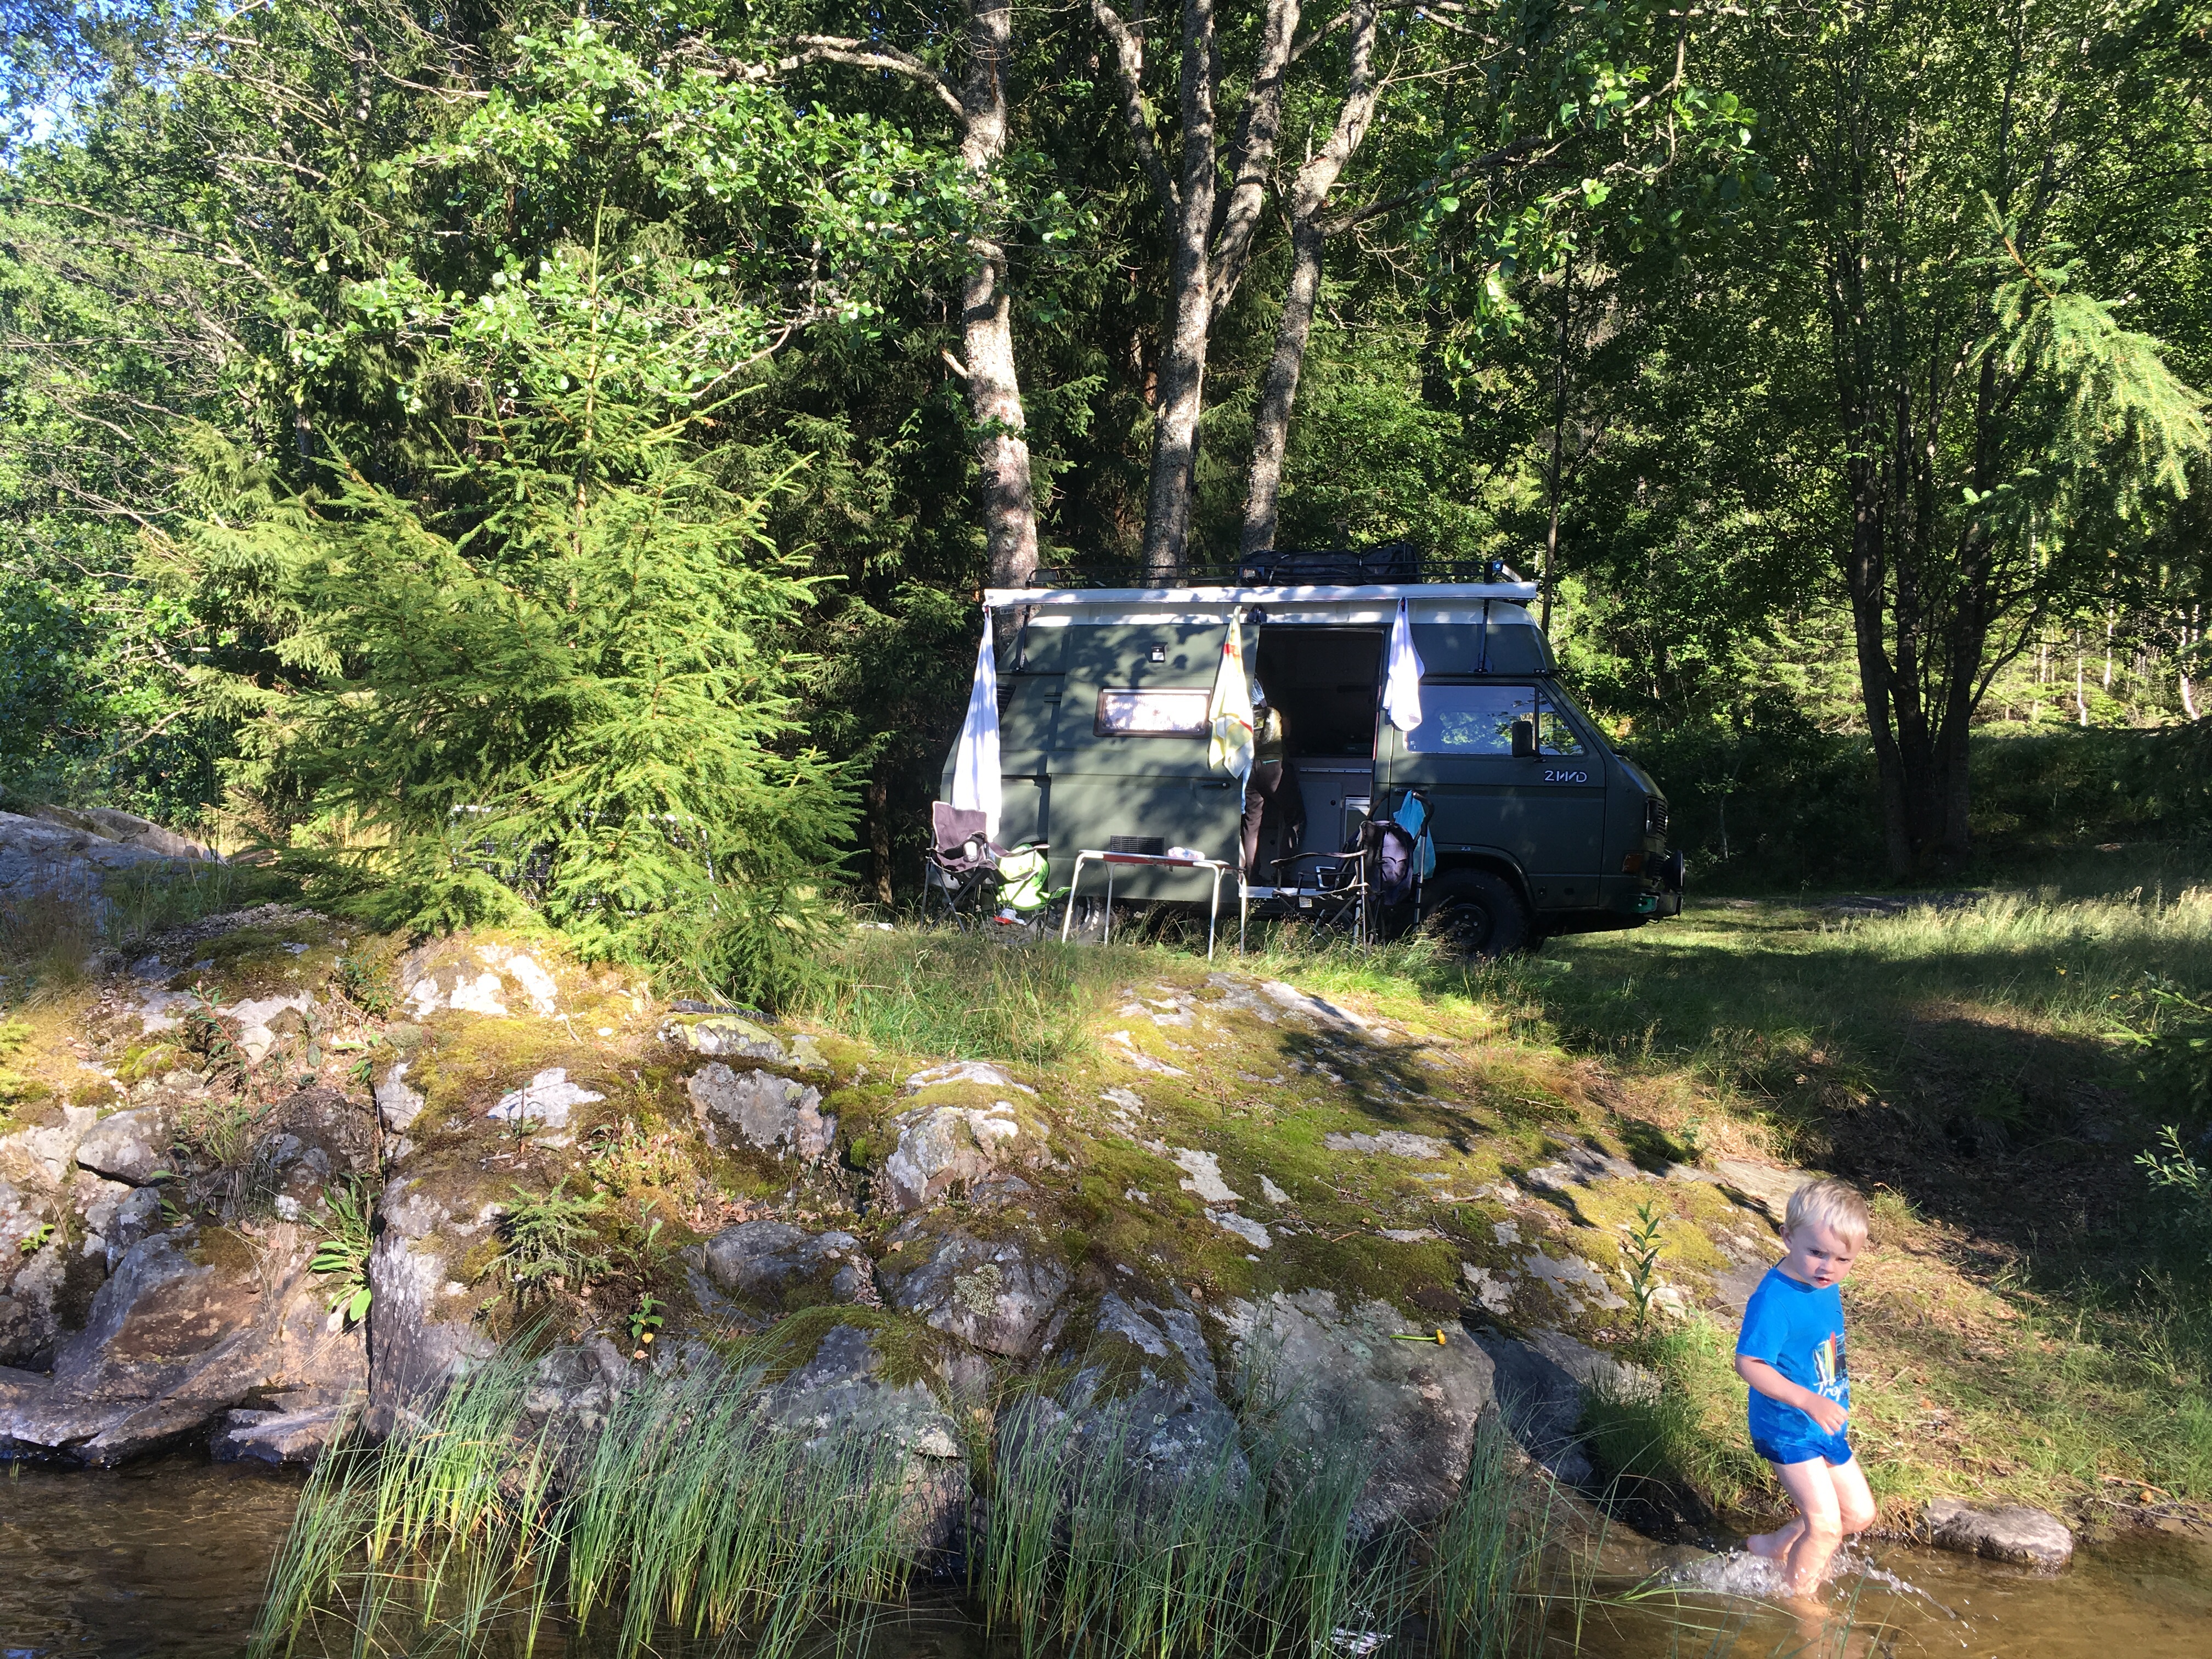
Last weekend we spent a night in the wilderness. Not very far from home, we cooked burgers, drone photographing, walked in the woods, watched TV in the warm bus while it started to rain. A movie is coming very soon! Keep an eye on the YouTube channel.

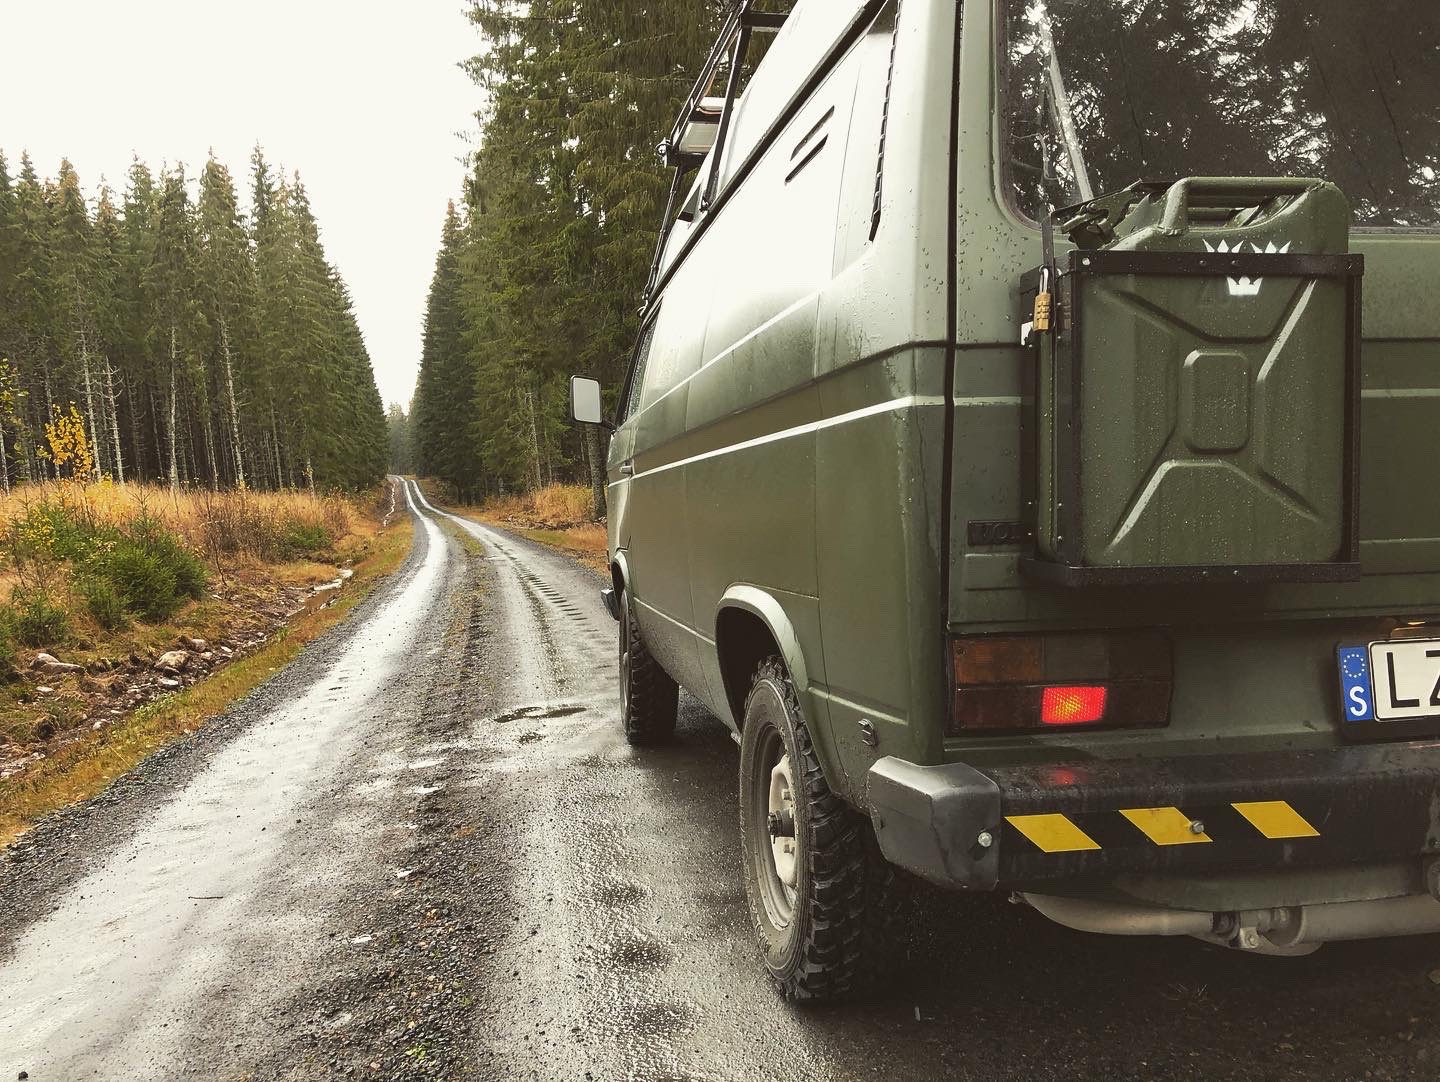
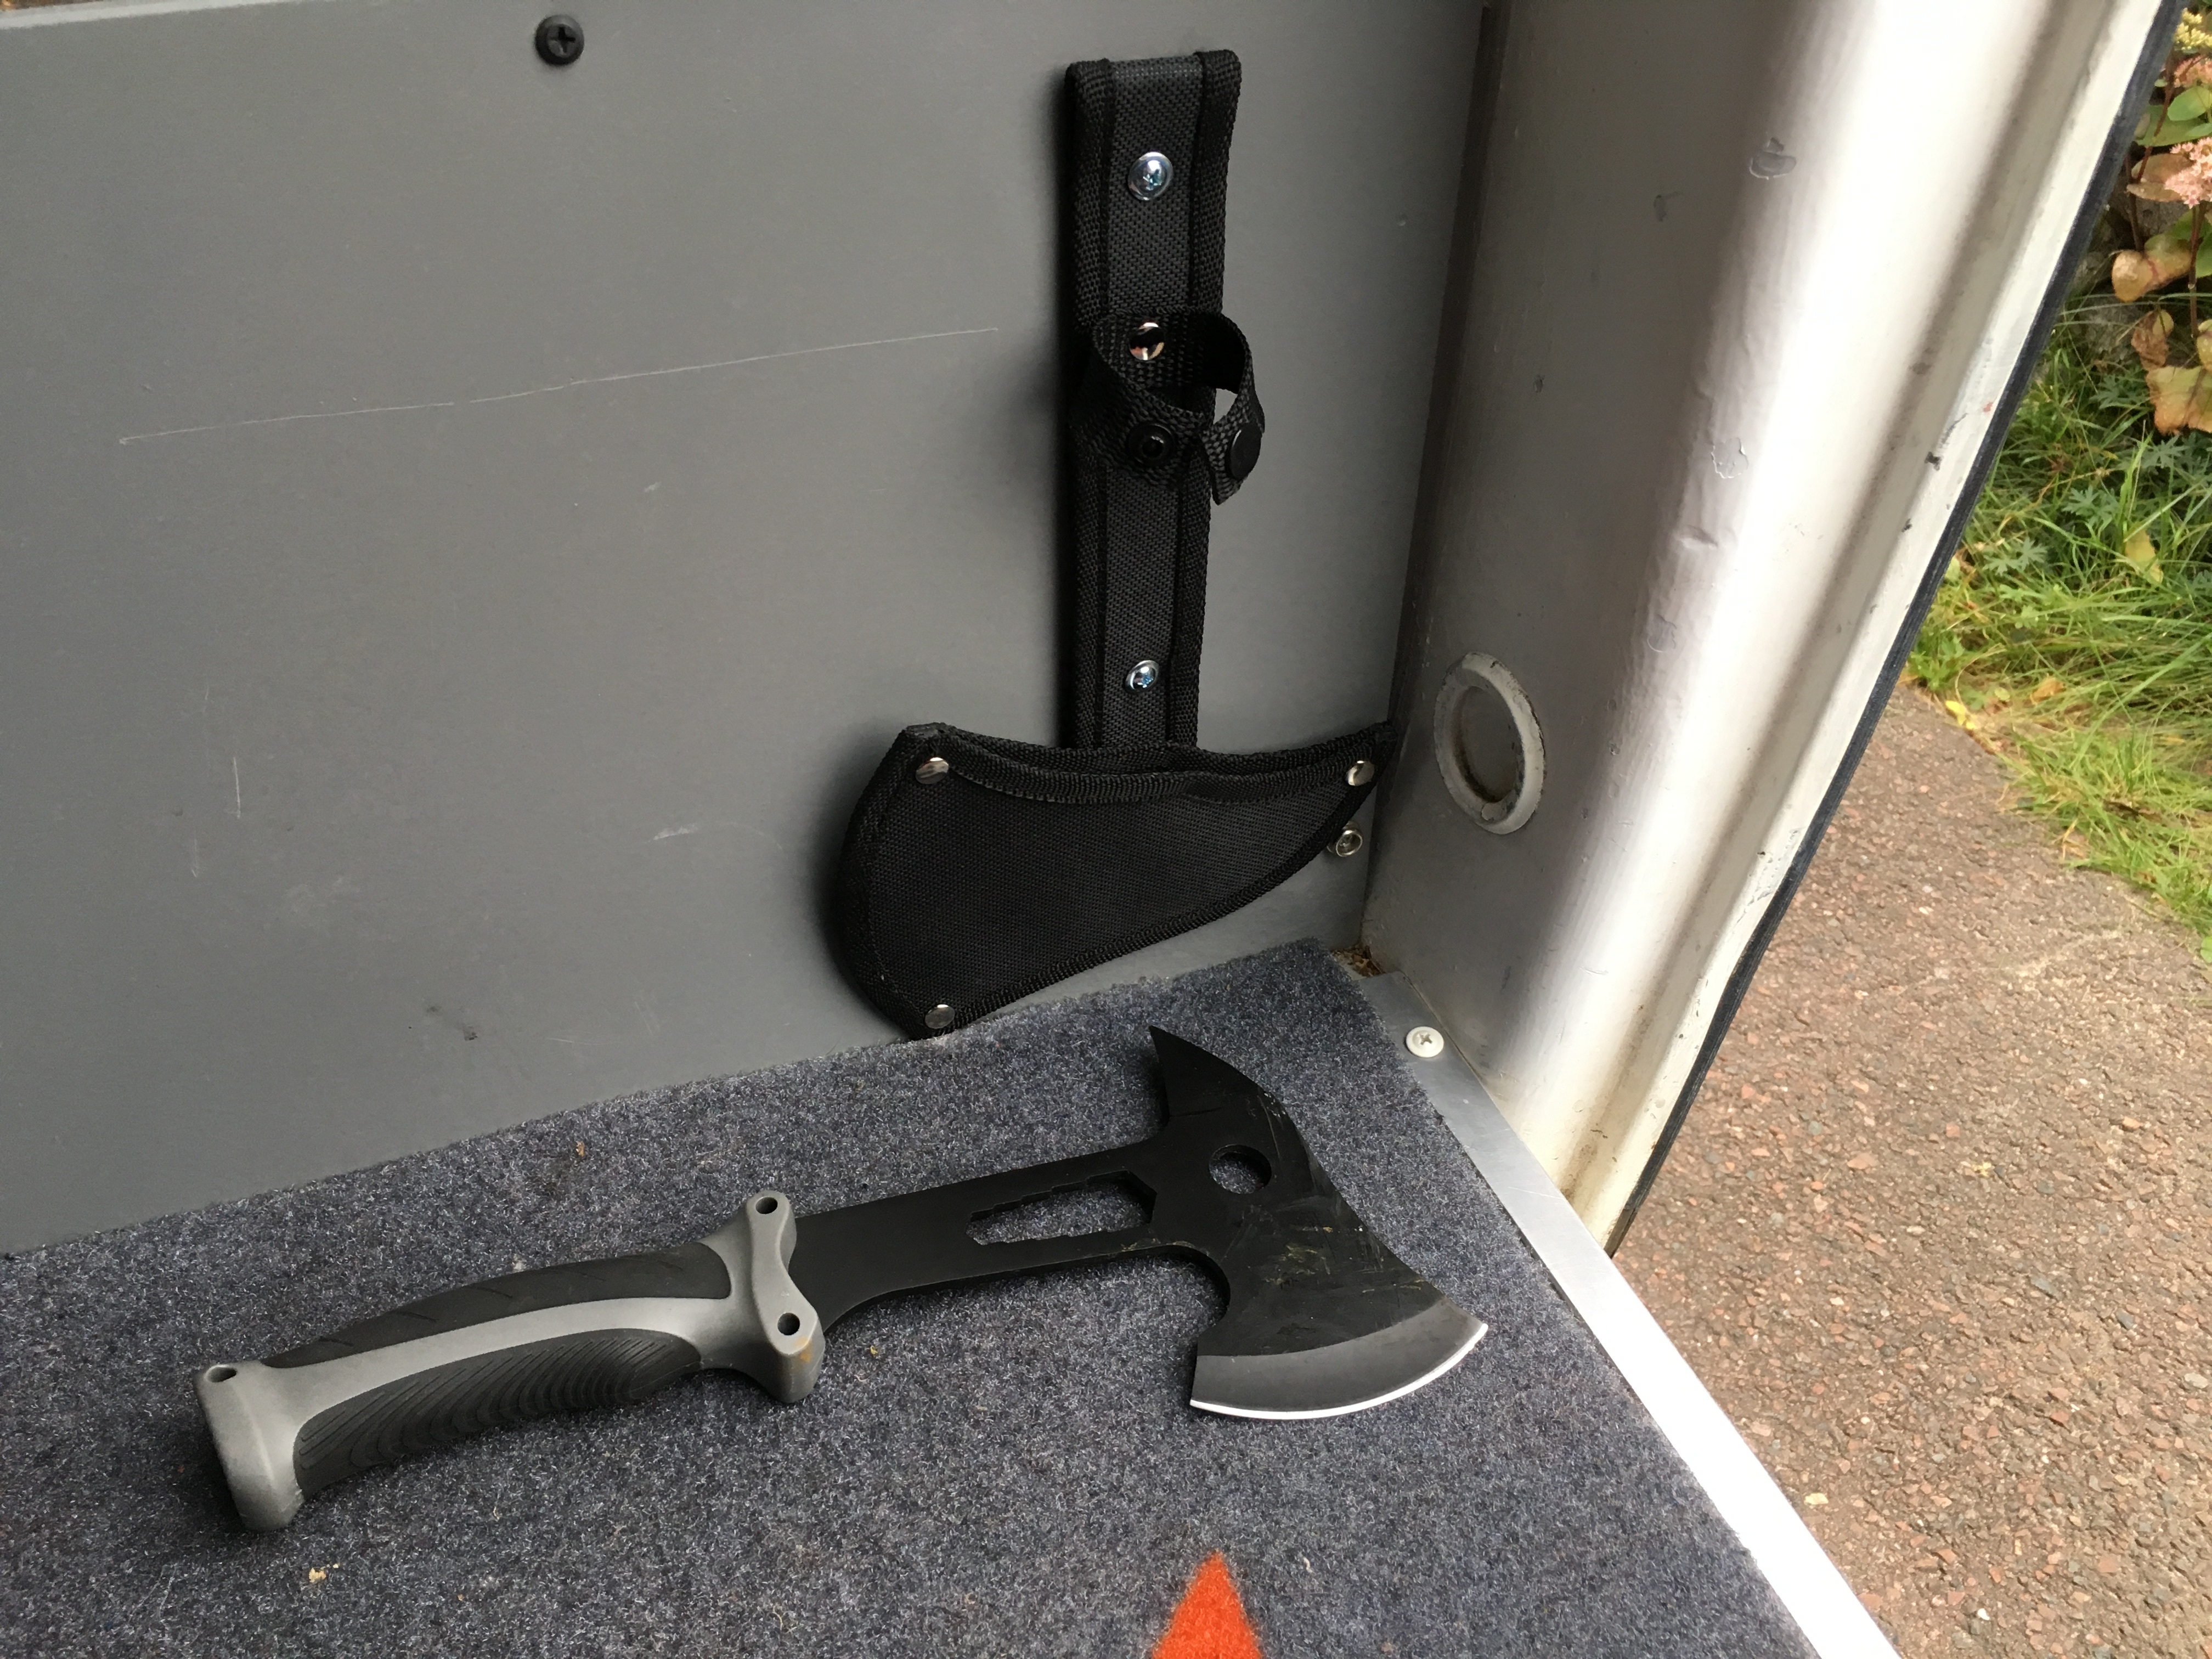
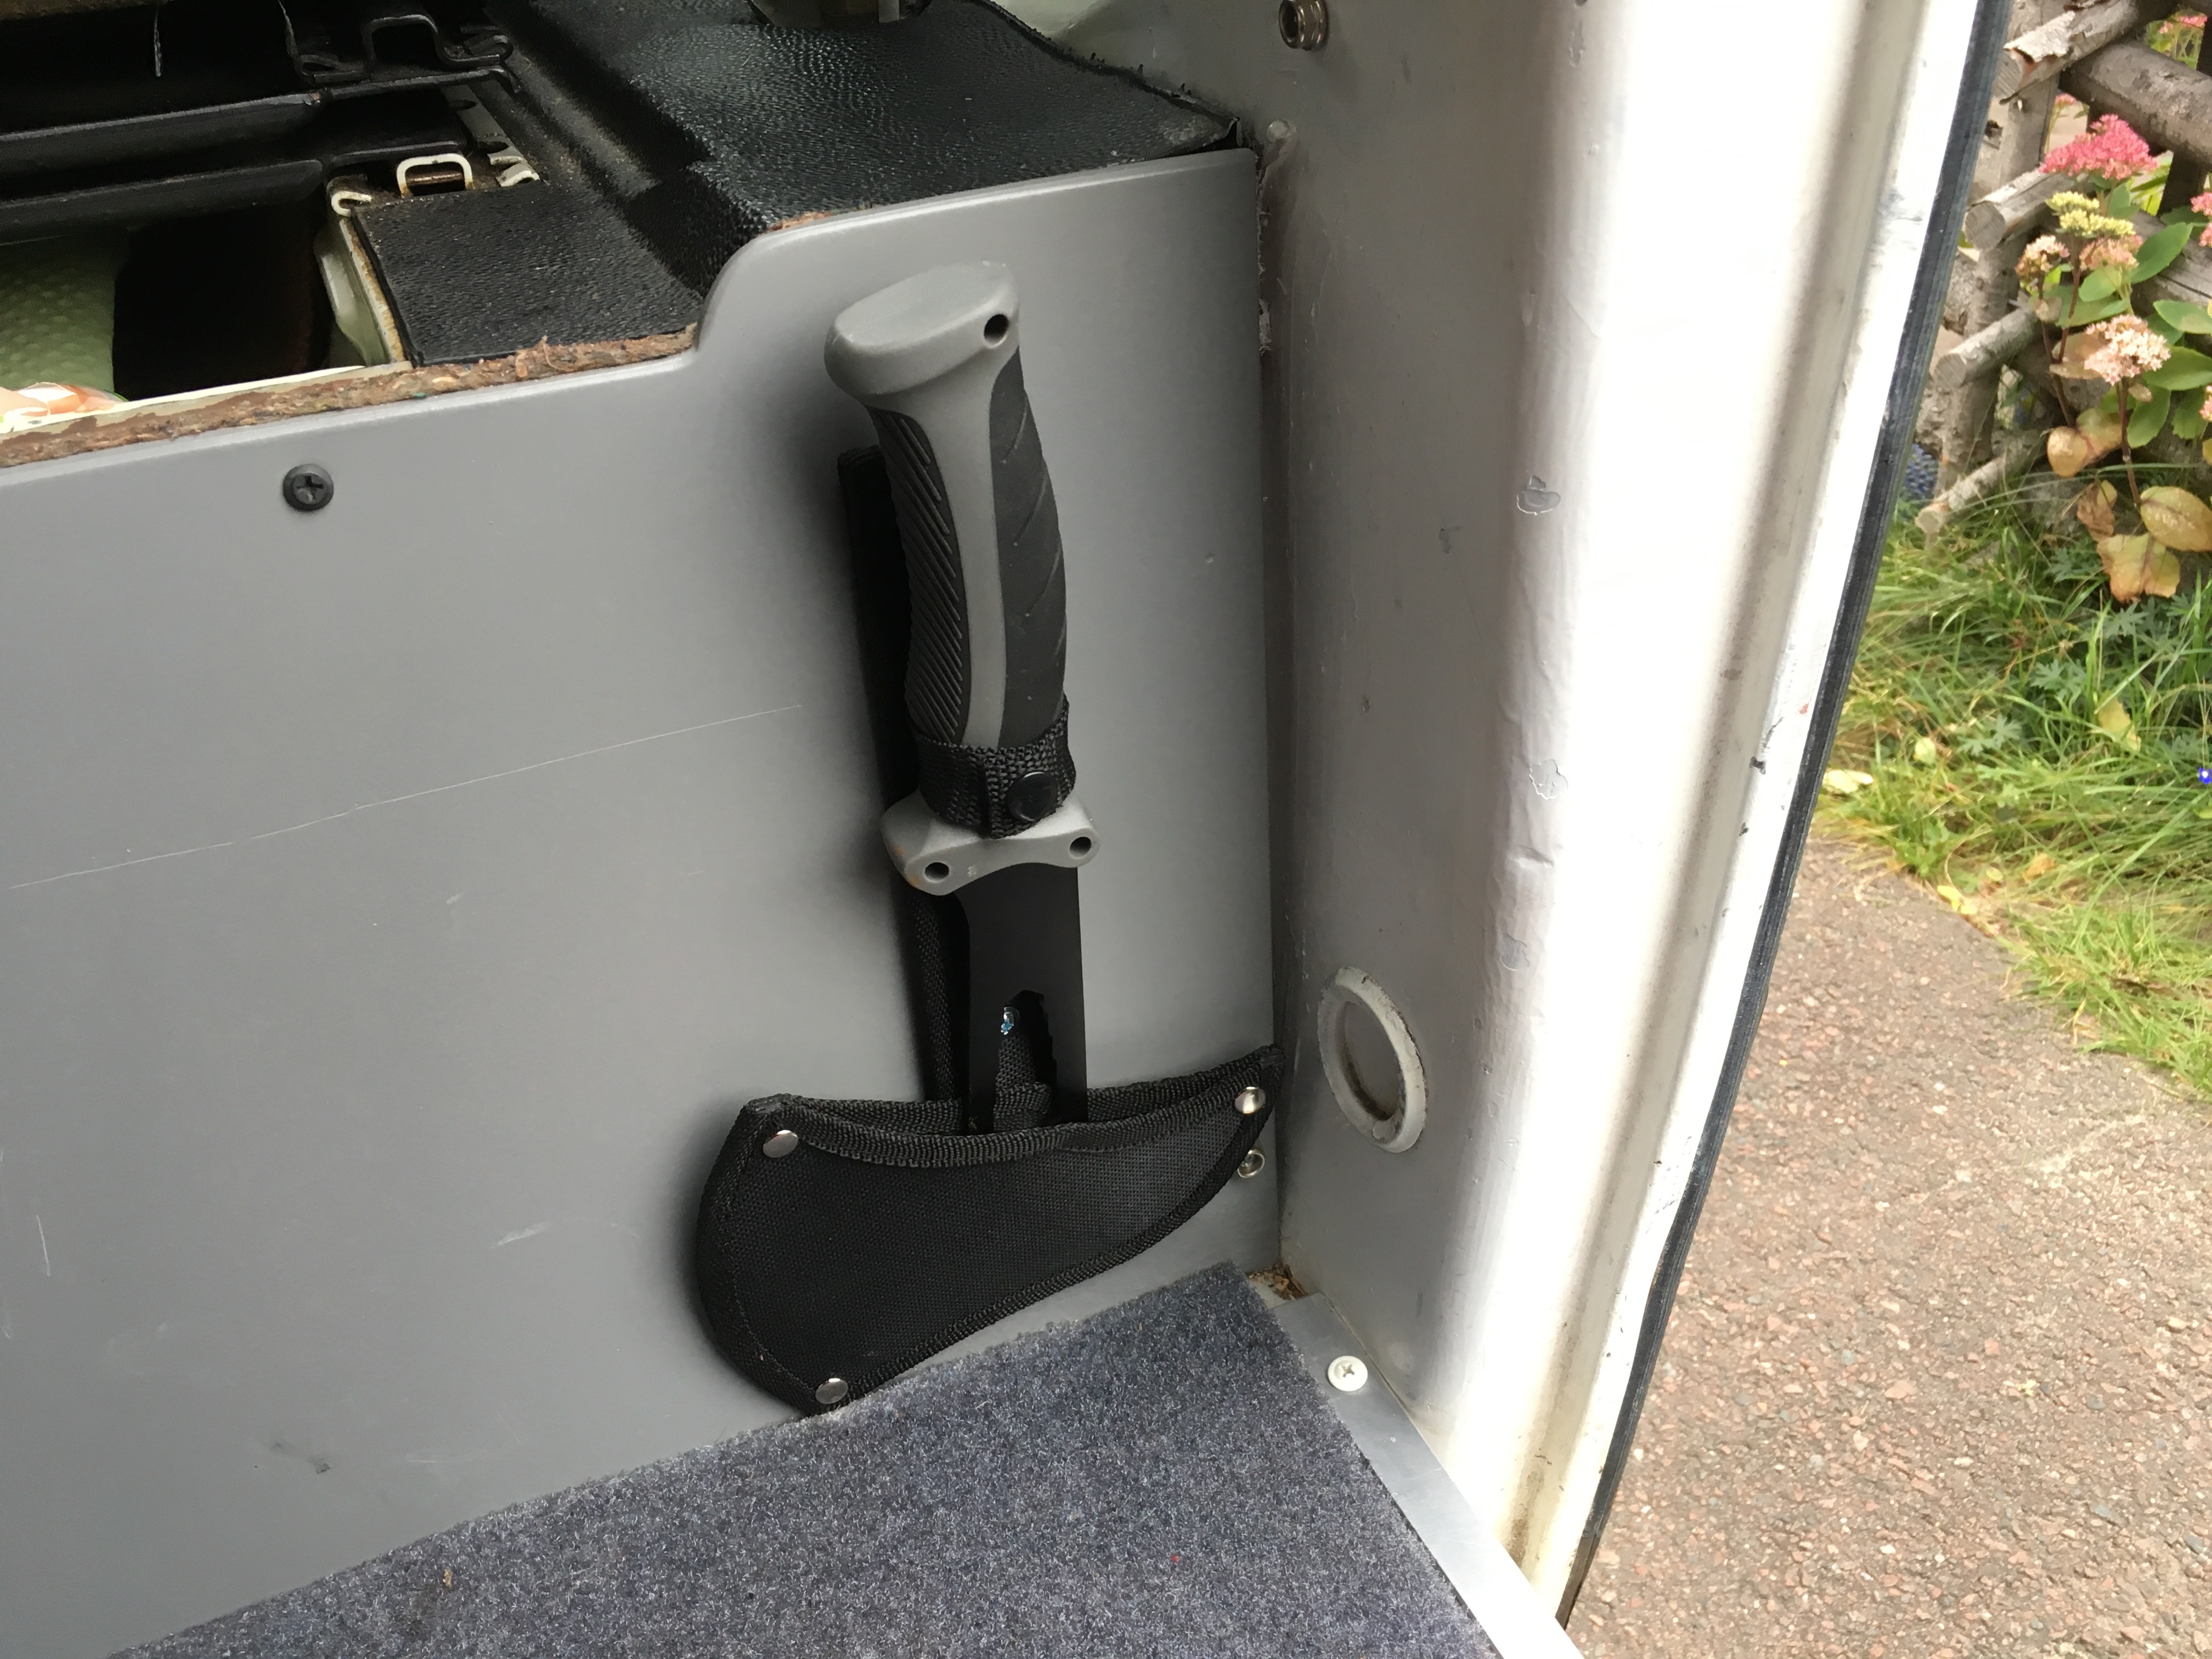
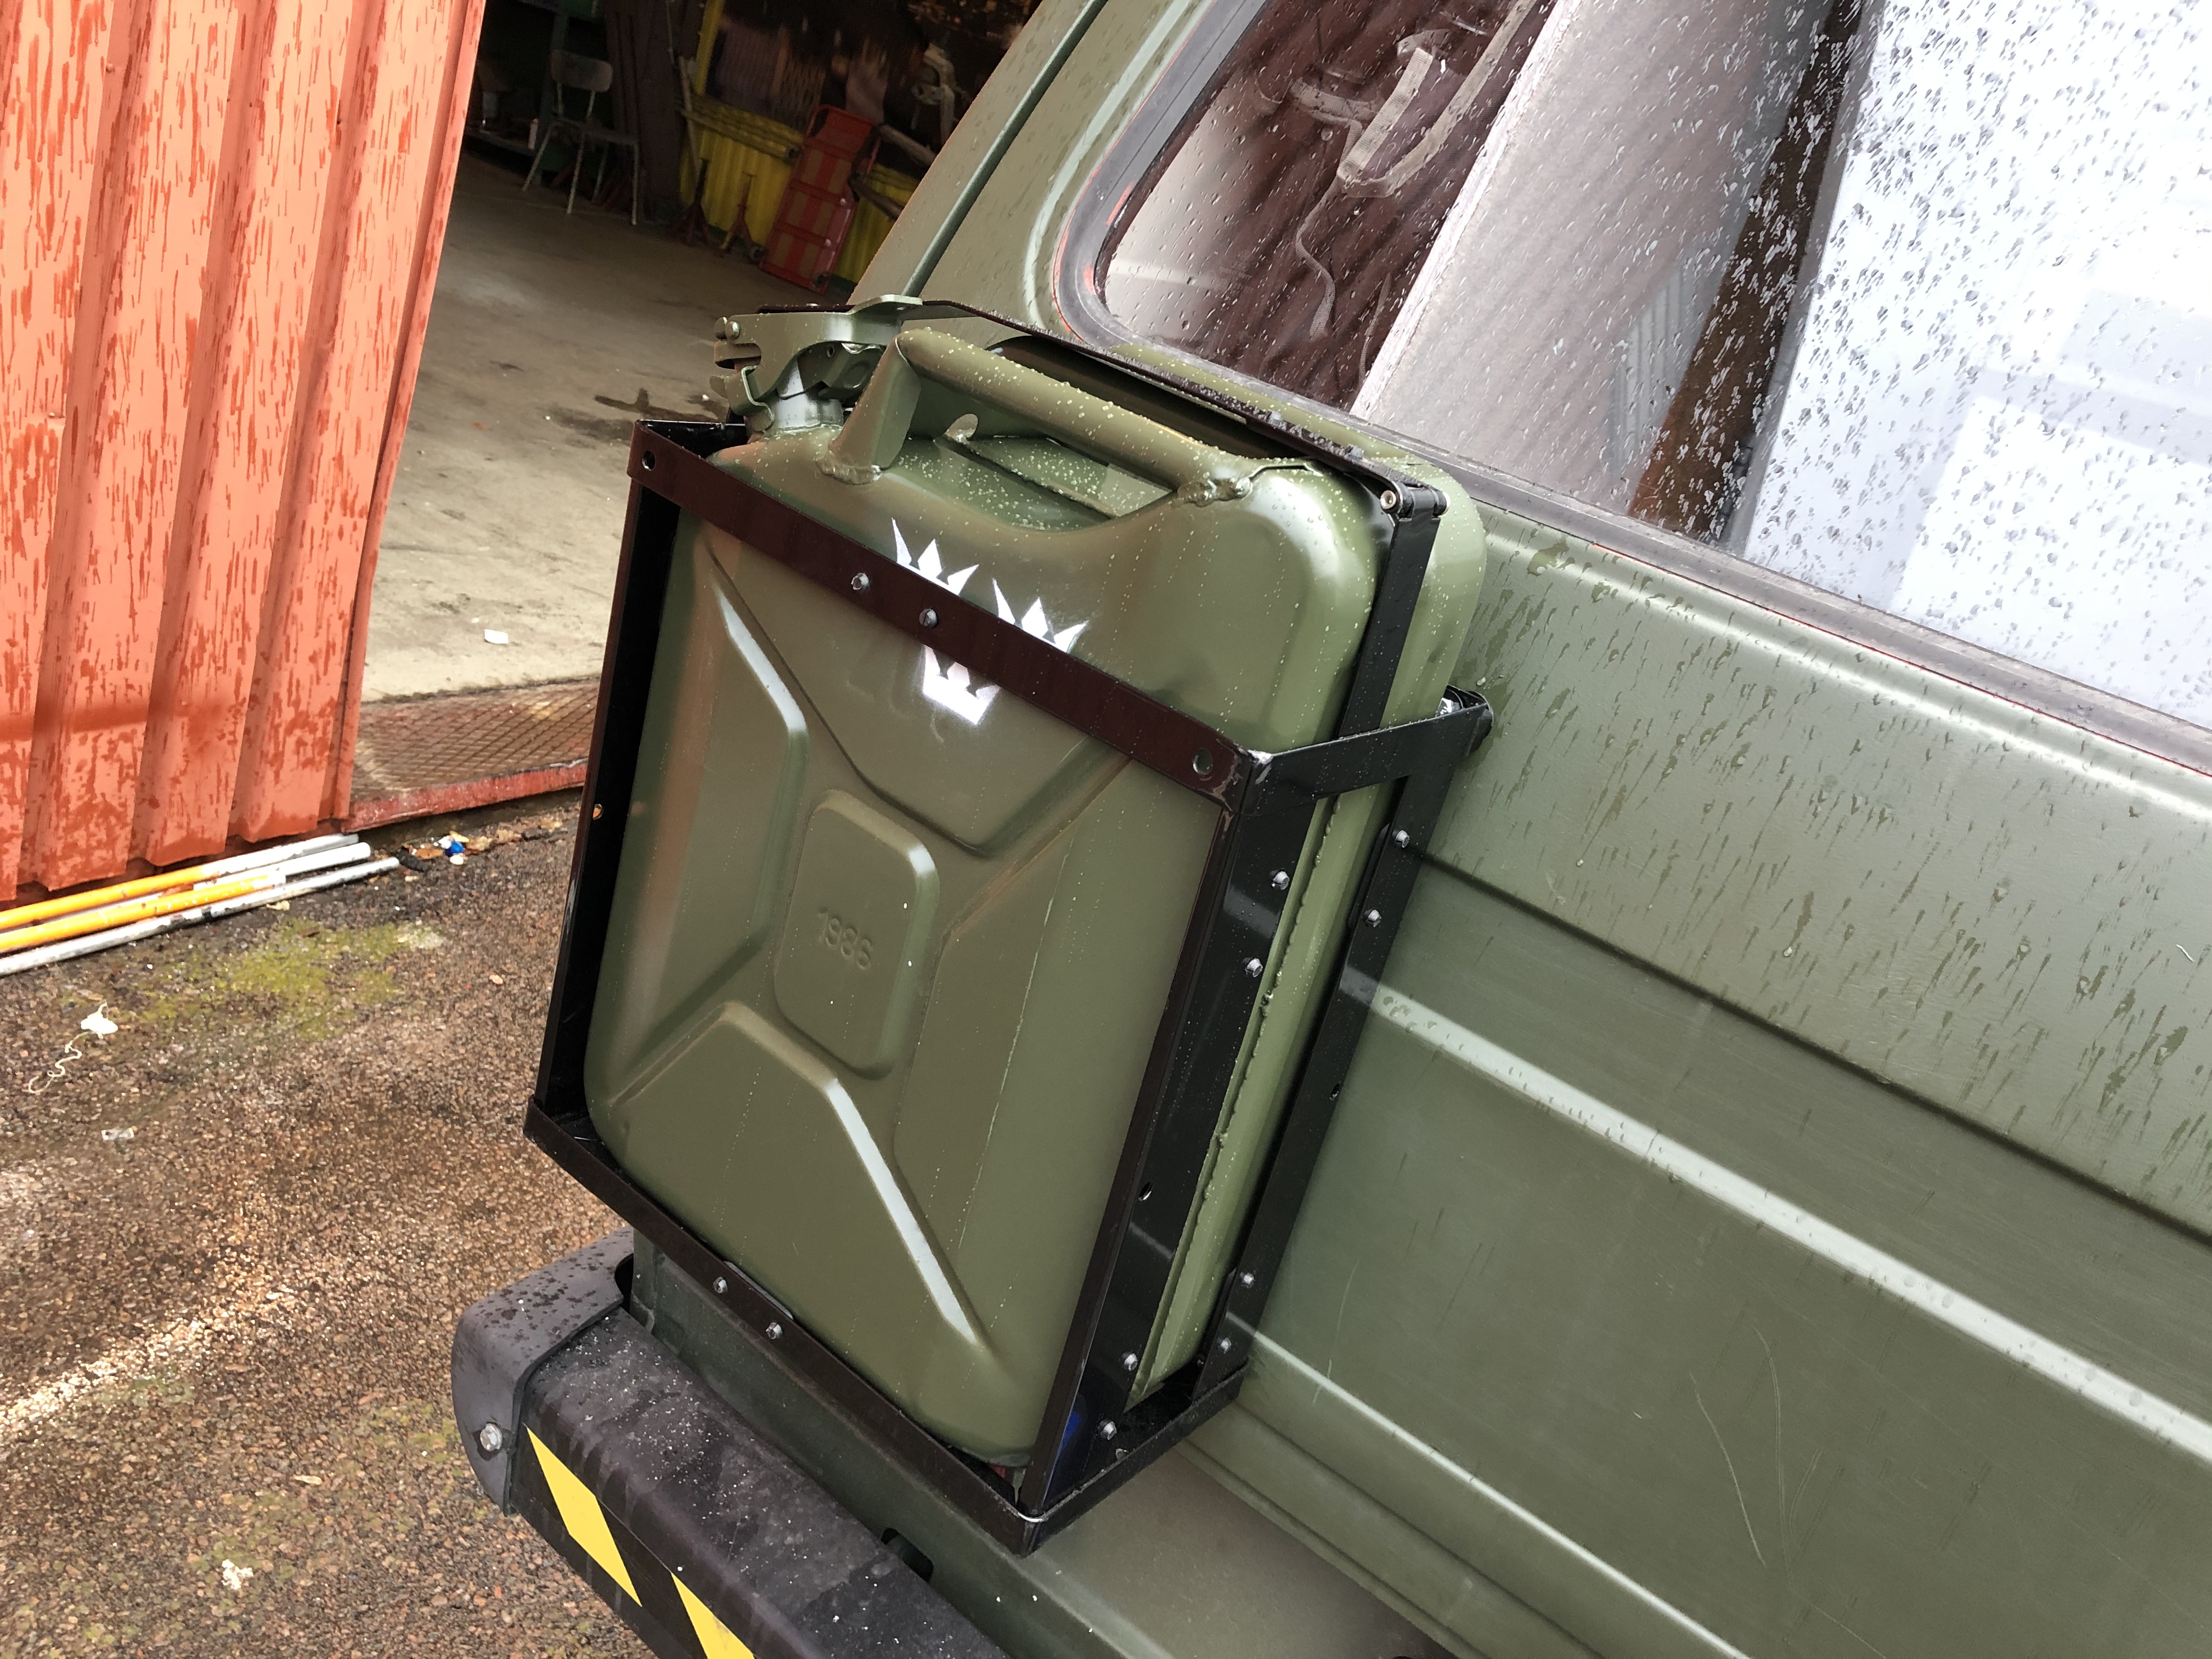
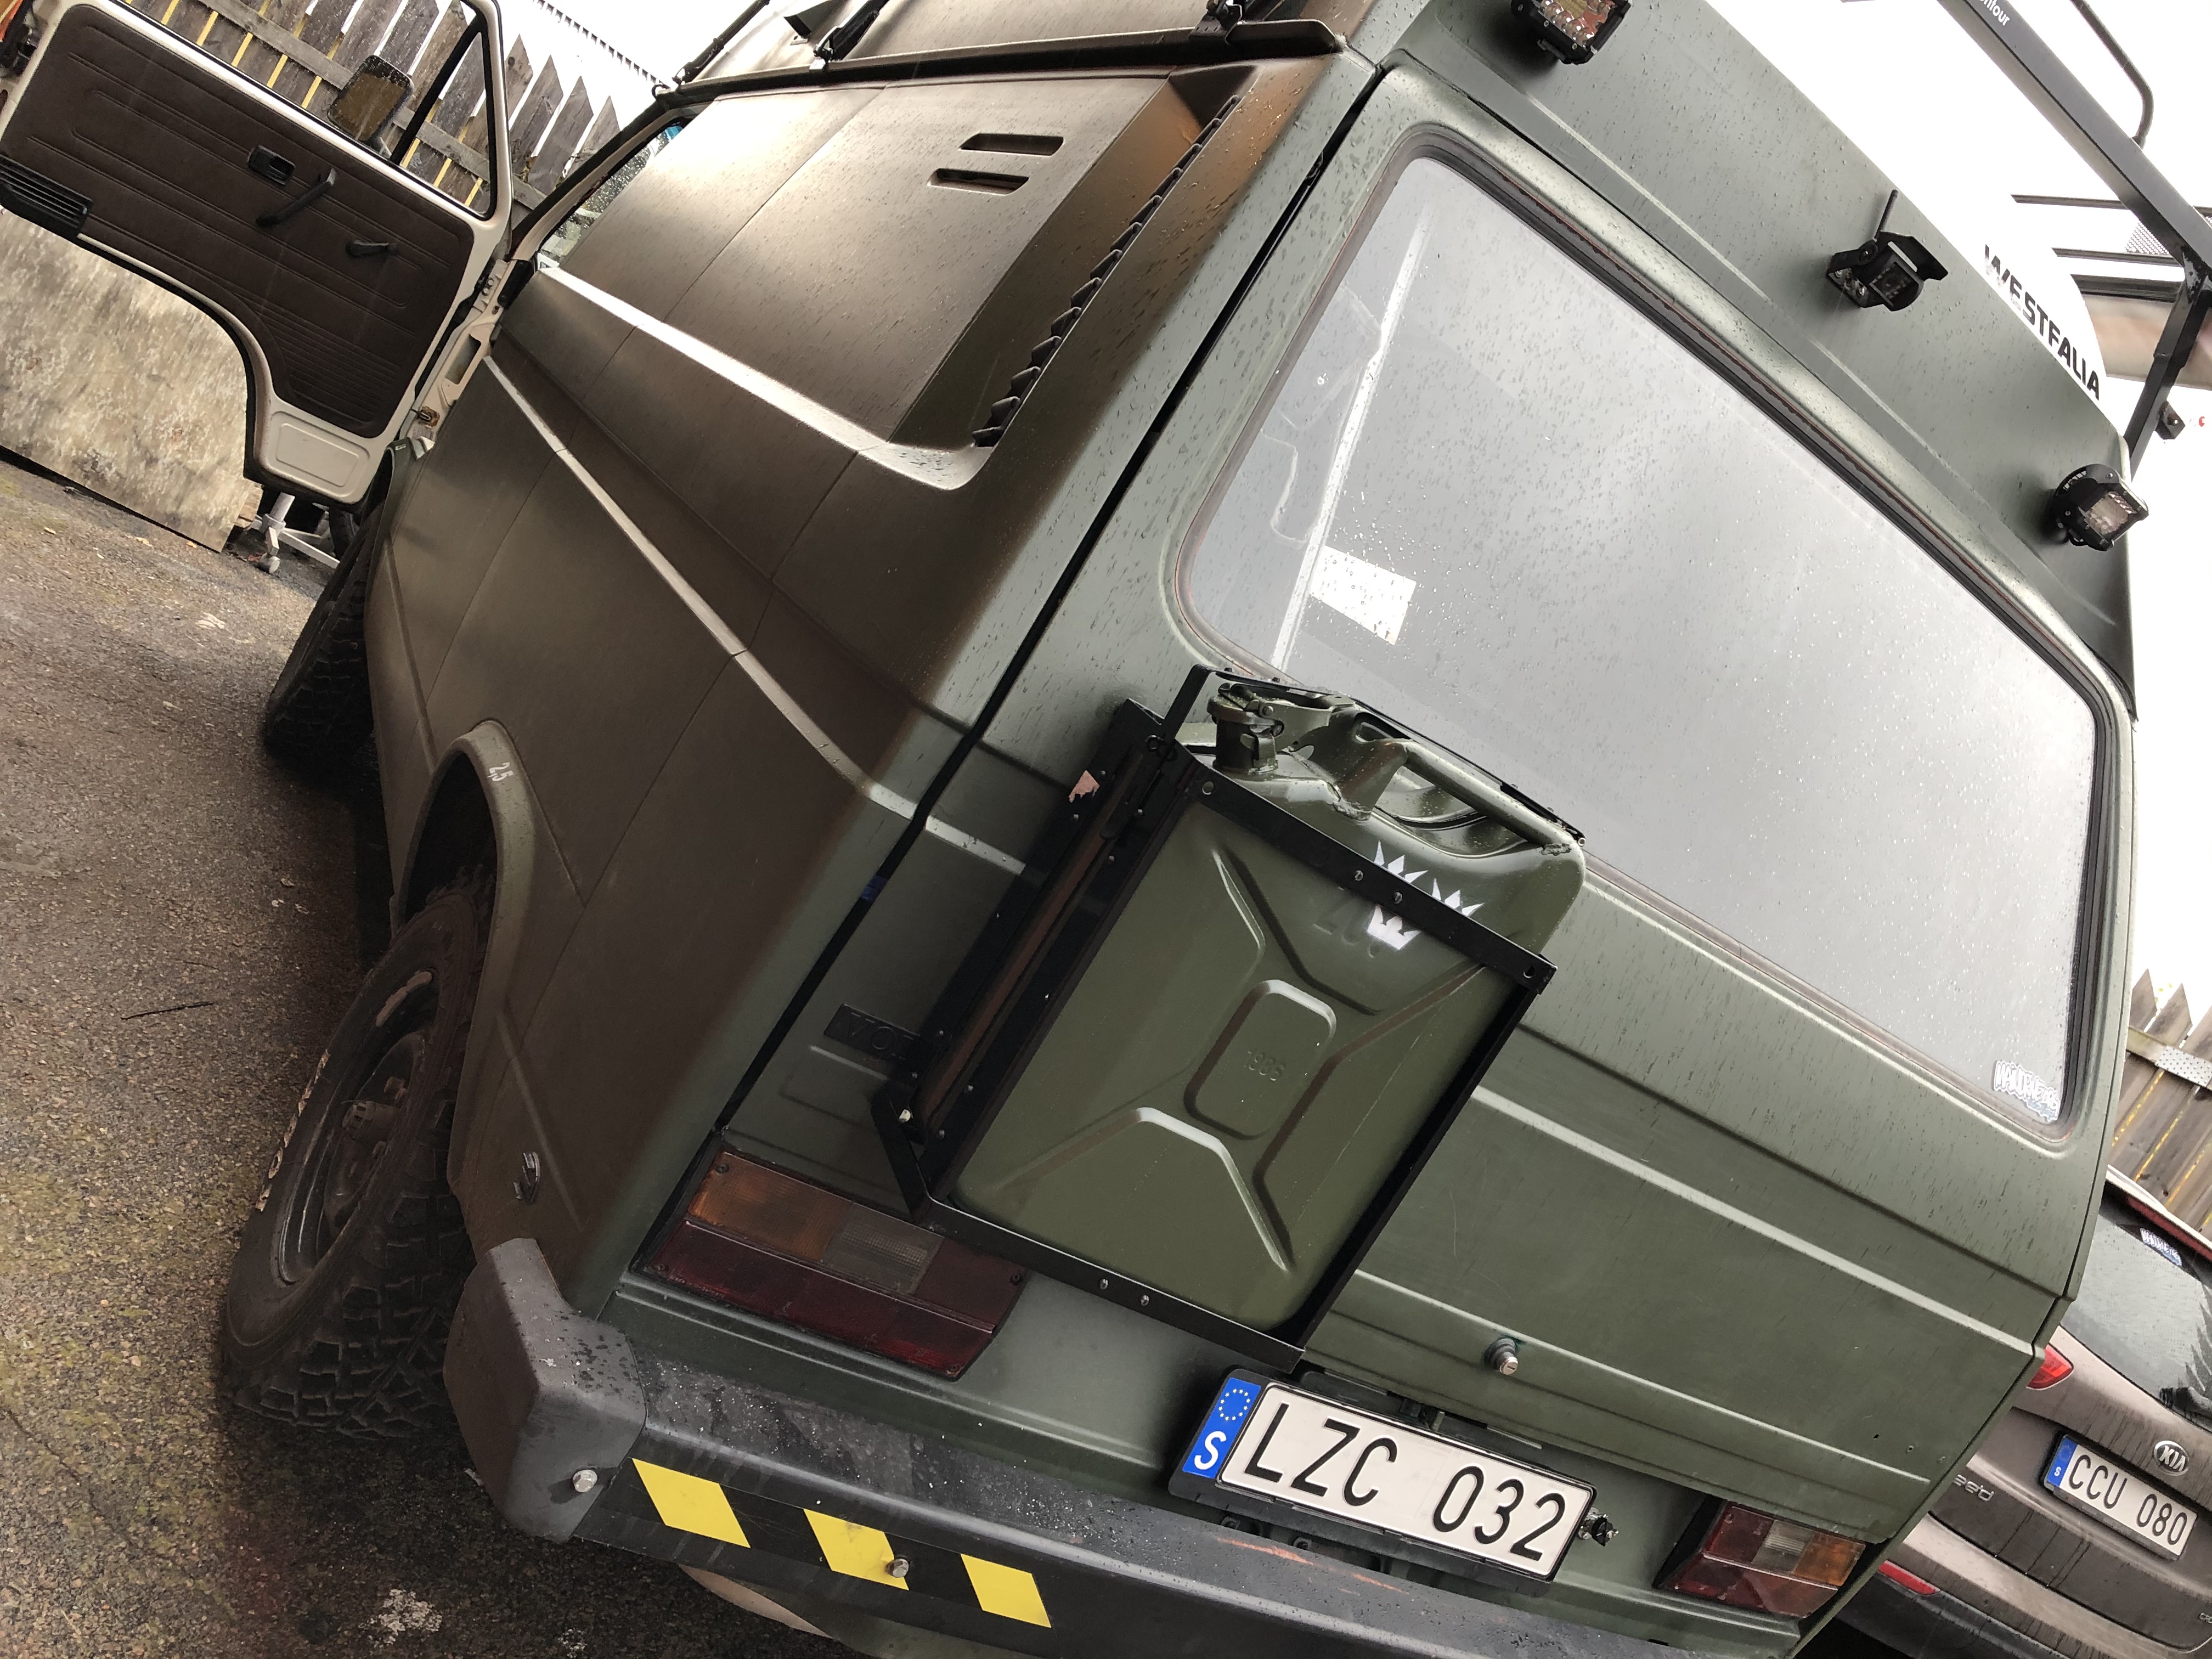
Some additions to the T3 have been done. A axe with holder, perfect for campfires or trees and branches laying over small dirt roads. Also a 20 liter spare jerrycan have been mounted on the tailgate. I have two cans I choose between, one with diesel or fresh water. Good to have in remote places.
I have changed my old 1.6 Diesel to a 1.9 from 1999 in my 1983 VW T3 bus. The engine code is AEF and it can be found in VW Polo, Skoda, Seat and Audi. When I started this conversion I was suprised how little information it really was about doing this swap. So I made a video collecting this information and what parts needed and problems that I had to solve. So hopefully this will help others that is thinking about doing this conversion. Good luck!
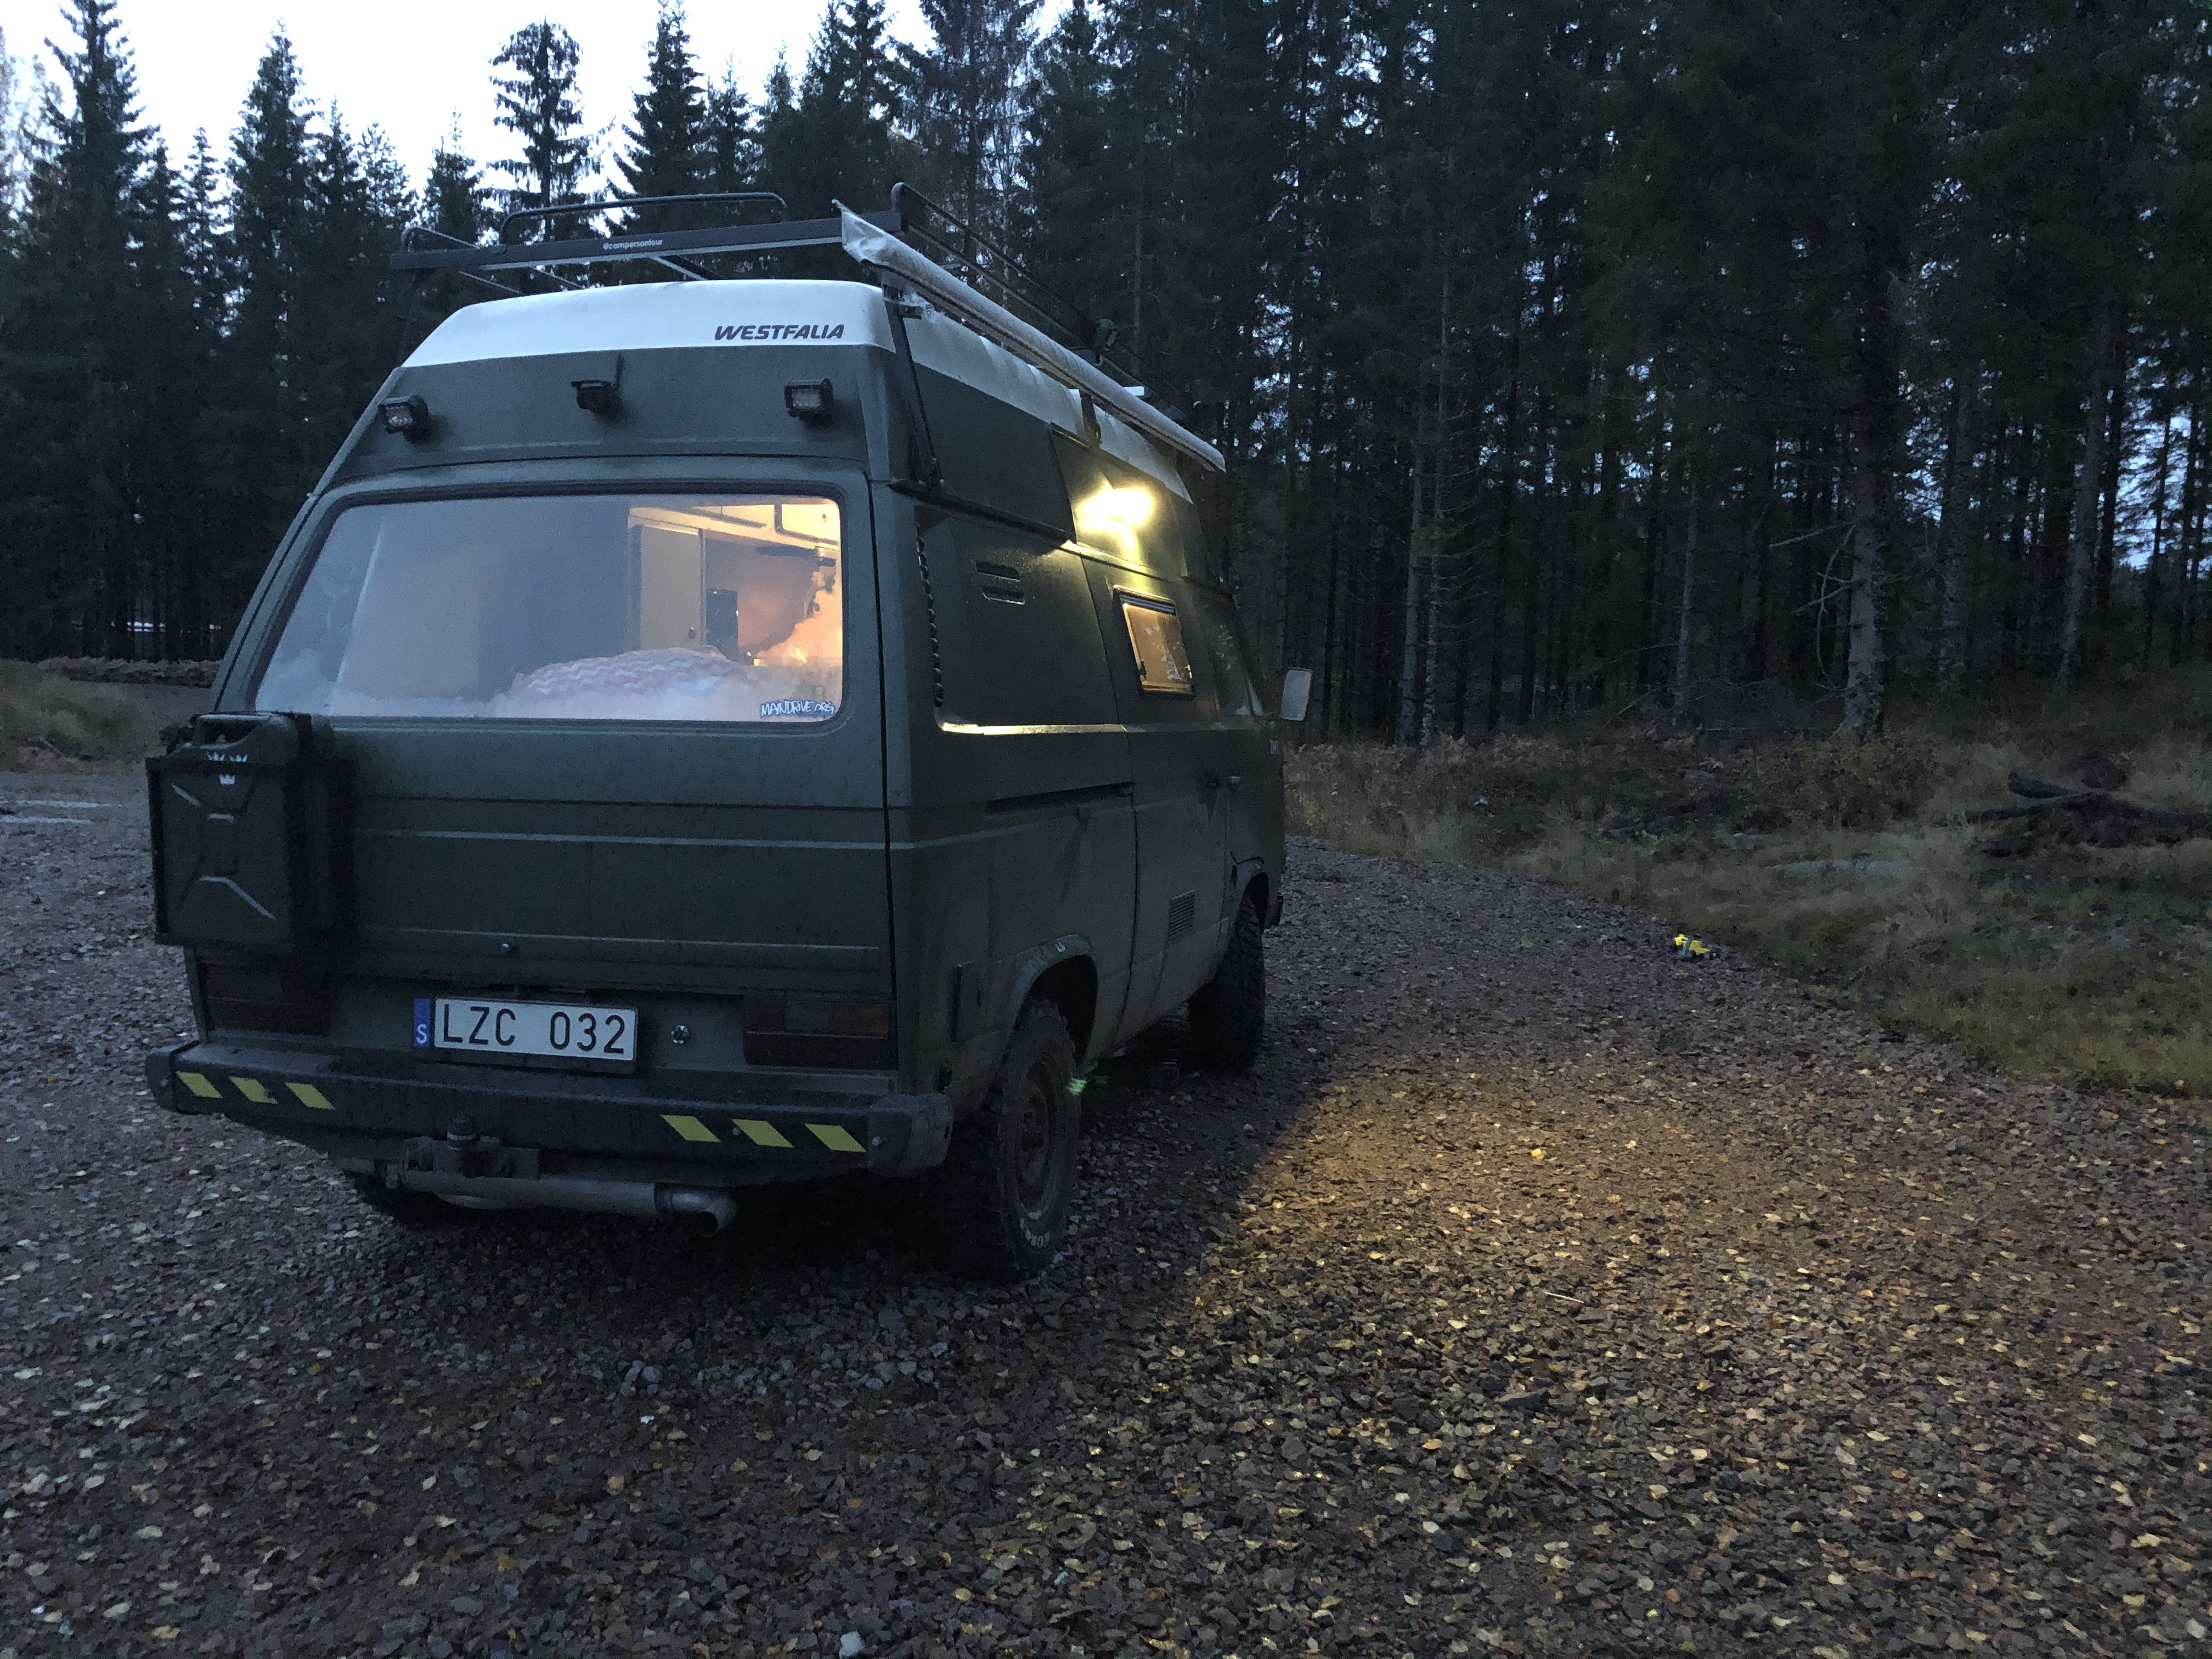
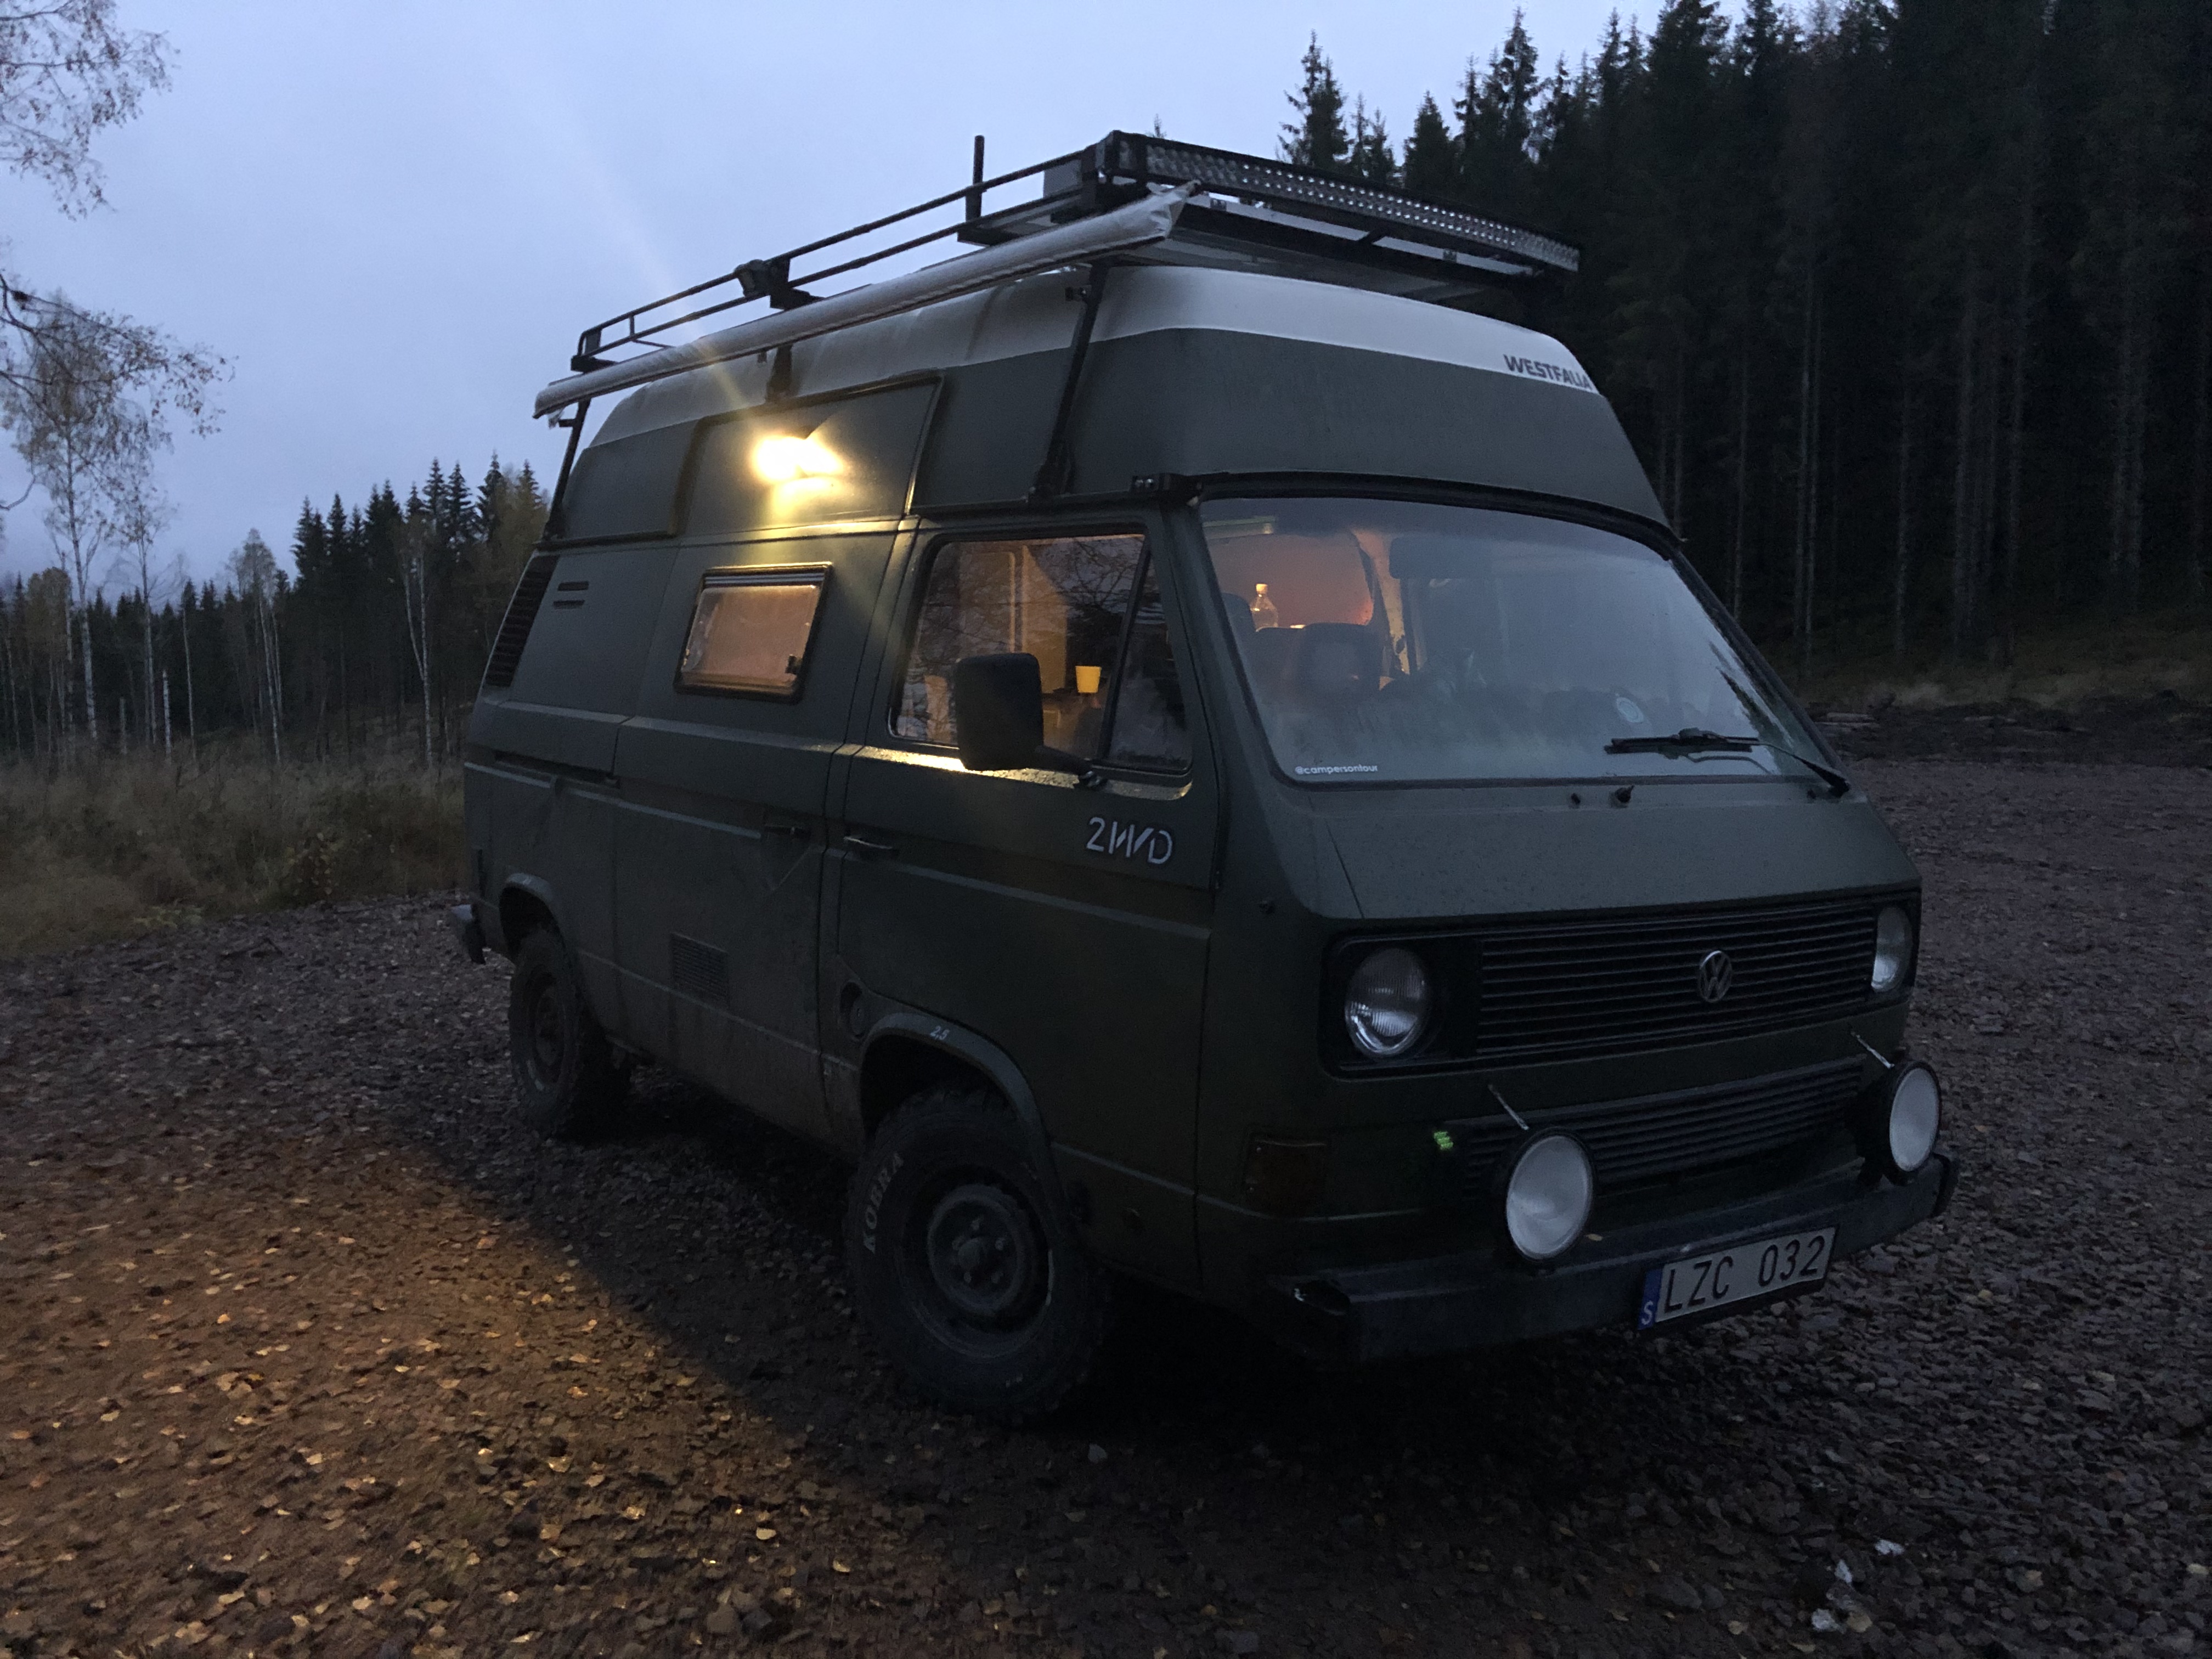
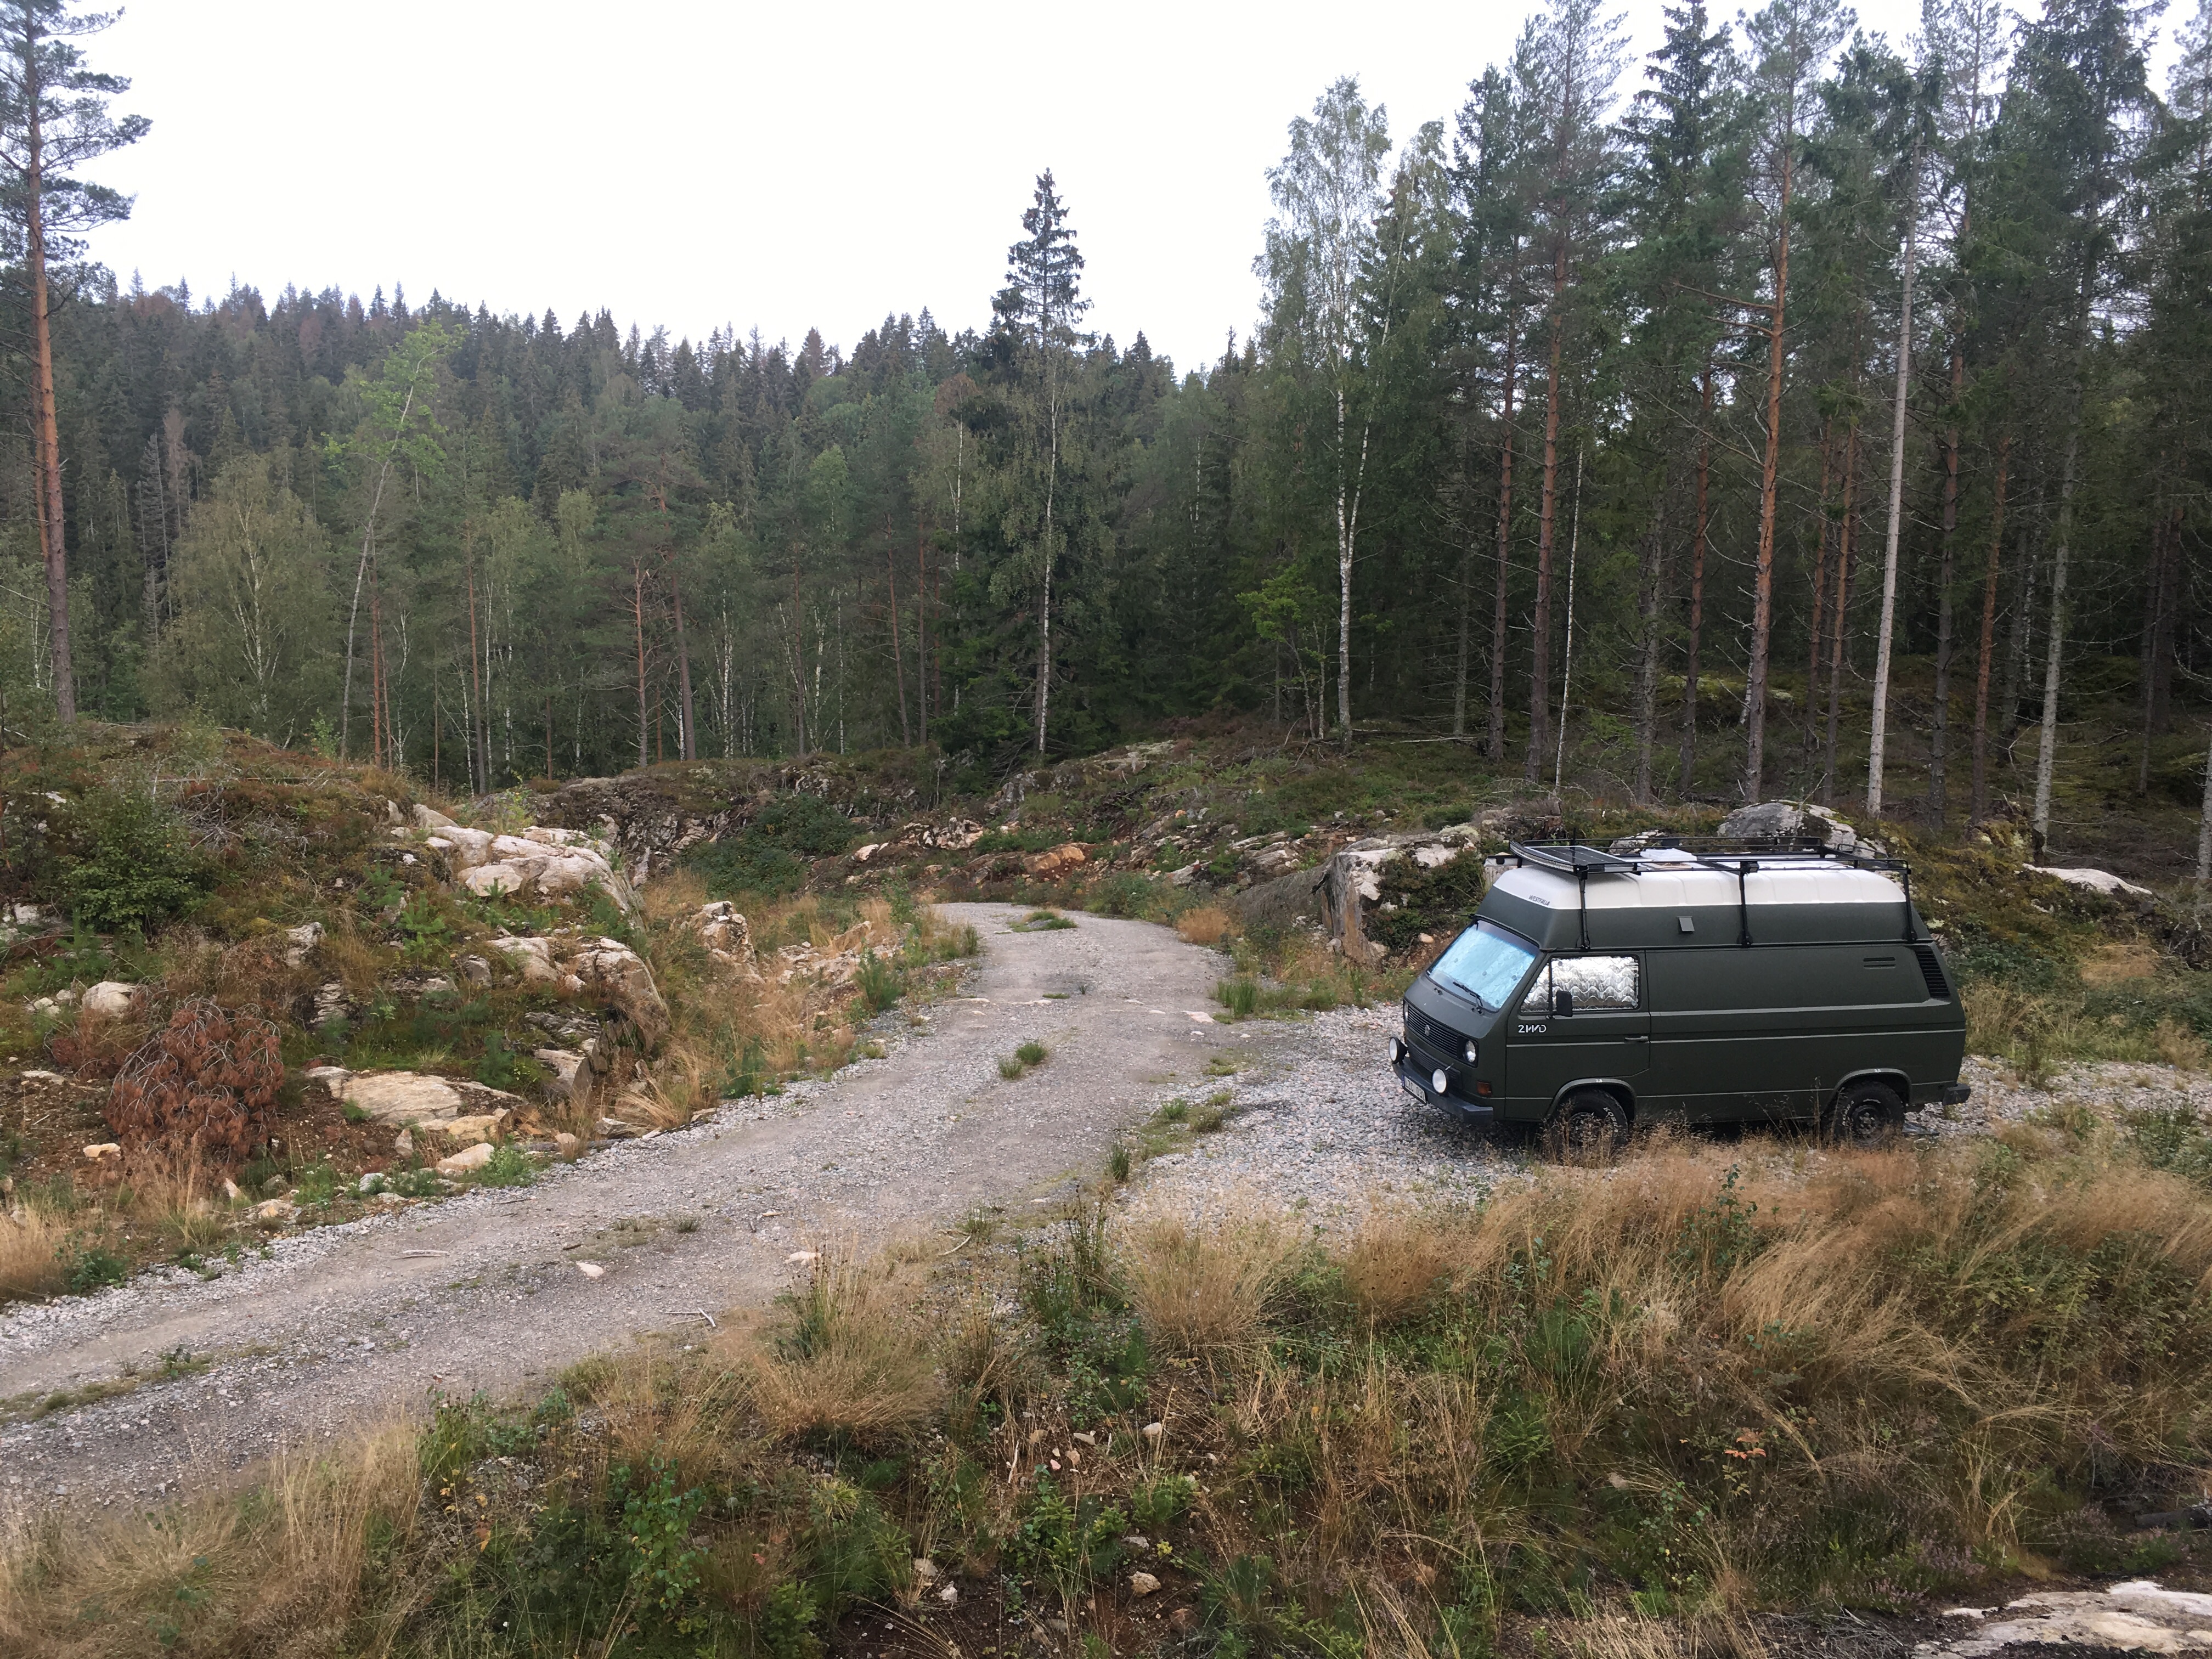
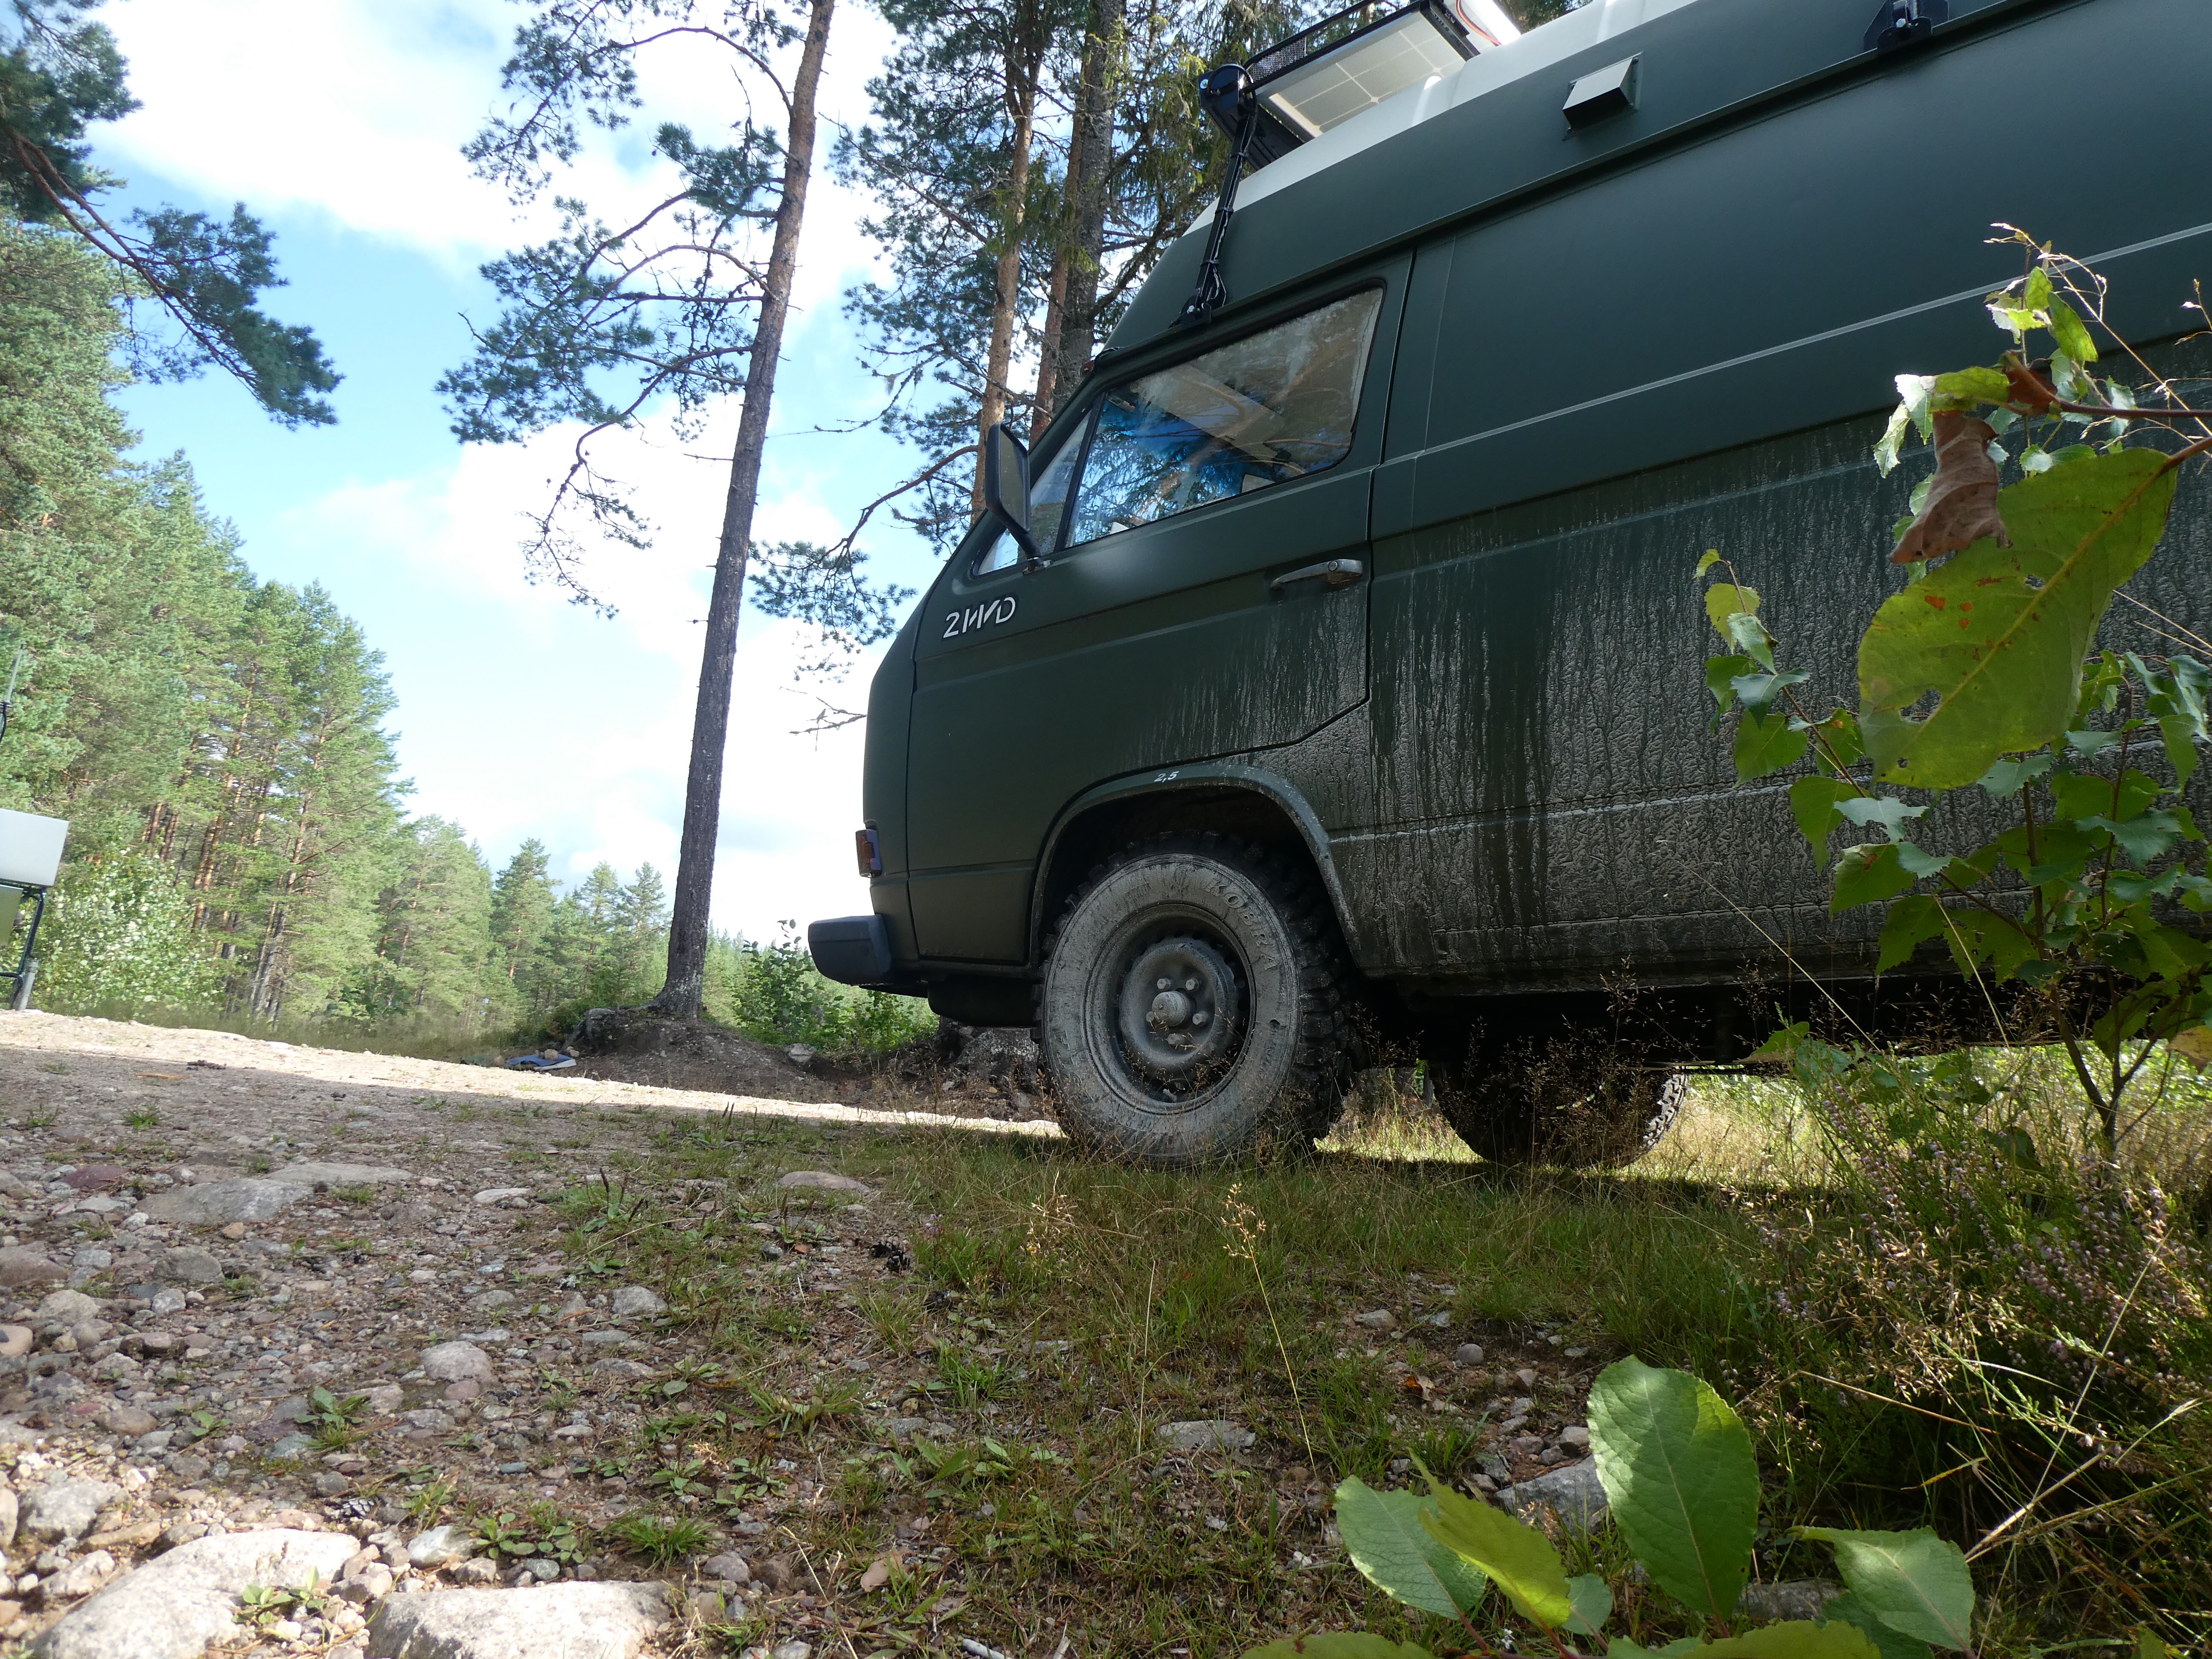
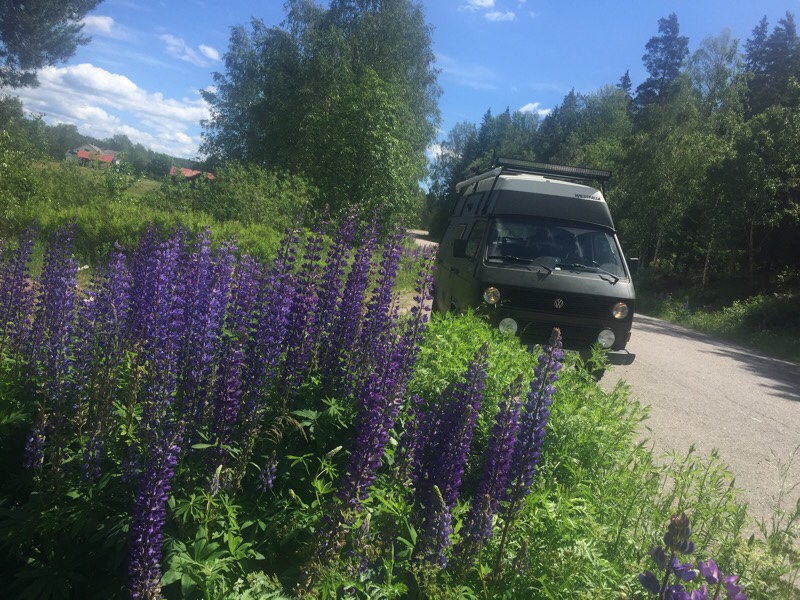
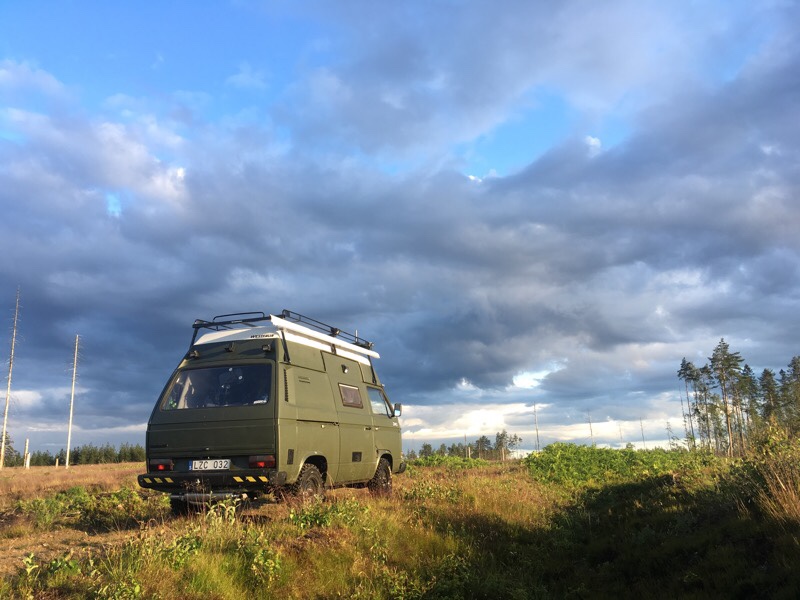
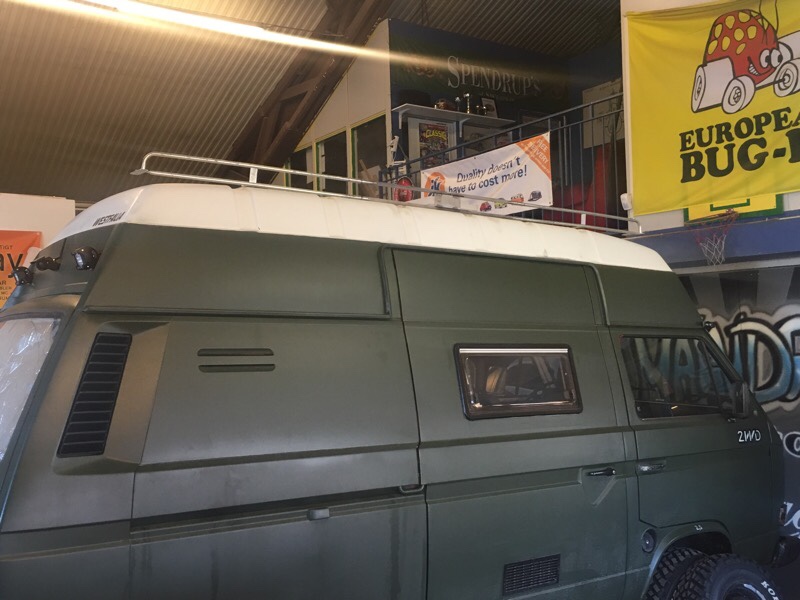
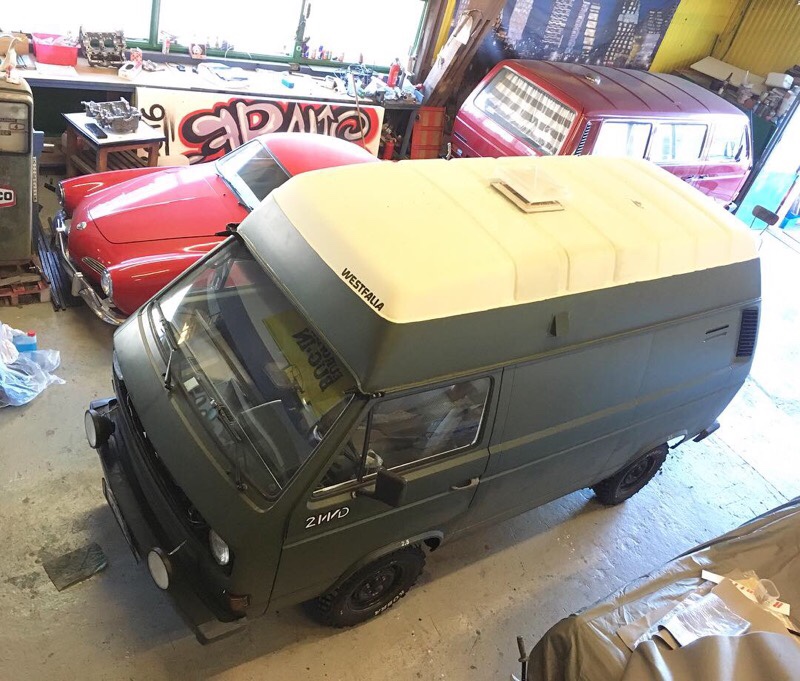
Just some random pics from last month on the T3 Highroof or as my son calls it “The Monster bus” 🙂
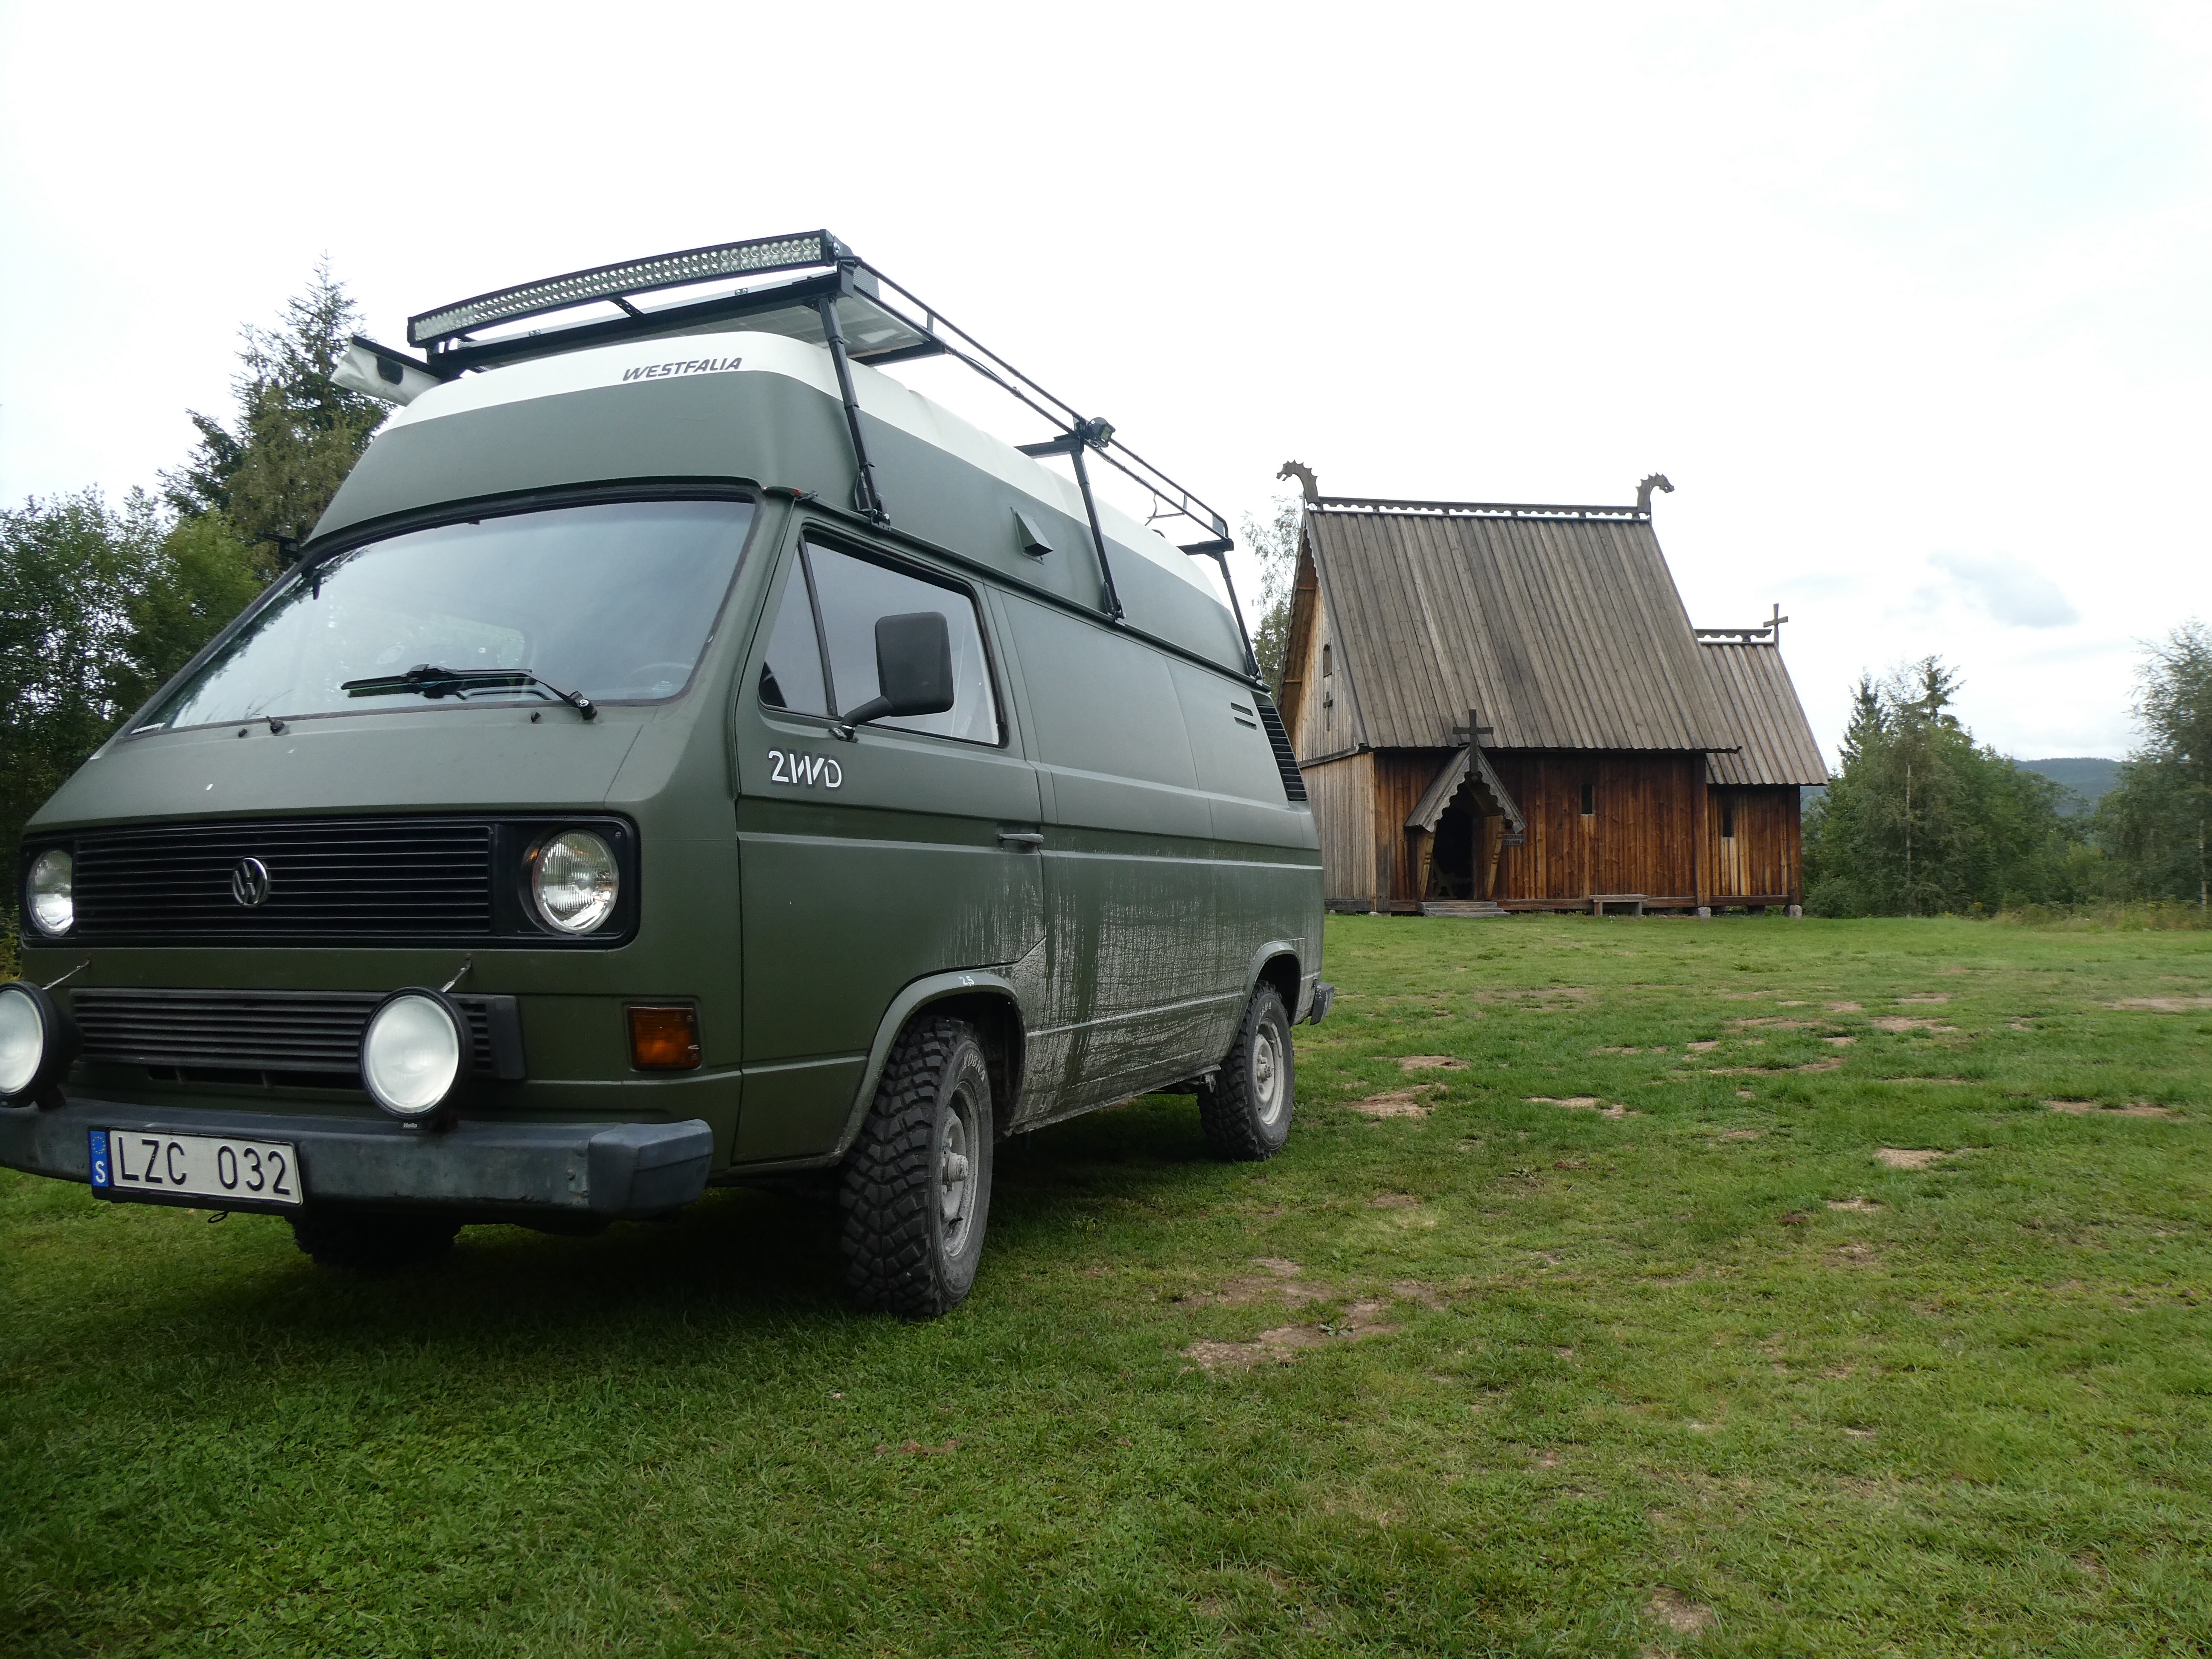
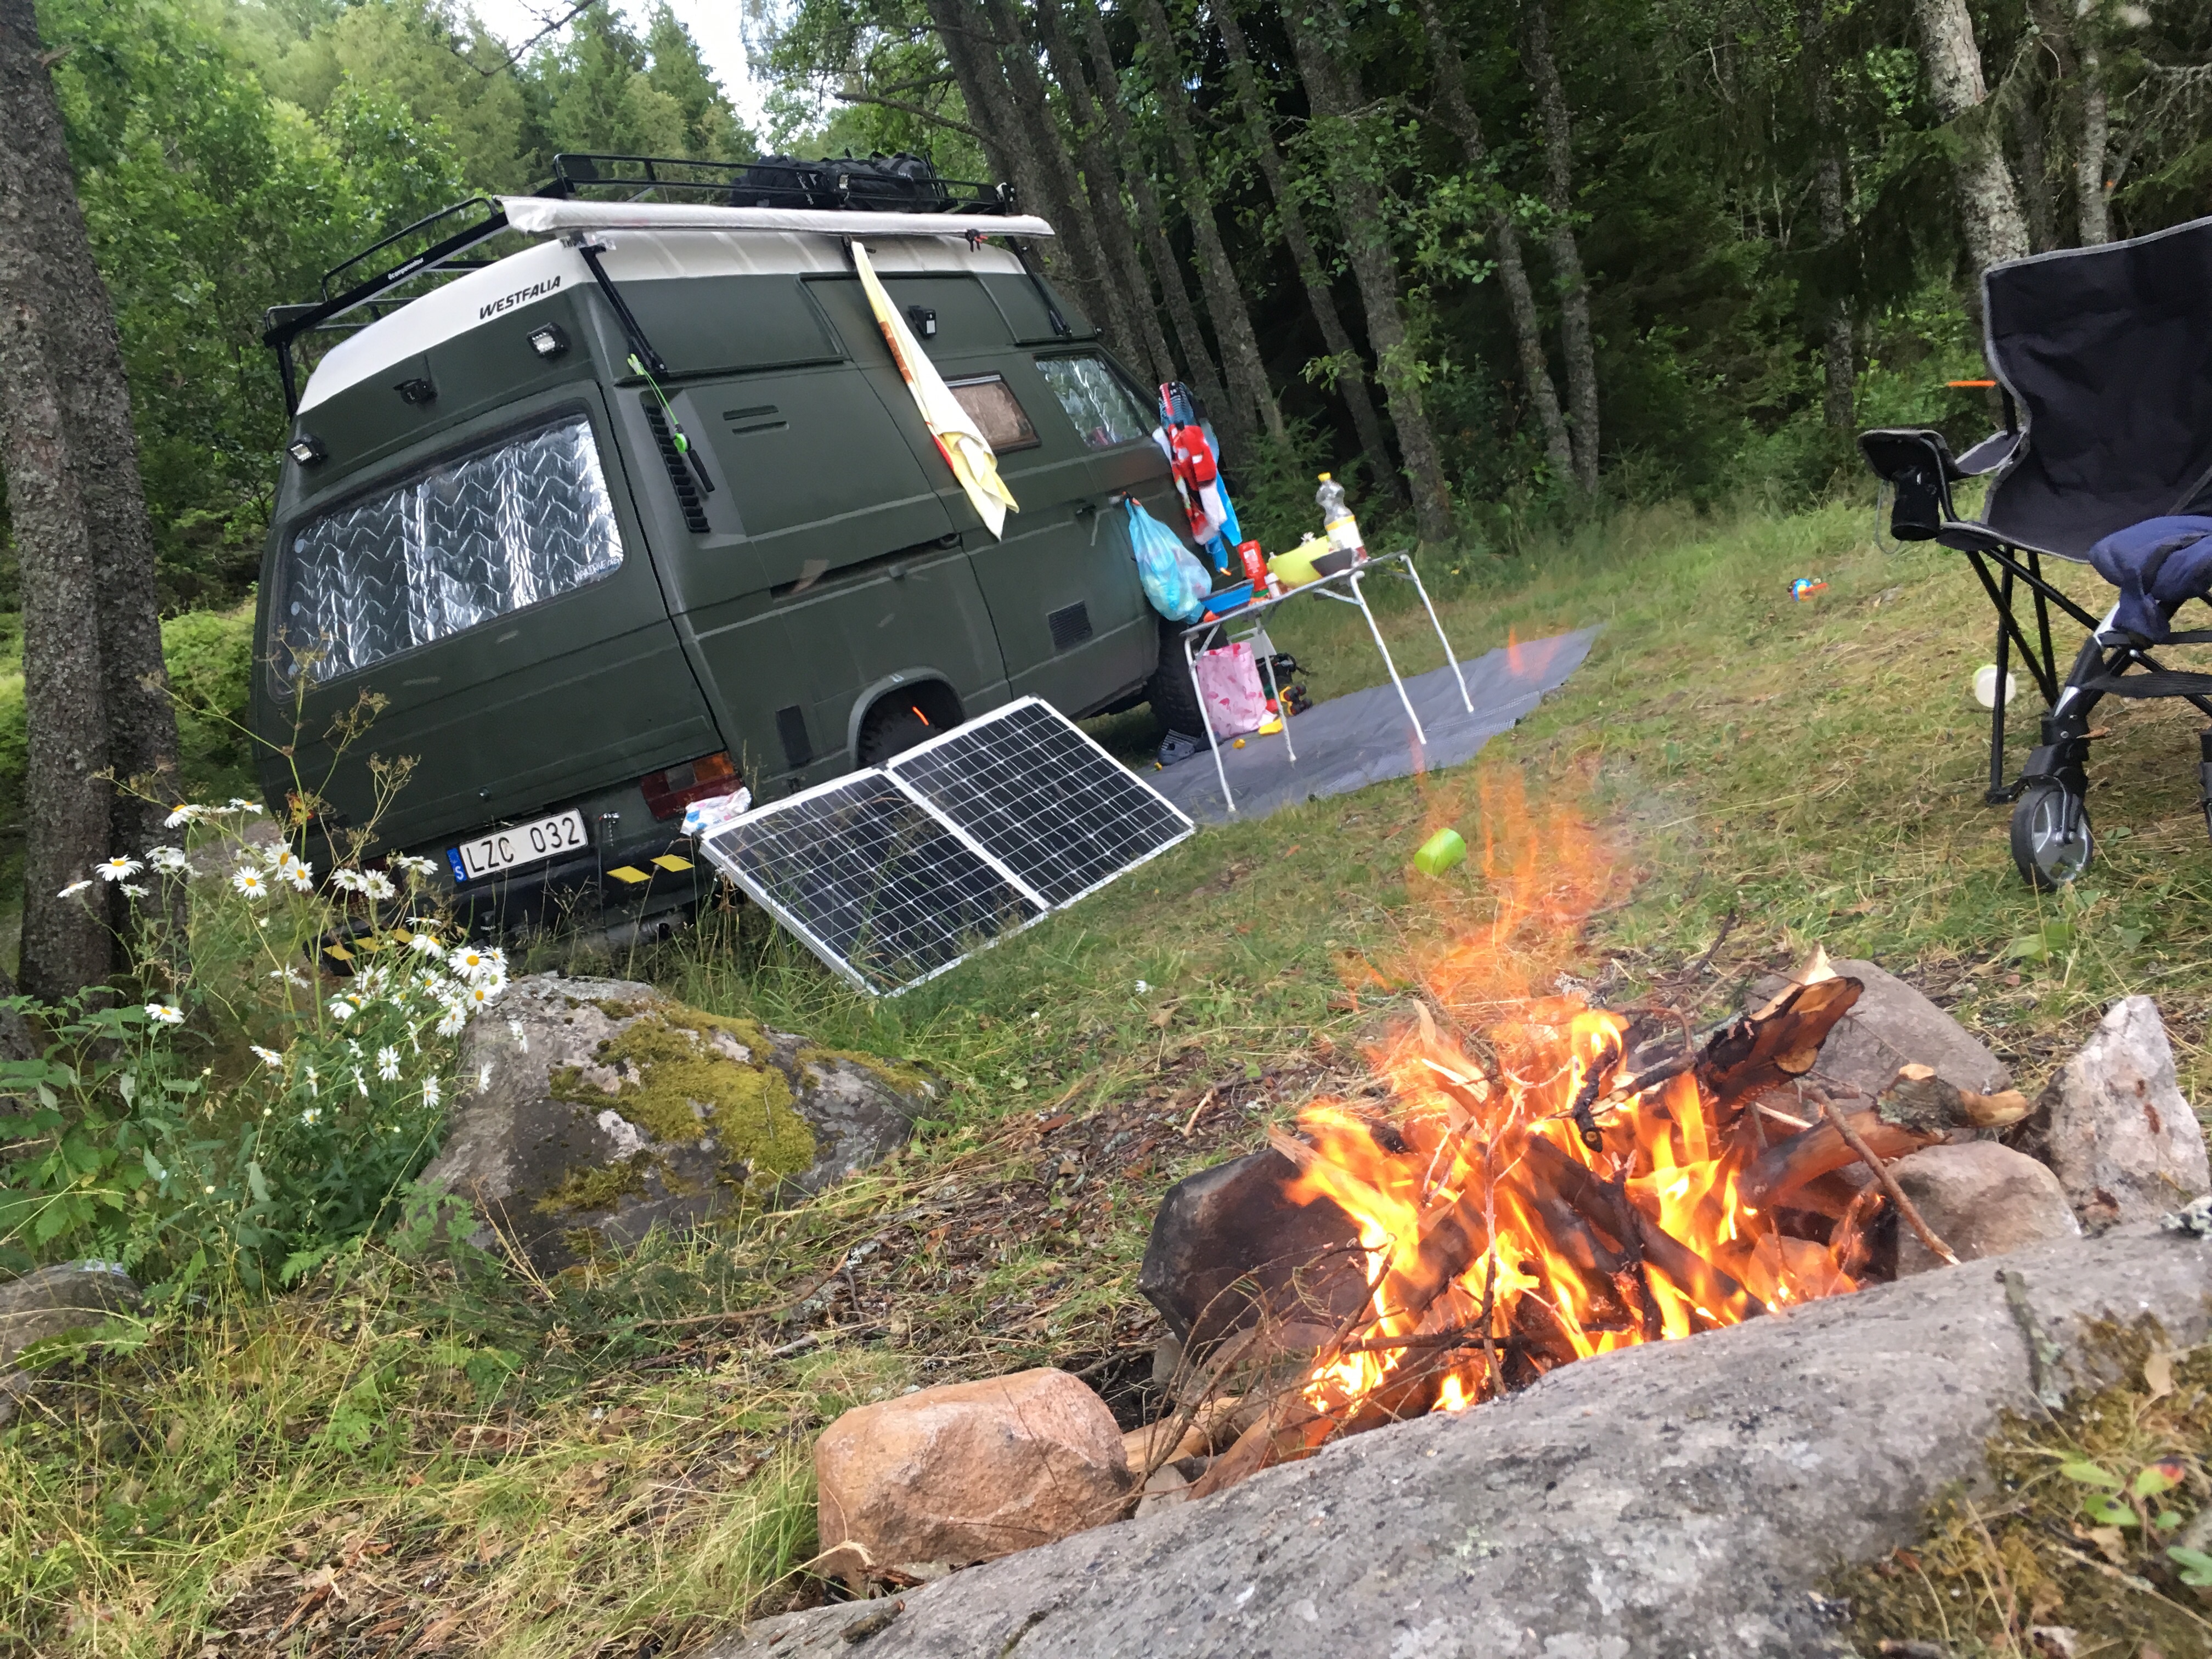
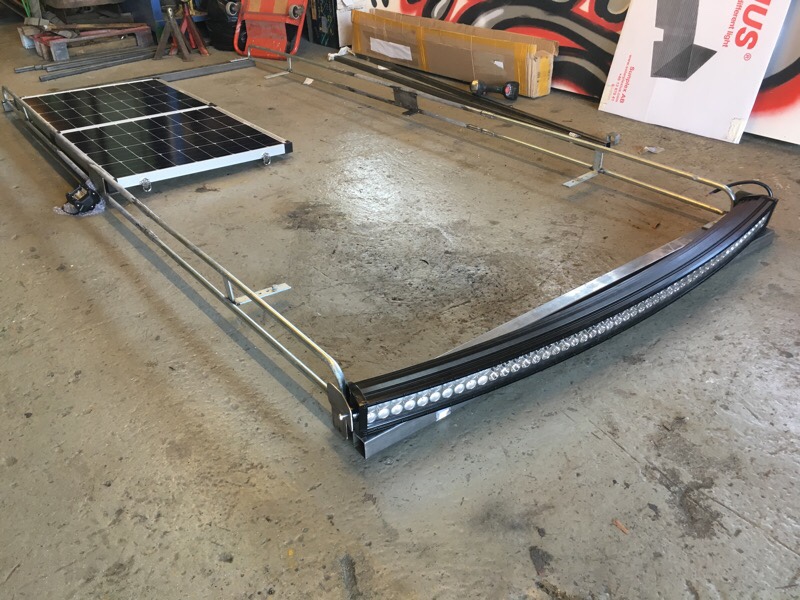
Added a solarpanel to the roofrack on the bus. But we also have a portable solarpanel to use when parked in the shadows or just need more power. Roof panel is Monocrystal 120w and the portable is also 120w mono, so a total of 240w solar power and 200amps of batterybank, they are also wired to the car alternator so charging when driving. We have a pretty sweet setup now!


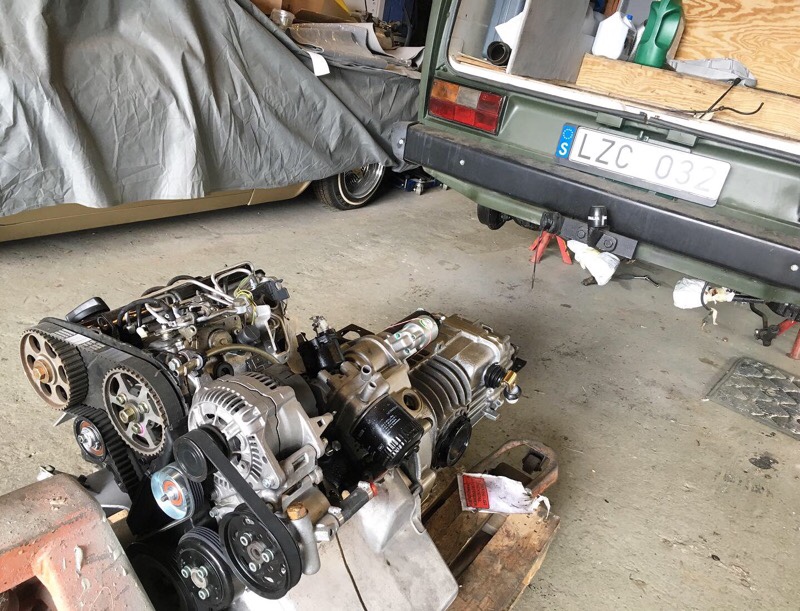
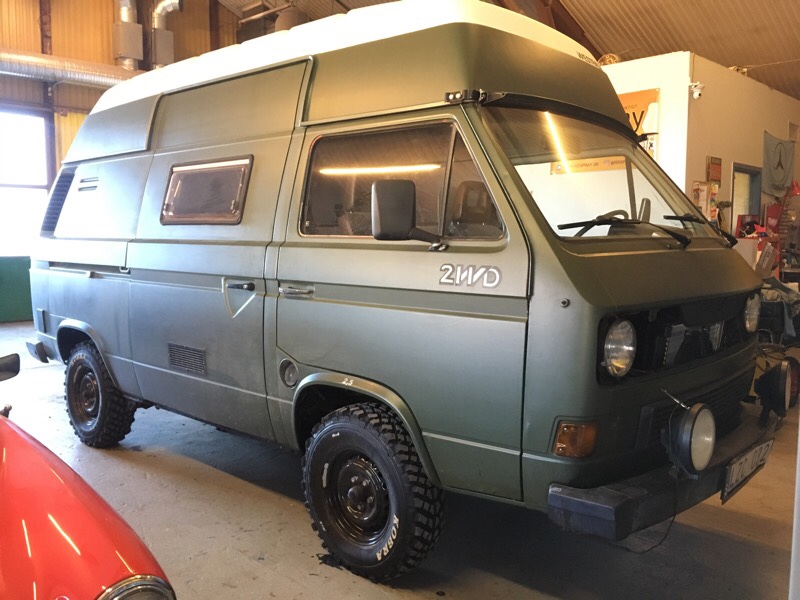
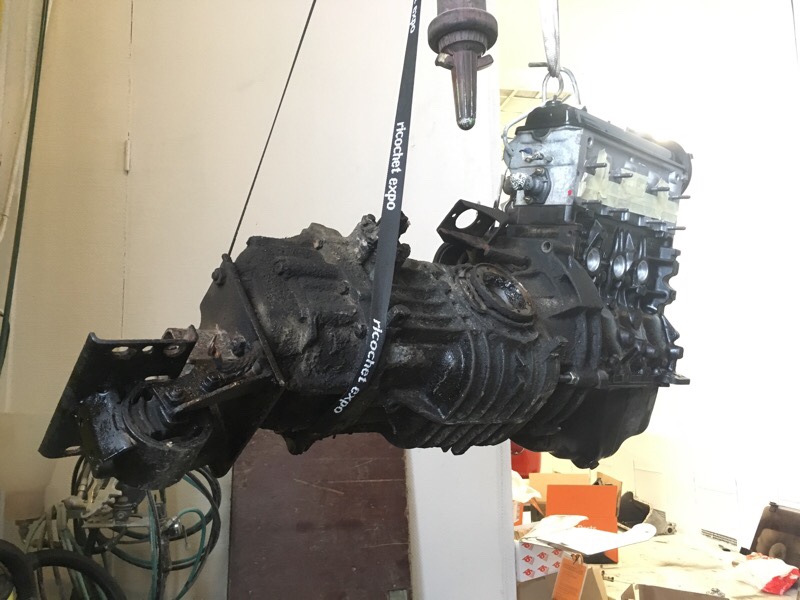
The T3 bus is now ready for summer vacation. Engine conversion and transmission is all finished now. Took an hour testdriving it on some dirtroads, all good. We are going to drive up north to Norrfällsviken in the high coast of Sweden. Nordic VW TYPE 2 club is having a bus meeting there.
#bussfest2019 #nt2k #vwt3overland
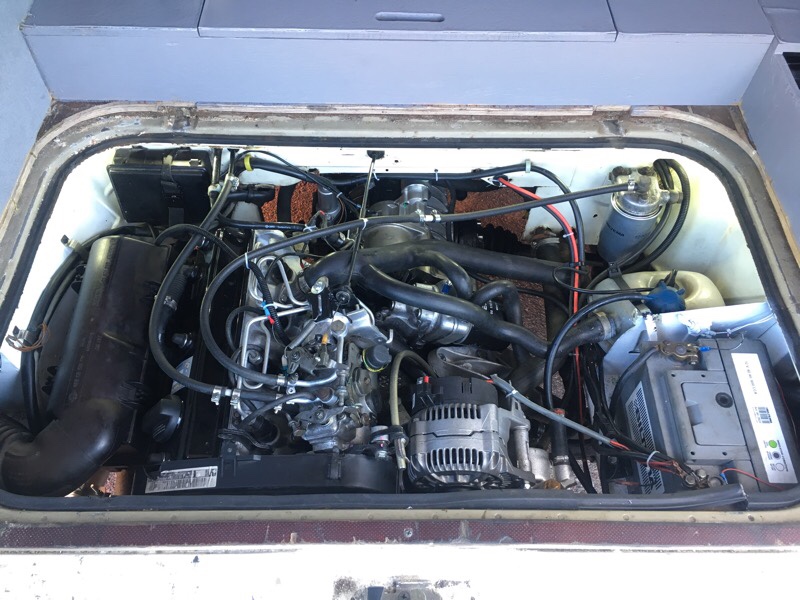
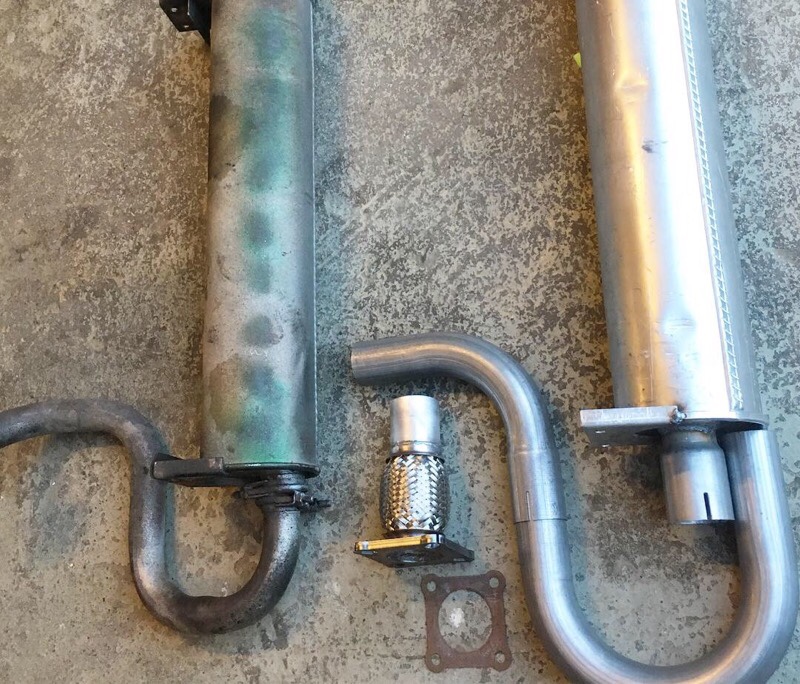
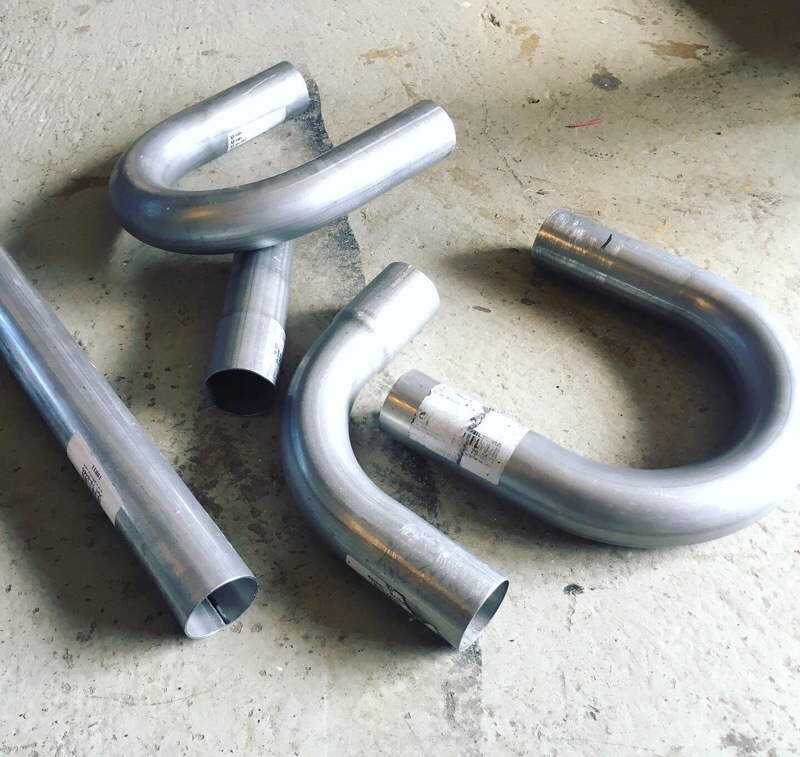
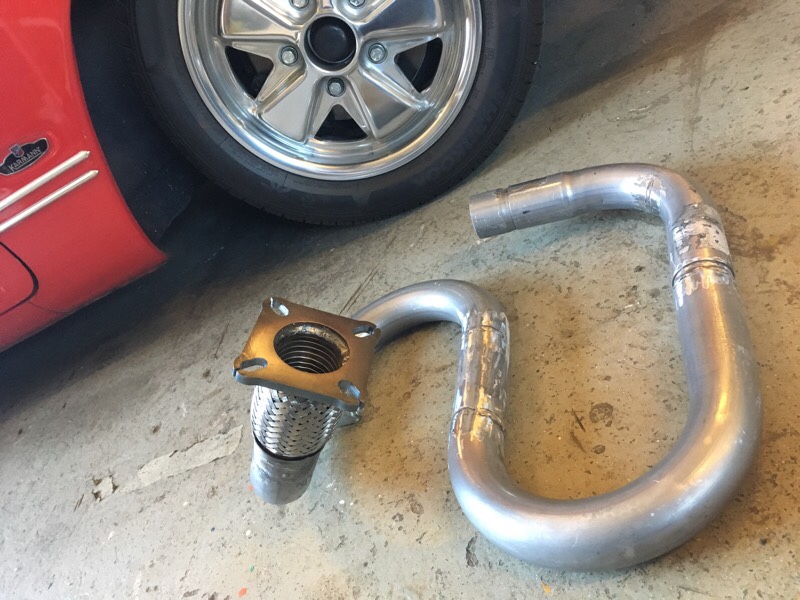
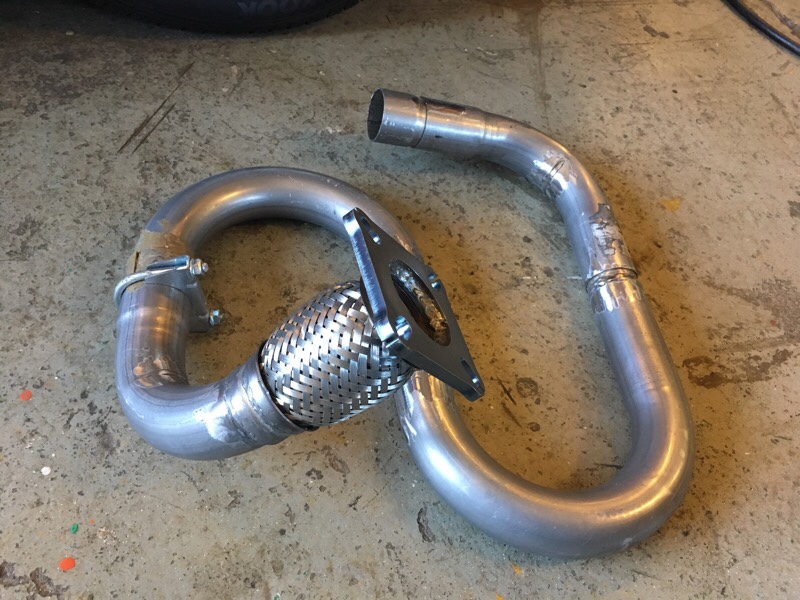
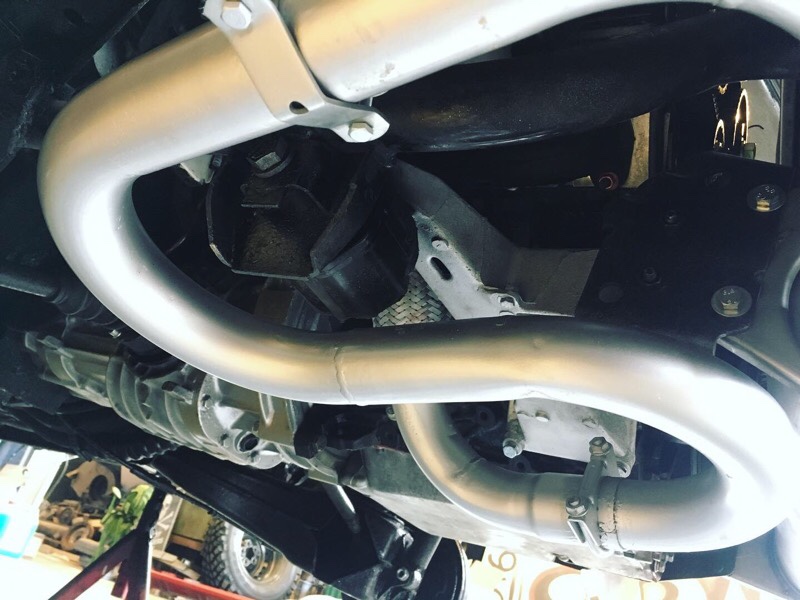
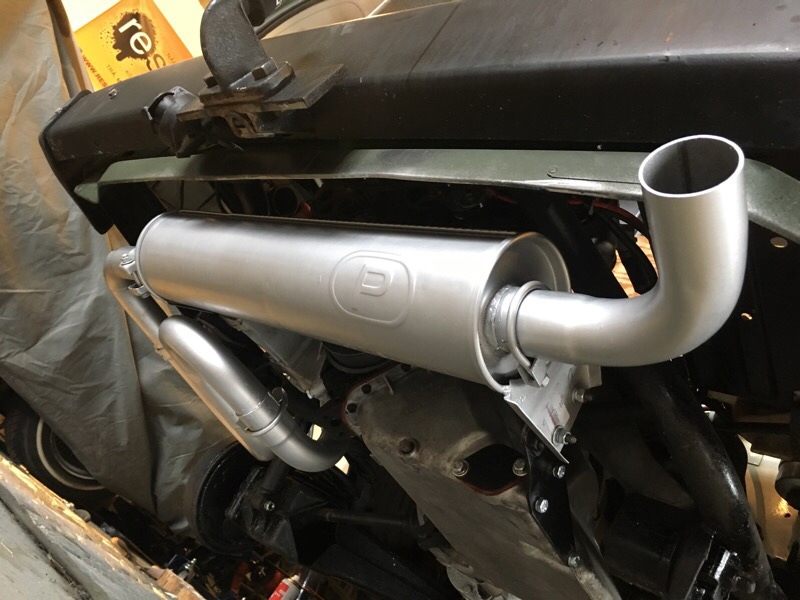
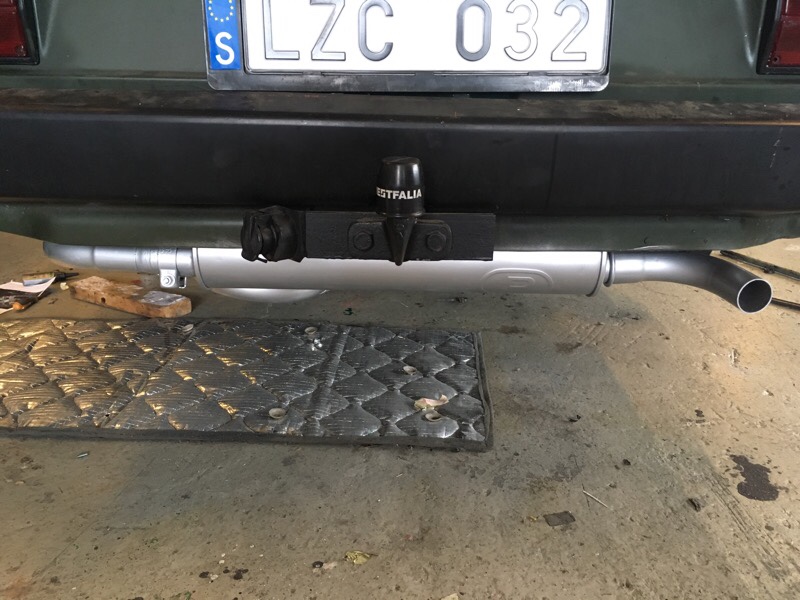
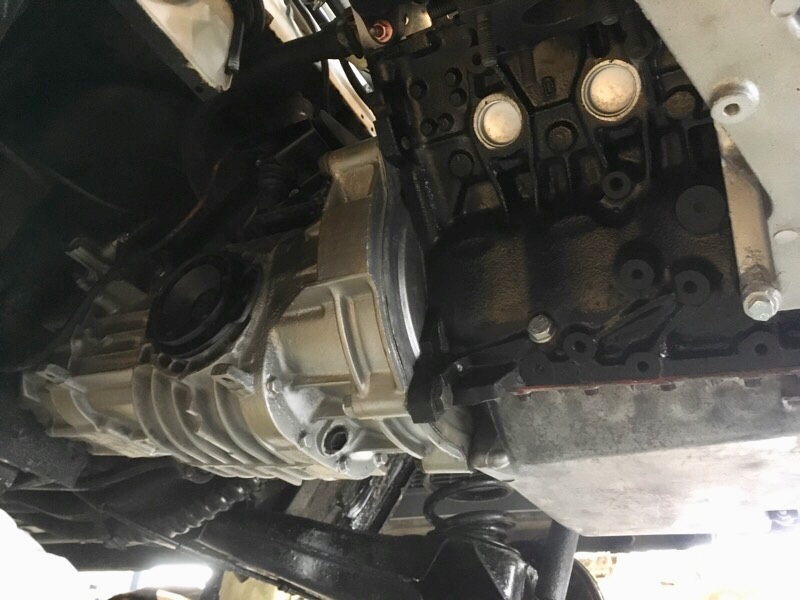
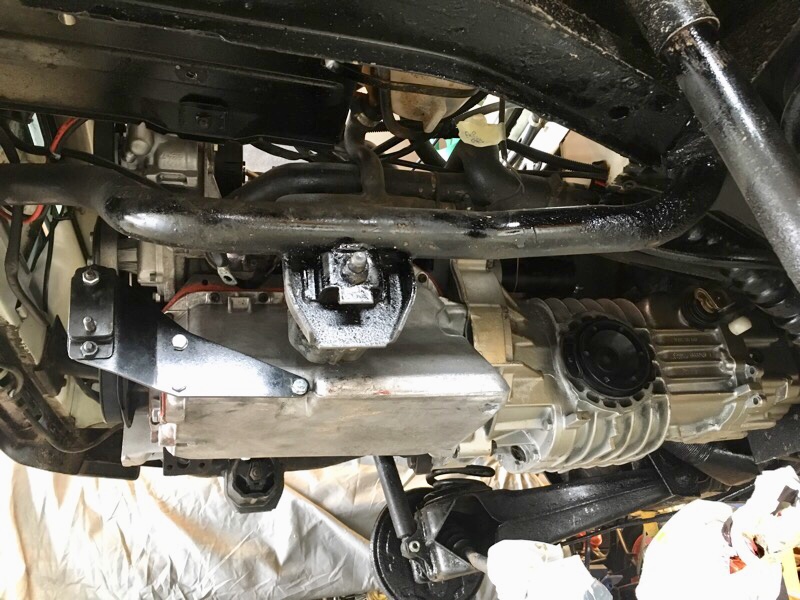
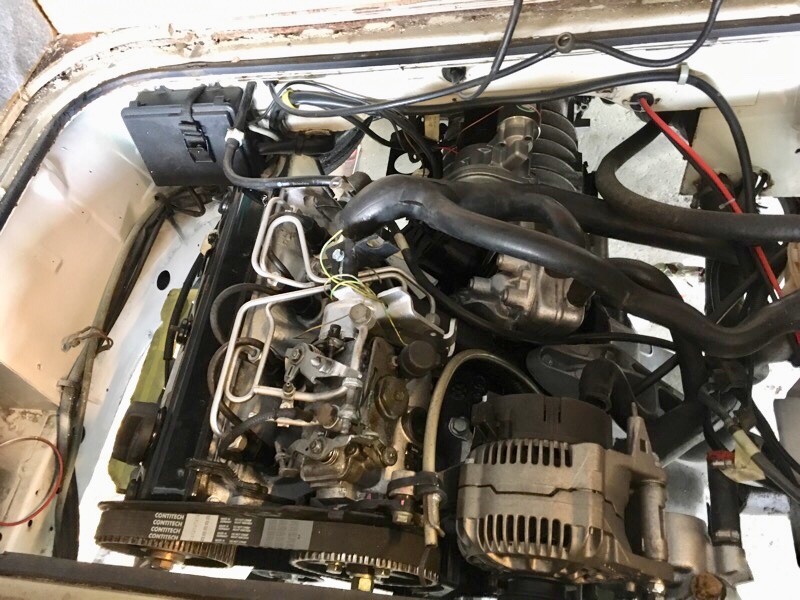
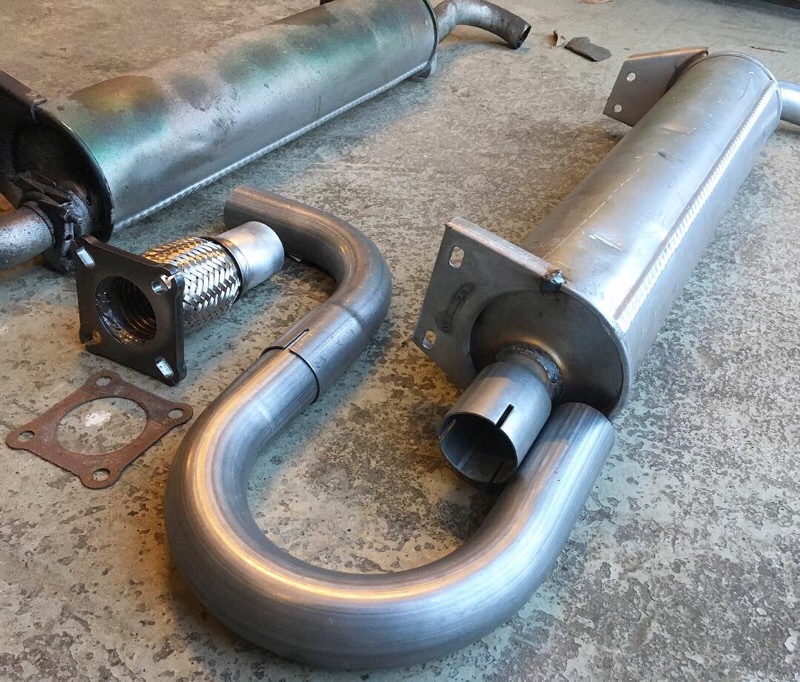
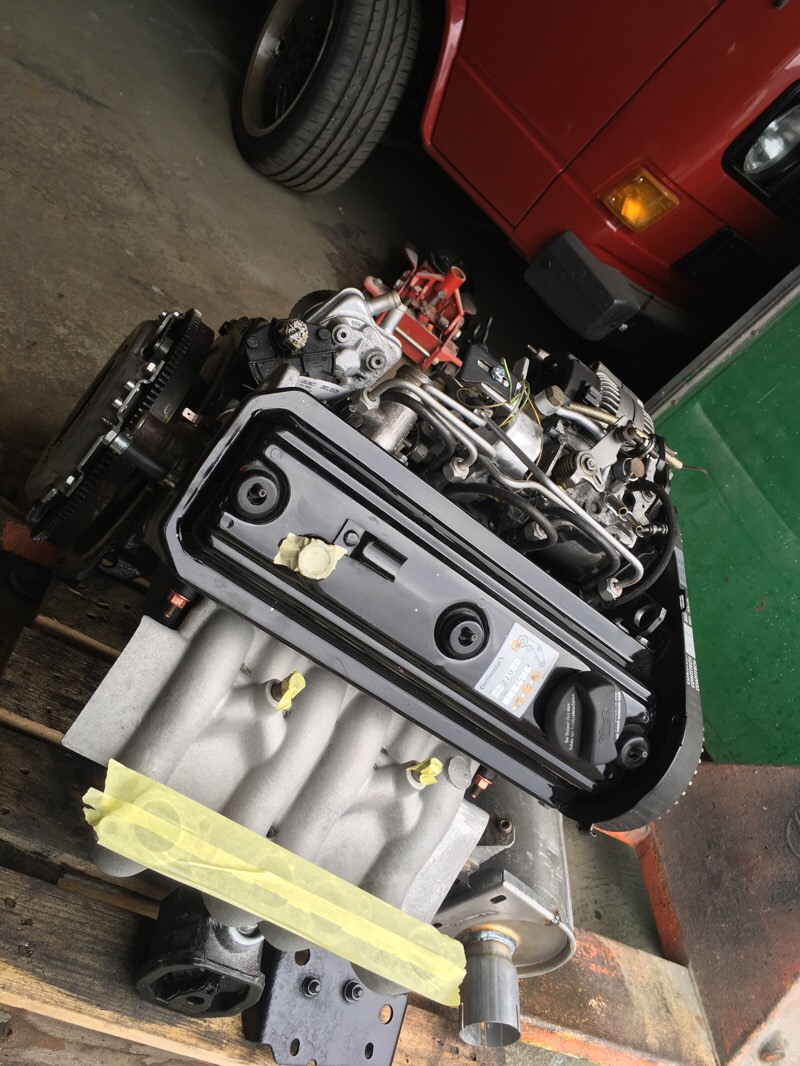
Yesterday I finished and installed the complete exhaust system. You could use the original 1.6 CS exhaust system if you take the 1.6 header, that’s the easy way. I choose the hard way, using the 1.9 AEF header. Why? Because the exhaustheader ports and outlet are bigger than the 1.6 CS. Which means a little more HP. The problem is that the AEF header have a different angle than the CS one, so need to build a new exhaust system from scratch. The AEF header and enginemount need some grinding to fit/clear.
The original exhaust was 48mm, the new I built is 51mm and the silencer is from a Turbo Diesel, for better flow. Original system was one welded pipe, which I didn’t want to have on a car that should drive on crappy roads and trails. If going offroad and hit a stone not only the pipe would take a pounding but also the head on the engine! I used a flex joint, which now makes the system to flex at least 3-40mm, so hitting a stone or something hard now and the system will just bounce or slide over and the head will be more safe. Also removing some extra vibrations to the car itself.
#vwt3overland #aefconversion


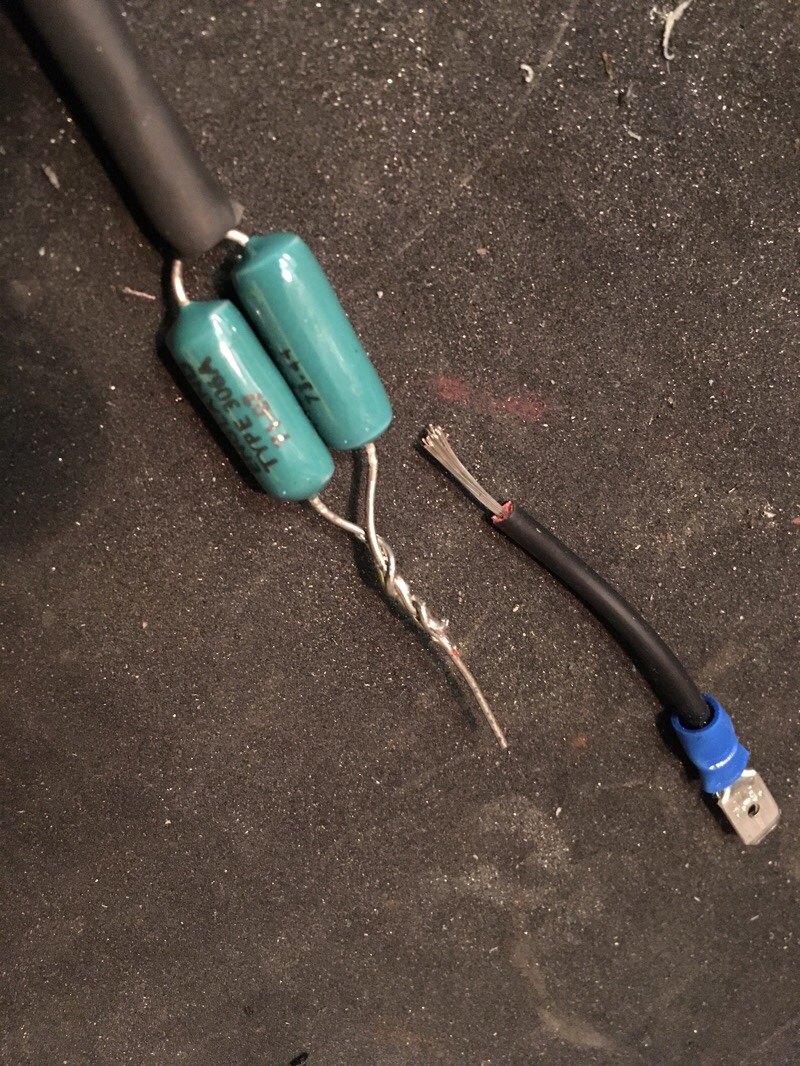
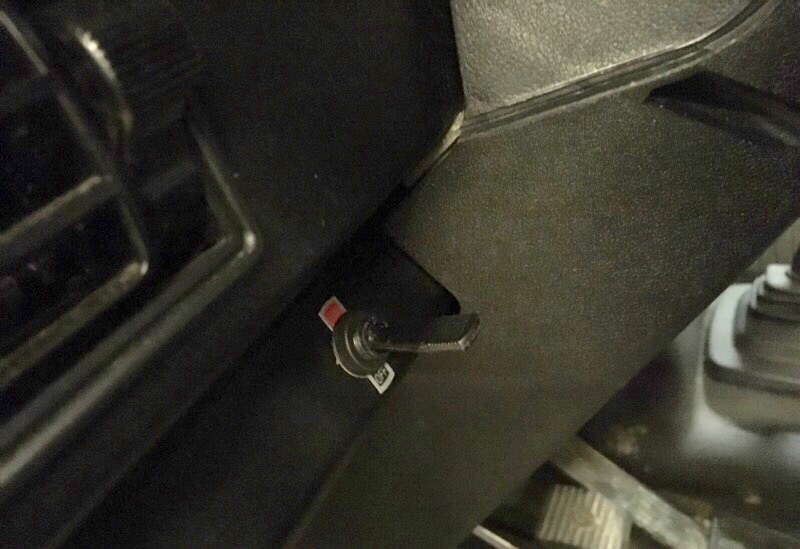
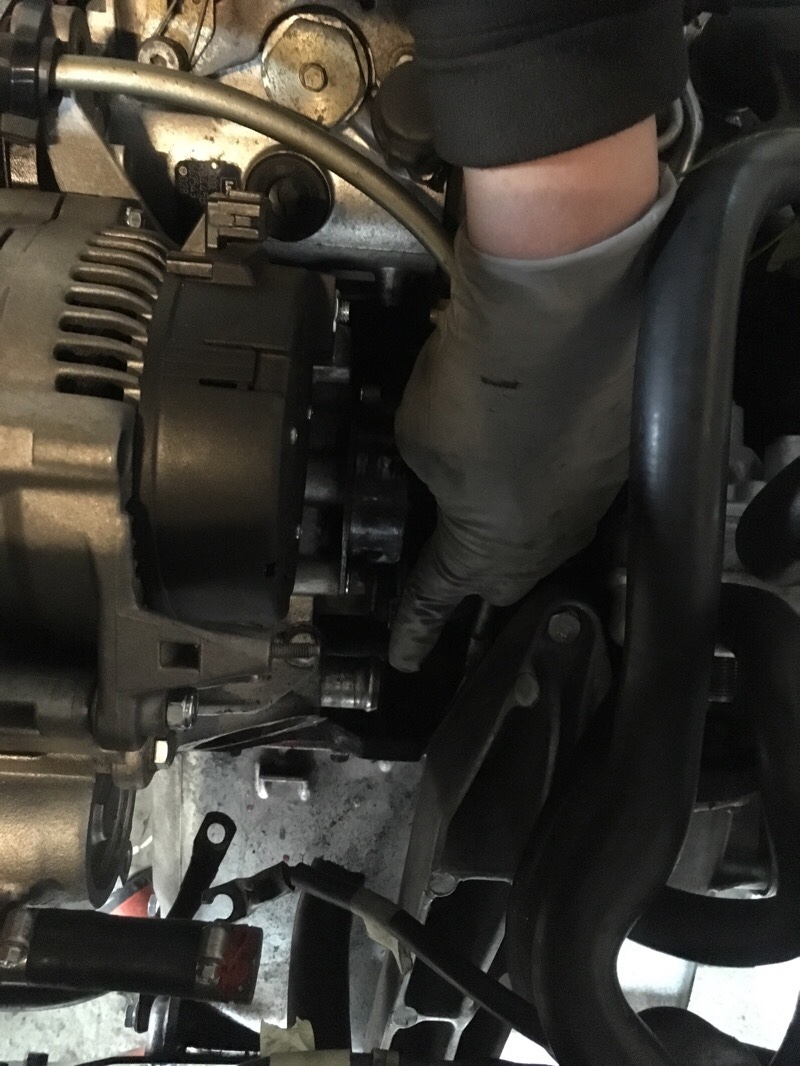
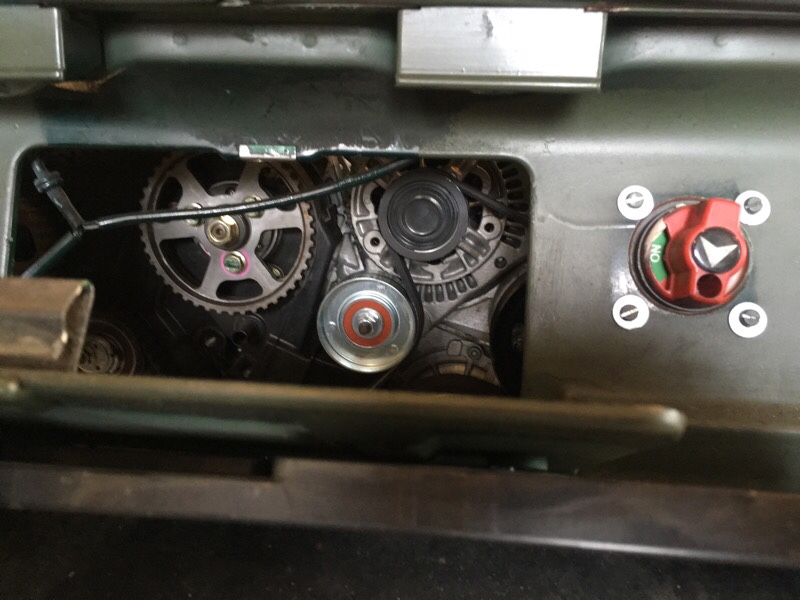
Now with the engine and transmission installed, left to do is connecting electrical wirings and coolant hoses. The AEF engine used a different glow plug relay, but the original VW bus T3 glowplug relay can be used with some modification. I soldered two resistors of total 580ohm to the temp sensor wiring (at the waterflange at top of the engine, black/blue) this will trick the relay and let it glow a little all the time which is needed for the AEF to run clean/nice. The grey/green wire from the pump works like a electric choke at cold starts and can be connected to a timer relay for about 20sec. I bought a cheap timer relay from EBay that would probably work but it was so brittle and crappy. So I didn’t trust it, I just ran a wire to a switch on the dash, will work like a manual choke, almost like original but electrical rather than mechanical, bullet proof too.
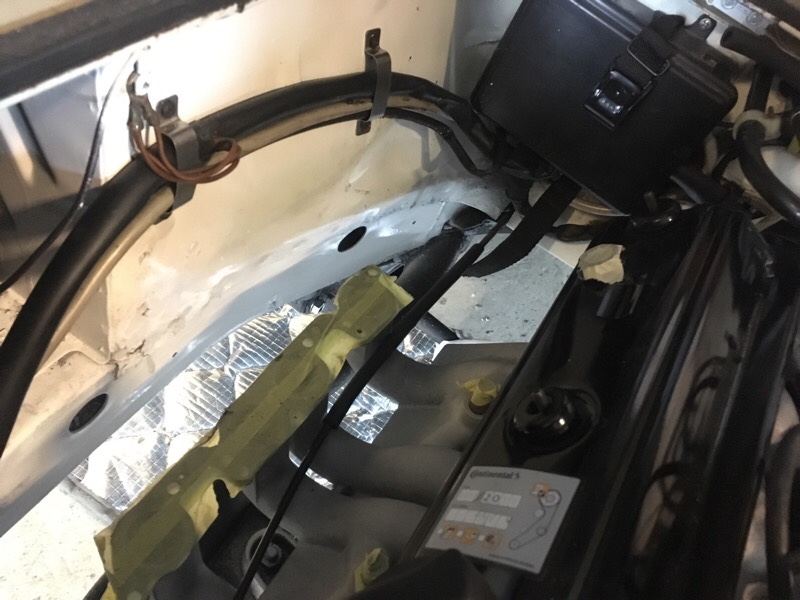
Since the old CS intake and air filter box is installed on the little taller new engine, the wires in the engine compartment beside the airfilter needed to be moved upwards (around 60mm) to make space for the filterbox.
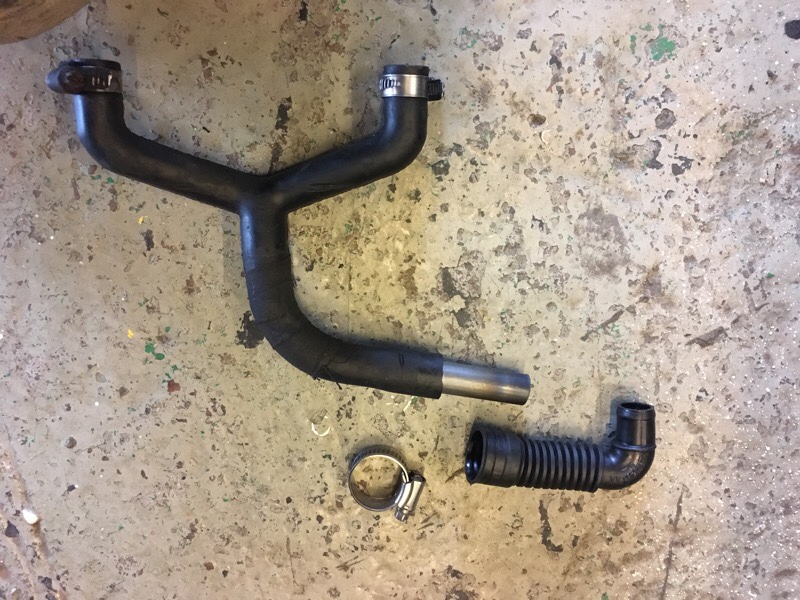
I found the diameter on the AEF water pump flange bigger than the old CS which made it impossible to re use the 90degree coolant hose. So I ordered a new 25mm 90degree coolant hose that will be jointed togheter with the old hose.
The crankcase breather need to be cut off in the end, and joined (with metal pipe insert) with the AEF hose. The connection at the cam cover is different on the AEF.
If any one need finished 587ohm resistor for the glowplug relay, let me know and I can ship some out. All you need to do then is cut the wire, crimp on spade connectors on both ends and plug in the resistor. That’s it! info@maindrive.org

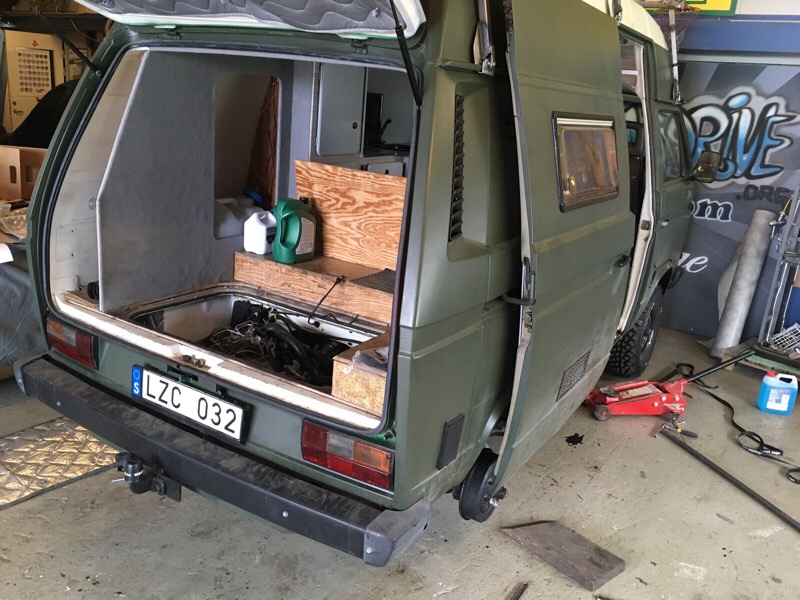
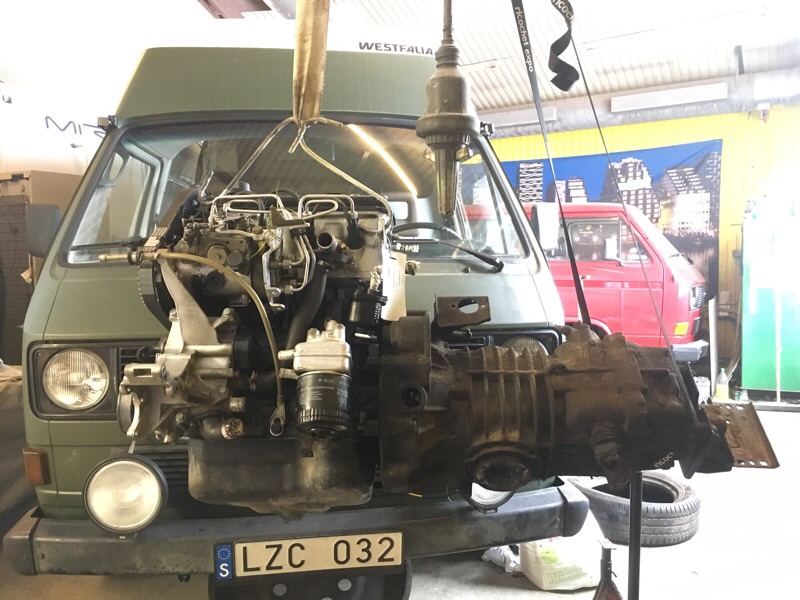
Now the engine and transmission is bolted back in the bus, fits perfect! Left to do is all small stuff (But time consuming!) wiring, 587ohm resistor to the glowplug relay wiring, and a timer relay, install all hoses, fill up the coolingsystem with water, gearlinkage, cables, oil and filter, fill up all fuel lines with diesel, prime the pump, build a new exhaust and much more. Here comes some new pics…
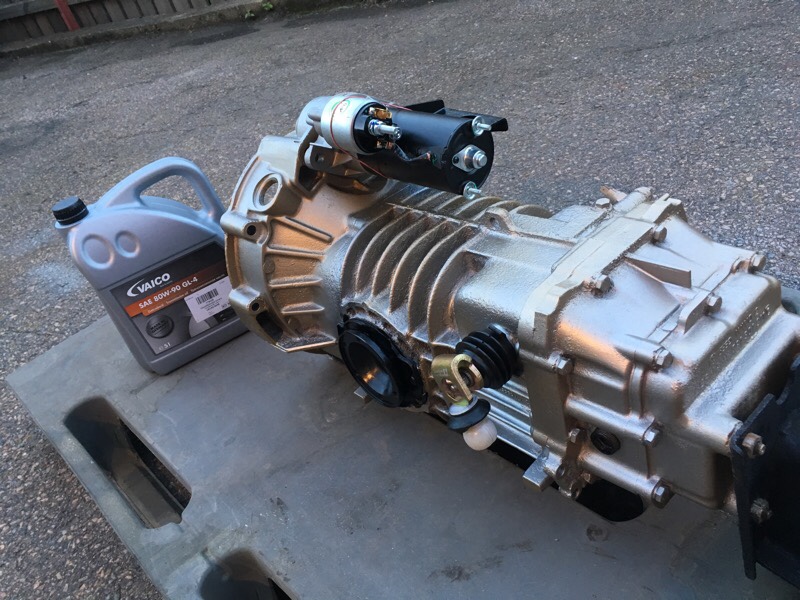
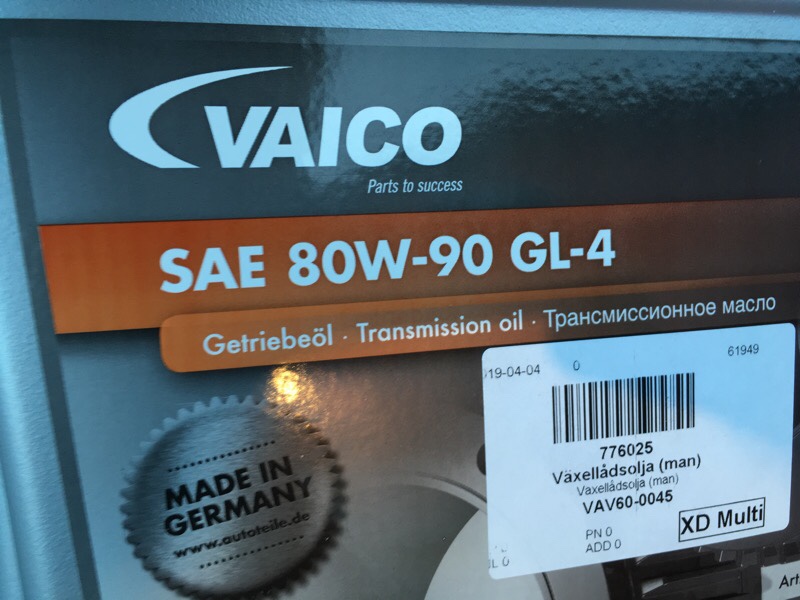
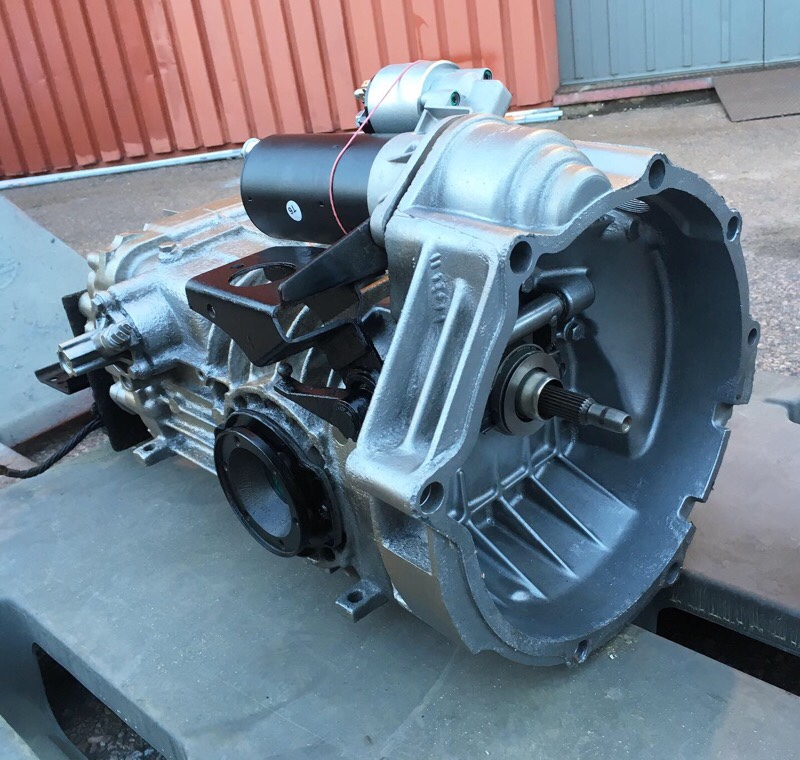
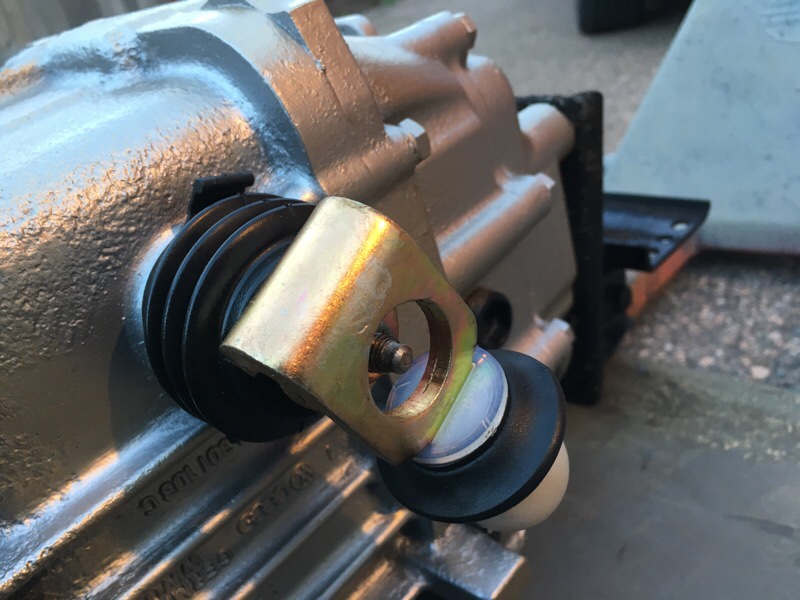
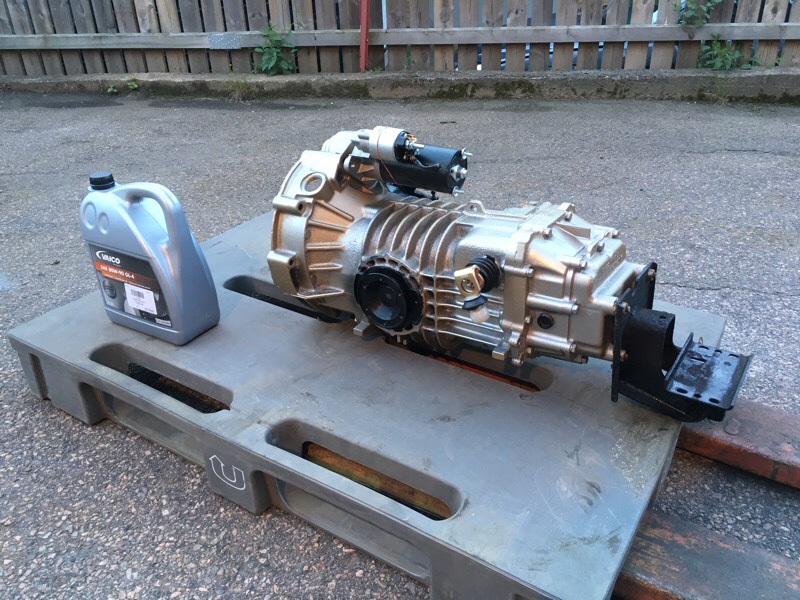
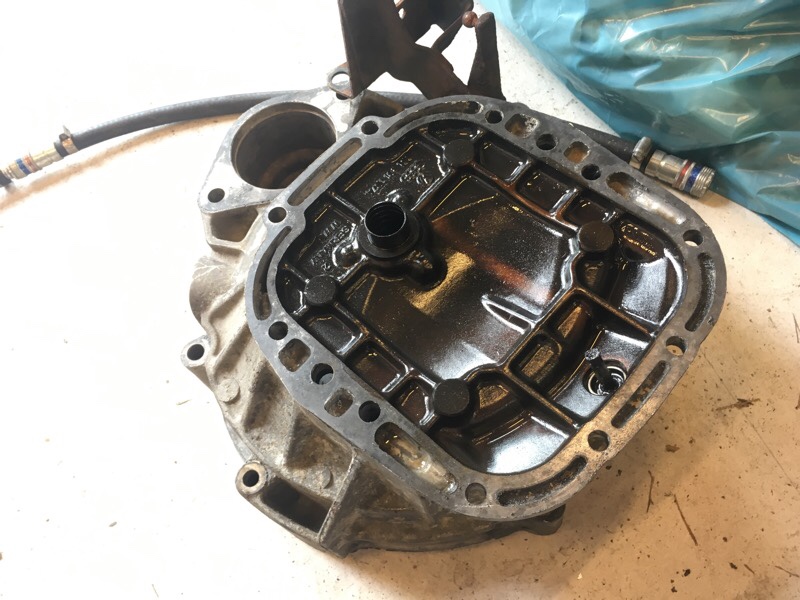
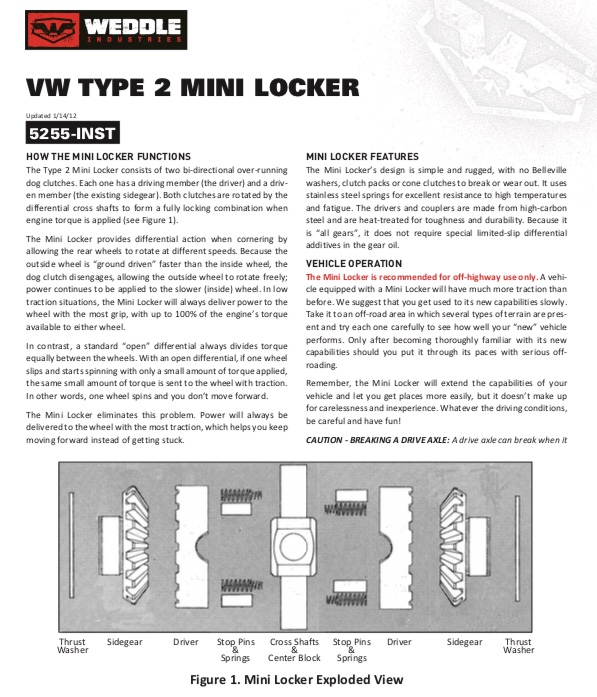
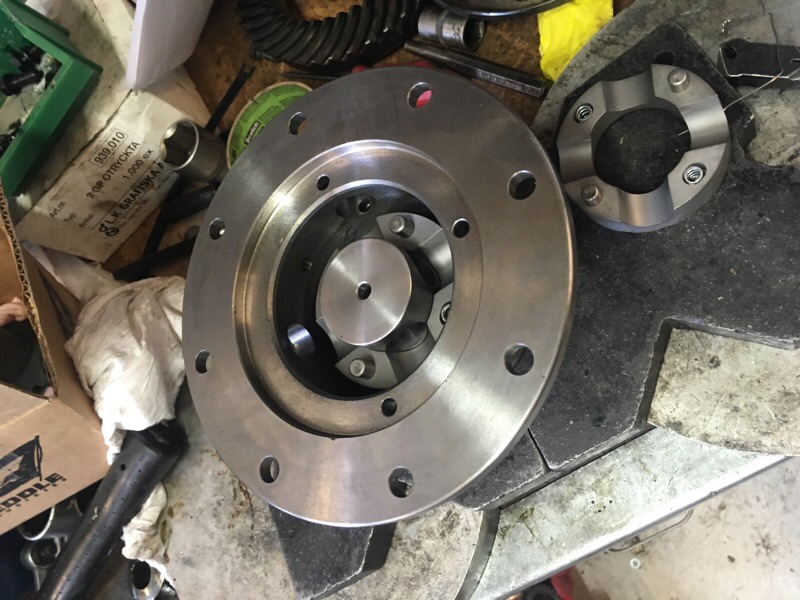
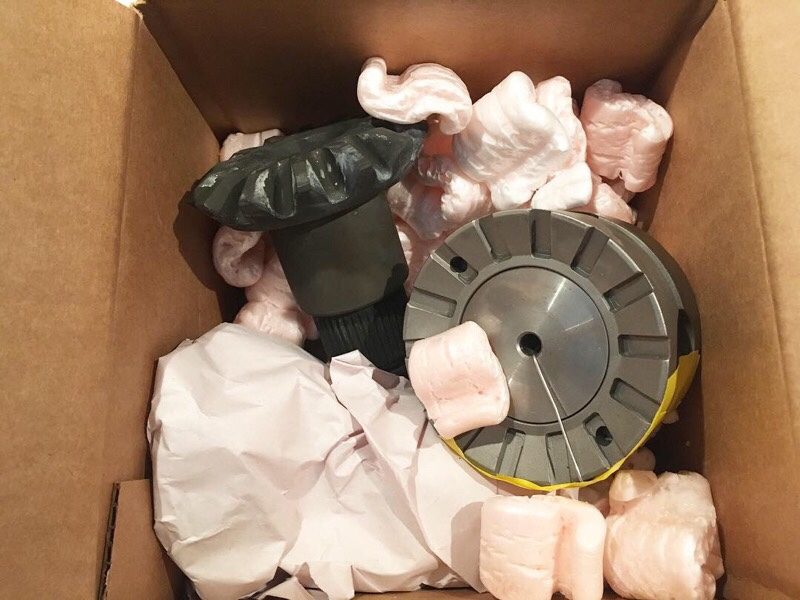
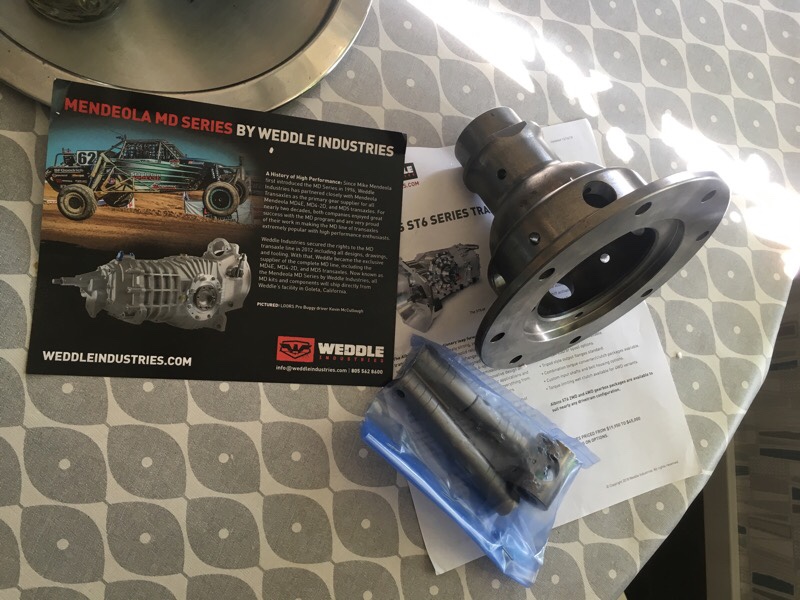
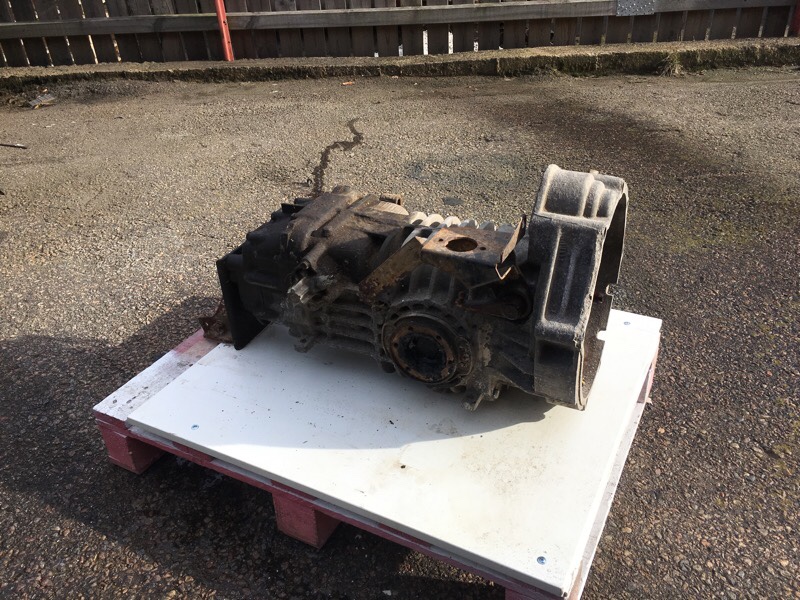
Together with Hans Landenius a offroad transmission was built. A mechanical difflocker from Weddle Industries. This locker engages when stamping on the throttle and locks up to 100%. Which for example a LSD (limited slip differential) never do. That’s why I choosed a locker over LSD, to always have maximum traction when it really needs. The downside with this locker is that it’s noisy, clicks when turning corners (axle tooth’s is “sliding” over the cogs in the differential), but I don’t care so much about noise.
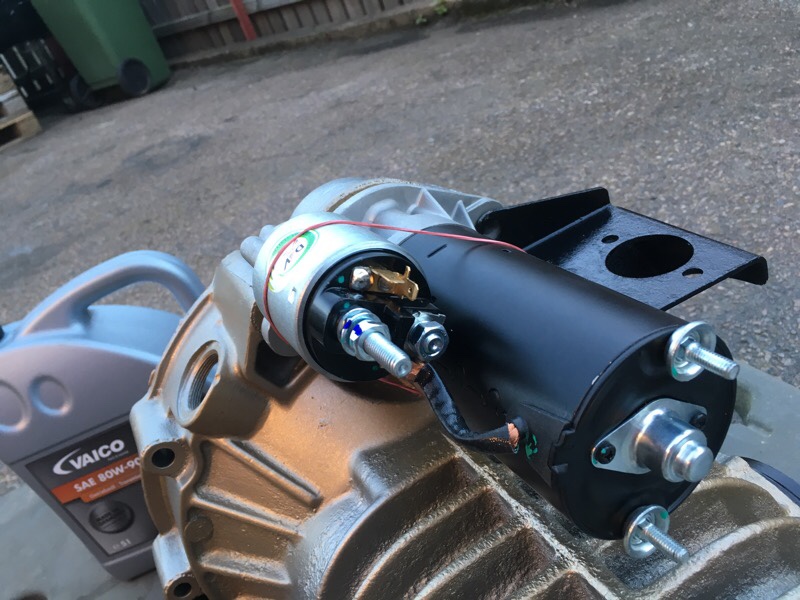
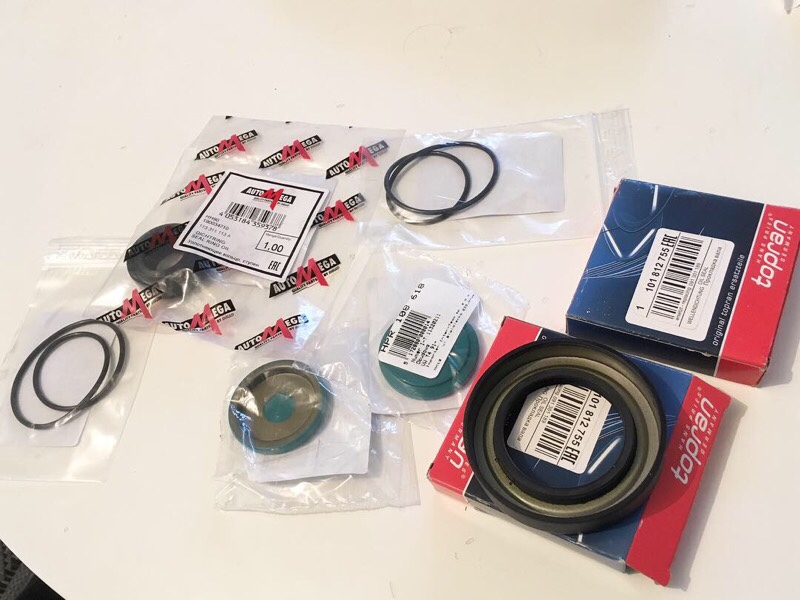
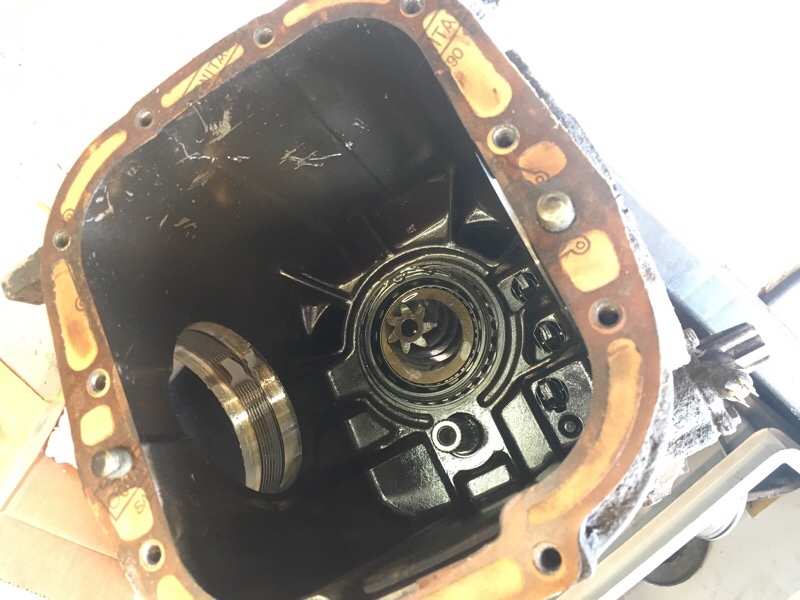
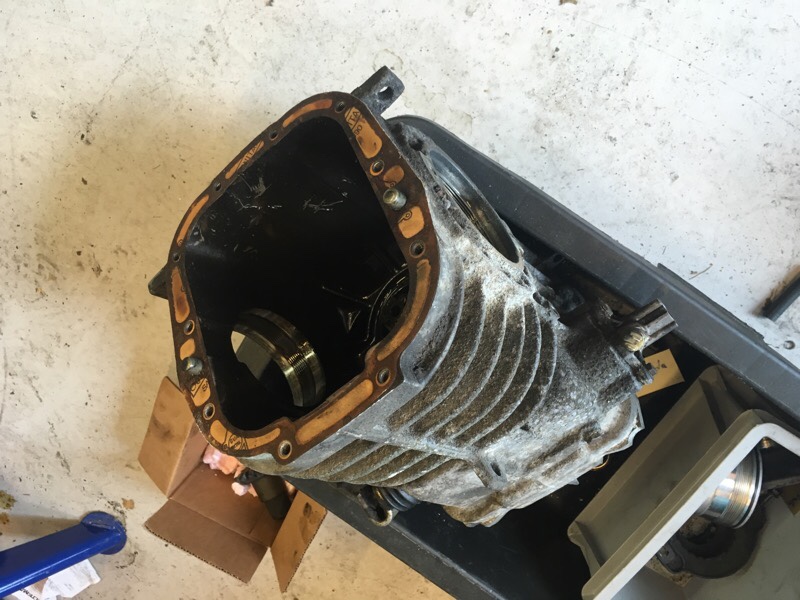
The old differential had only 2 spider gears, so it was replaced by a new stronger “Super diff” that’s made for 4 spider gears. The spider gears was the replaced with the spring loaded locker. Everything was bolted back together, measured with micrometer. Then all seals was replaced with new. New starter and throw out bearing was installed too.
#vwt3overland

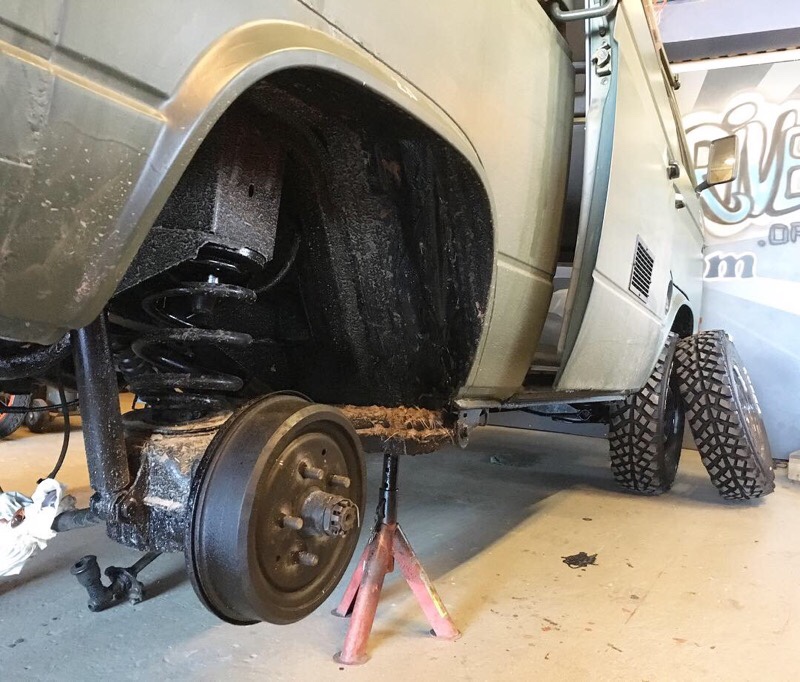
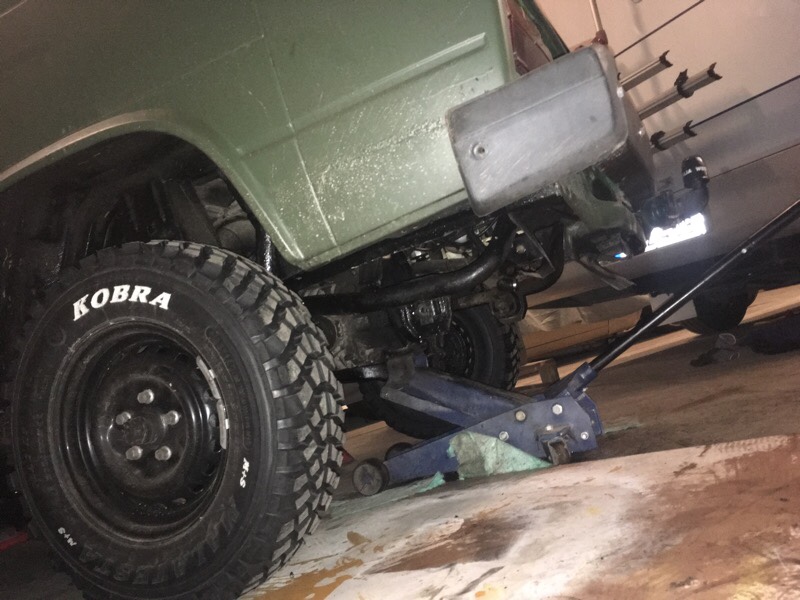
Stuff is getting done, slow but steady at the moment, with two small kids there is not much time left! I have lifted the rear on the 30mm with spacers and I will lift the front 30mm too, but later on. Engine is ready to go in and transmission is getting built with Superdiff and locker while I write this. A custom beefy exhaust is made too, with a turbo diesel muffler for better flow.
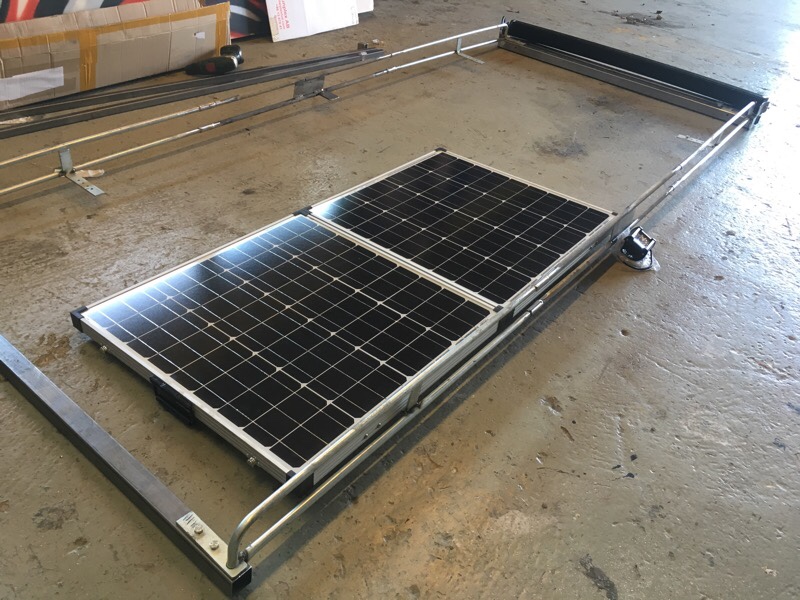
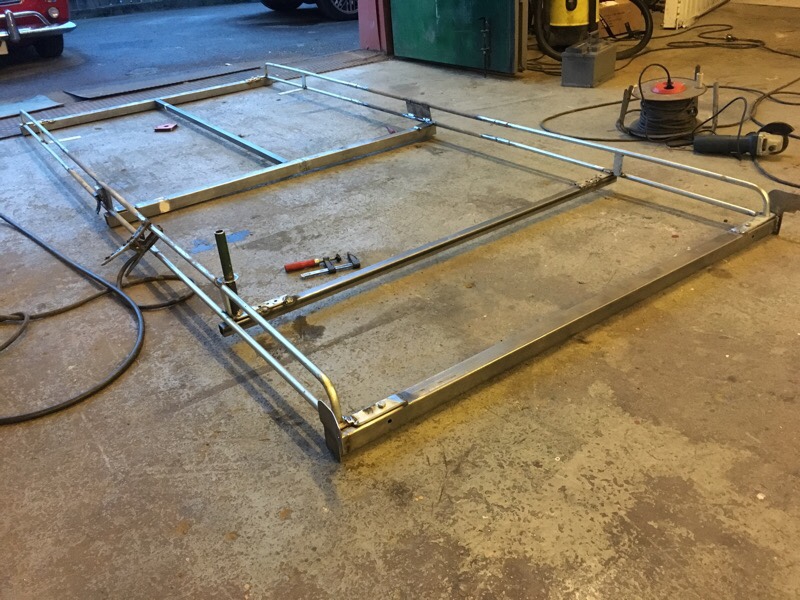
I have a Thule awning with safari room for the bus, but it’s not possible to install it with ordinary brackets in the droprail (highroof slidingdoor) and I don’t want to drill it in the roof directly. So I want a roof rack that the awning can be bolted too instead.
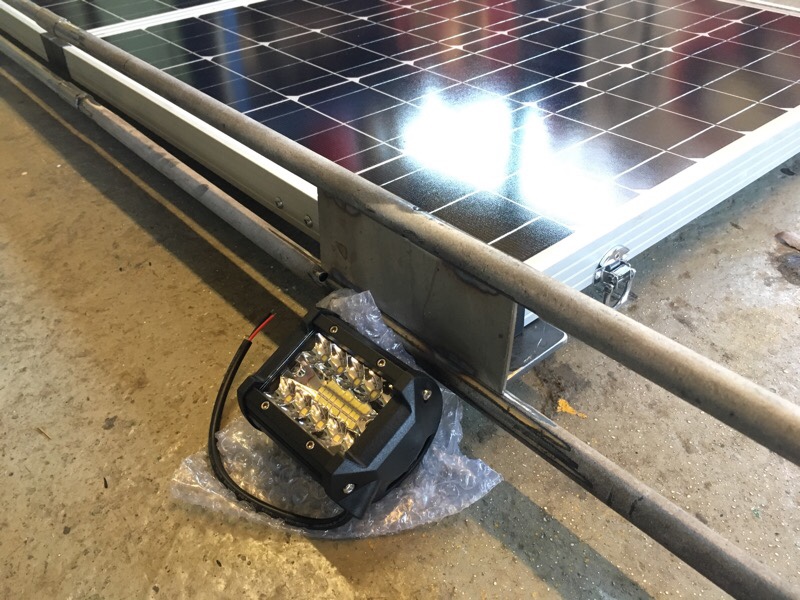
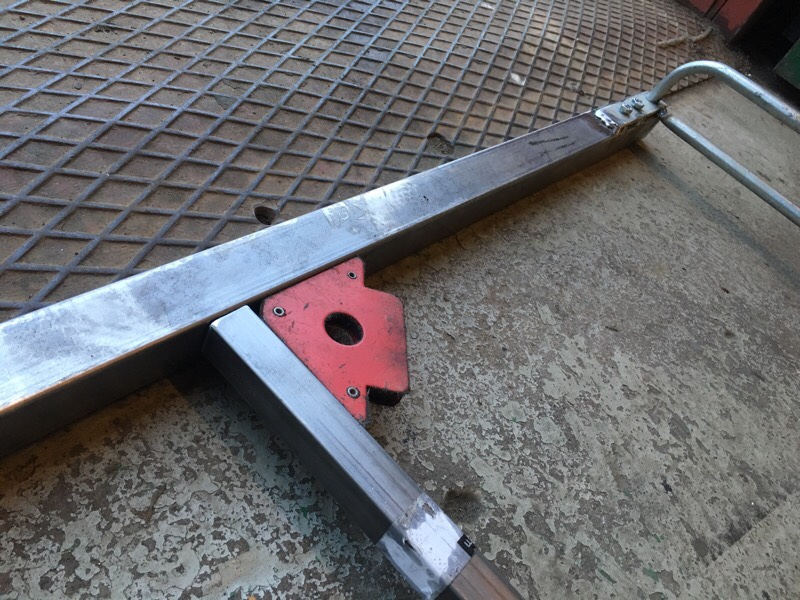
But it’s not possible to buy a “bolt-on” complete Expedition roof rack to a VW T3 Highroof bus so I need to make one myself. I had a old roofrack laying that I could use/modify. I have been extended it 100cm and widened 40cm (total 290cm long and 130cm wide). 1000w LED light bar 133cm long, two 100w LED flood spotlights on each side, portable solar panel 120w (can be removed from rack easy and plugs into a 10m extended cable so it can be moved with the sun for maximum power). CB radio antennas, digital TV antenn/scanner and ladder is being fixed too.
Just need to make legs and brackets then it will be painted in satin black. Then Ready for safari and zombie apocalypse ?
Instagram:
@maindrivegarage
#vwt3overland
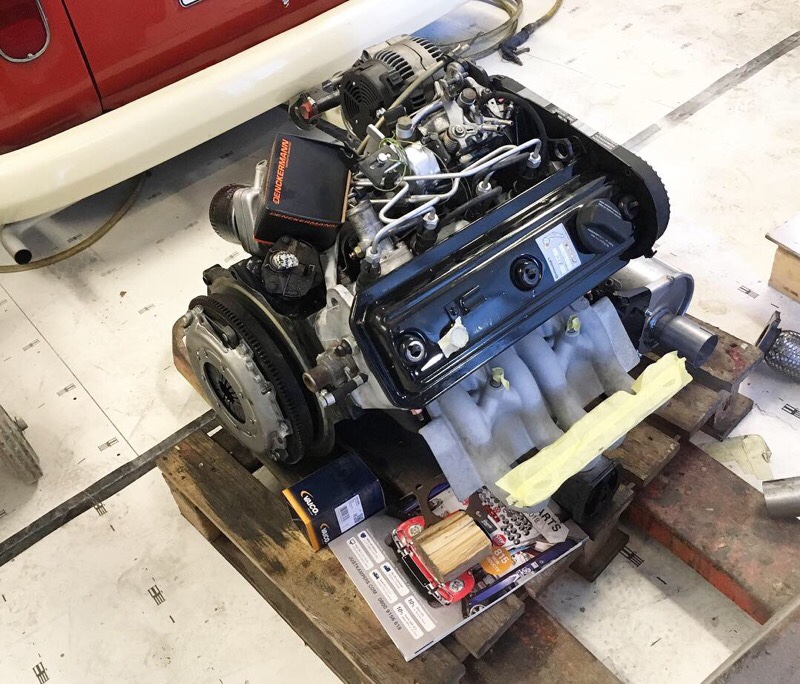

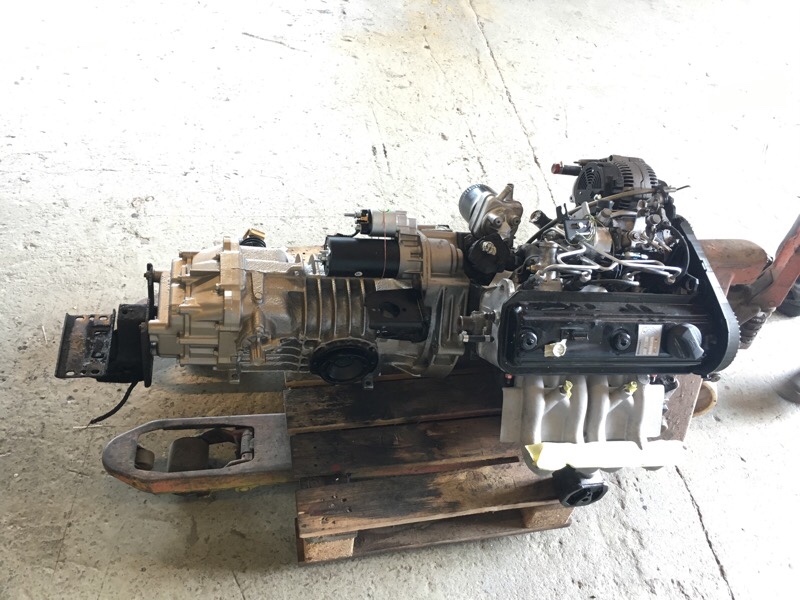
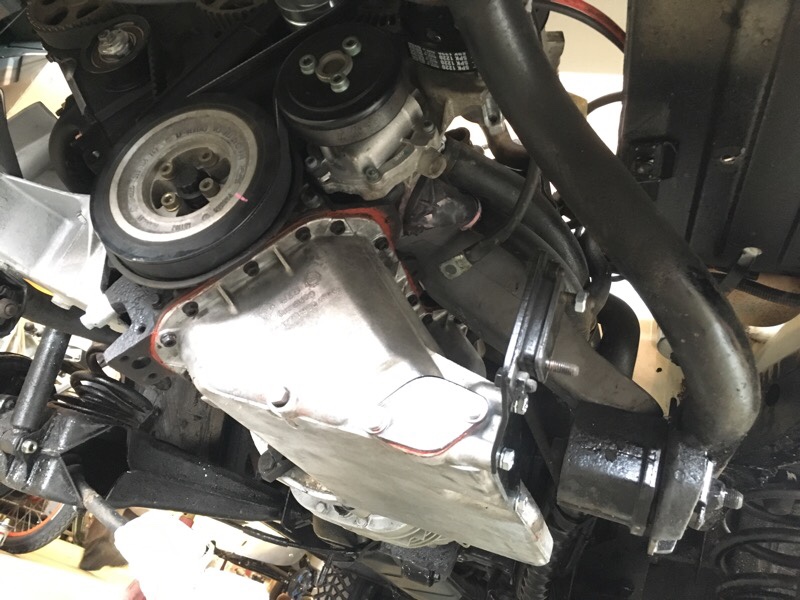
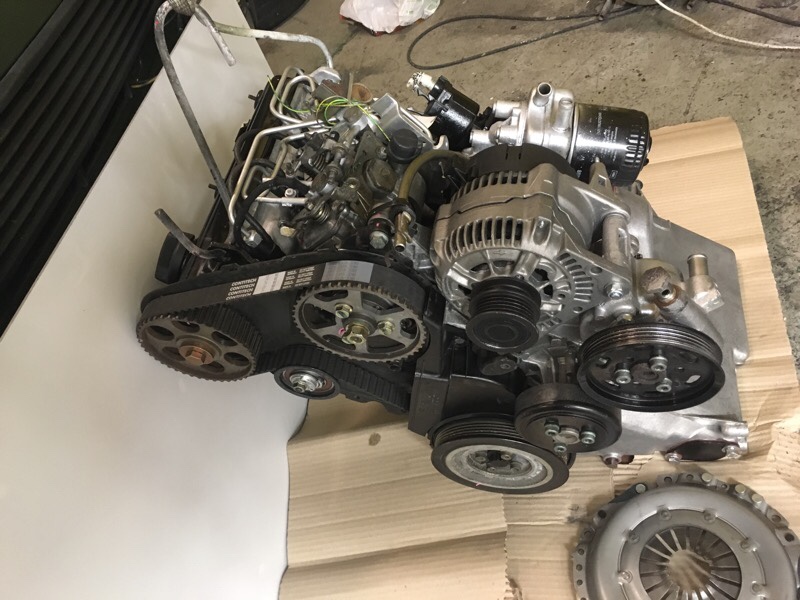
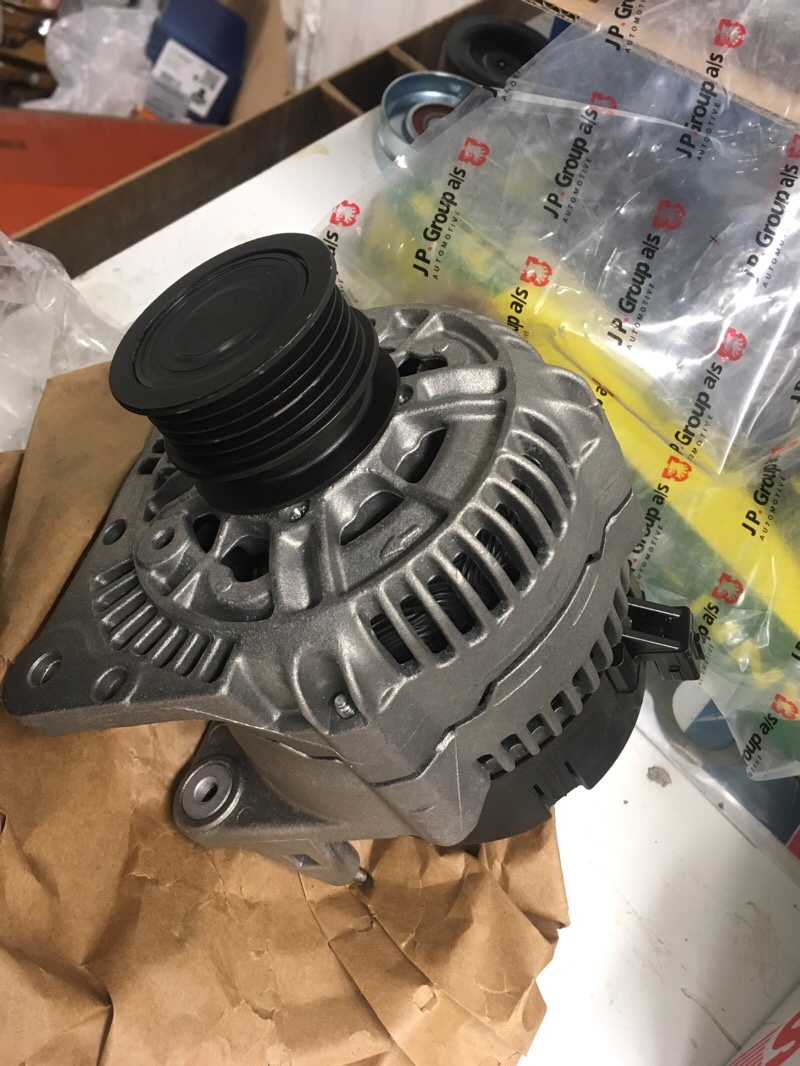
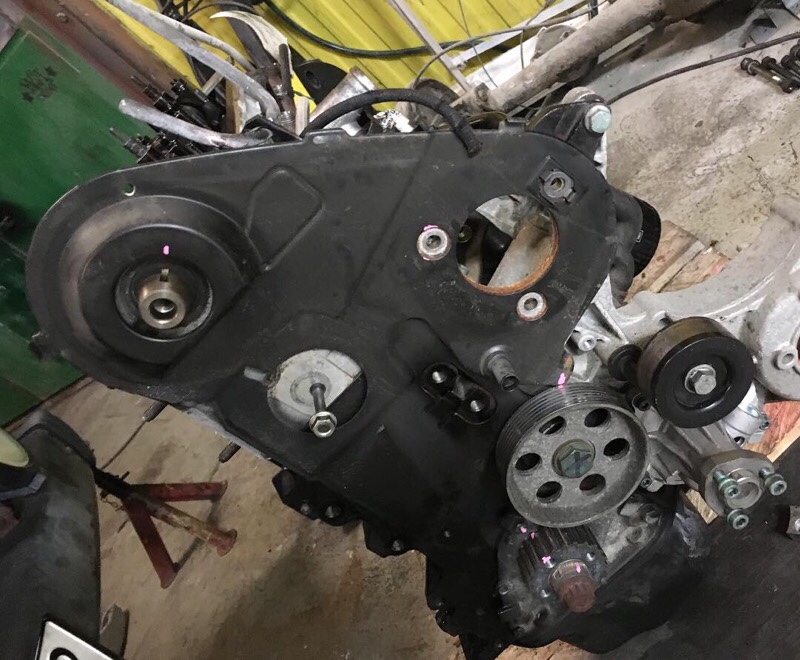
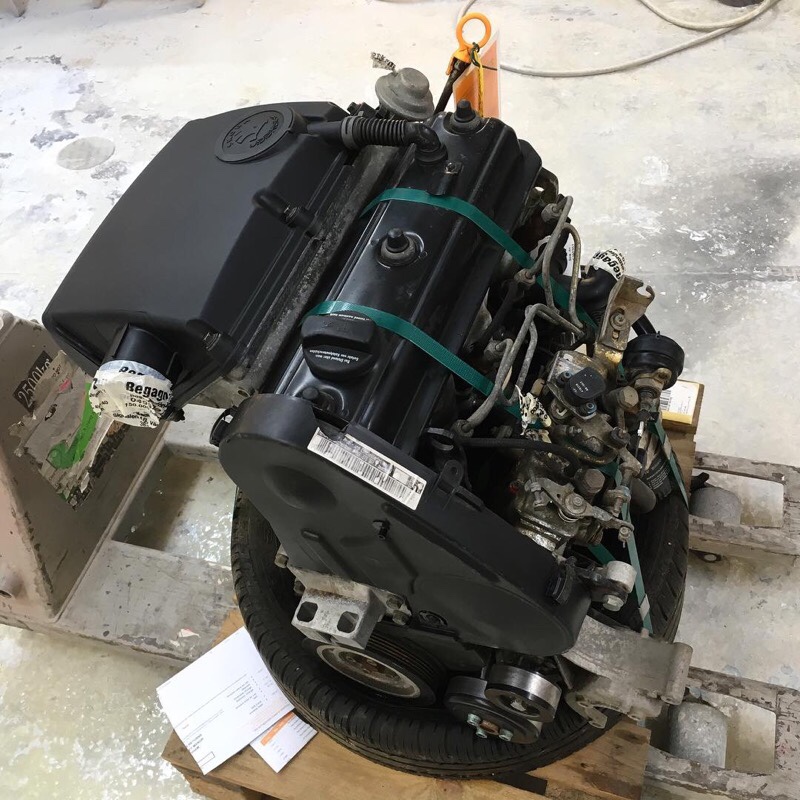
New alternator, servo pump, fan belt, clutch, oil pan, exhaust, intake manifold etc is now on the engine.
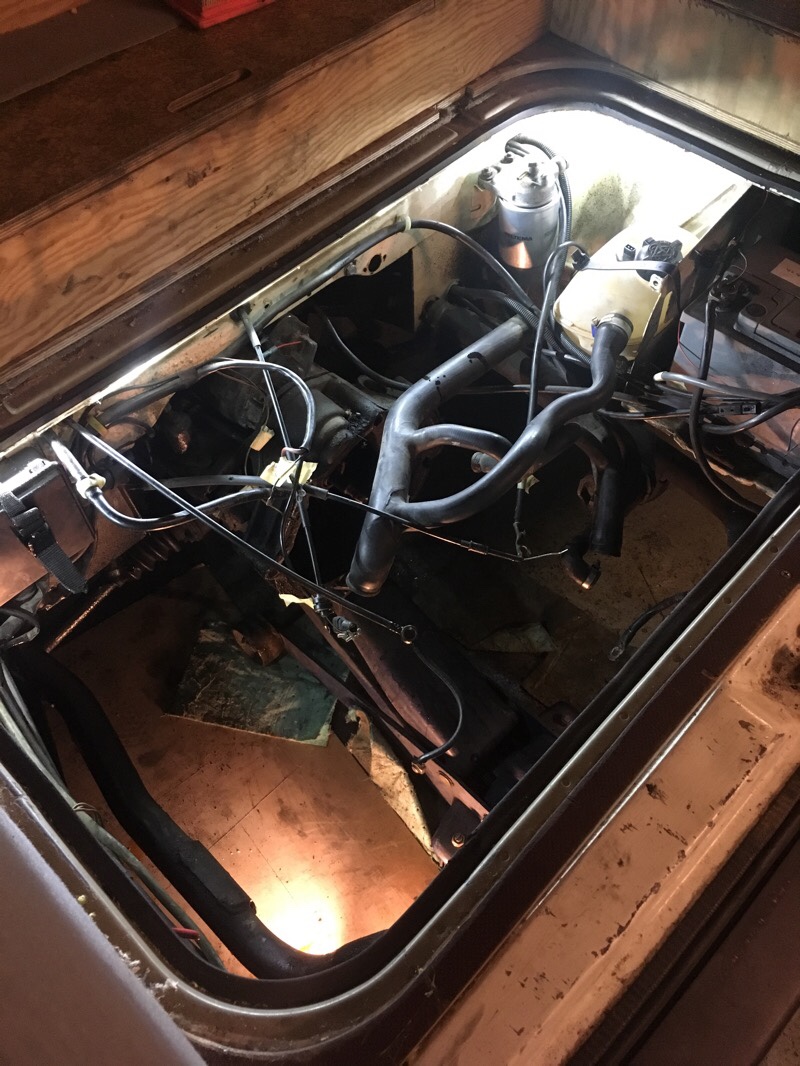
It is almost ready to go in, just need to fabricate a new exhaust system. And get the transmission ready with new seals, difflock and new gear linkage bushings etc. Then I will bolt engine & trans together and lift the whole package up in the bus. Then the electric work can begin and later on start up. New radiator is going to be installed tonight…
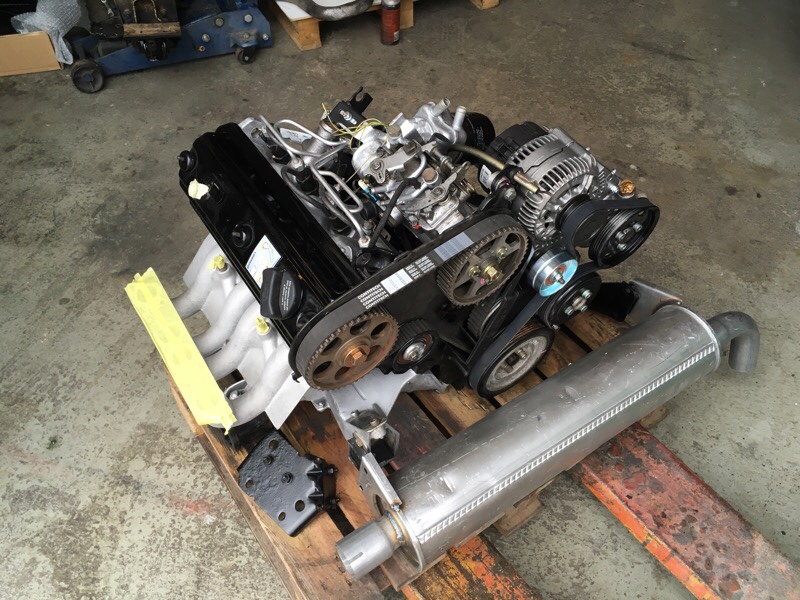

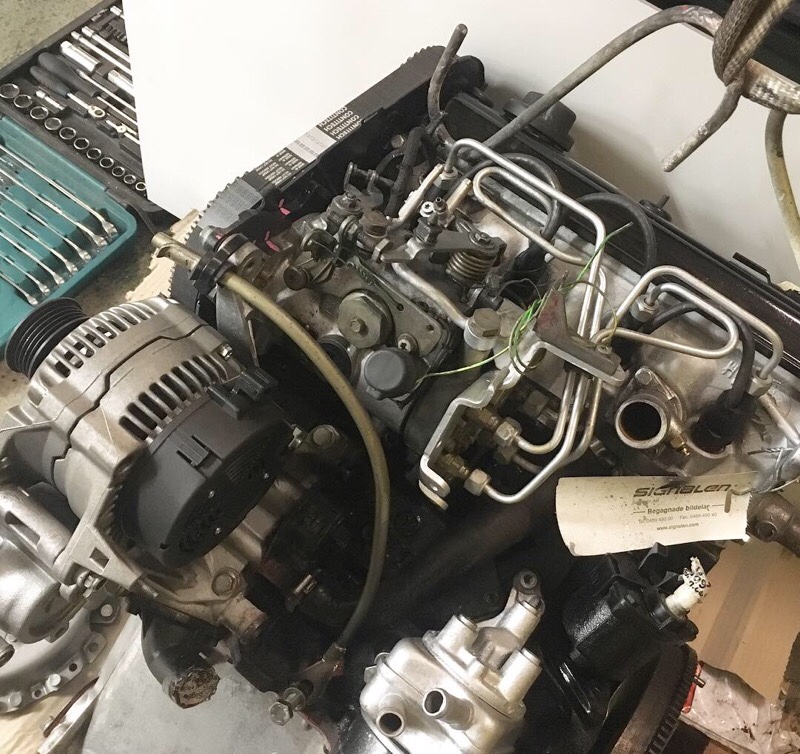
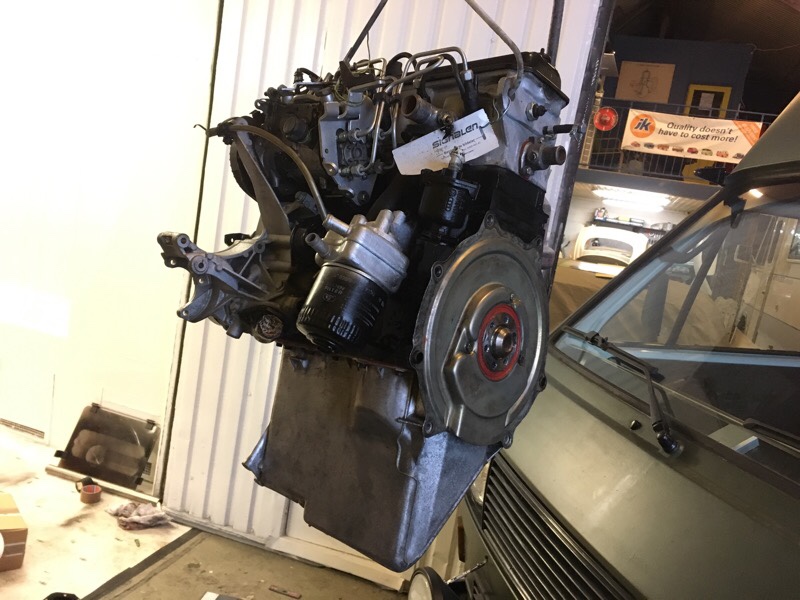

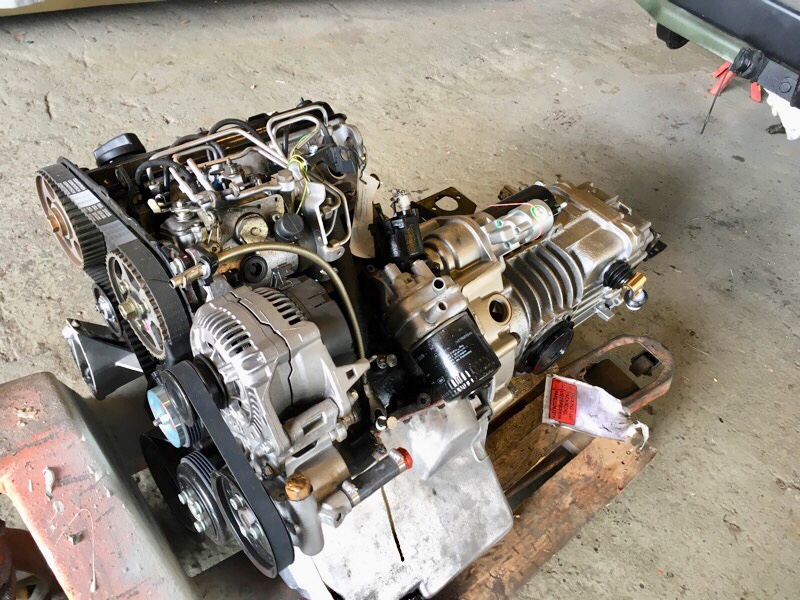
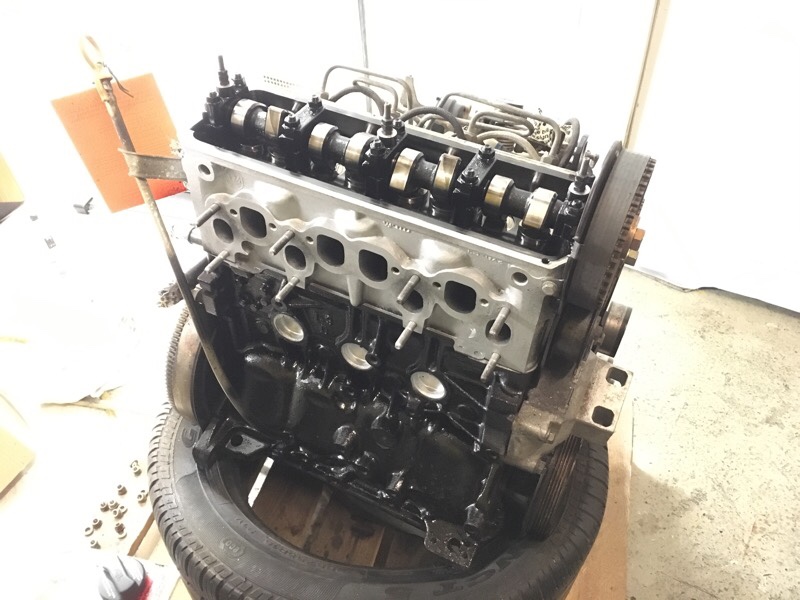
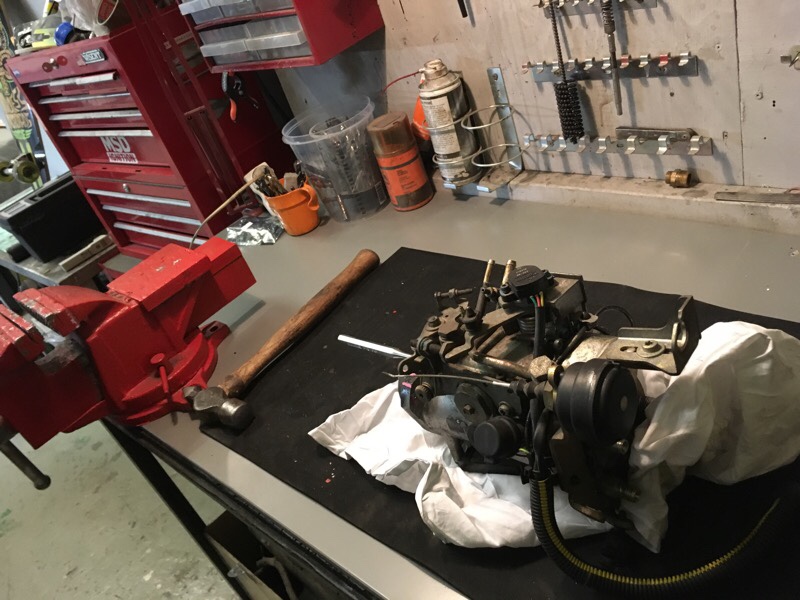
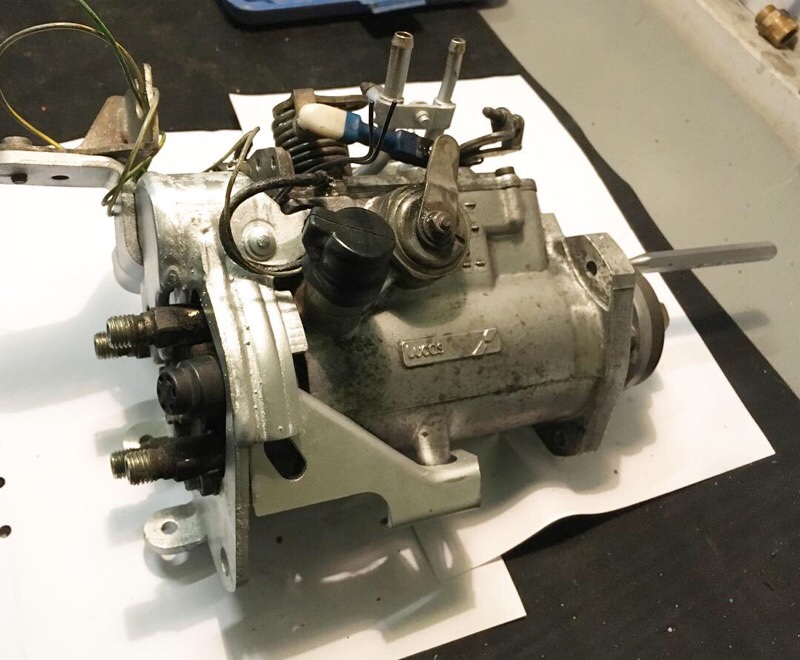
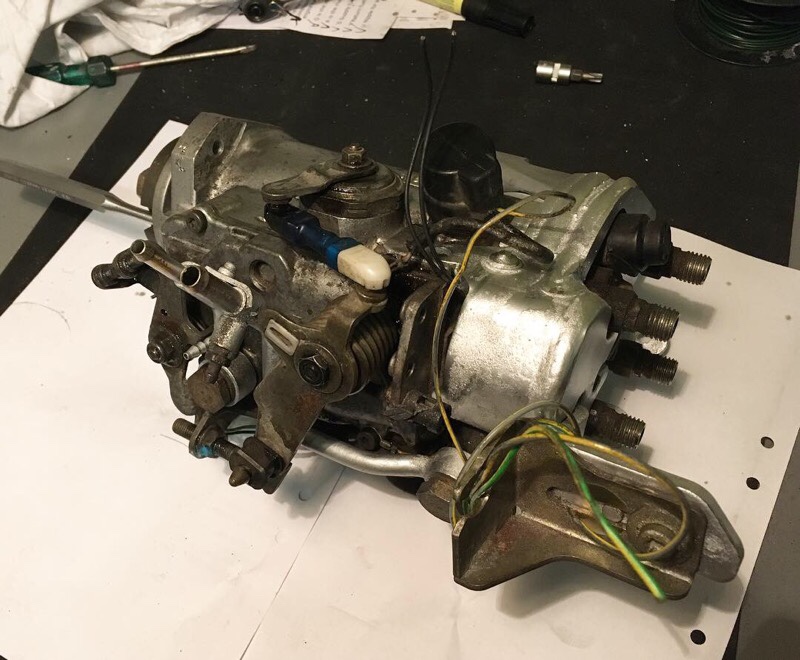
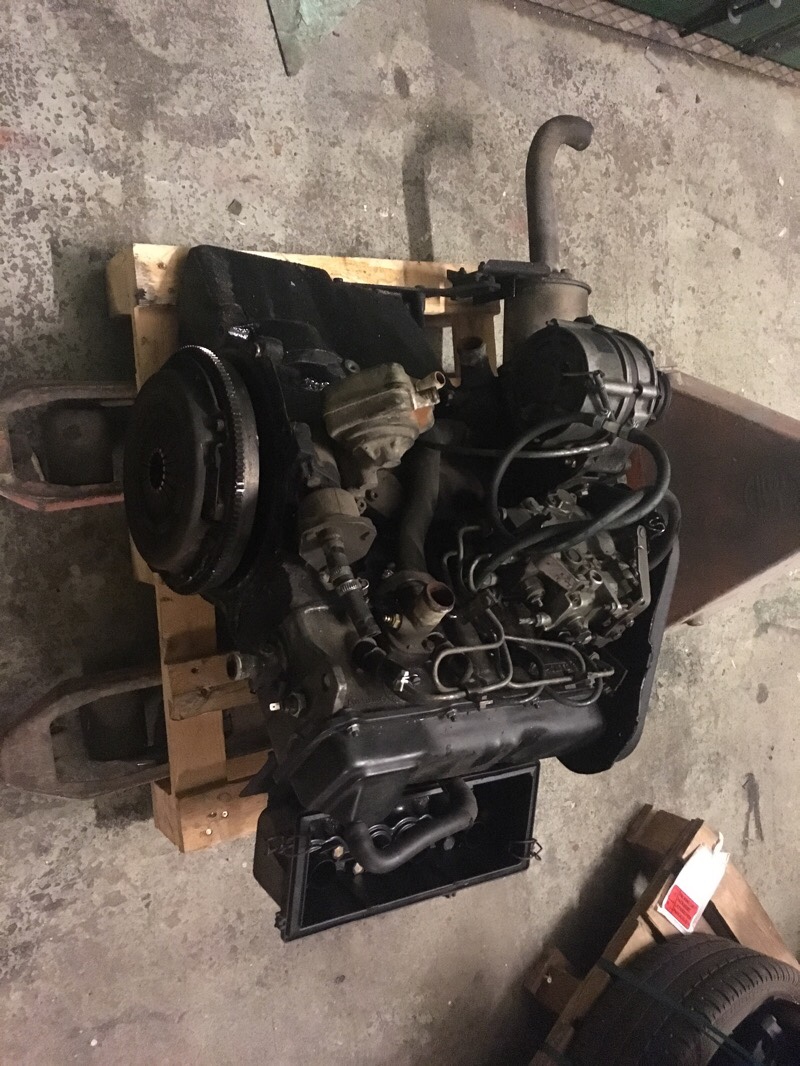
Have got much done on the VAG 1,9 AEF diesel engine the last days. Dieselpump cleaned up and wiring is fixed. Only 3 sensors are used now. There is alot of wiring and electric sensors that is not needed in a van. (removing immobilizer for example). I moved the dipstick hole to the other side of engine, as it is tilted 45degrees in the bus also are on the wrong side. So drilling a new hole in the engine block was needed. And the old was tapped and sealed up with a 12mm bolt. The tube from the AEF was used and modified/bracket.
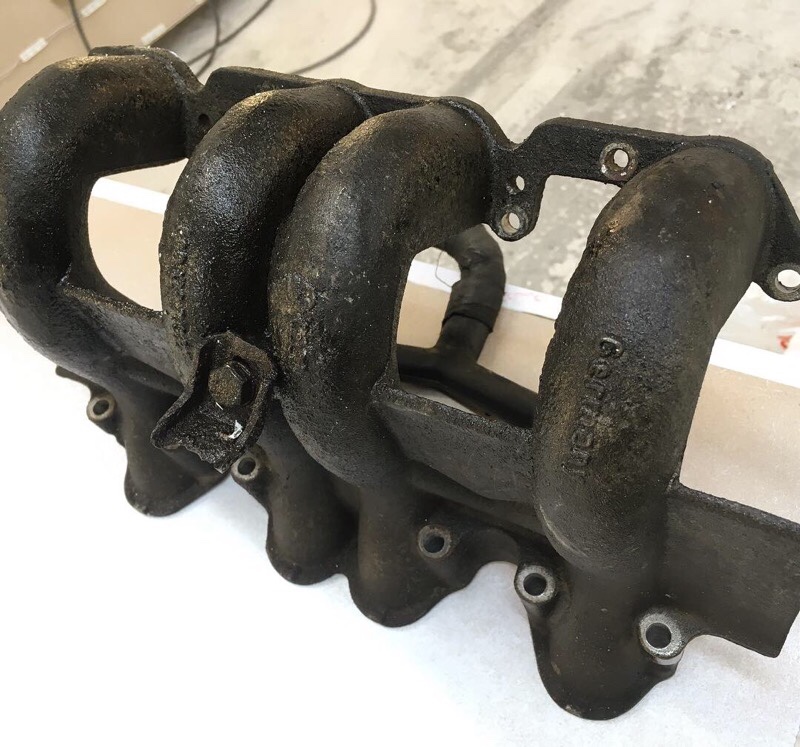
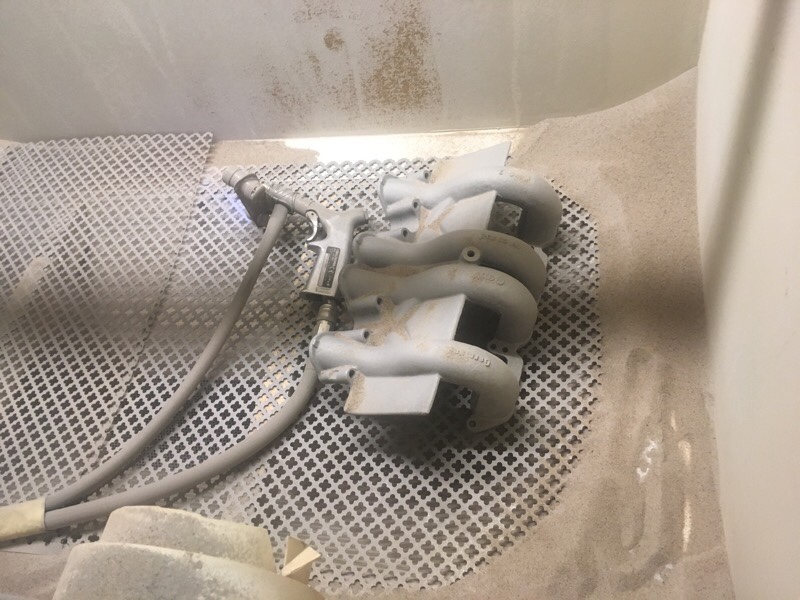
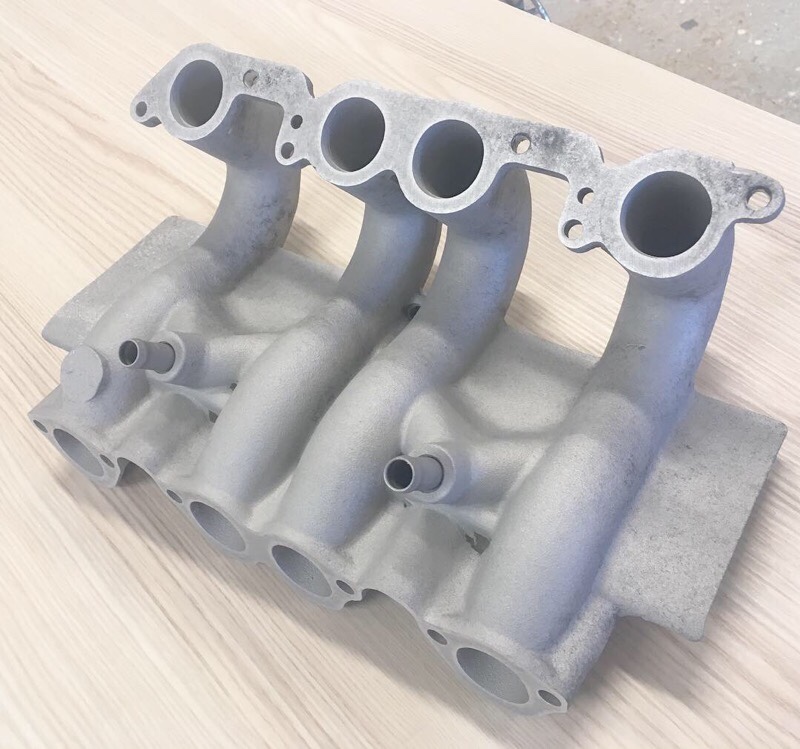
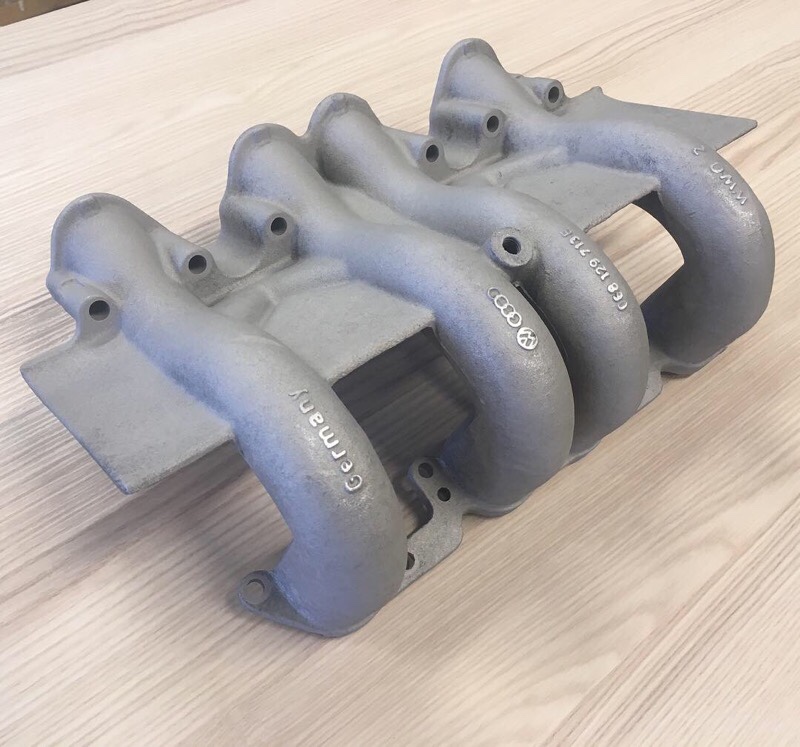
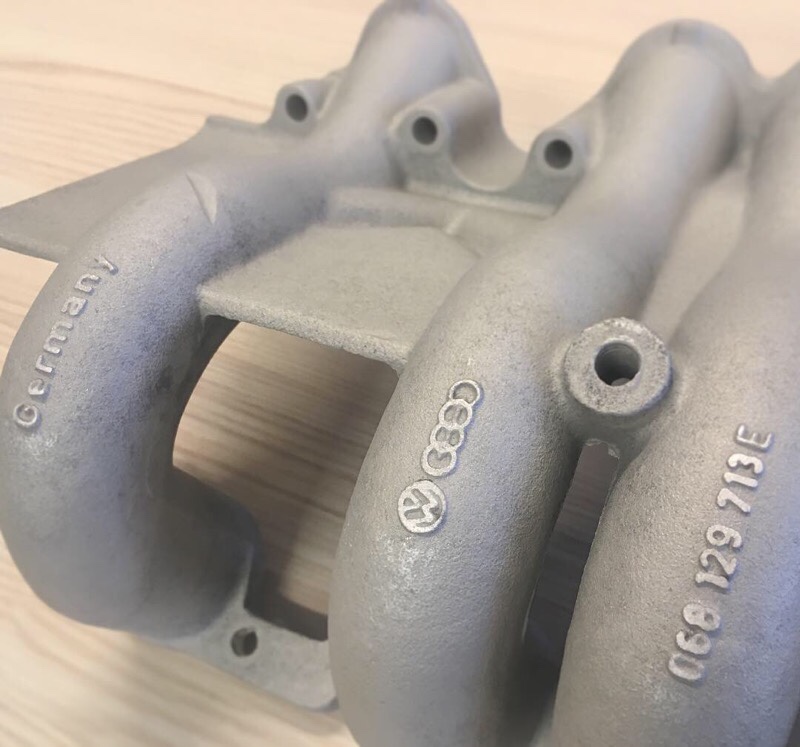
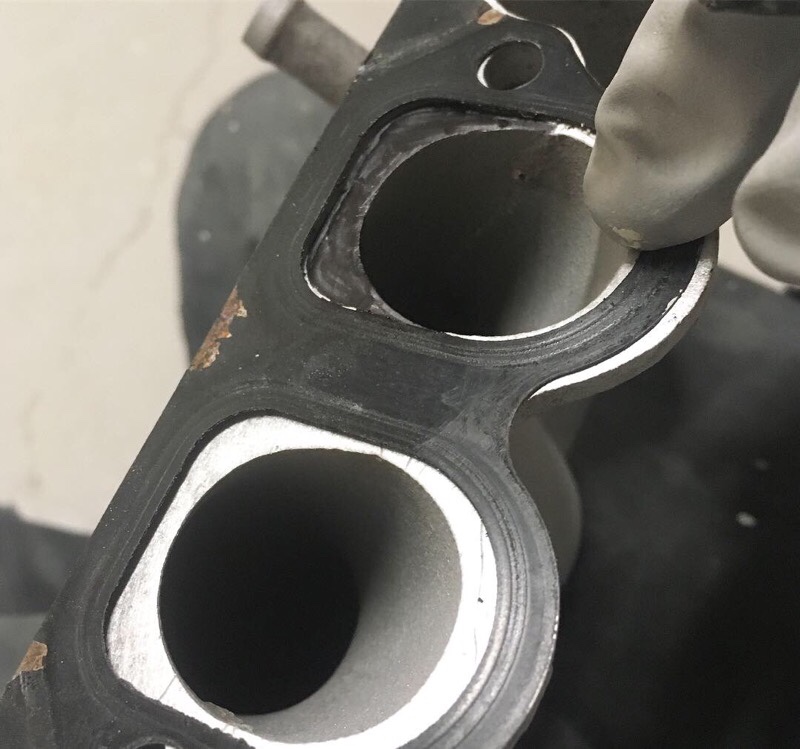
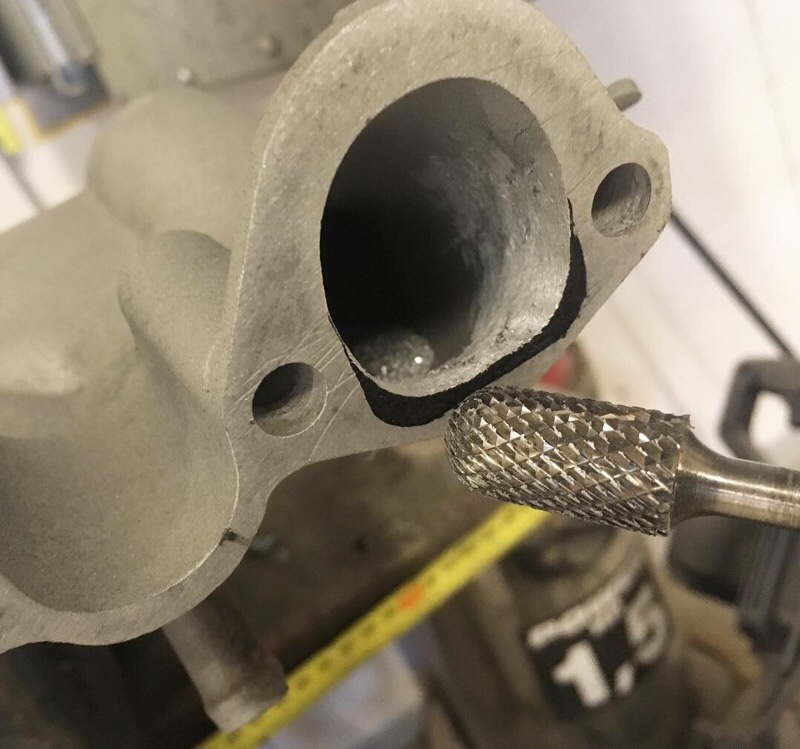
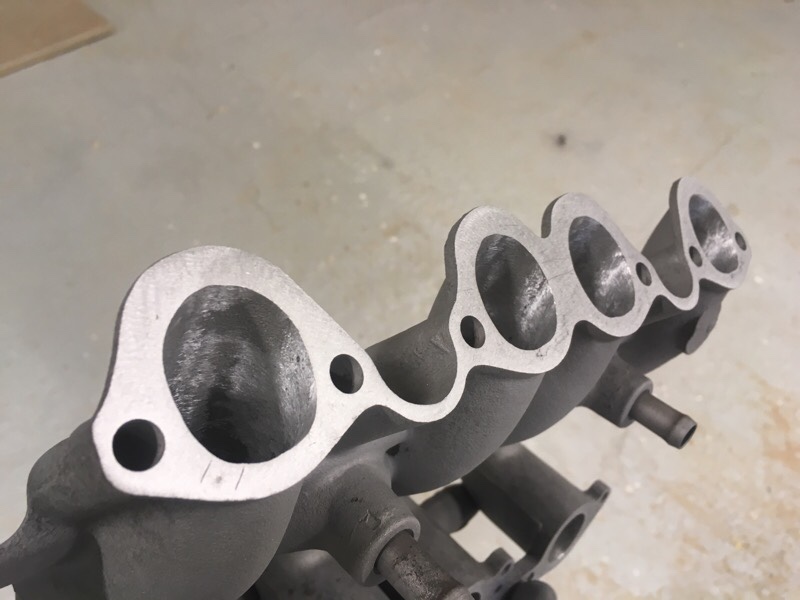
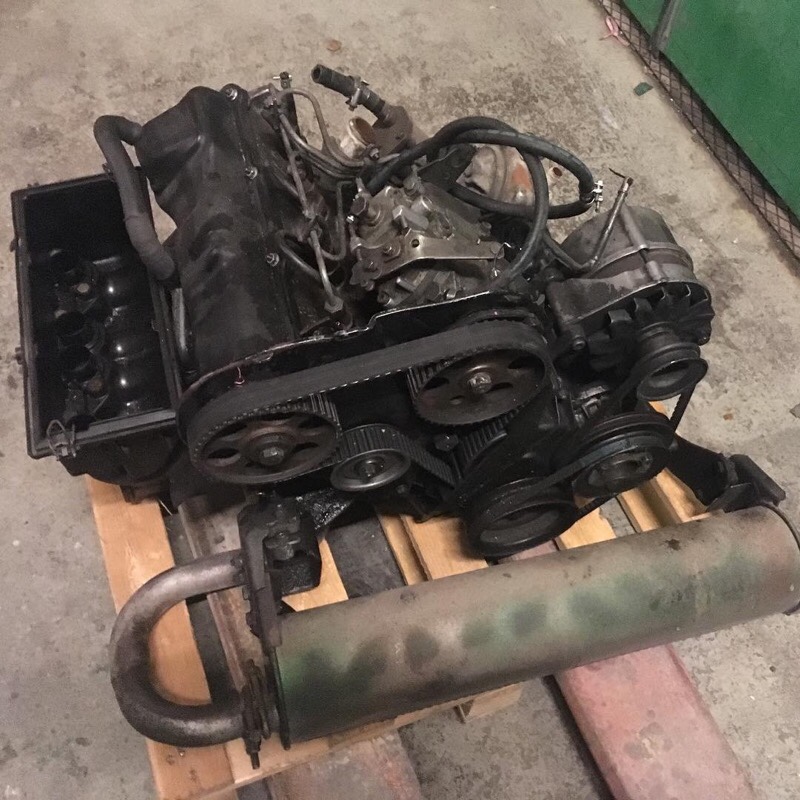
The intake manifold don’t fit in the tight bus engine compartment so the old one from the 1,6 CS are going to be used, it has a better angel/shape that fits inside the bus compartment. But it’s a little smaller in diam so I made a port matching (as close as possible) for better flow. The exhaust manifold, I probably going to use the AEF, its bigger in diam than 1,6 so will improve the performance. The downside is I must make a custom exhaust and blank off the EGR valve. Hopefully worth it in the end!
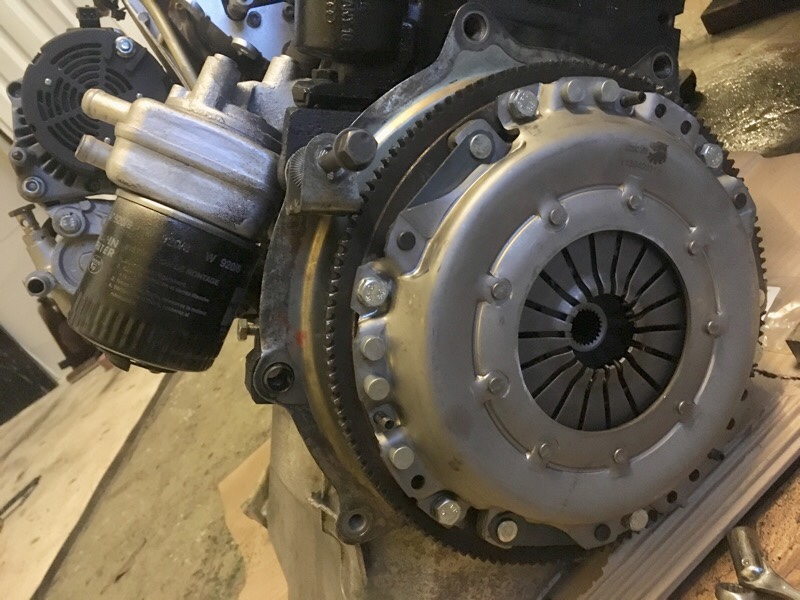
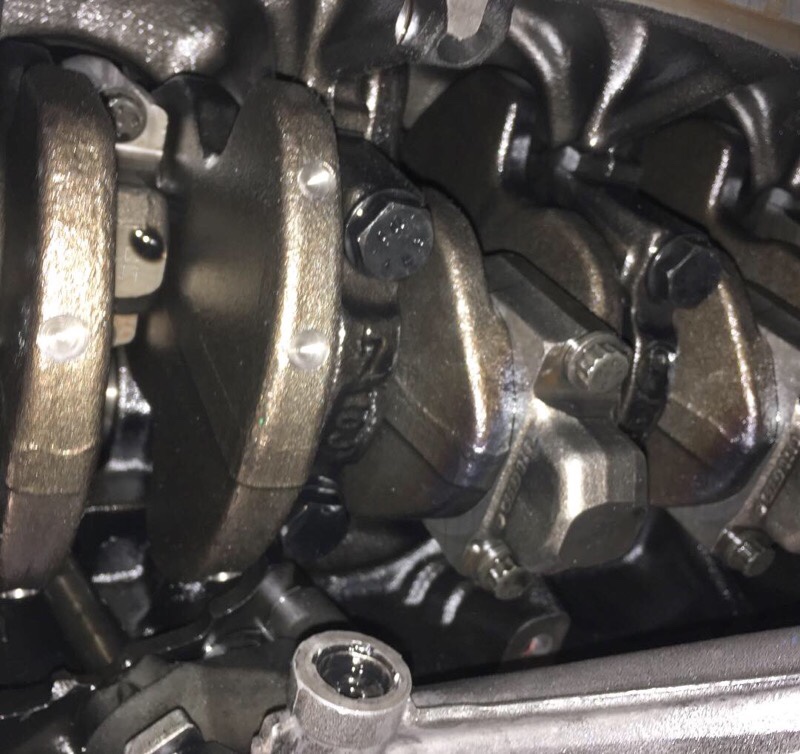
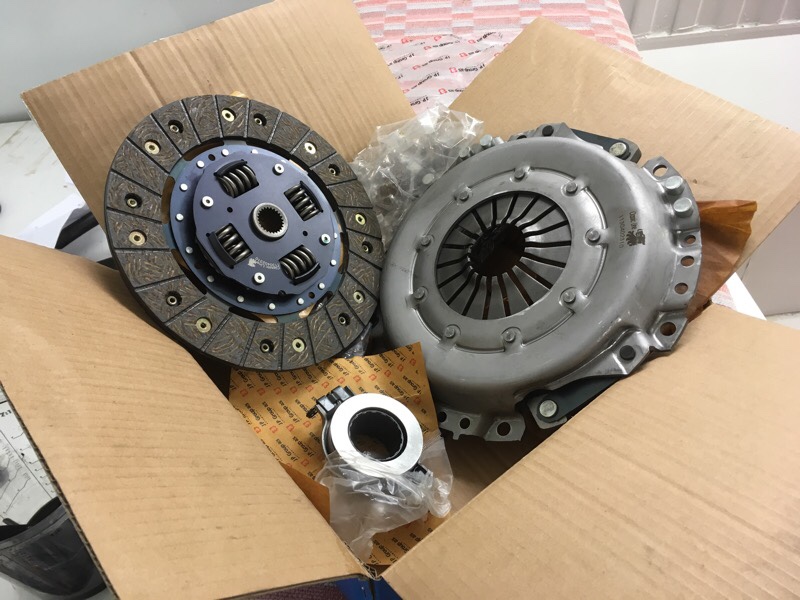
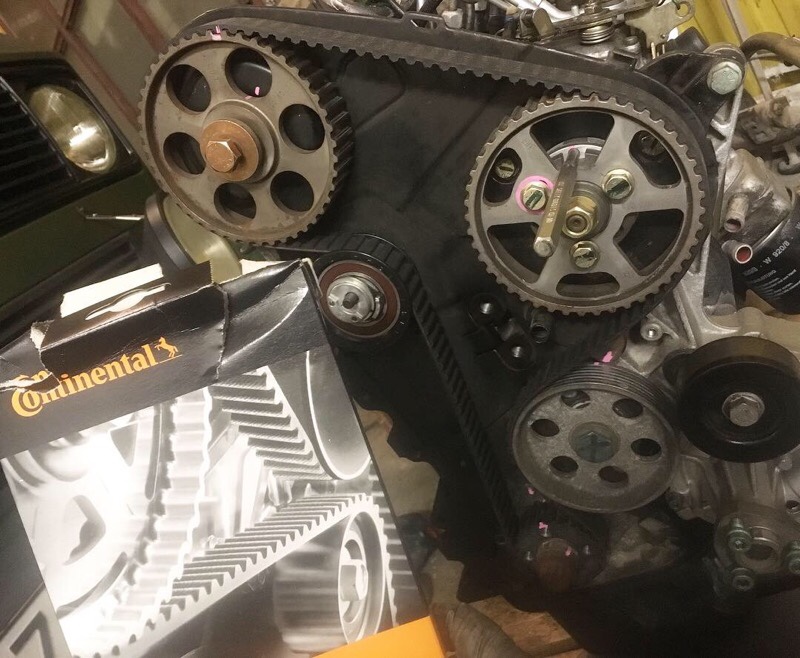
New water pump and thermostat is installed. New timing belt and tensioner etc. Changed flywheel to the 1,6 CS, new needlebearing (don’t forget!) new throw out bearing, new clutch kit. I used new bolts from FEBI to the flywheel, standard size. I took the backing plate from the 1,6 as it will fit the bus transmission better. Also needed to remove two upper studs from engine bolt holes, bolts straight thru will be used instead.
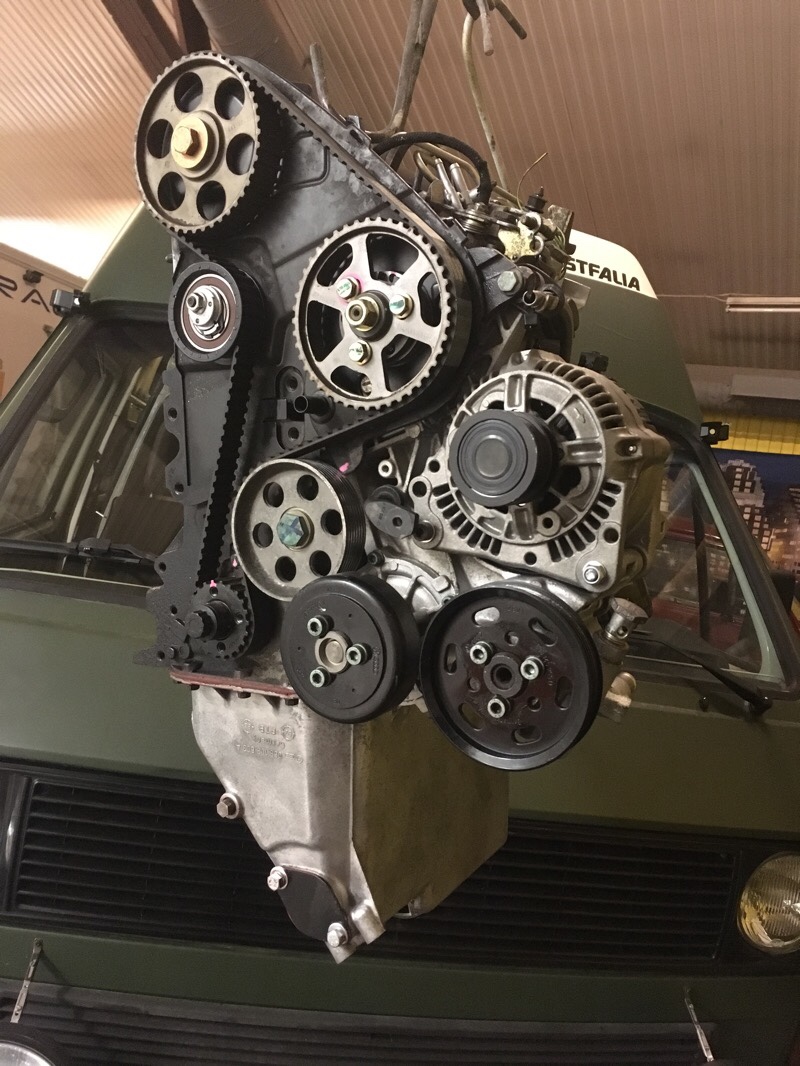
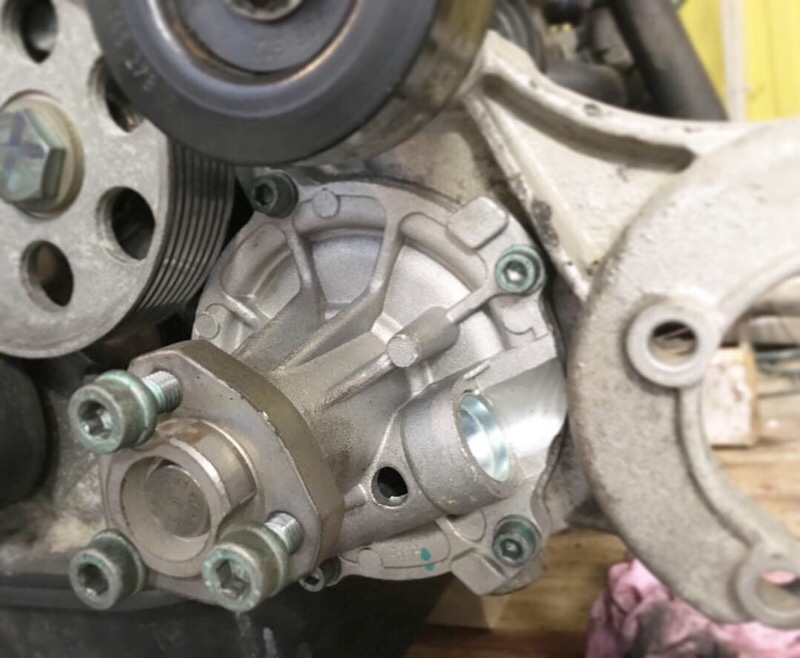
All sensor need to be taken from the old engine (good since I bought all these new awhile ago) like oil pressure, water temp, glow plug sensor etc. Waterflange in alu with sensor was taken from the 1,6 also. All waterlines and hoses to oil cooler etc was removed. Next up is changing oilpan to bus cast alu 1,6 CS. The oilfiller tube has to be removed and plugged, the servopump will be in the way. Will use the cap in the camcover instead. New alternator and servopump, waterpump pulley, idlerwheel and new fan belt is going to be installed next time. Also some new resistors and relays need to be added to the glow plug sensor and relay for coldstart etc.
Transmission have also been removed from the bus now, getting it ready for overhaul and difflock, new seals and shifter bushings. More about that soon…
Another really good page for AEF conversion is Colins write-up on Brick-Yard forum, here is the link: http://www.brick-yard.co.uk/forum/1-6cs-to-aef-engine-swap_topic52595.html
#vwt3overland


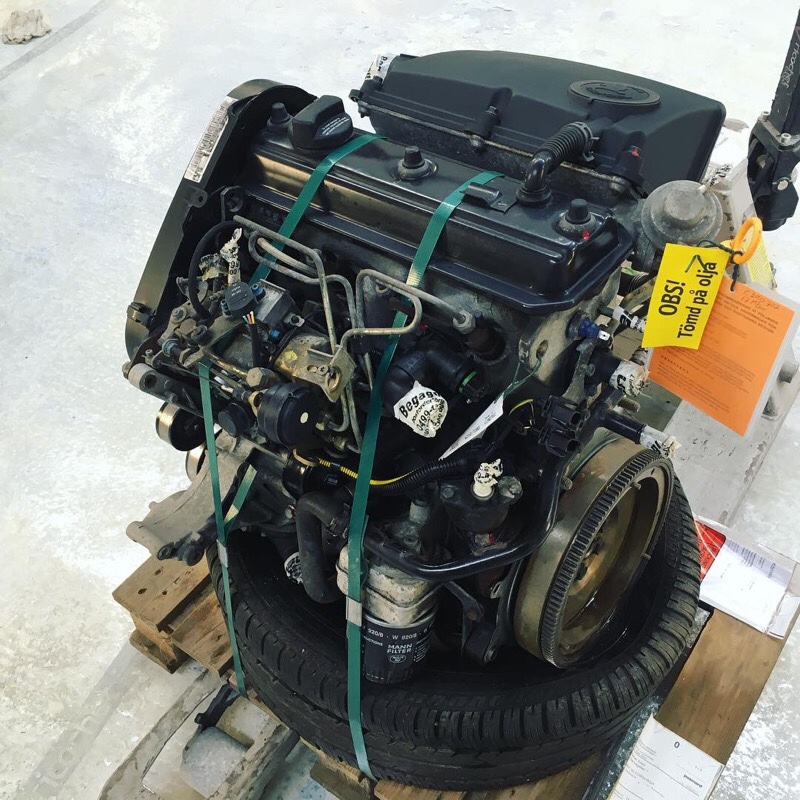
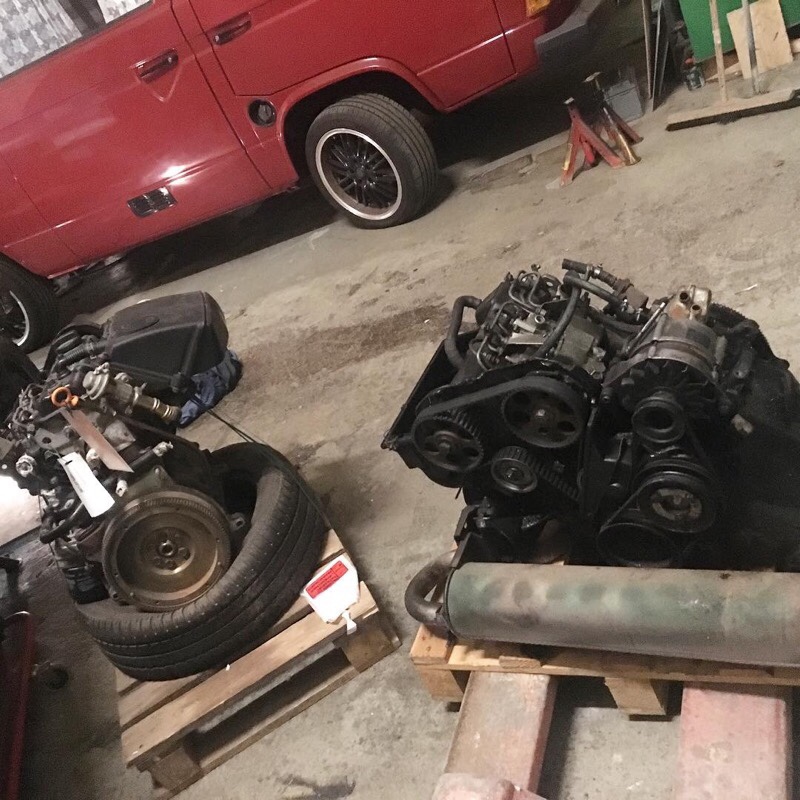
The old 1,6 CS diesel was a bit to slow in hills/highways (to the point it get dangerous in traffic). So it needed to go. I don’t going to race Lemans with the bus, I just want a more modern, stronger, cheap to drive (diesel) and most important RELIABLE engine that always work. First I was looking at a AAZ 1,6/9 Turbo engine but with a turbo it’s just another thing that can brake and these engines always runs much hotter. So I decided to go with a VAG 1,9 AEF engine, found in VW Polo, Golf, Audi and Skoda Felicia.
THE NEW ENGINE
I managed to find a really lowmilage 1,9 AEF diesel engine from a Skoda Felicia, year 2000. But it is not just to bolt this engine in the bus and drive, a lot of stuff need to be changed and parts from the 1,6 CS need to be re-used and modified. But its probably the easiest conversion you can choose, if your thinking of using a non standard engine in your VW T3 diesel bus.
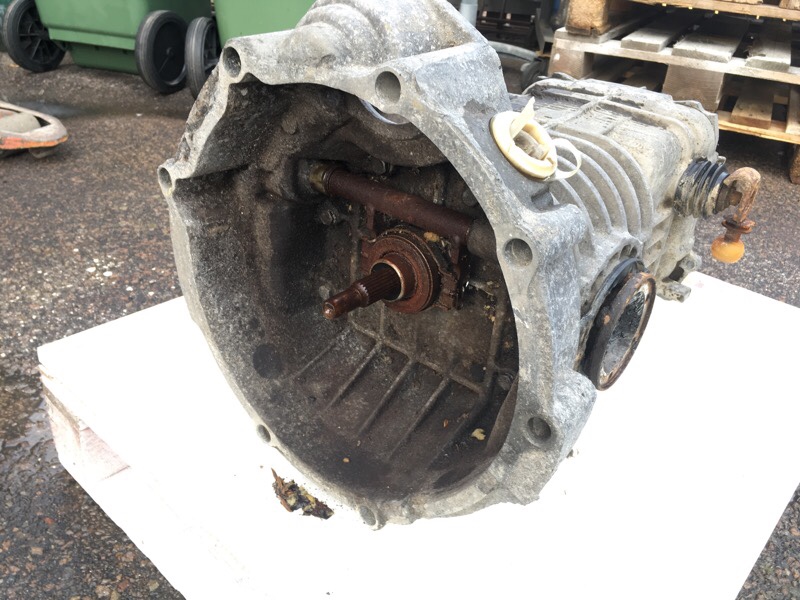
TRANSMISSION
While the engine is out I will also take out the transmission. And make a check up, change shifter couplings, linkage bushings and gaskets. Upgrade driveshafts to stronger, Porsche. Upgrade the differential with a difflock from Weddle Ind. In a standard “open” differential, torque is divided equally between the wheels. If one wheel slips and spins, only a fraction of the torque is utilized. The difflock eliminates this problem. Power will always be delivered to the wheel with the most traction to keep you moving instead of getting stuck, up to 100%. Then it we can do some serious off-roading 🙂
More to come soon! #vwt3overland
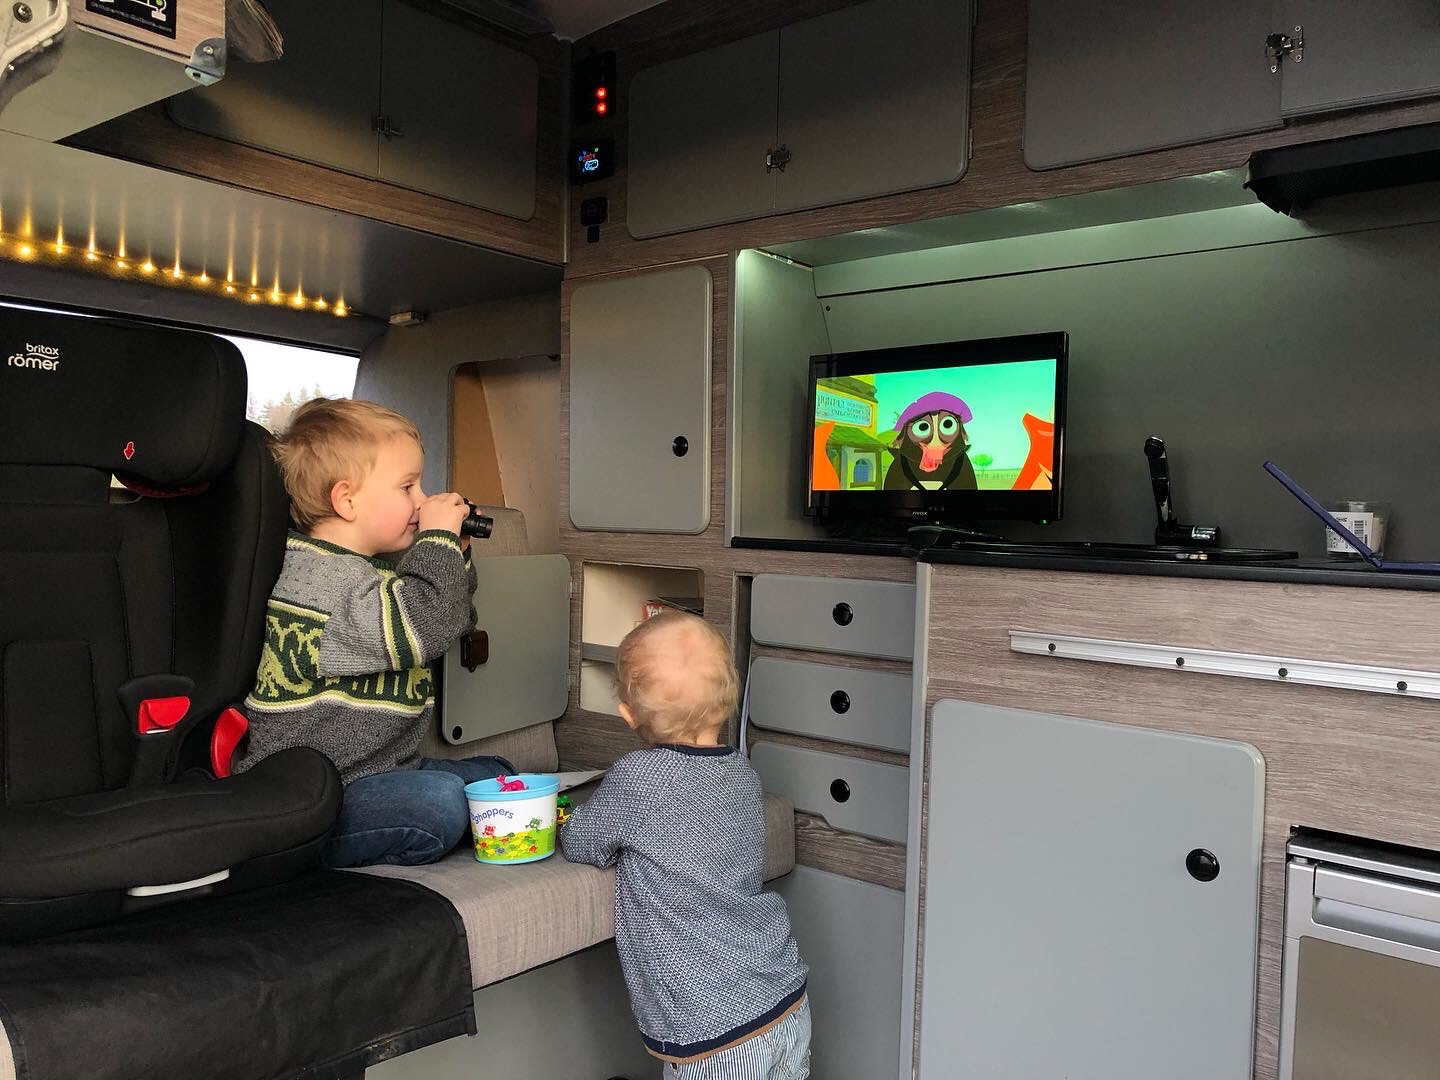
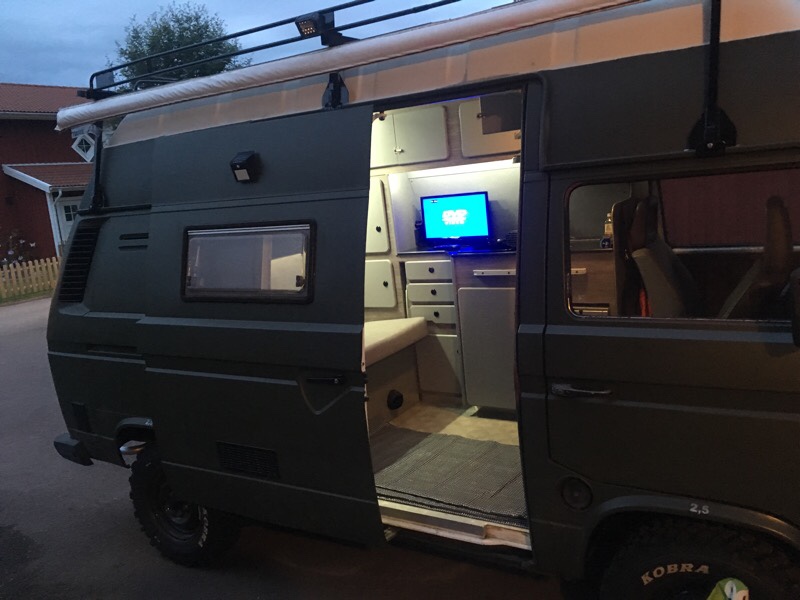
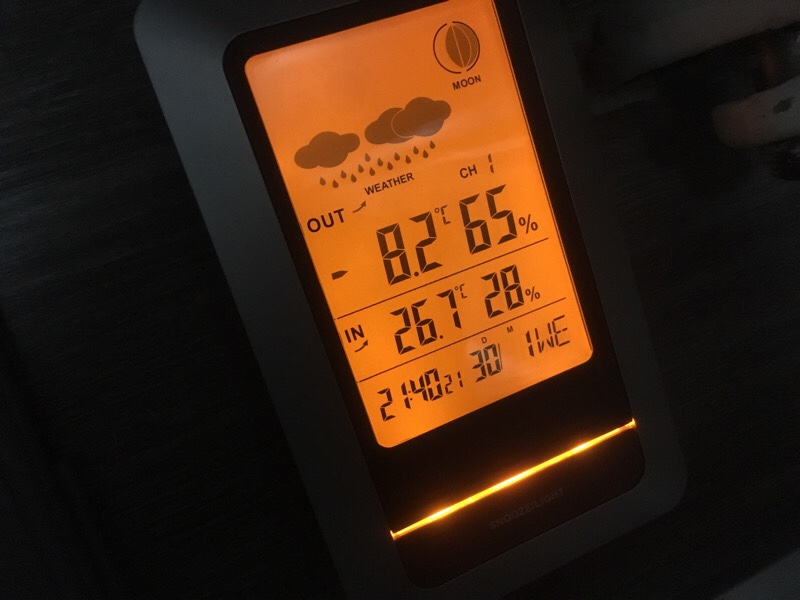
The interior is almost finished now, just some small details left to do. Here is how it looks so far… it so nice with heater on the winter, it was -9 celsius and inside was set to 26+celsius 🙂
#vwt3overland
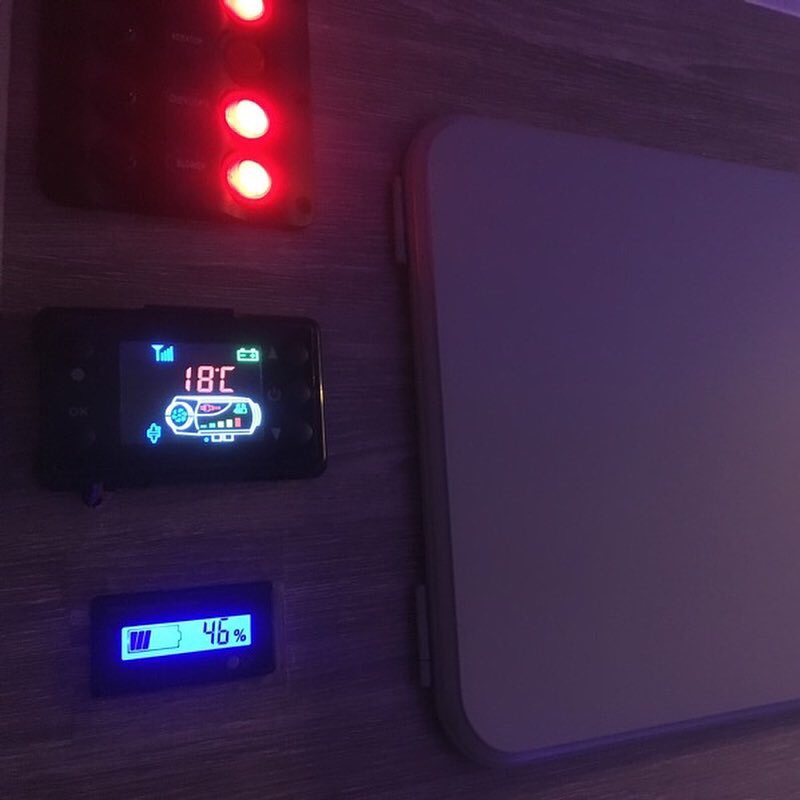
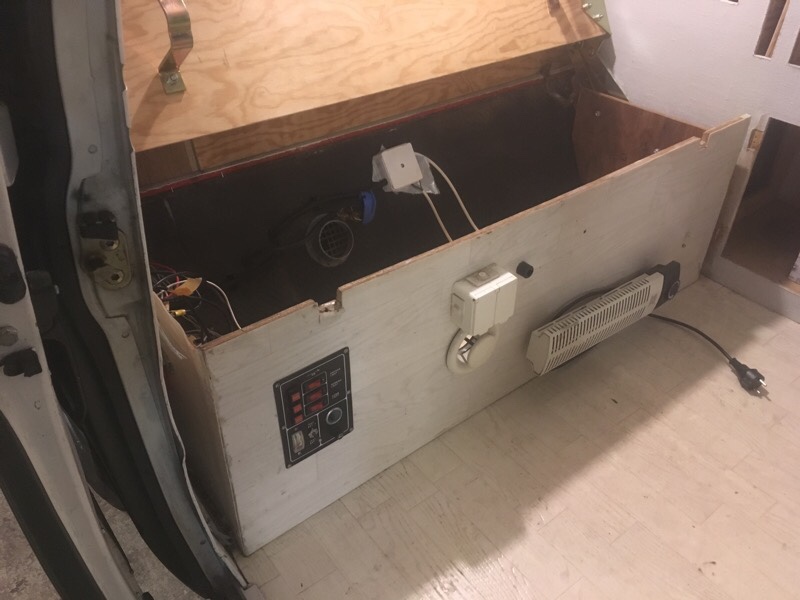
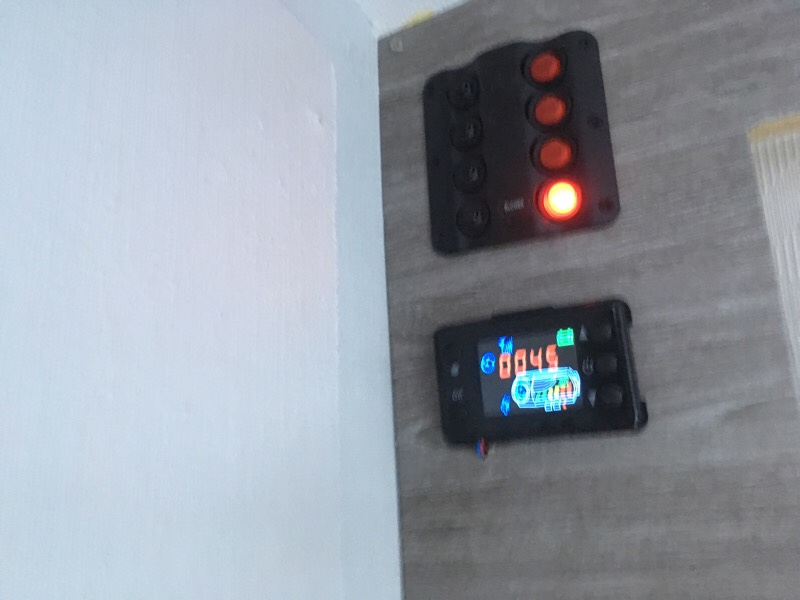
The wiring was a mess (for all equipment) so a new control panel with automatic fuses was installed togheter with new wiring. The 230v wiring (camping power) was also updated with automatic ground fuse and two new sockets with combined USB outlets.
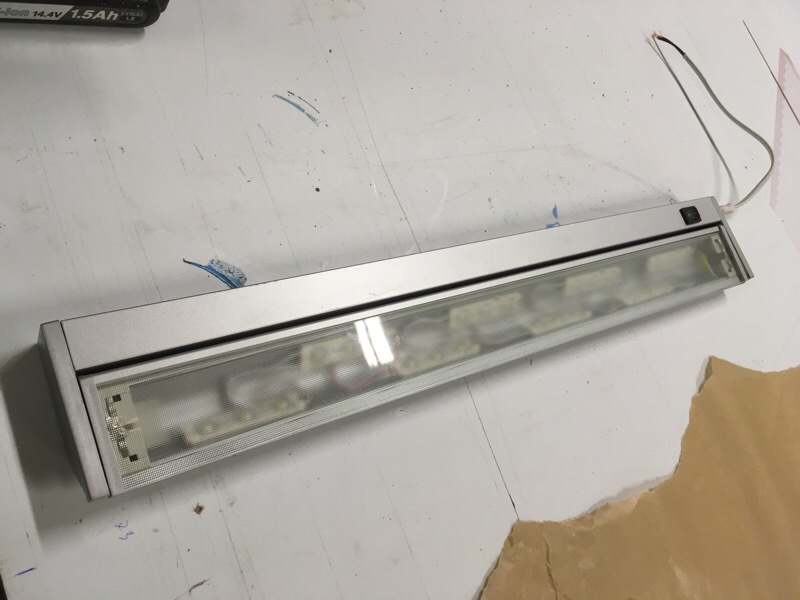
The old interior lightbar was only 230v, but it was a great design so you can flip/turn the light angle. So I took it apart and converted it to 12v with LEDs. An extra LED light with two touch dim/settings was mounted up in the front of the sealing/roof also.
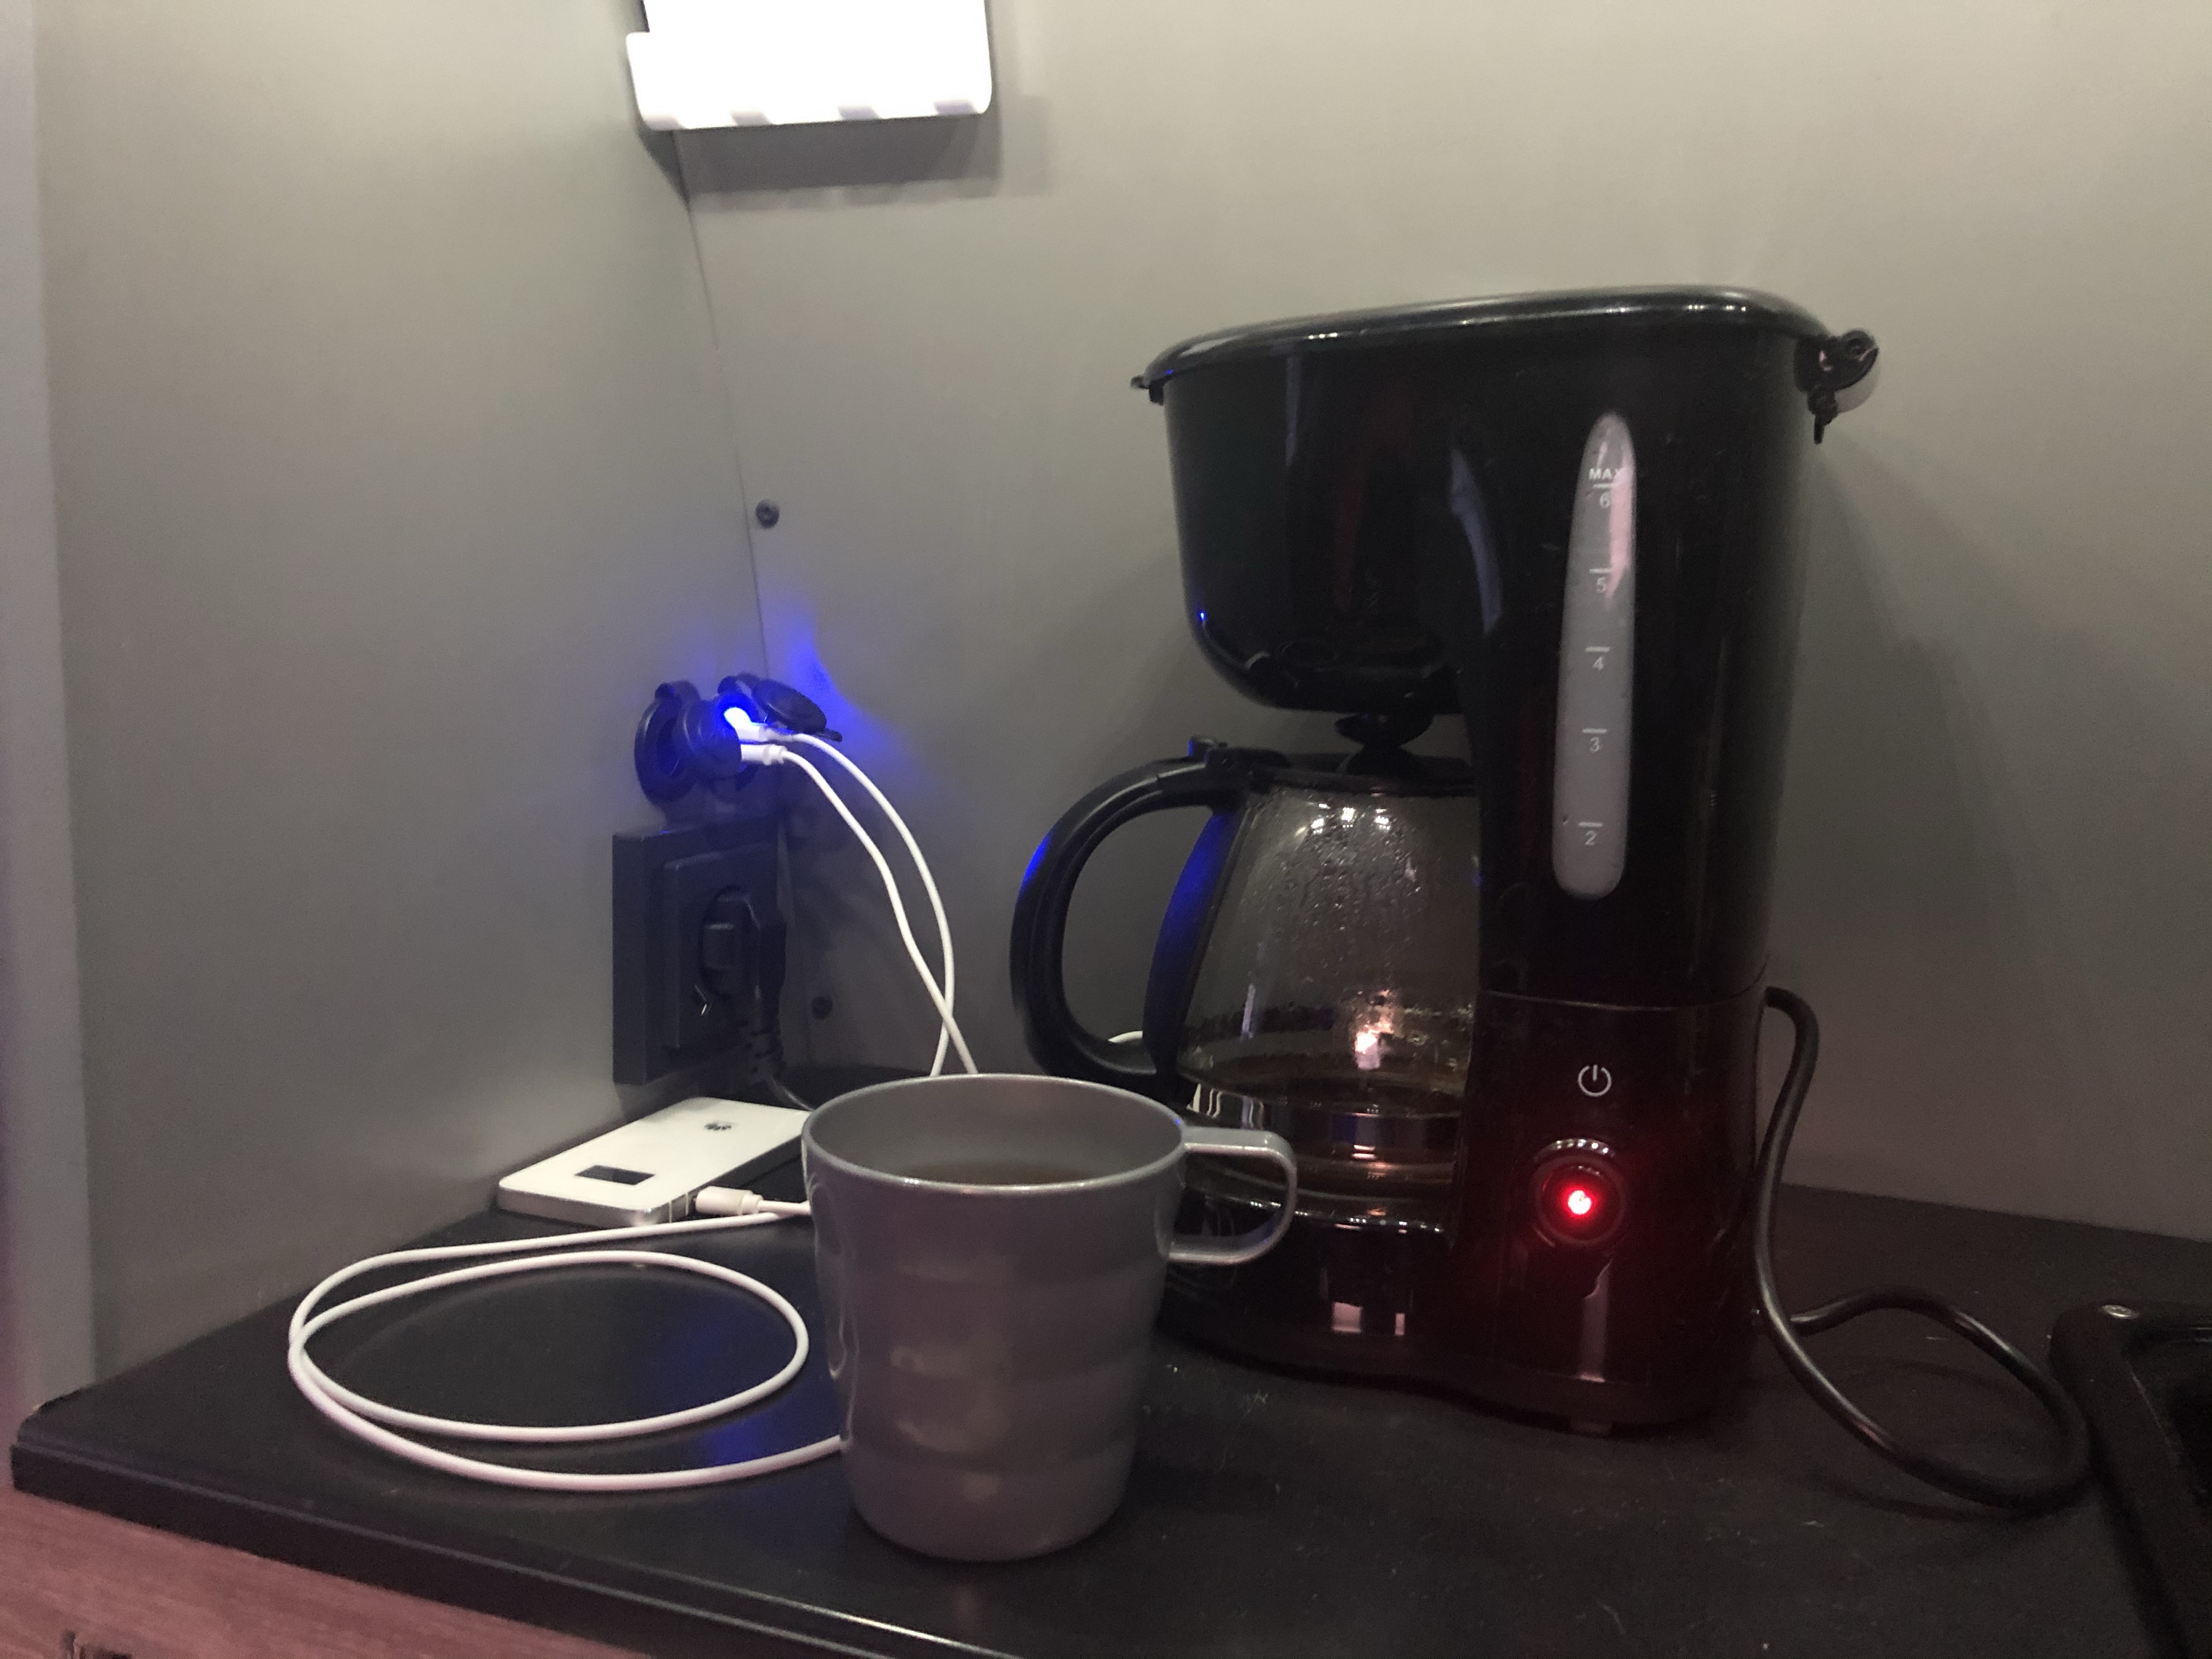
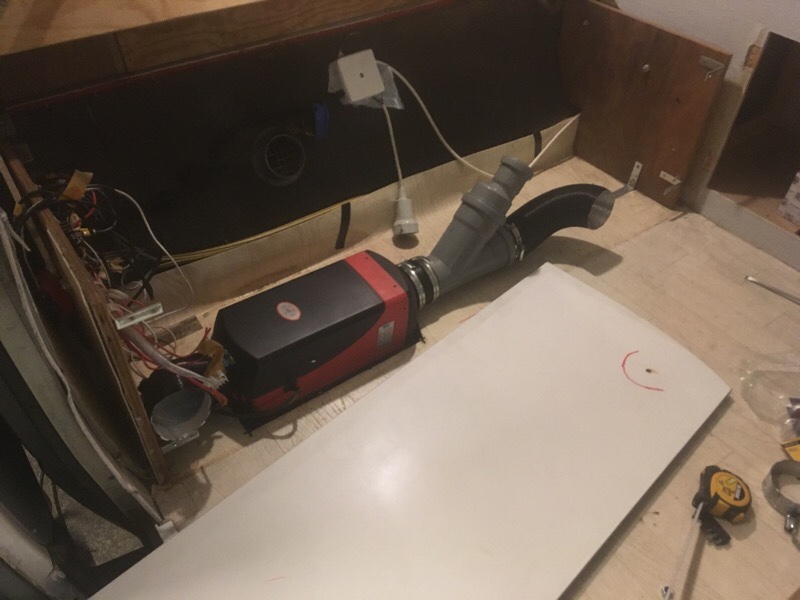
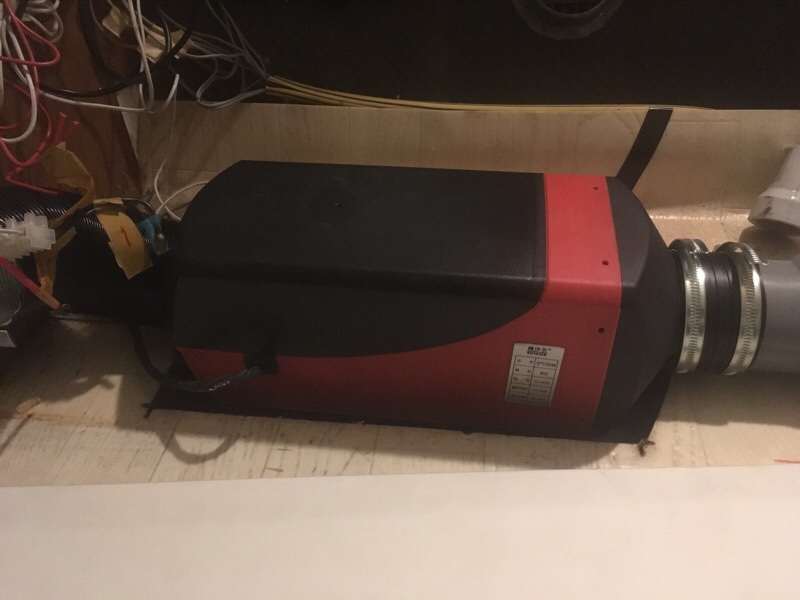
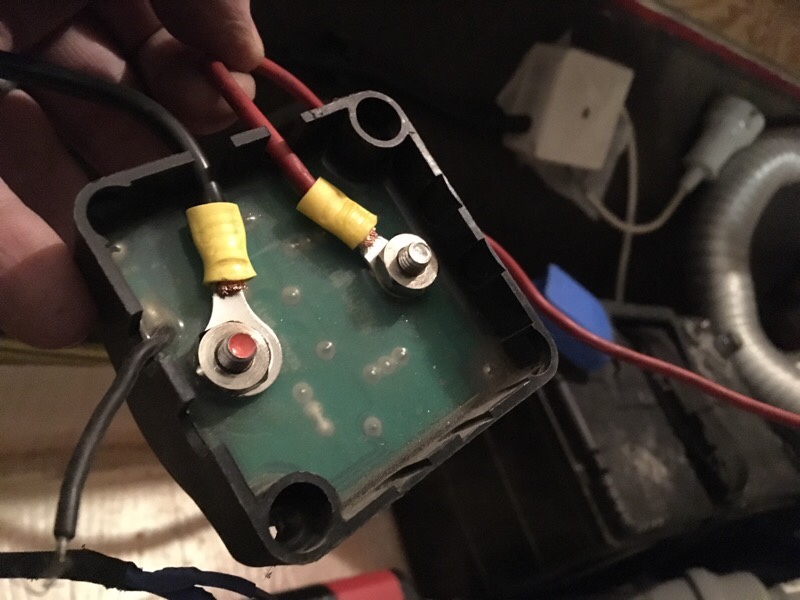
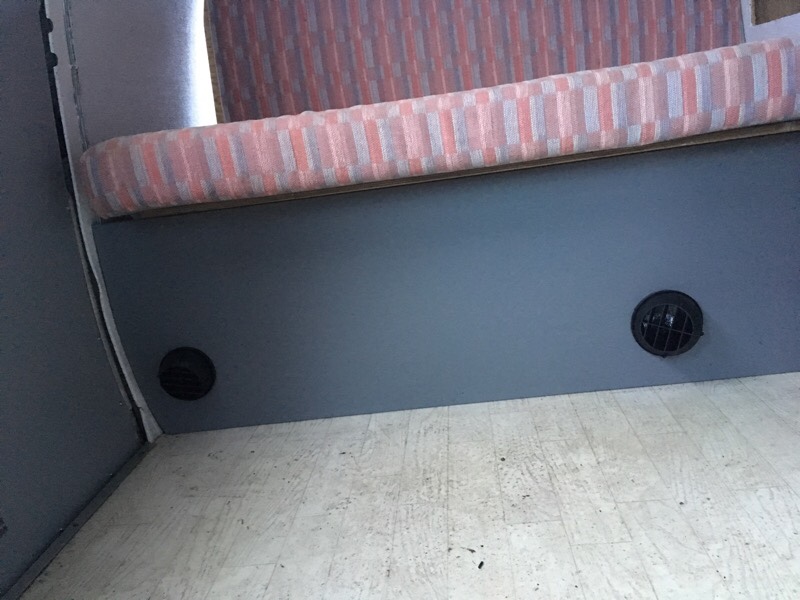
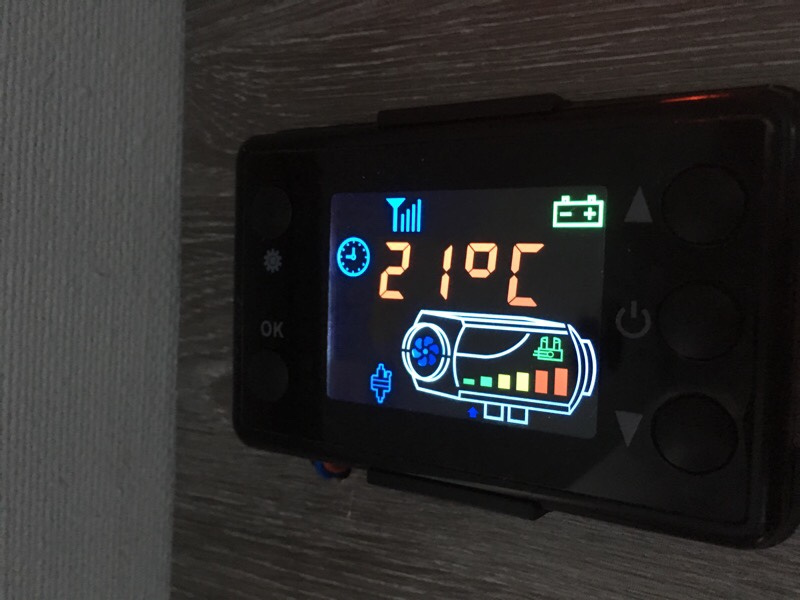
Under the rock n roll sofa I made space for 200amp of batteries (dual 100amp). These I connected to the car/start battery thru a relay, so the car alternator will charge all battery’s. These batteries are connected thru Bluetooth to my cellphone so I can see how much power is left and how much is charging. The solar panel (portable 120w) have a quick connection to these battery’s. Also the 5kw diesel heater is installed under the sofa. It takes air from outside and diesel from the main tank, and the exhaust is routed thru a silencer and out. It runs on diesel and 12v so it can be used anywhere for a very longtime, no need for 230v power. It has a digital display, and a thermostat so it will keep the inside toasty warm on winter. It can be started thru GSM net with my phone. I routed the heater outlets to the main floor and one to the back/bed. It works great and produce a lot of warm dry heat!
The walls, doors and roof was already insulated with 50mm cellplastic, thats very good! But I had some extra aluminium/bubblefoile rolls that I put inside some of the doors and walls for some extra insulation and vapor barier.
#vwt3overland
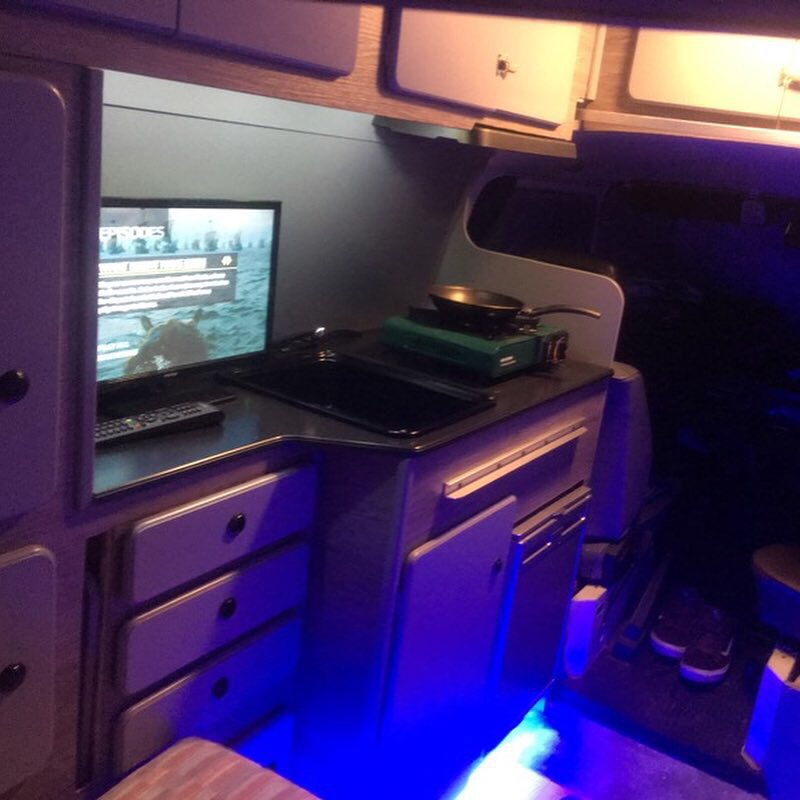
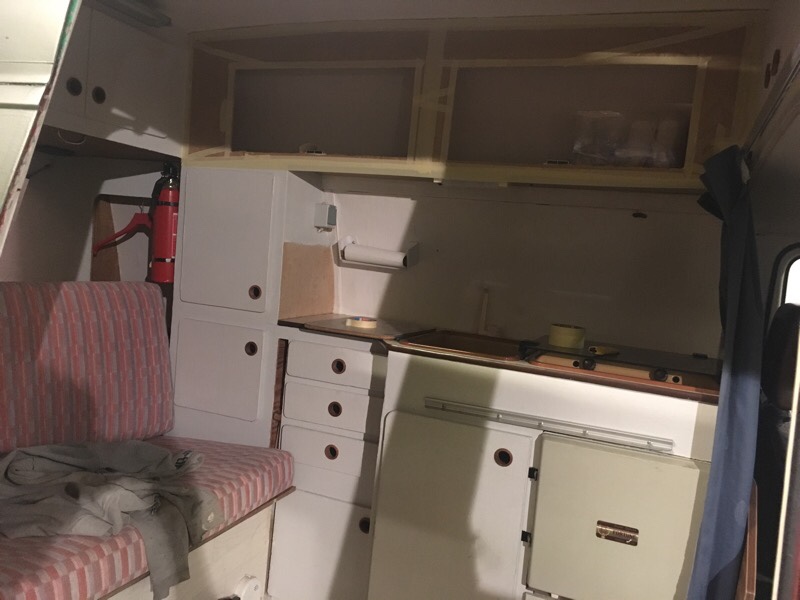
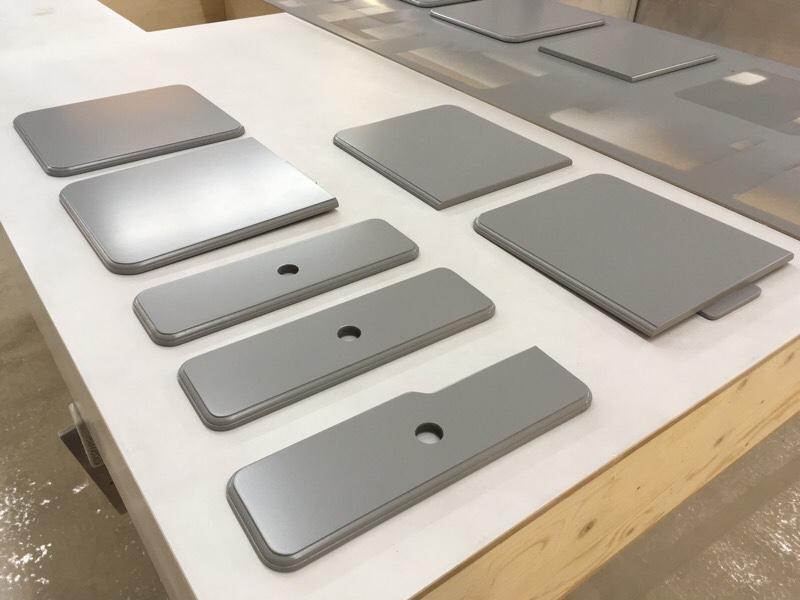
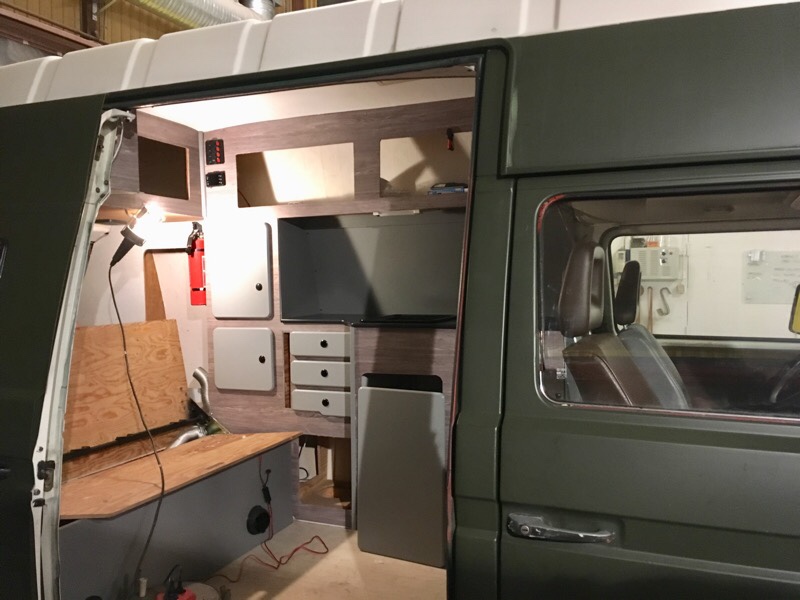
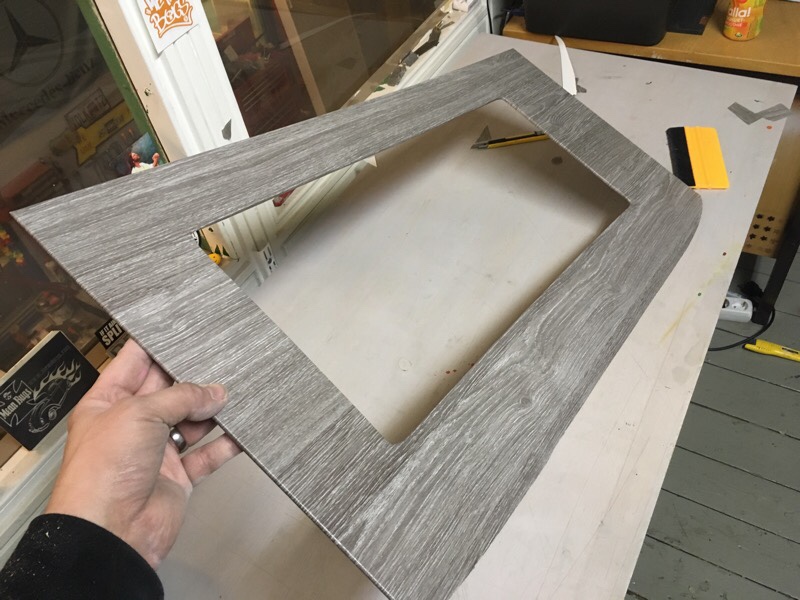
Have been working on the camping interior lately. The old interior was crappy and looked like shit, it had some structure wall weave/papper that hade been rolled with paint 10 times, the touch and feel was like a 40 grit sandpaper so it needed to go. But it was a good design/plan layout on the cabinets and storage. So I decided to keep the base of it and make a new outside finish on it in light grey oak vinyl.
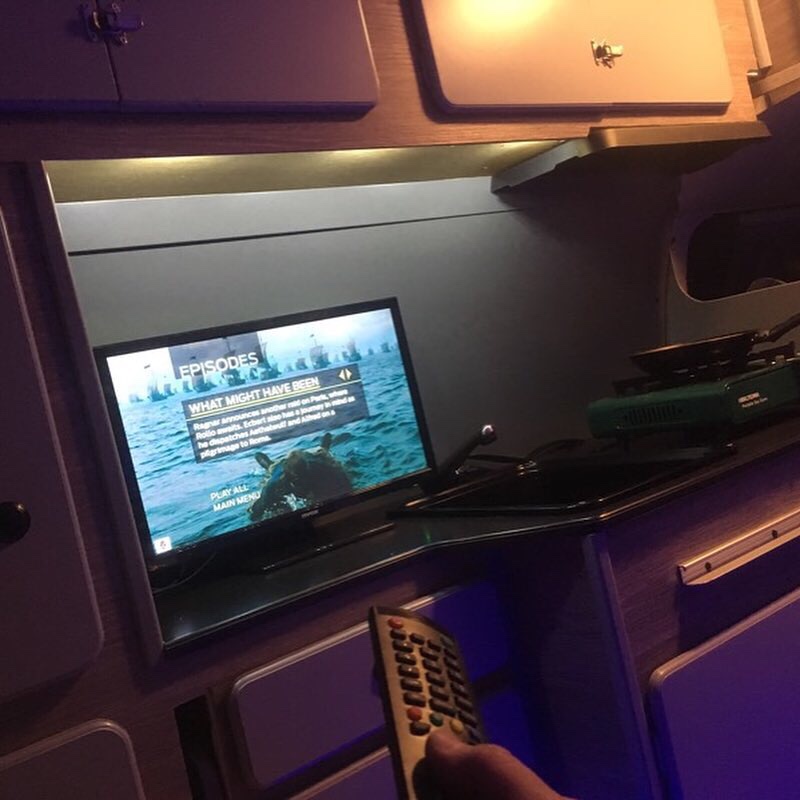
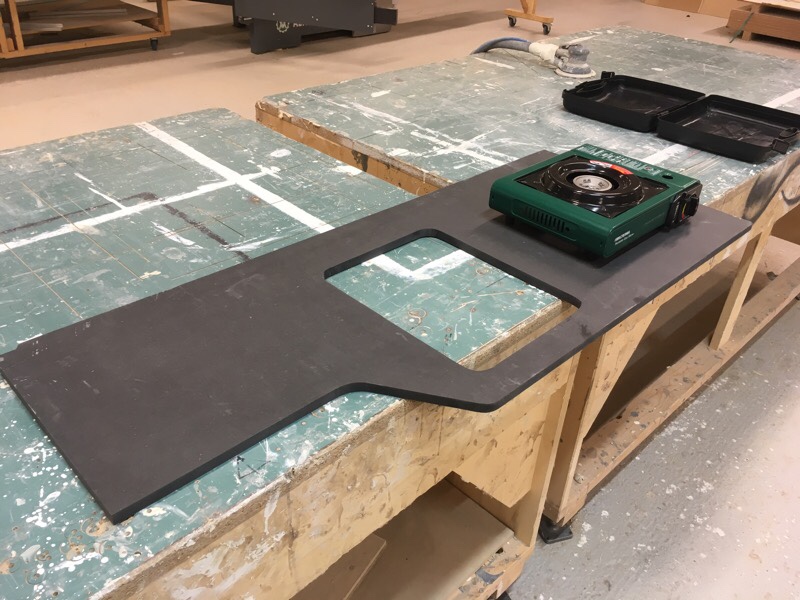
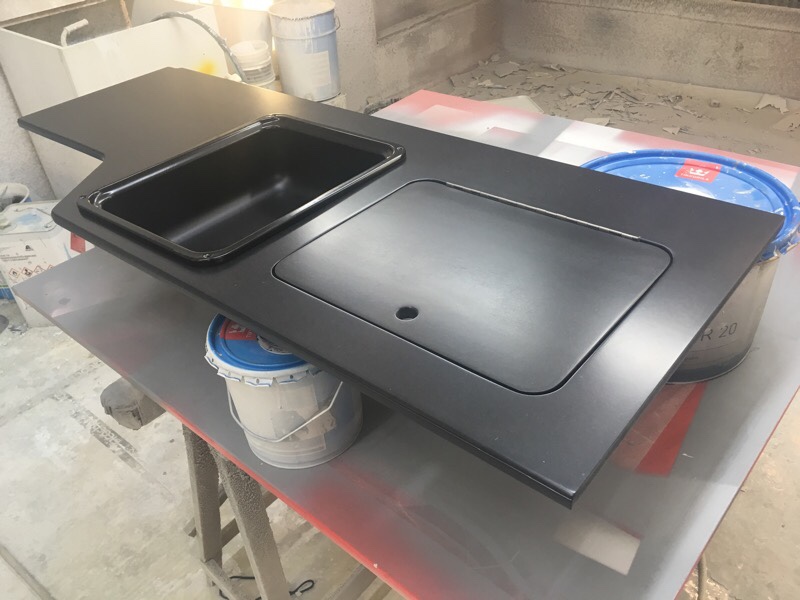
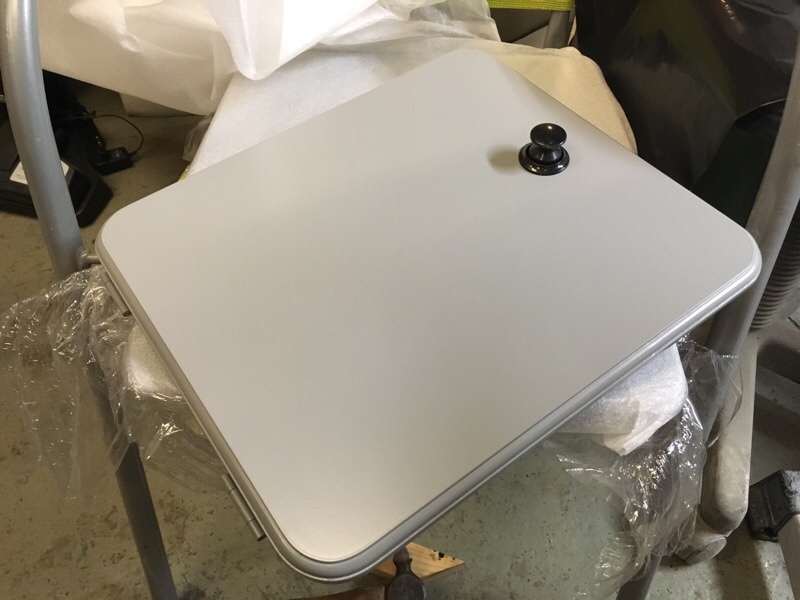
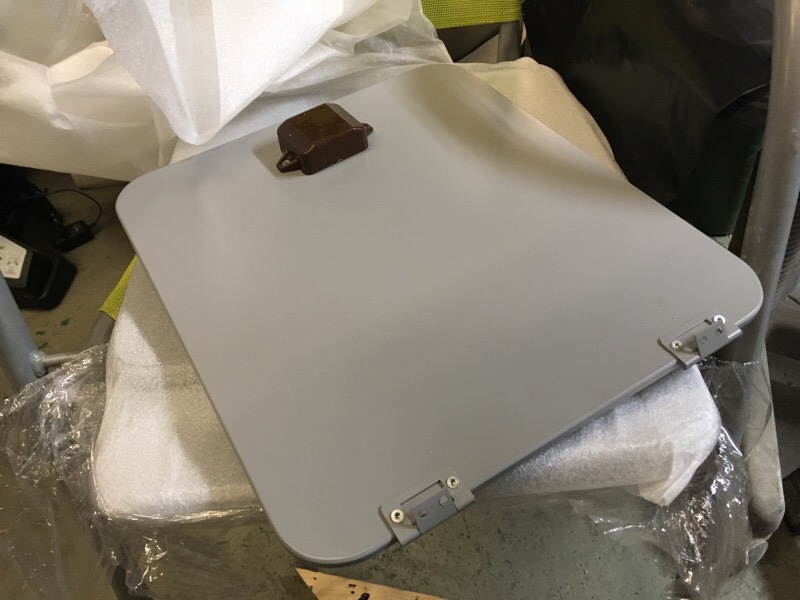
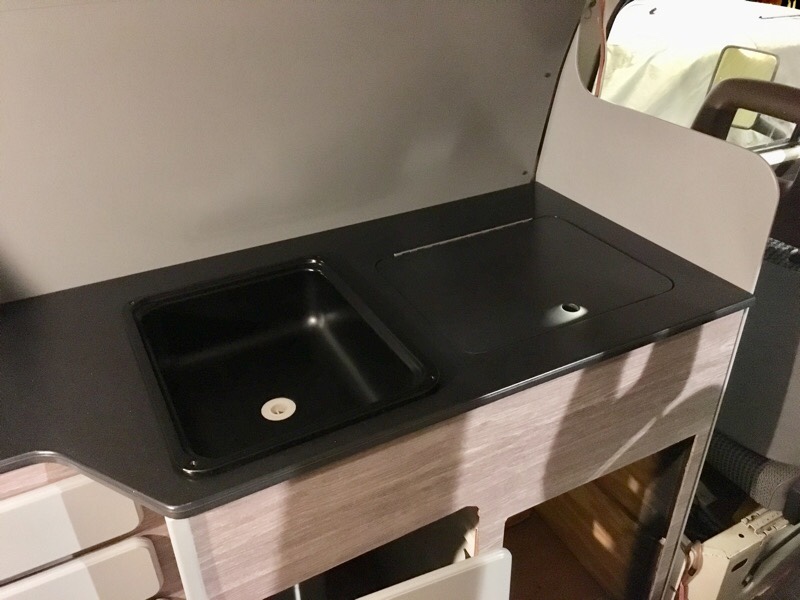
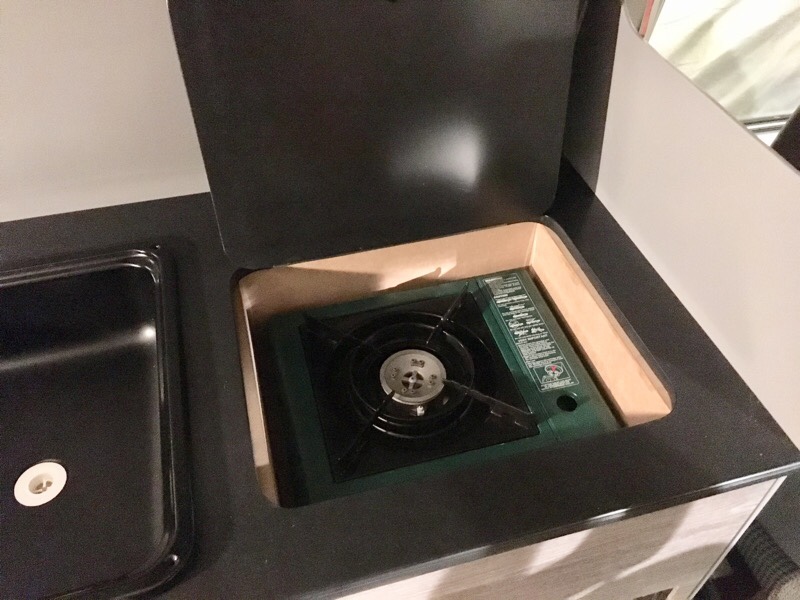
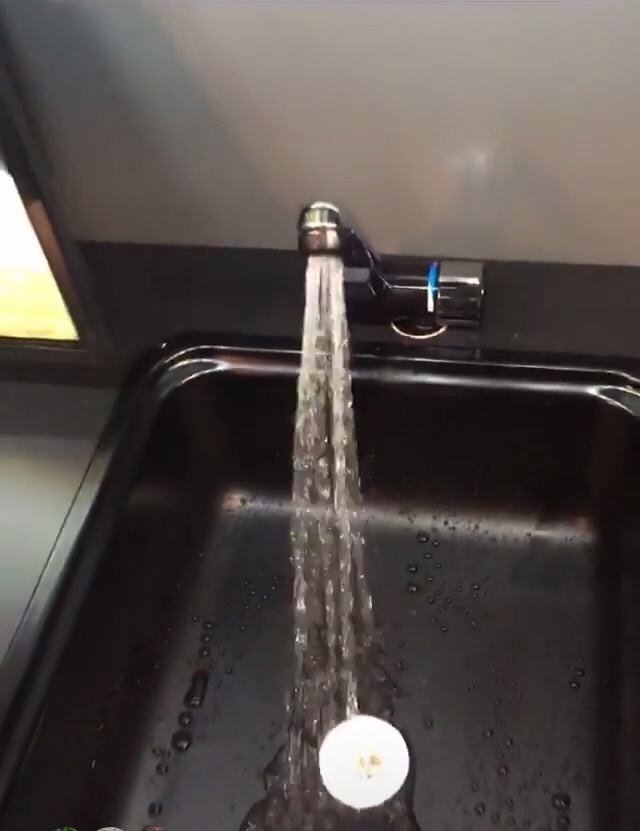
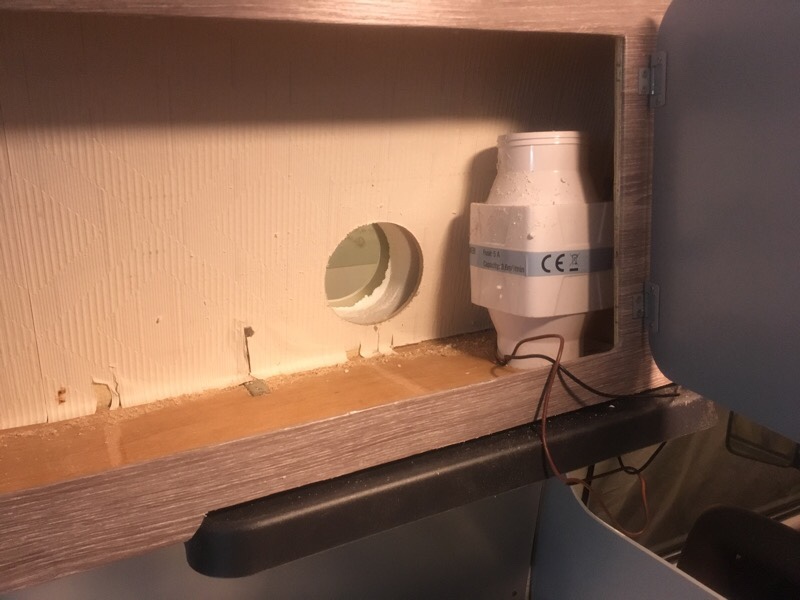
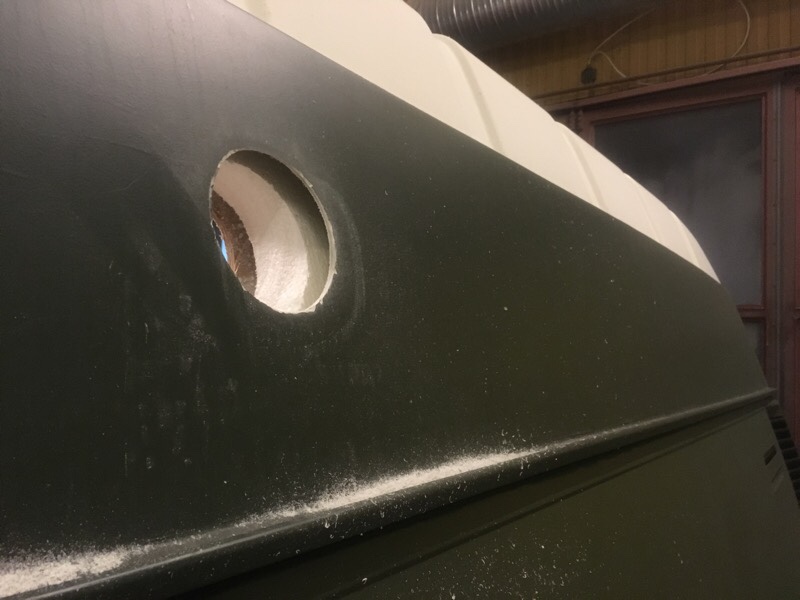
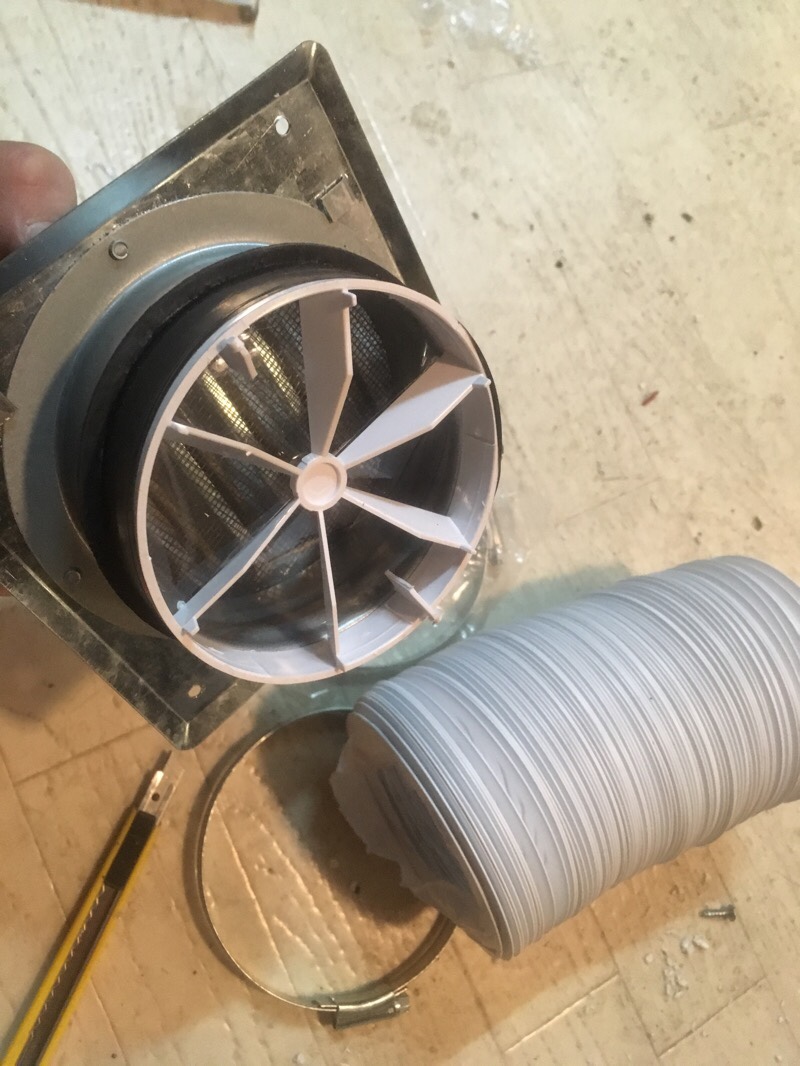
All cabinet doors was made new in 12mm Medium Density Fibreboard and painted in medium gloss grey with paintgun. Countertop was made new in black colored MDF with semi-gloss clear coat, now with space for a portable kitchen / stove. Above the stove space I made a 12v kitchenfan with outlet, the fan is moving 3,8 squaremeters of air per minute so now you can make bacon with closed doors without smoke/smelling anything 😉
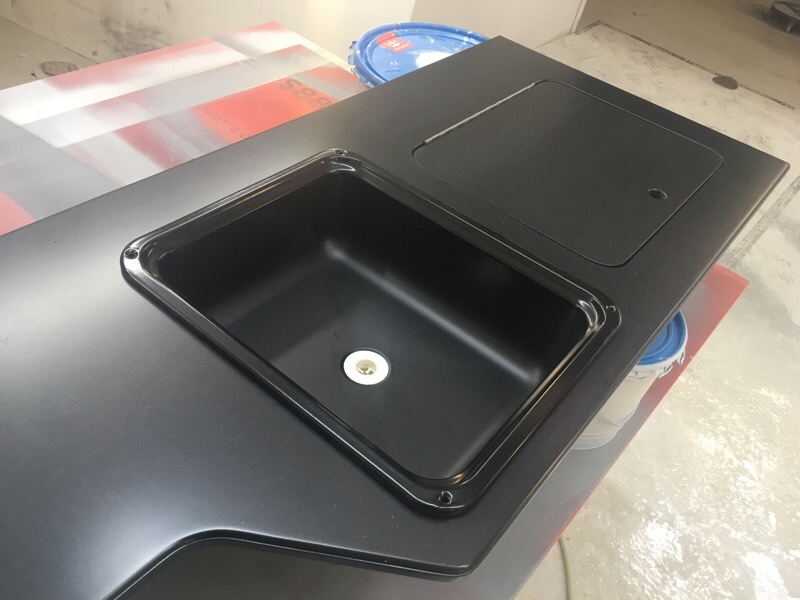
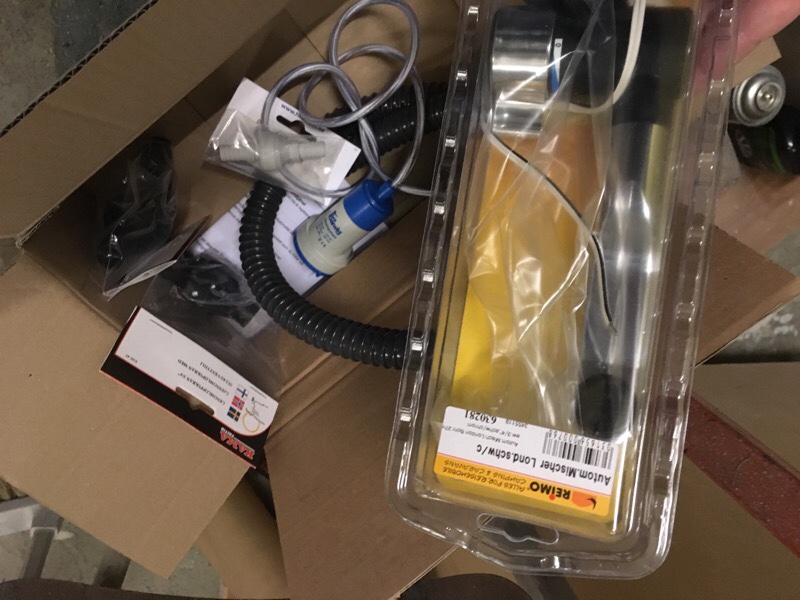
All the old gas equipment was removed, and the old fridge was replaced with a modern 12v Waeco 48L fridge with freezer. A new black sink and a new Reimo water tap was mounted. And all new waterlines, pump and 20L freshwatertank. Before the water ran straight out on the ground, now it goes into a 10L tank first, with a valve so the water can be emptyed. This is good of you are using water when you are on a parkinglot, ferry or on a big camping with neighbors.
Part 2 is coming on Tuesday…
#vwt3overland


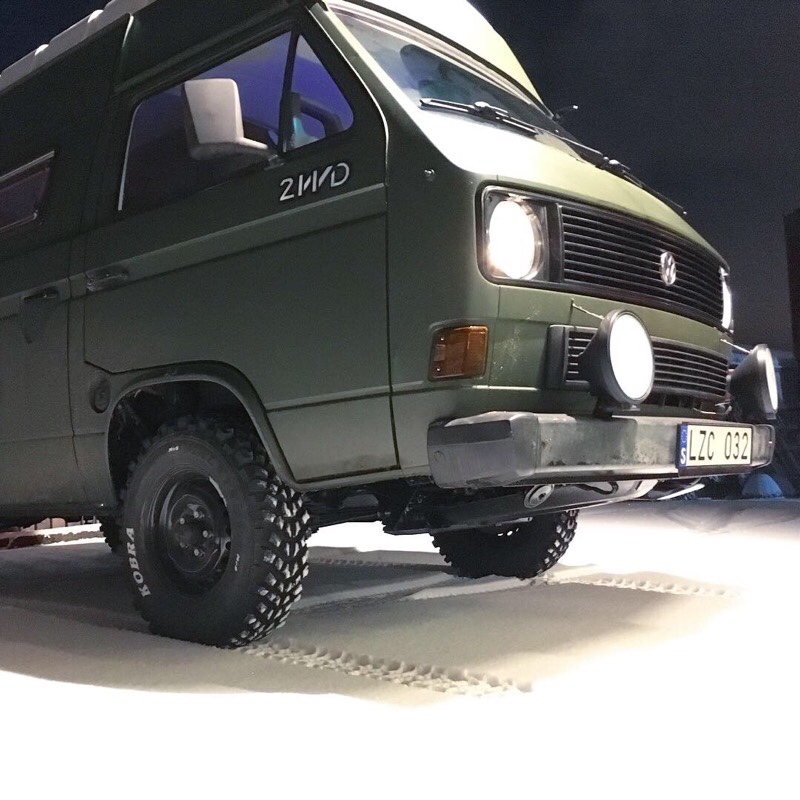
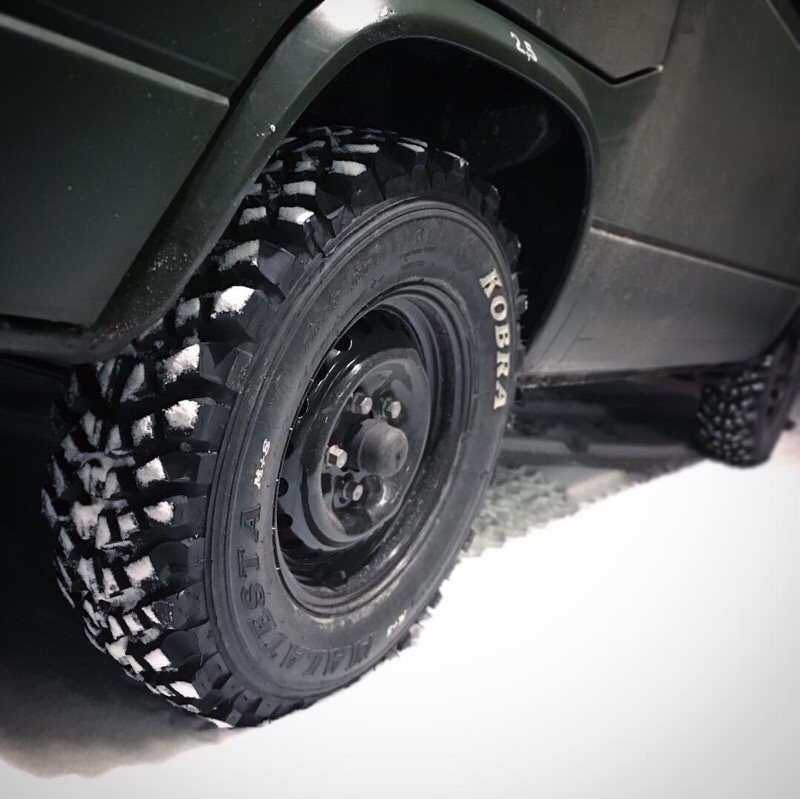
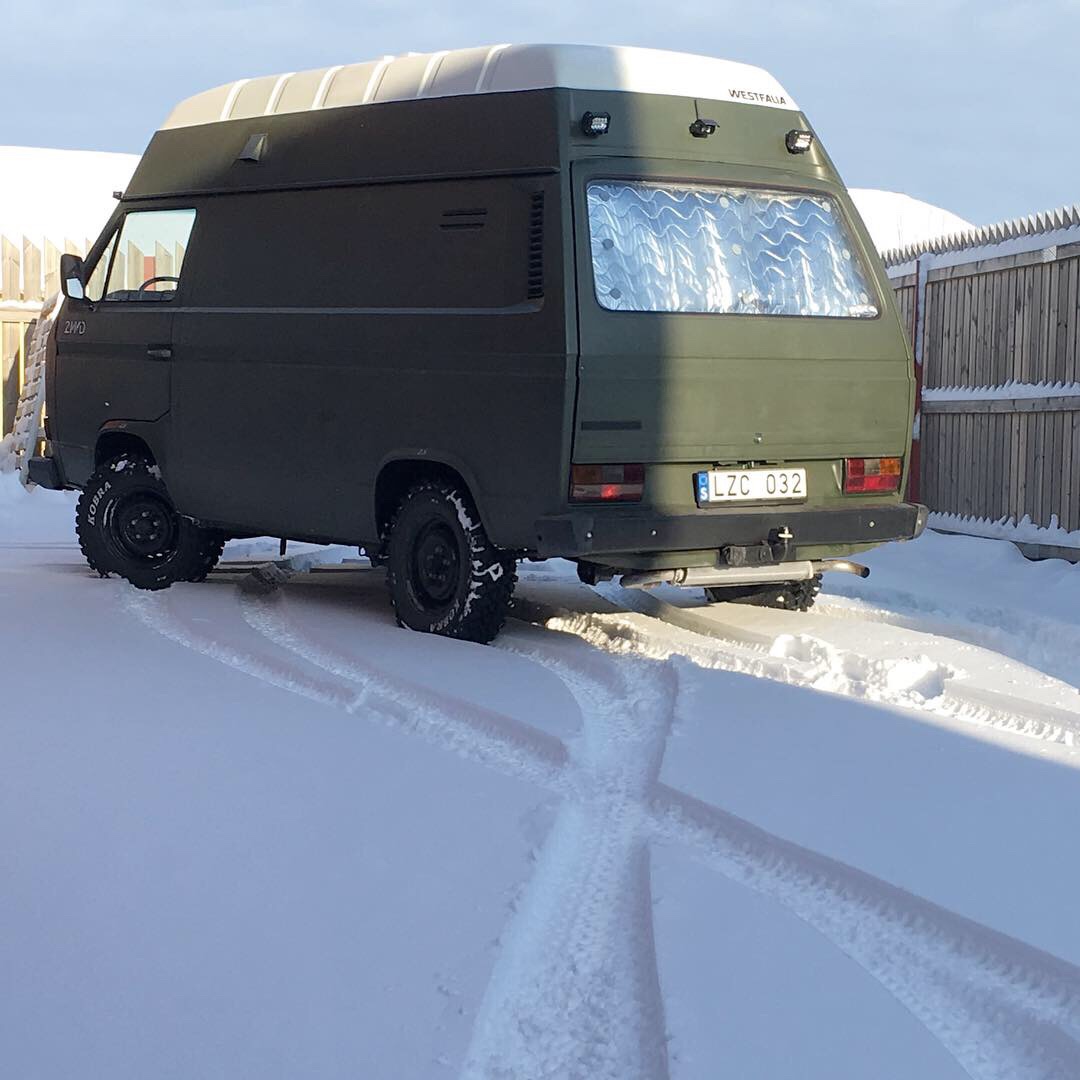
Tested the bus on snow tonight, it rides great in snow with the terrain tires. And the heating works great now. It was -7c and inside of bus was 25+c 🙂 More about dieselheater and interior is coming soon…