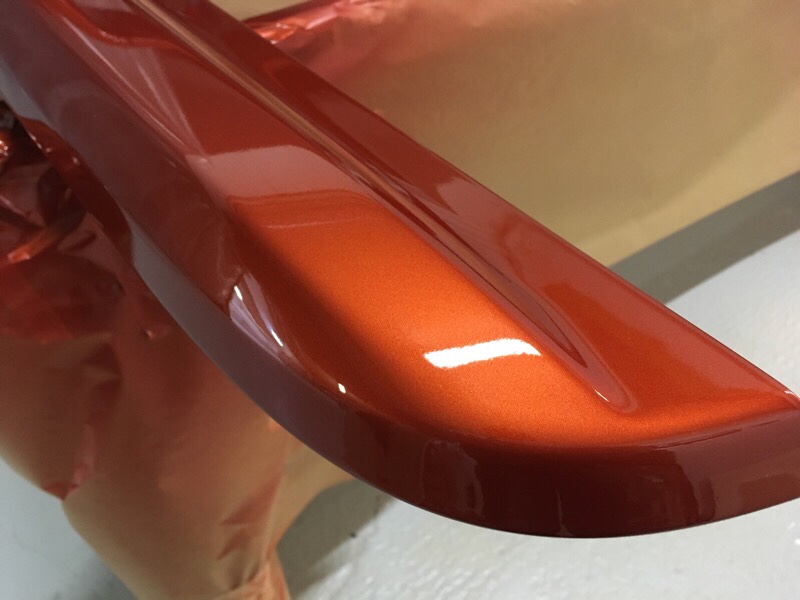
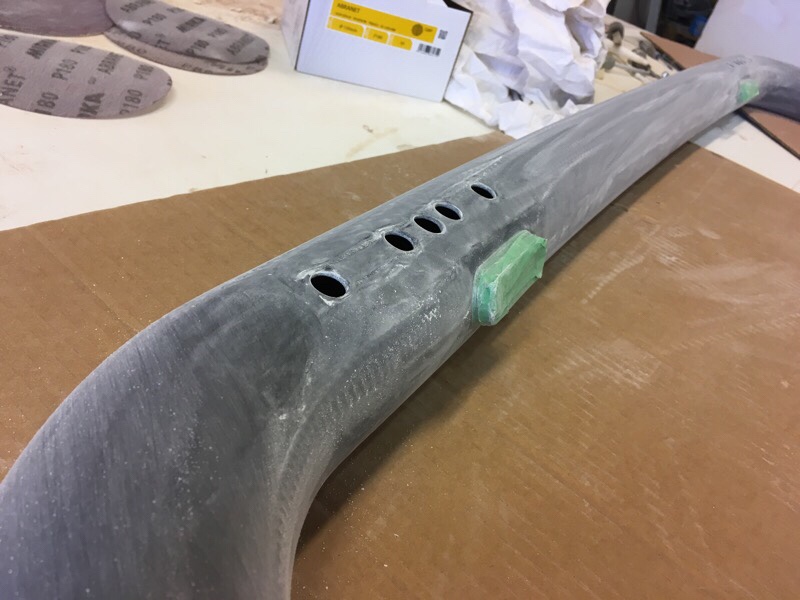
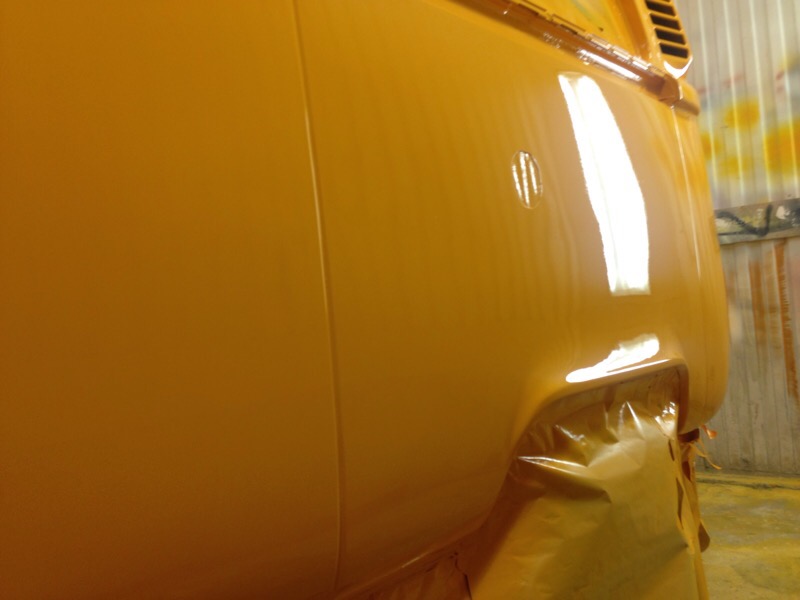
Crescent Compact moped, from bare metal to top paint in orange.
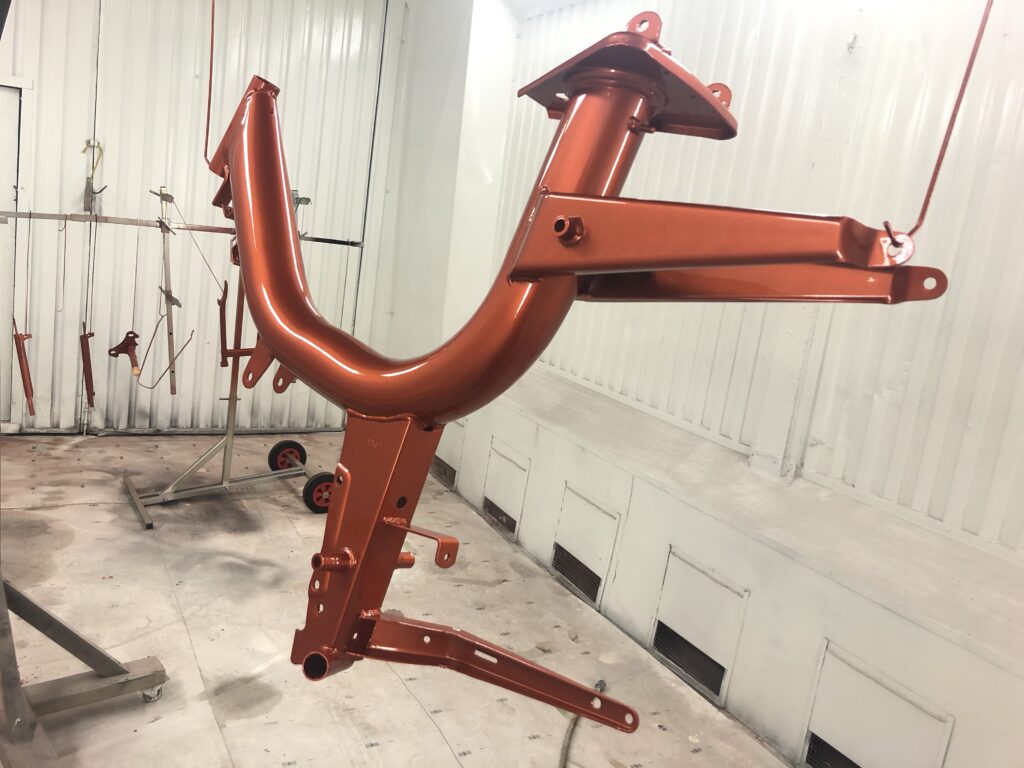
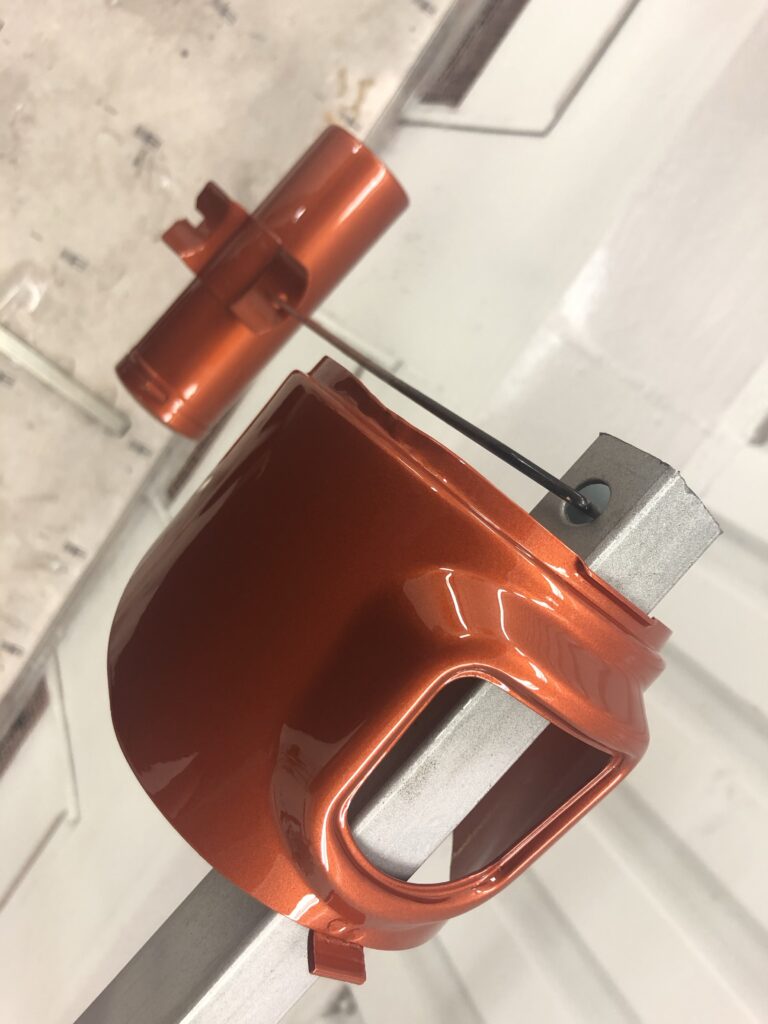
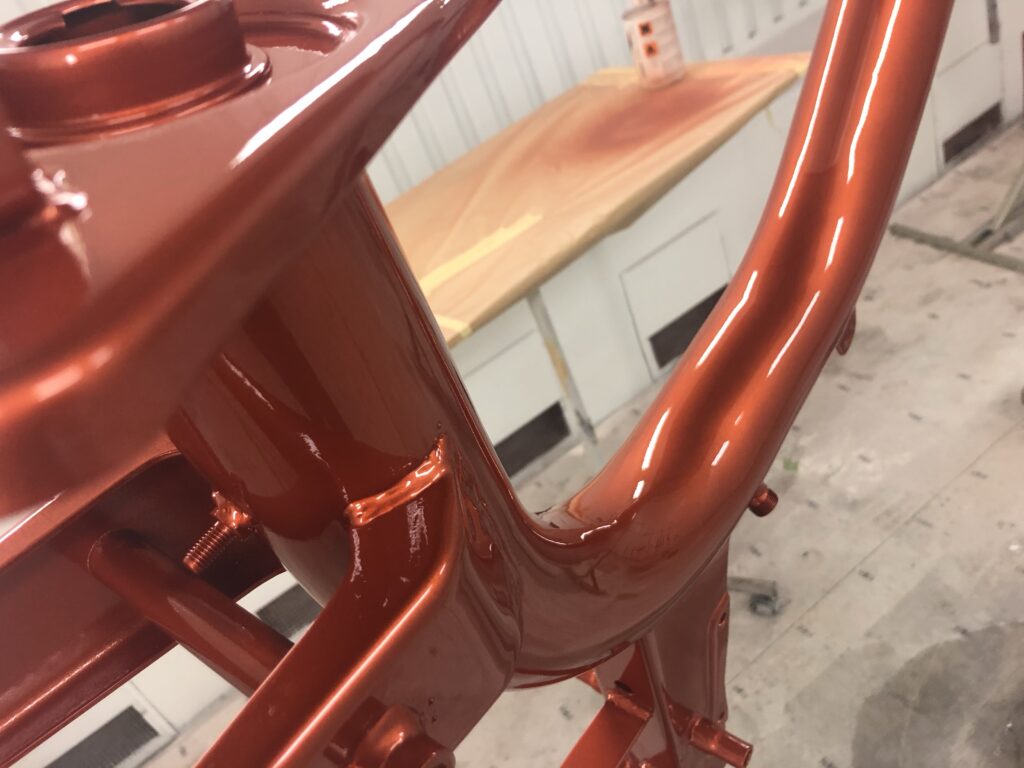

Crescent Compact moped, from bare metal to top paint in orange.
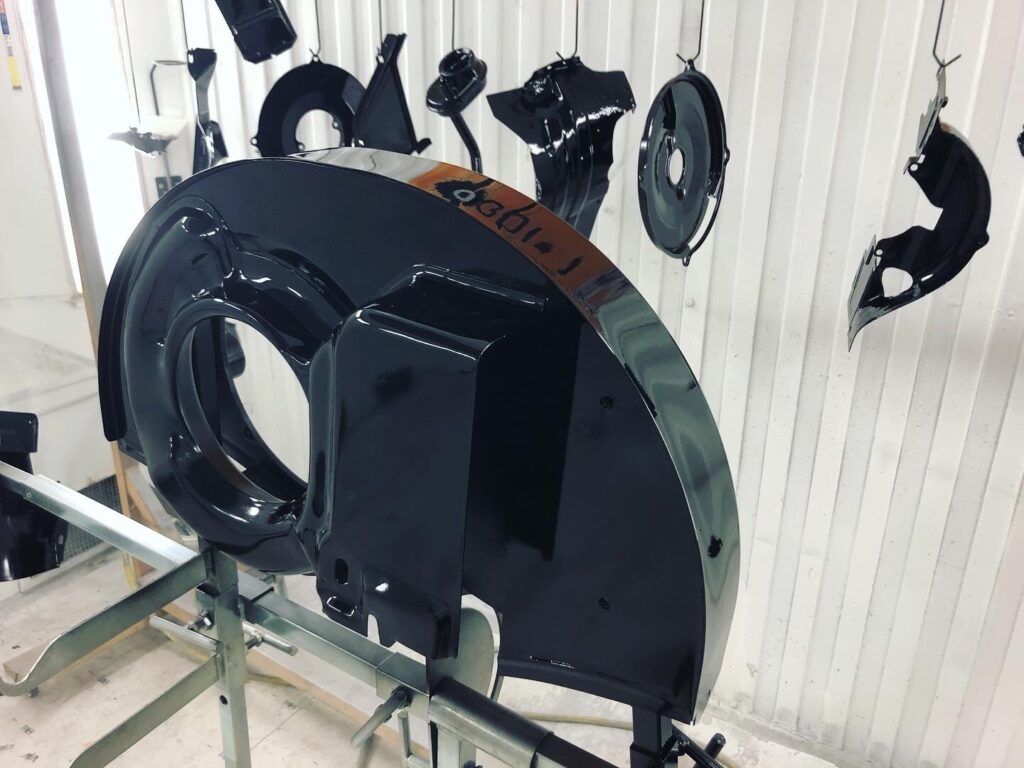
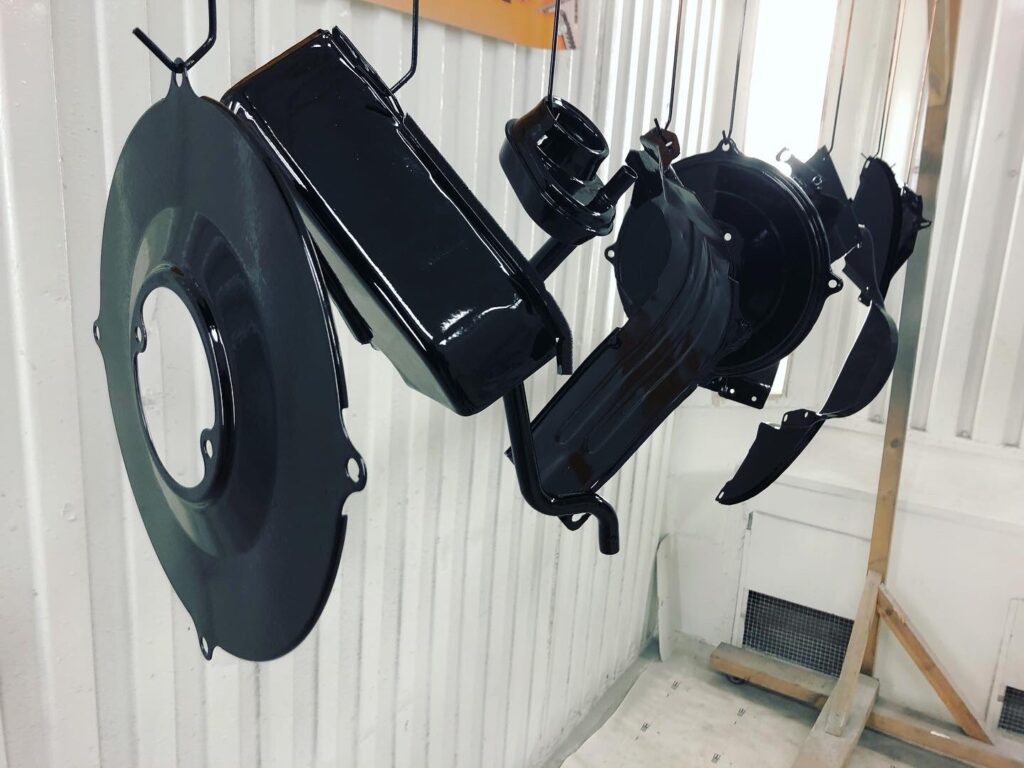
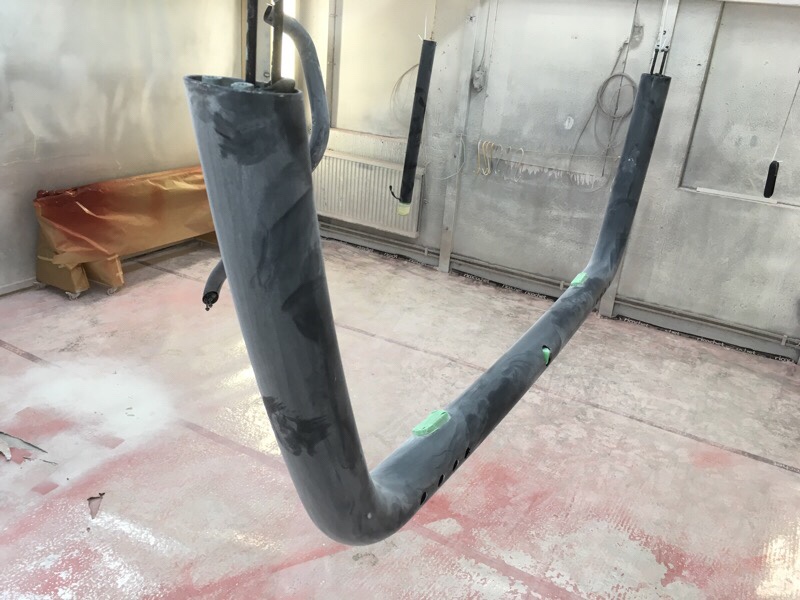
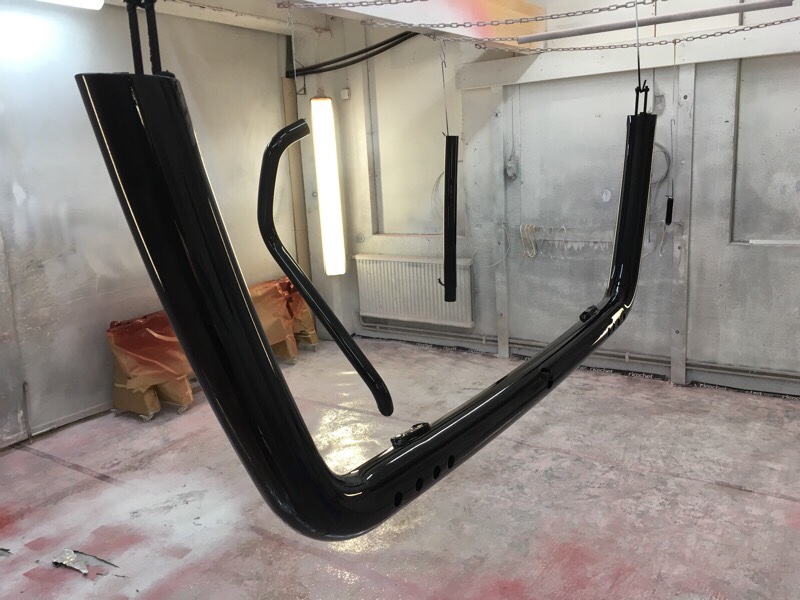
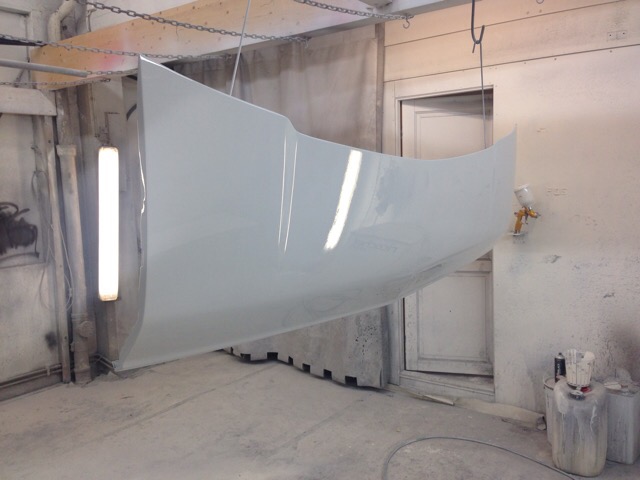
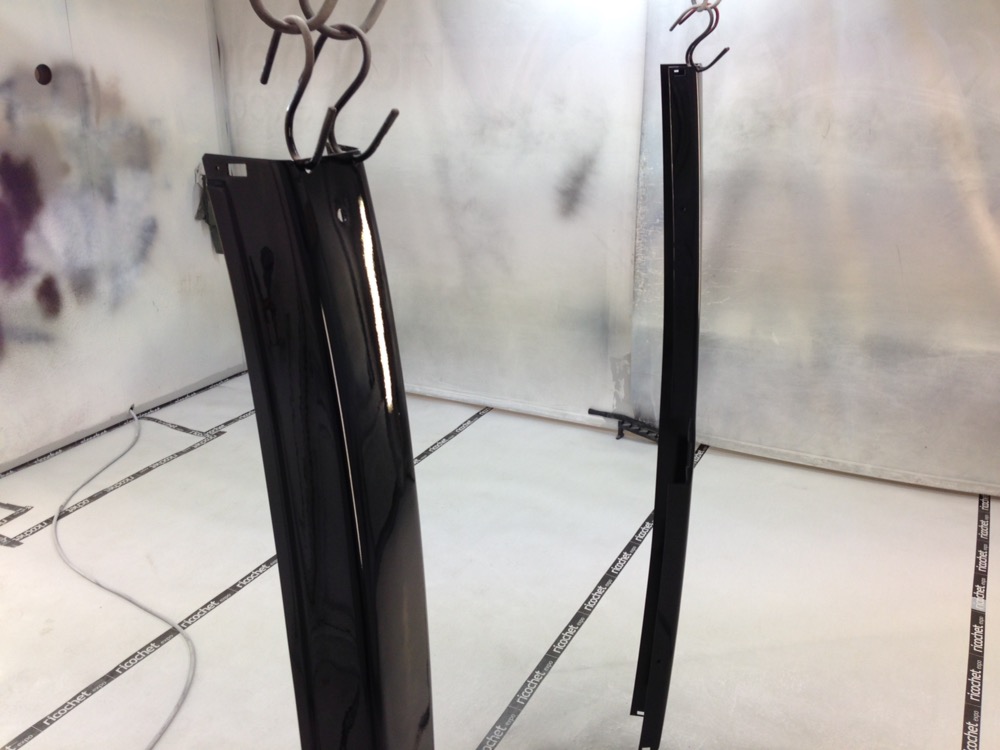
Fanhouse and other engine sheetmetal painted for Piece Performance, Hans Landenius.
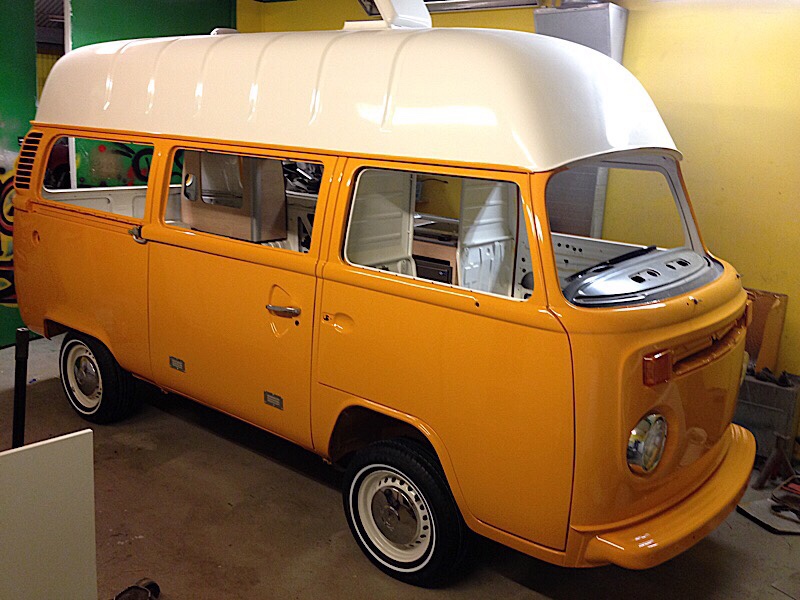
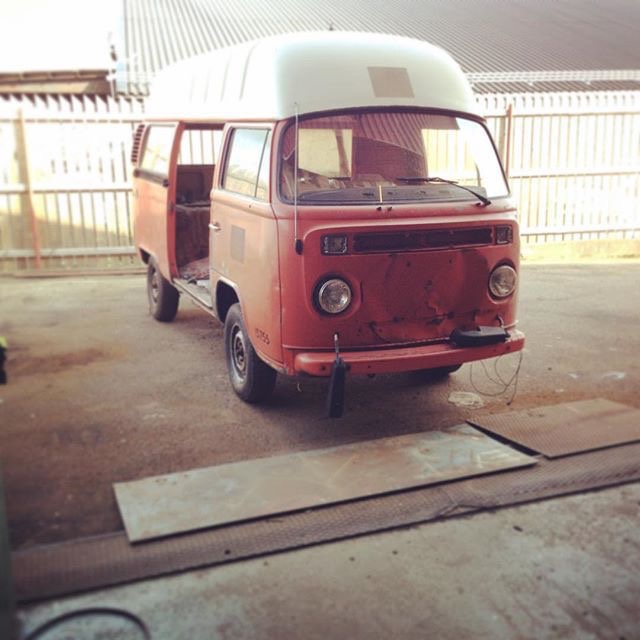
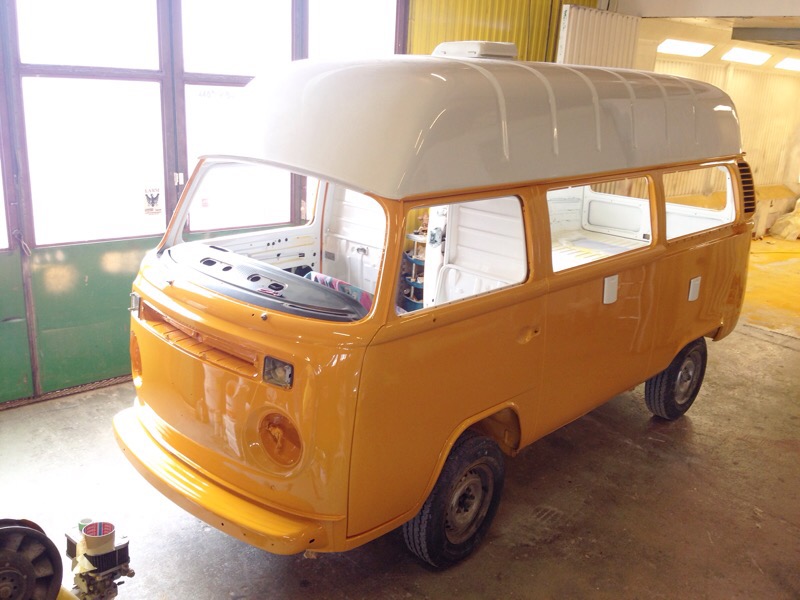
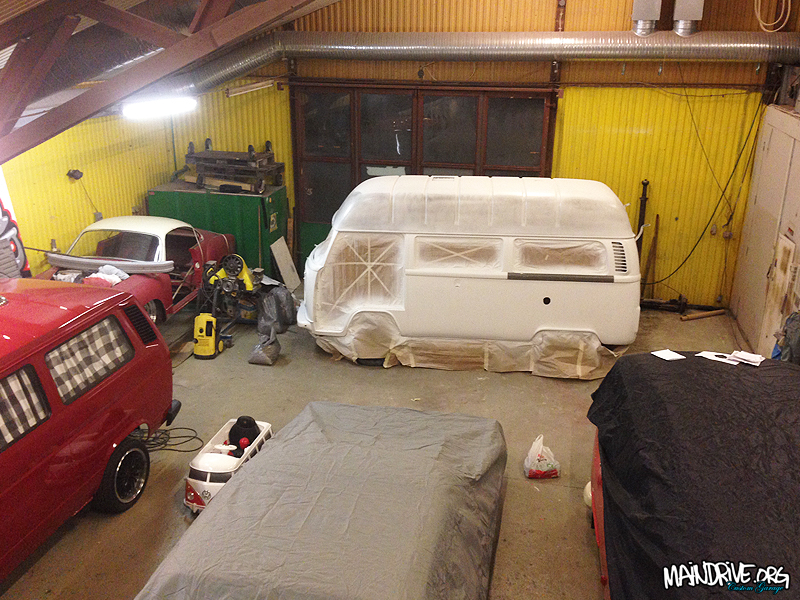
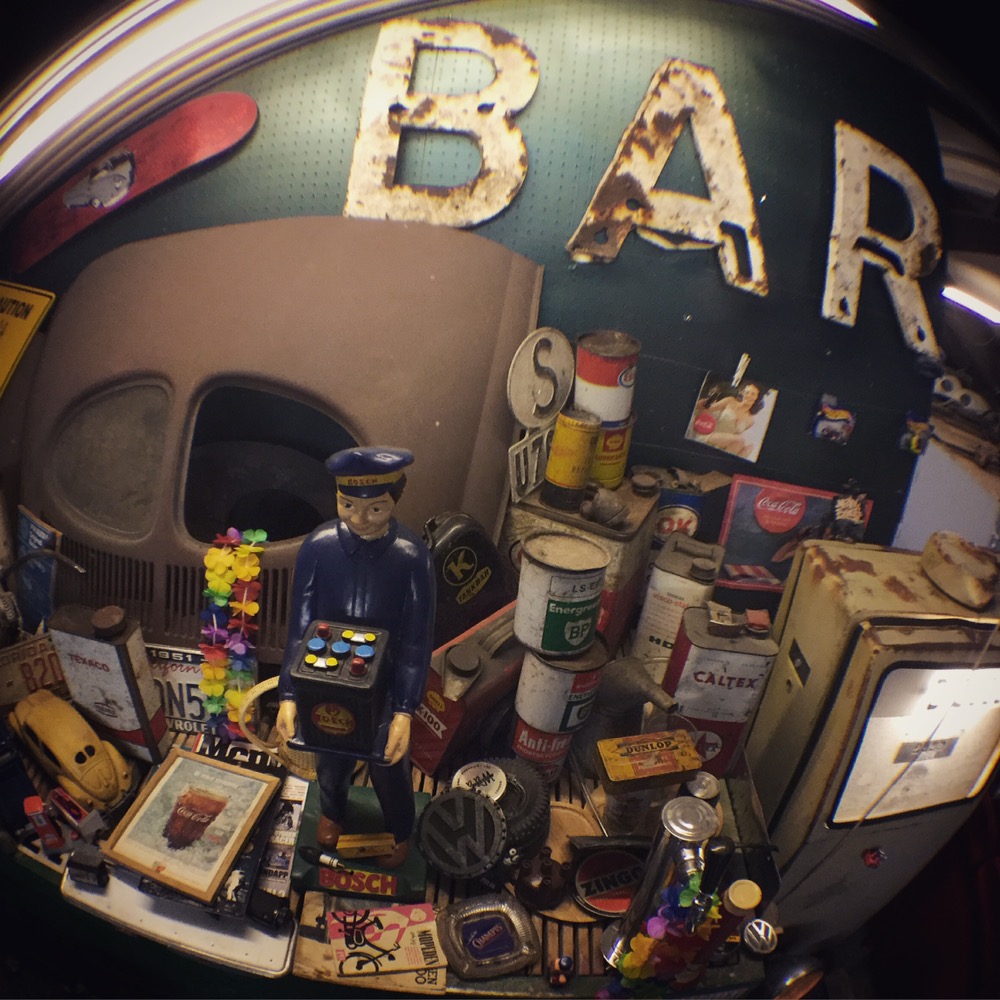
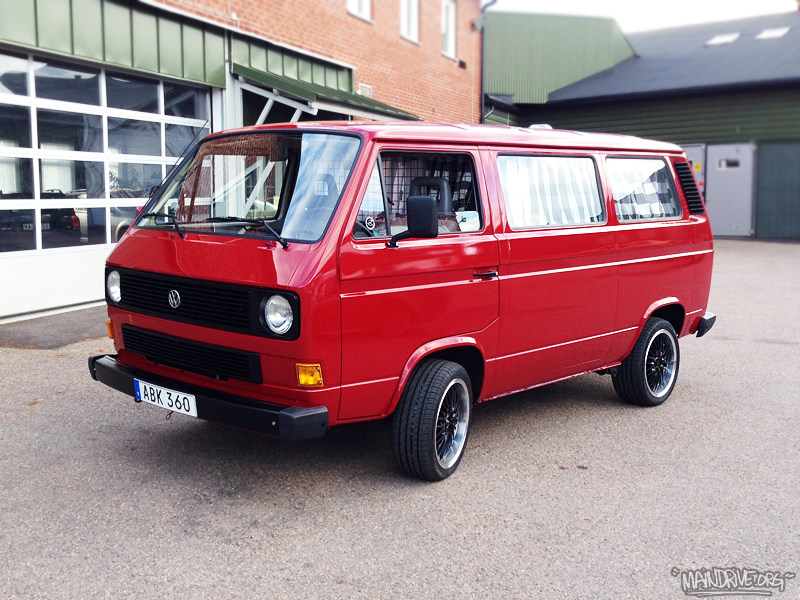
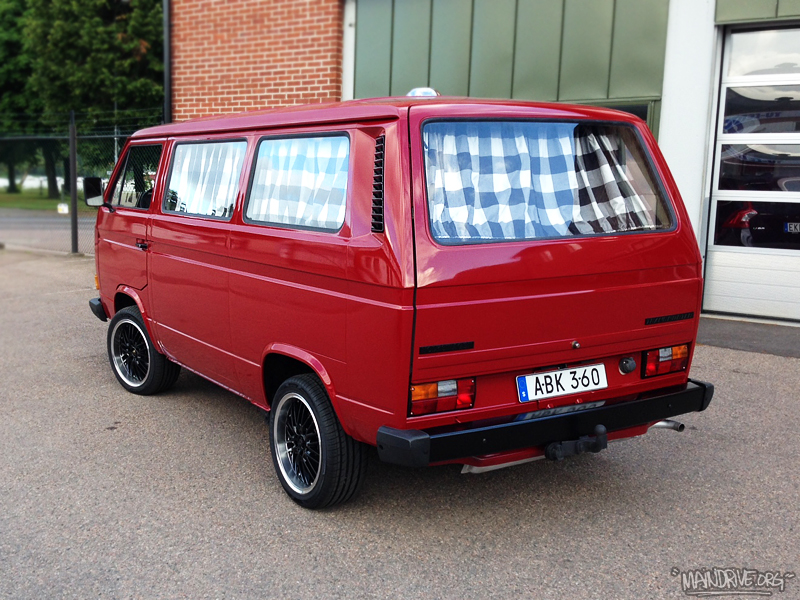
Some pictures on my 1975 VW T3 Baywindow bus with factory spec highroof. Color is “VW Marino Yellow L20a”. Last picture shows how it all started…


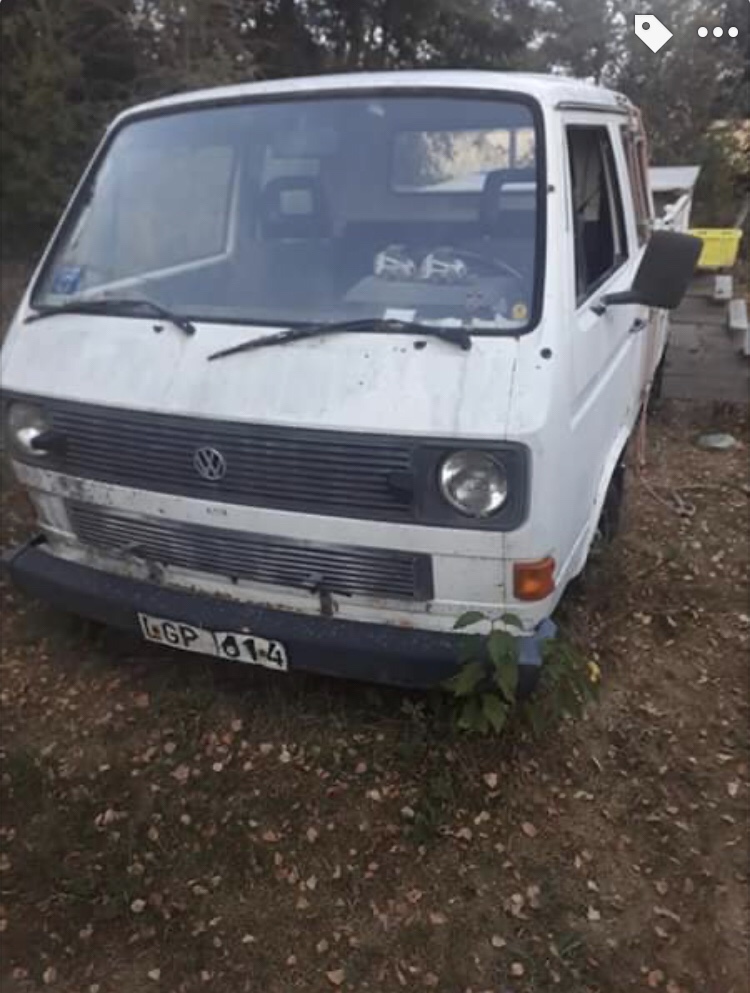
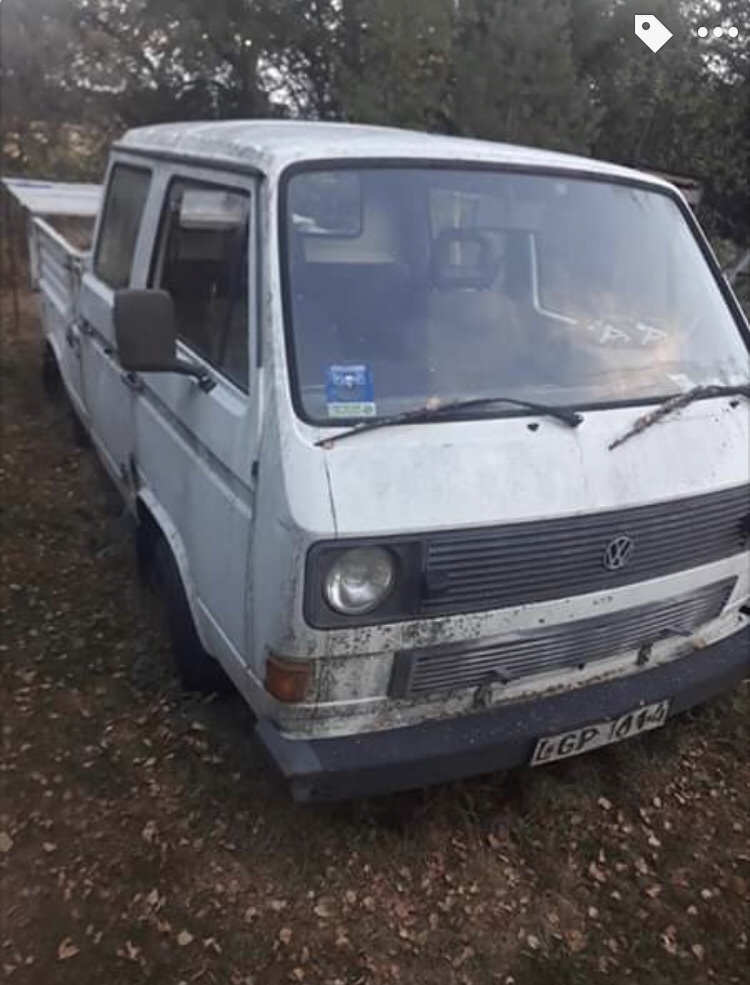
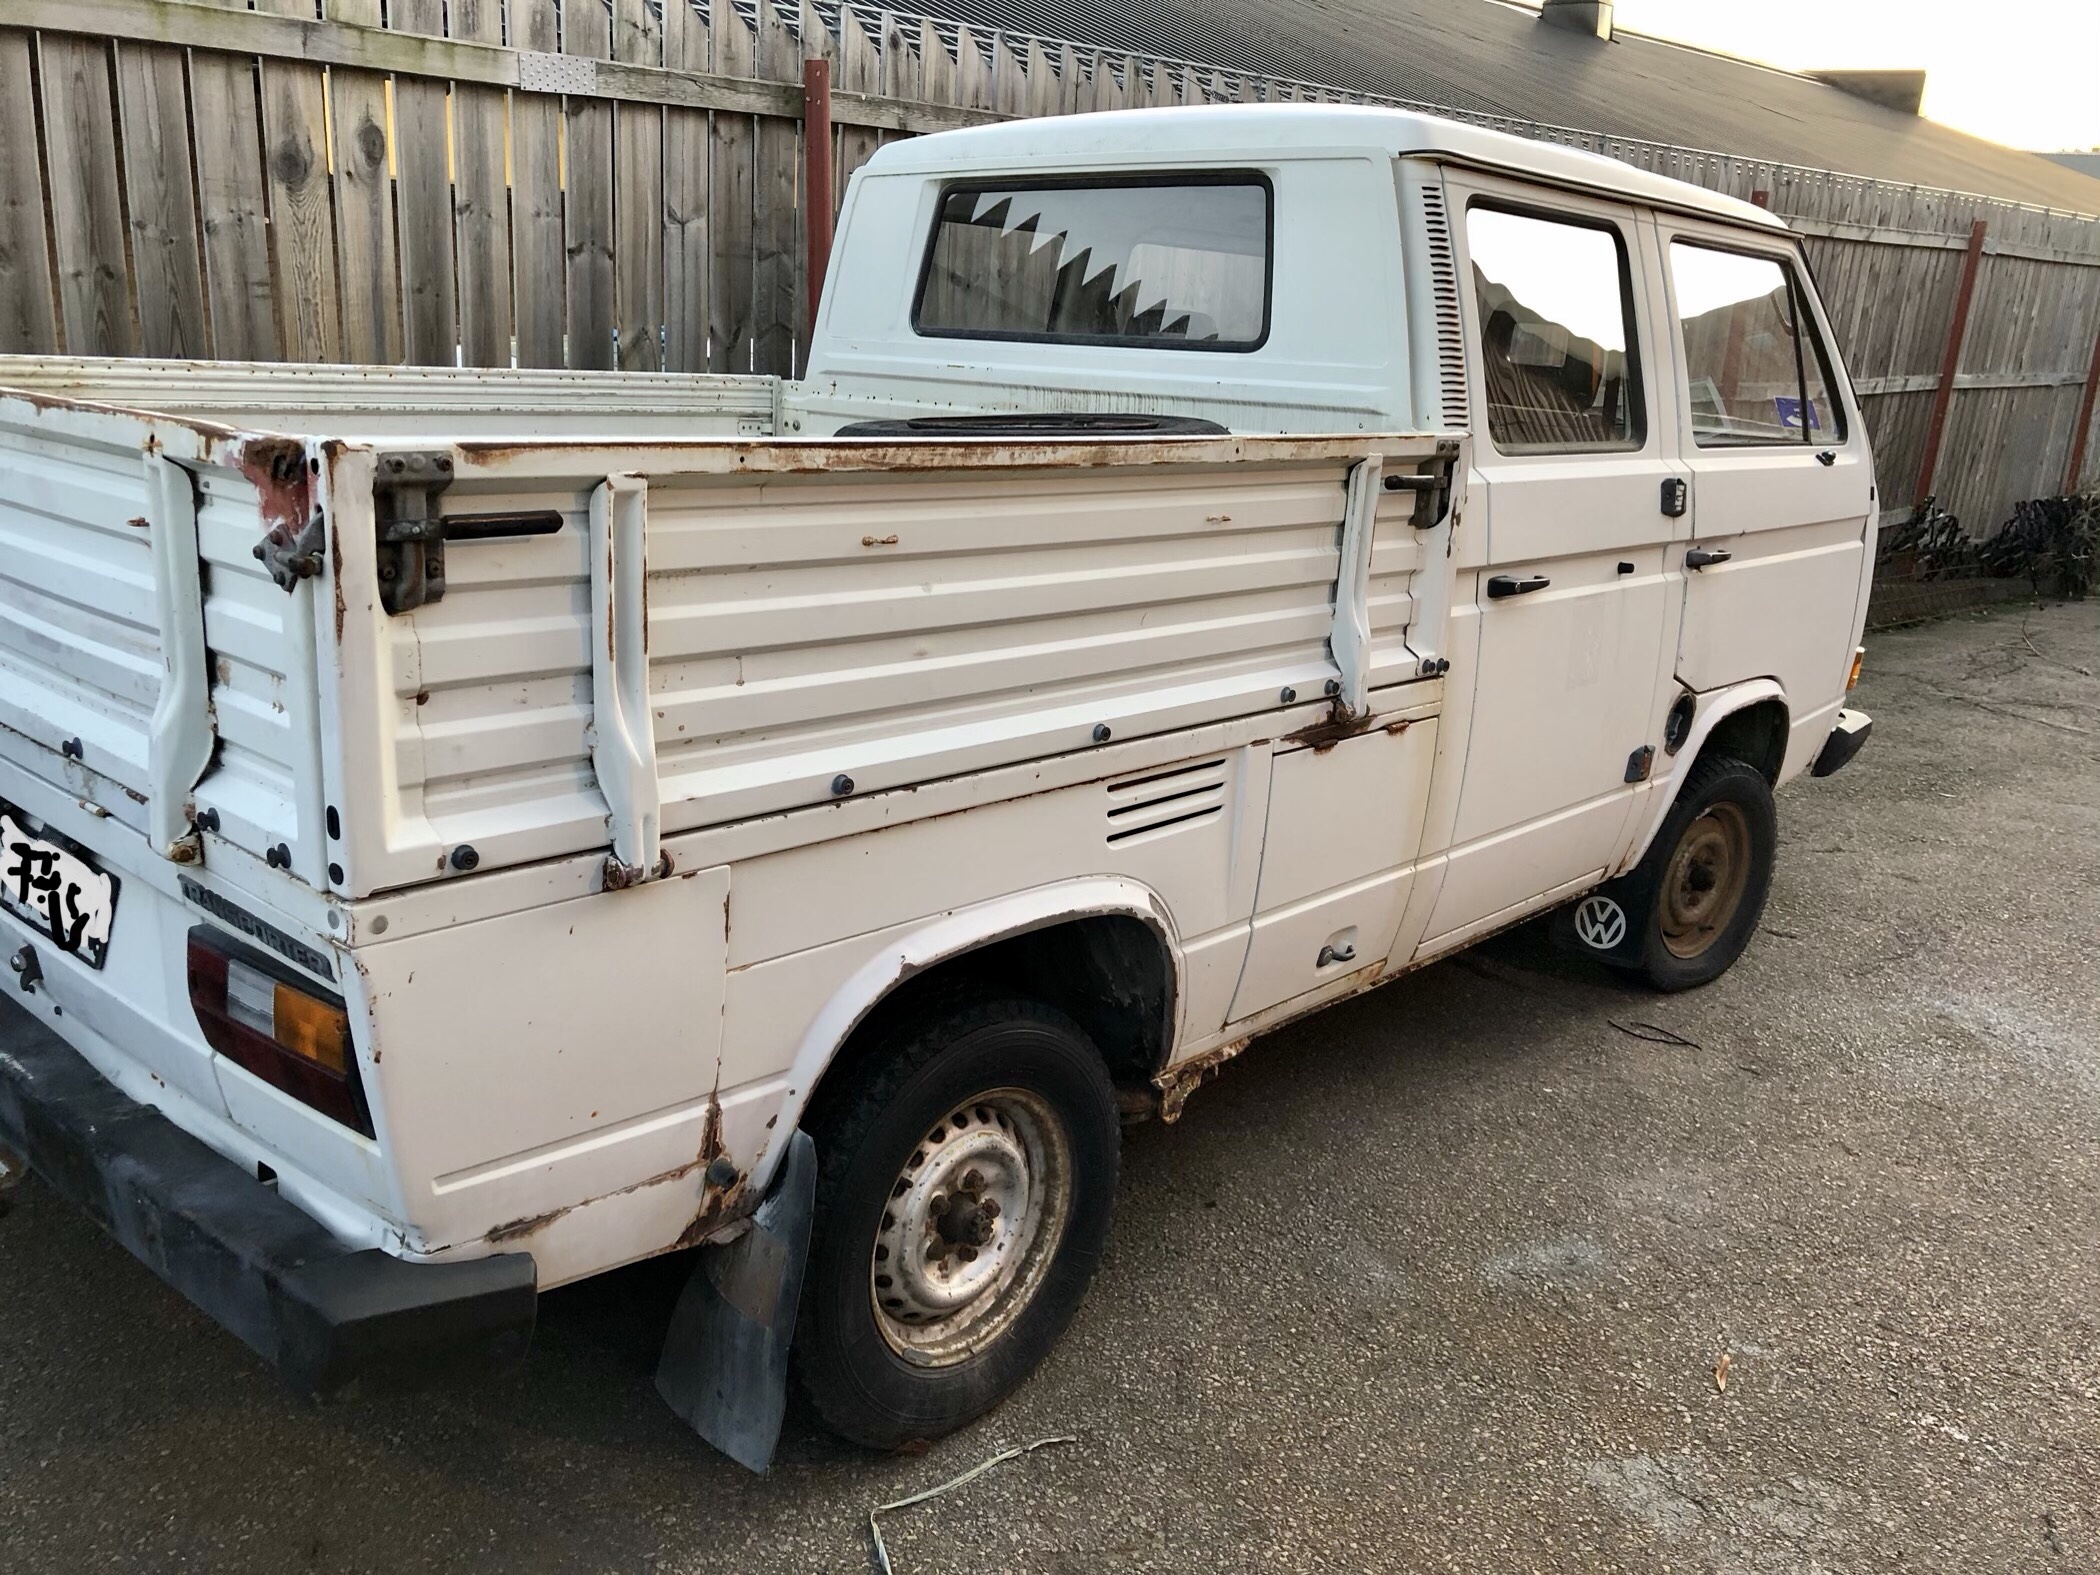
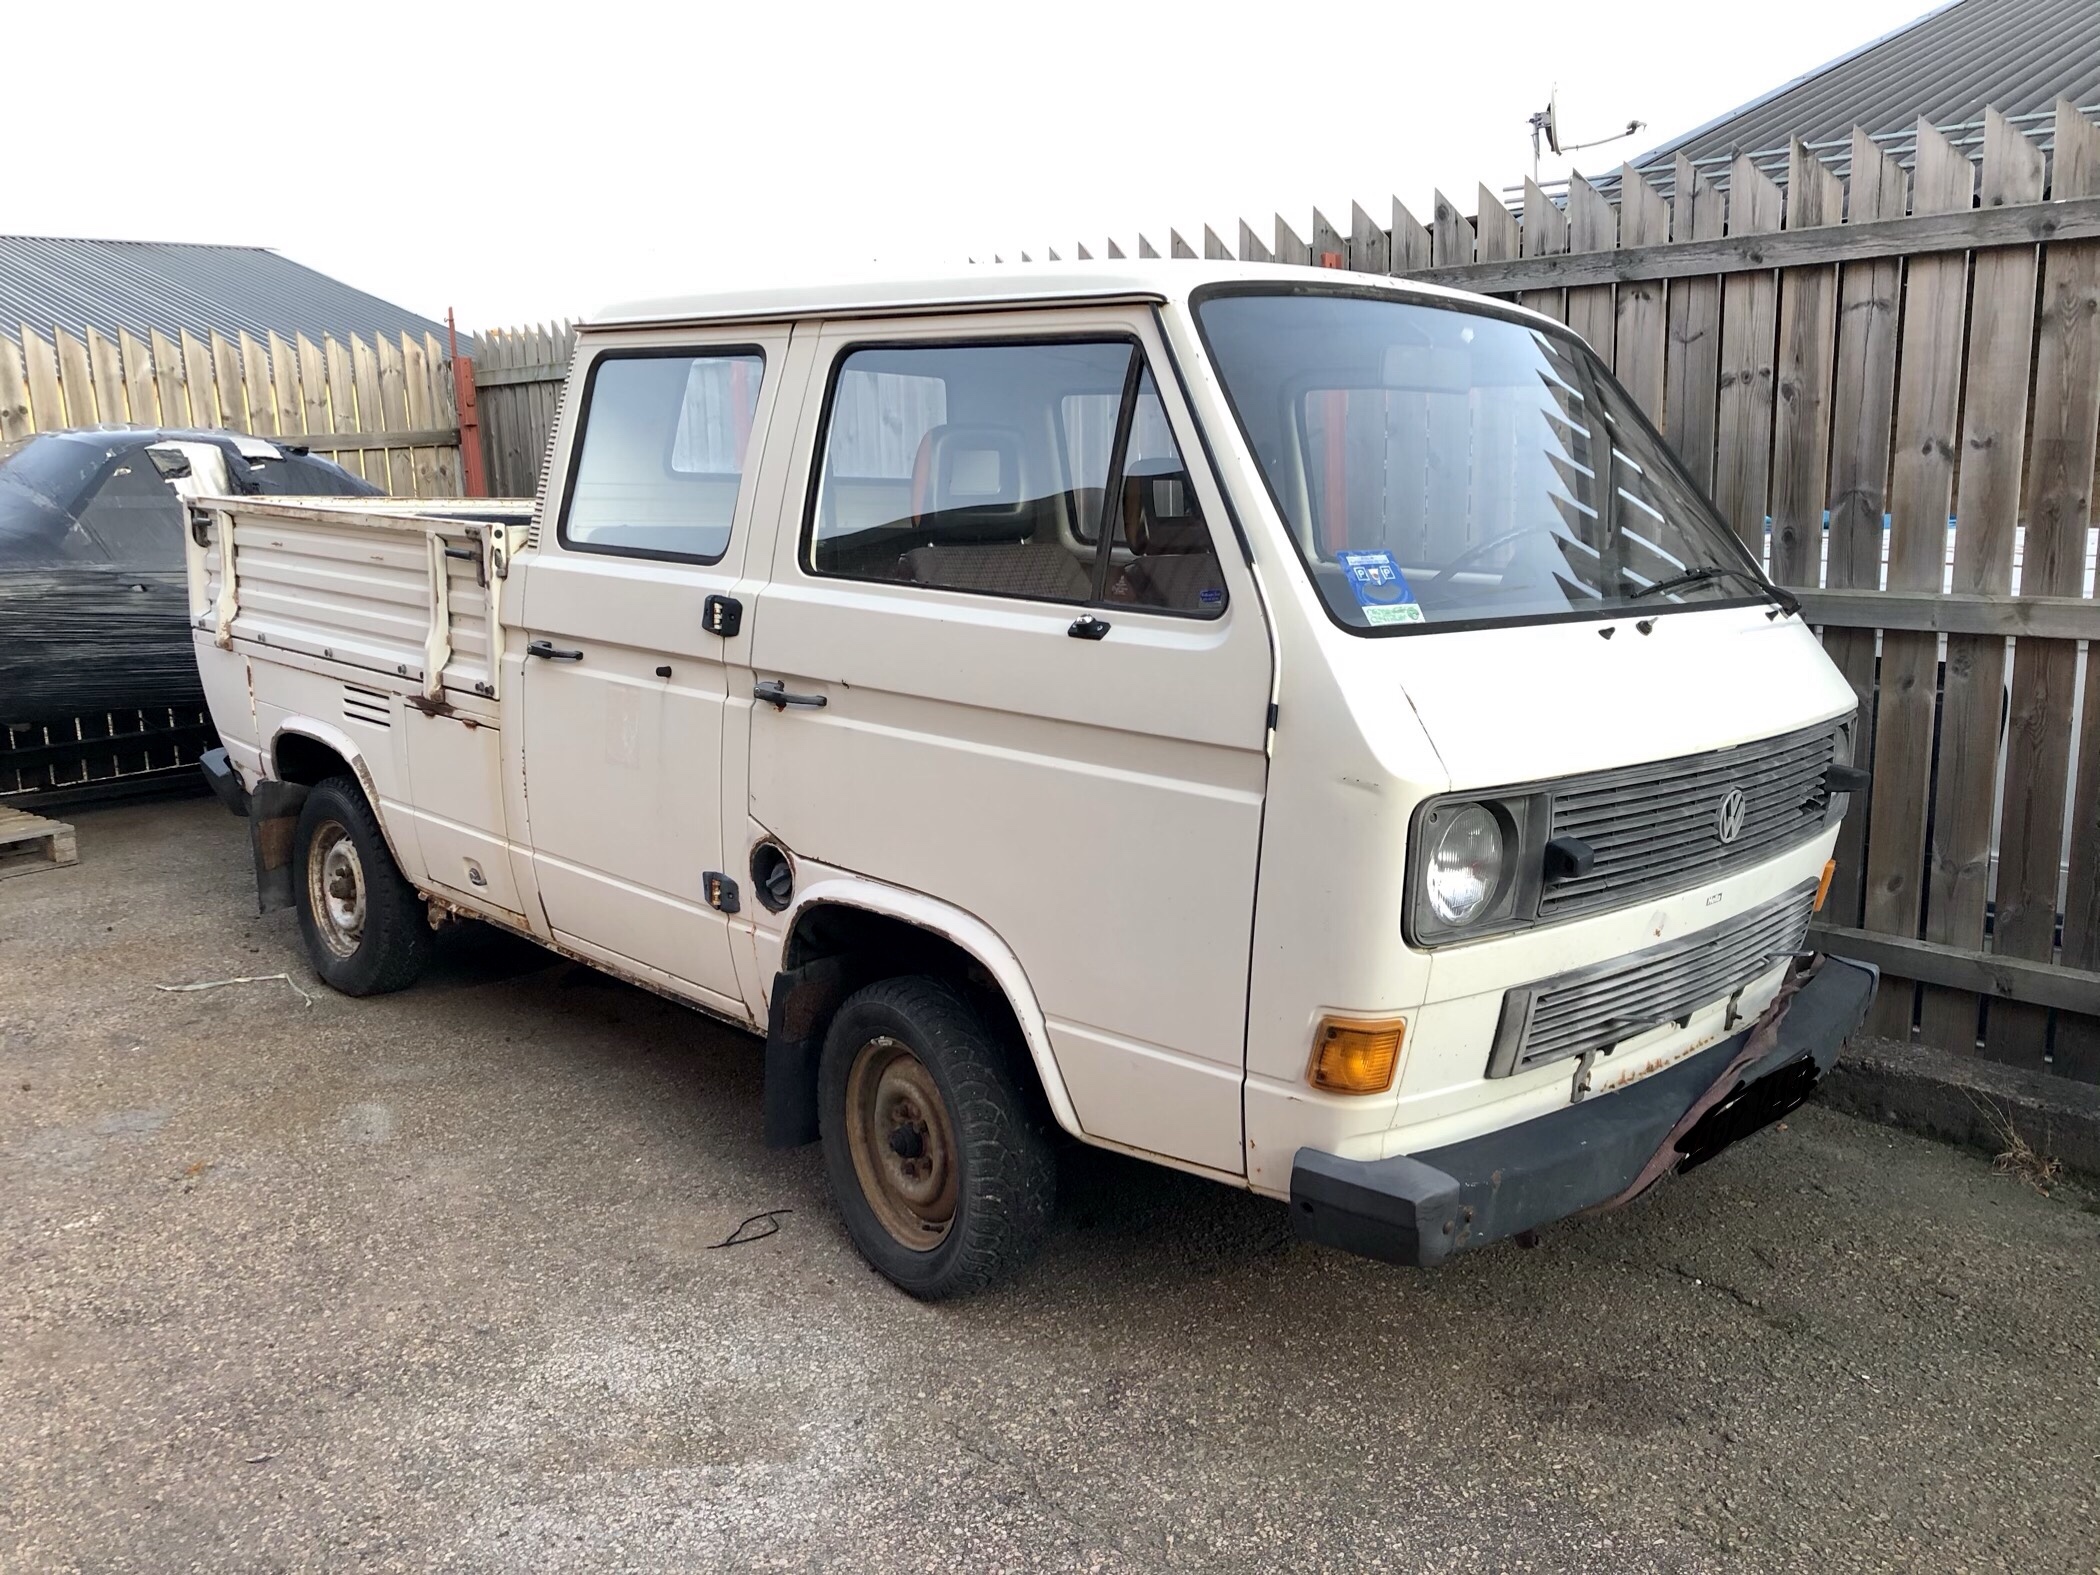
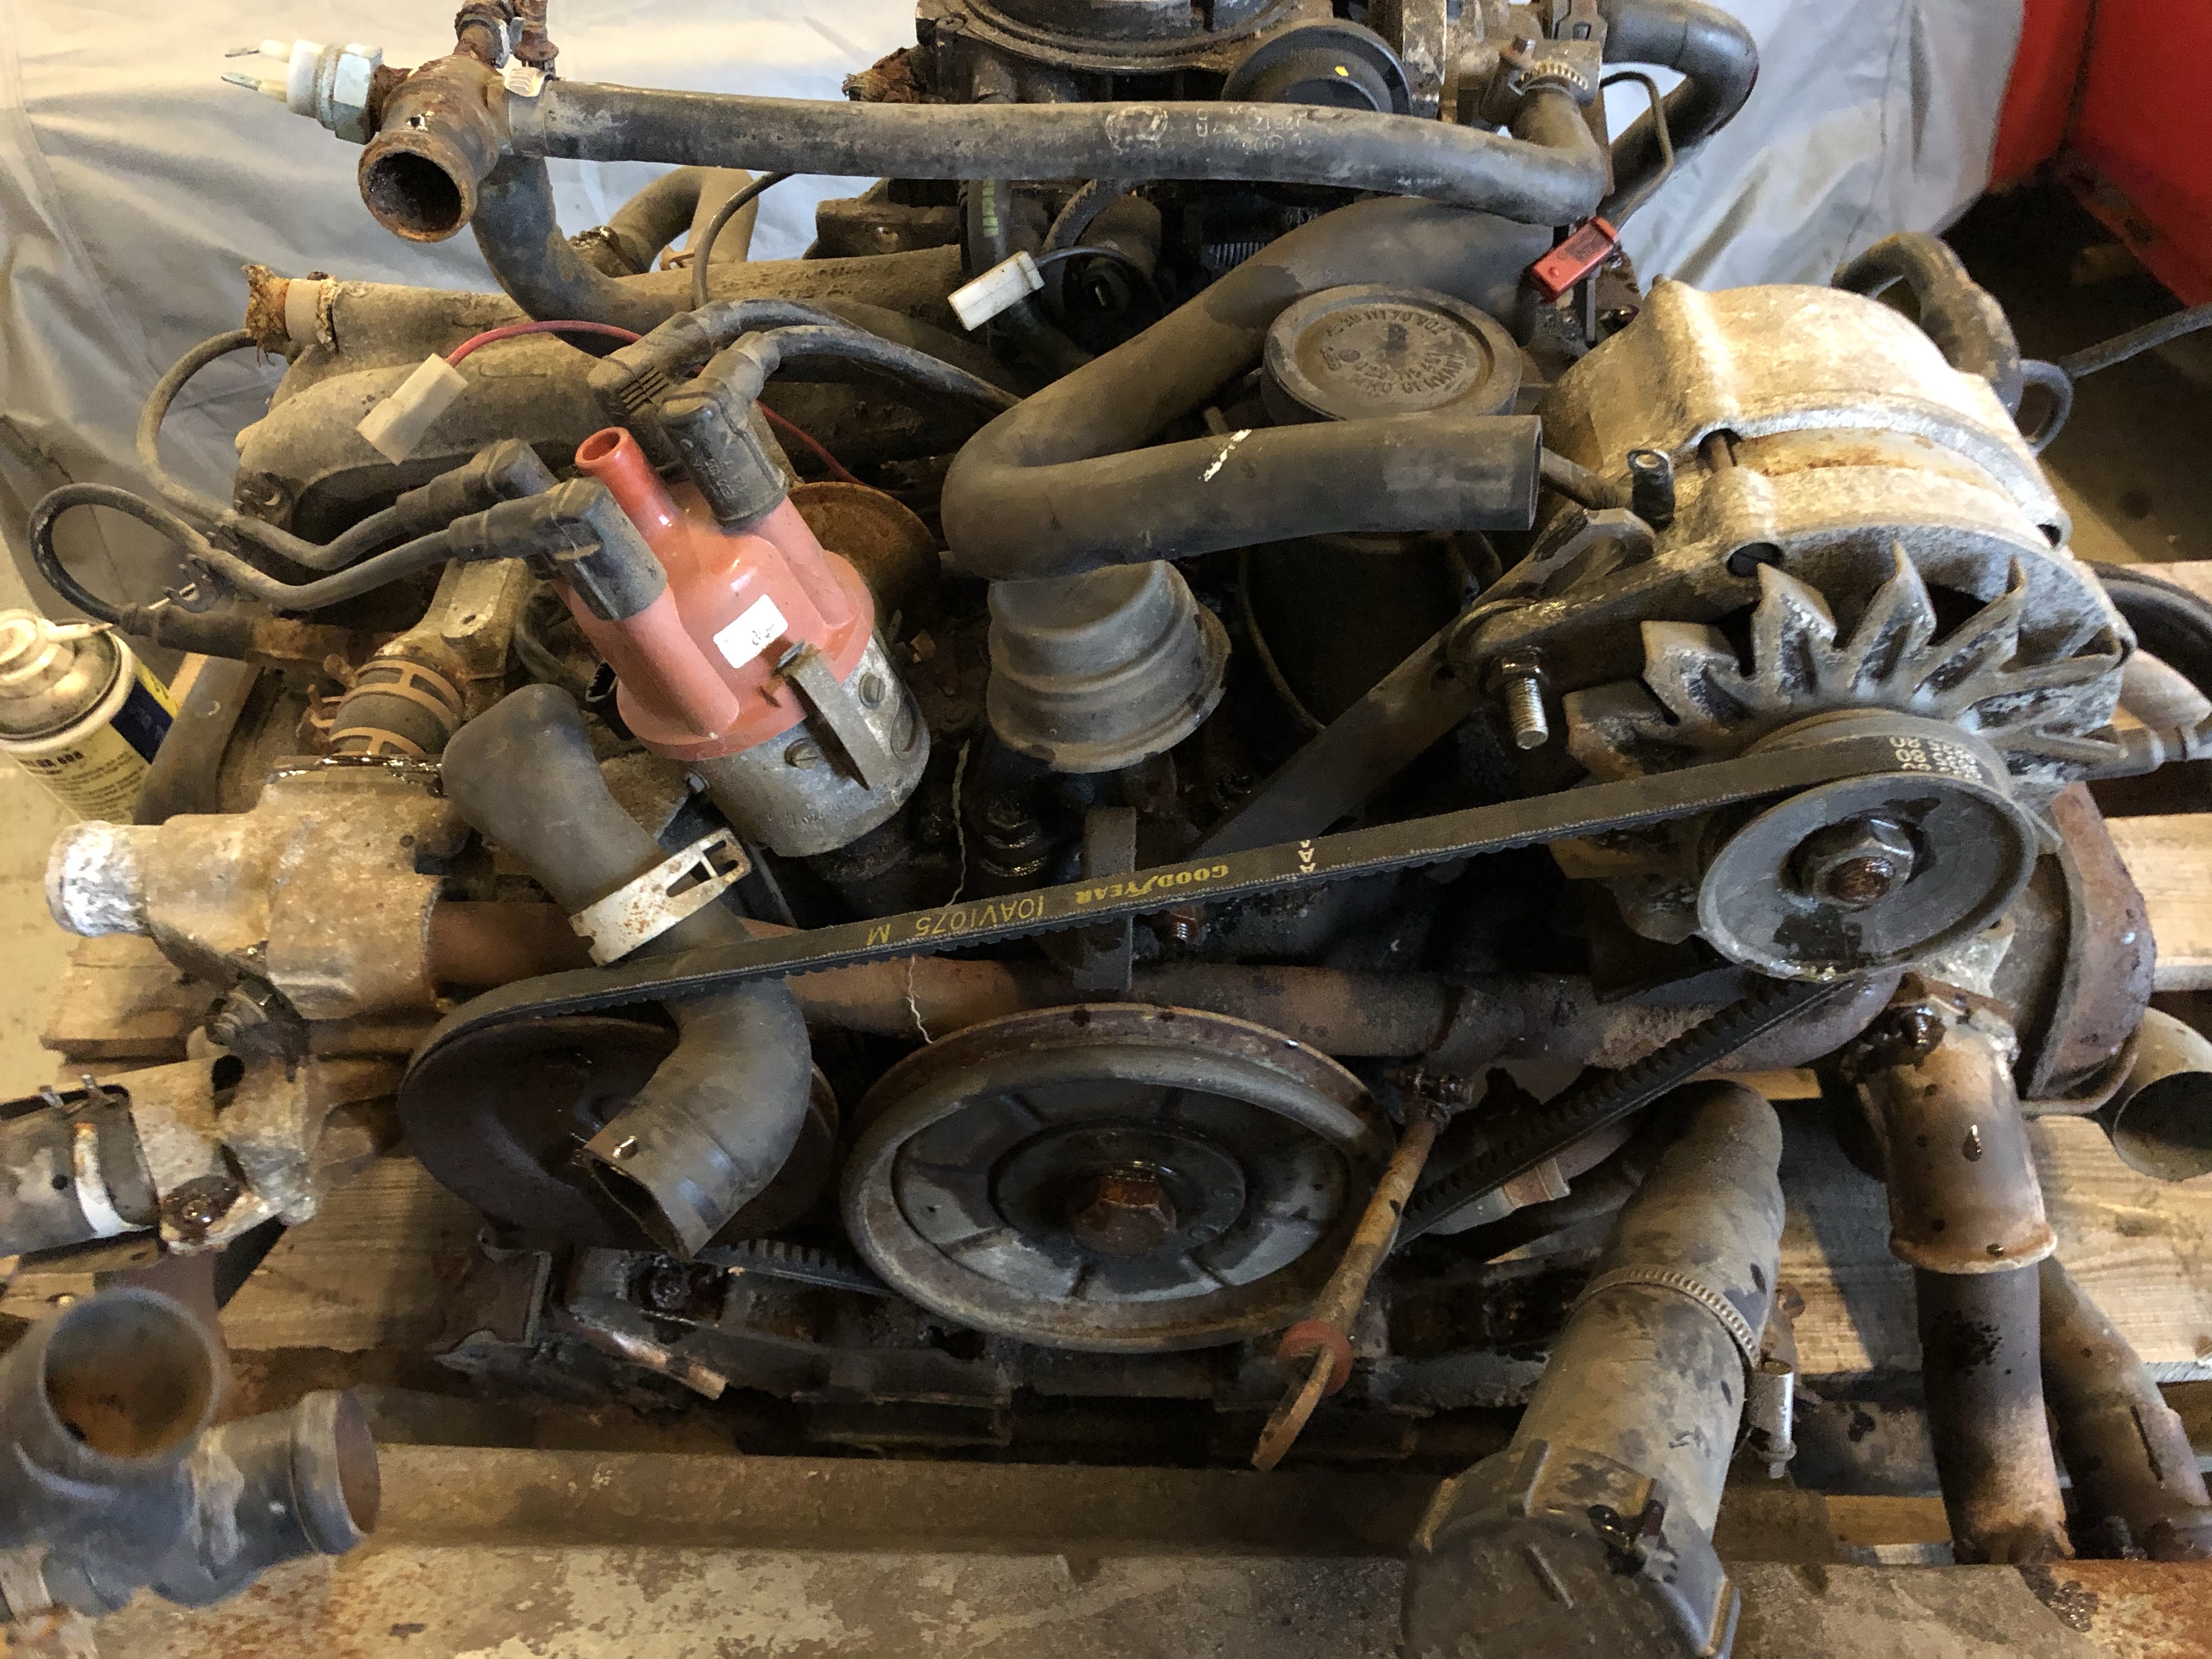
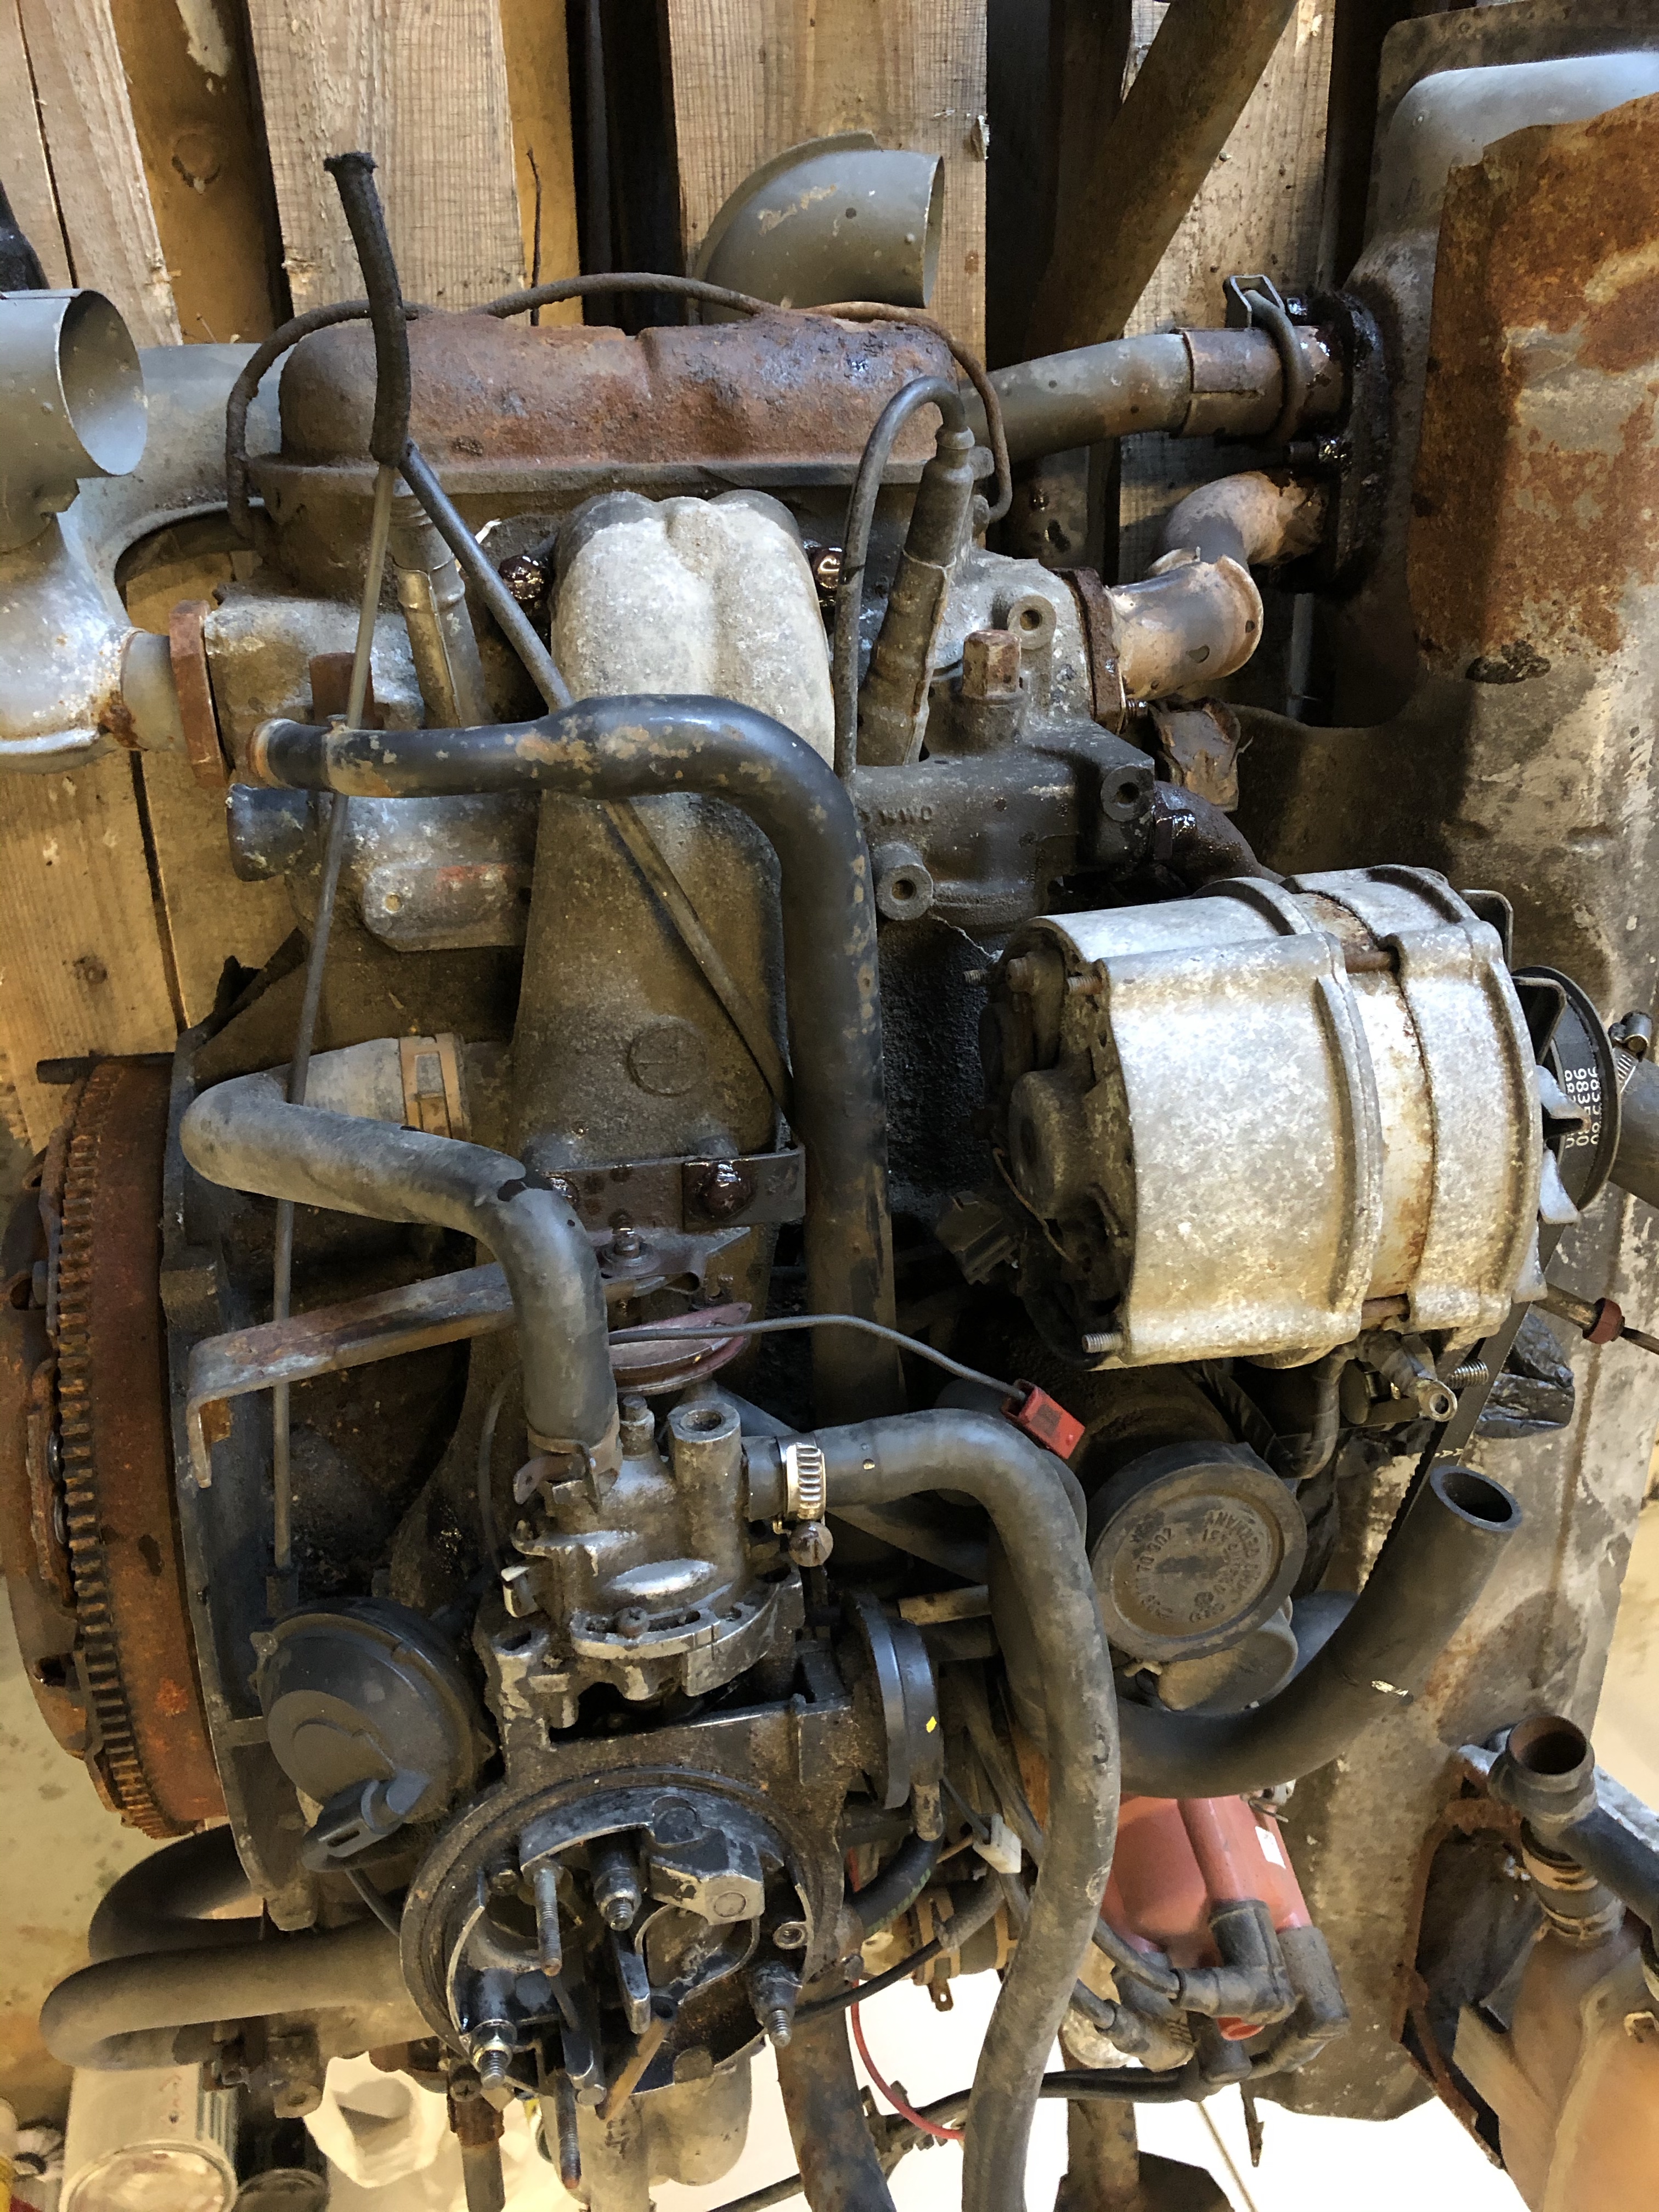
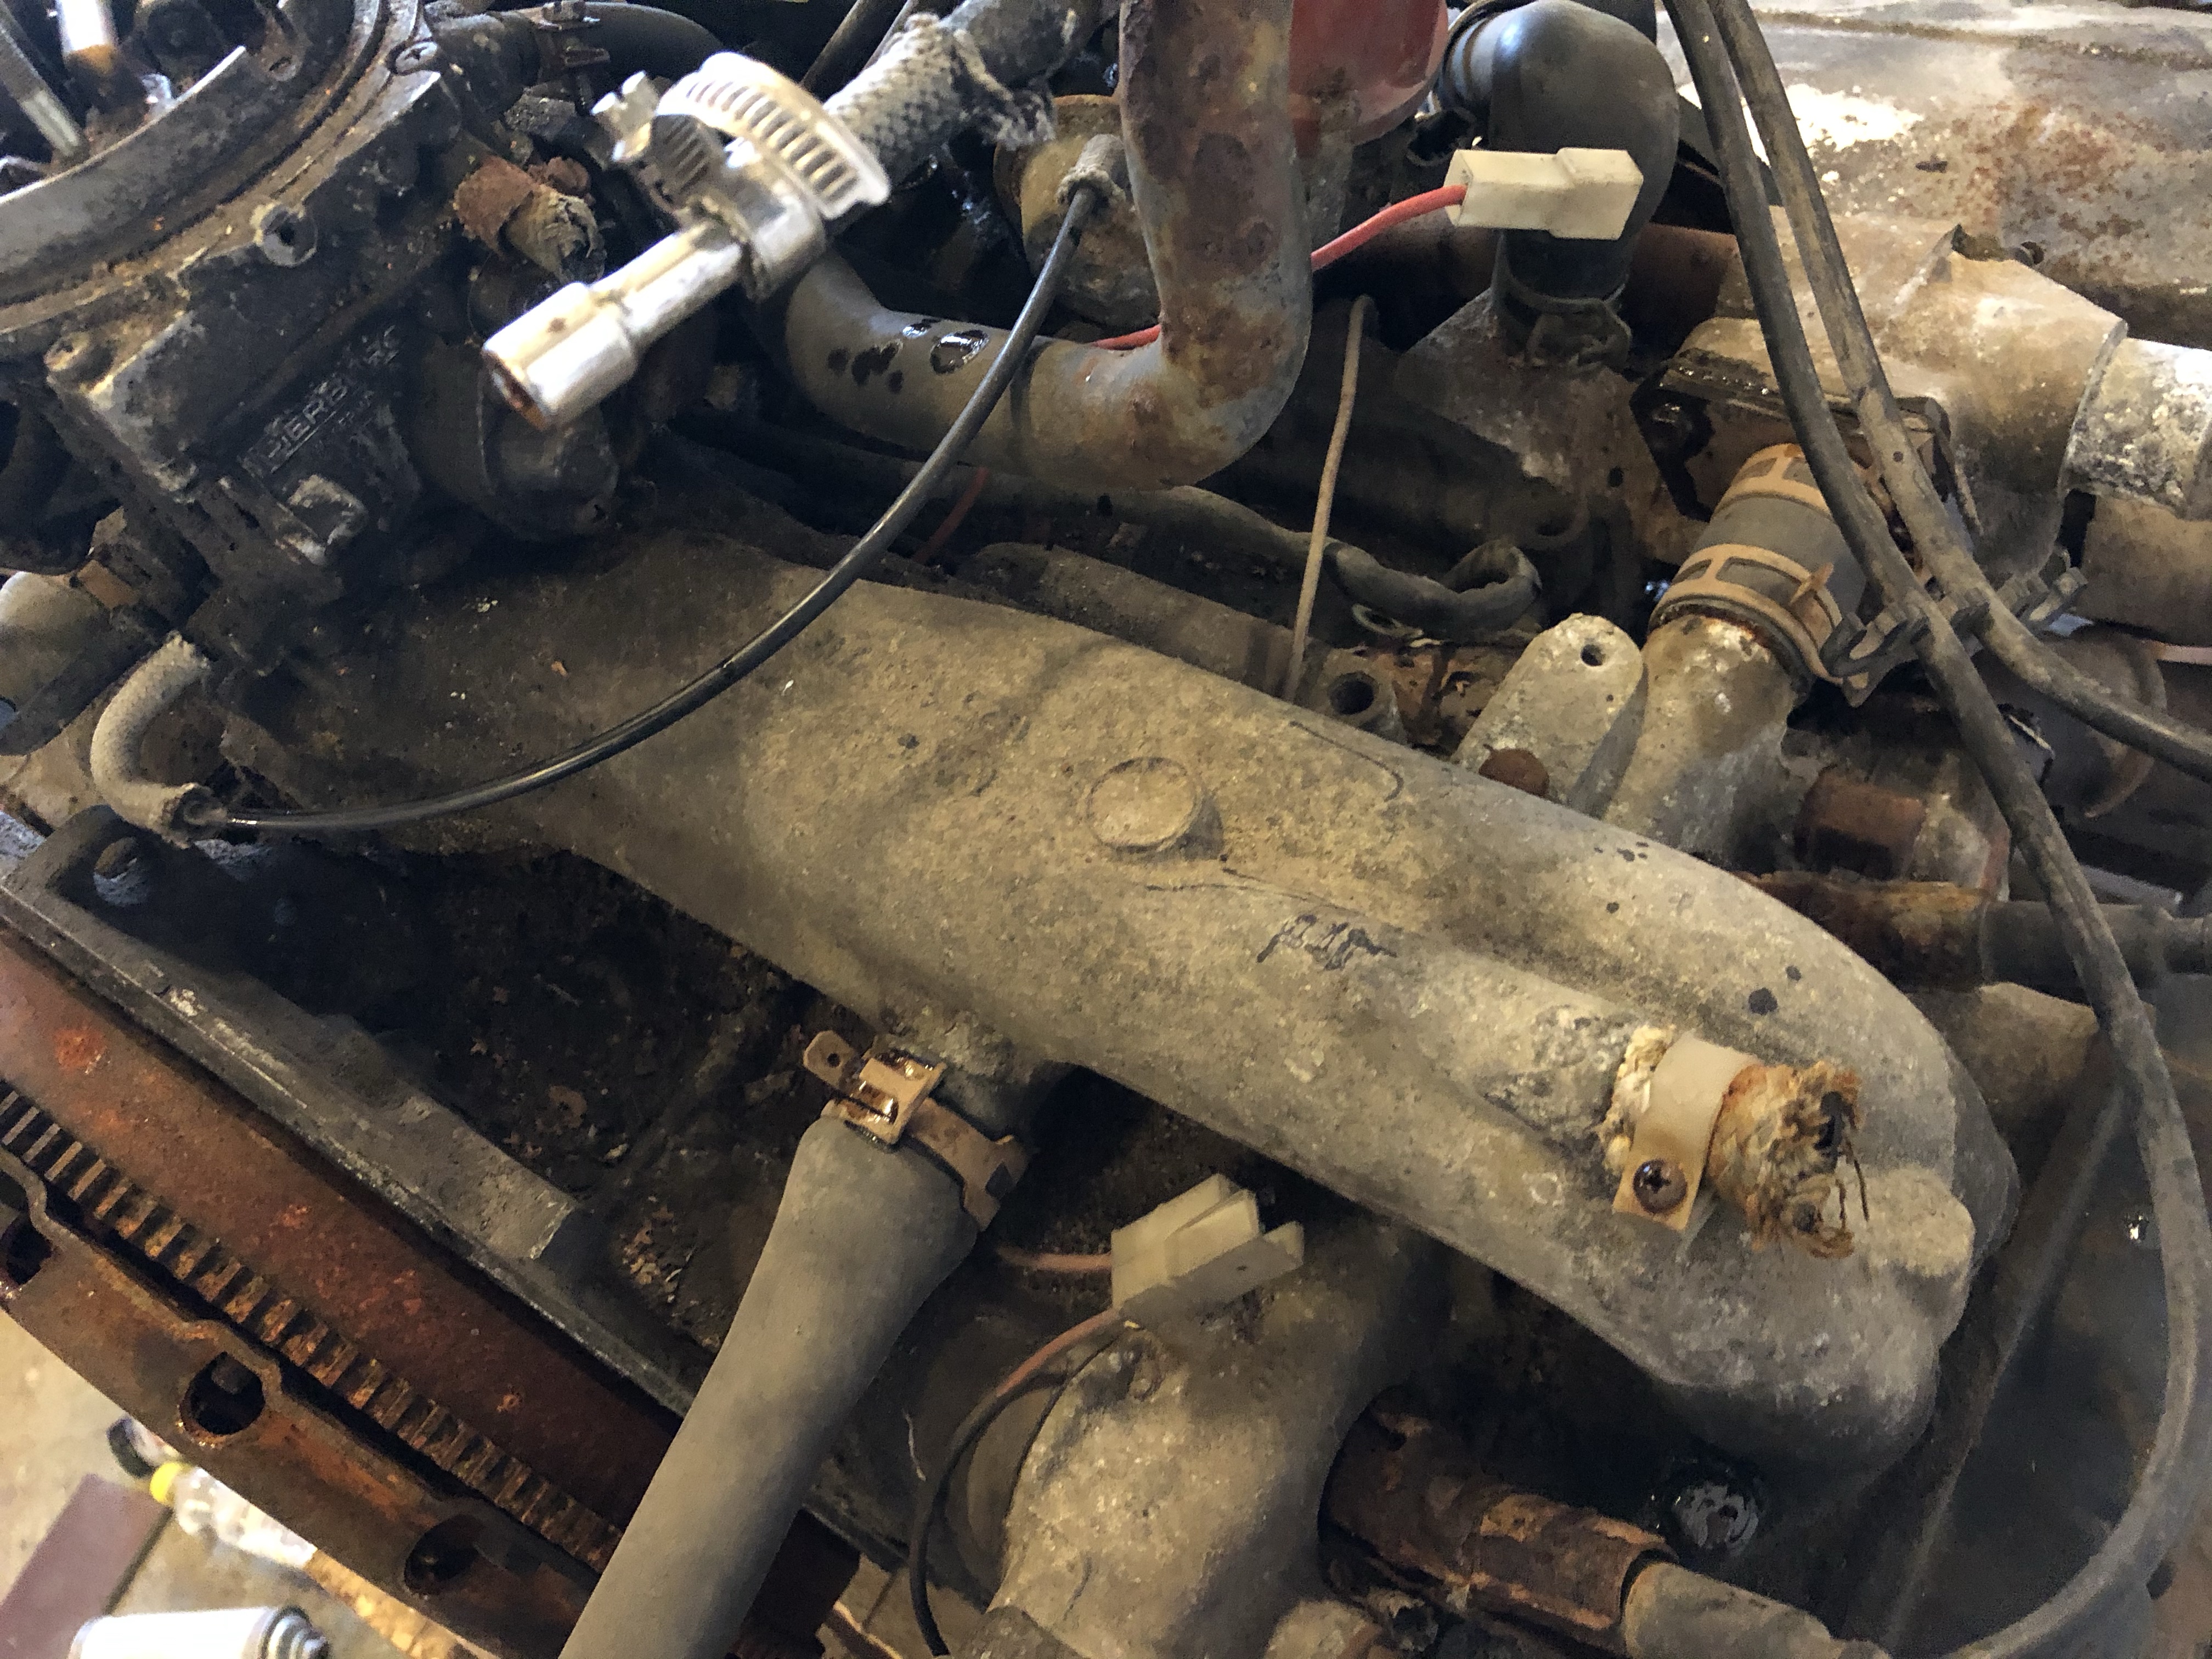
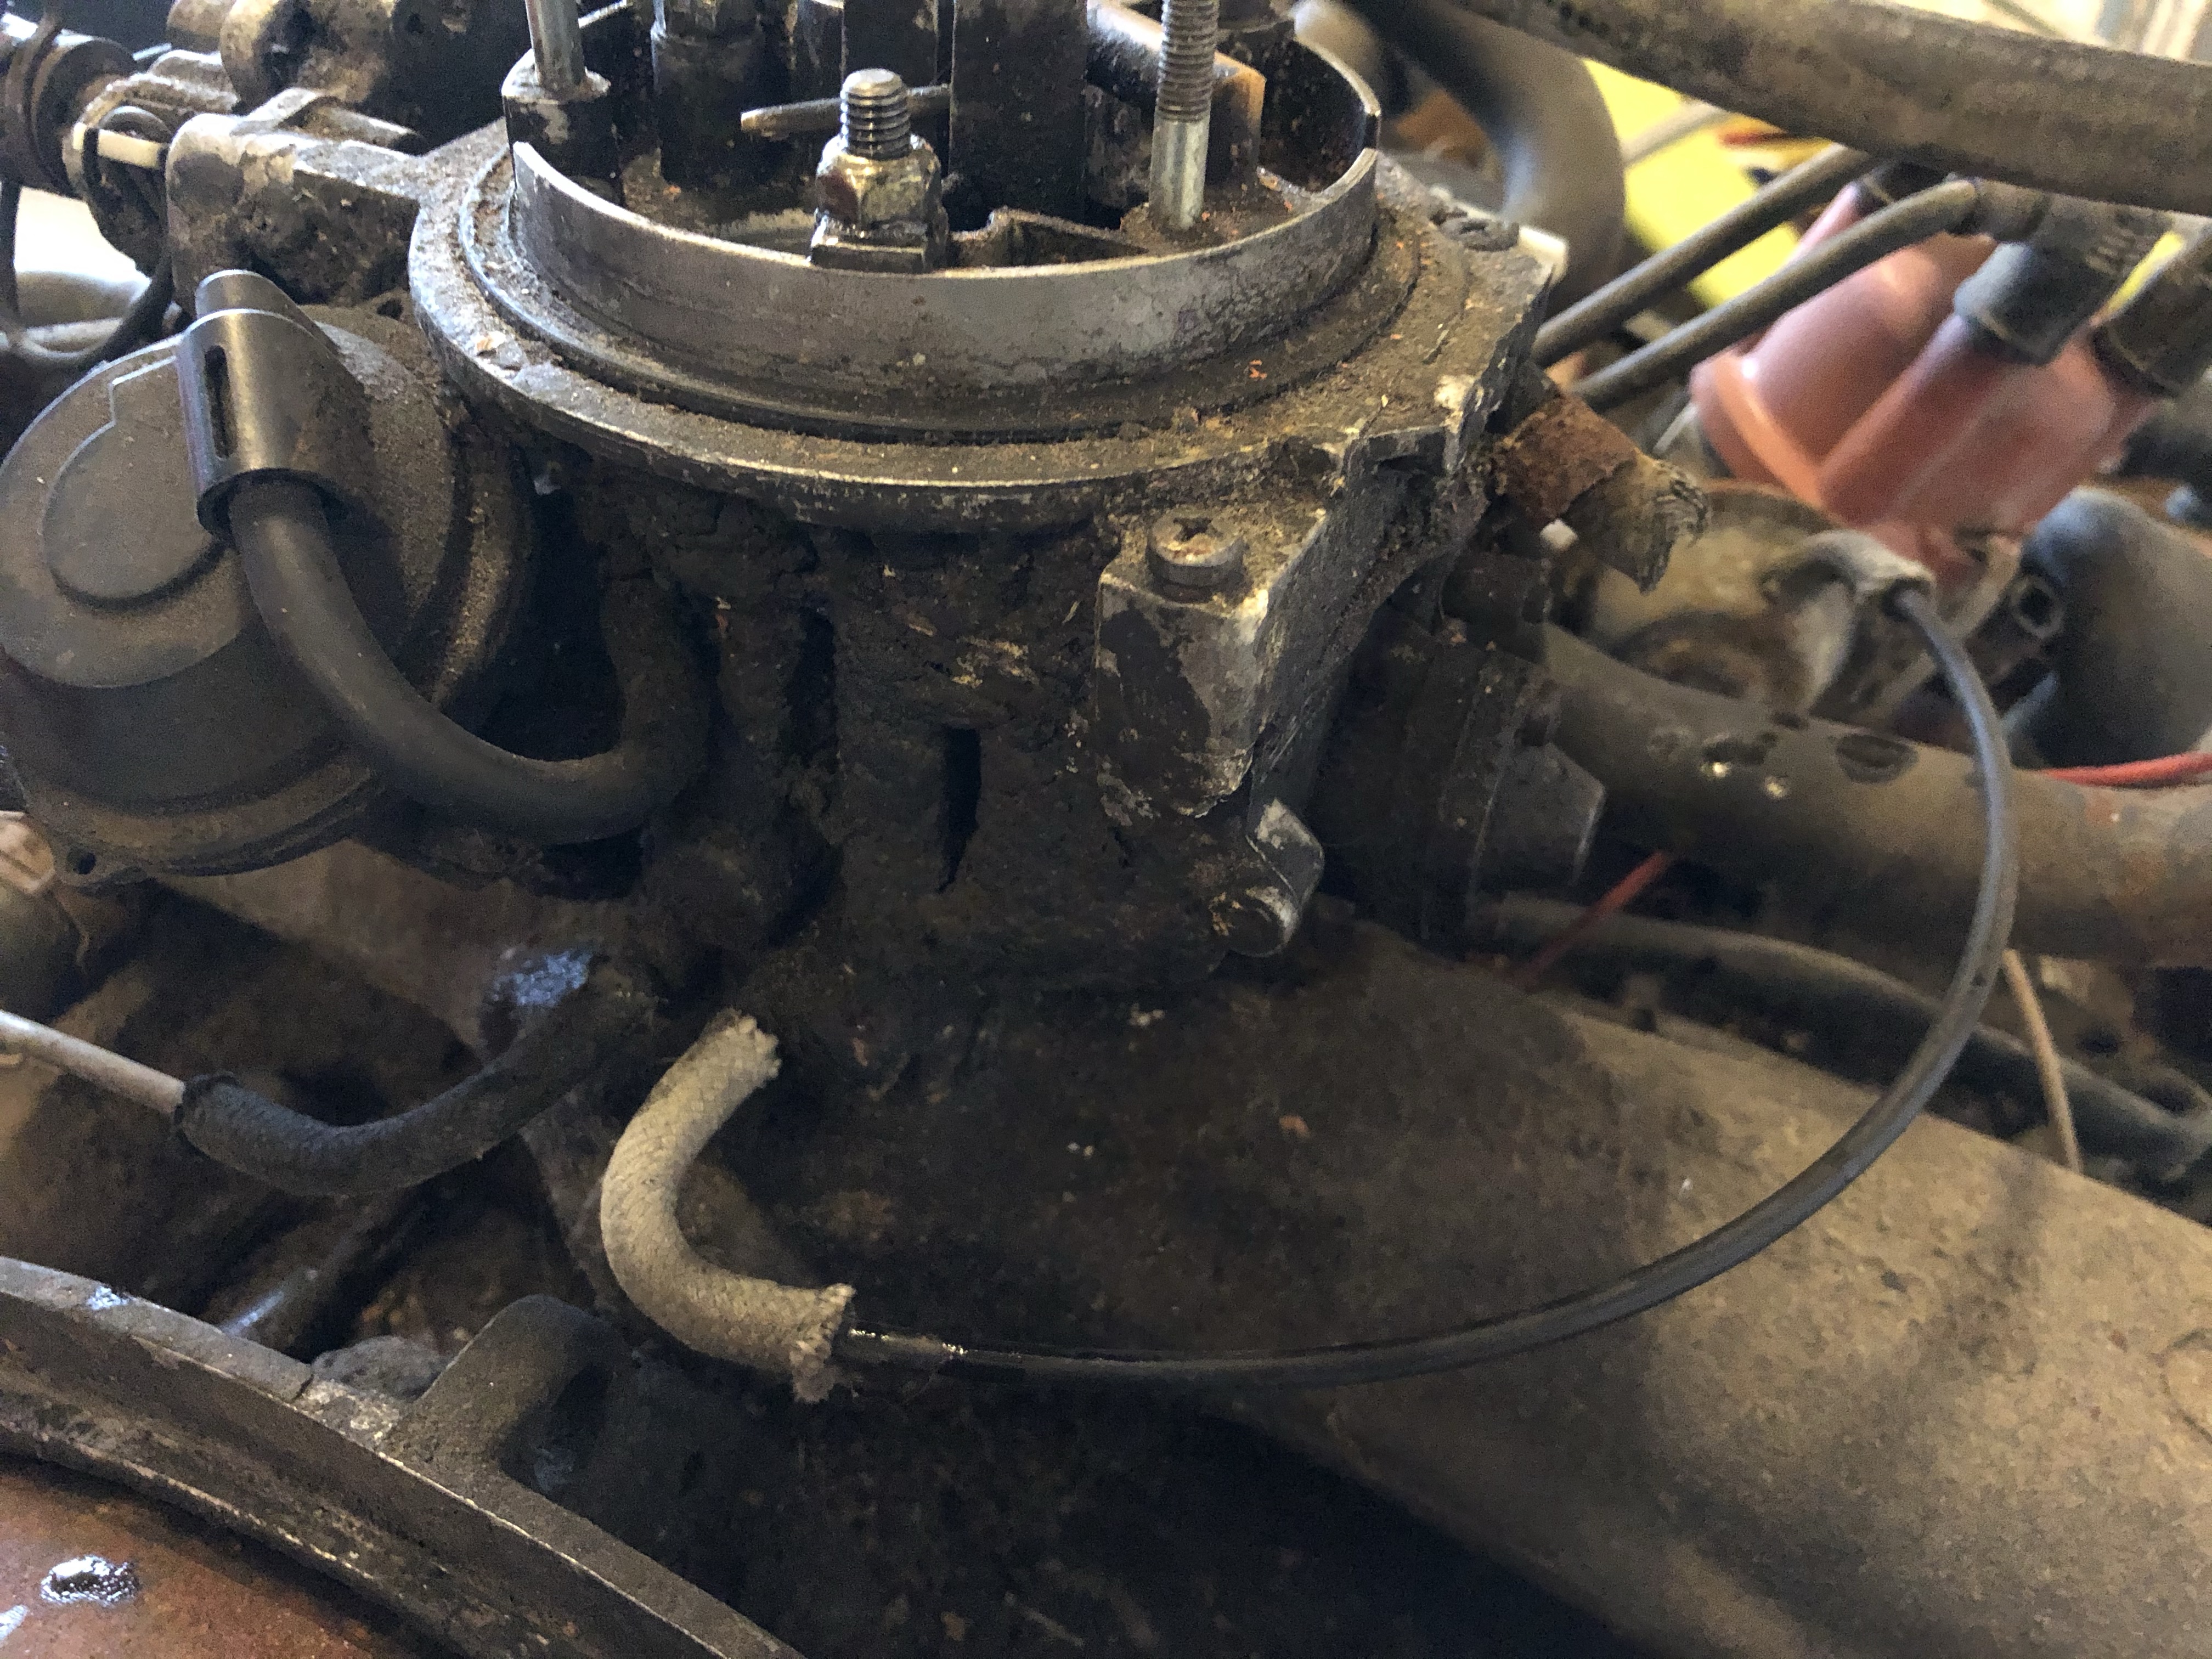
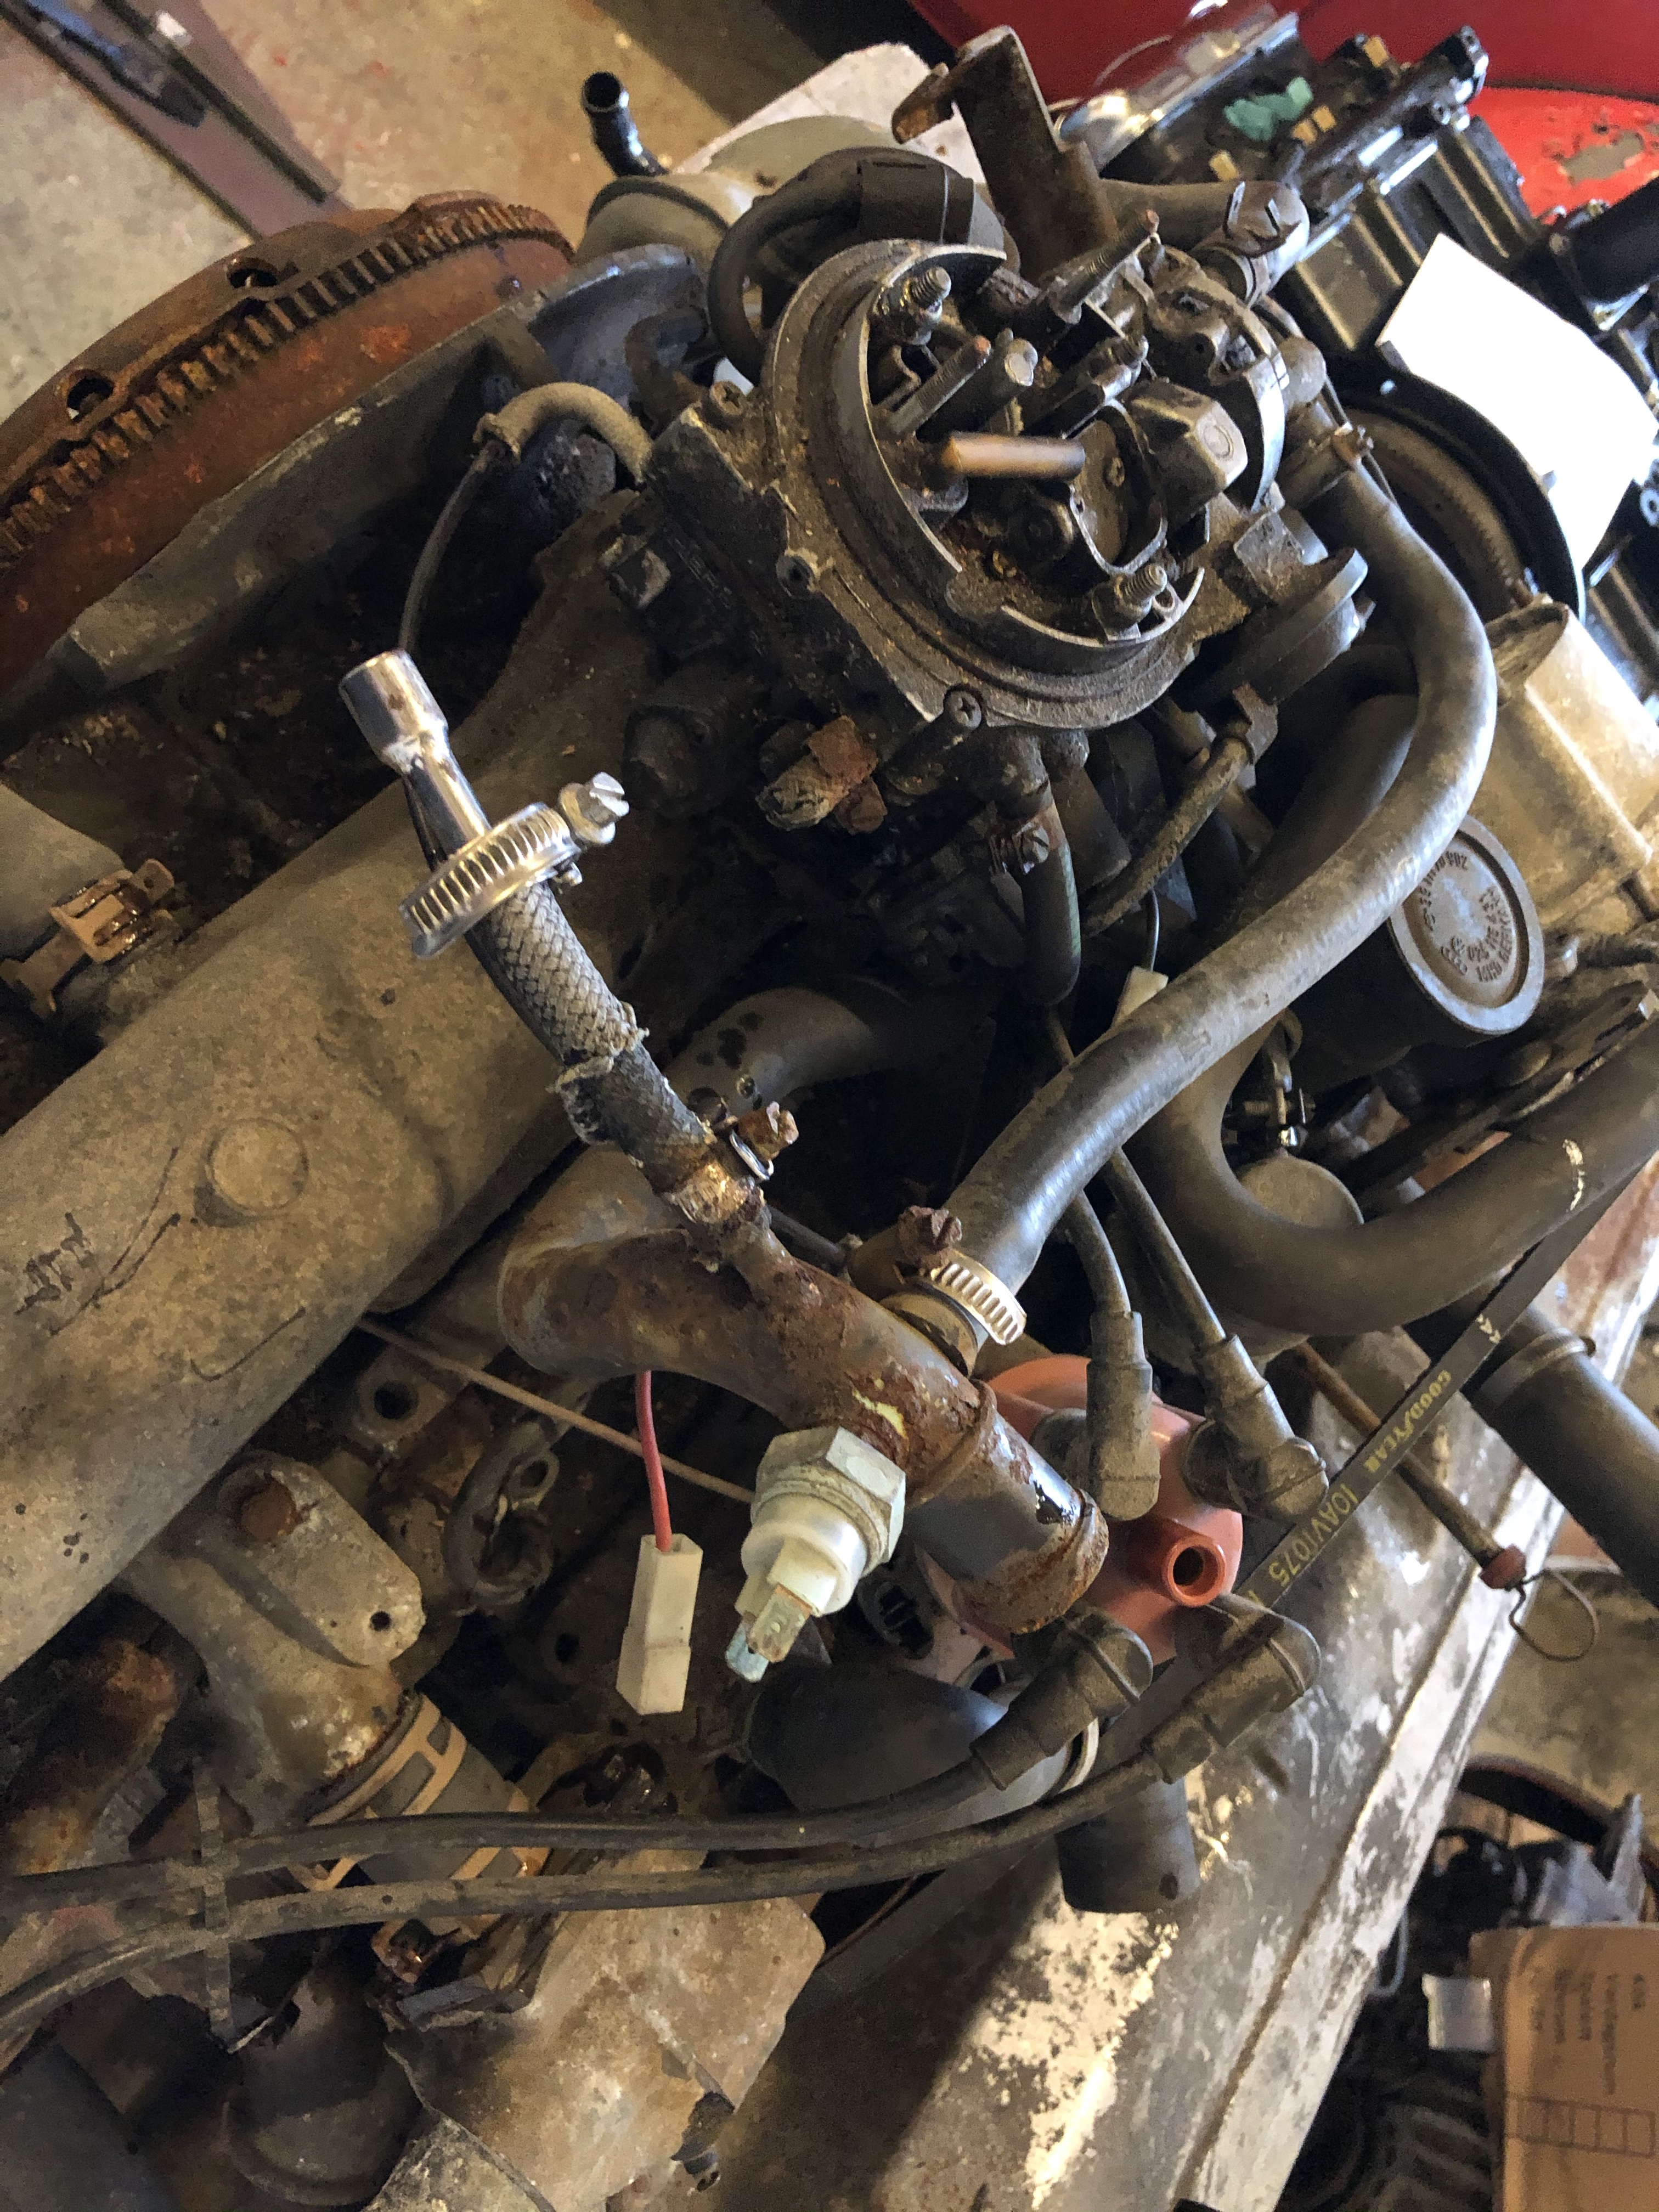
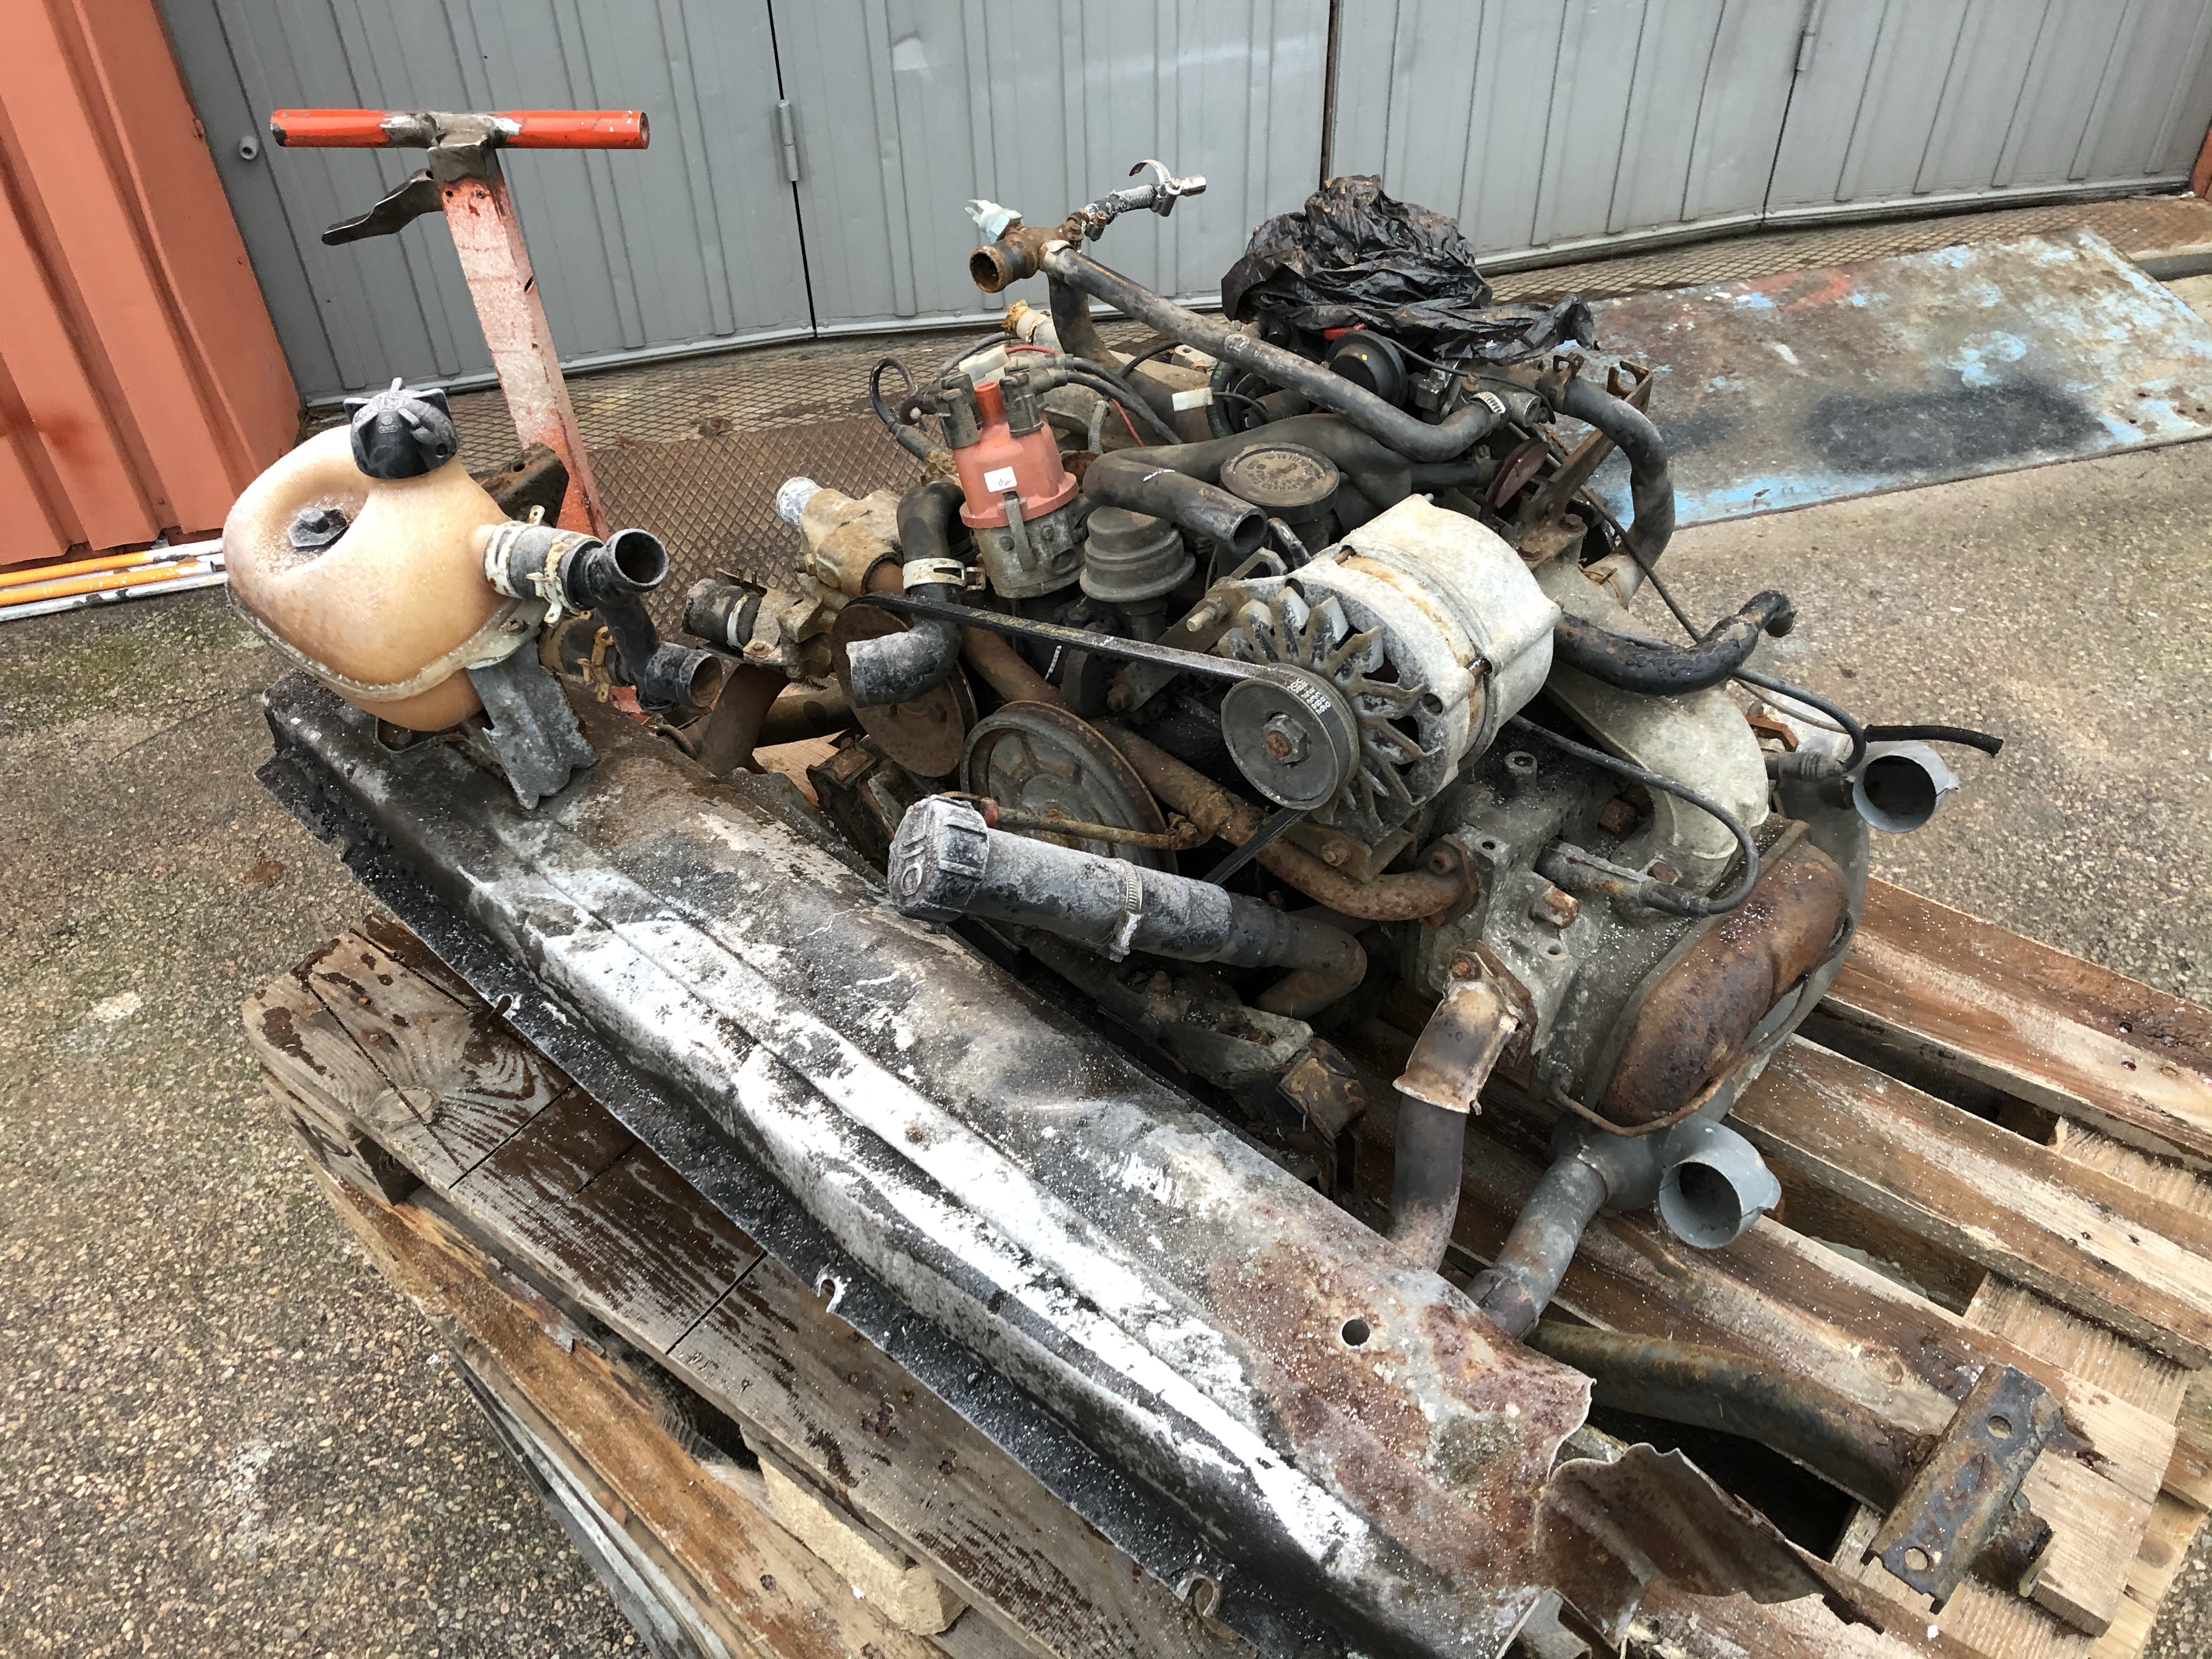
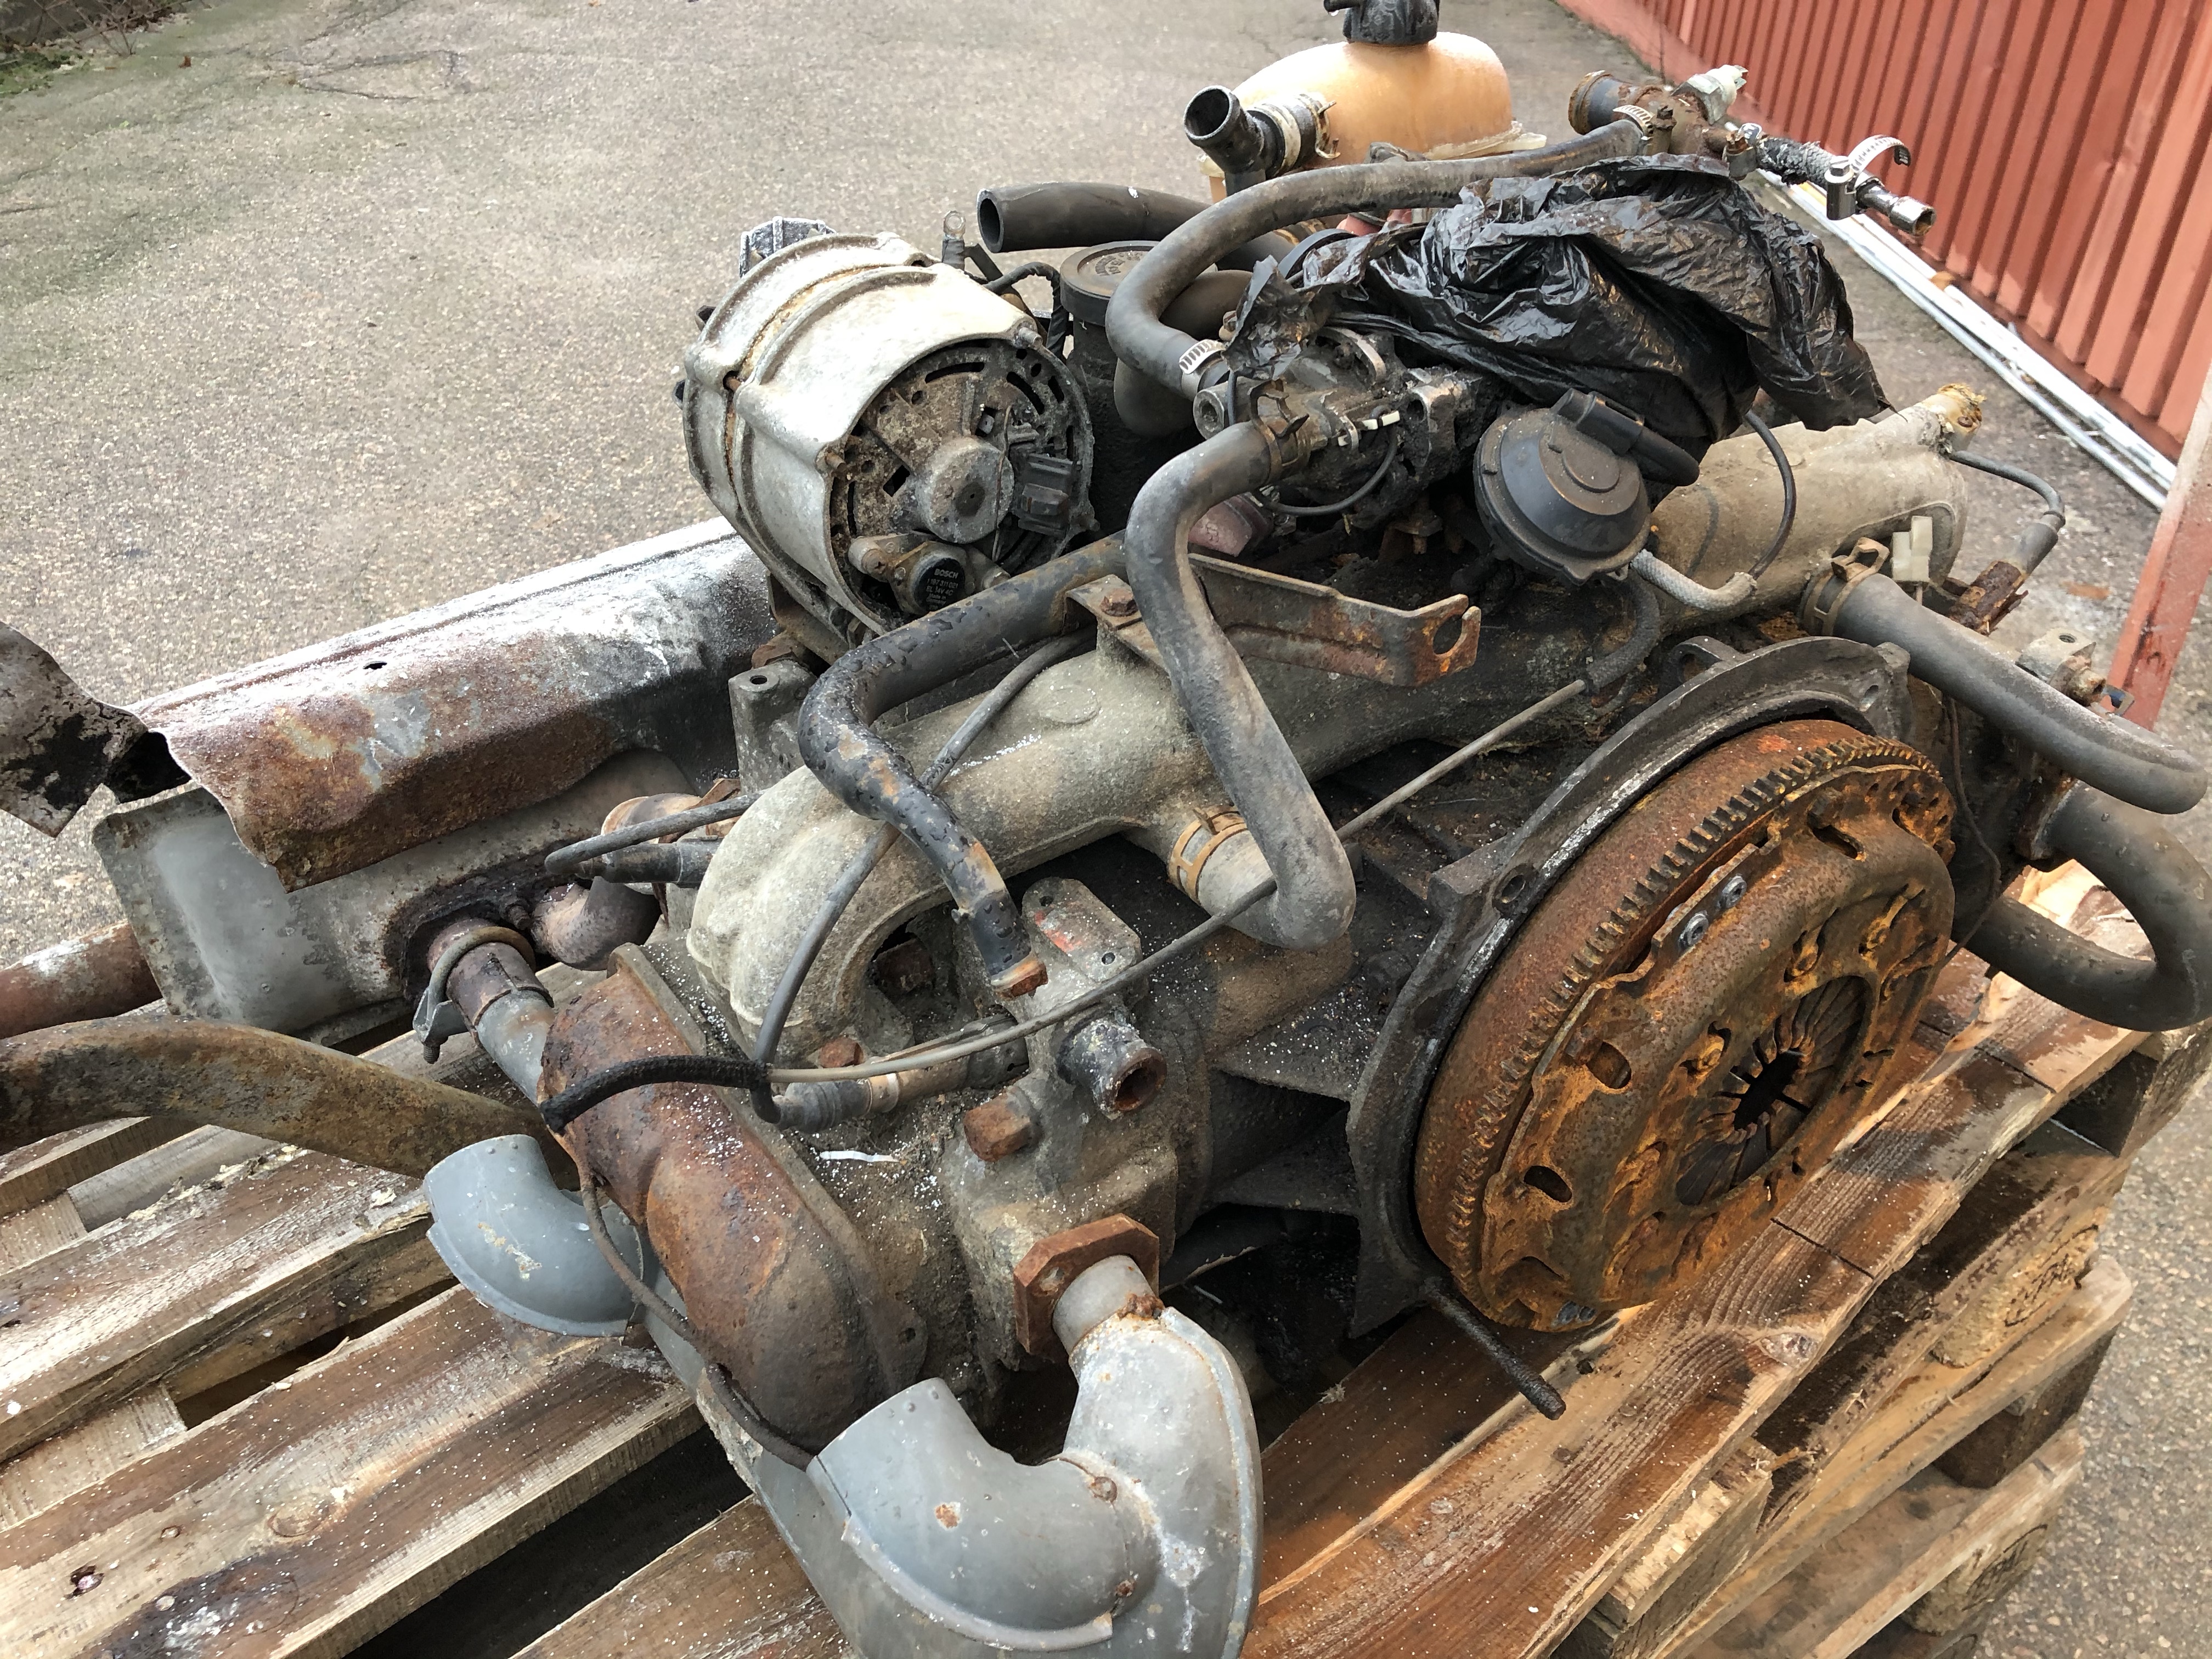
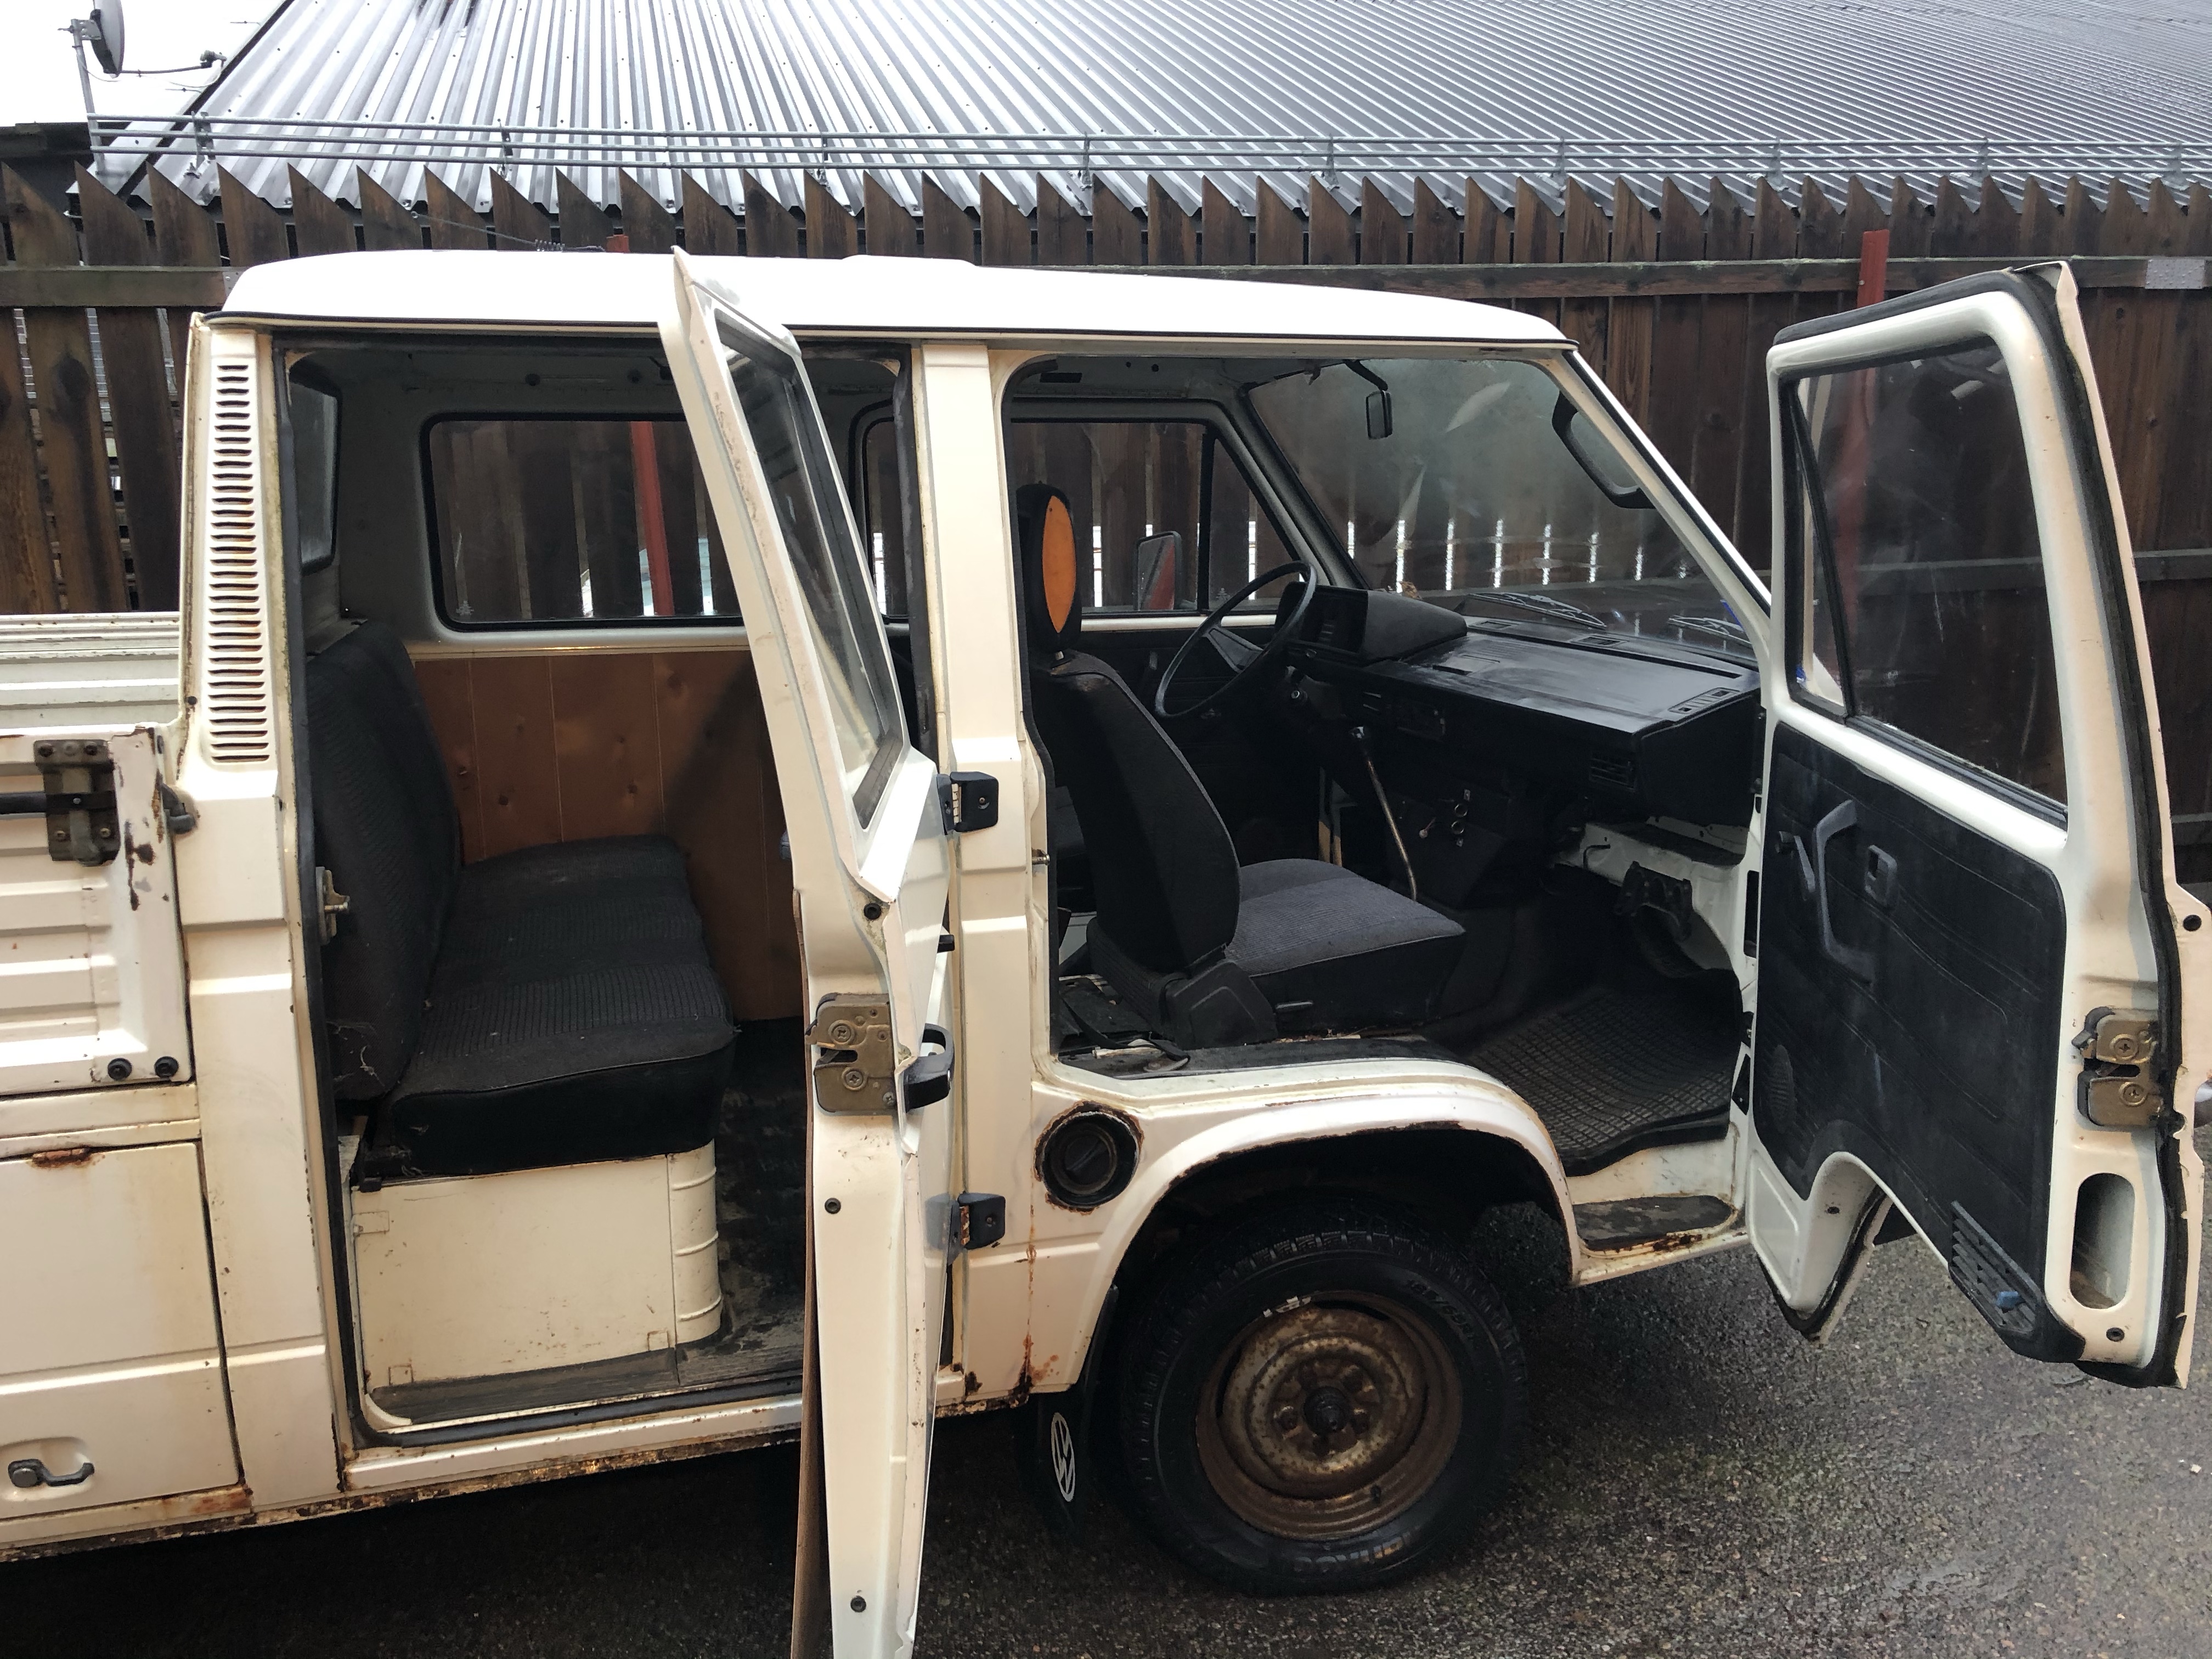
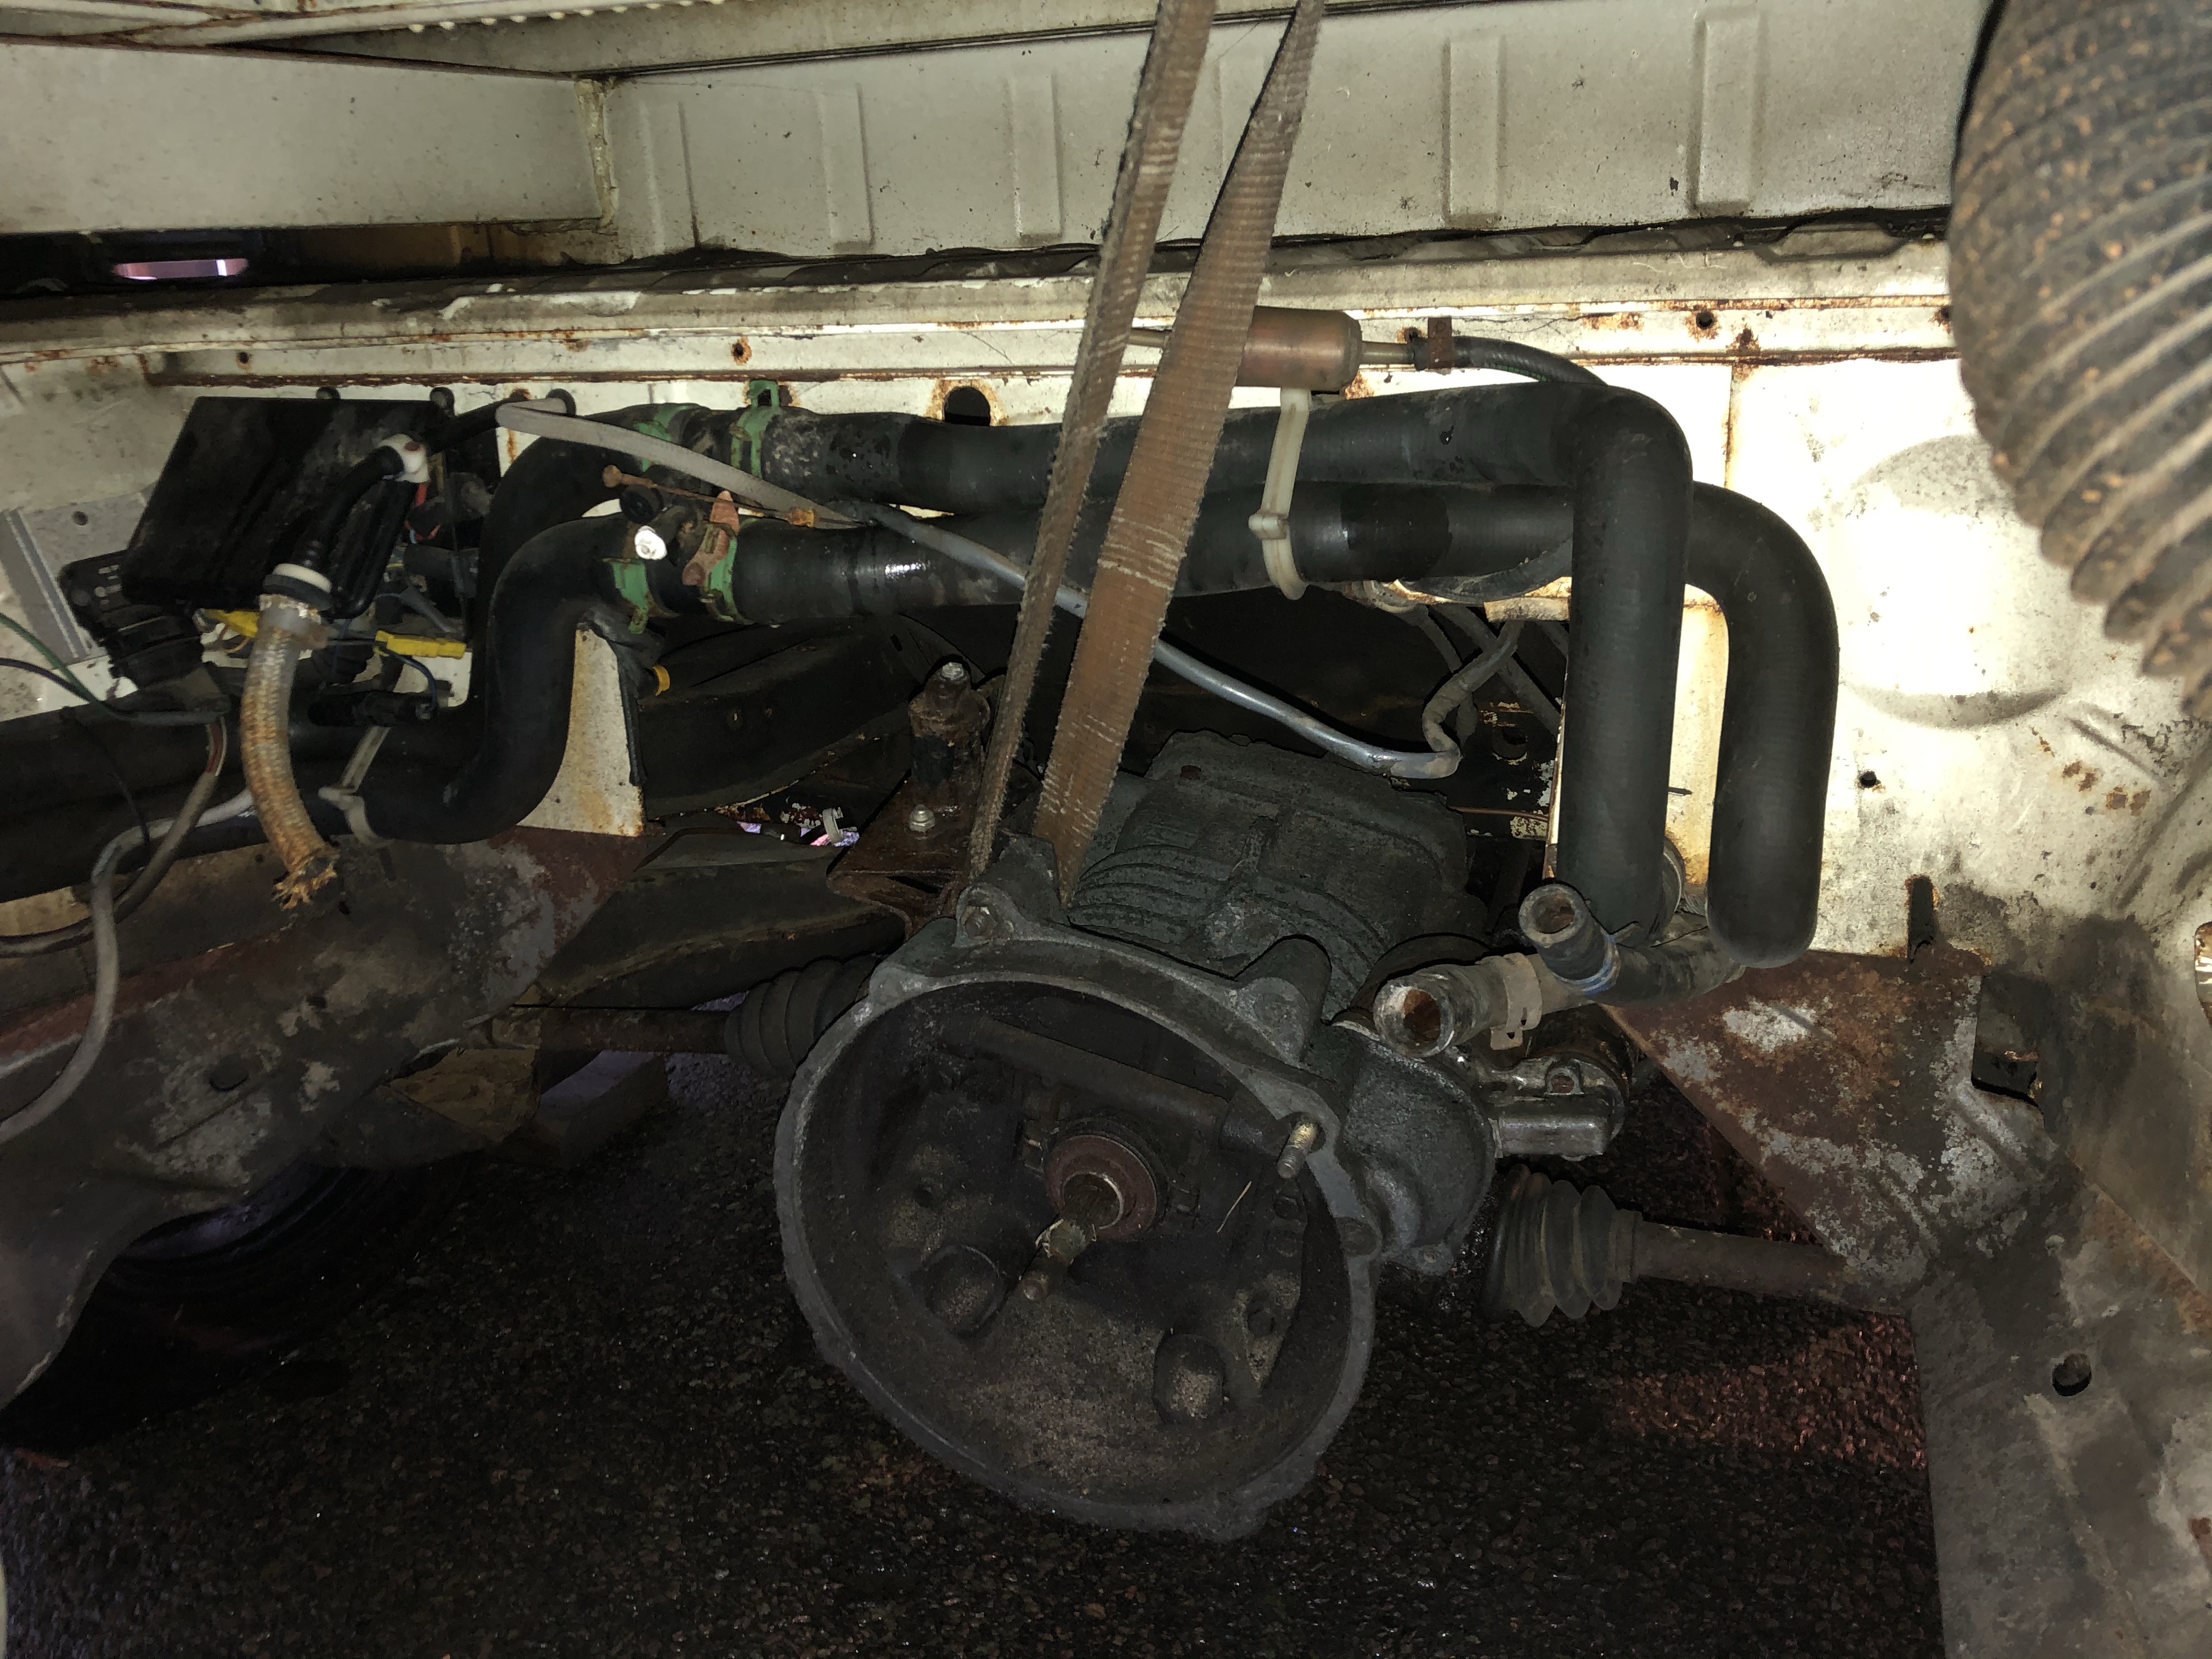
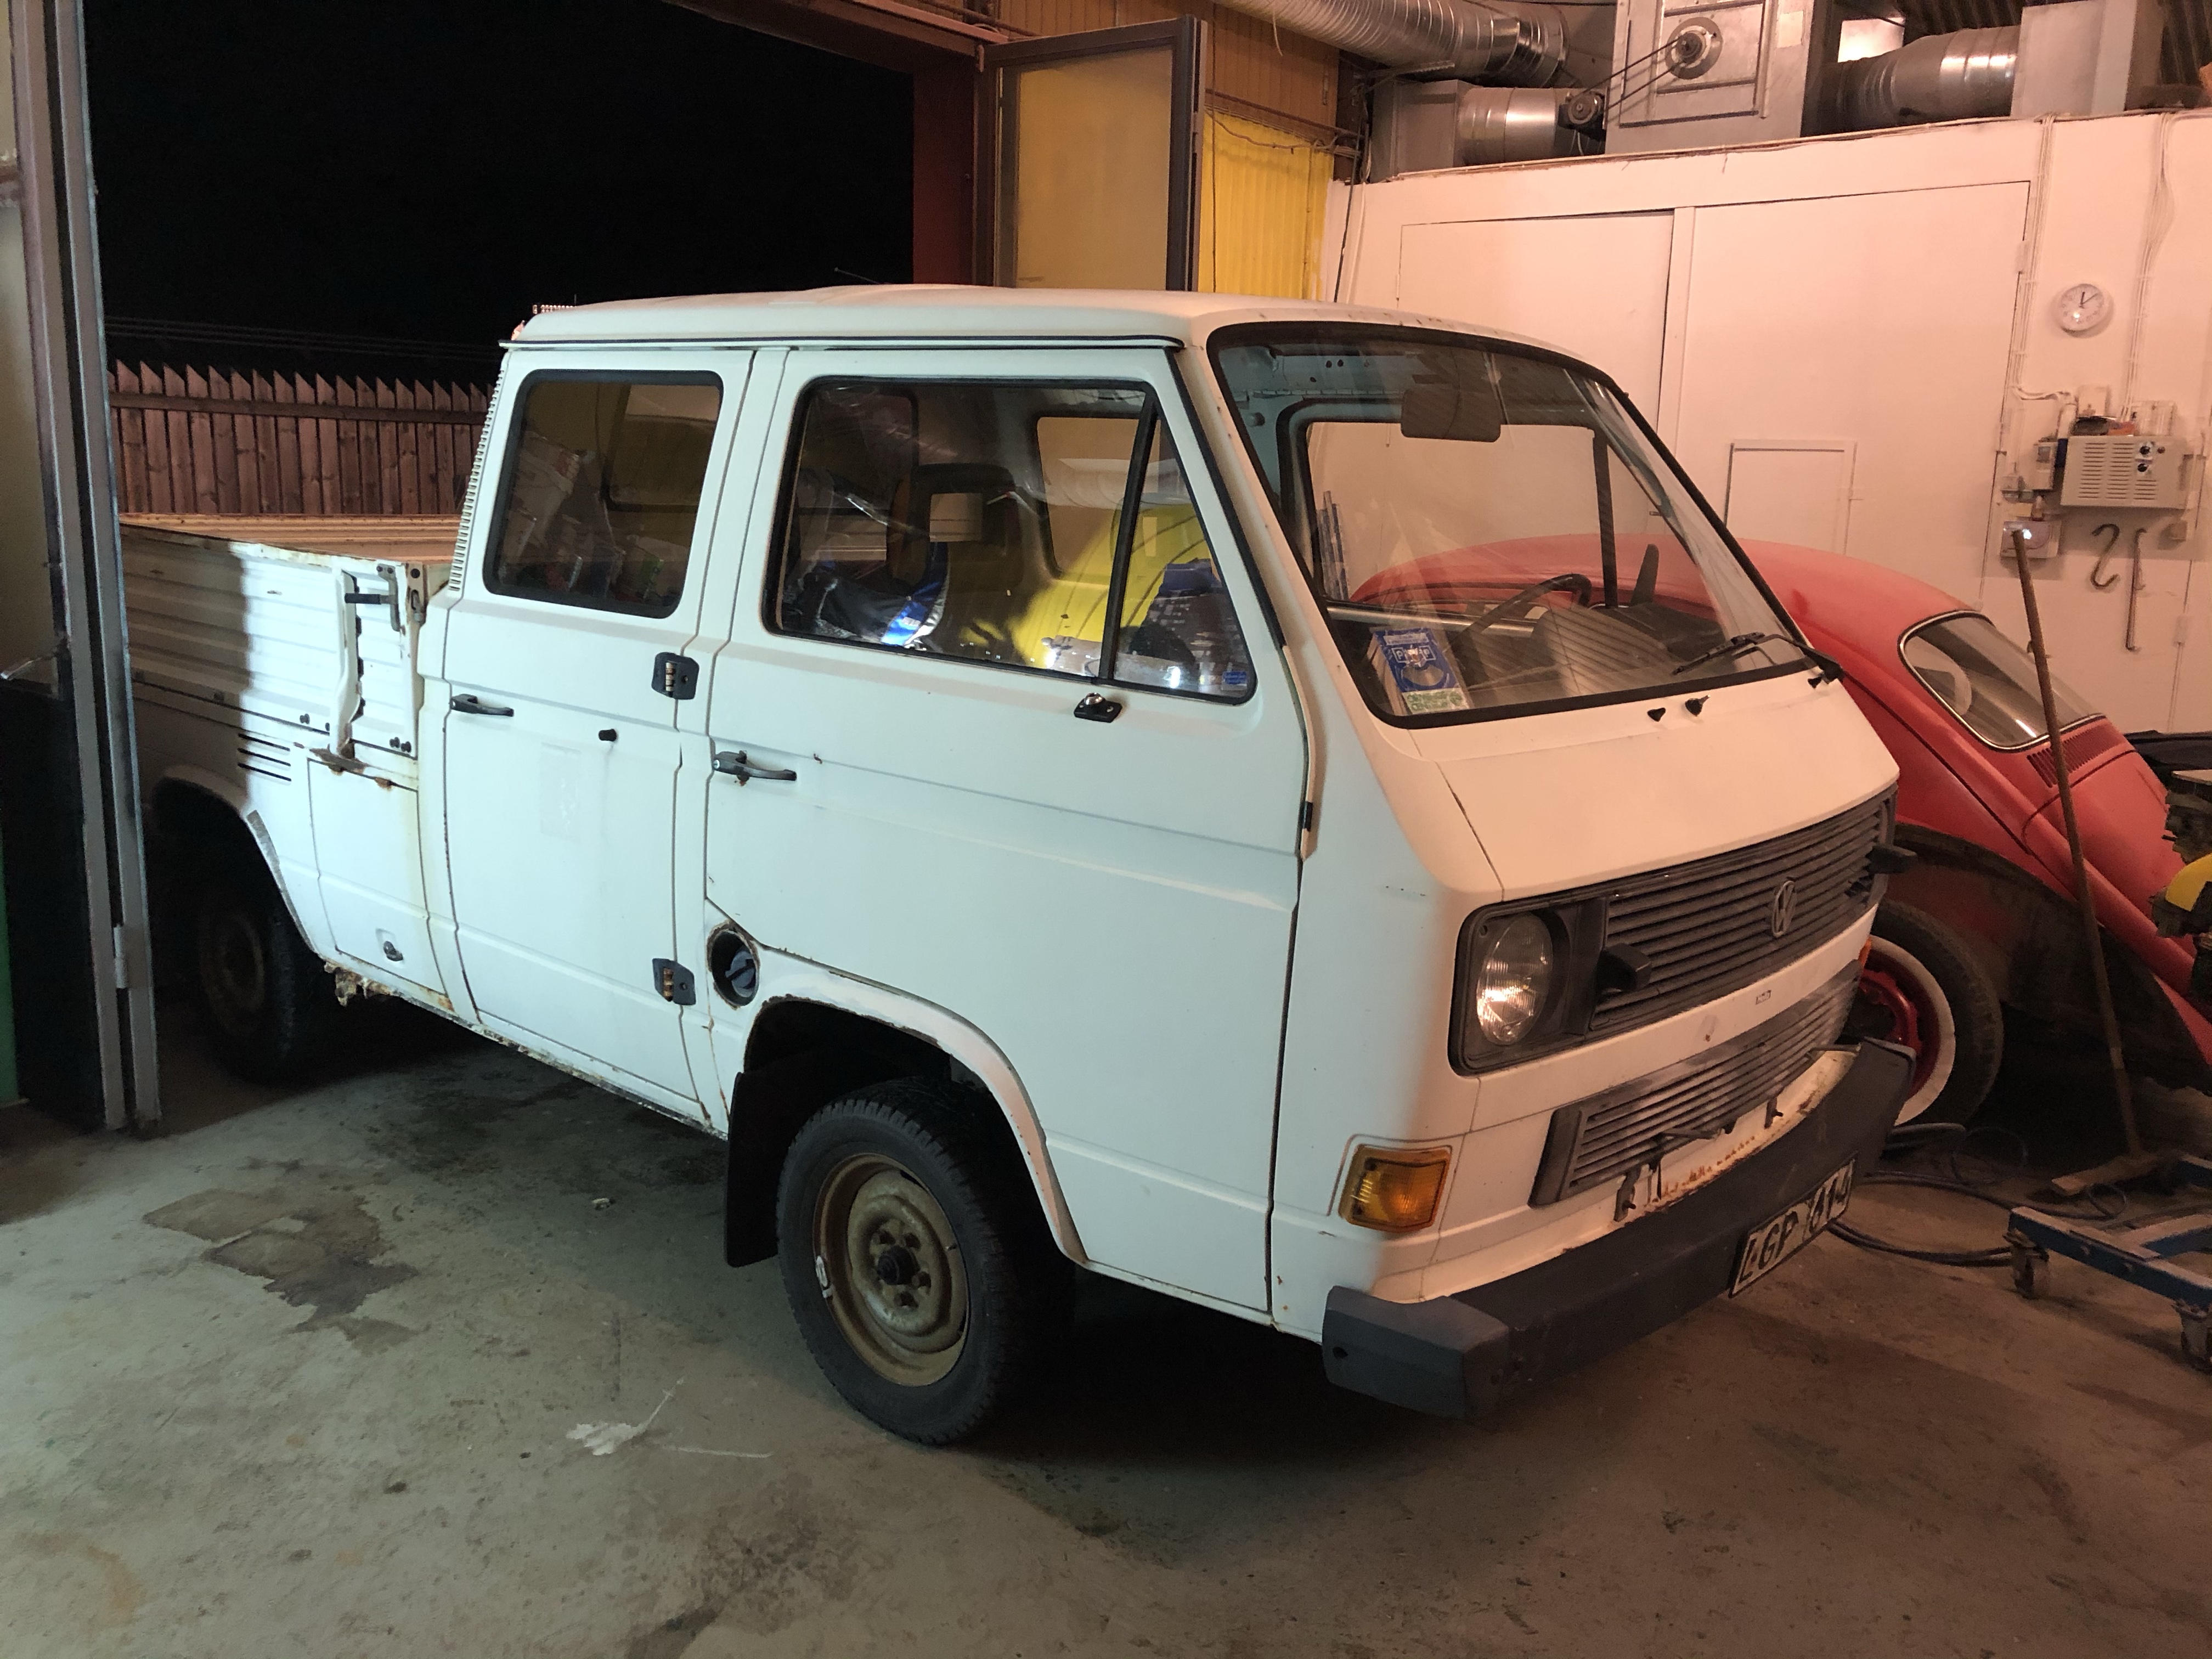
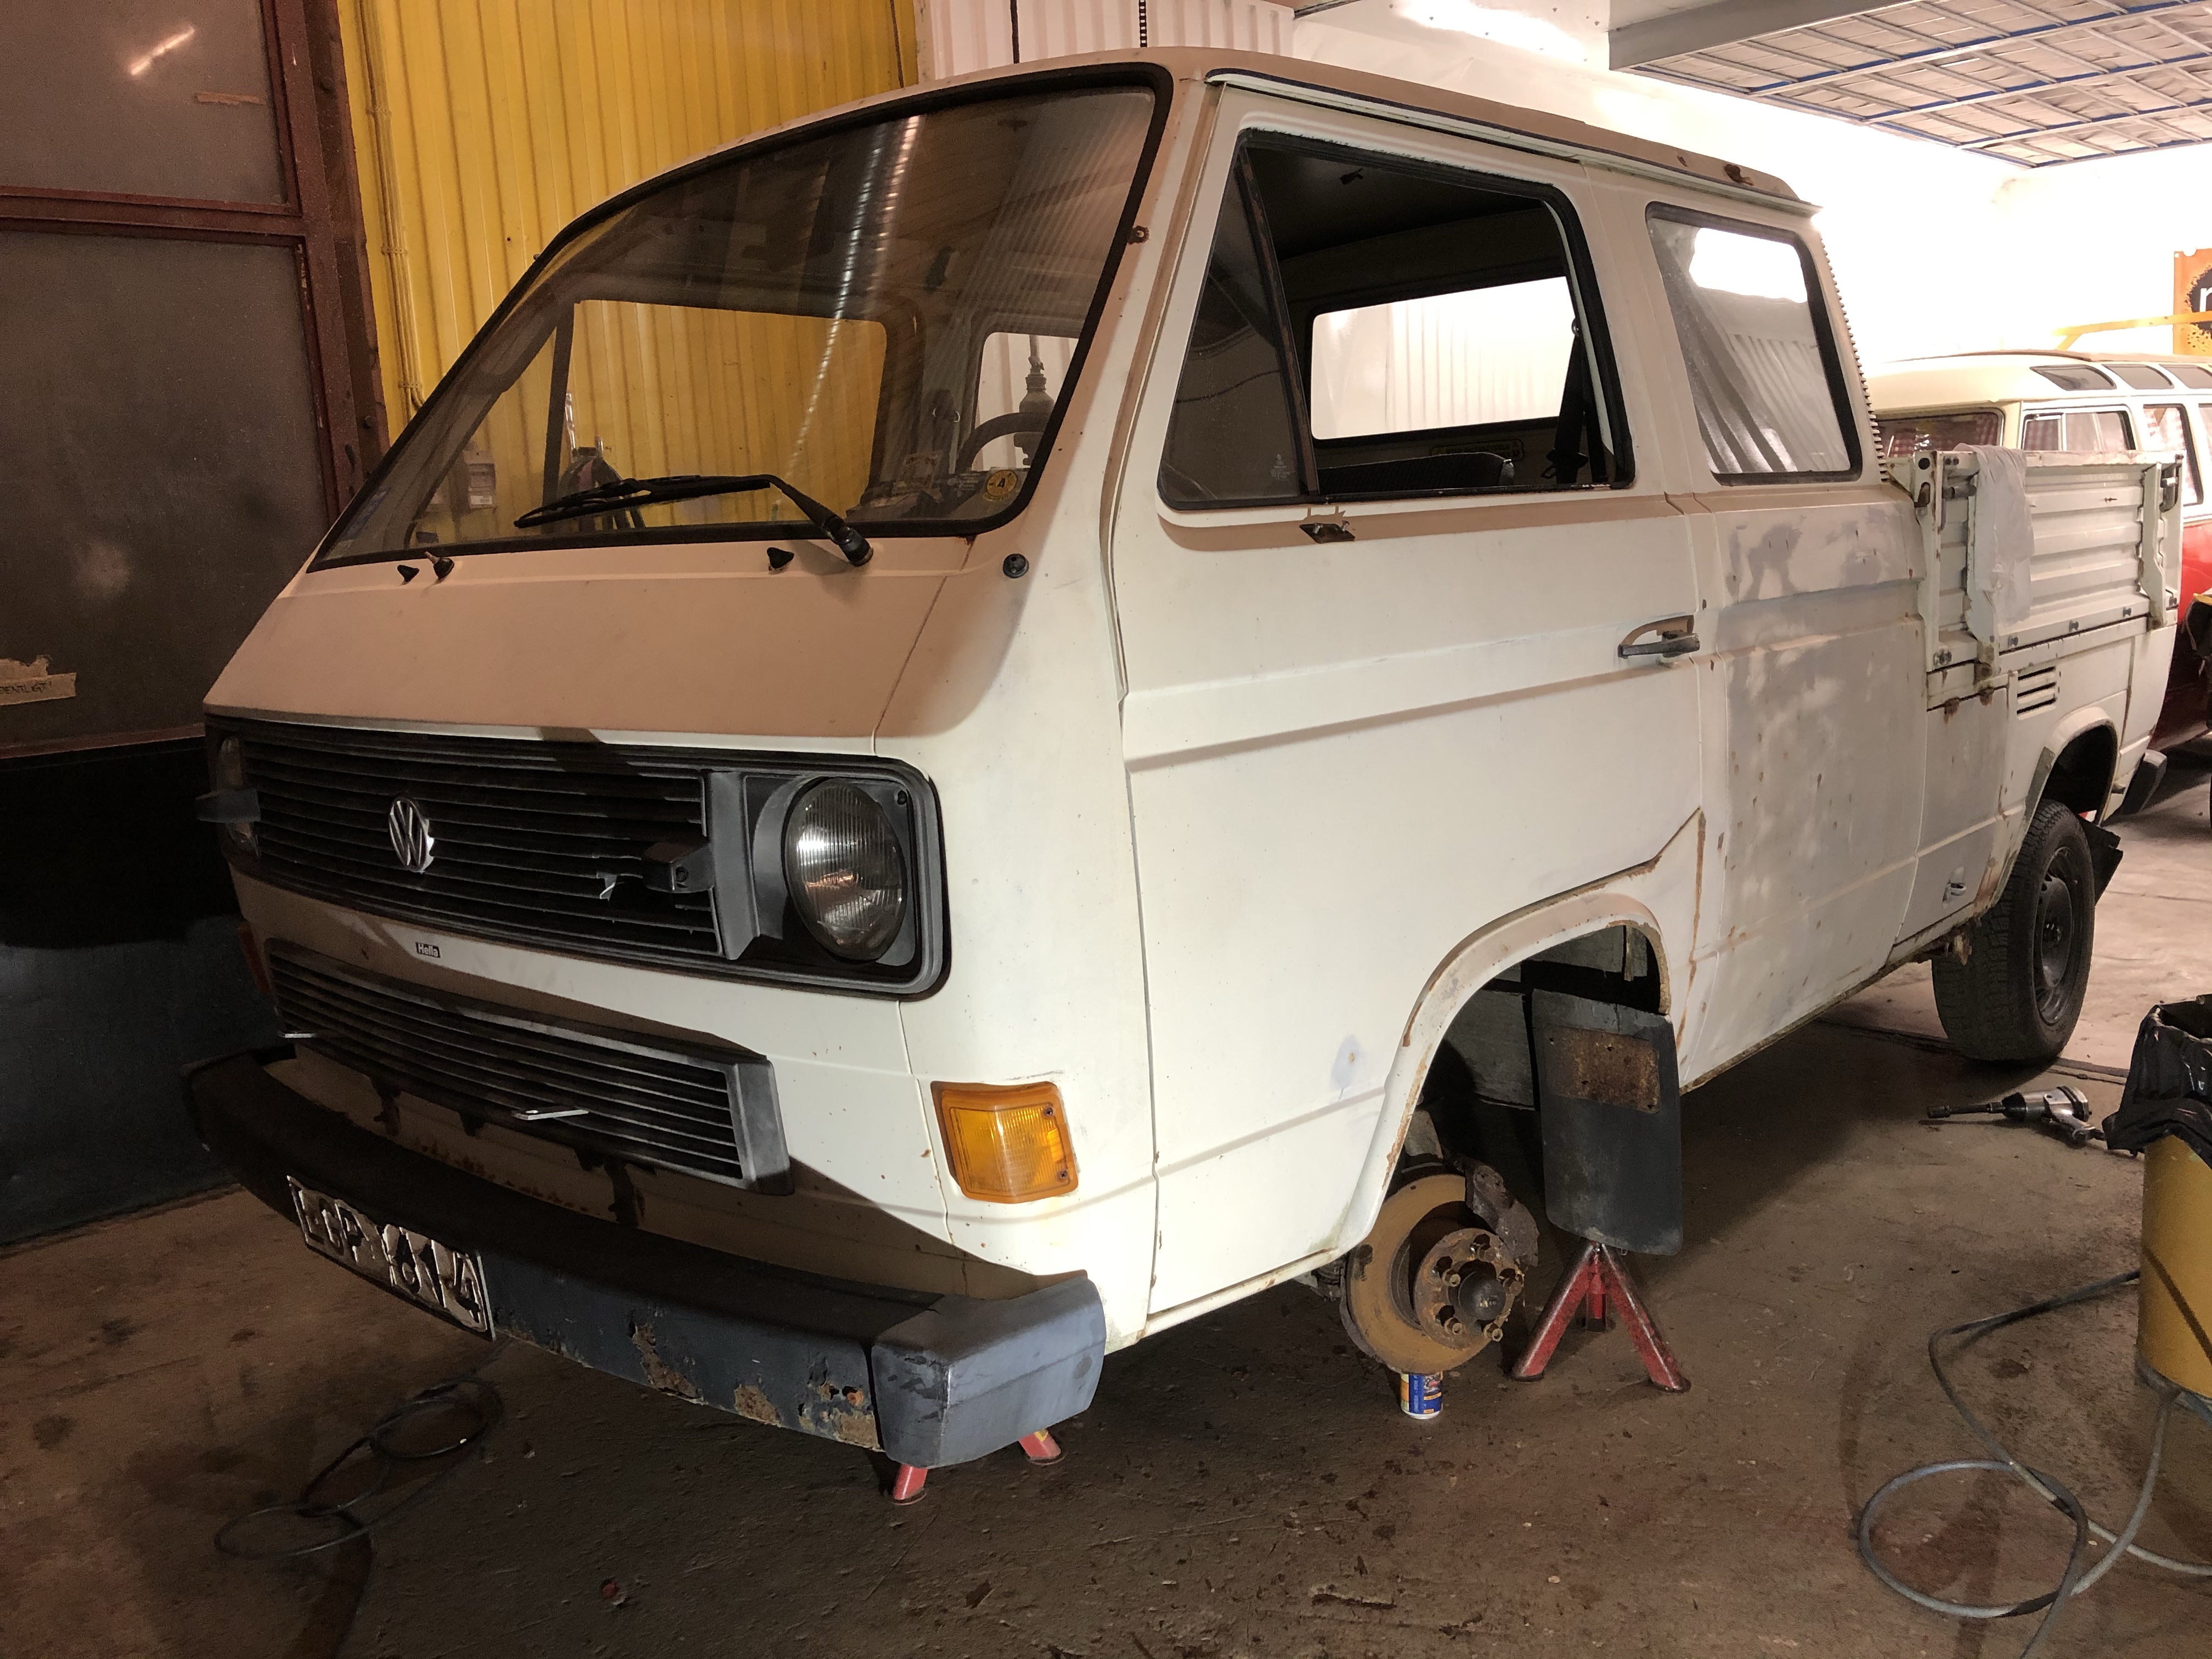
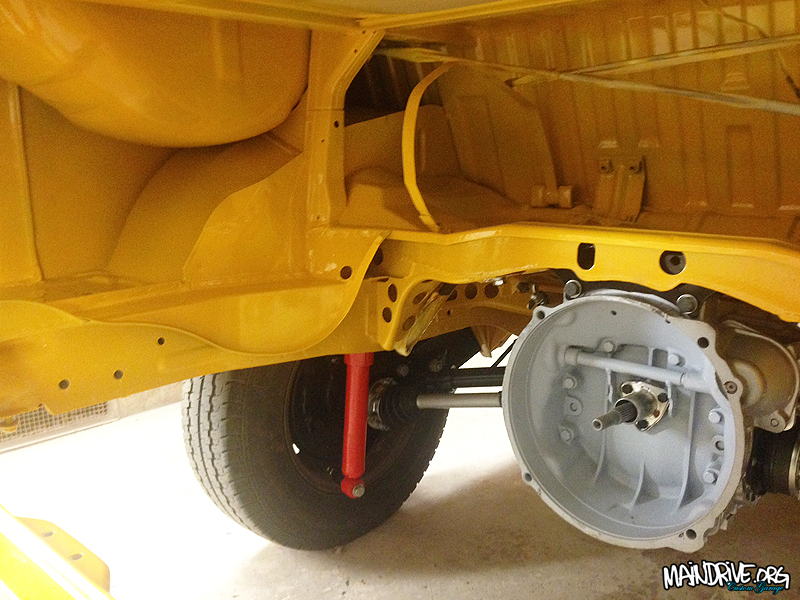
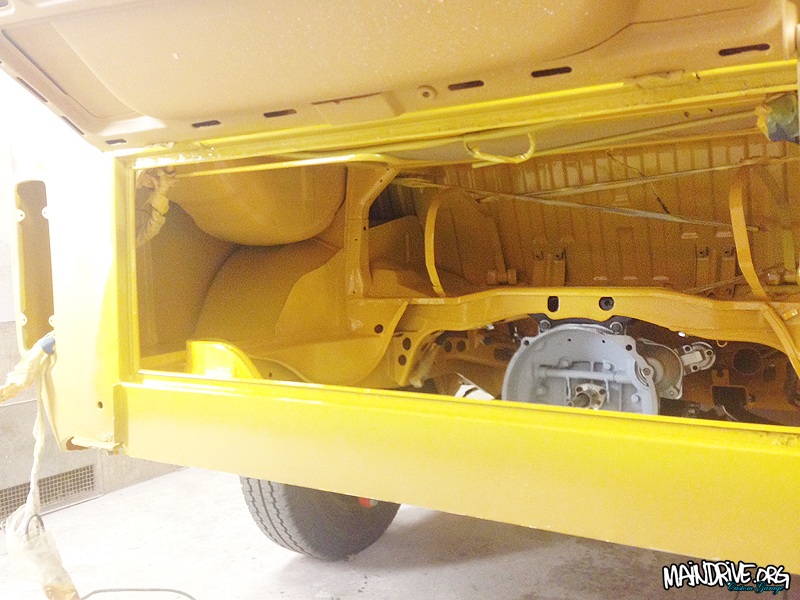
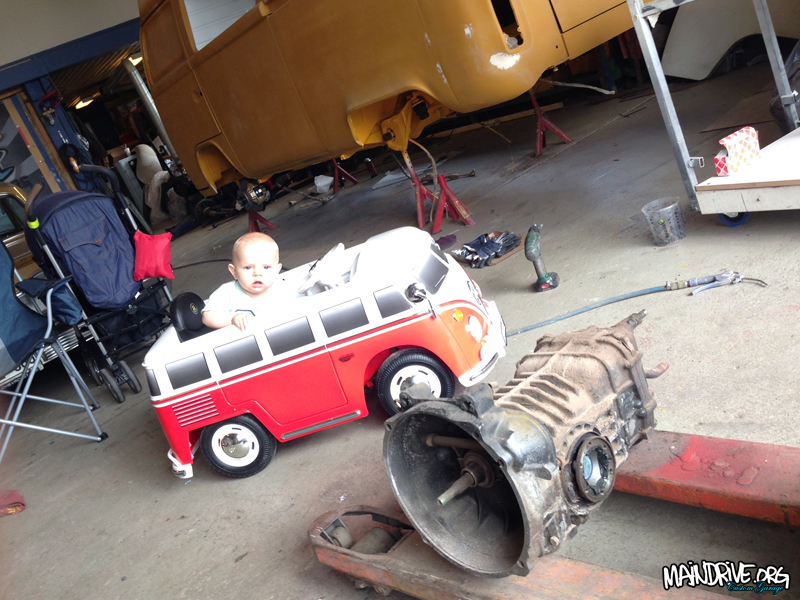
The plan with this T3 pickup is to make it a daily driver. You can ride 5 persons and still have a big flatbed that you can load with almost 1 ton of stuff on. Now a ton of work need to be done, everything in the chassi, brakes, steering, transmission and engine needs to be replaced with all new parts to make it as dependable as possible. Also some rust and bodywork needs to be done also. Engine was junk, a 1,9 DG petrol. It’s going to be replaced with a bigger 2.1 DJ/WBX with 112hp.
This pickup will be used on winter which means it will get a new undercoating and rockers and doors sprayed with wax-oil on inside. Engine will get a engine warmer and inside will have a diesel heater with remote control. Here comes some pics!
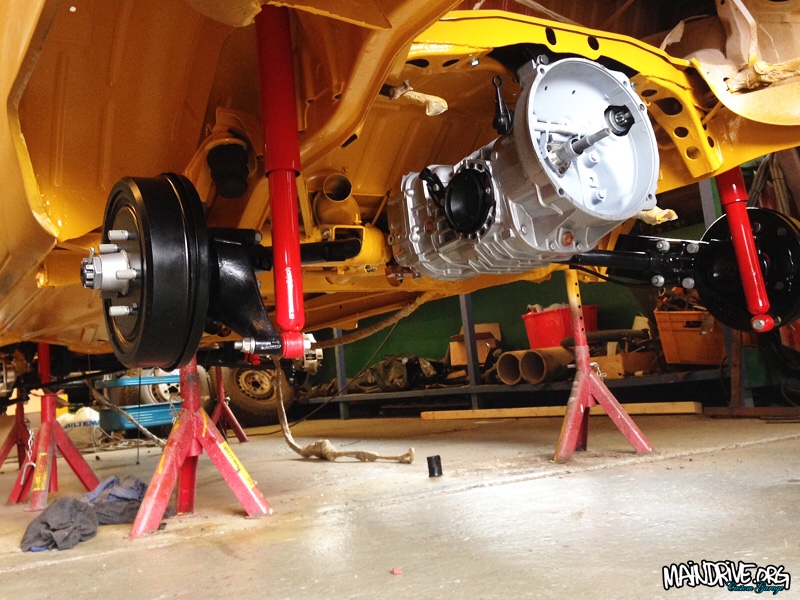
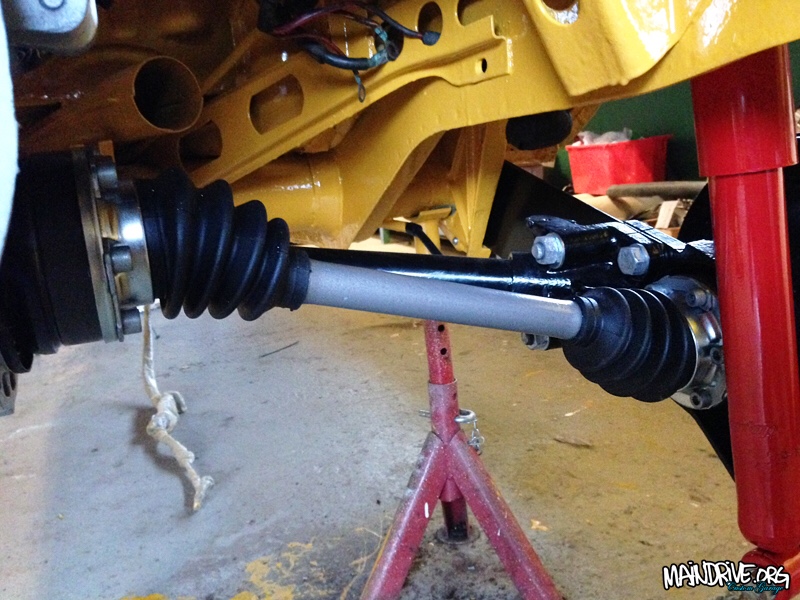
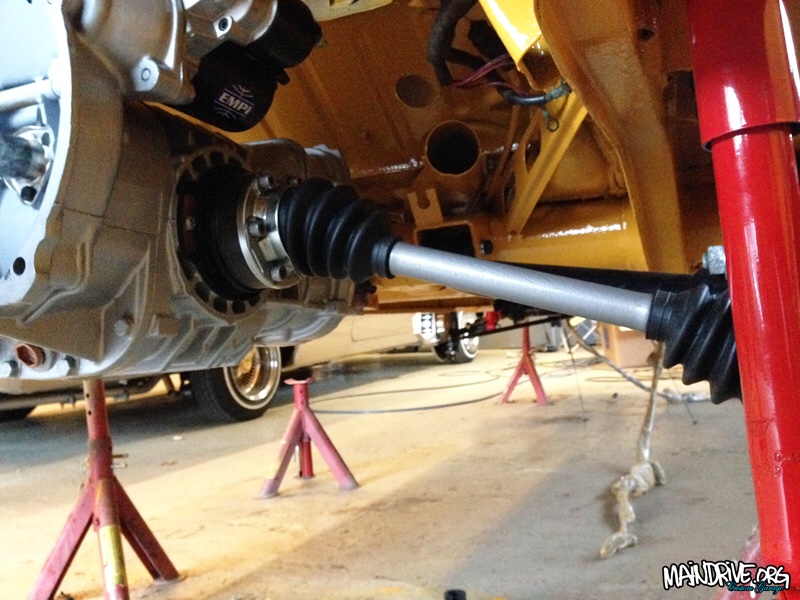
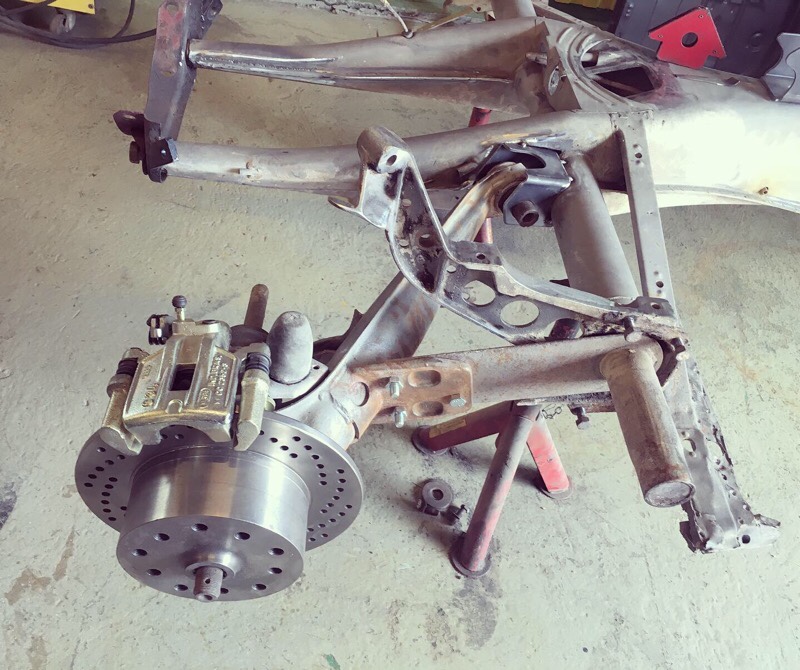
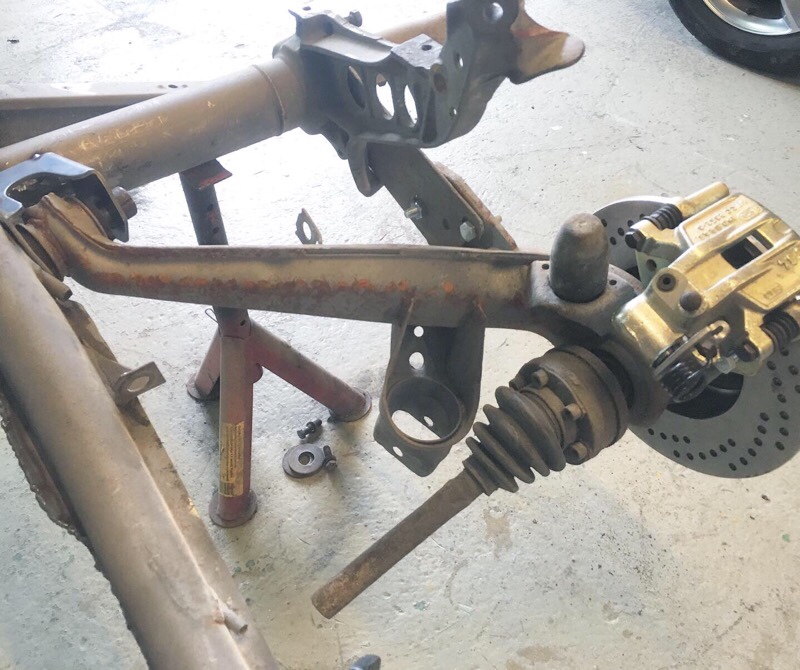
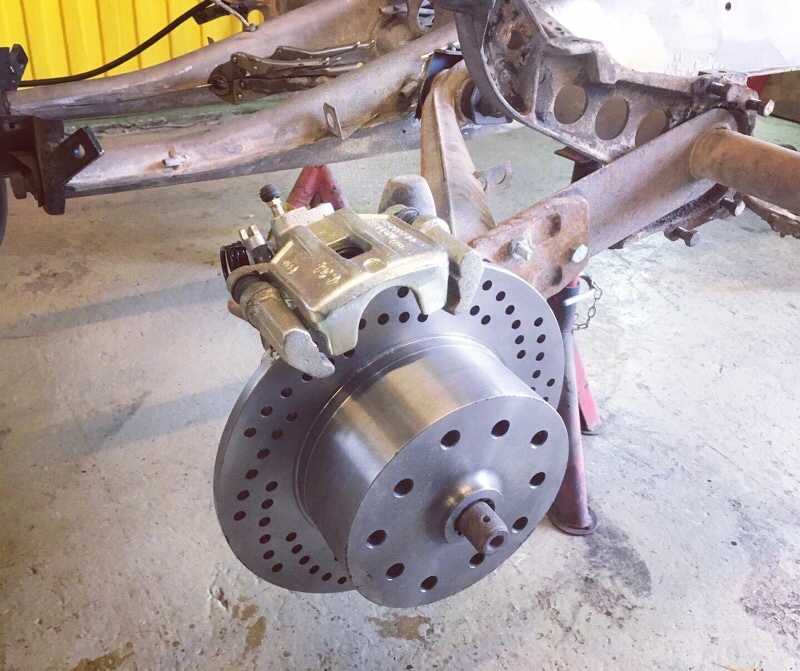
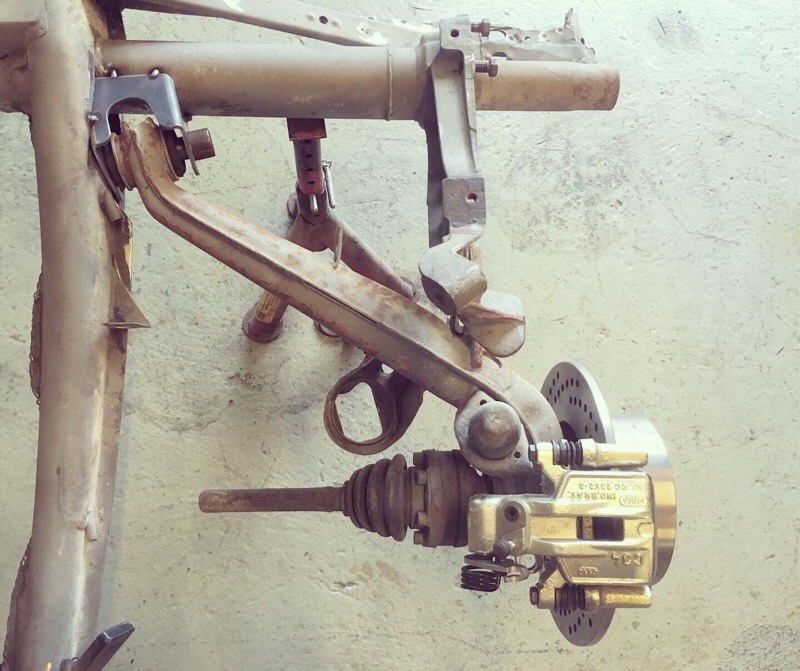
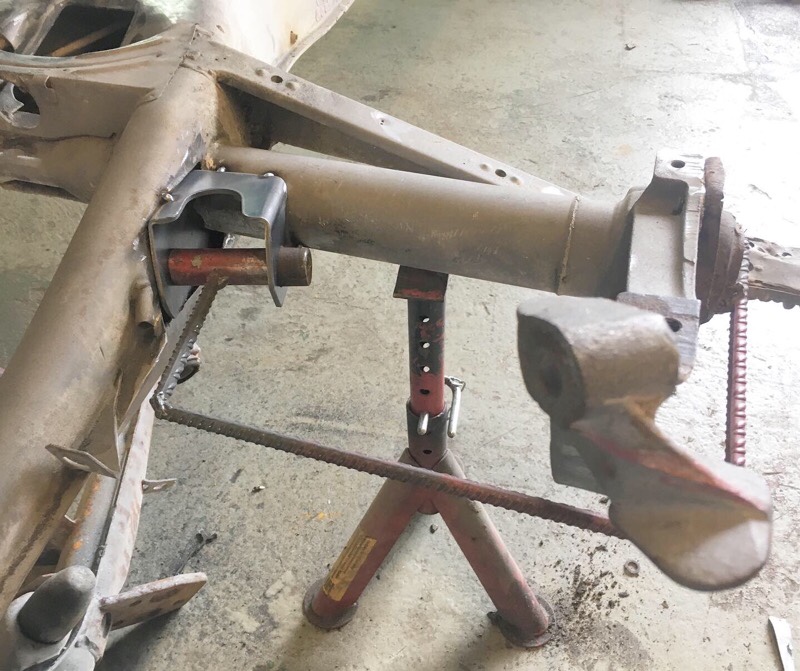
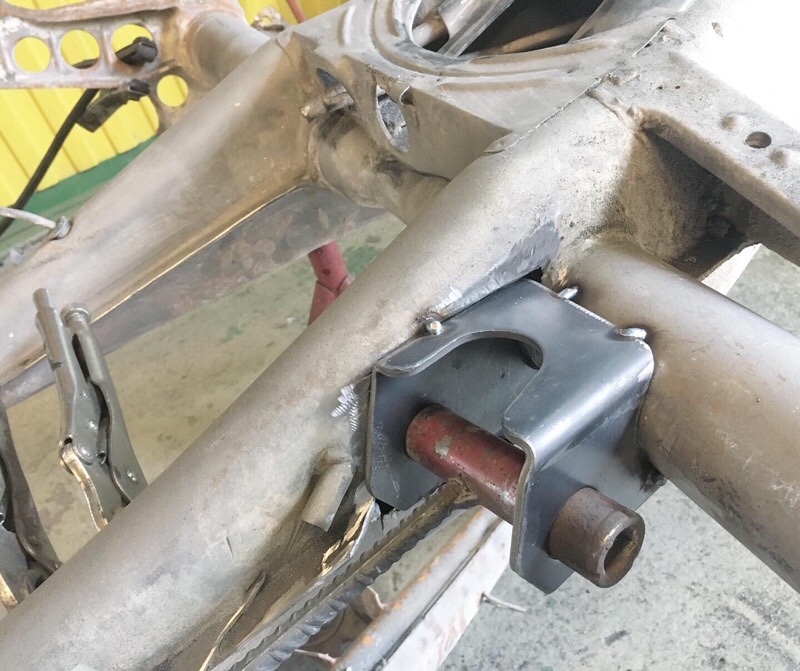
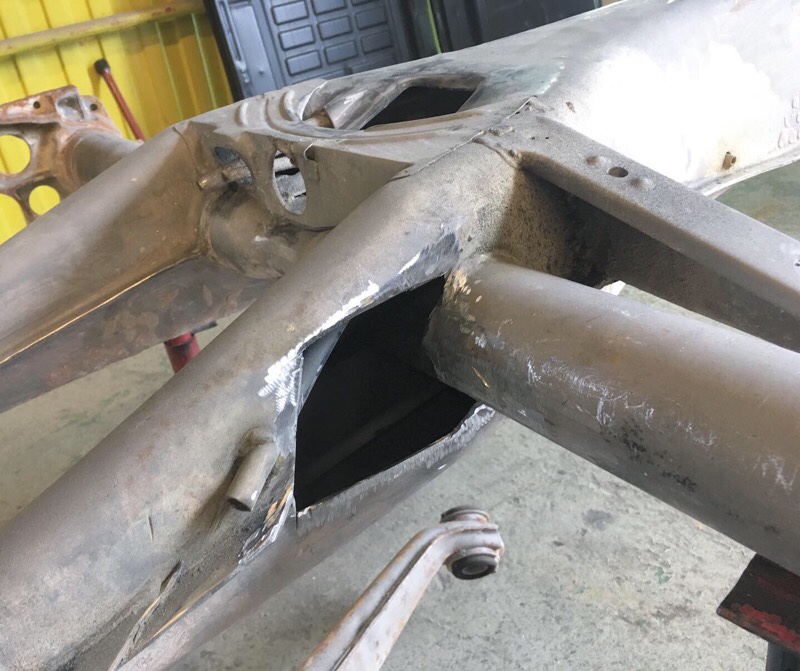
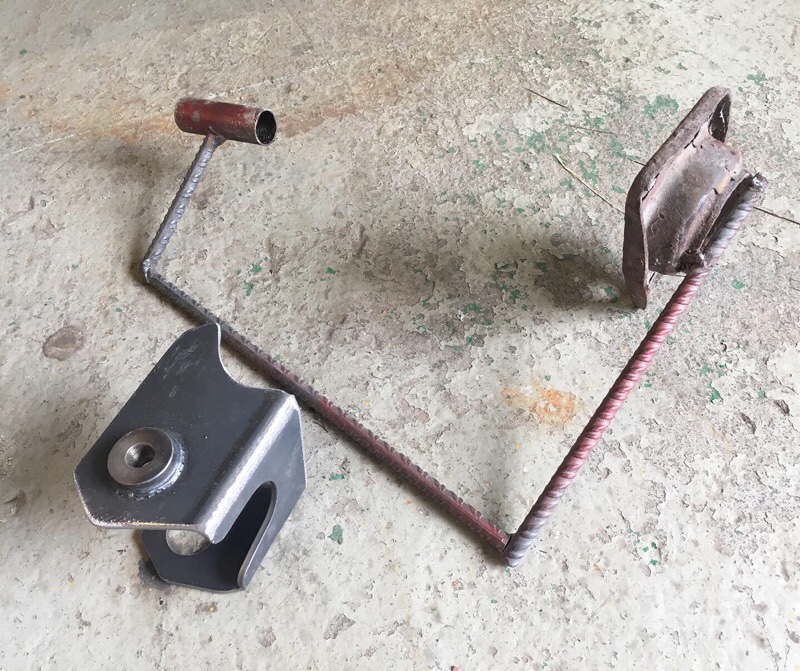
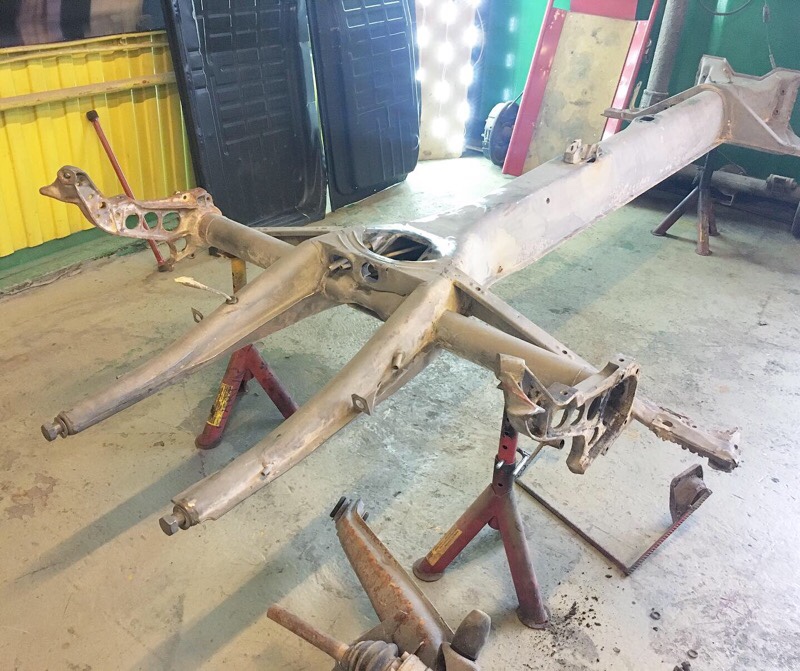
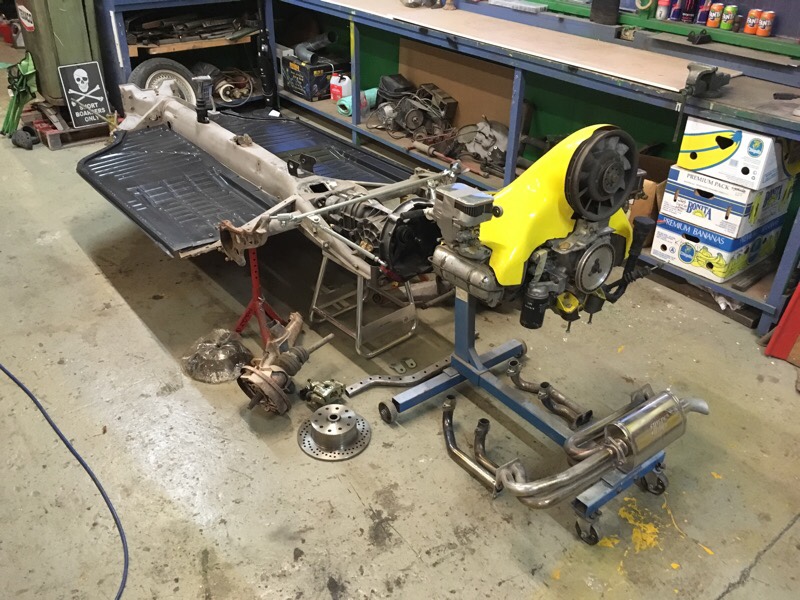
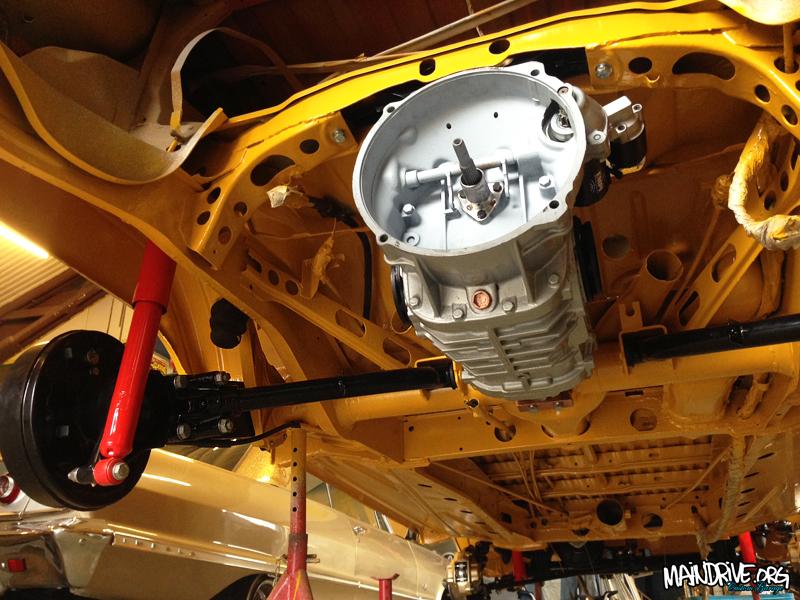
Have finally got something done on the old VW Karmann Ghia chassi. Its being converted from swing axle to a better independent rear suspension. It’s just mocked up and tack welded at the moment, test fitted the new rear discbrakes. The fork/frame have been clearanced for Porsche 5speed 901 transmission and also reinforced, welded all around. Probably I will reposition the IRS brackets further in, and mount the trailing arms on the inside of the springplates. Then I will get about 1″ more space against the outer wheel arch and can then fit wider tires. Driveshafts need then be shorter also of course, the left VW type 3 automatic driveshafts are shorter and would be perfect or buy new shortened EMPI’s. Next up is to fabricate front transmission mounts and 911 (or maybe VW) gear linkage.

That means we are going toward colder and darker times, winter.

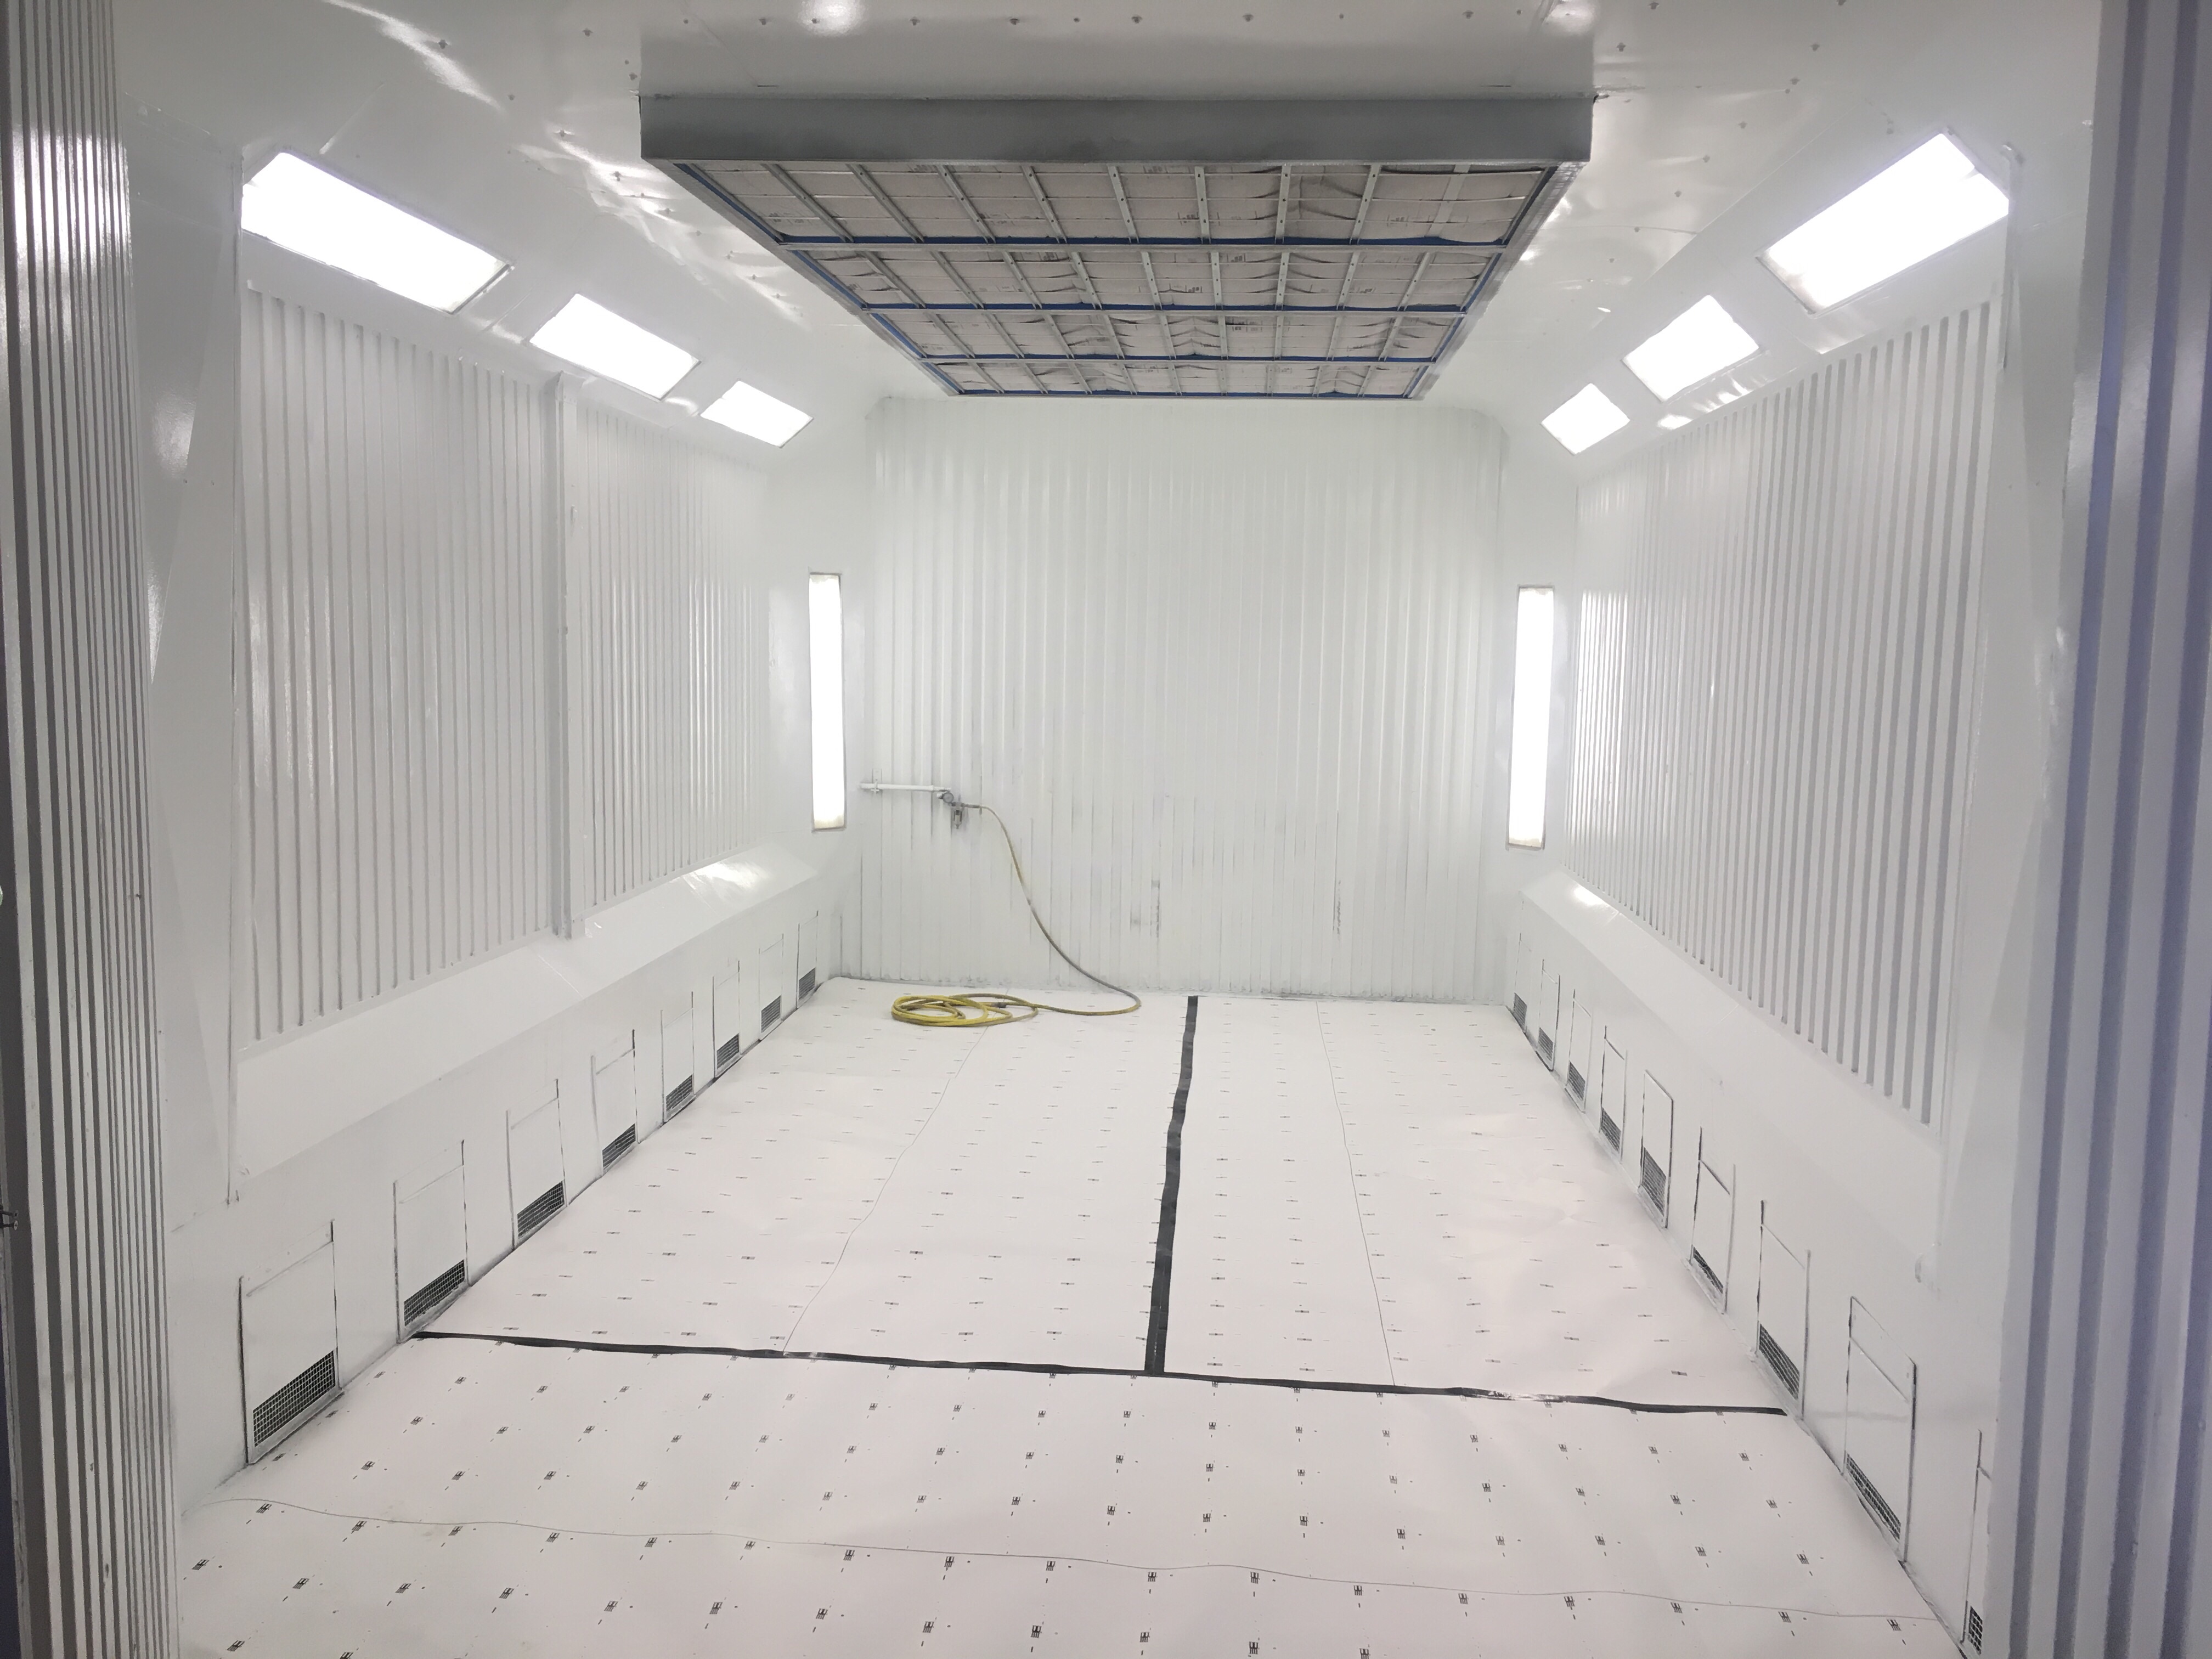
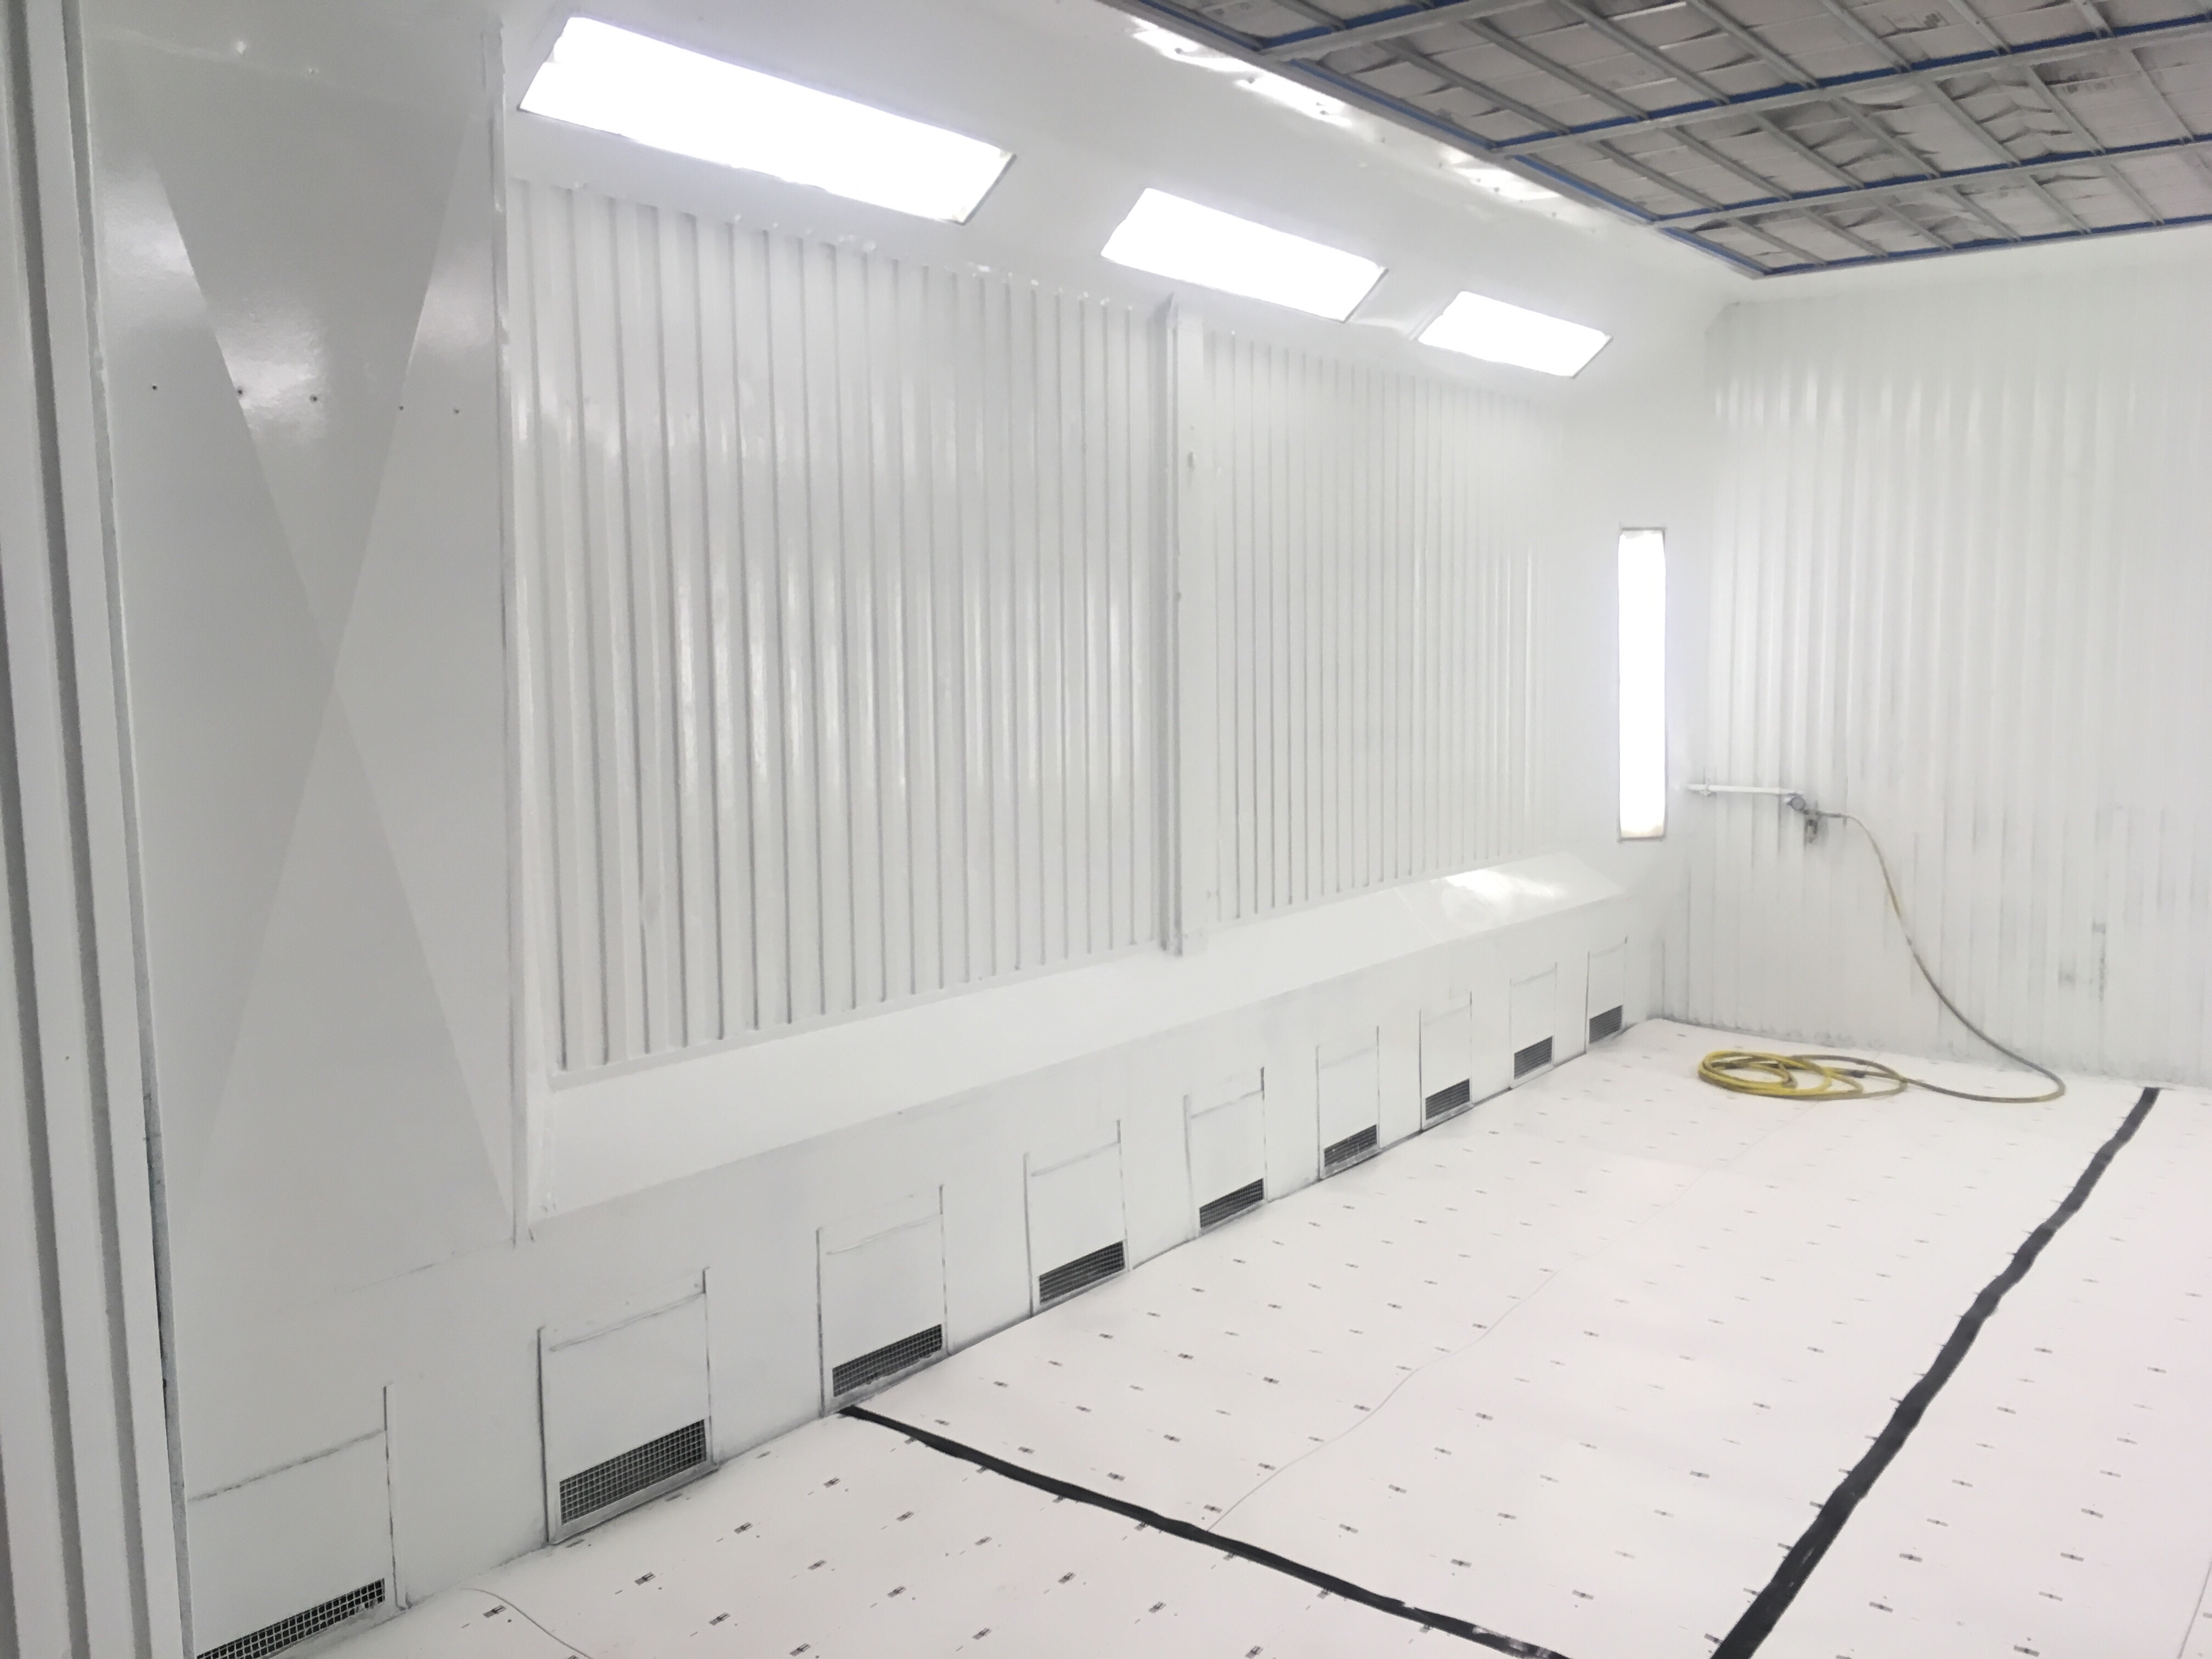
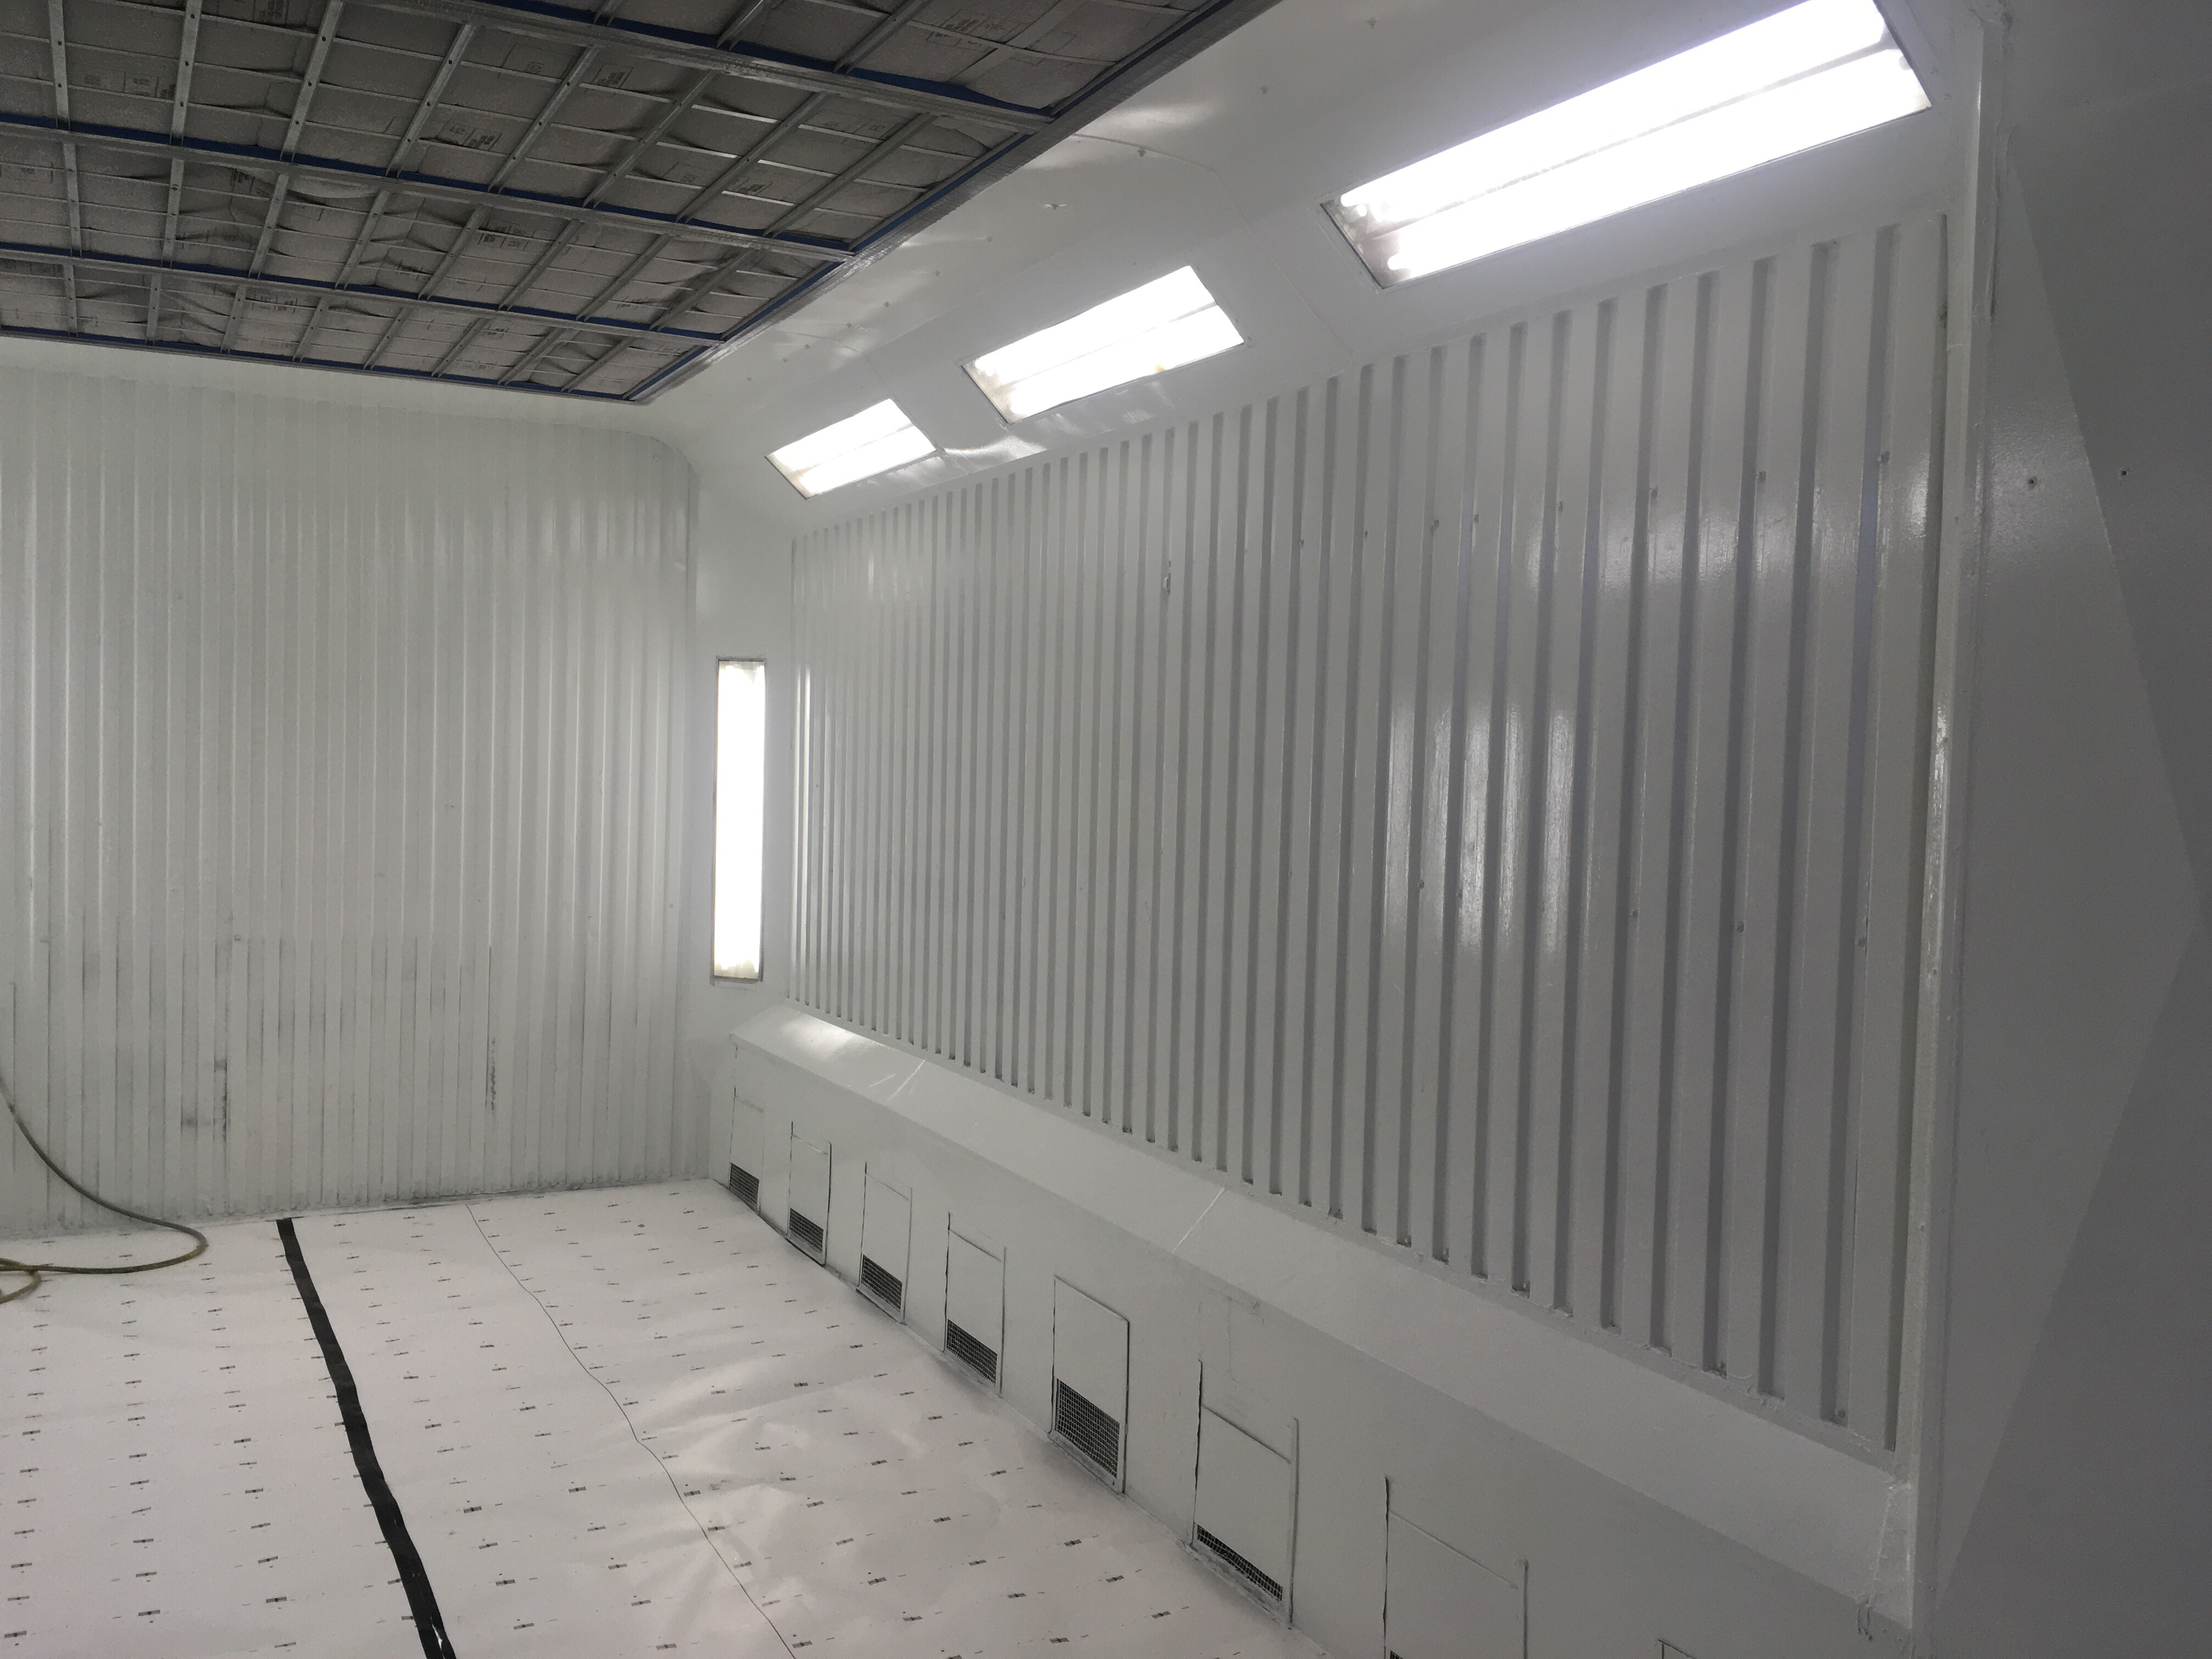
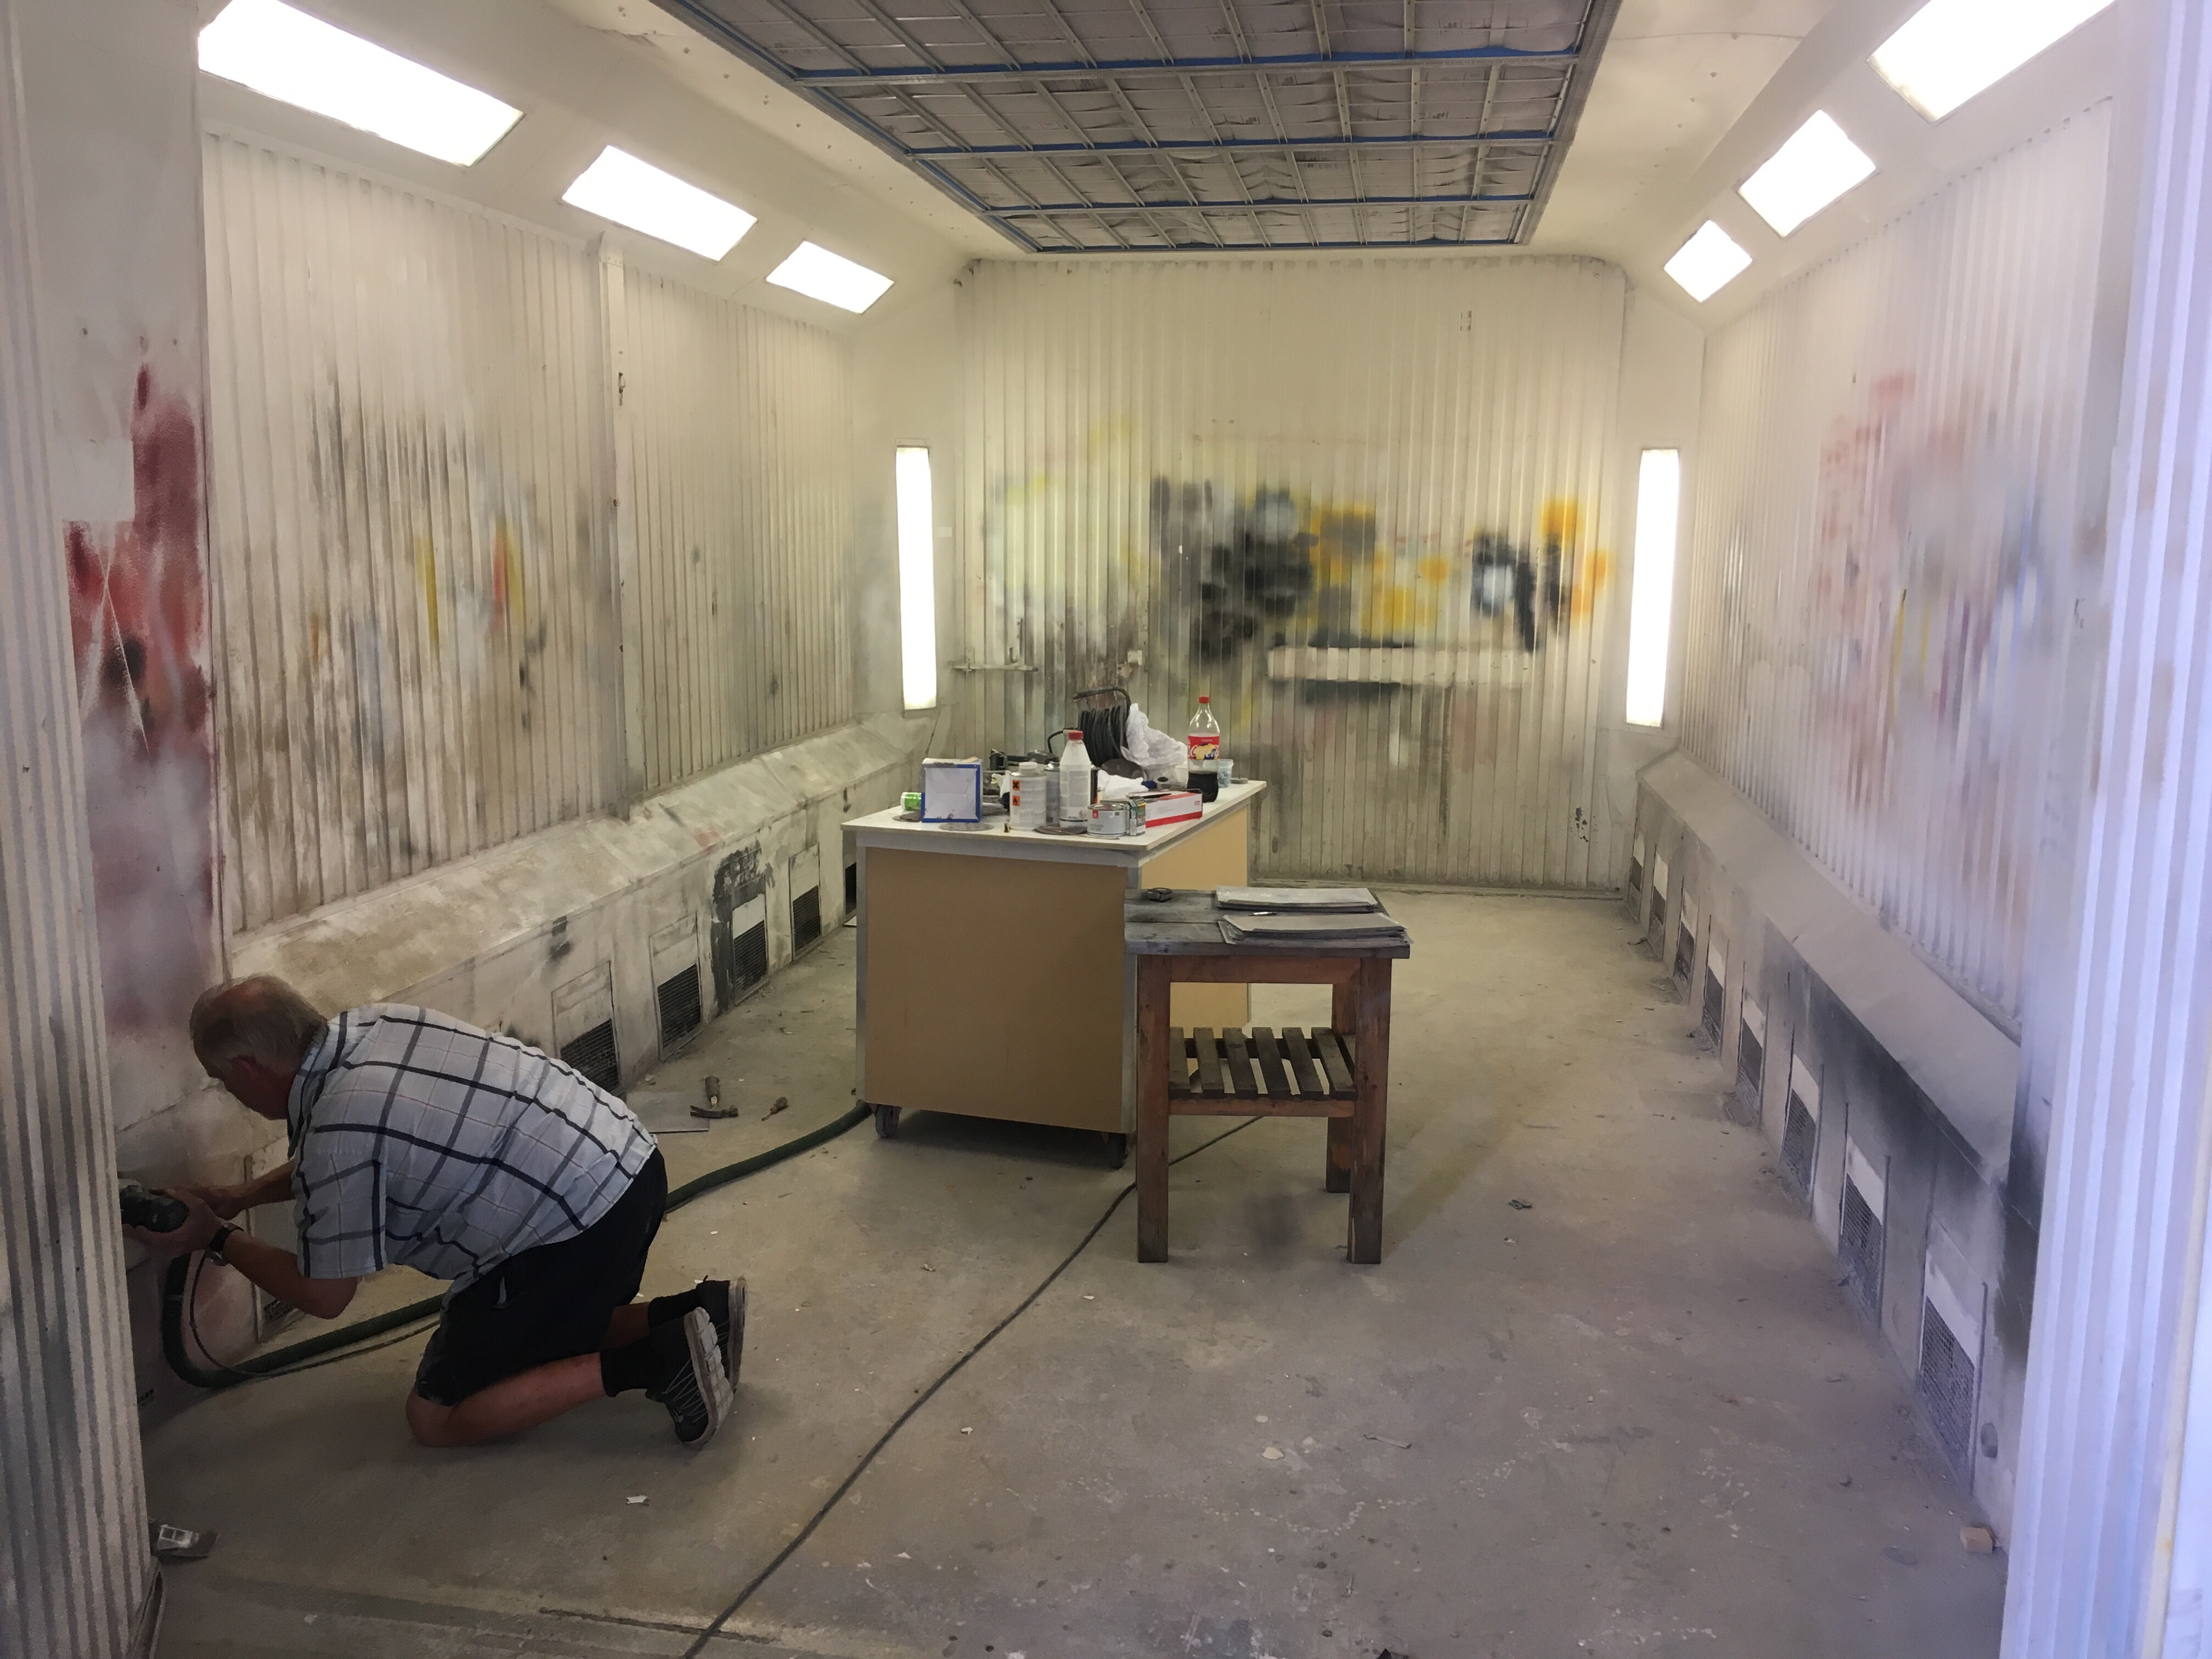
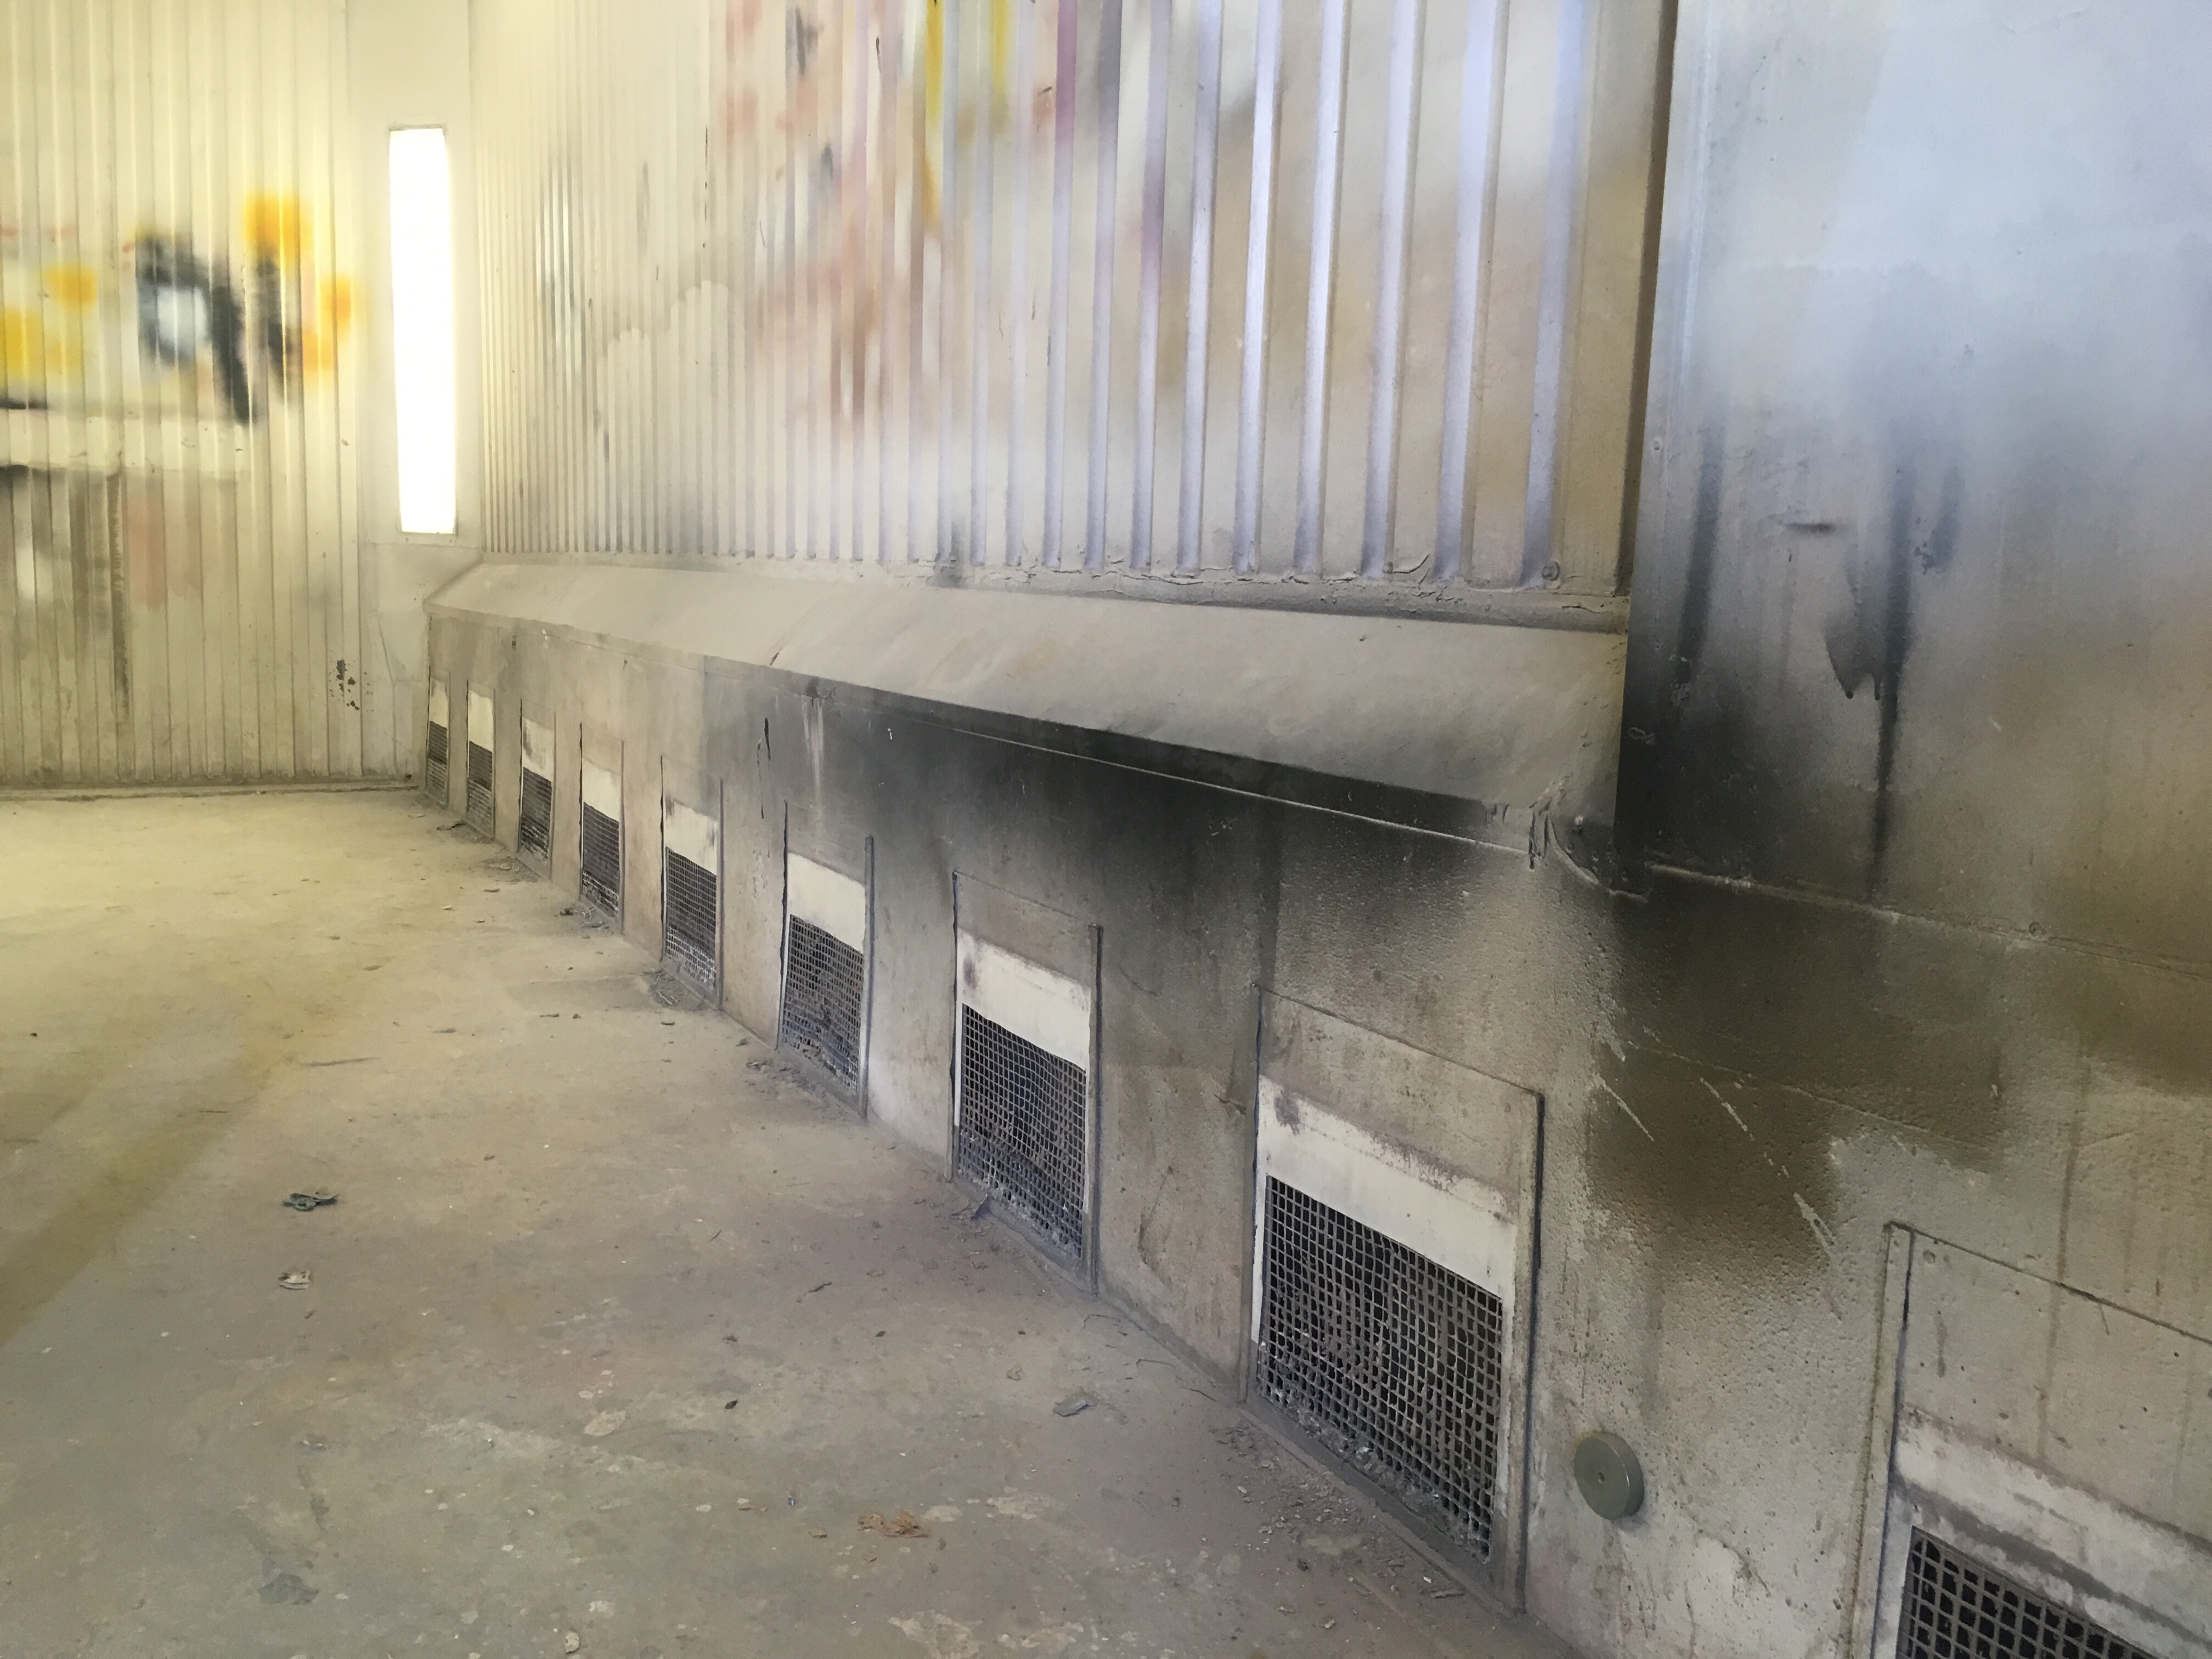
The paintbooth have got a proper clean up and are ready to rock! Here is some before and after shots.
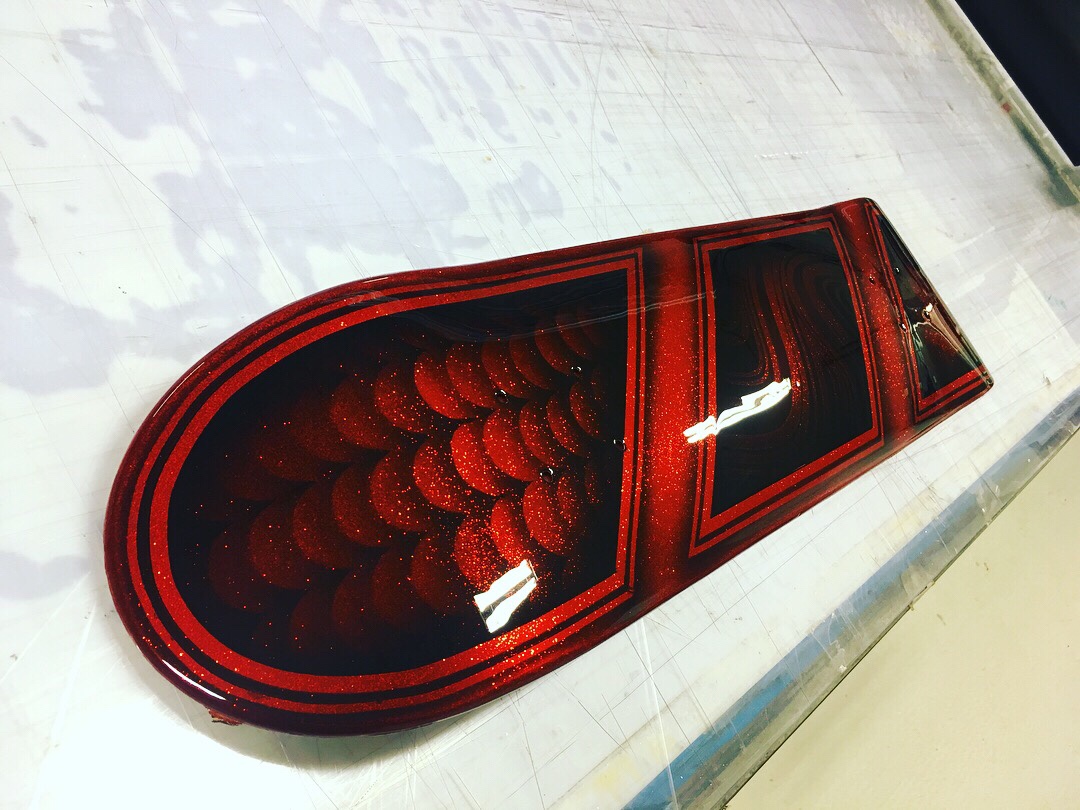
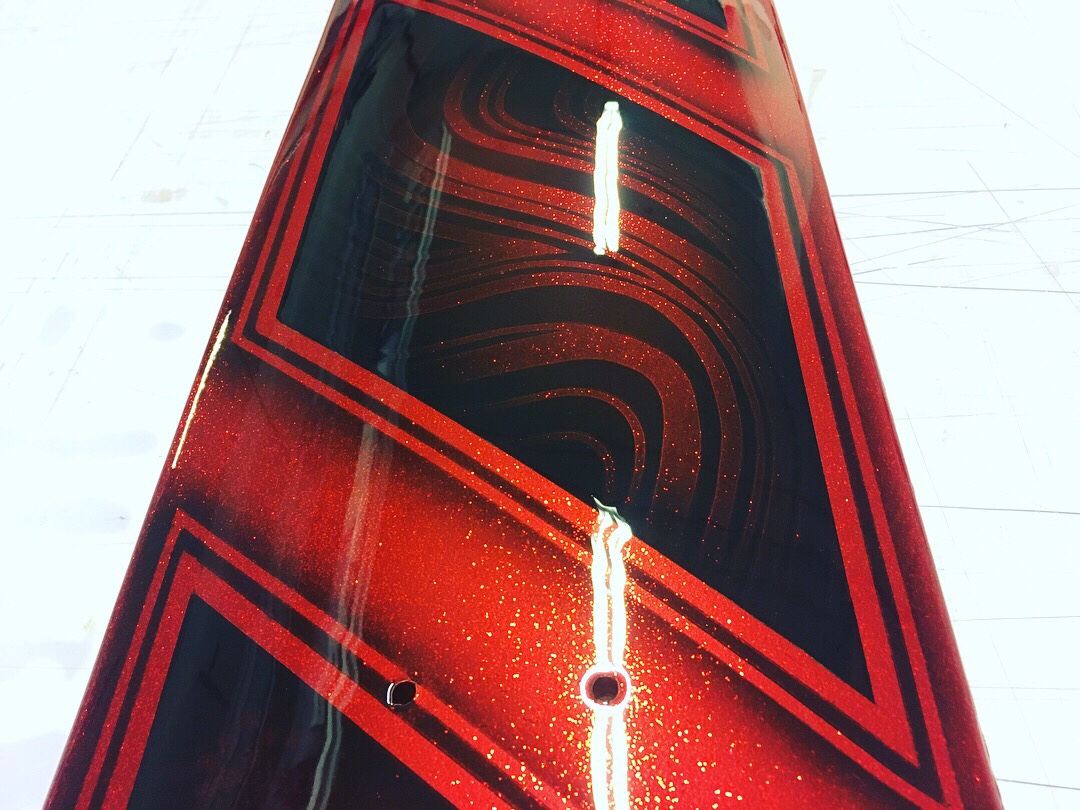
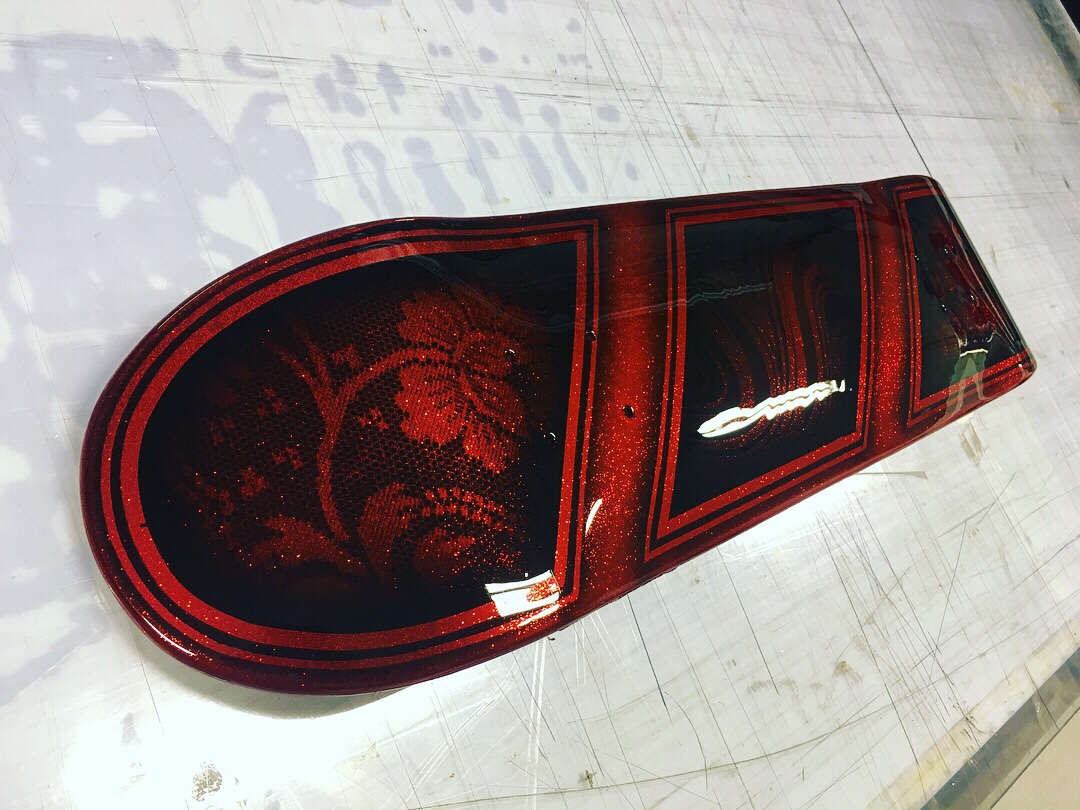
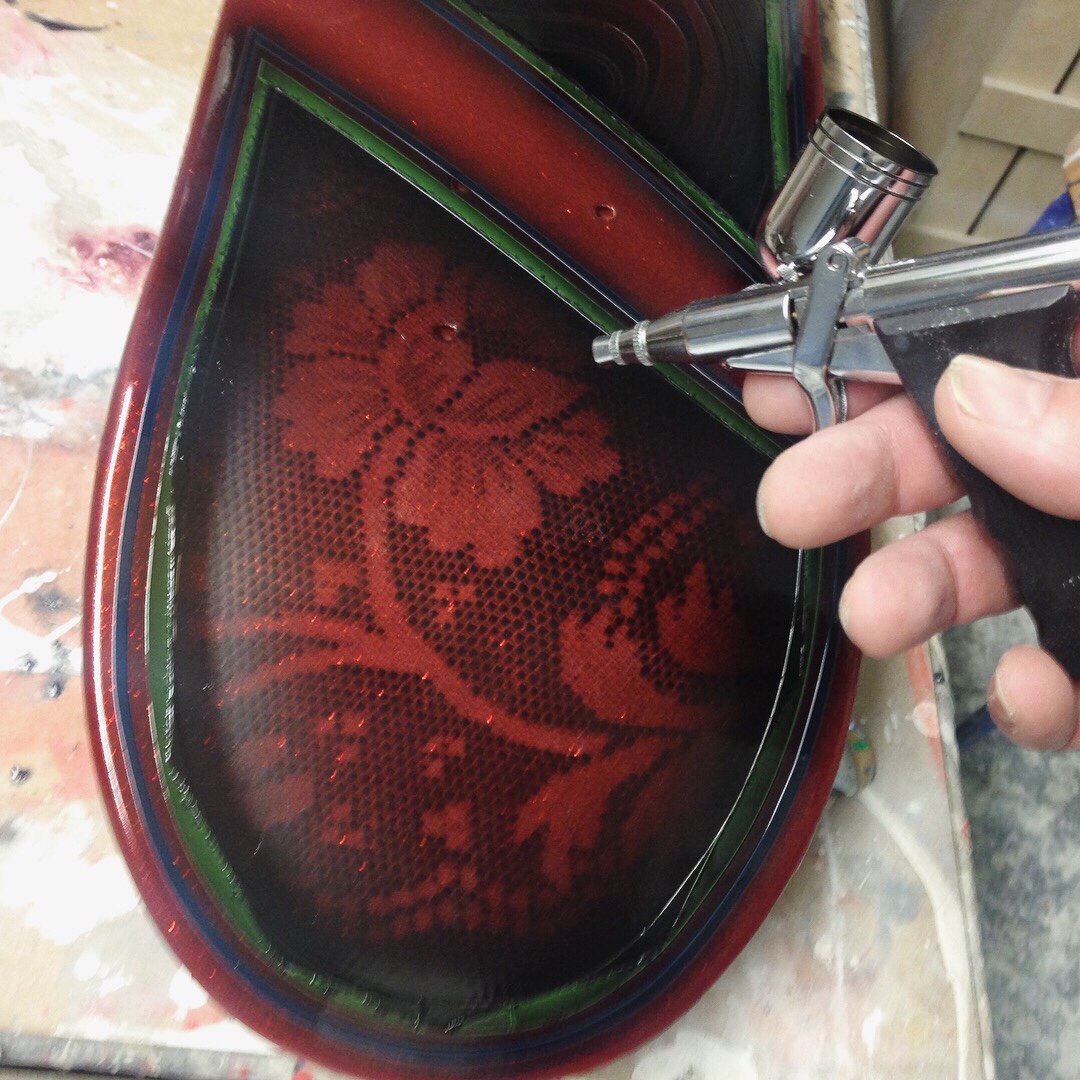
Painted this skatedeck recently. Red chunky flake with deep black paint patterns. One more to the collection! ;-p
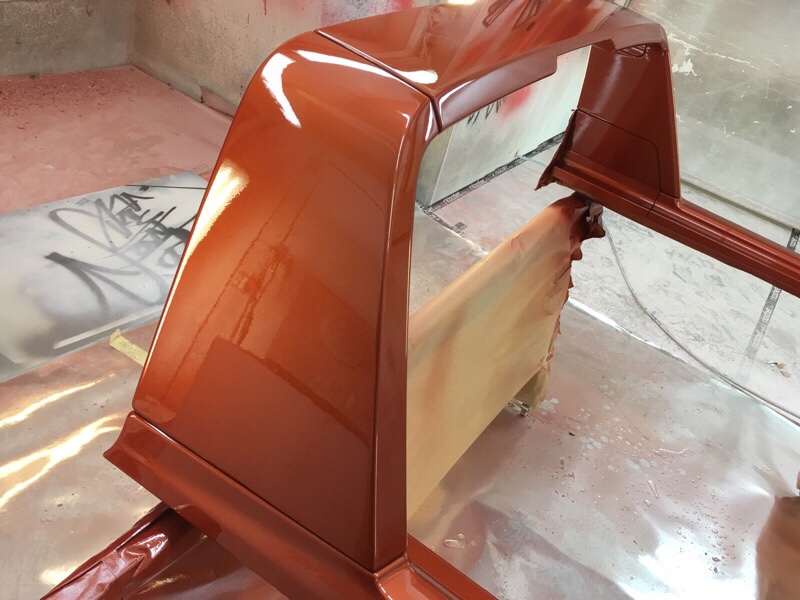
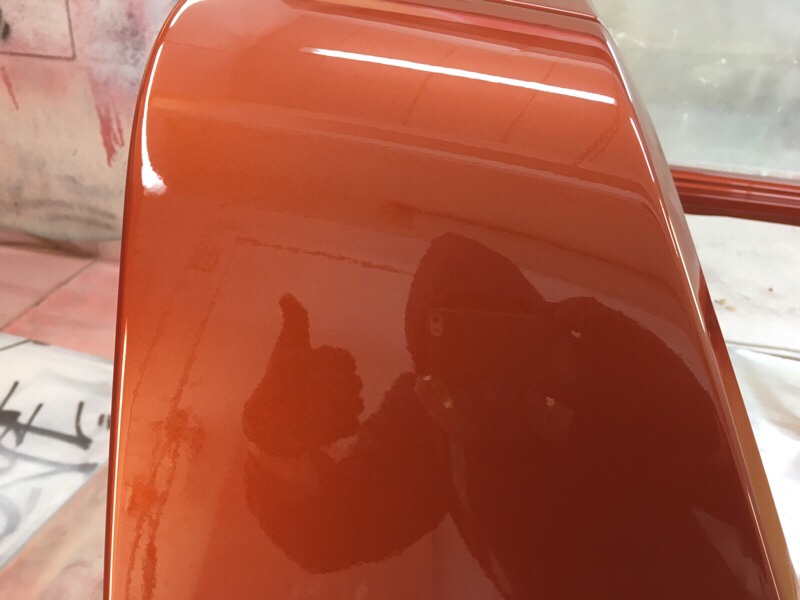
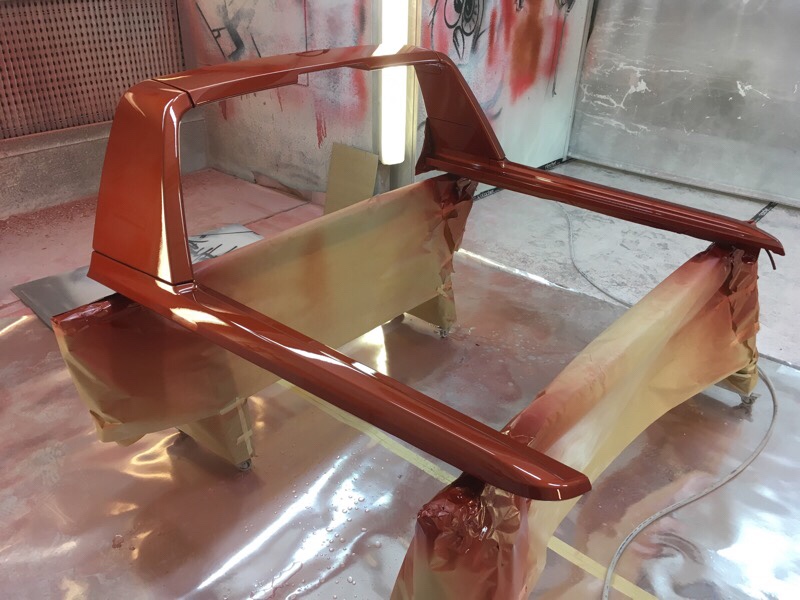
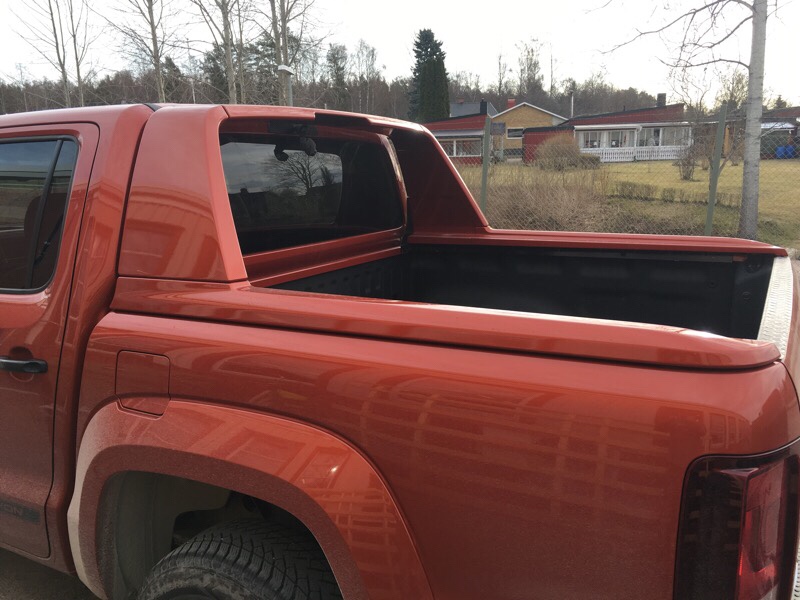
Painting this part in Canyon Red for a VW Amarok pick up truck. Nice color!


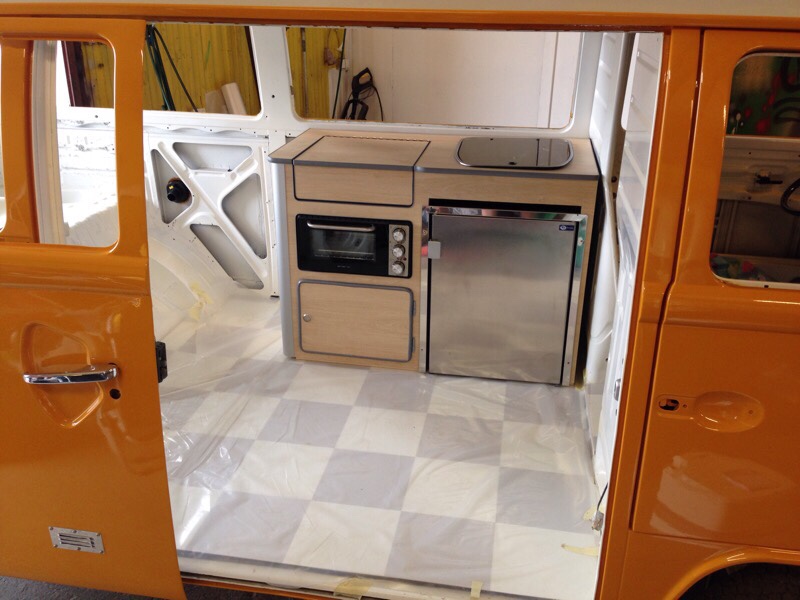
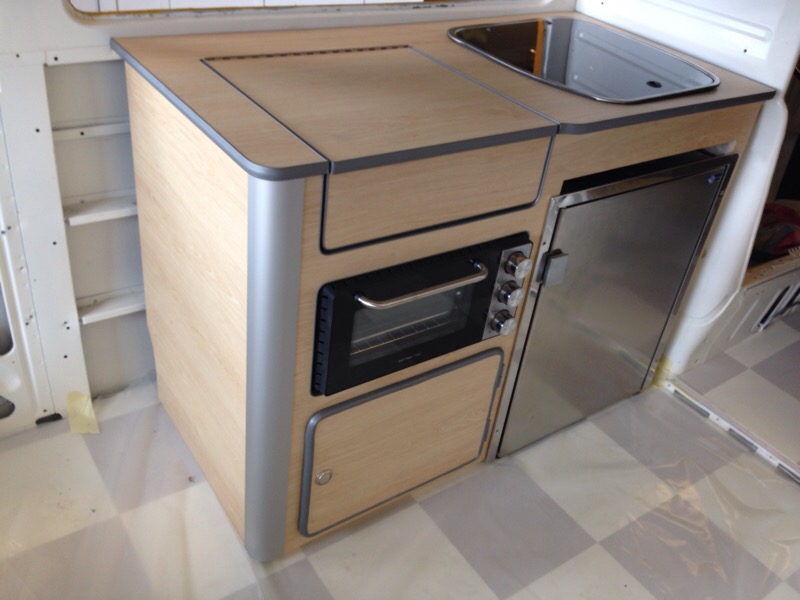
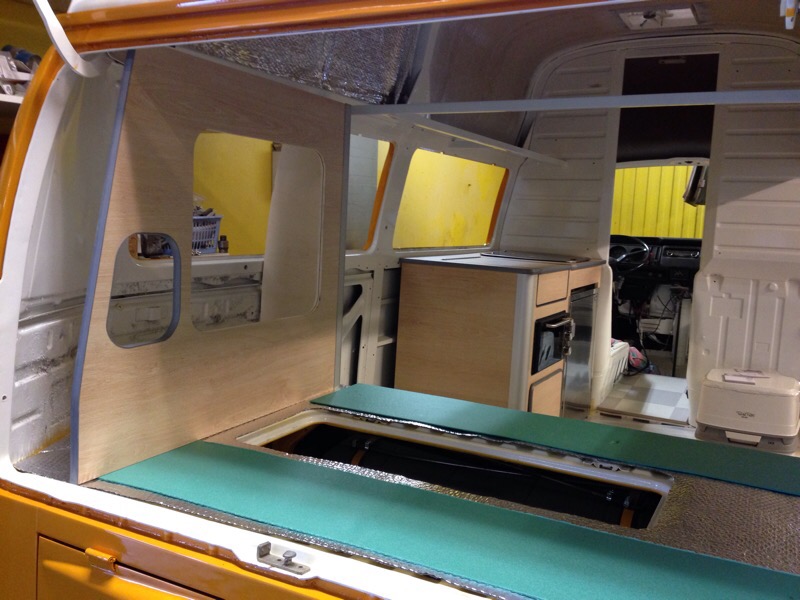
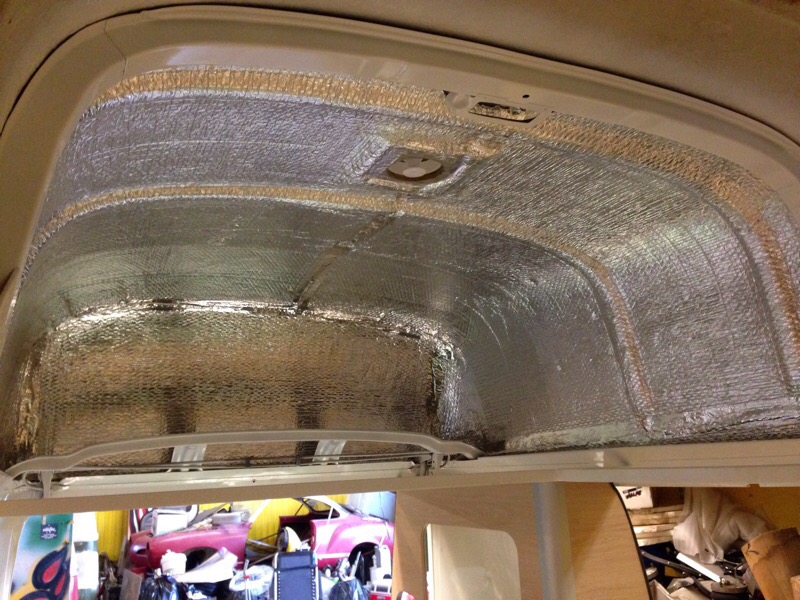
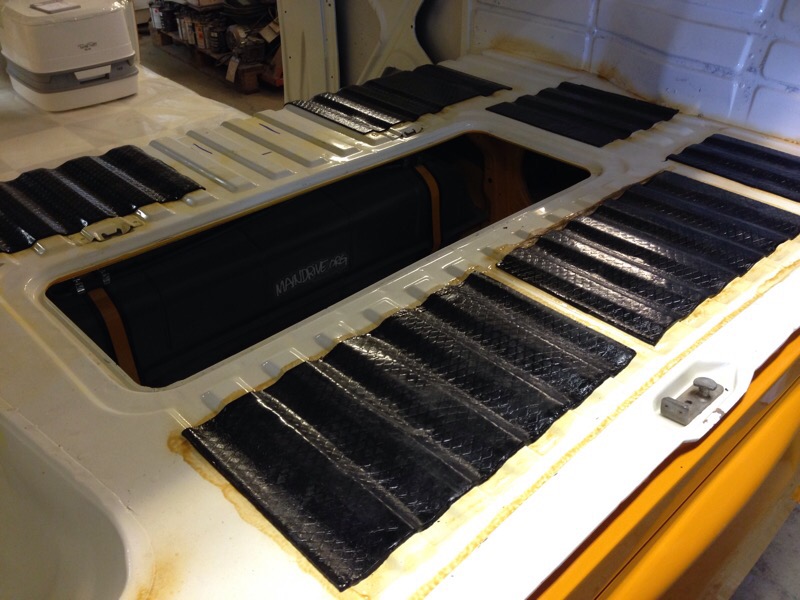
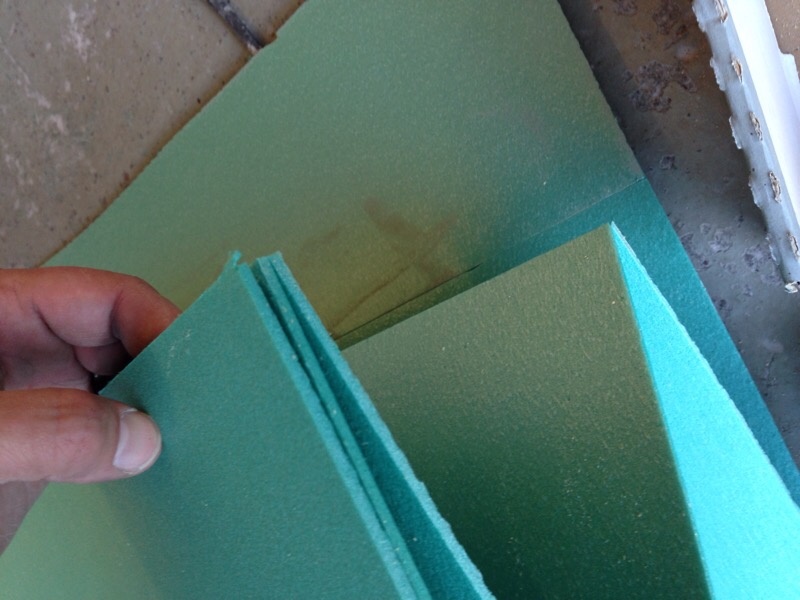
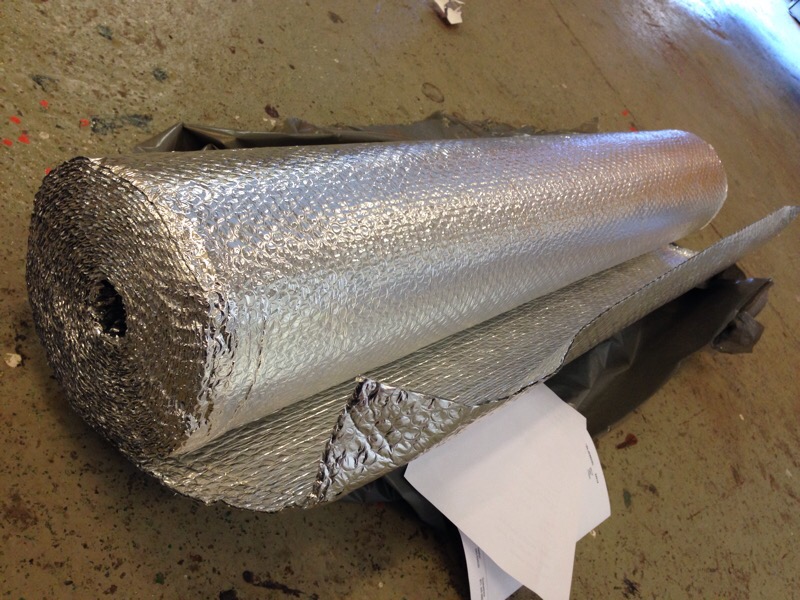
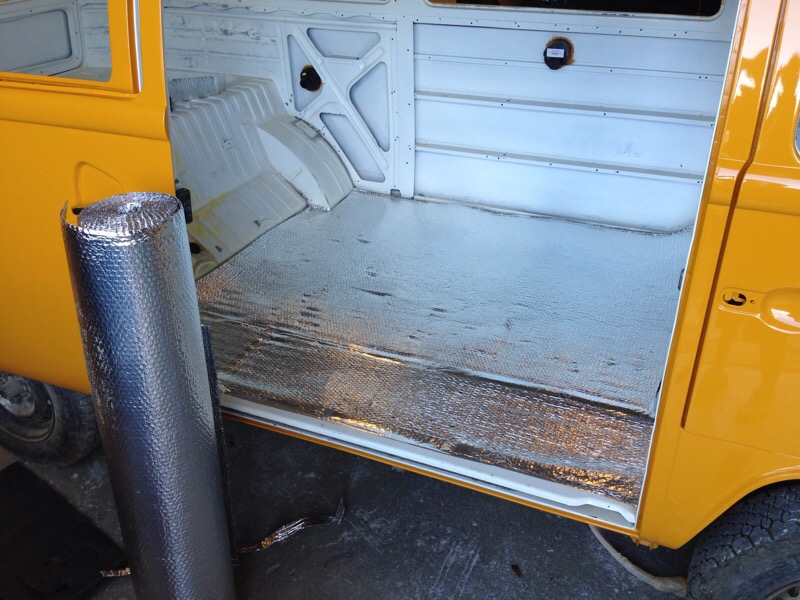
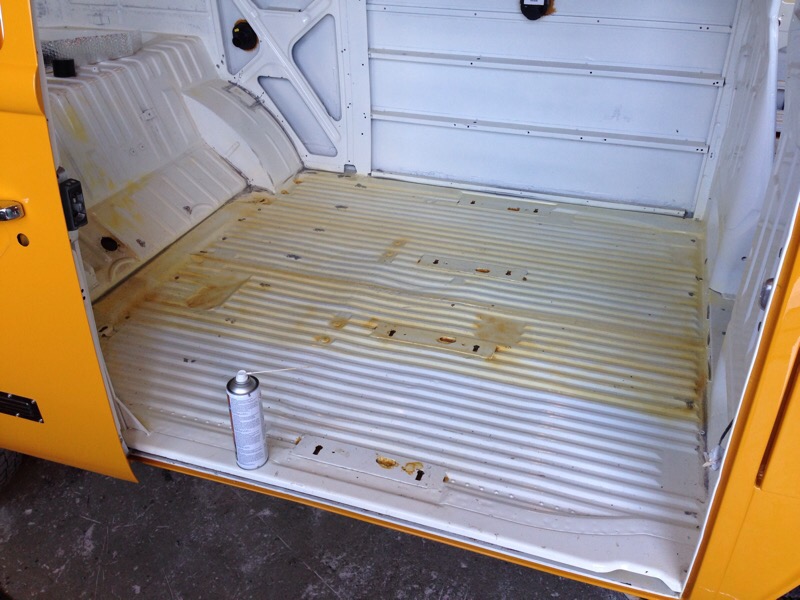
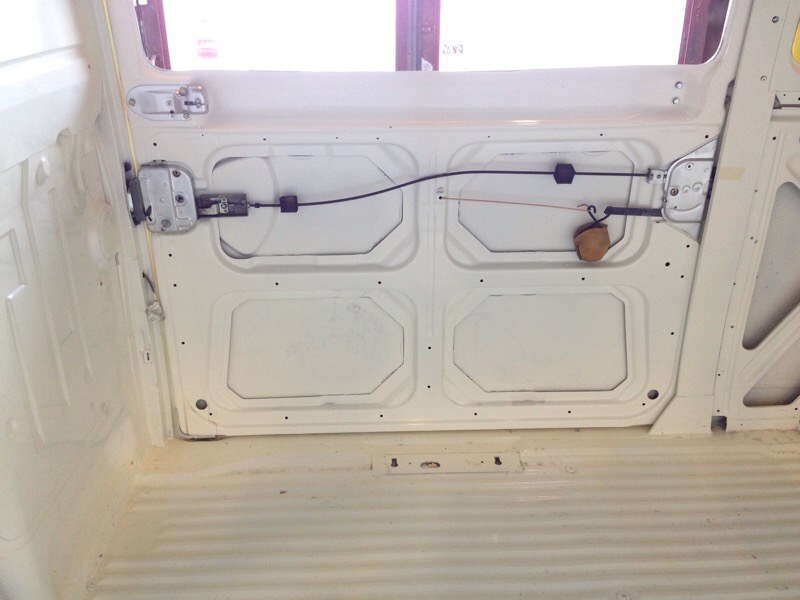
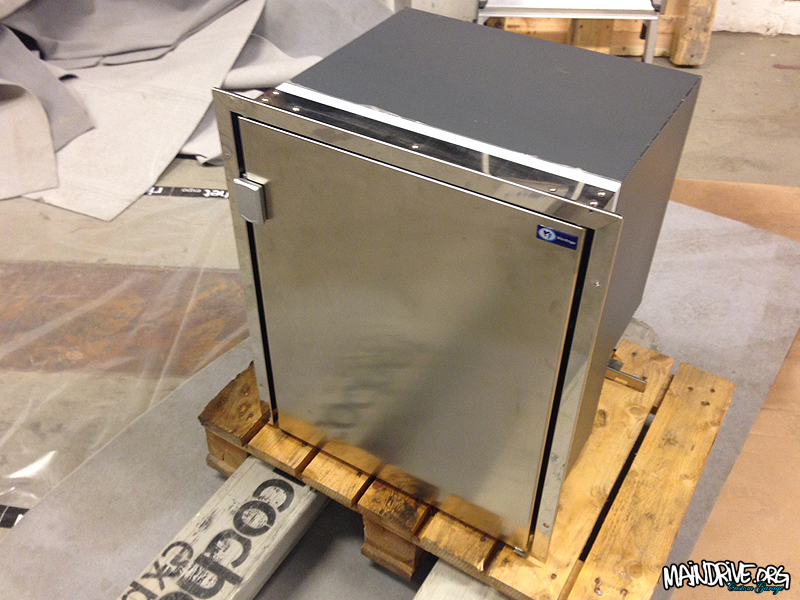
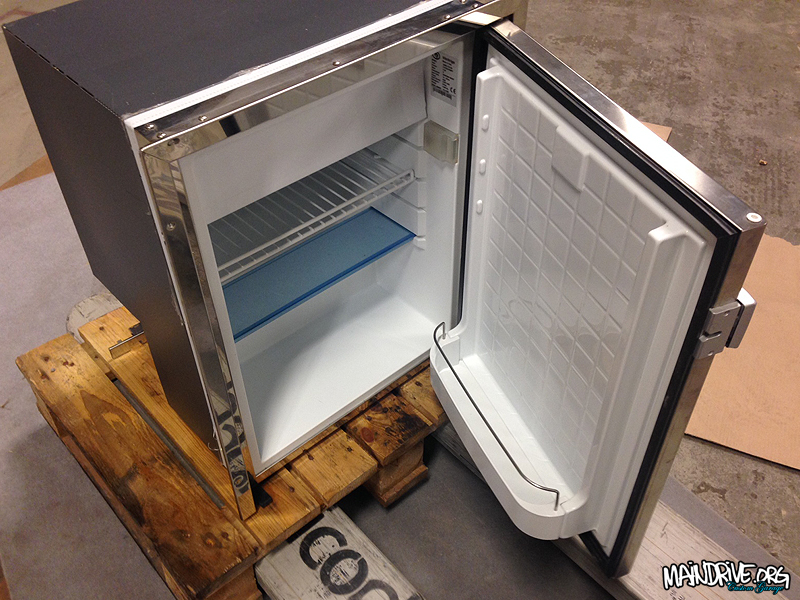
Have now started with the interior on the Highroof bus. Have put sounddeadning mats in floors and doors, sprayed it all with wax for rust protection. Then added insulation (Refectix) a material of aluminium with plasticcells of air in middle. NASA came up with this tecnology when insulating spaceships actually! After this I put some extra 5mm insulation foamboards (green) then 15mm marine plywood and then a new linoleum carpet in Classic checker pattern, went with light grey to match the grey details on furnitures. The furnitures itselfs is in Light Oak wood finish (laminate). I built it all in a special extra light plywood 15mm. This interior is gona weight nothing!! And thats great in a slow VW bus, all the stuff thats going to be loaded in the cabinets are heavy enought 😉 The kitchen pod/cabinet is featuring a new Vitifrigio fridge on 48 liters + 2 liter freezer. A new small owen in stainless that will be running on 240v (euro). The zink is from a newer crashed/parted out Knaus campervan I bought cheap online. The lid in top is hiding a gastove and the cupboard in bottom will be housing the greywater tank etc.
Still have plenty to do before I can start restoring the 1800cc AP engine.
More to come soon!
#highroofbayproject

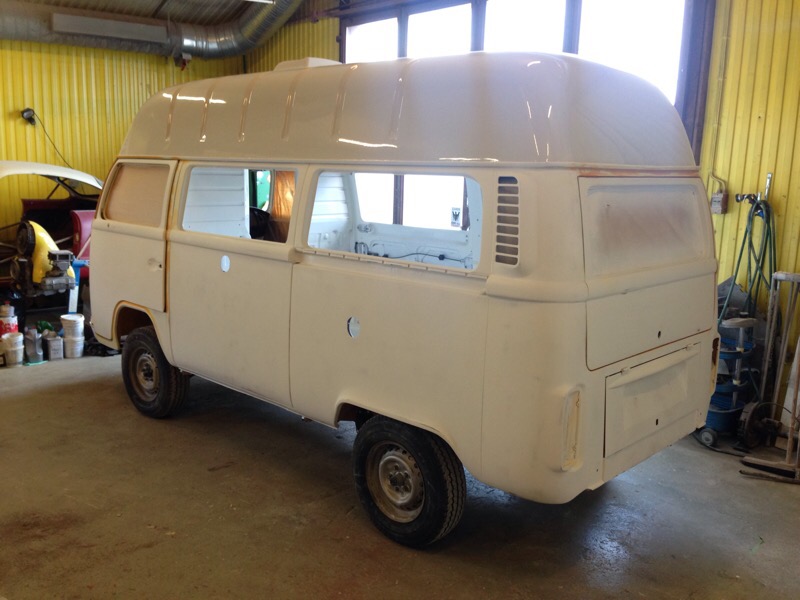
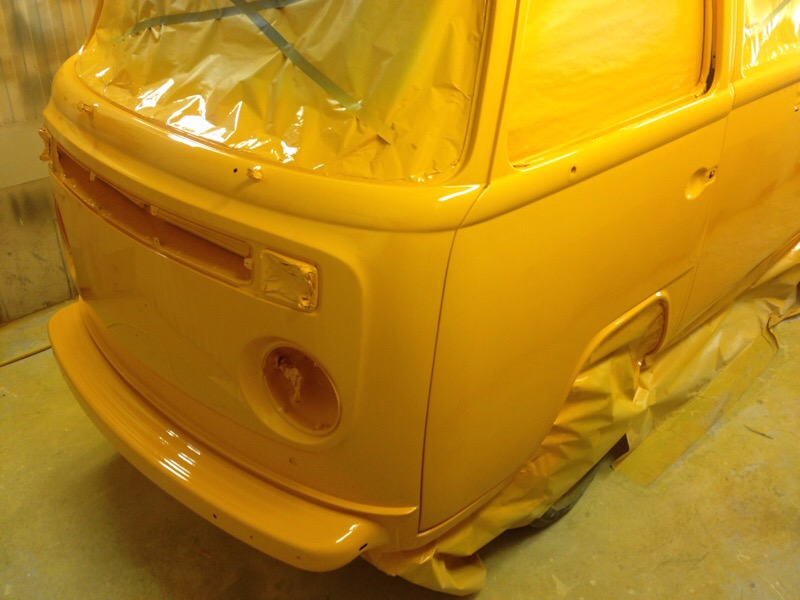
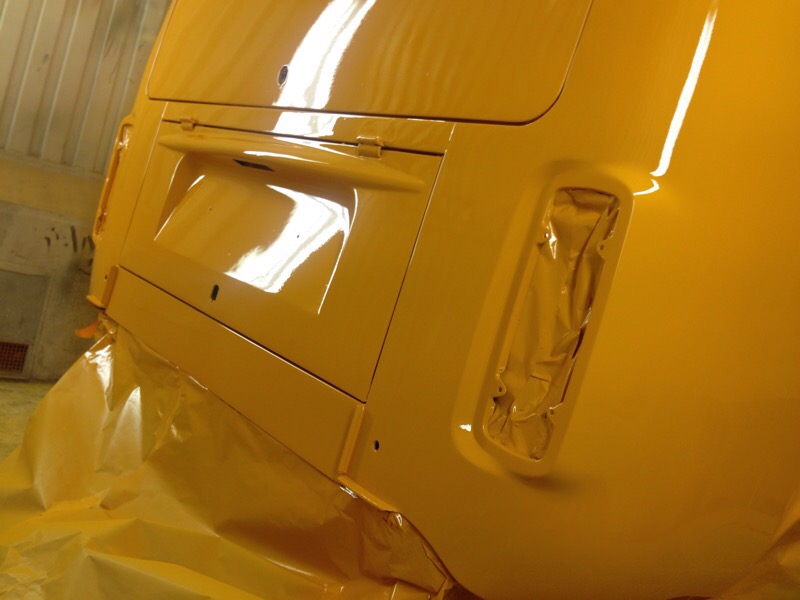
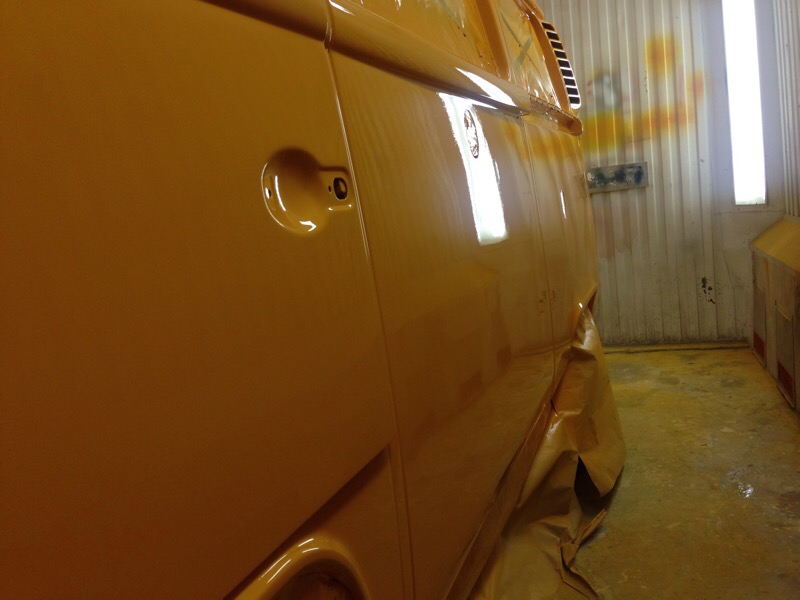
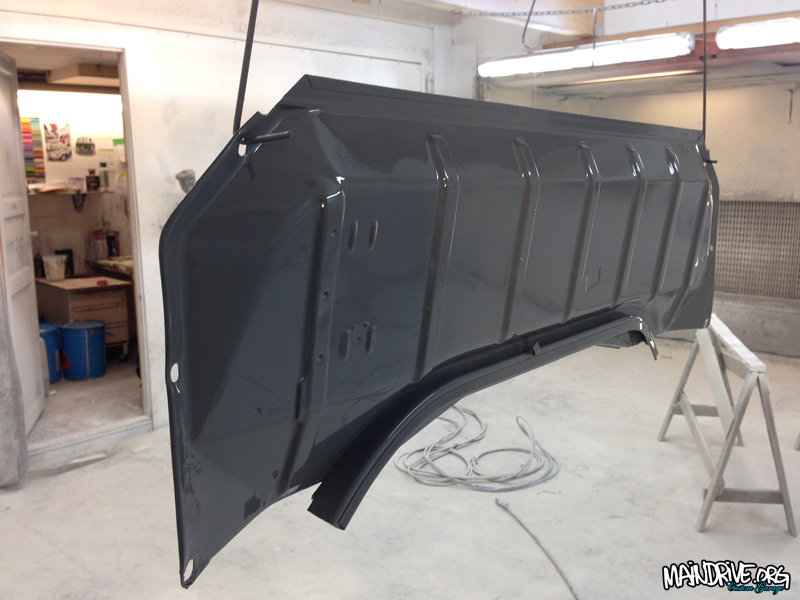
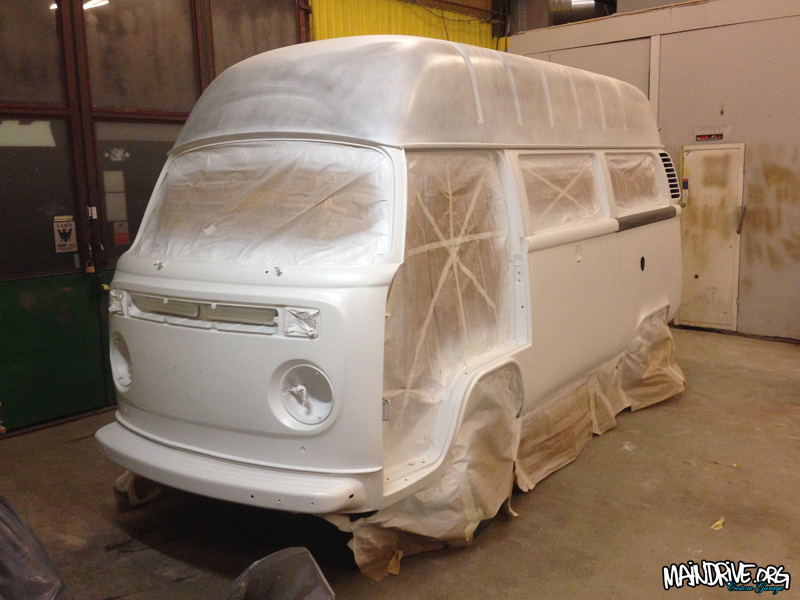
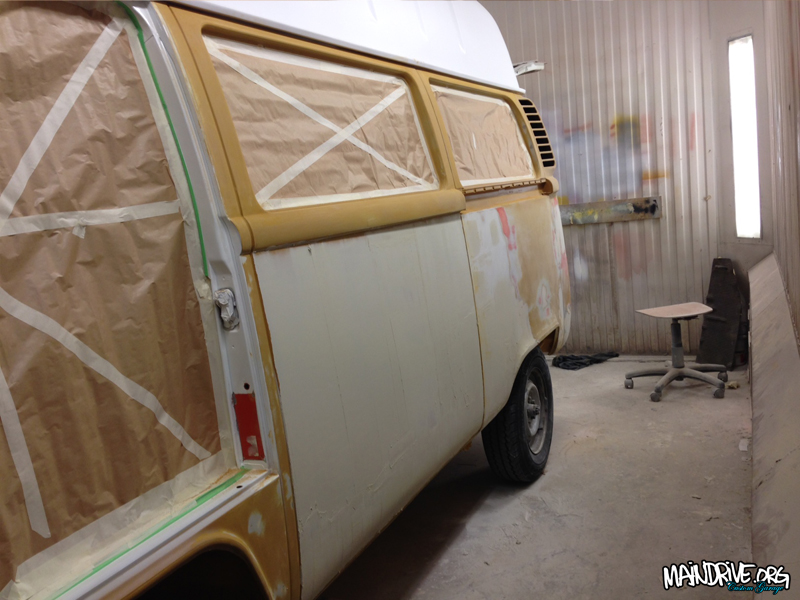
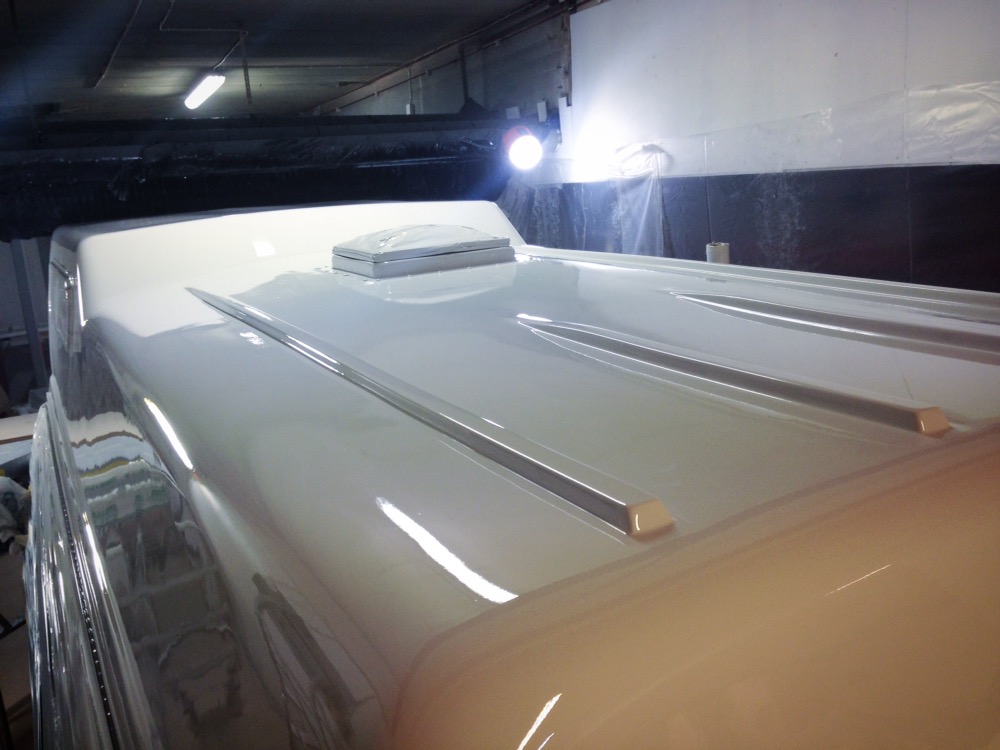
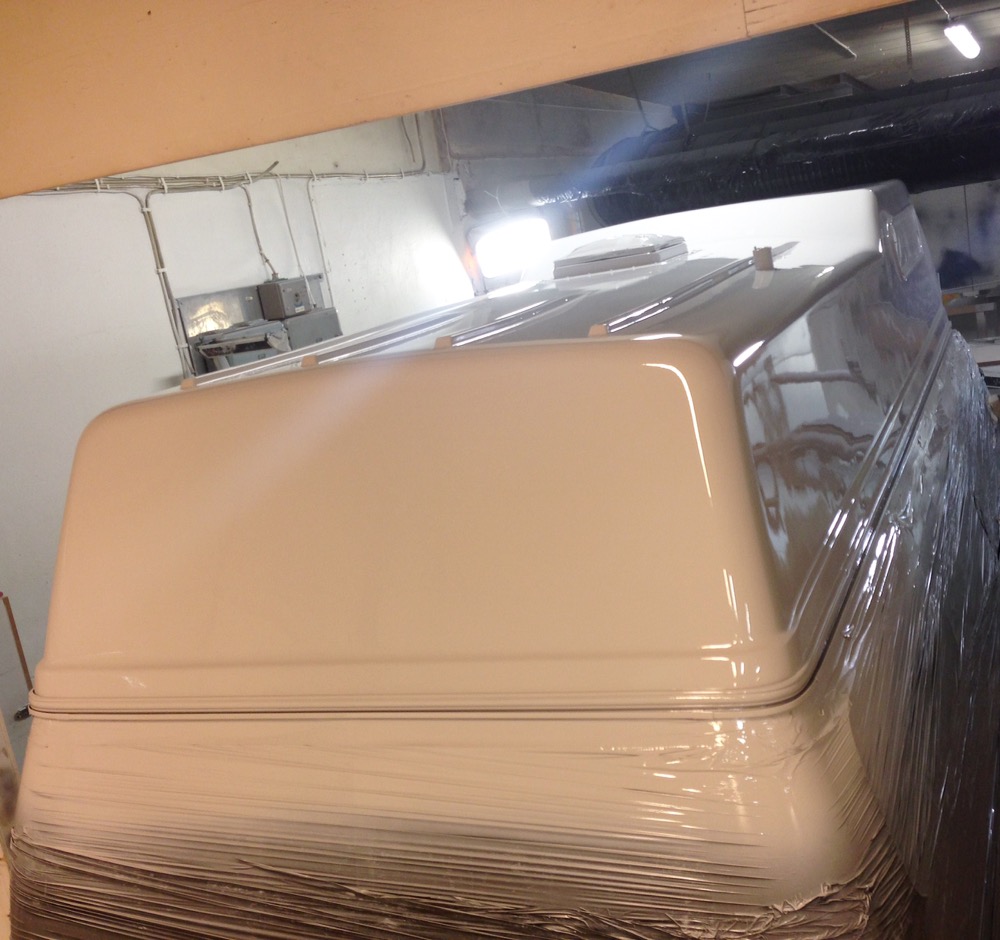
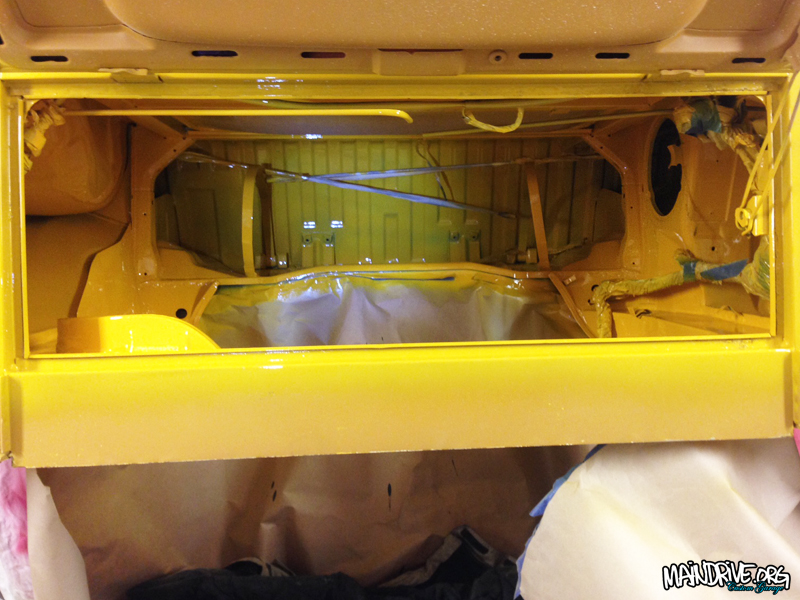
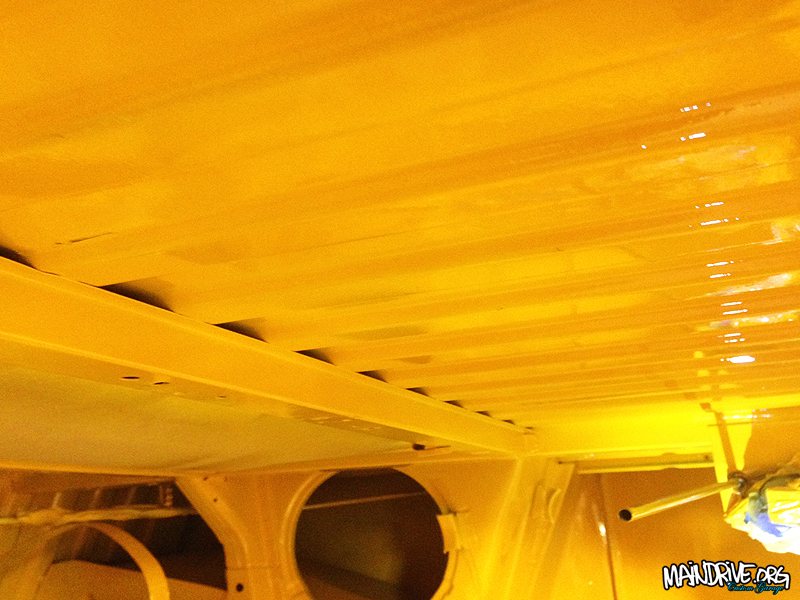
So the Highroof is now painted at last, in Marino Yellow VW L20a, period correct for 1975. It have been a ton of work and to get that yellow color to cover the bus needed to be painted 4times/coats. That because all yellow (and sometimes red) colors have less pigment than all other colors.
Now the fun can begin, mounting on all new parts like lights, handles etc! Next step will be to start with the interior and begin with insulation in walls and floor. Would be nice to have the most done on interior and exterior until fall so the winter can be focused on engine build and install etc.
More pics coming soon!


Short movieclip from when I painted the skate deck, check out all videos on the Maindrive Youtube channel and dont forget to subscribe: https://m.youtube.com/c/MainDrive
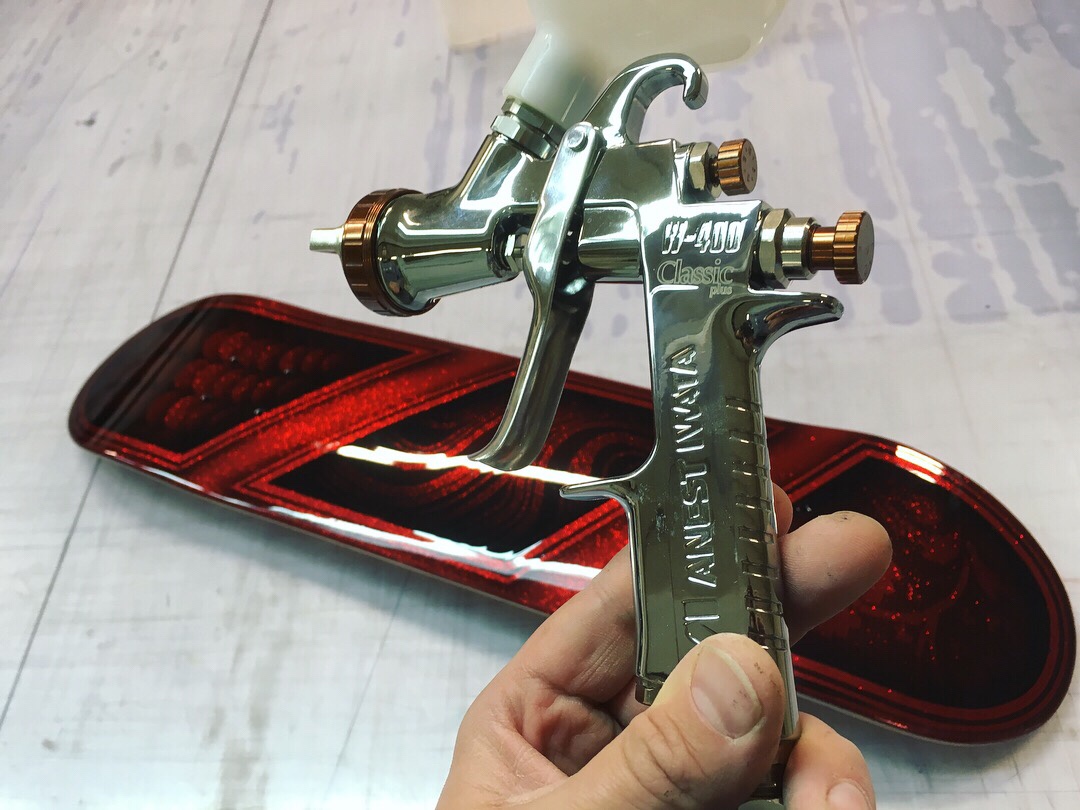
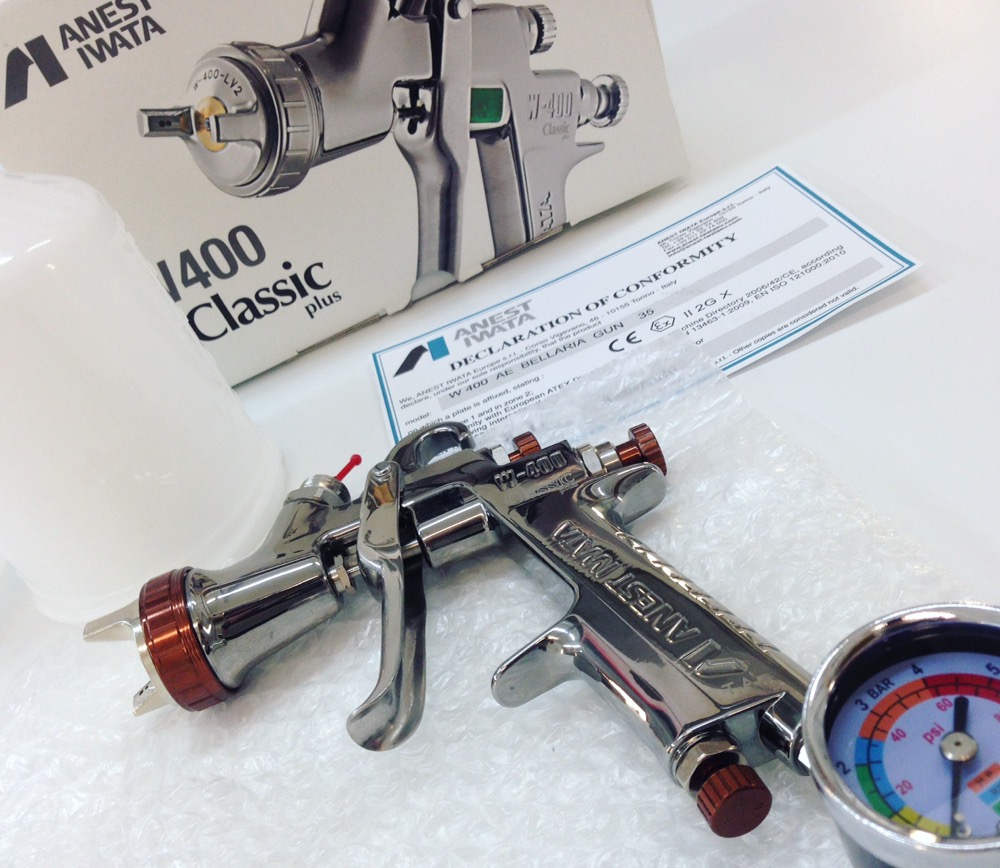
The new paintgun! Anest Iwata W400, Low Volume Low Pressure. Many professional carpainters favorite gun. Only the best, Iwata 4 ever!
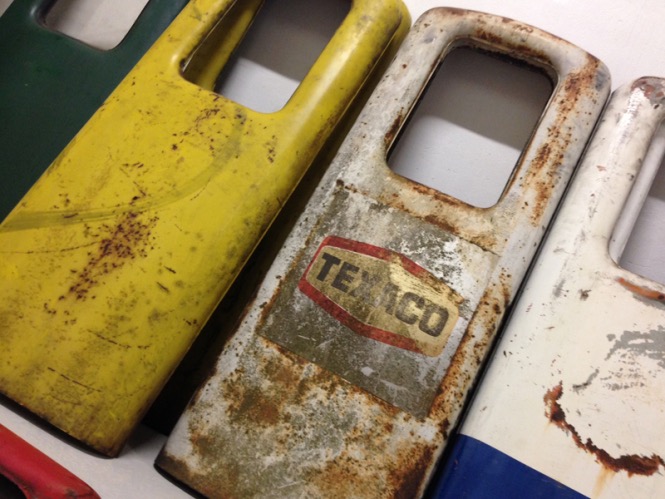
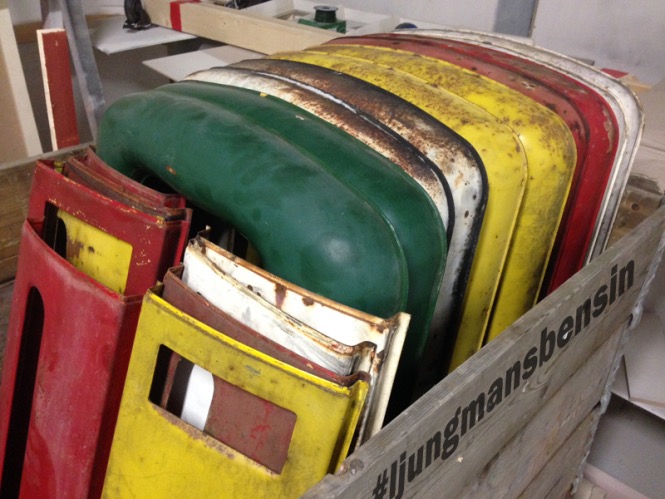
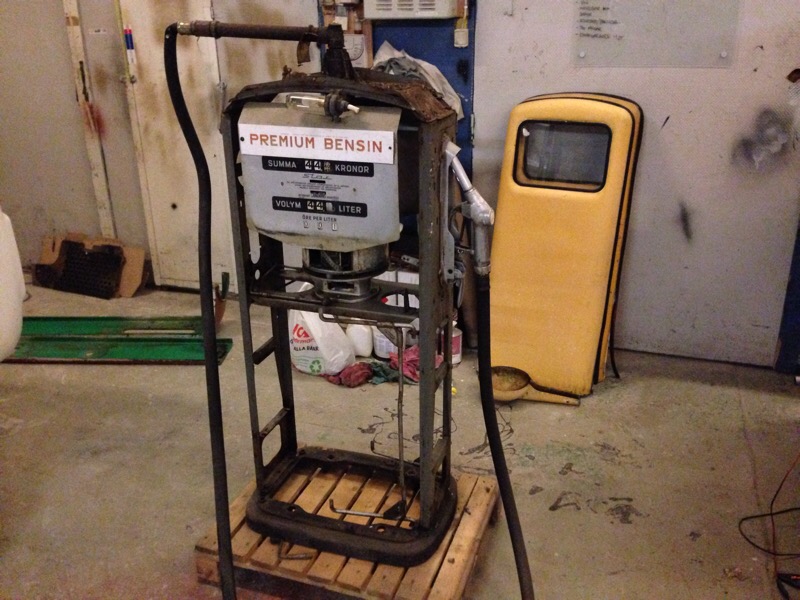
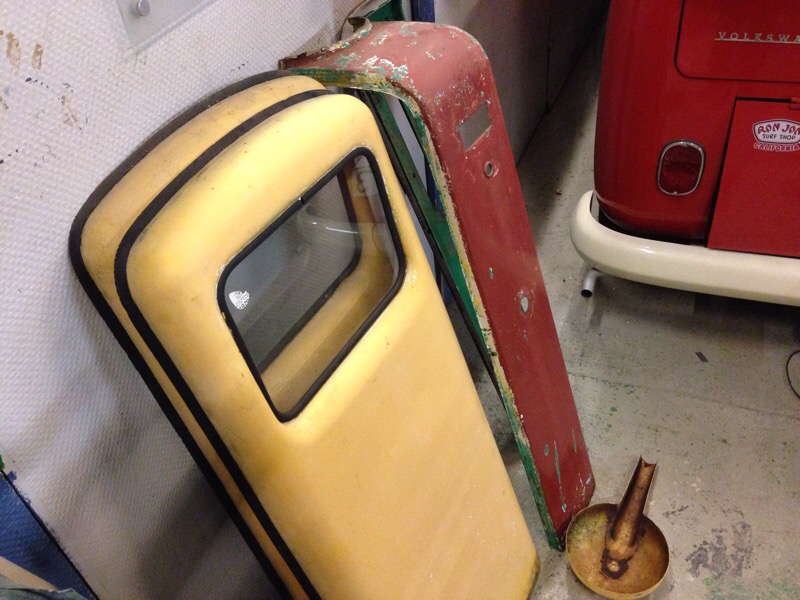
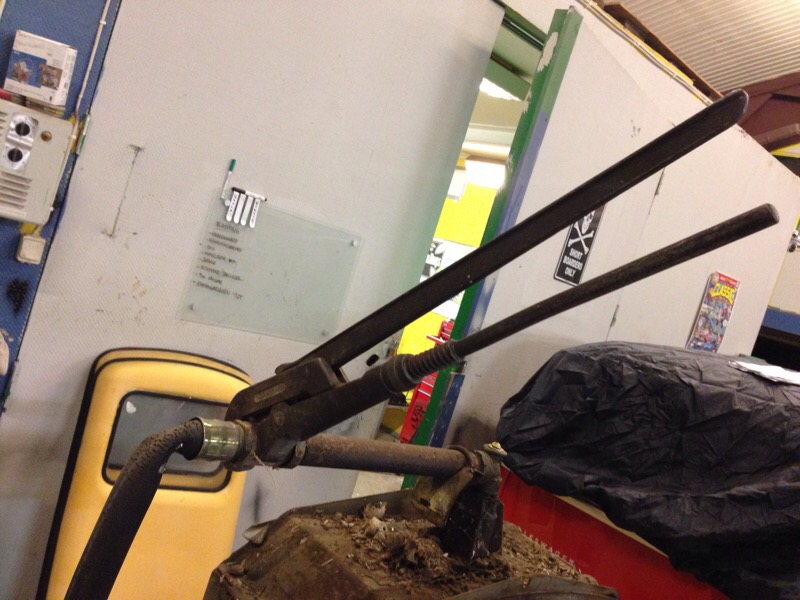
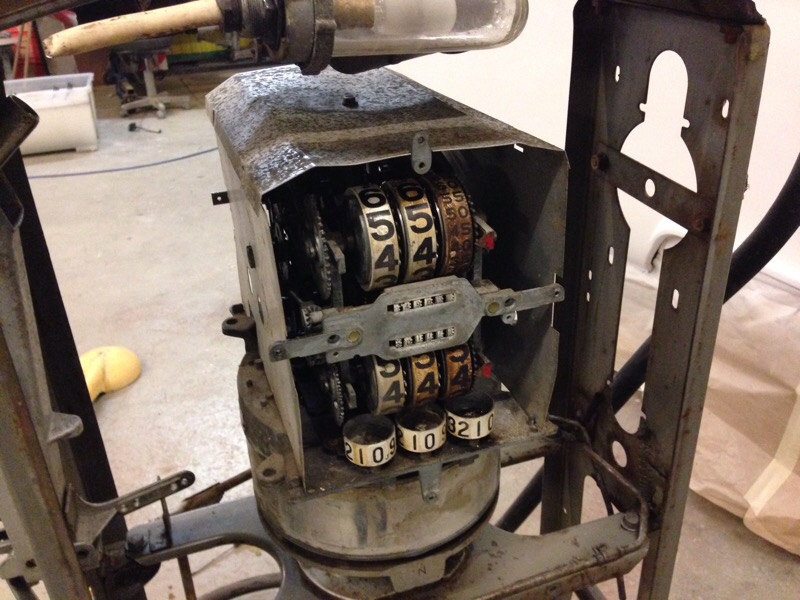
A bunch of 1950’s gaspump ready for restoration. Ljungmans Verkstäder, made in Sweden. They have all been sandblasted to baremetal now and bodywork started. Preping for primer and then paint. Will all be painted in diffrent gascompany.
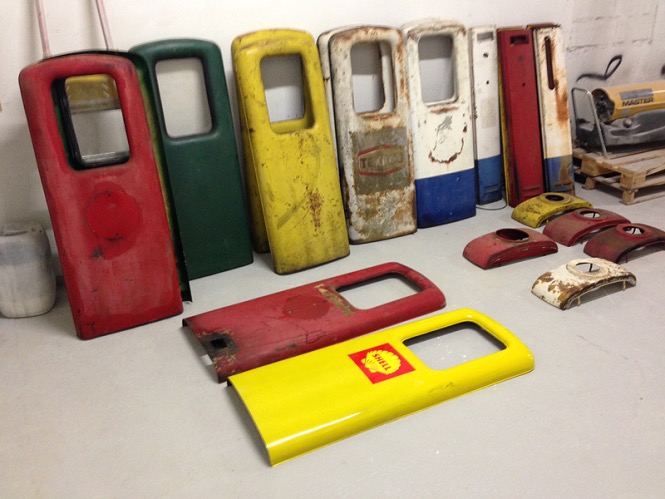
Some new pics on the 1958 Ljungmans Star78 gaspump!
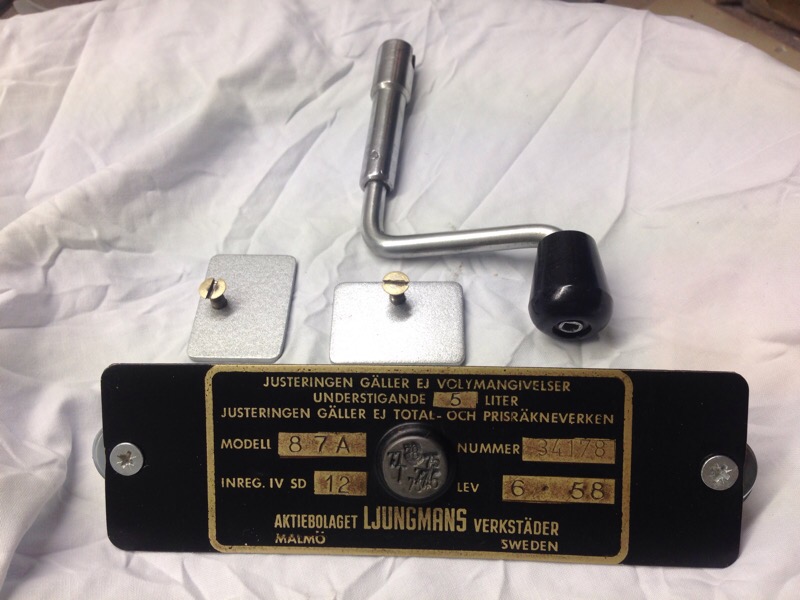
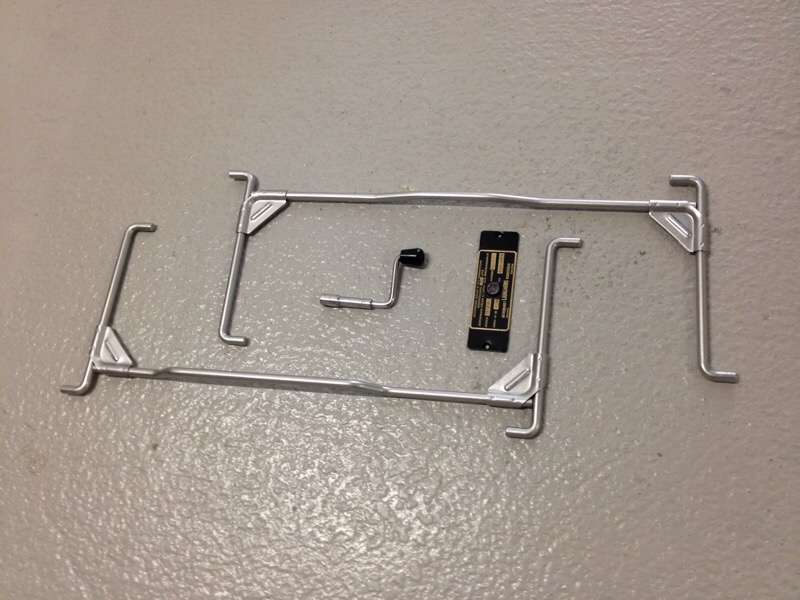
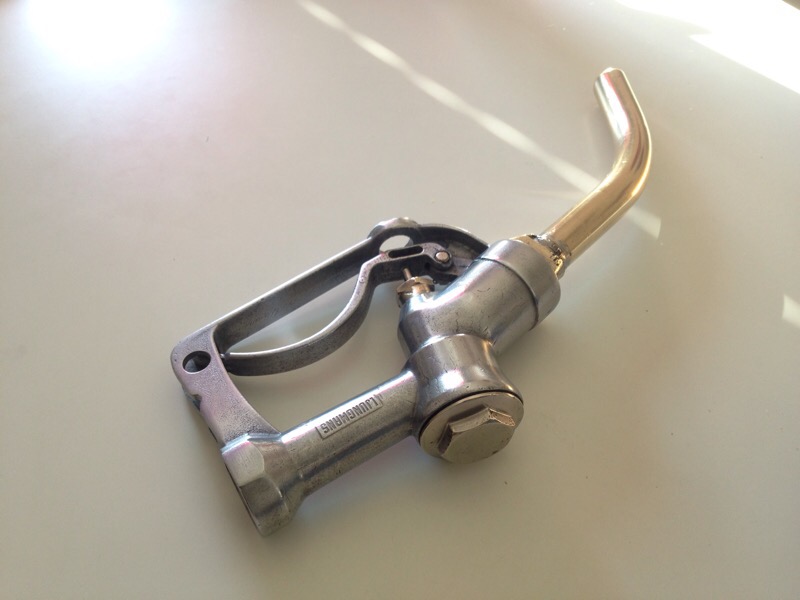
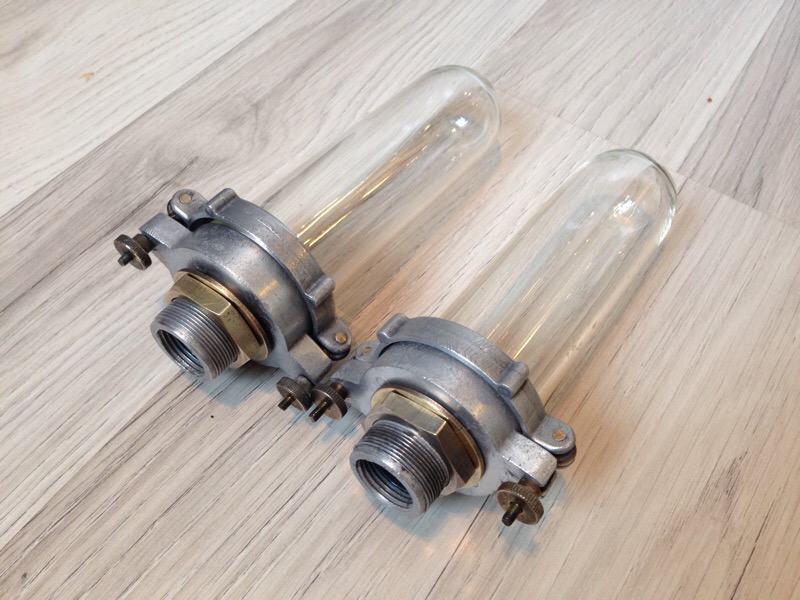

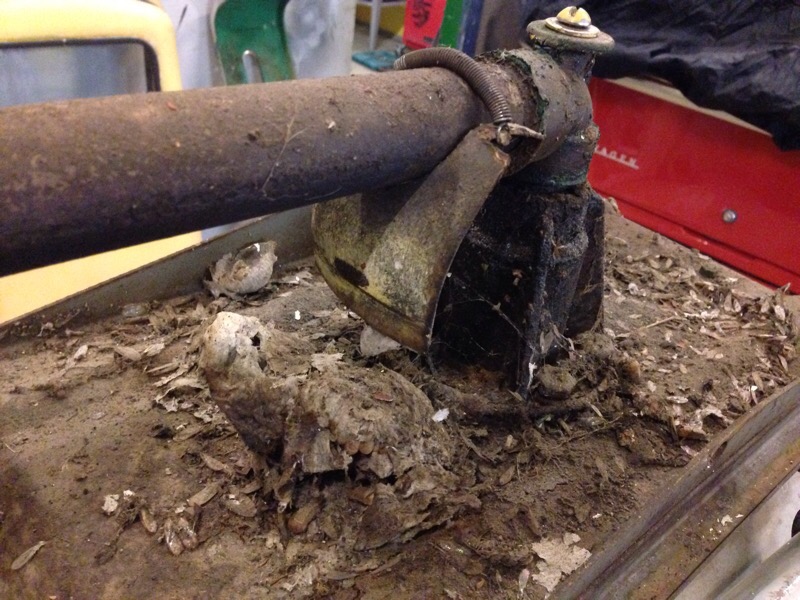
Got inspired to restore my vintage gaspump a 1958 Ljungmans Star 87. Electricmotor, pump, wires etc was removed by me earlier so just the rest of the stuff needed to be taken apart and cleaned and highpressure washed. Lots of old diesel everywhere. Going to be a BP (British Petroleum) again like it was new 1958.
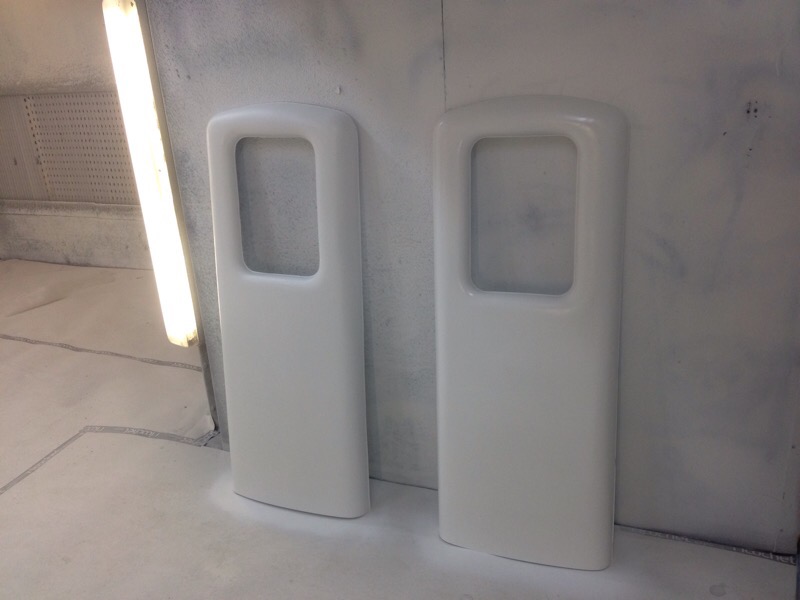
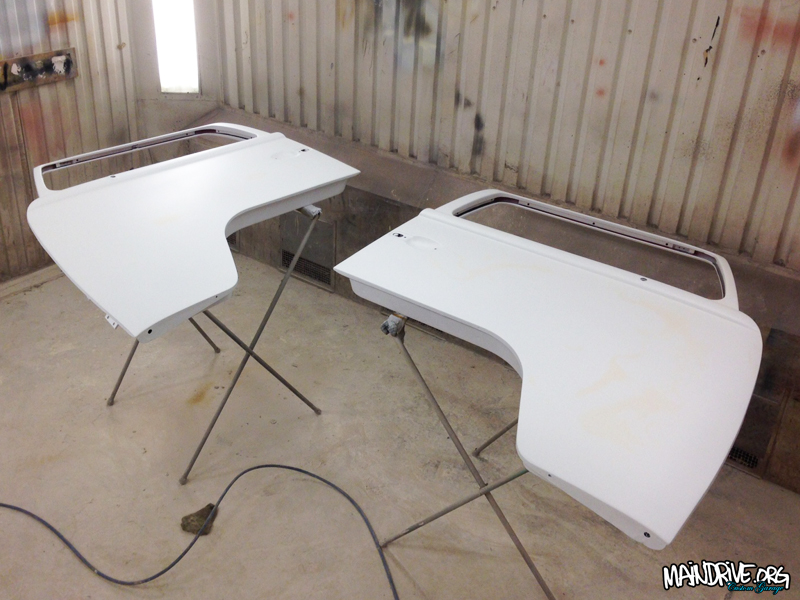
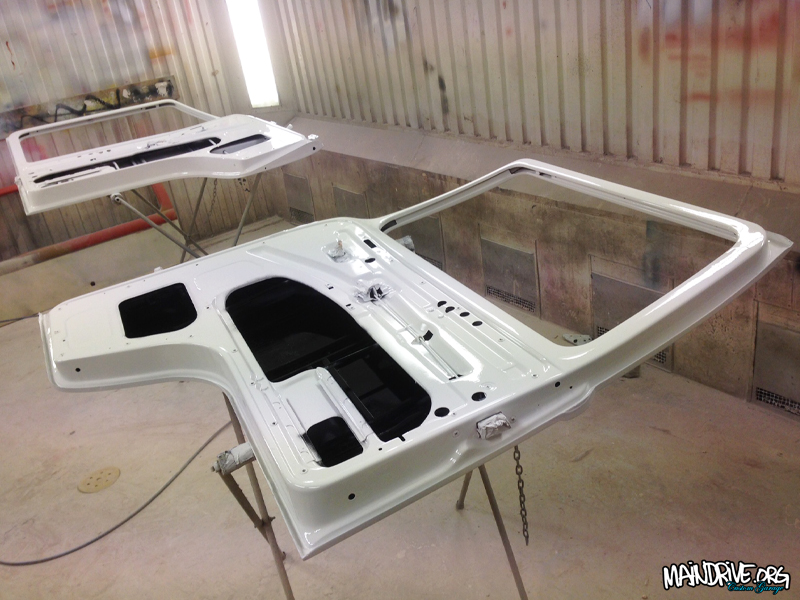
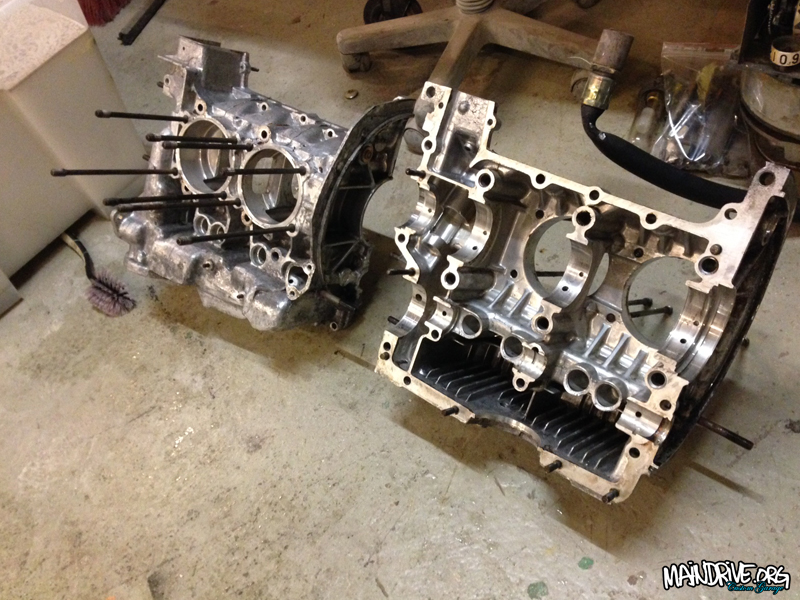
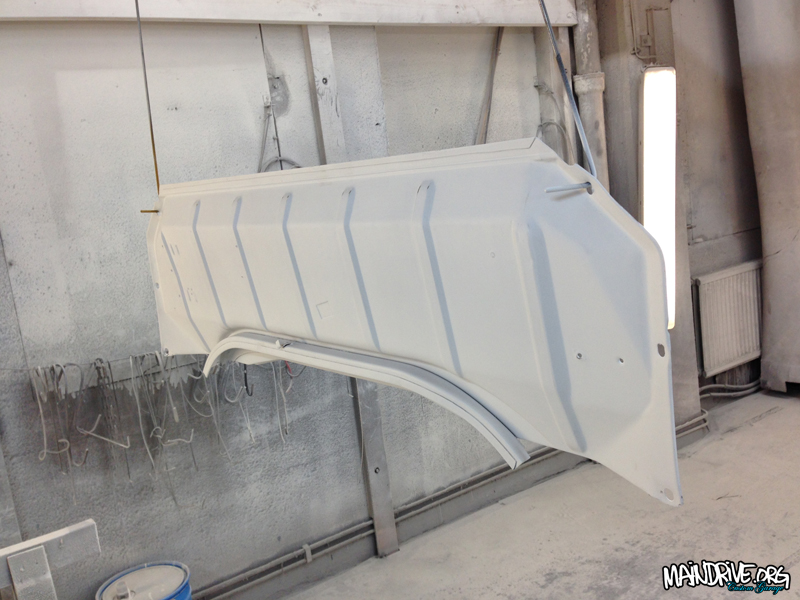
Front doors are ready for paint. Inside is already finished painted. Engine case have been cleaned up also!
Have not got very much done lately. As my first son (1 year old) takes most of the time now. So that more important at the moment. But Im trying to push forward on the bus too, couple of hours after work and on weekends etc. Soon have all doors and lids in primer and then it all just needs a easy sanding and then its time for a paintjob! Have also sandblasted the fueltank cover and bellypan and got them painted and ready too. Hope to start rebuild of the 1800cc Type 4 engine in begining of February also!
More to come, but thats it for now, here is some pics…
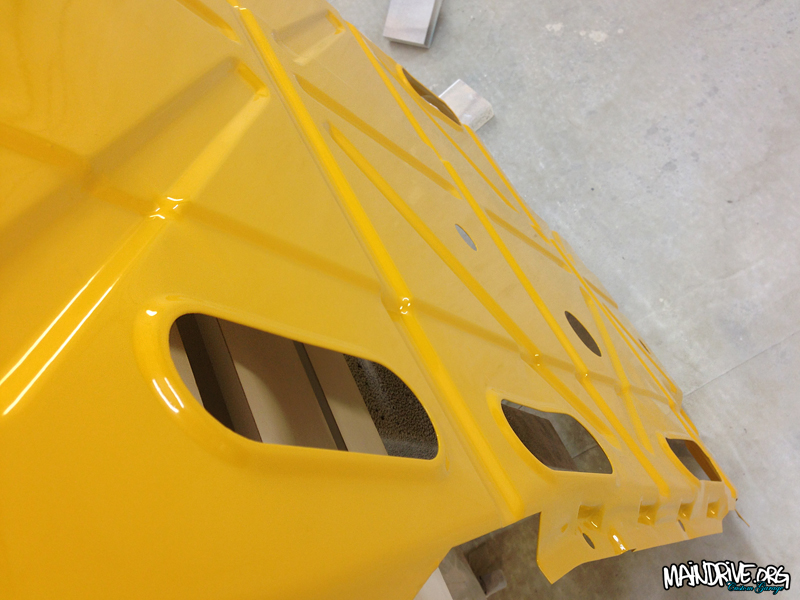
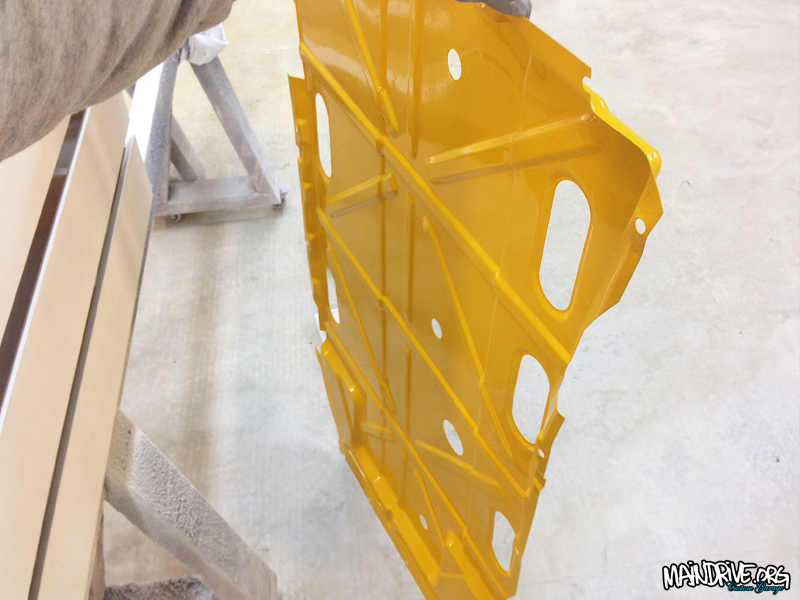
Blasted and epoxyprimer, ready for topcoat in VW factory greyish
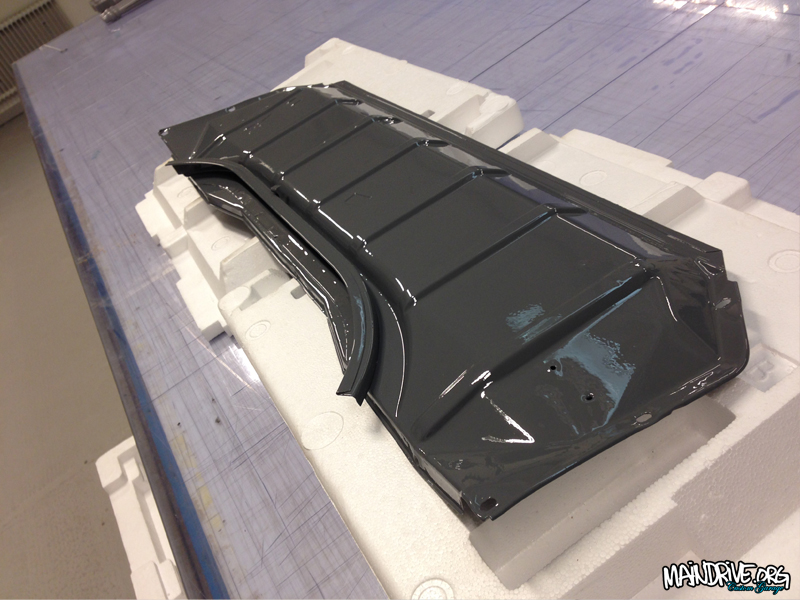
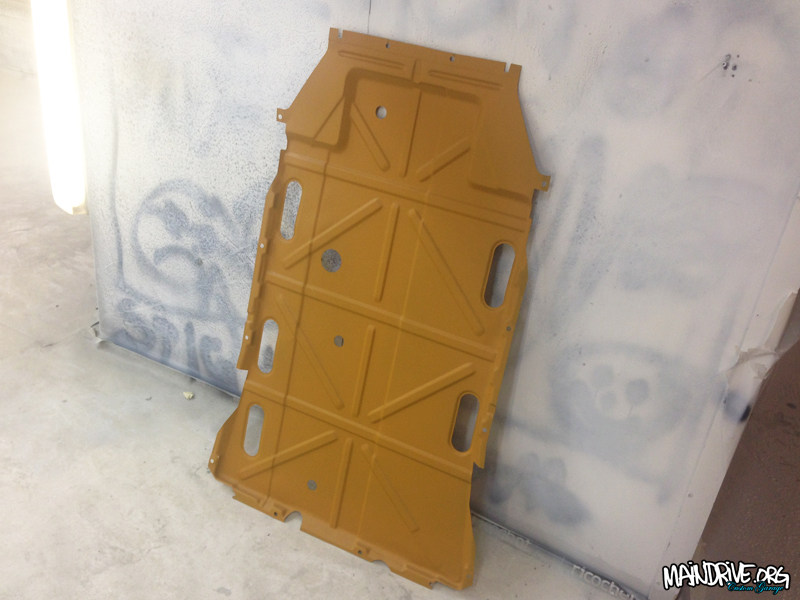
Baremetal then yellow epoxy/zinc primer
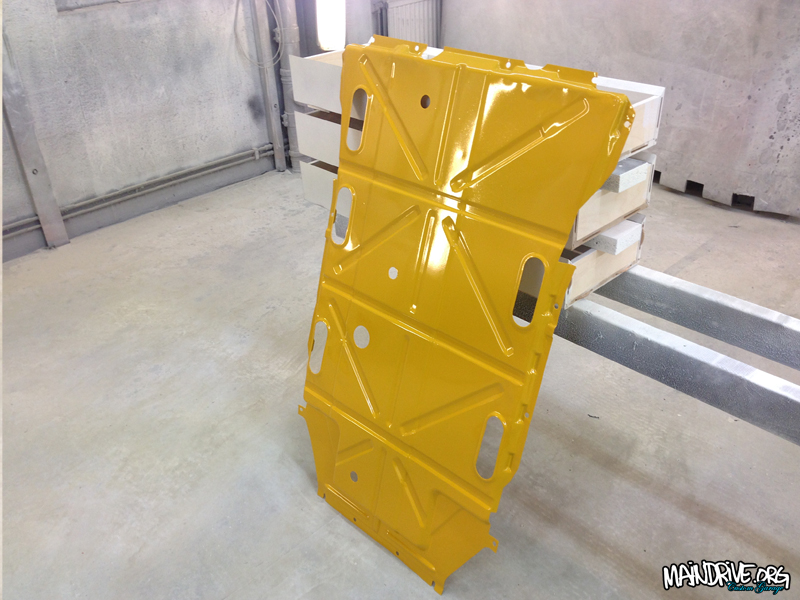
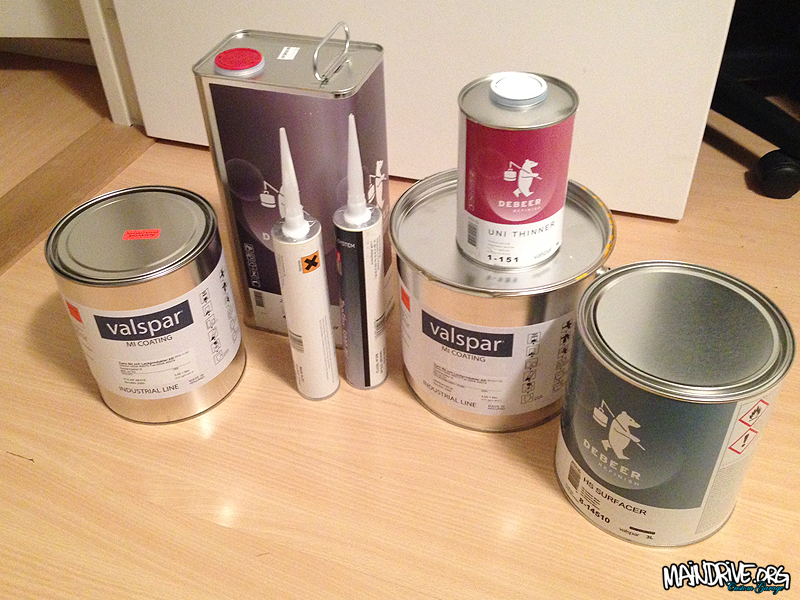
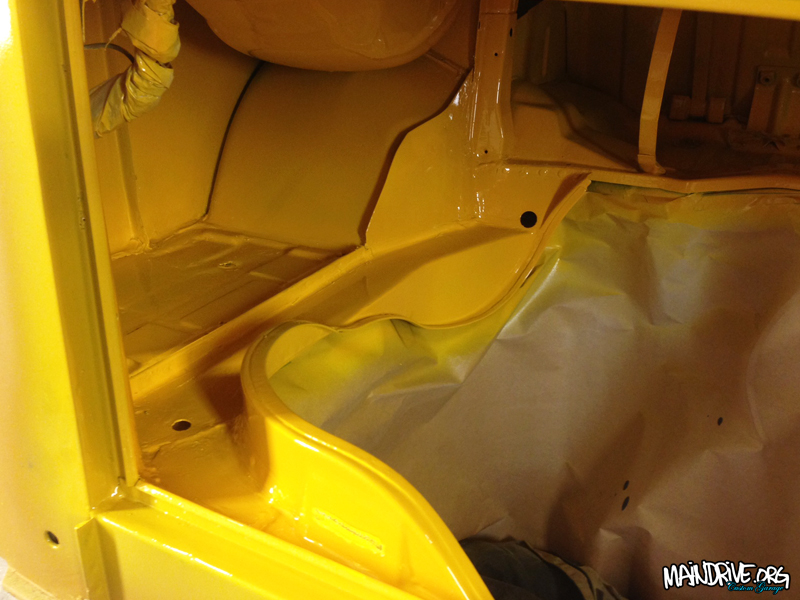
Topcoat in VW L20a Marino Yellow with 2K polypaint with elastic characteristics. So the stones wont chip the paint. The gloss on the elastic is a little less, but this panel is under the car and you normaly never see it anyway.
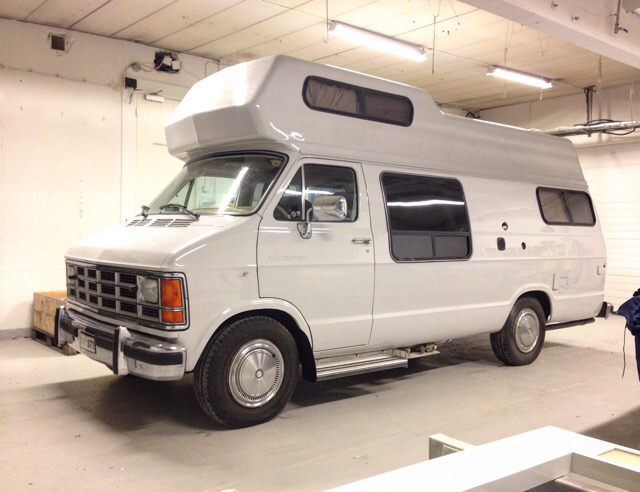
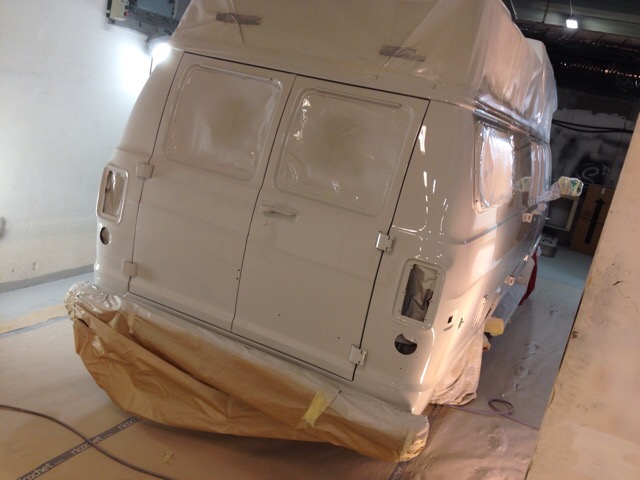
Dodge RAM campervan painted and ready.

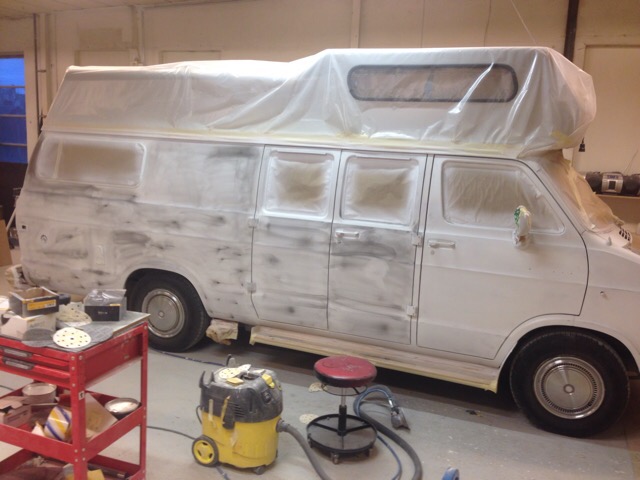
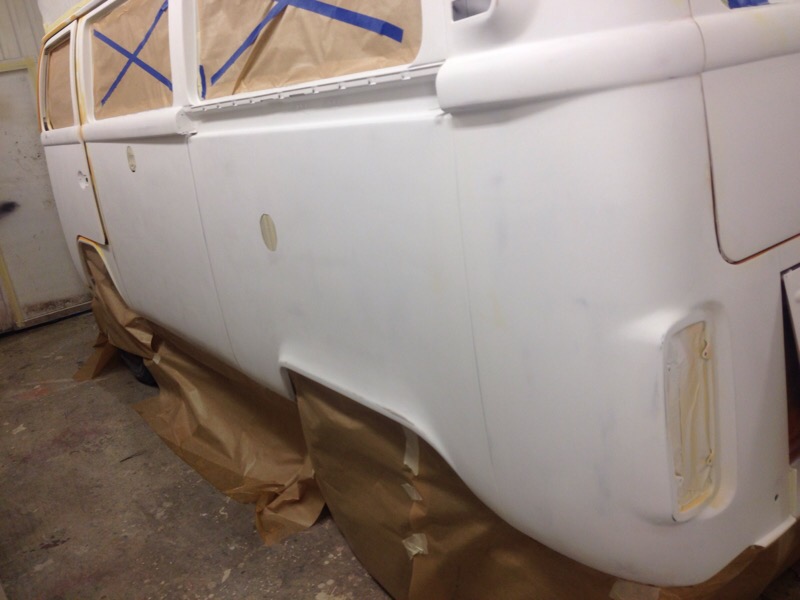
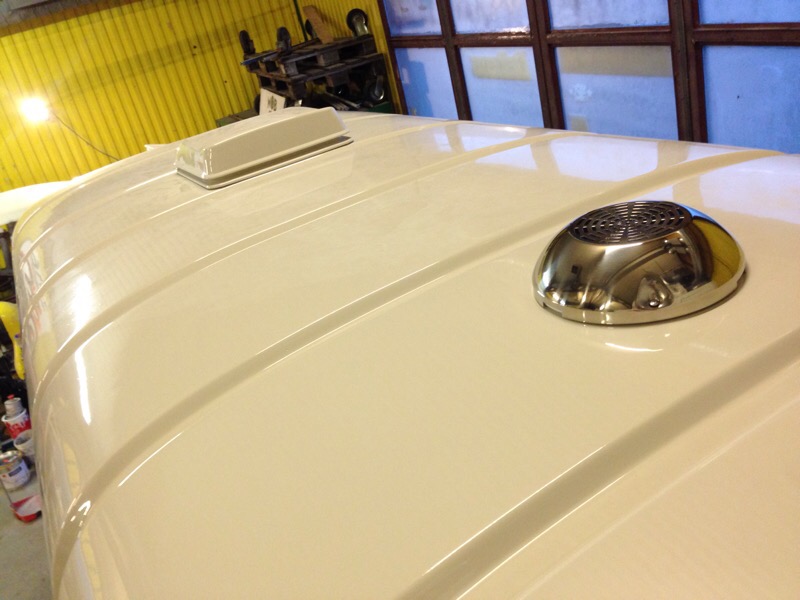
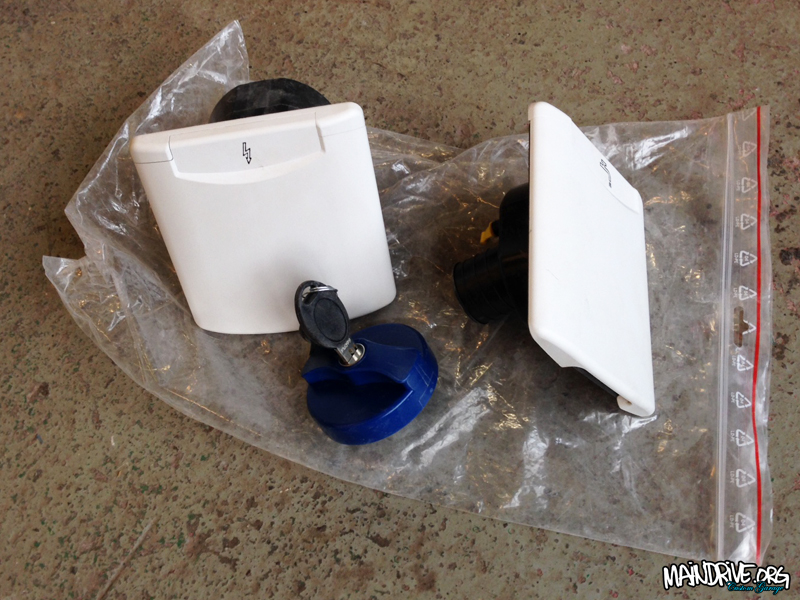
Slow with updates? Thats because I have been busy doing bodywork on the Highroof bus. A very boring, dusty and time consuming work. But now its in surffacer/filler/primer and ready for more sanding again, and hopefully thats it before paint. Paint for roof (white) and body (VW L20a Marino yellow) is bought. Still have all the doors and lids to do also! Got some new parts too, new lids for electric 240v hook up and fresh watertank filler with lock. A Vitrifrigio C60 fridge in stainless will chill the drinks and food nicely, its 60 liters and 10,5 liter is freezer. Danfoss compressor of course!
Painted the roof on a Dodge Van camper today. It was huge! Painters nightmare…
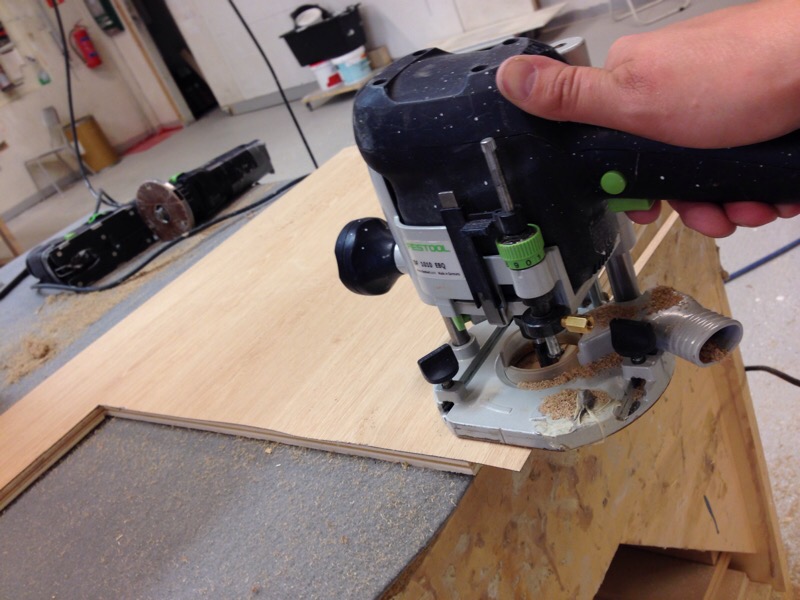
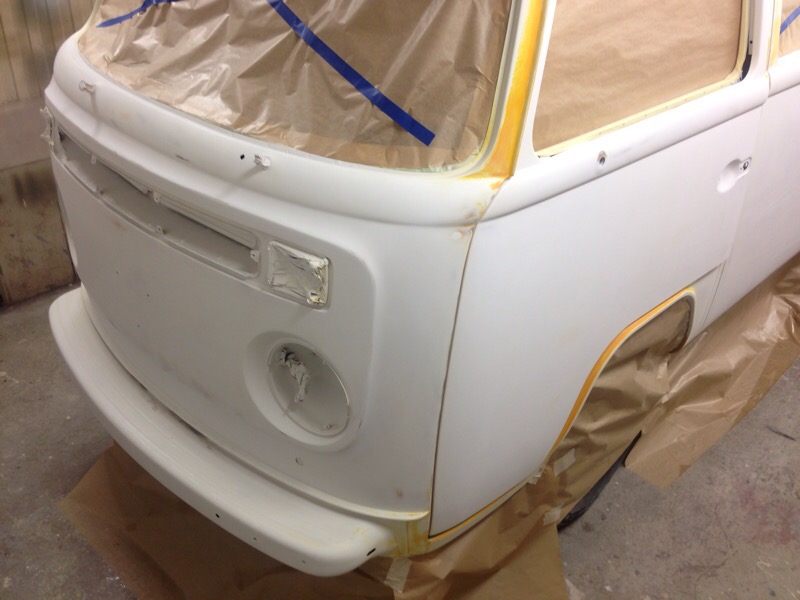
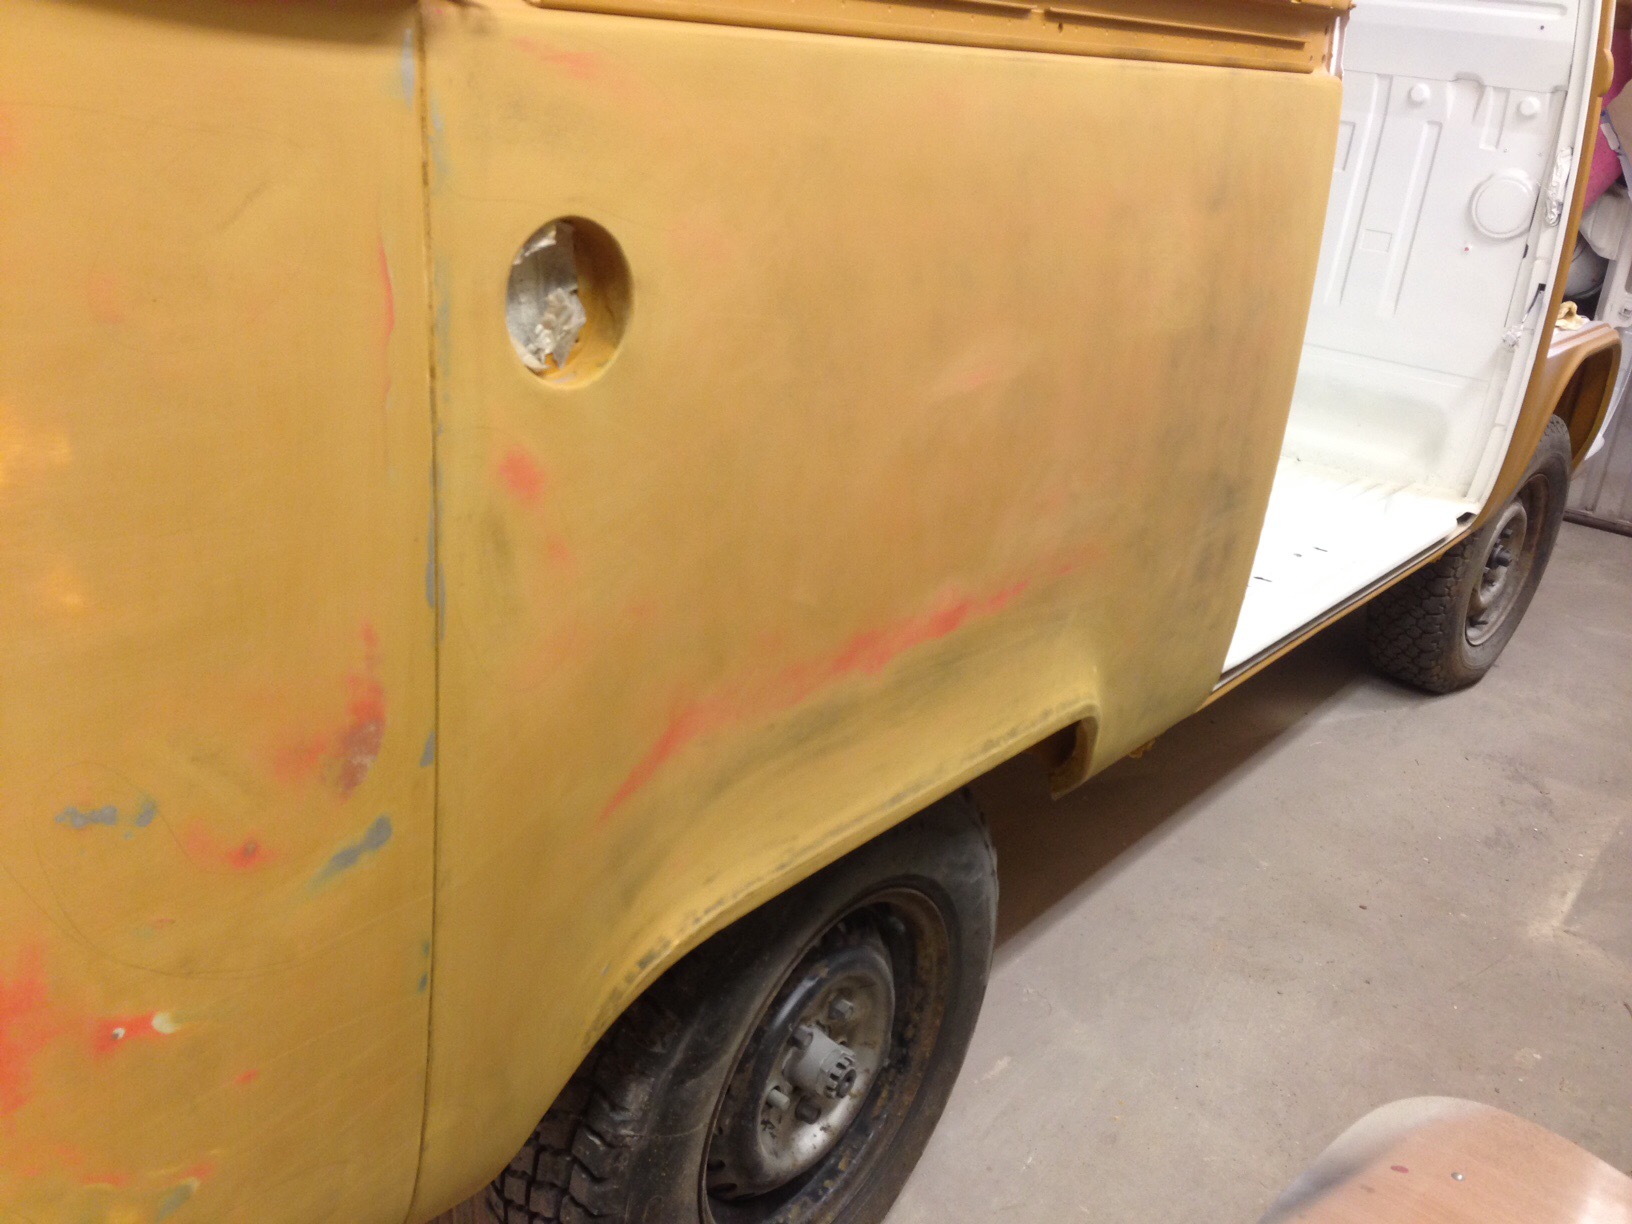
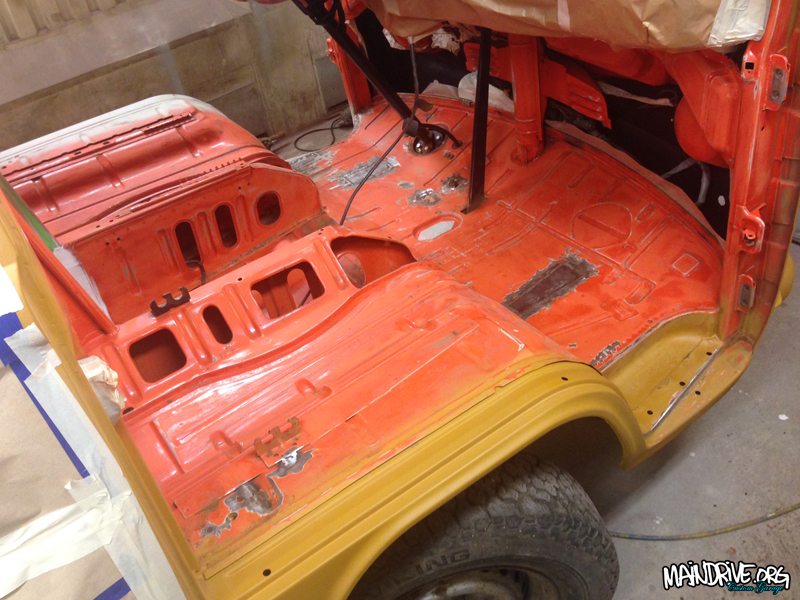
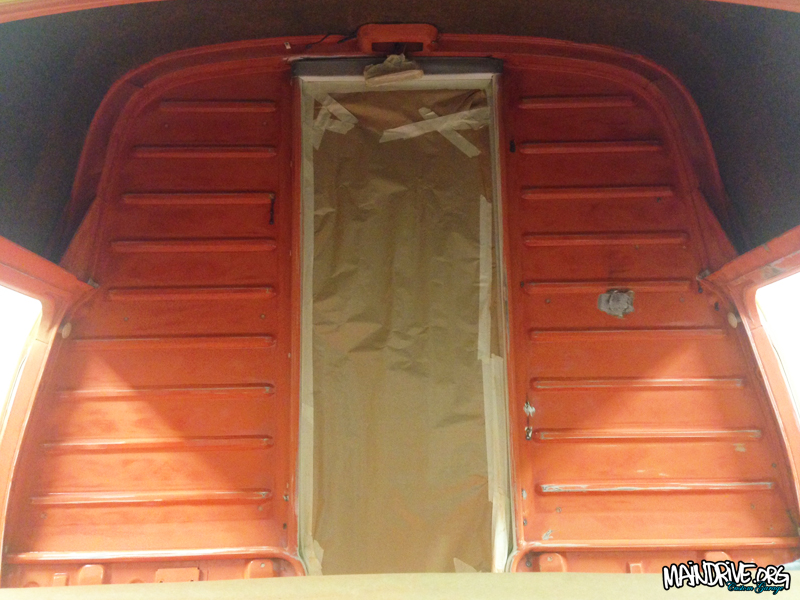
Have started the bodywork on the Highroof bus, preparing for primer and paint. Lots of sanding to do, when that is done it’s time for a coat of epoxyprimer again, to protect bare metal, then a quick sanding before a coat of surfacerprimer is layer down. Then it needs to be sanded down all over again. Then probably another coat of surffacerprimer again and then maybe it’s time for topcoat paint in VW L20a Marino yellow. A lot of people think it’s just mix paint and spray, but it’s not like that…only in fantasy!
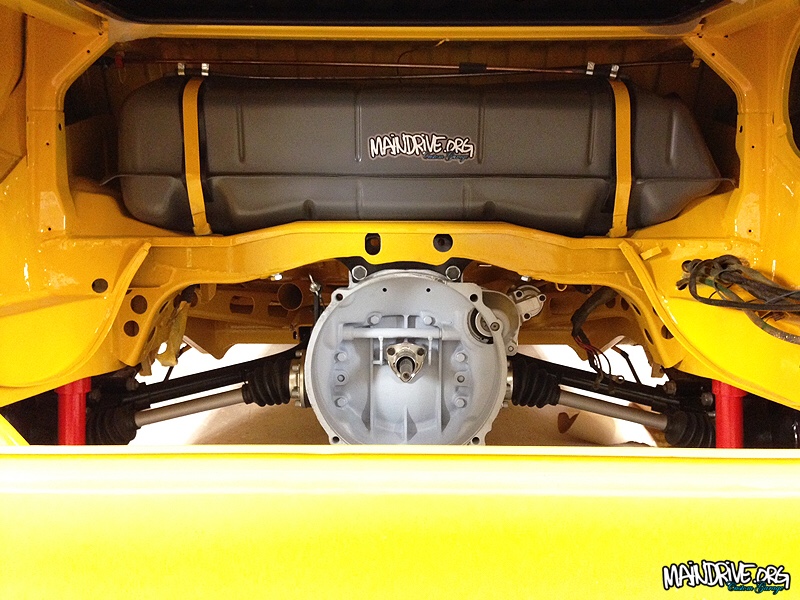
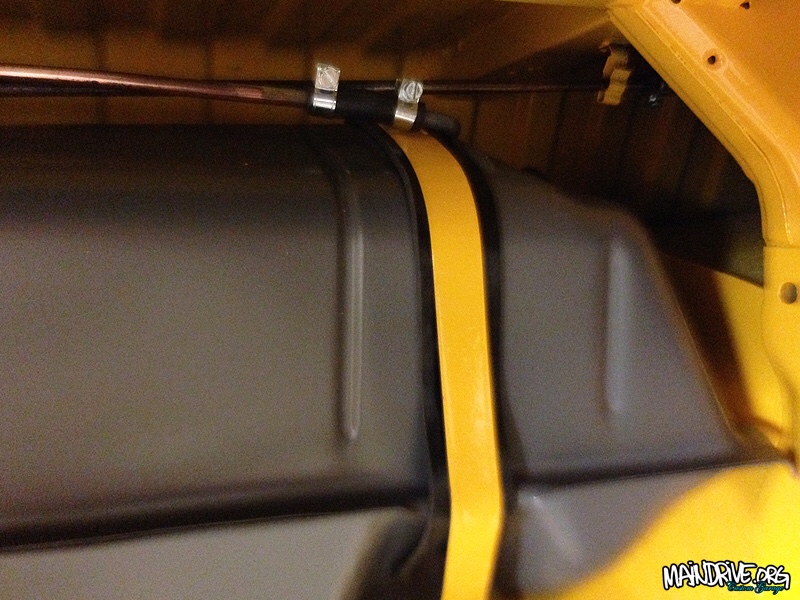
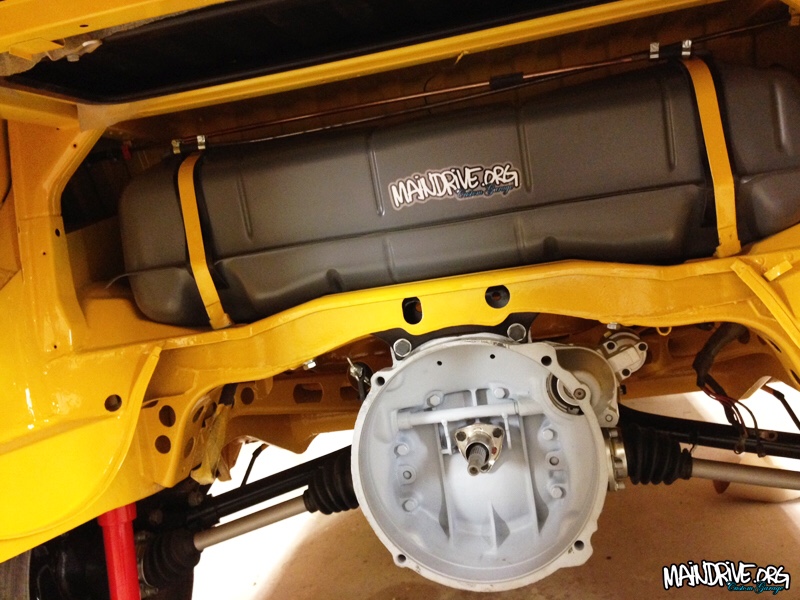
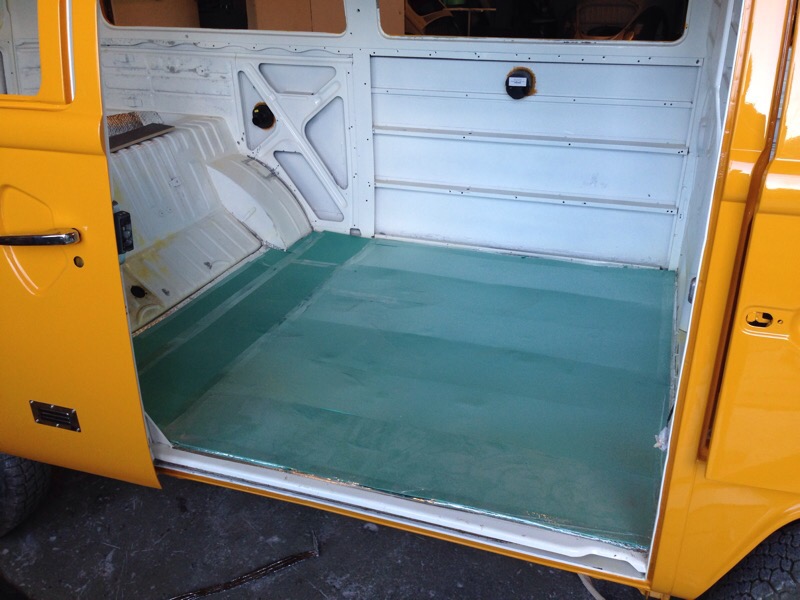
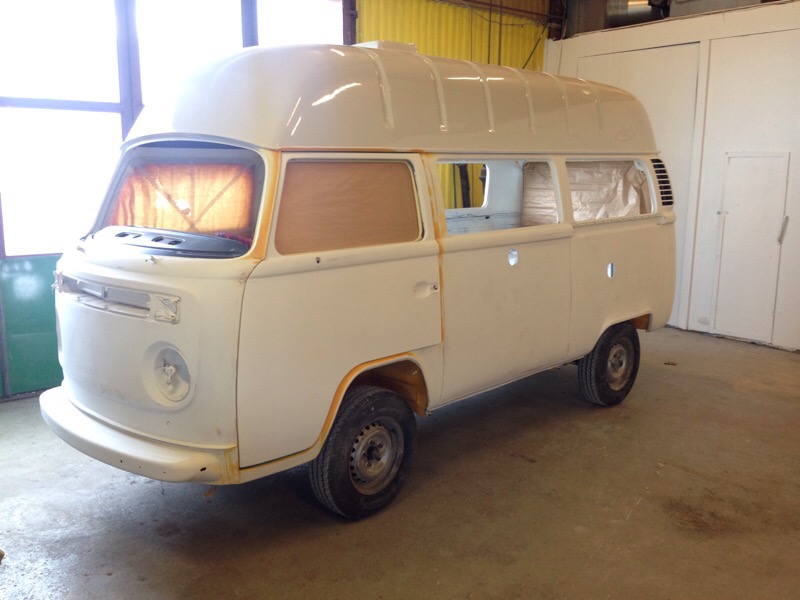
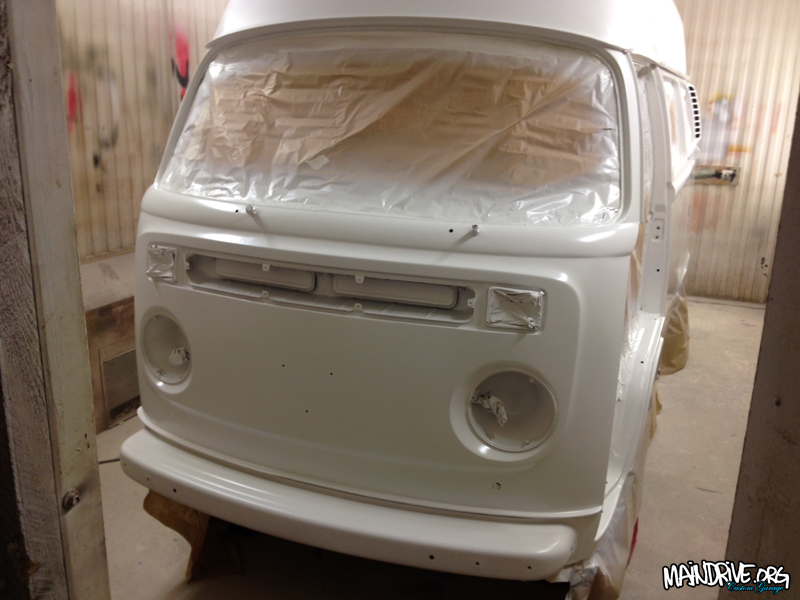
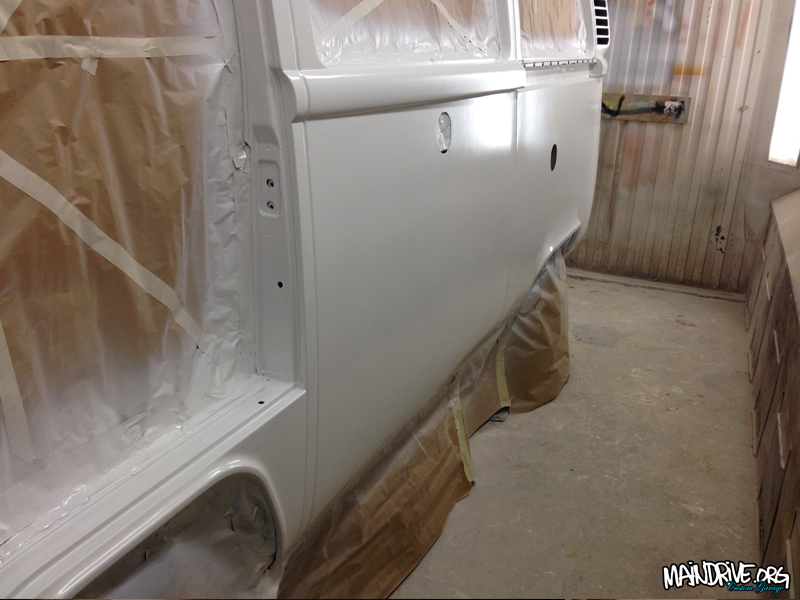
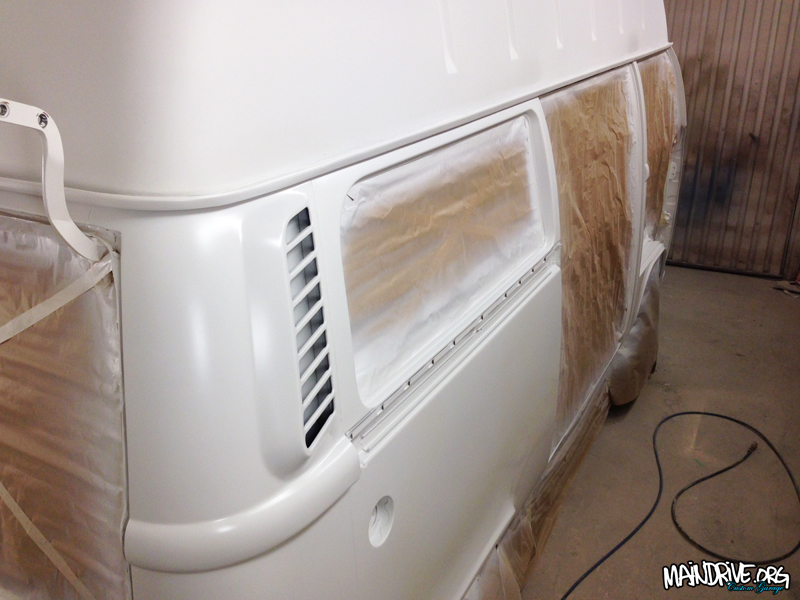
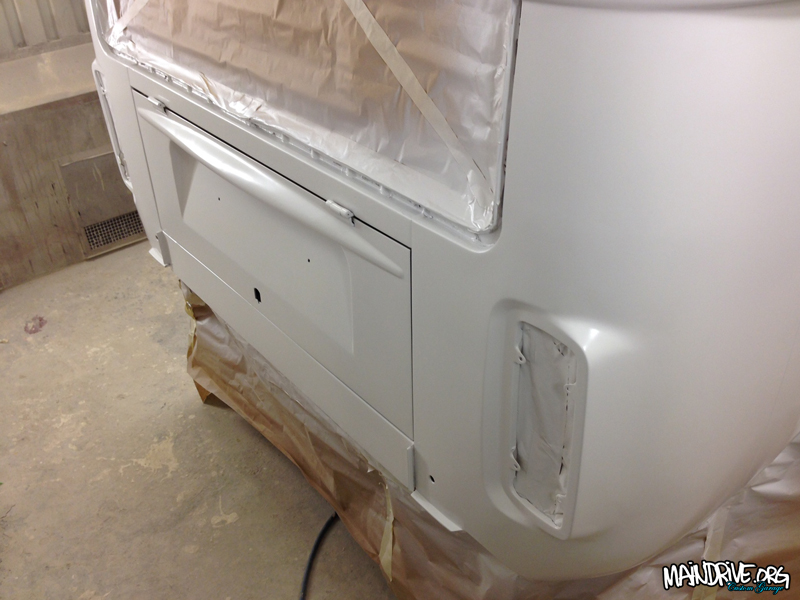
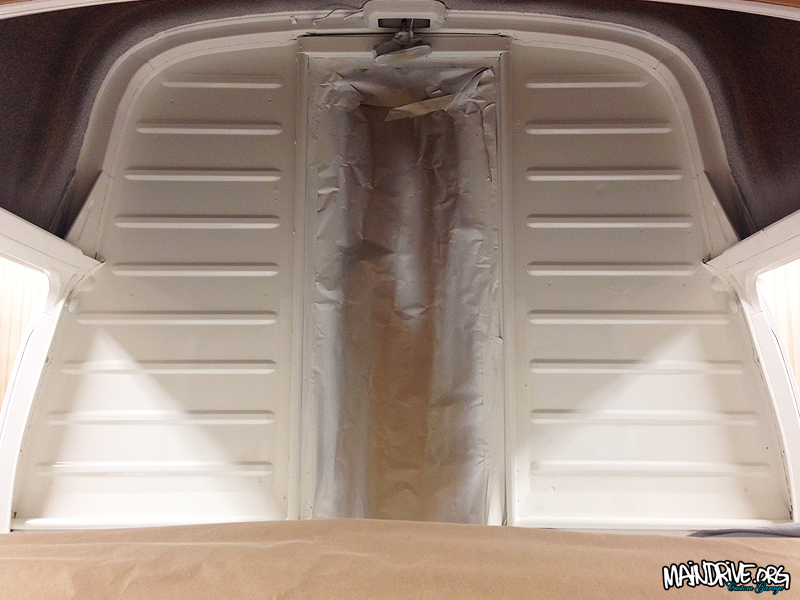
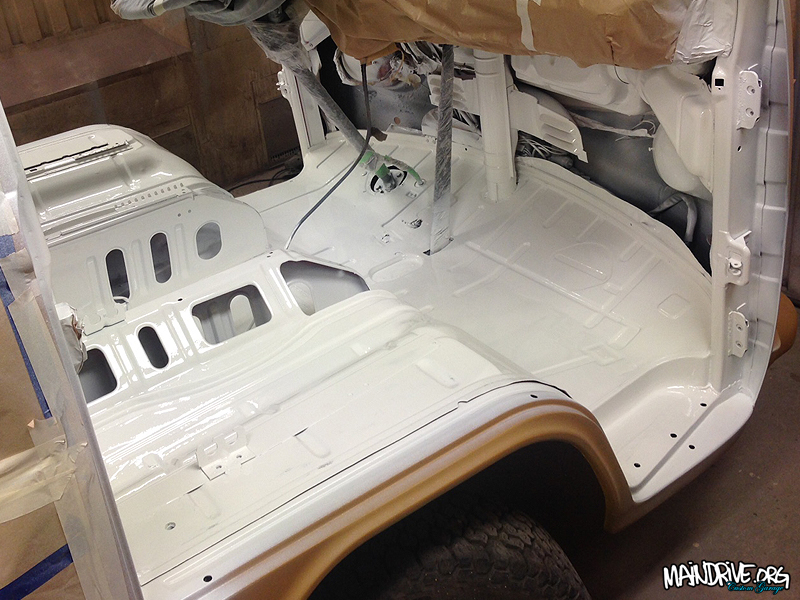
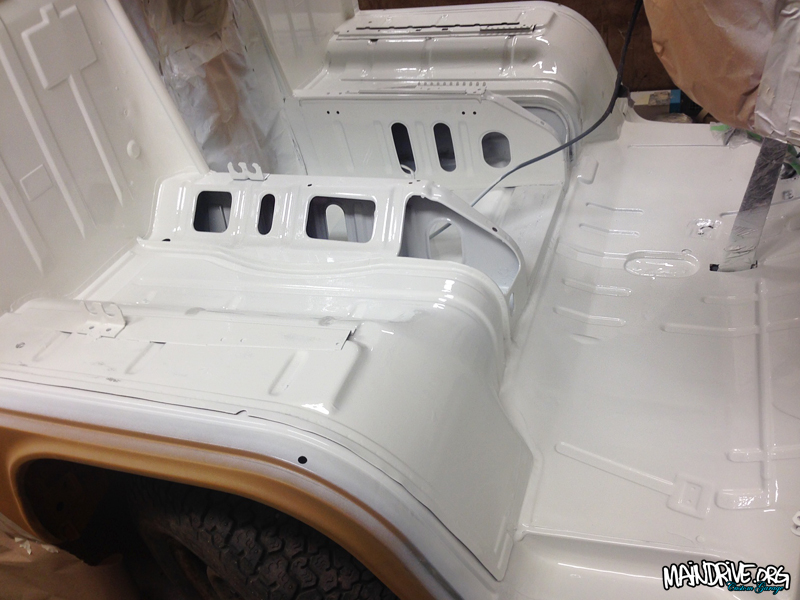
The engine bay is now ready for the fueltank and later on the 1800cc+ type 4 engine (need to be rebuilt first) to be installed. Today the whole front cab of the bus got sanded down (mostly by hand), front doors removed, masked, seamsealed, prepared for primer and then topcoat in Off White color in 2 layers. Most of this wont be showing when all sounddeadning materials and carpets are in place later but good to have a clean surface for glue and its also nice to know its clean and protected under the carpets.
Next up is; top section of dashboard needs to be removed to paint it in semi-gloss Deepblack (easier to do when windscreen is already out). After this I can start with the outside body of the bus and make it ready for paint. Here is some new pics…
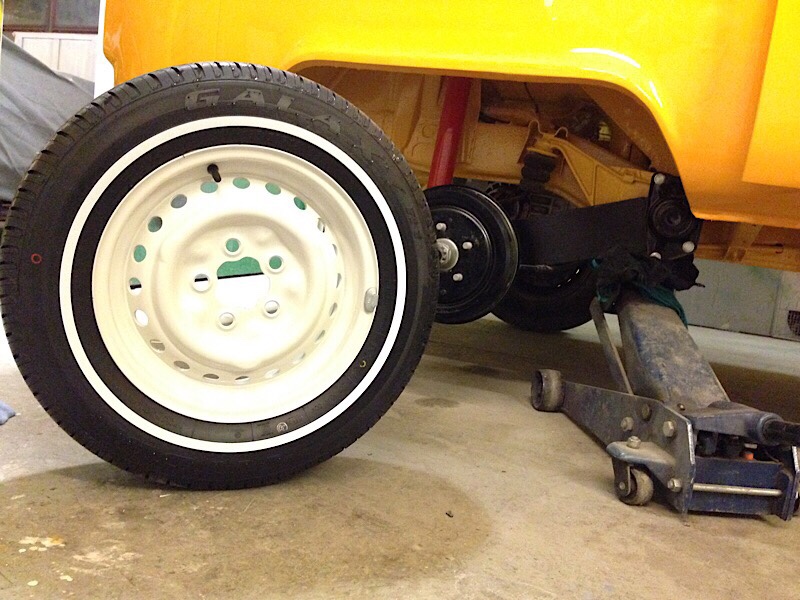
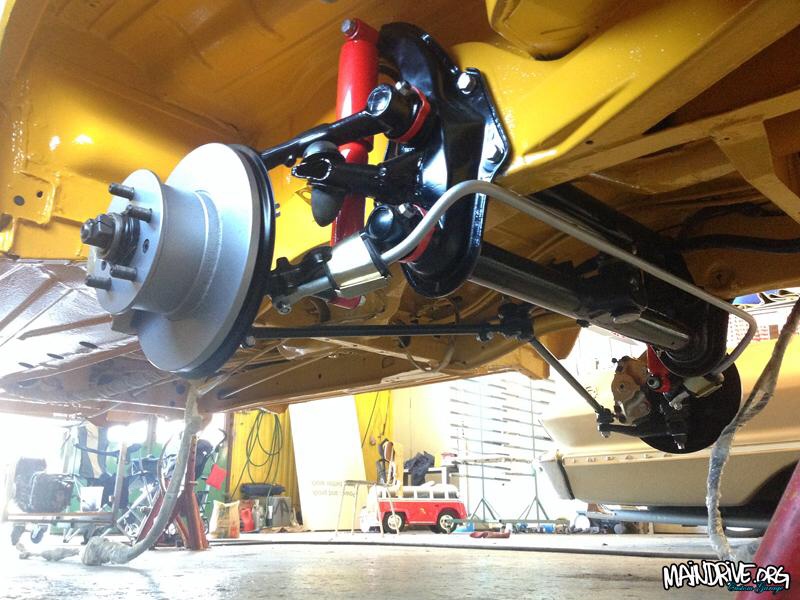
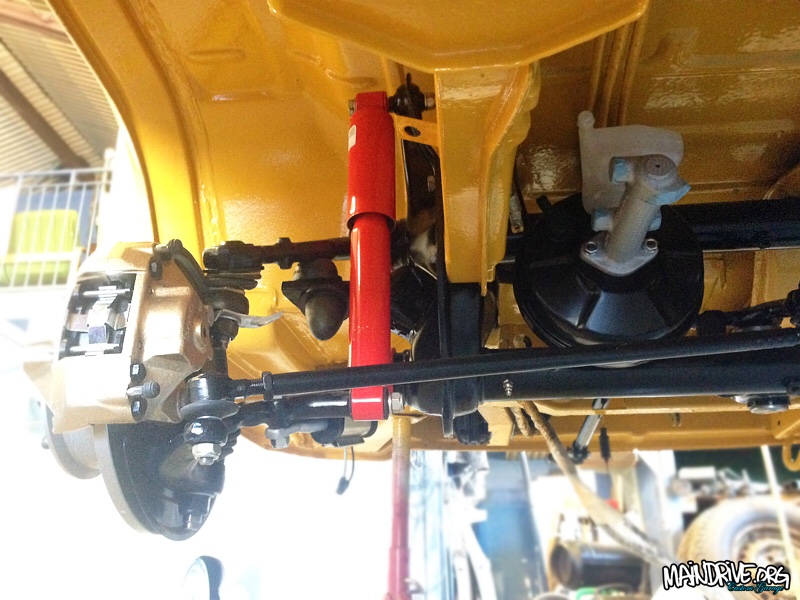
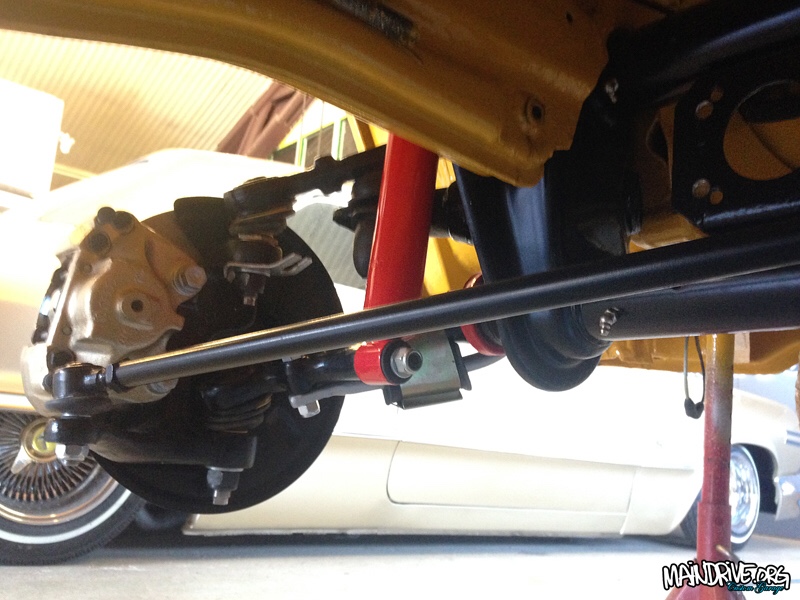
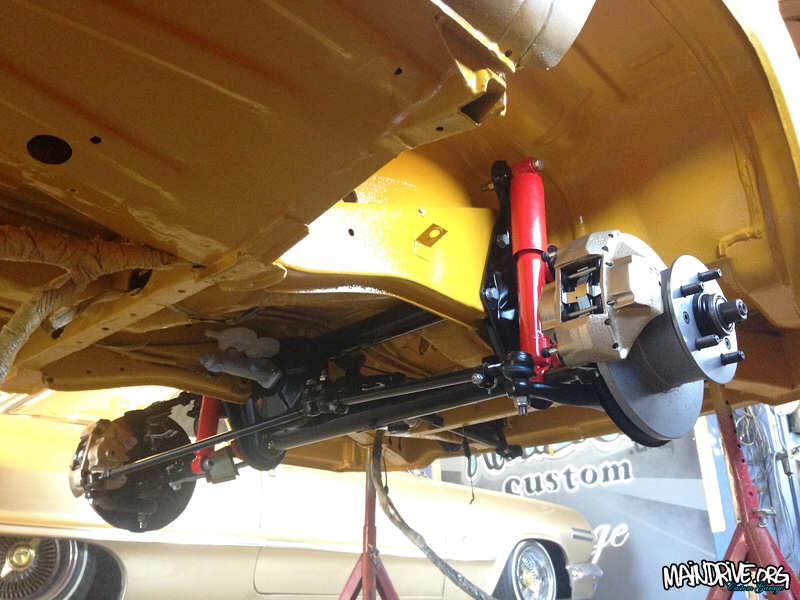
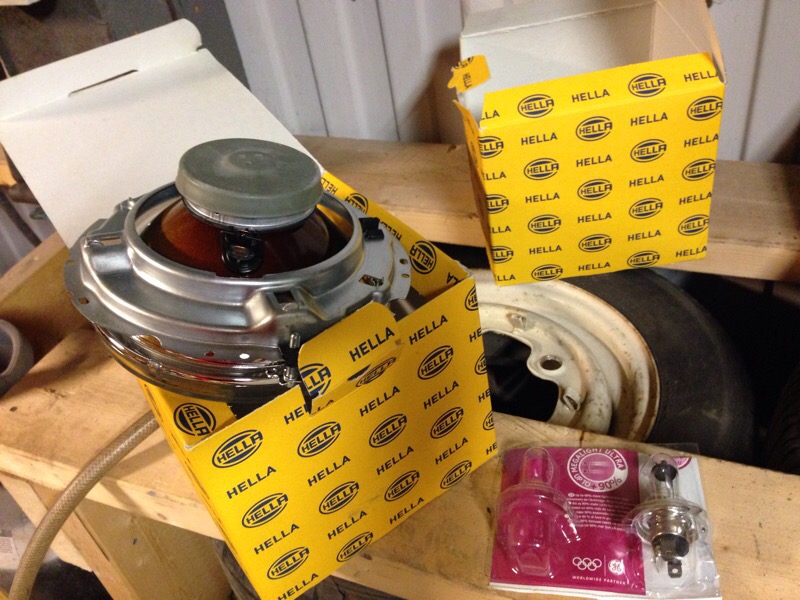
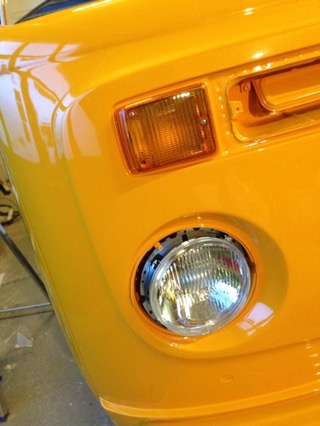
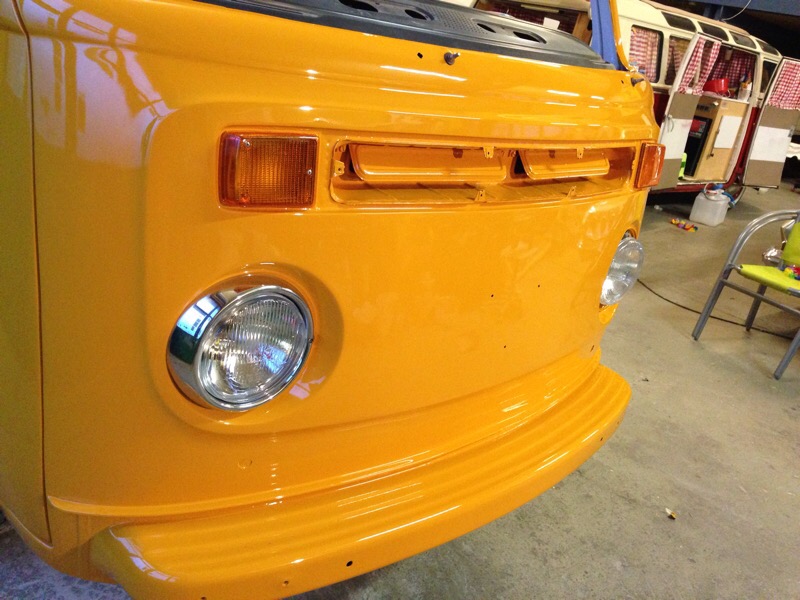
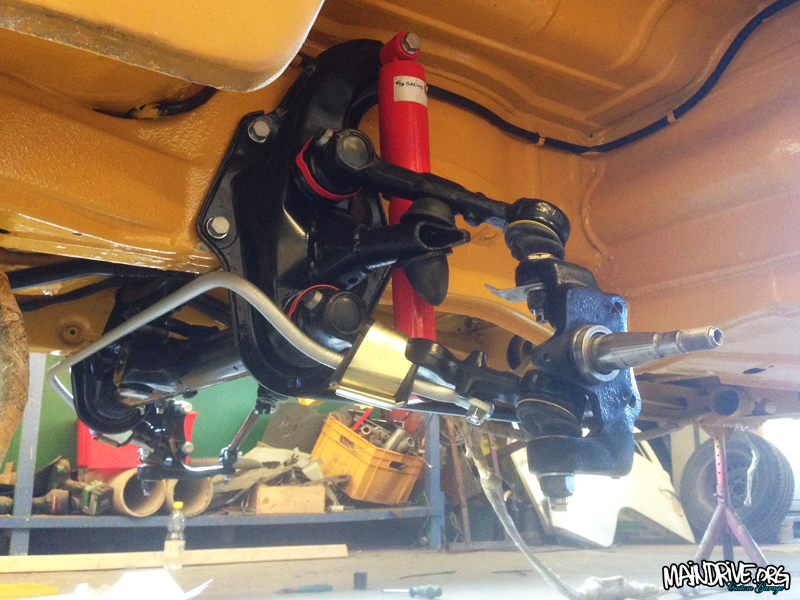
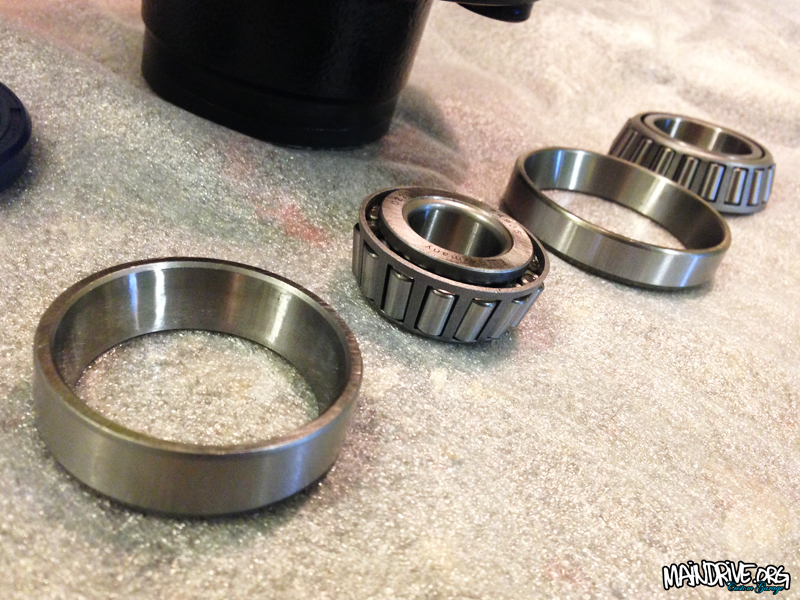
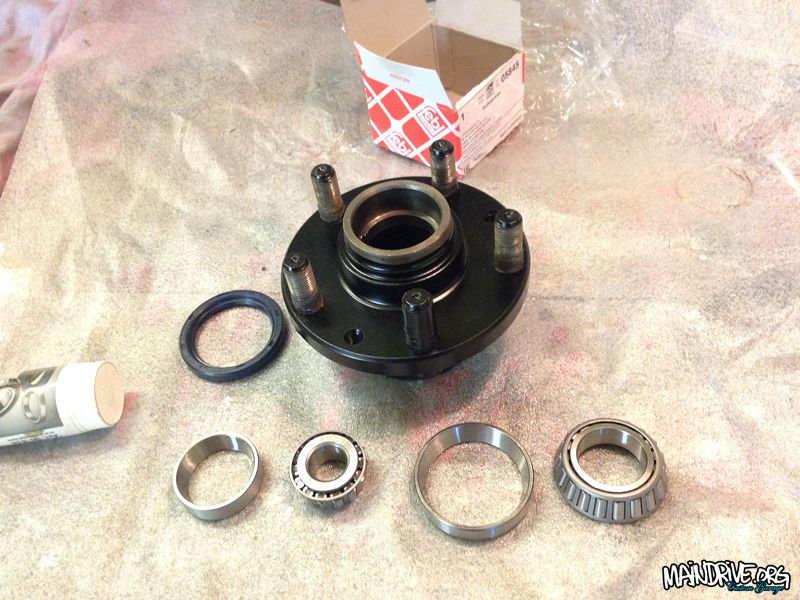
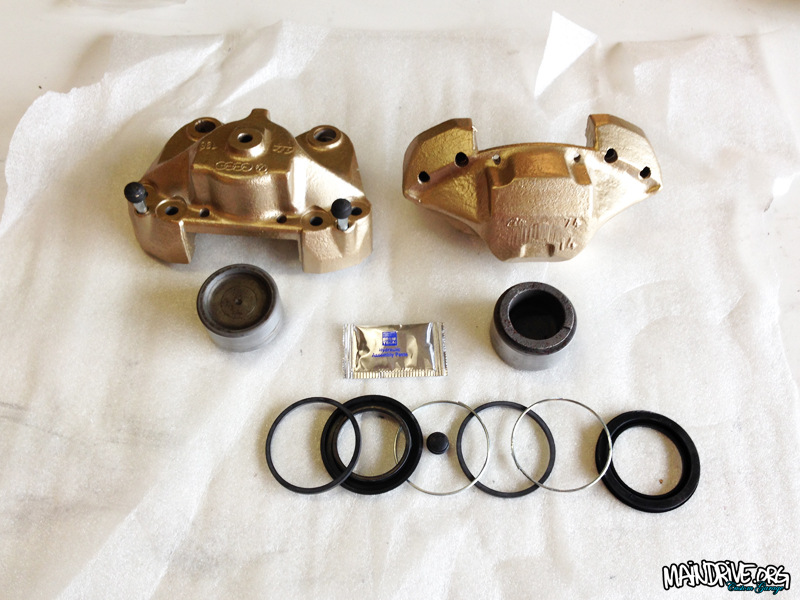
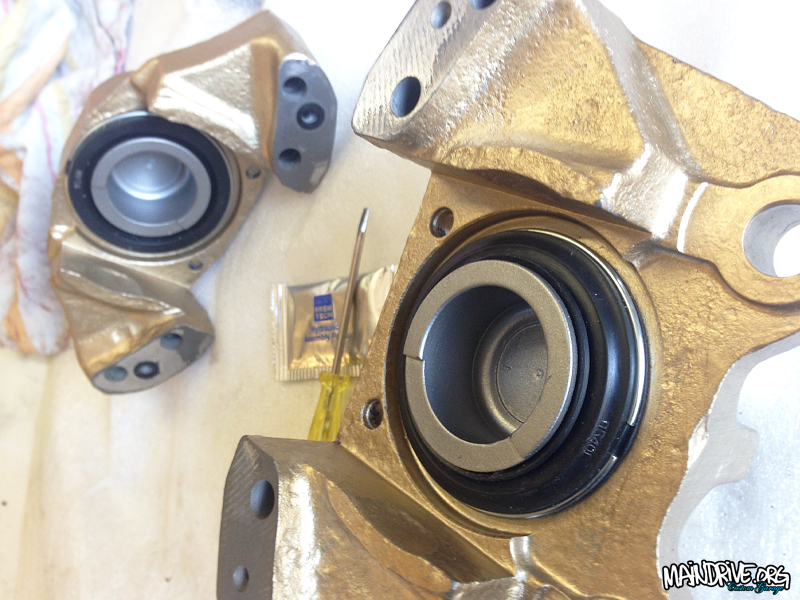
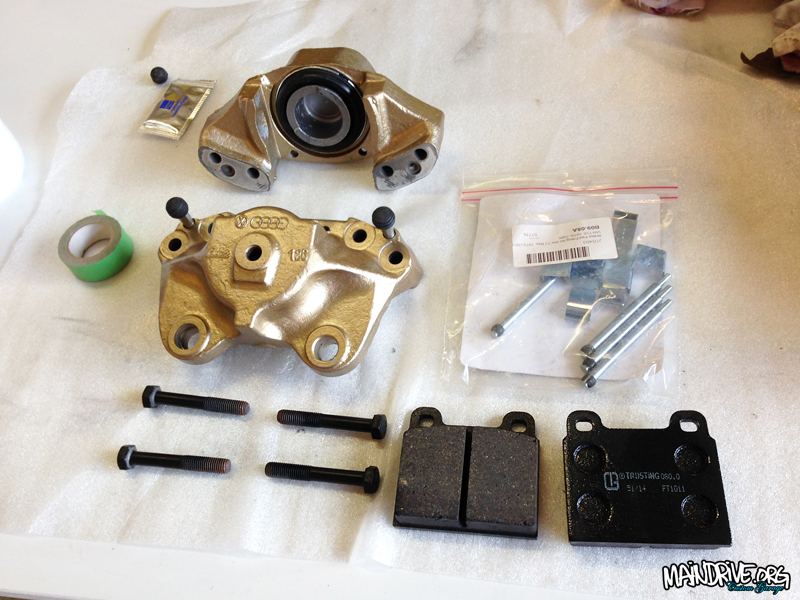
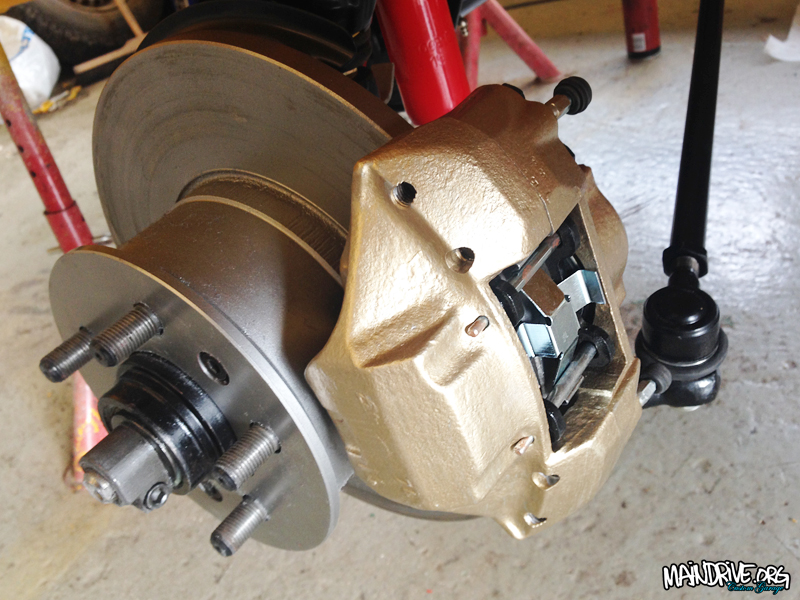
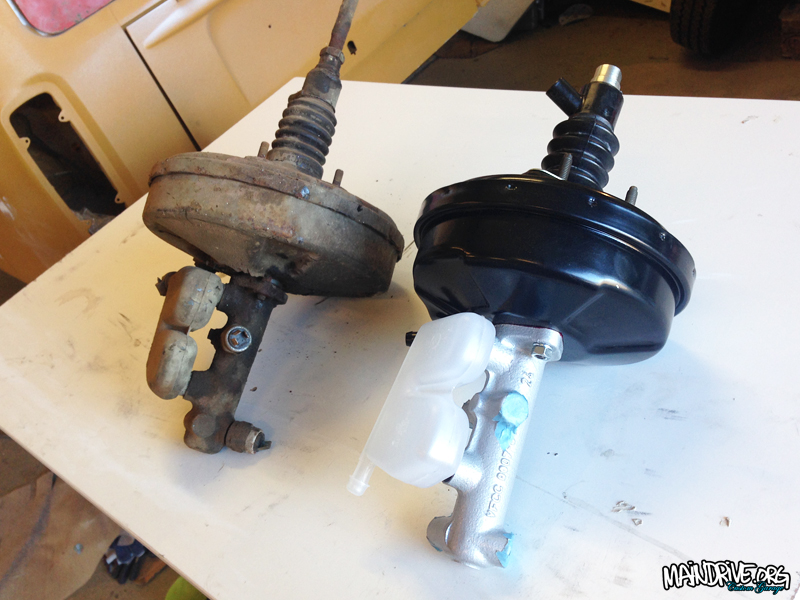
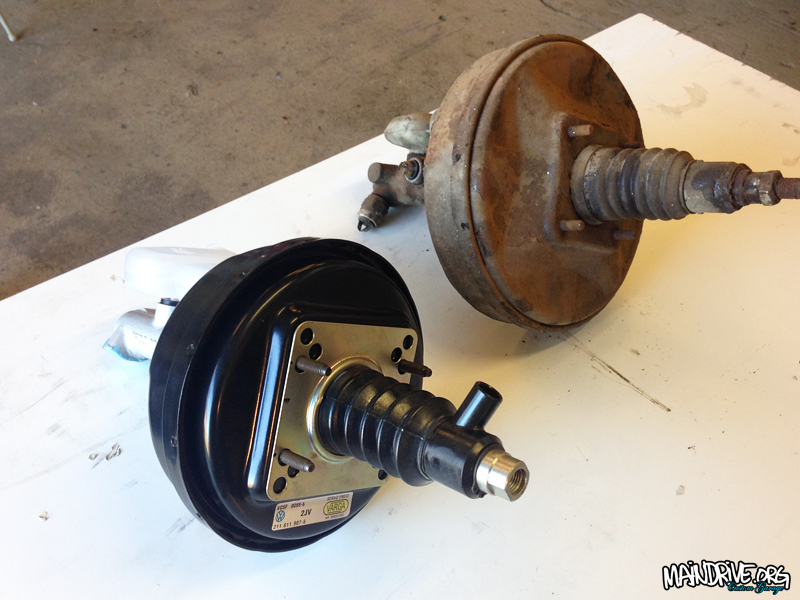
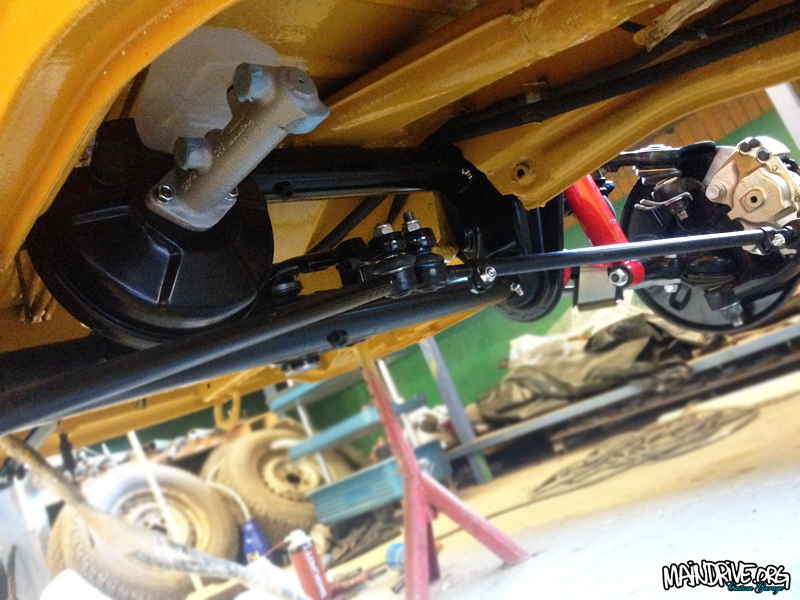
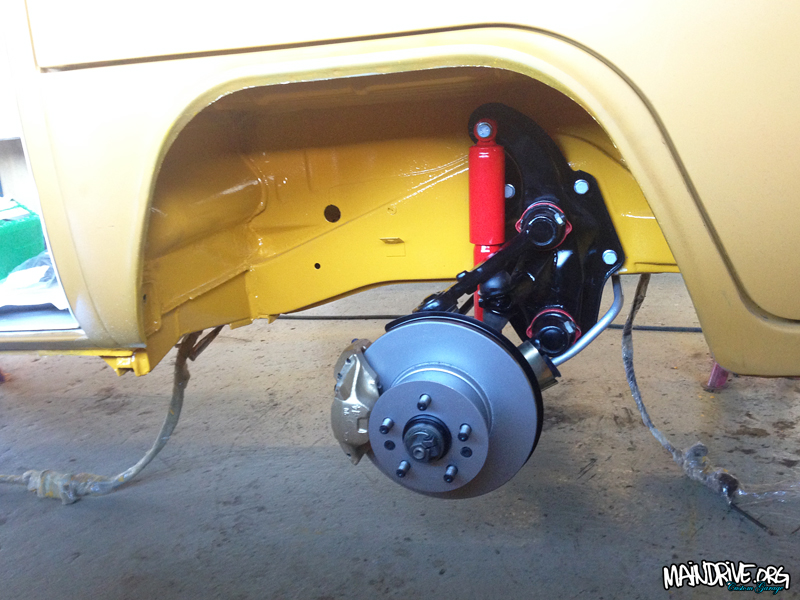
Have finally got some stuff done on my own project, Baywindow Highroof 1975. The frontend is all done, just need to mount the new brakelines etc. The sandblasted and painted beam have all new needlebearings, new centerpin/arm bushings, new grease zerks, torsionarms have new balljoints, new swaybar bushings, new shocks, new steeringdampner, new tie rods and draglink, steeringbox is adjusted (no more play) got new oil too and a new rubber/steeringplate. Wheels bearings are new and packed with fresh grease, new brakediscs, new speedocable and brakecalipers have been blasted, and have all new seals and pistons, brakepads etc. New masterbrakecylinder and new brakebooster is in place too. Basicly every nut and bolt are new on this car!
Here is some new pics…


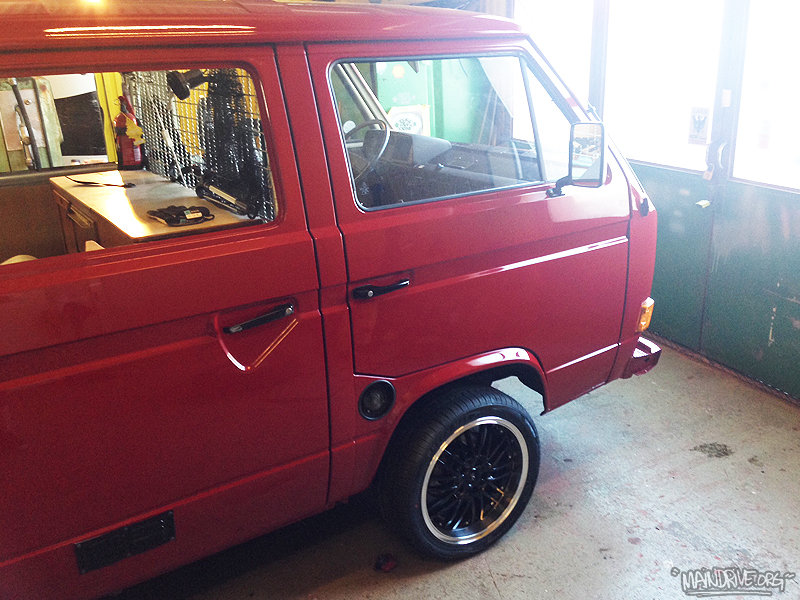
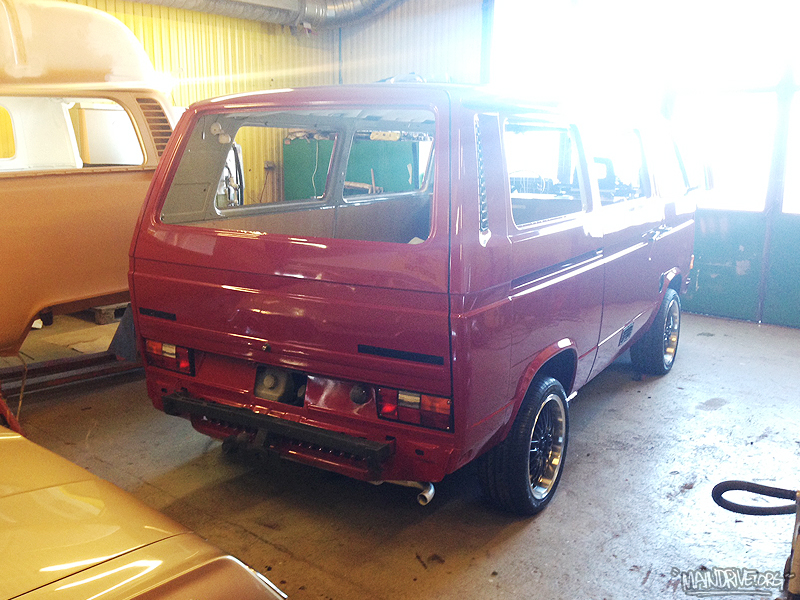
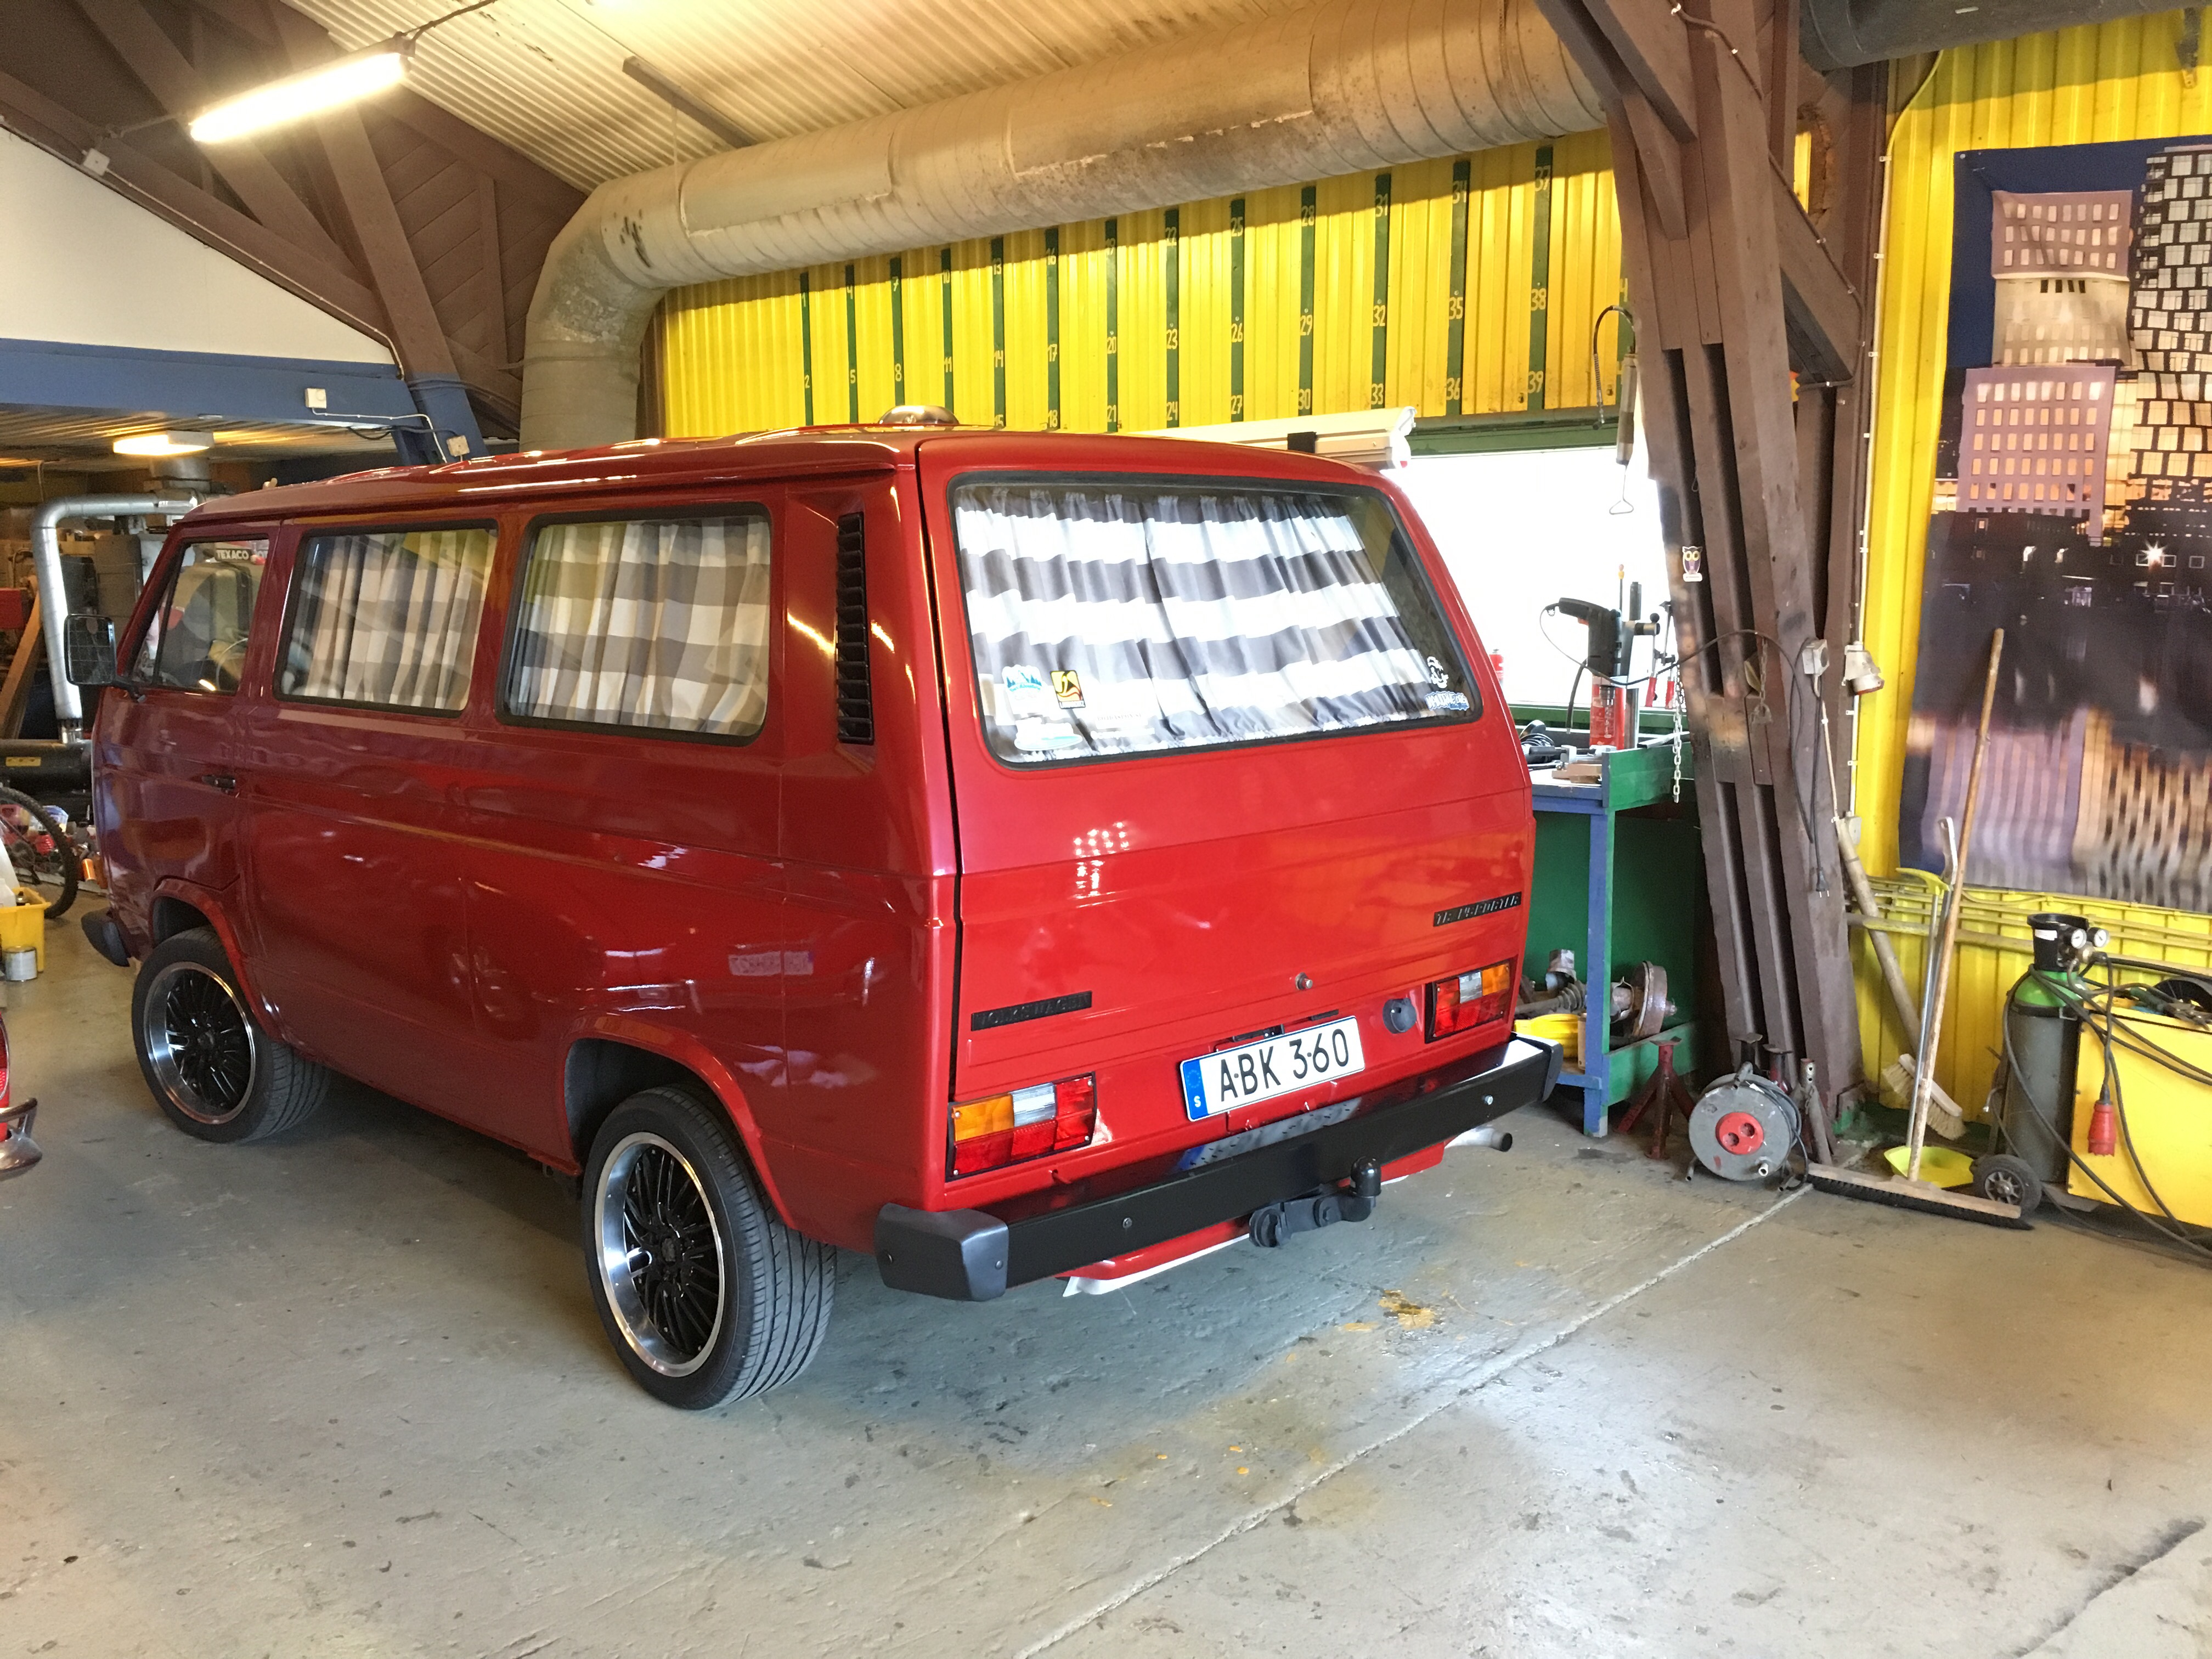
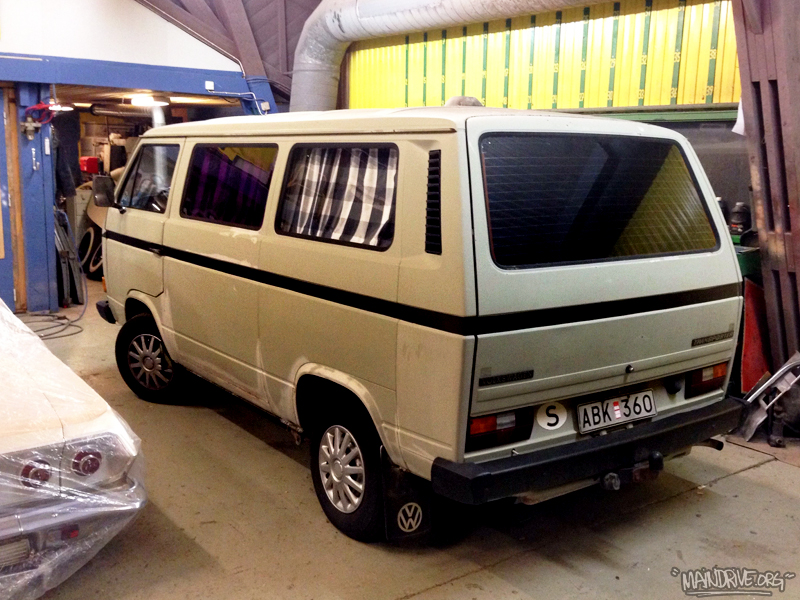
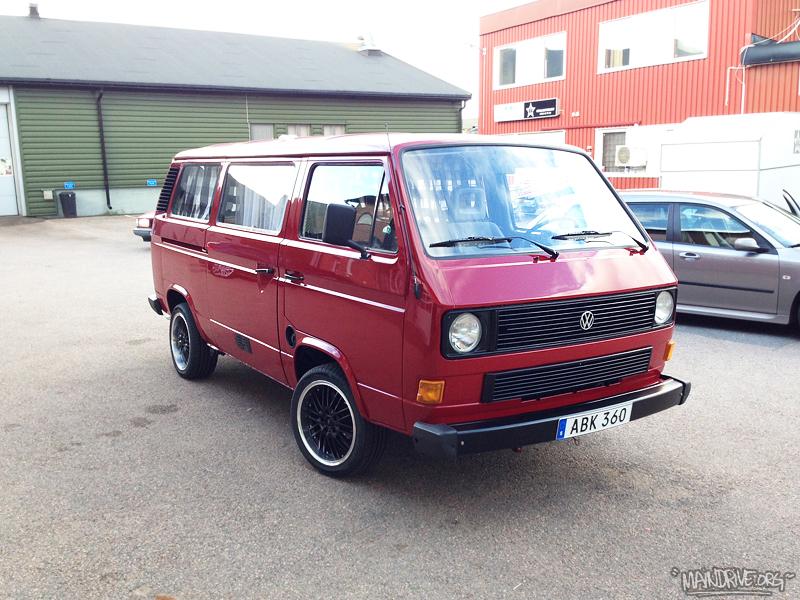
Bennys VW T3 bus finally finished. Here is some BEFORE and AFTER pics. 🙂
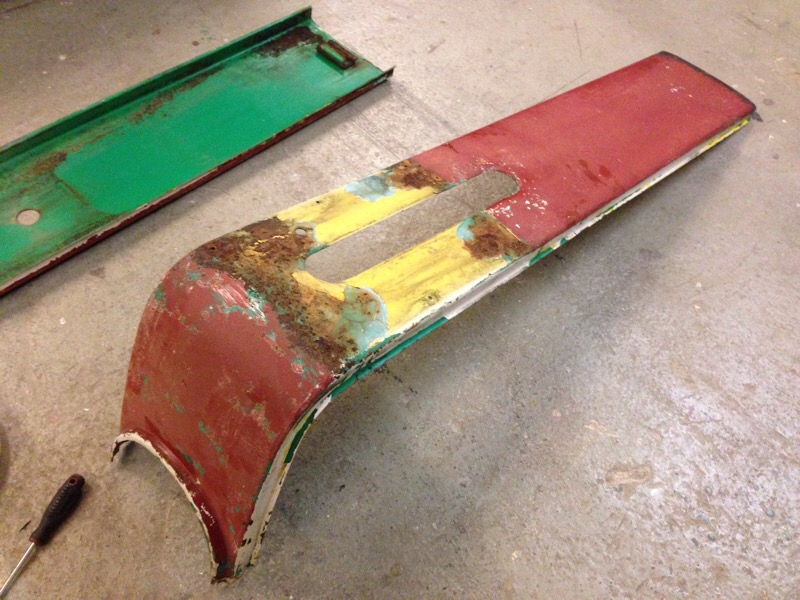
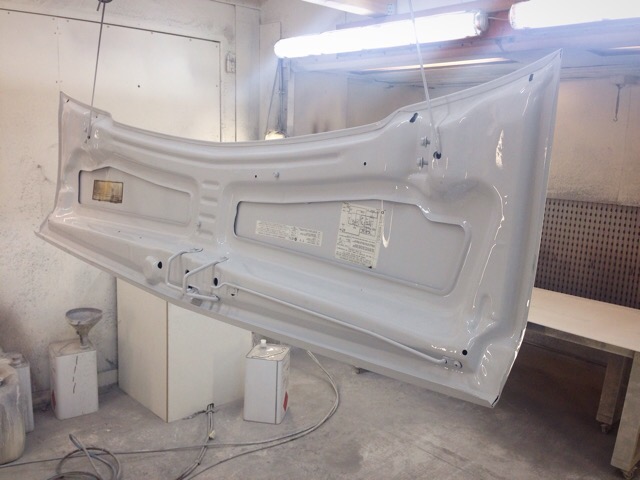
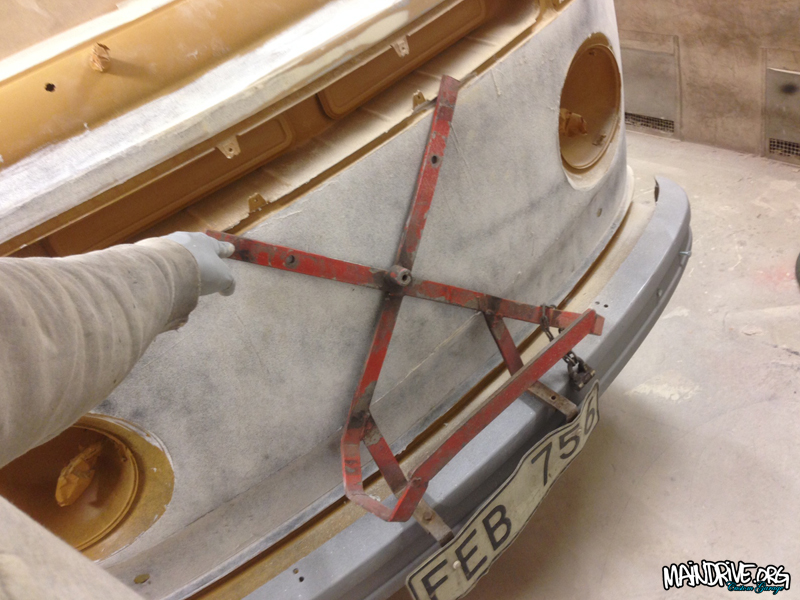
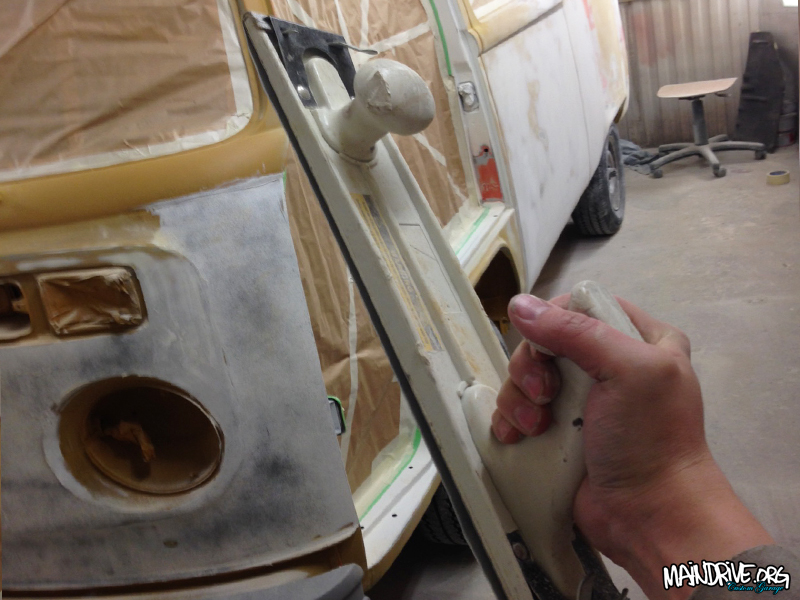
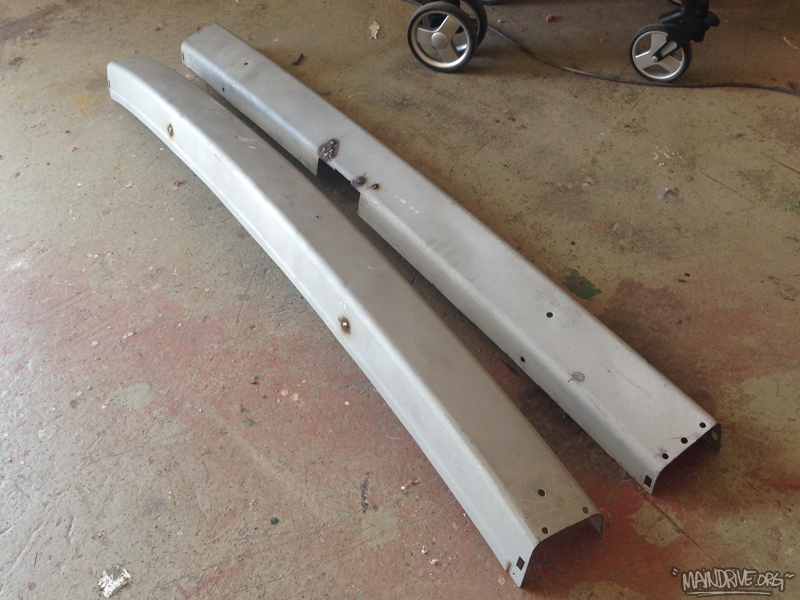
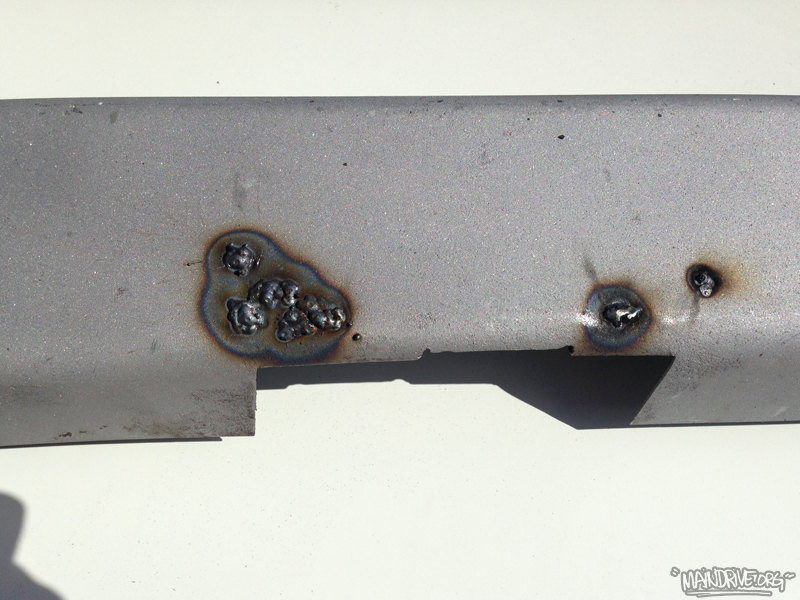
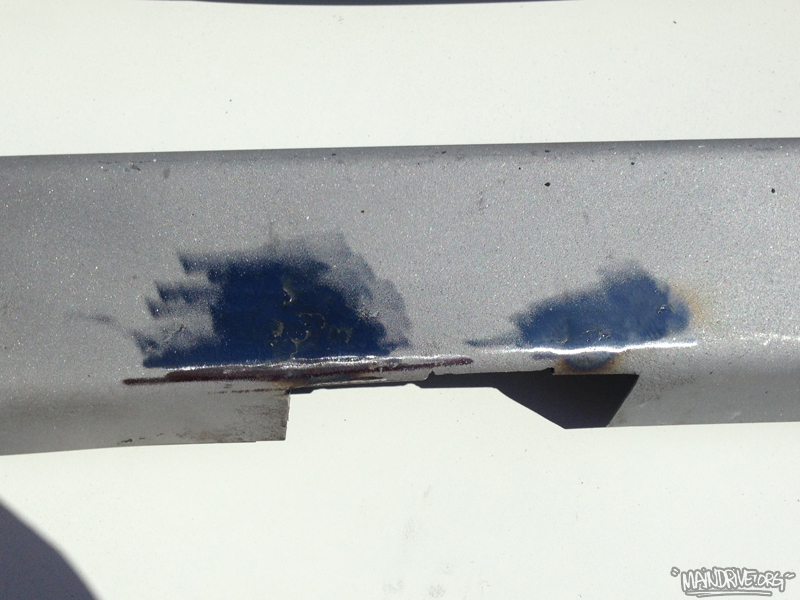
Today the bus was dropped of at the glasshop for new front windscreen and installing all windows with new rubber seals. The last final parts (bumpers) are getting painted tomorow or on Thursday. They were handpainted with brush, twisted, rusty and lots of small dents. After sandblasting they got welded, straightned and all dents hammered out. Then a light coat of bodyfiller to make them straight again, then Zinc rustprimer and after this surfacer/ground primer to get them smooth again after the sandblasted surface. Next up is some more sanding and then Deepblack paint. New covers and bolts are waiting from Just Kampers! The bus should be ready for the road in the end of the week! More pics to come…
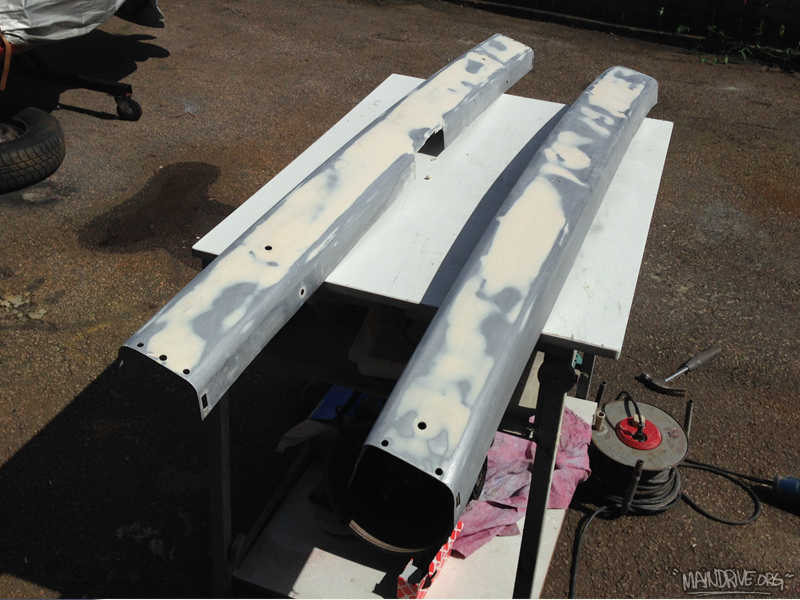
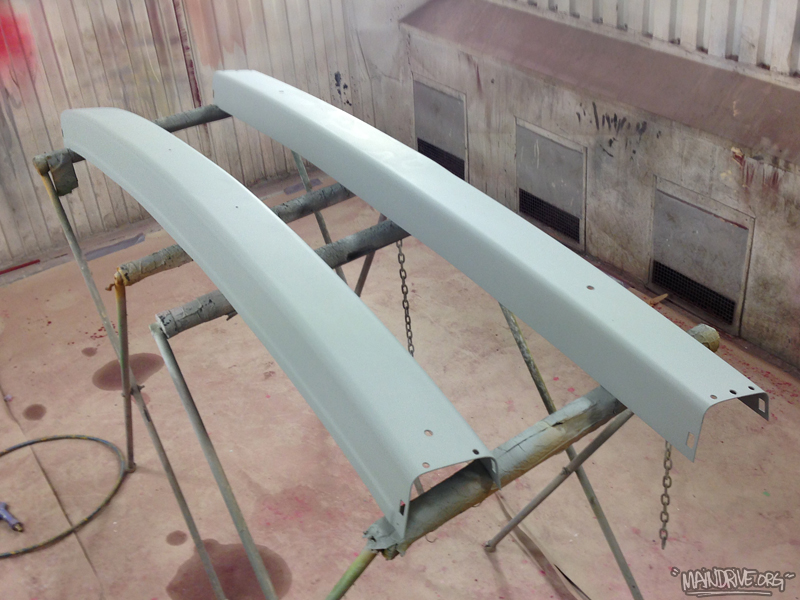
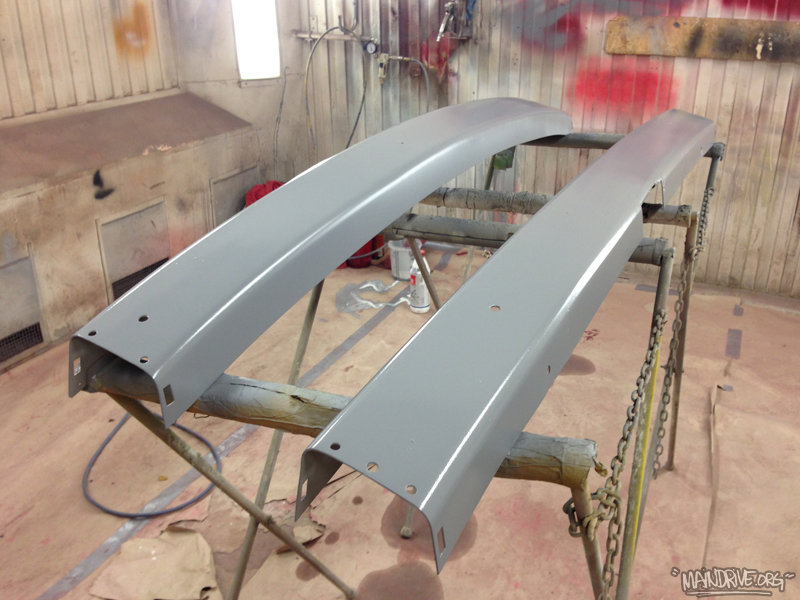
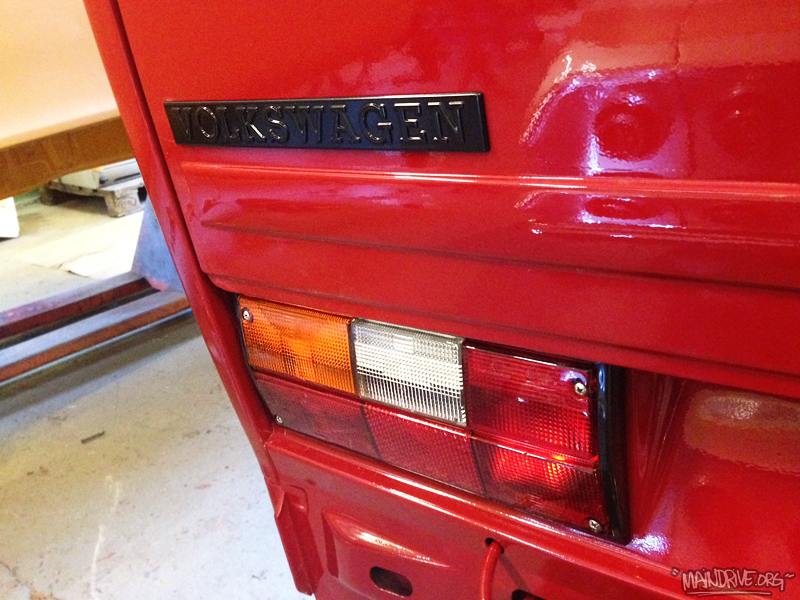
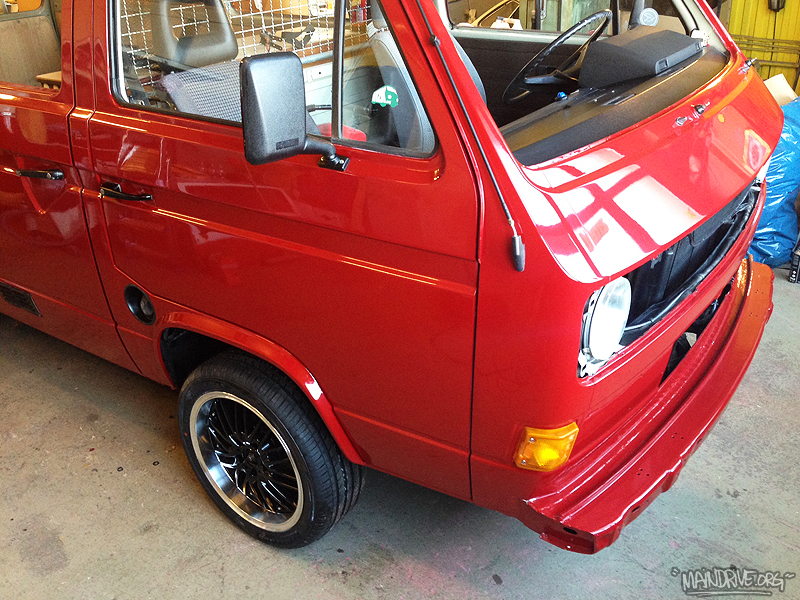
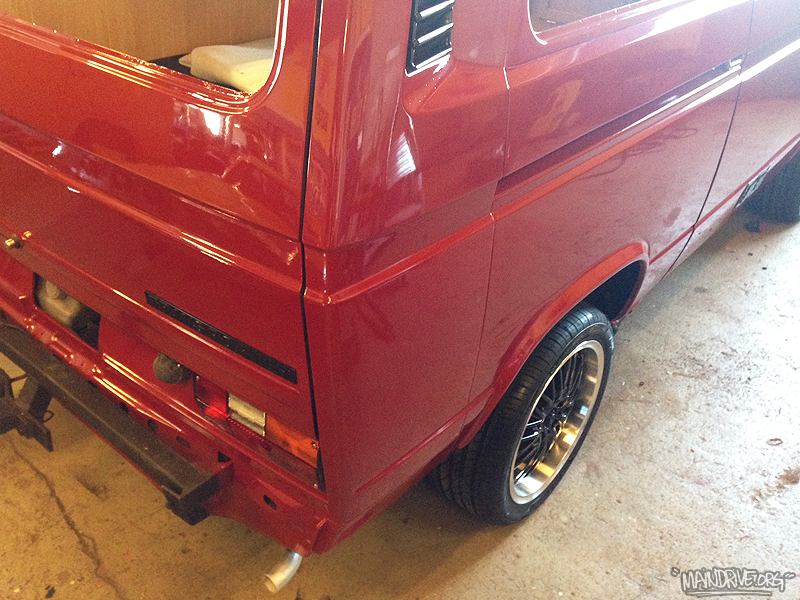
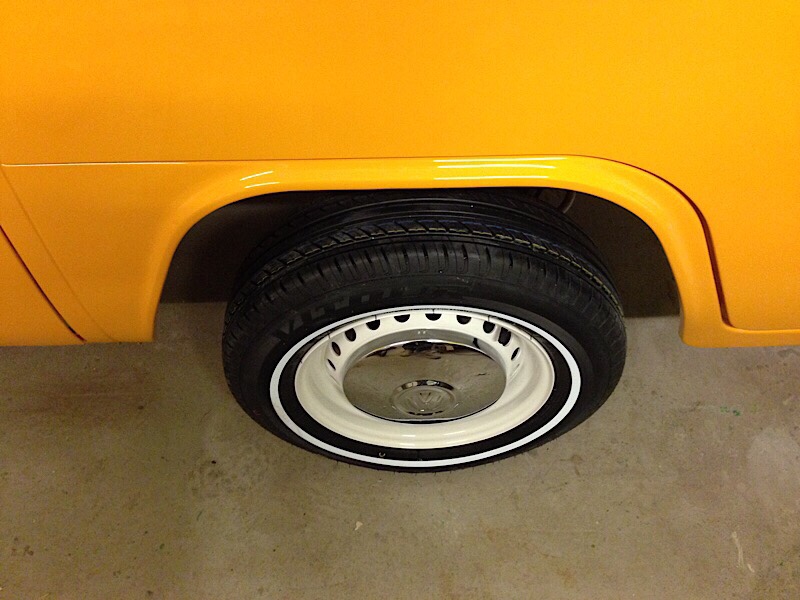
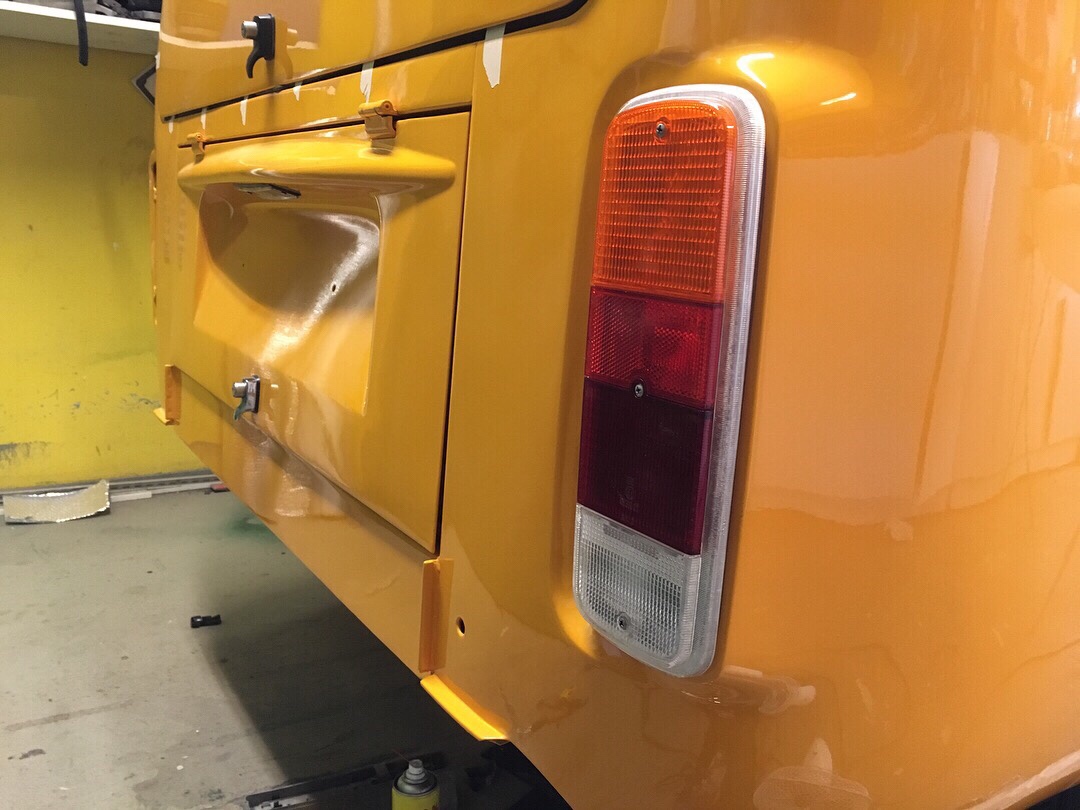
Wheels have been fitted, needed 5mm spacers all around and longer wheelstuds (56mm) in the rear and new bolts. Wheels are 17″ inch with 225/45 tires, offset 35. Need to make a custom centercap for the speedometer tho. Lots of new parts have been installed from Just Kampers, like new taillights, fuelfiller neck, footsteps, roof ventilation, mirrors, windowfelt trim in front doors etc. Waiting on tailgate seal and new clips for the freshly painted front grills. Bumpers have been blasted and are now getting welded, straightned up and removing big dents before paint in Deep Black. Next big step is taking it to the glass shop and get all windows installed with new rubber seals! Then its ready for the road…