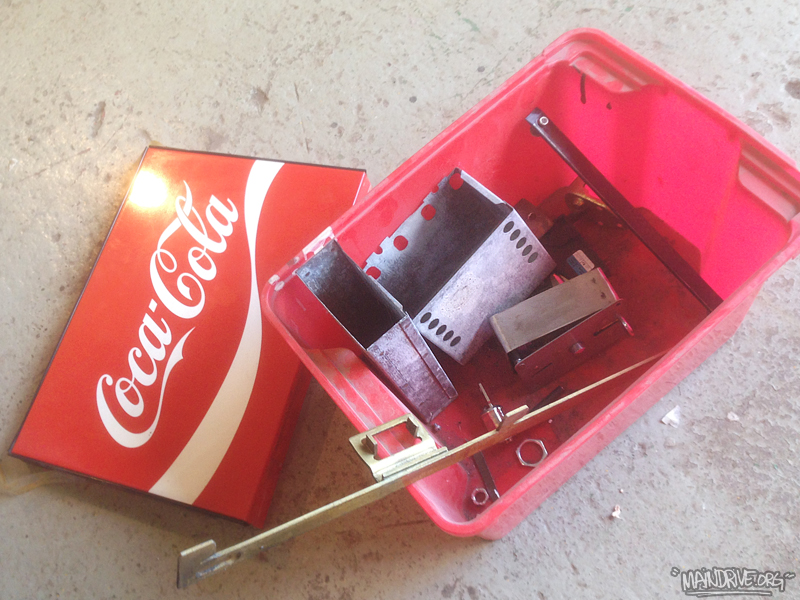
Broken pieces of yesterdays life… 
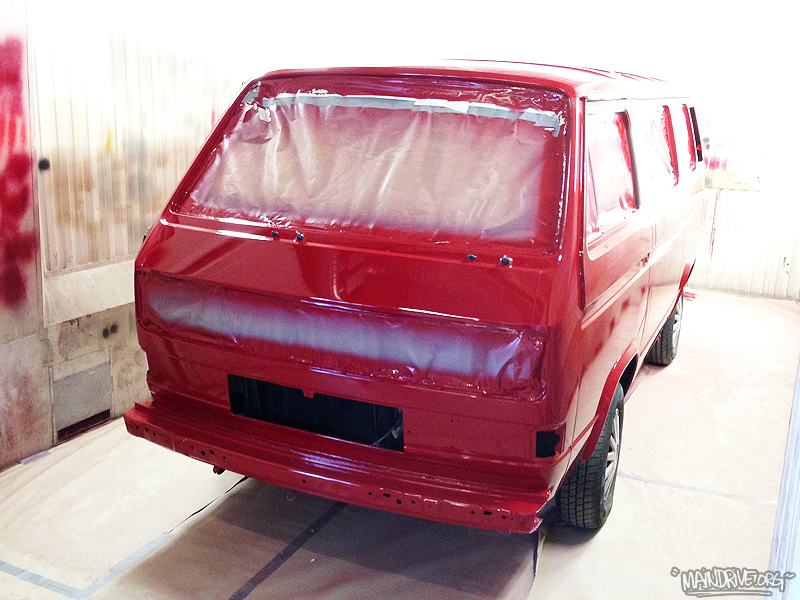
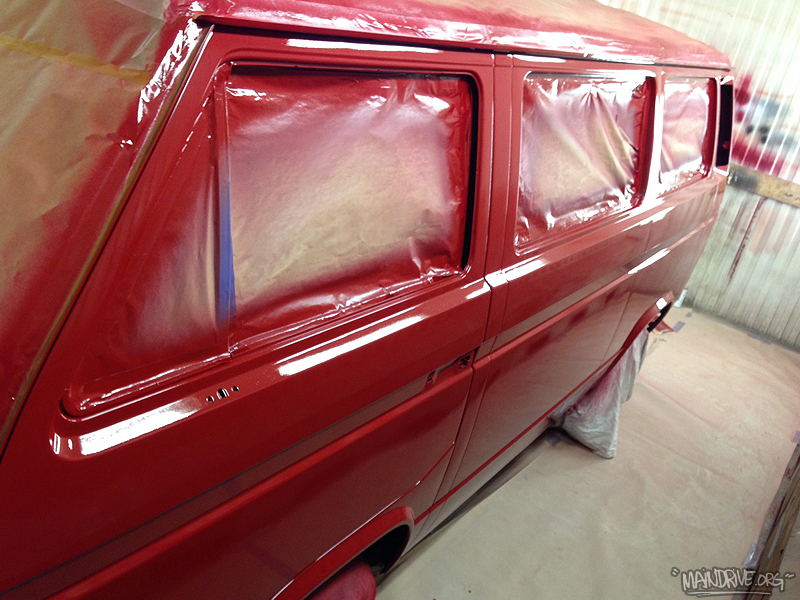
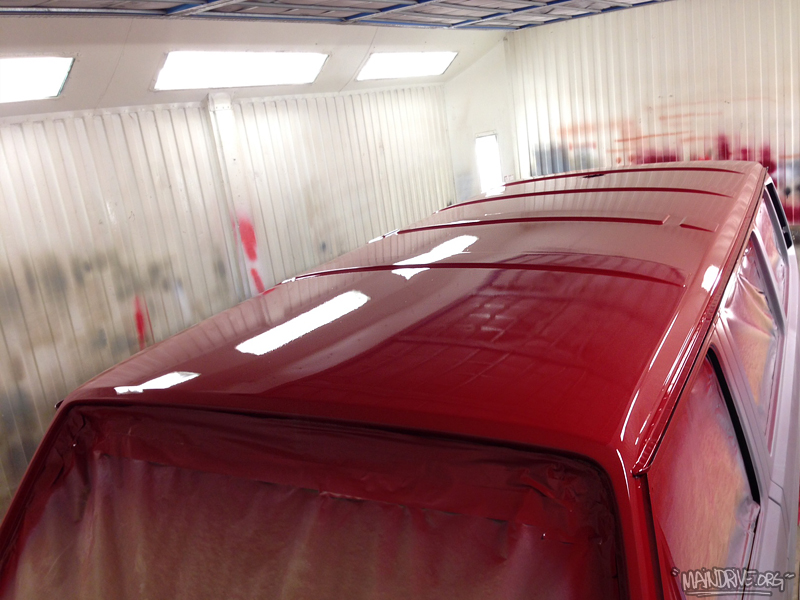
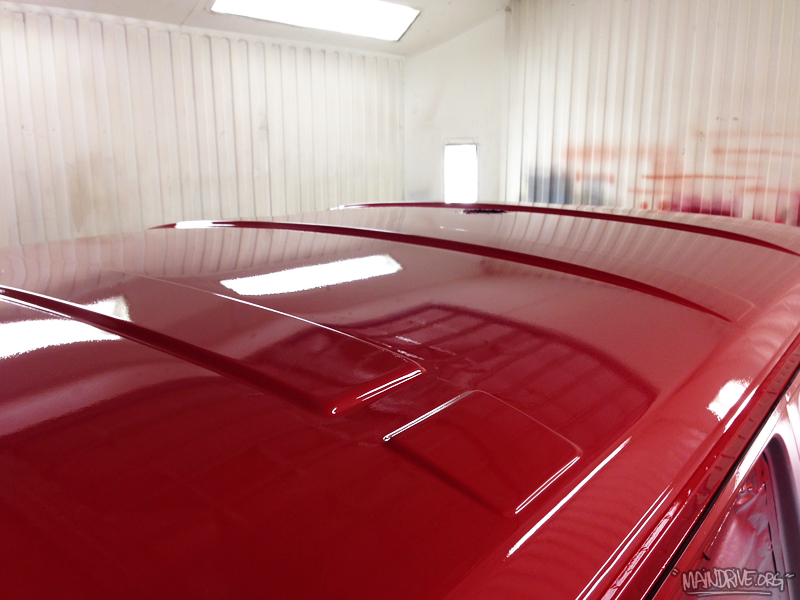
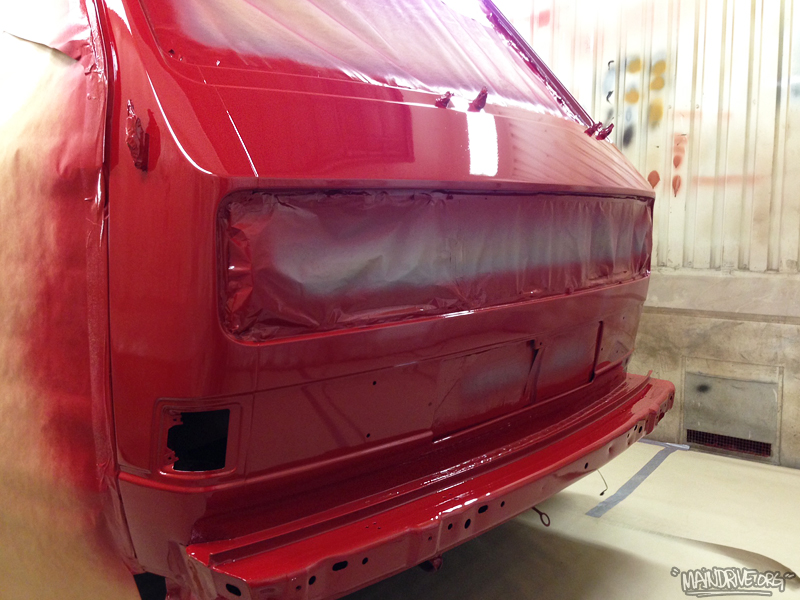
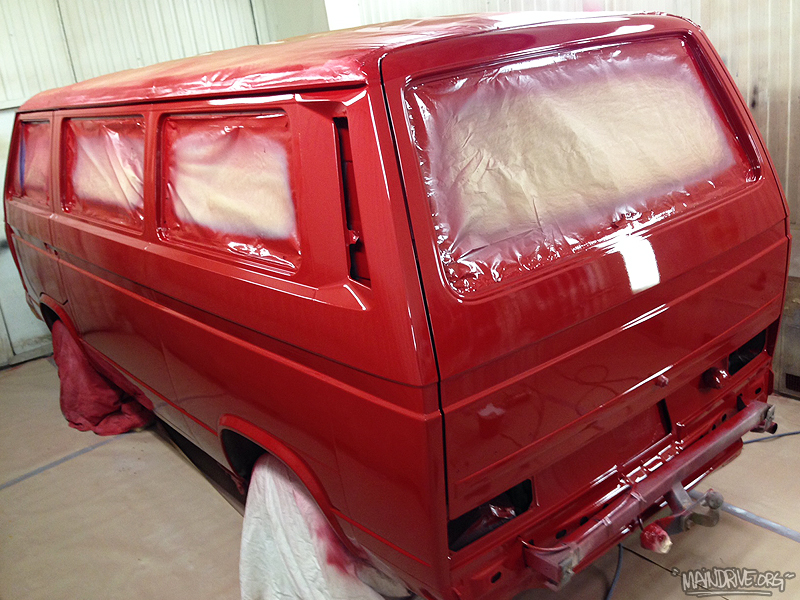
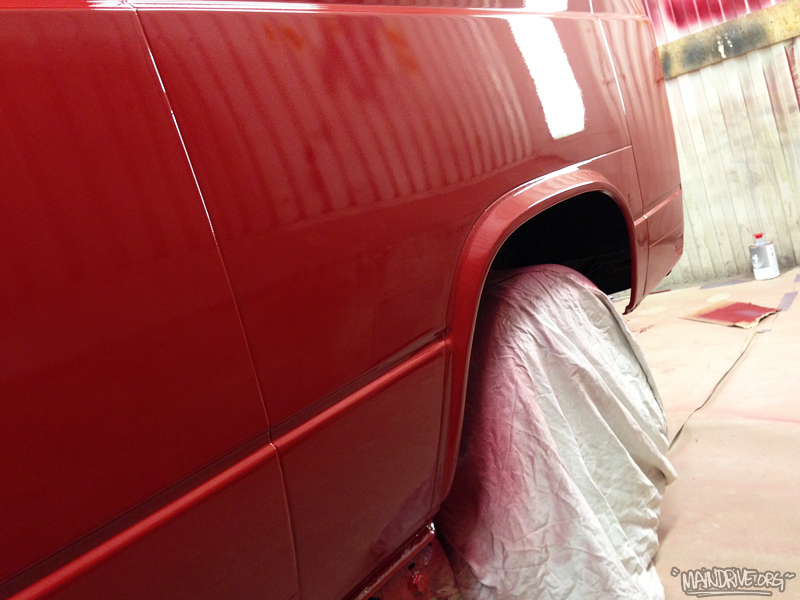
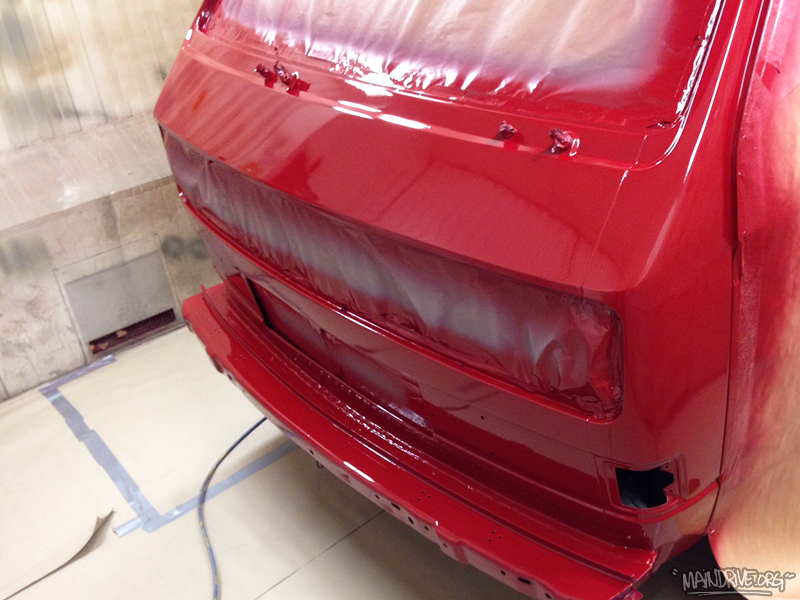
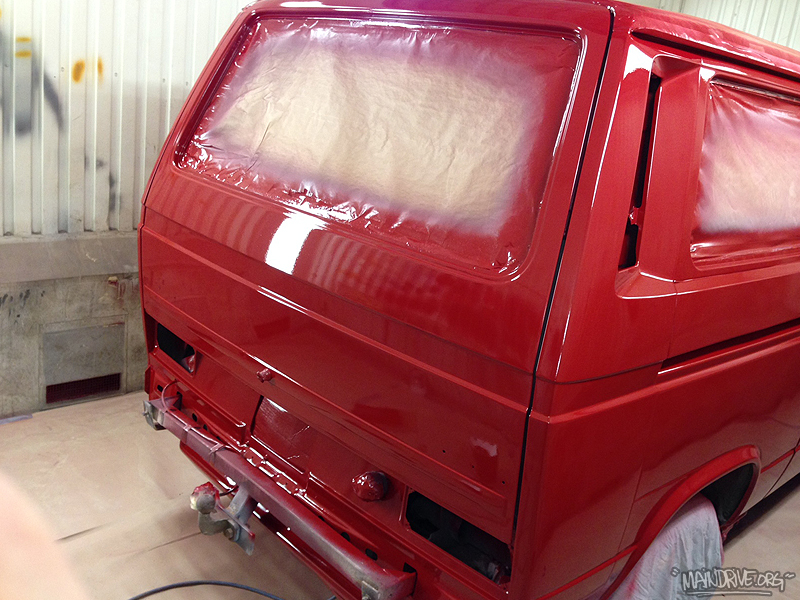
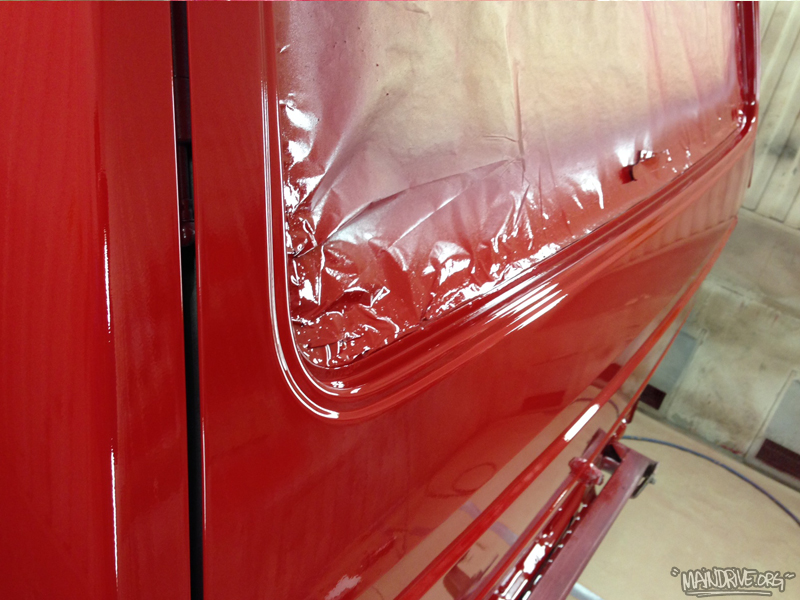
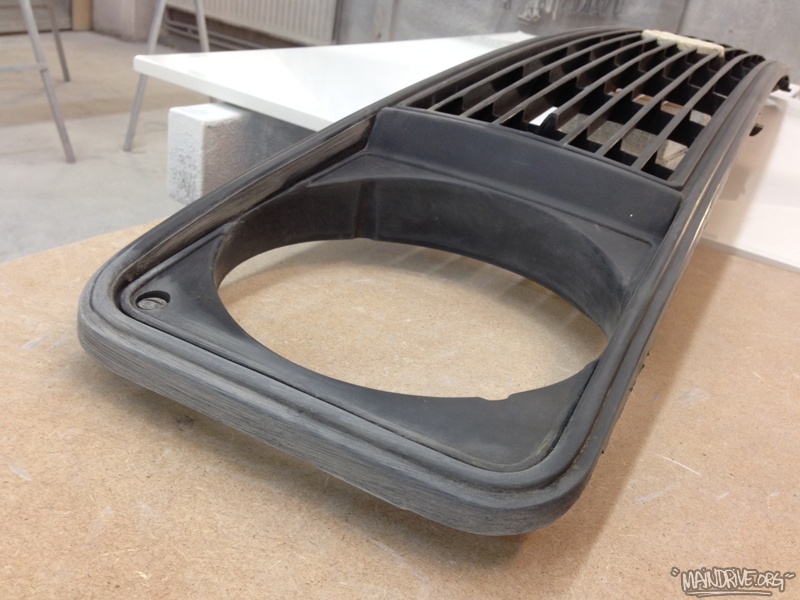
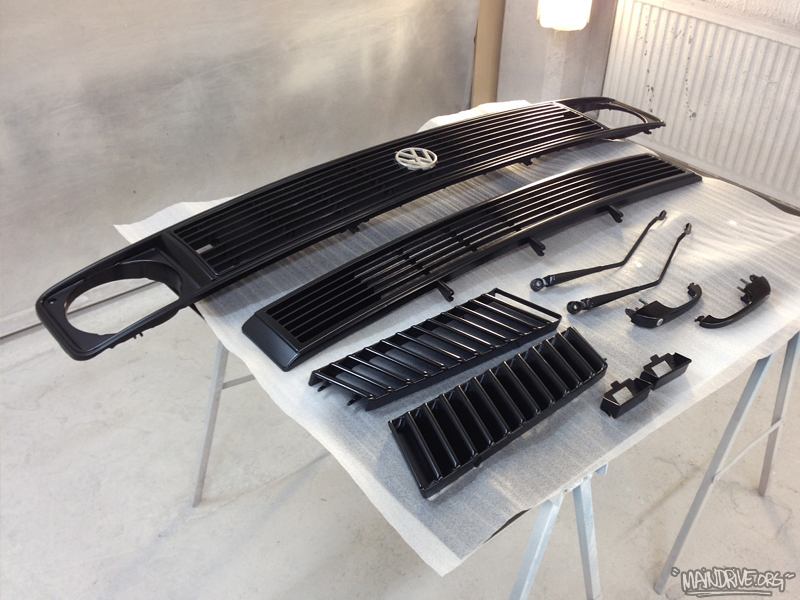
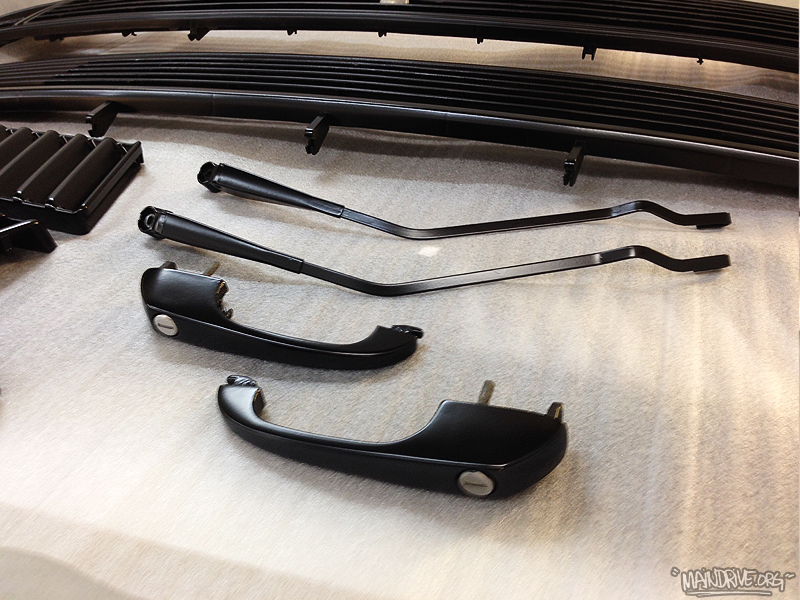
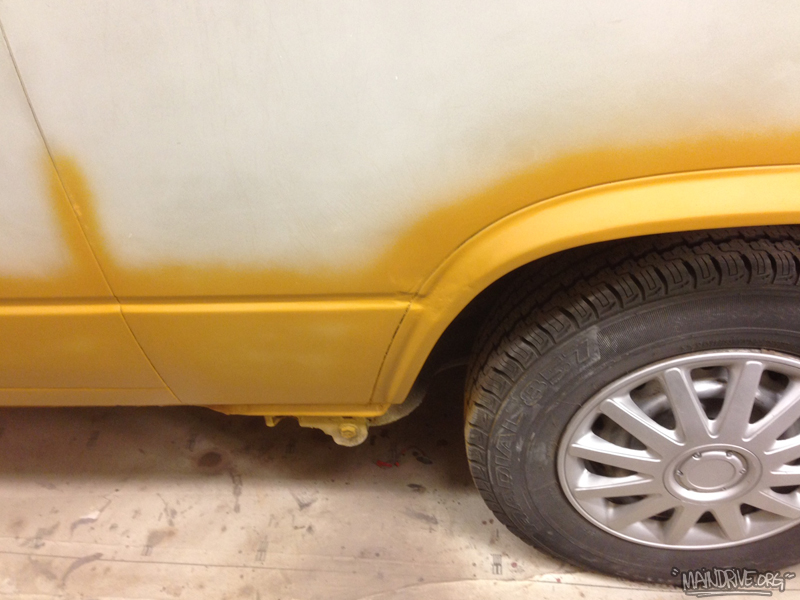
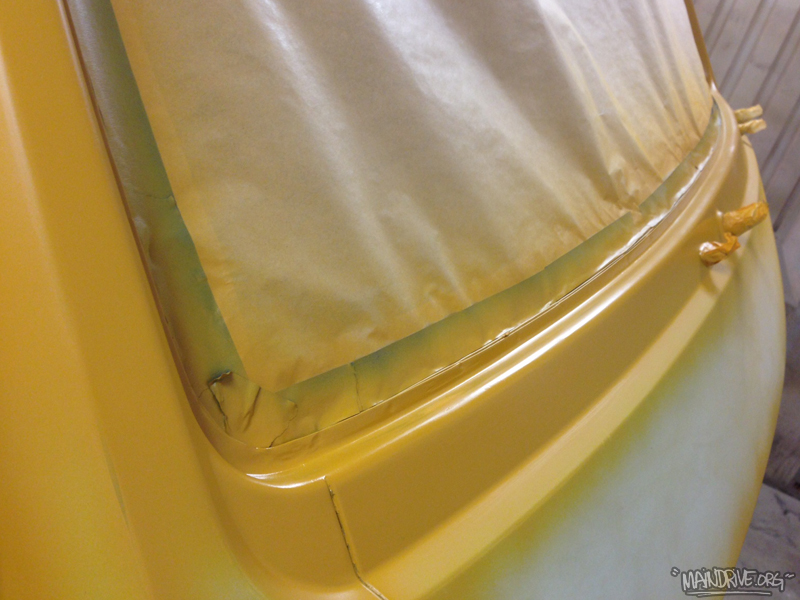
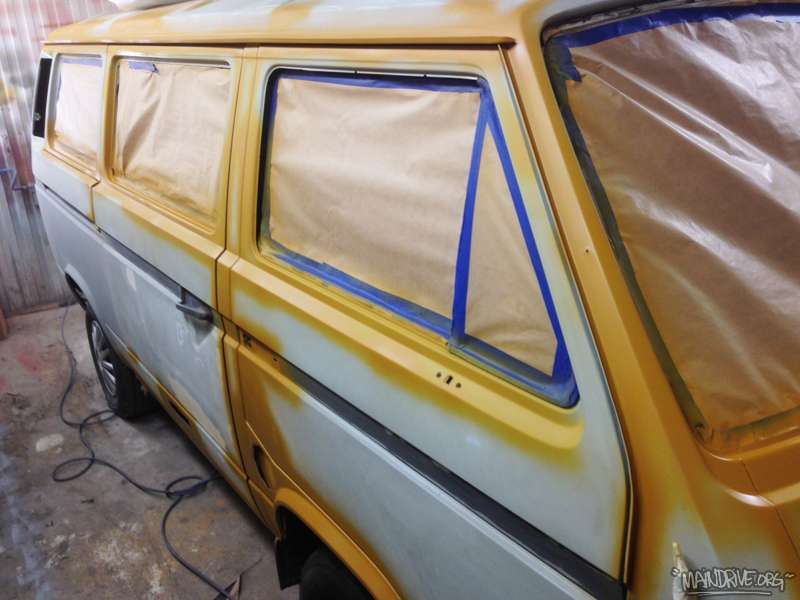
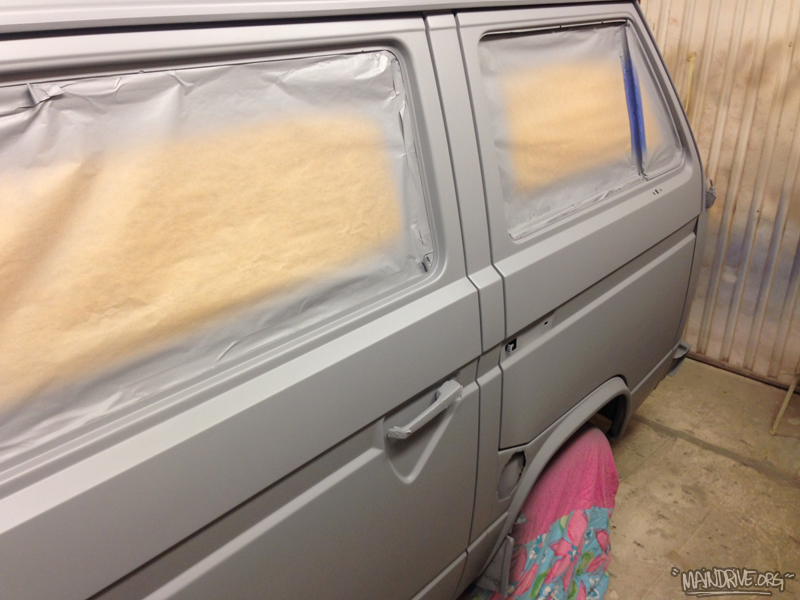
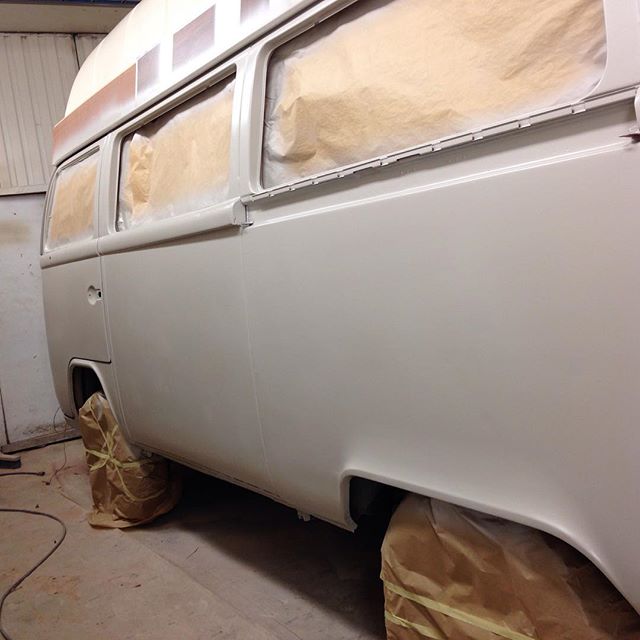
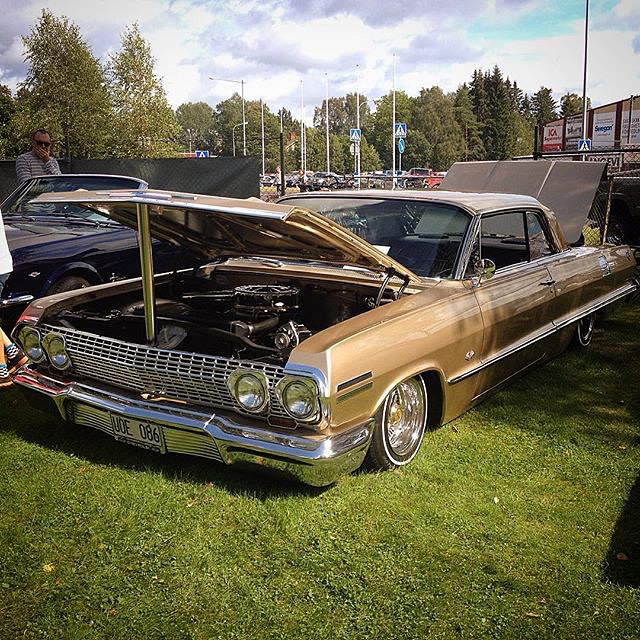
After alot of bodywork and sanding it was time for topcoat paint in VW Marsala Red H3D. Looks nice in red! Also got new Deepblack paint on the sun grey faded trim and parts like the front grills, handles, air intakes, wipers etc. I think all the black parts will match the black wheels perfect when its all together. The wheels from Germany will arrive this week and the other new VW parts from Just Kampers will be here tomorrow!

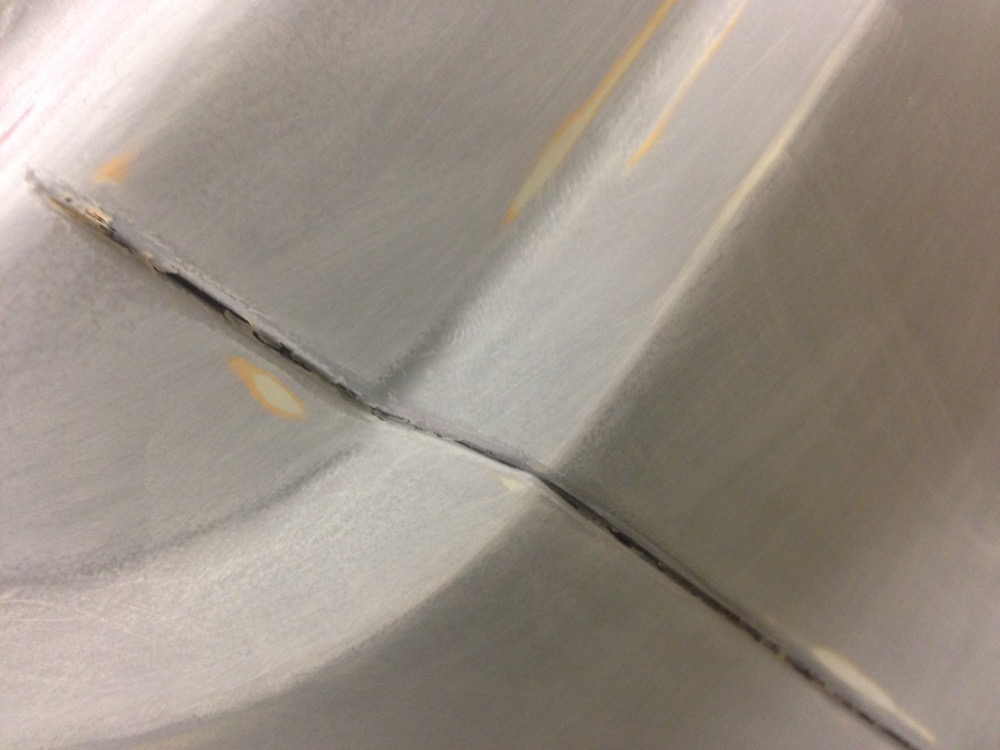
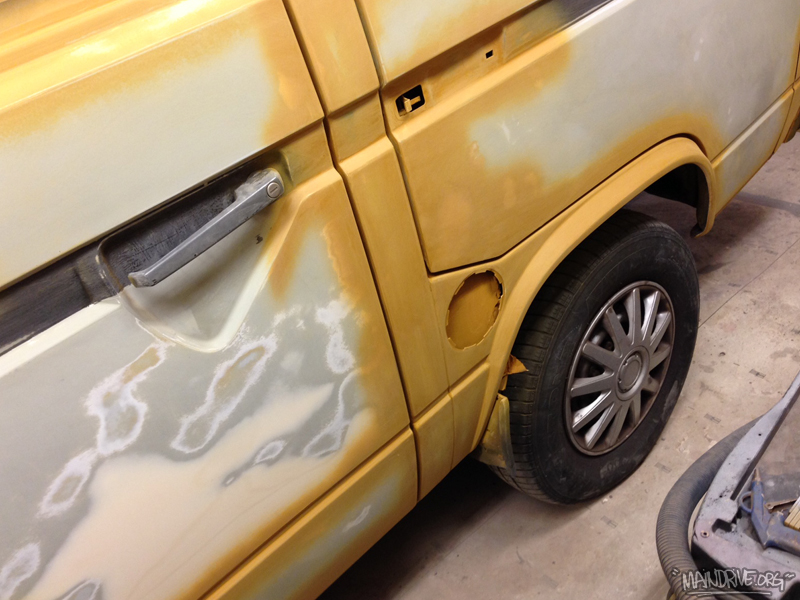
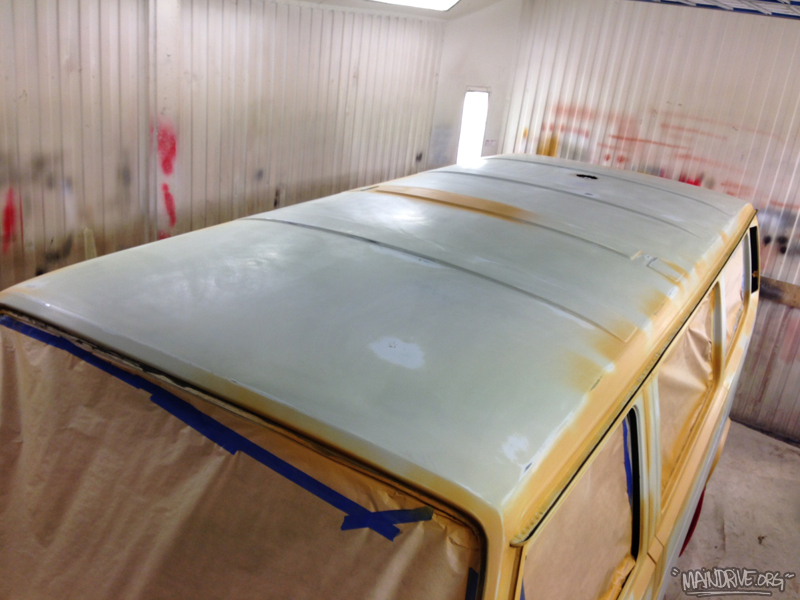
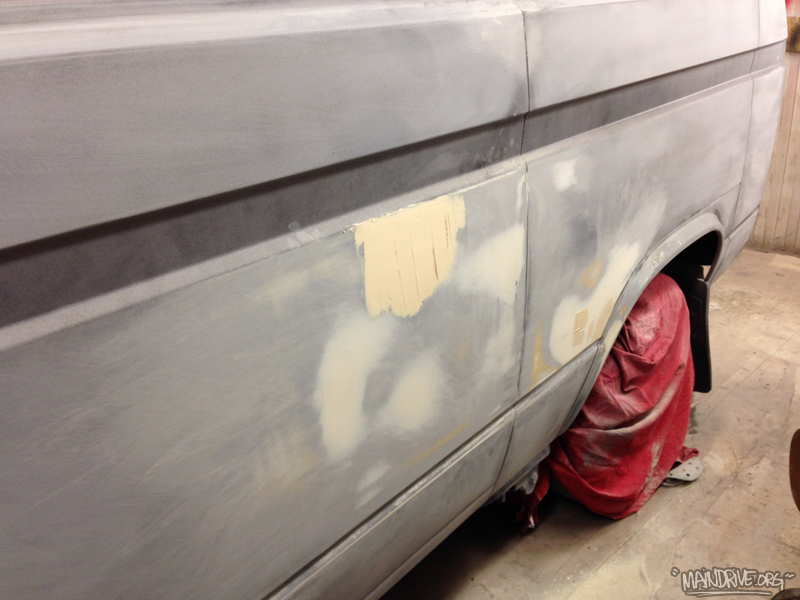
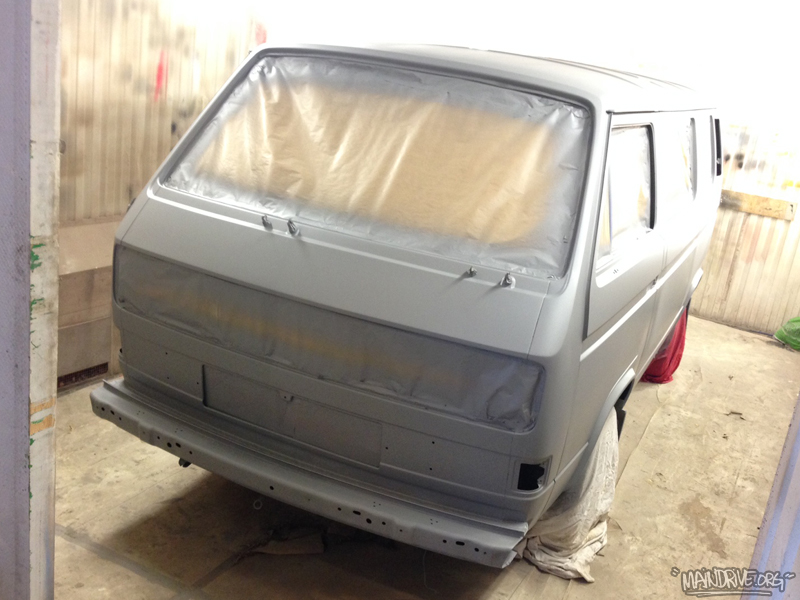
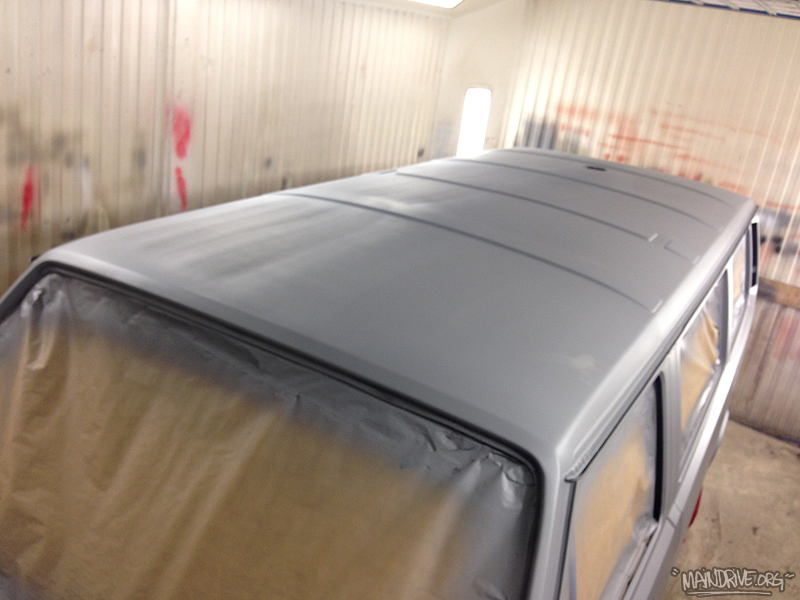
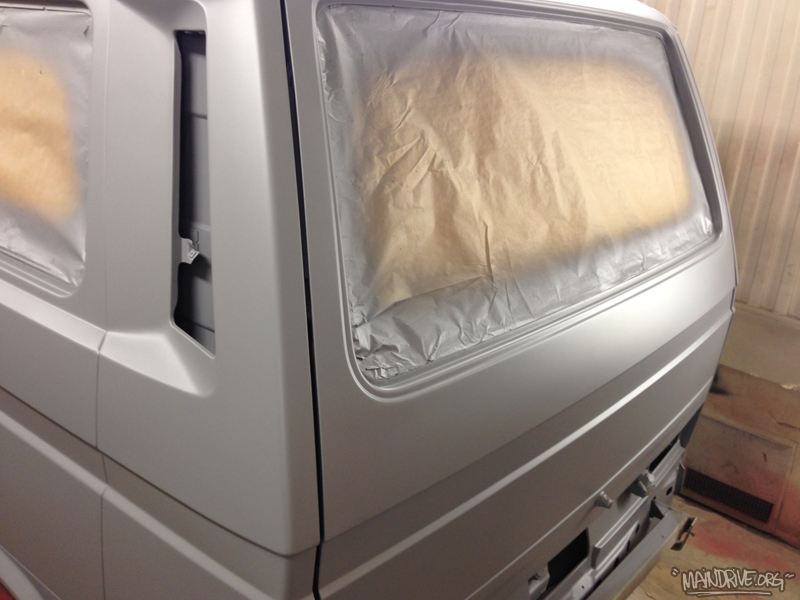
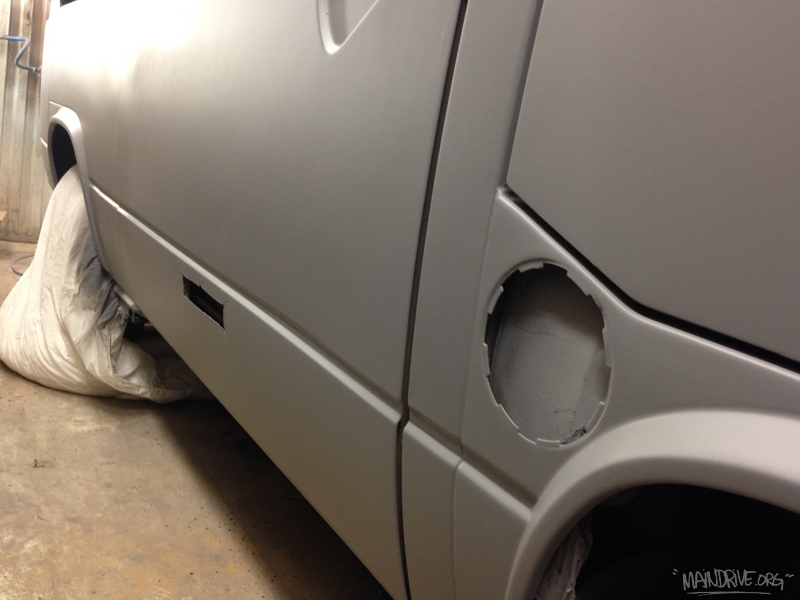
Time to sand the primer and fix small dents and scratches, and its alot of them both. When this is done a new coat of grey primer/filler is needed to get a good even base that needs a light sanding with 800 grit by hand before paint! Alot of work for sure!
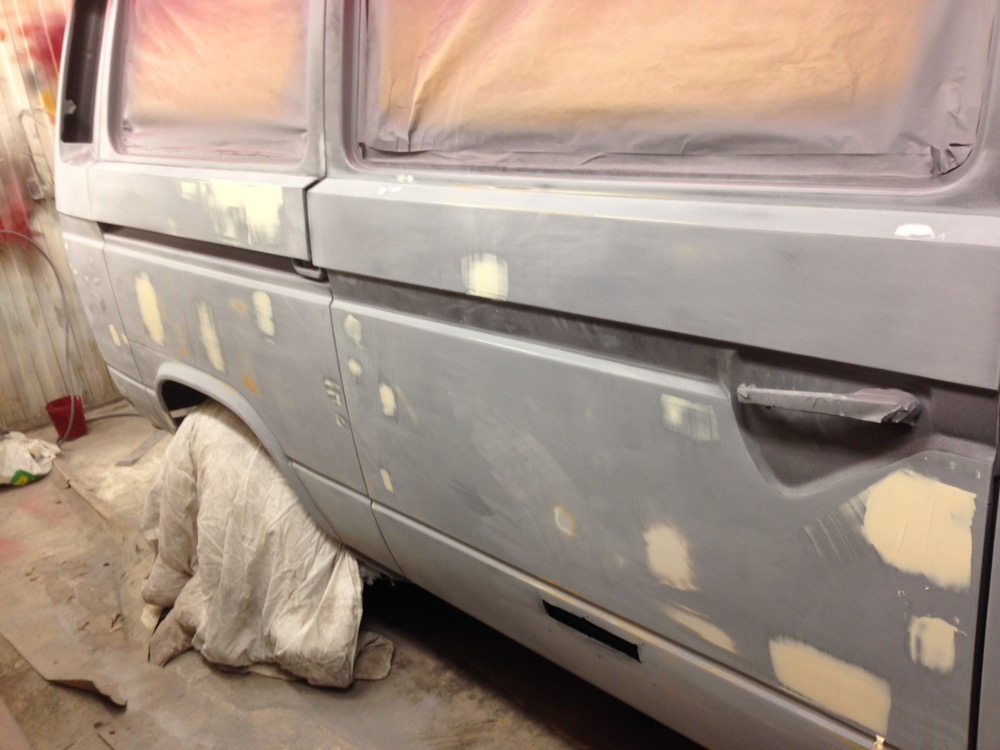
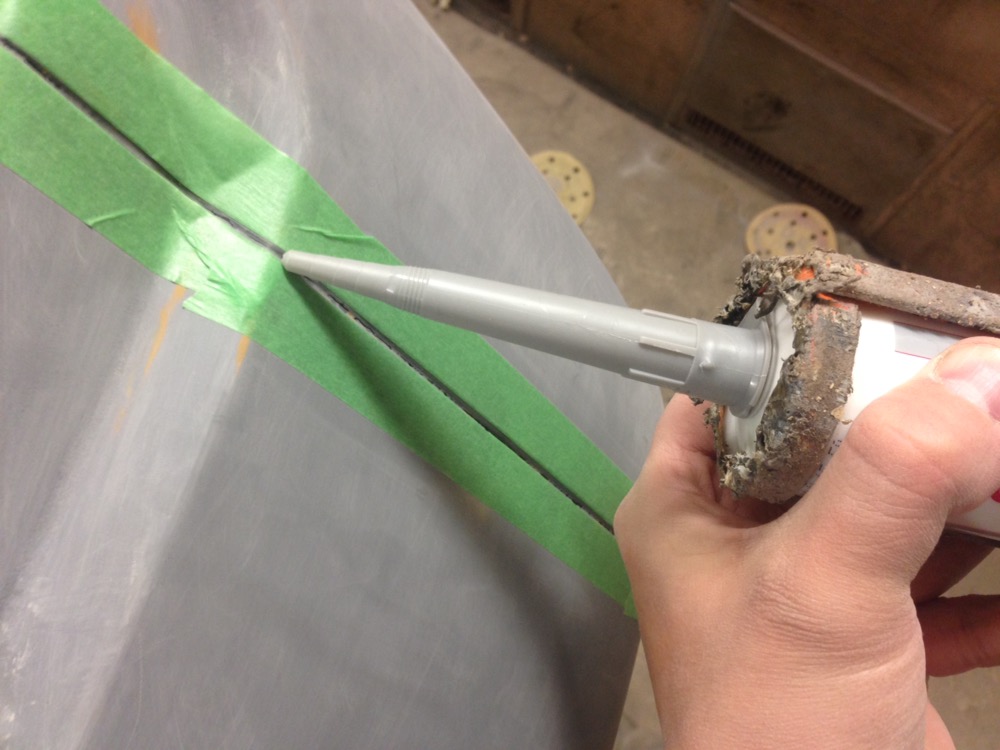
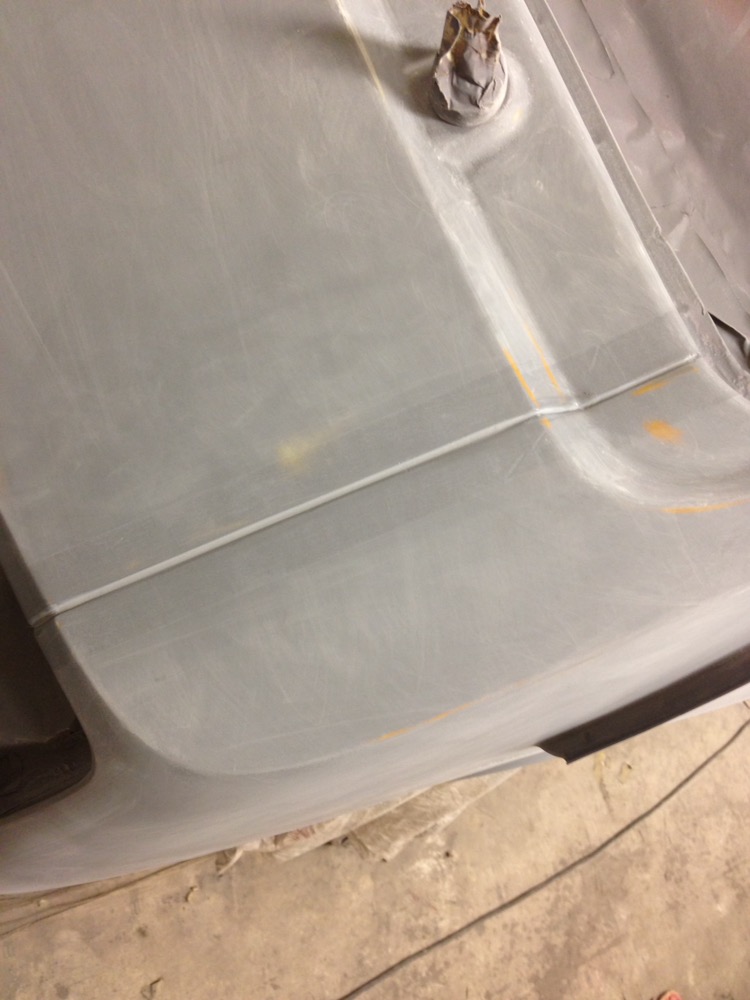
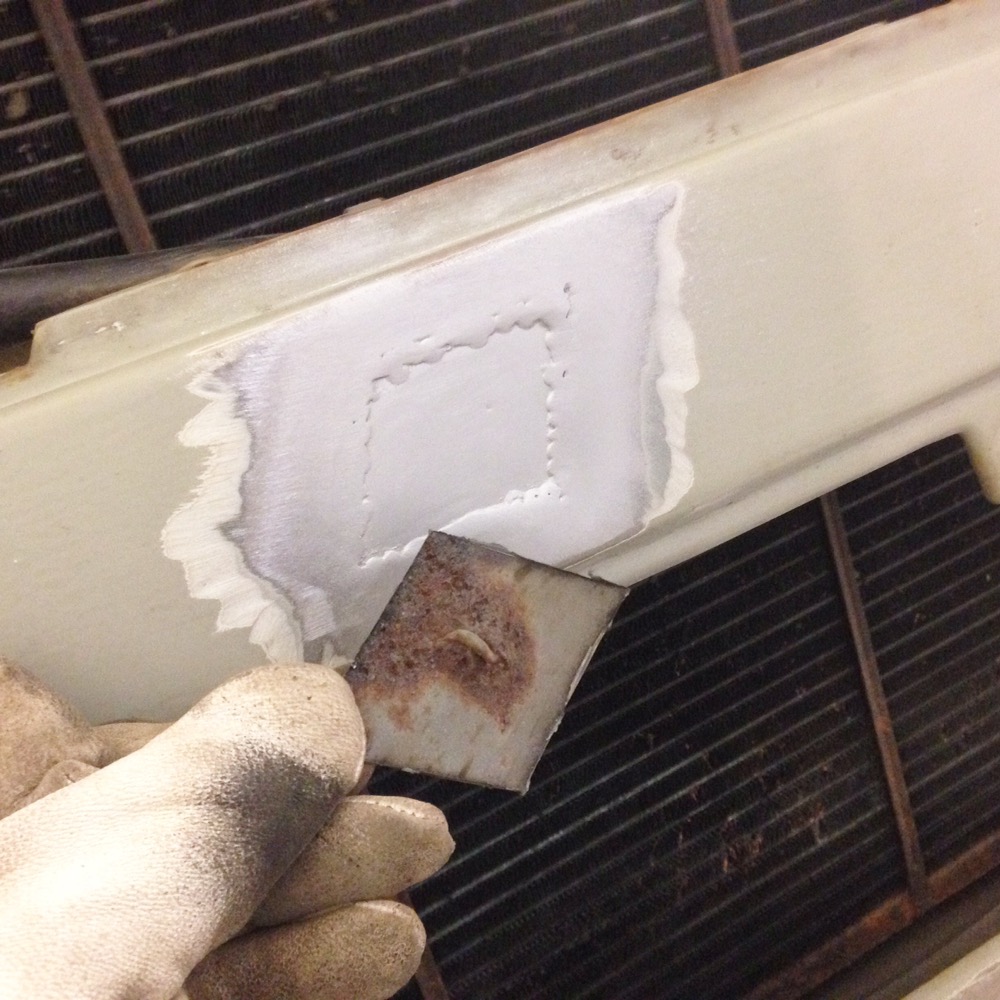
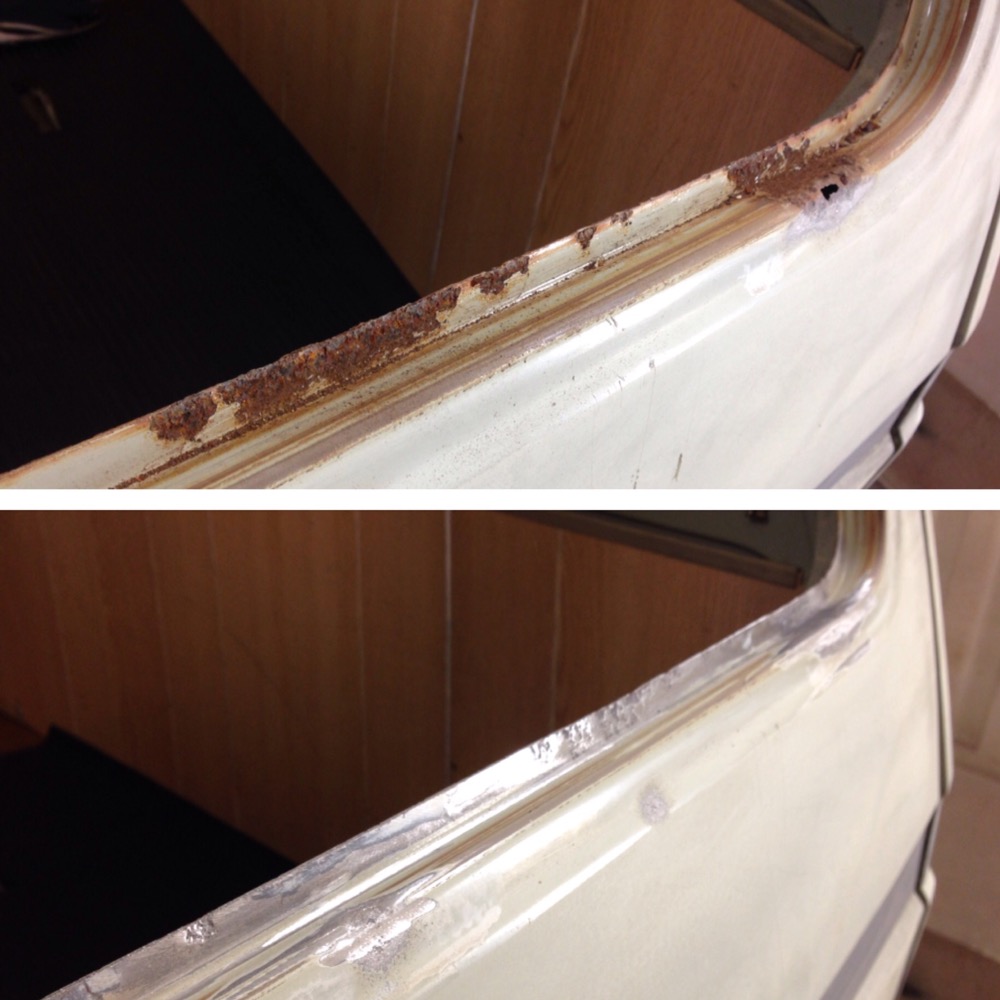
All the places that have been sanded and sandblasted down to the bare metal have been painted with yellow 2k epoxy rust primer for protection. After this, all the small dents, scratches and imperfections in surface/metal after sandblasting etc have been filled up and sanded smooth and all the seams have been sealed up with new seamsealer. Then it was covered in yellow epoxyprimer again. When it was all dryed it just needed a light sanding before 3 coats of grey surfaceprimer was added. Now it has to dry a couple of days before it can be sanded down again, but this time more carefully and must be perfect! When this is done its ready for topcoat paint in VW Marsala Red H3H3.
Bumpers and some smaller parts is at the sandblasters at this moment and more new parts from Just Kampers in UK is on its way right now. Time to choose some cool wheels also, stay tuned for more pics and updates!
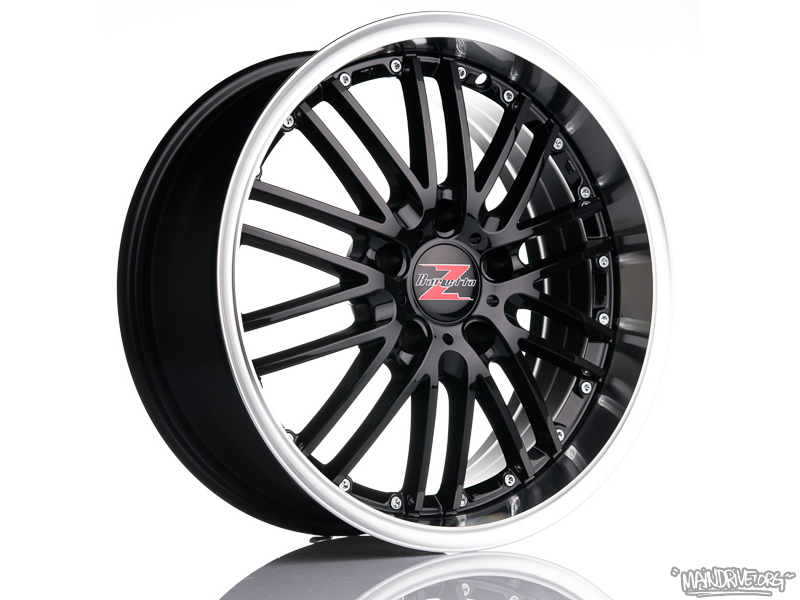
Maybe these 17″ wheels? 🙂
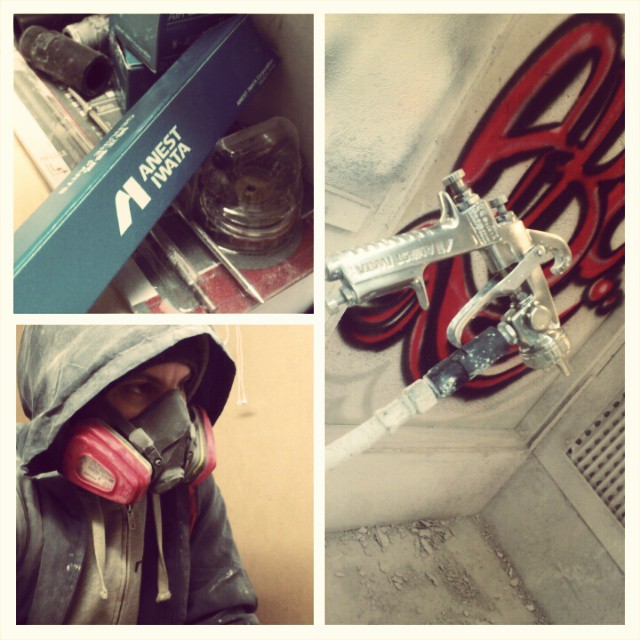
Behöver du något blästrat och lackerat till bra pris så är det bara att höra av sig på: info@maindrive.org
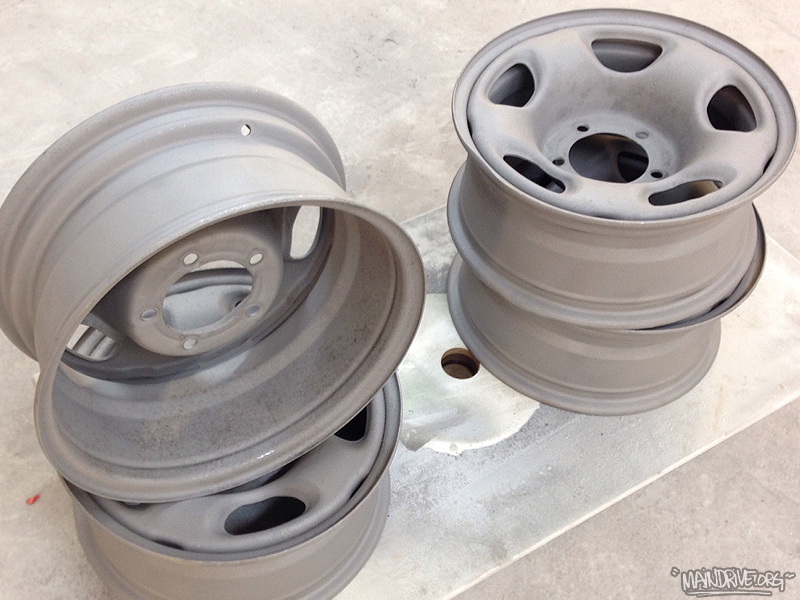
These rusty wheels got a new life with some sandblasting and new paint!

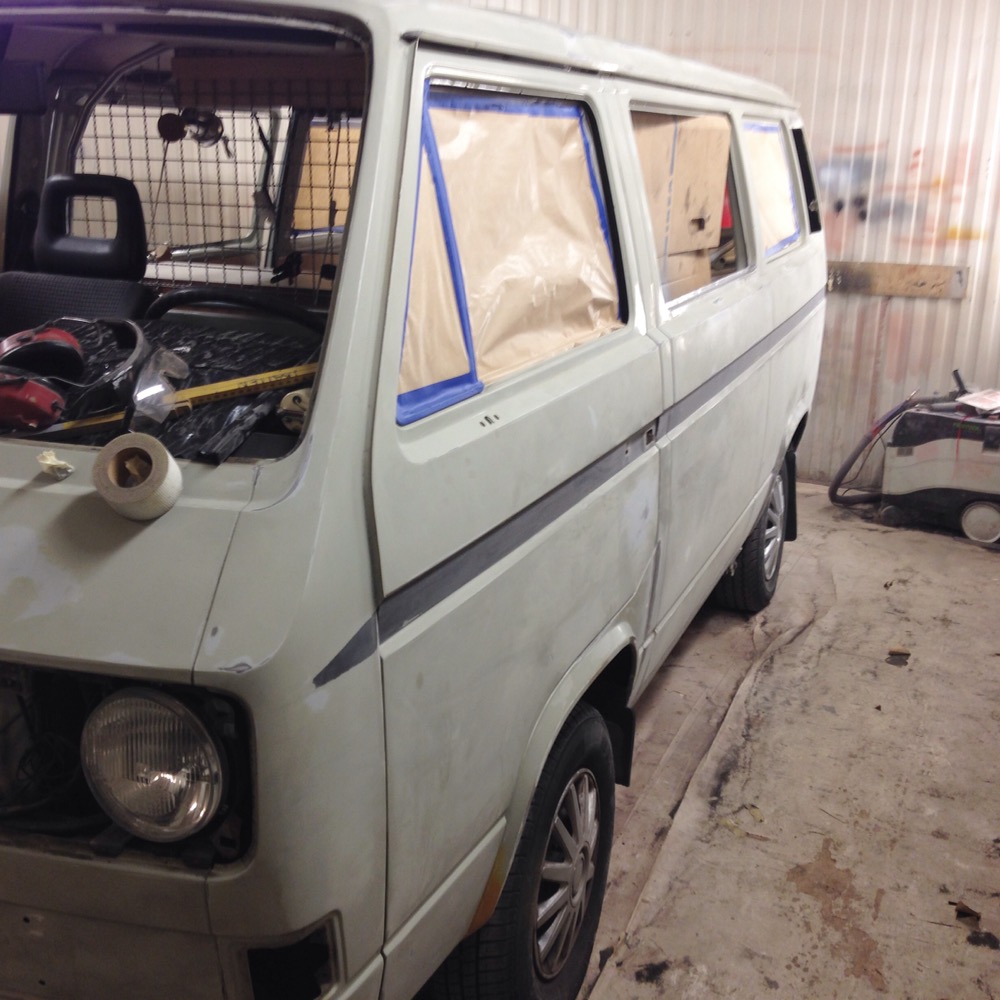
Some updates! All windows are out, all rust is repaired and the body have been sanded. Now the body work can start and I hope to have it in primer next week. Then its ready for more sanding and smaller bodywork before topcoat goes on. Maybe VW Marsala red paint?
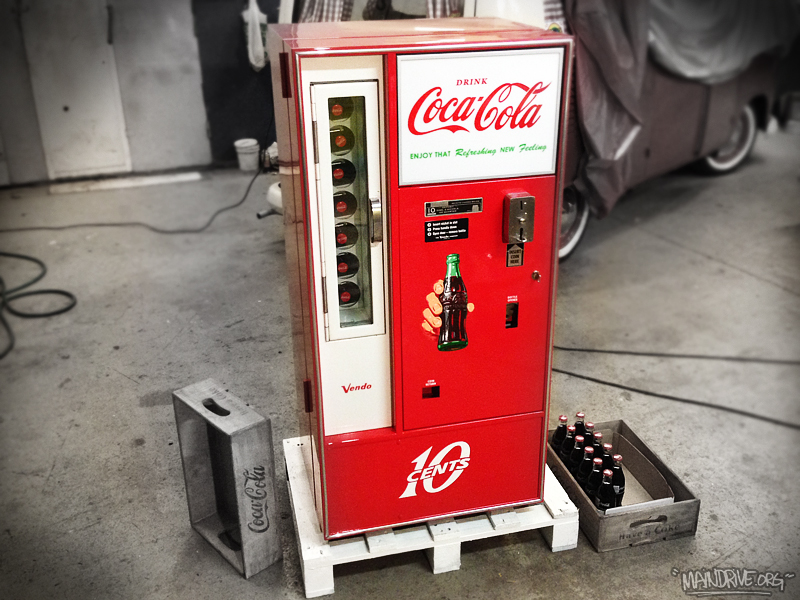
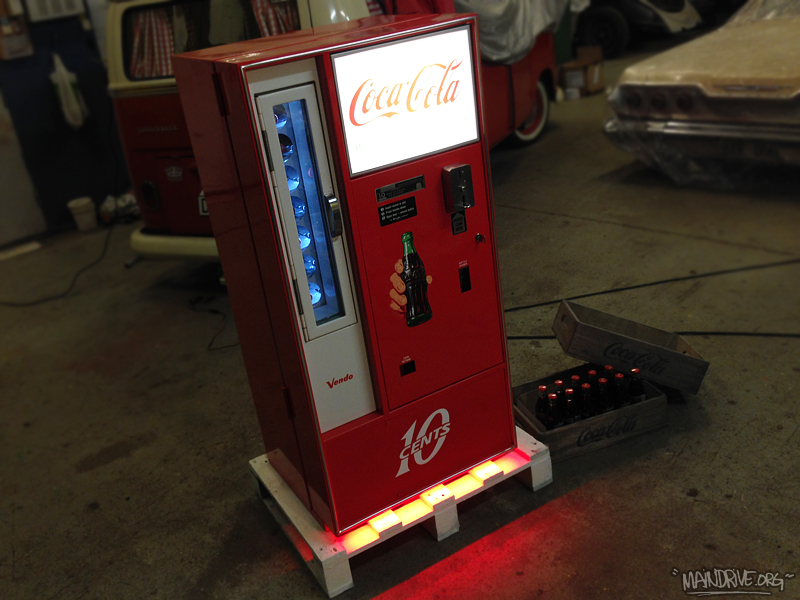
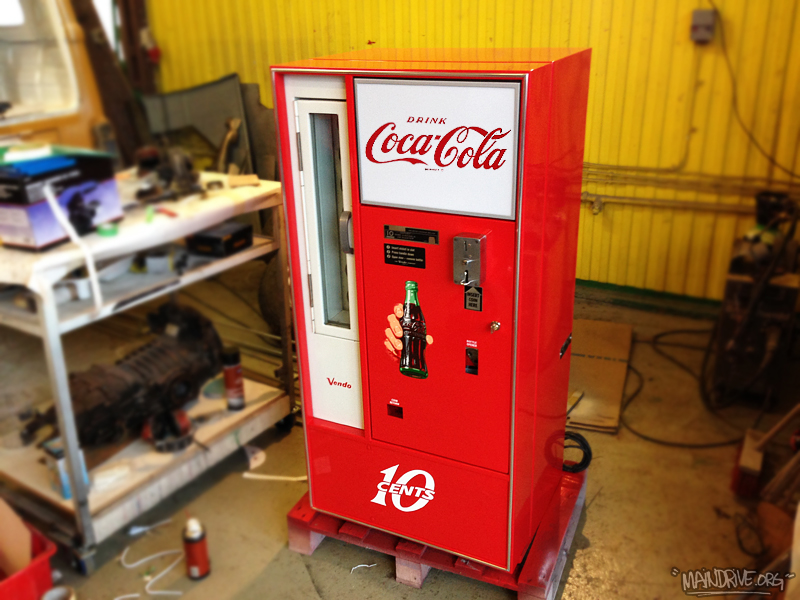
A short videoclip of the finished Coke machine restoration, we did during Mars 2016.
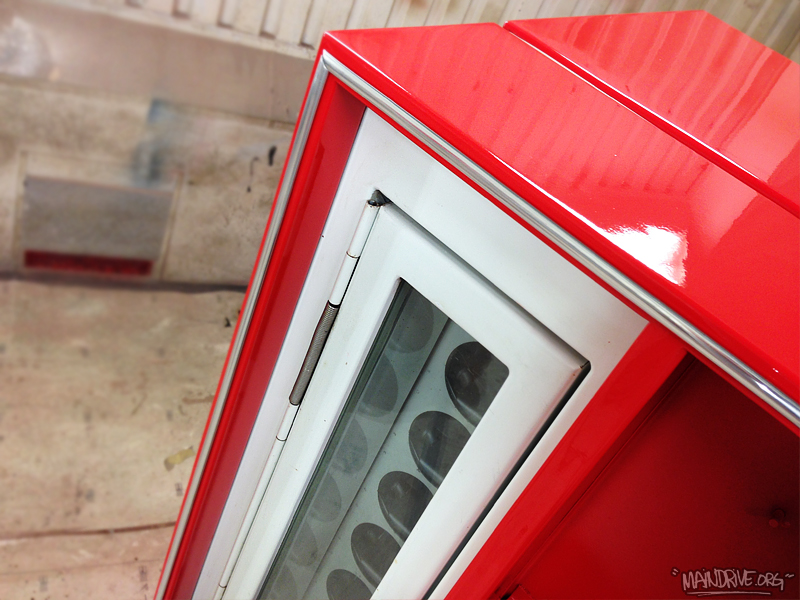
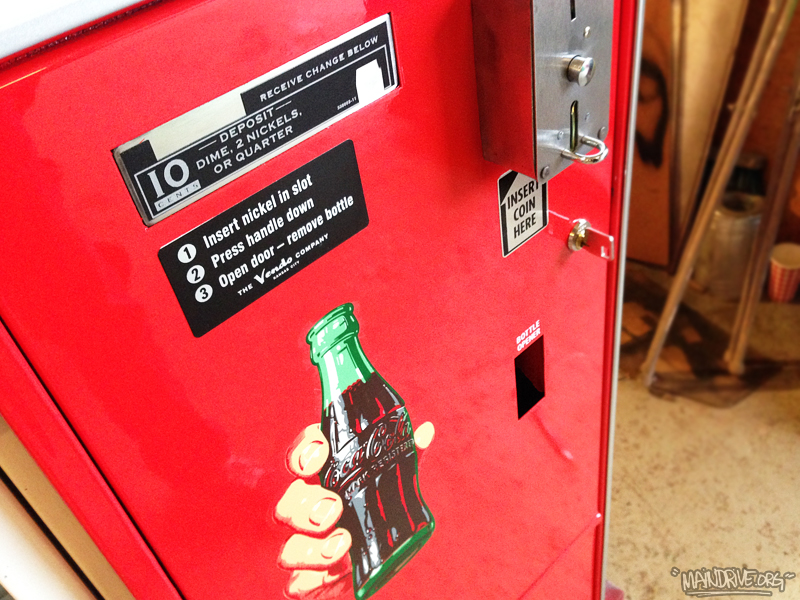
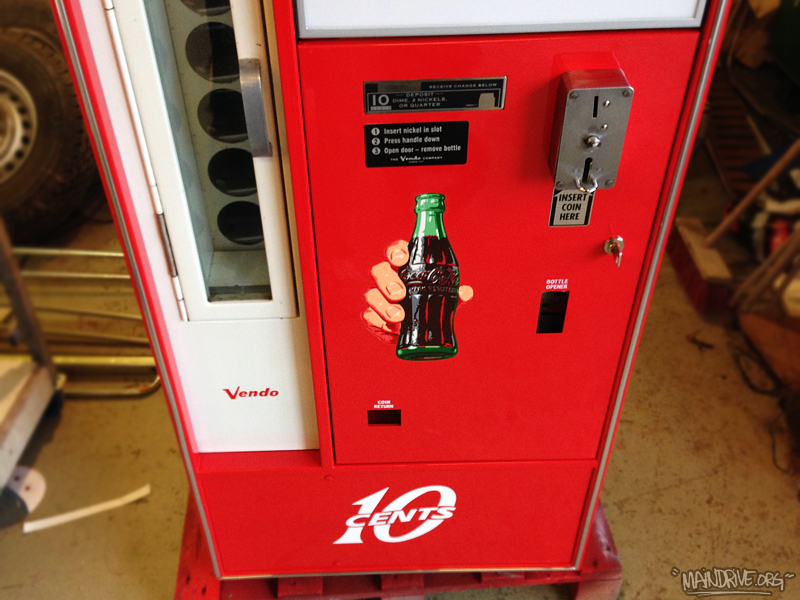
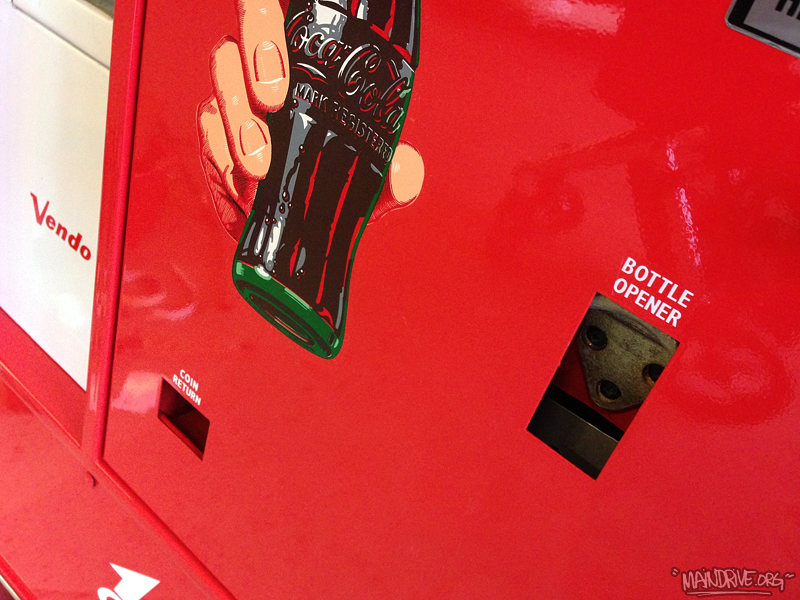
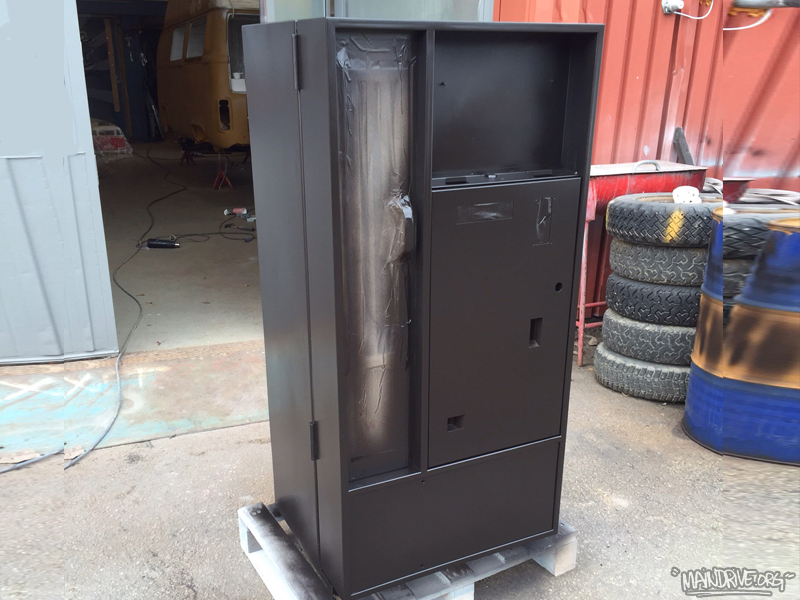
Yesterday the Coke machine was finished. Got the new lite-up sign to glow with new lightbars. Also added a cold white LED stripe to the bottle/door and a red stripe in bottom off front door. The Coke gets really cold just after a couple of minutes when running. Drop by the garage if you are thirsty! 🙂
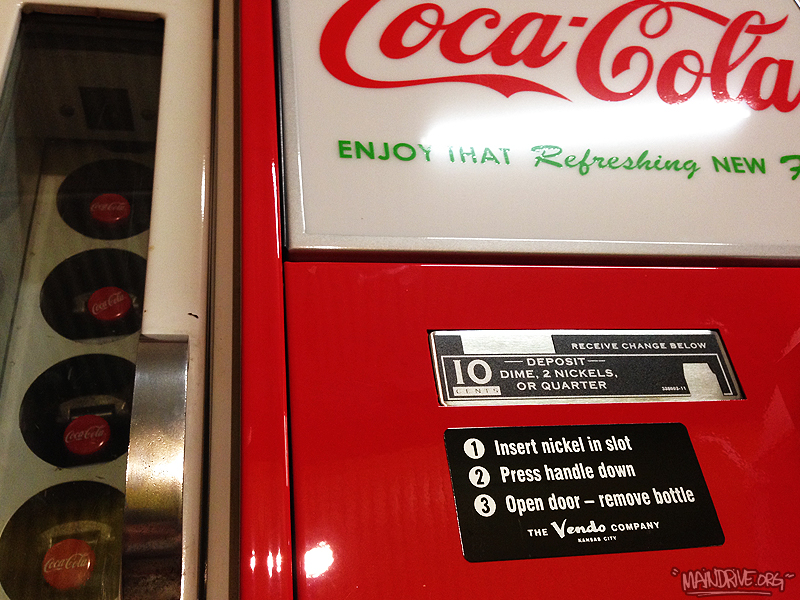
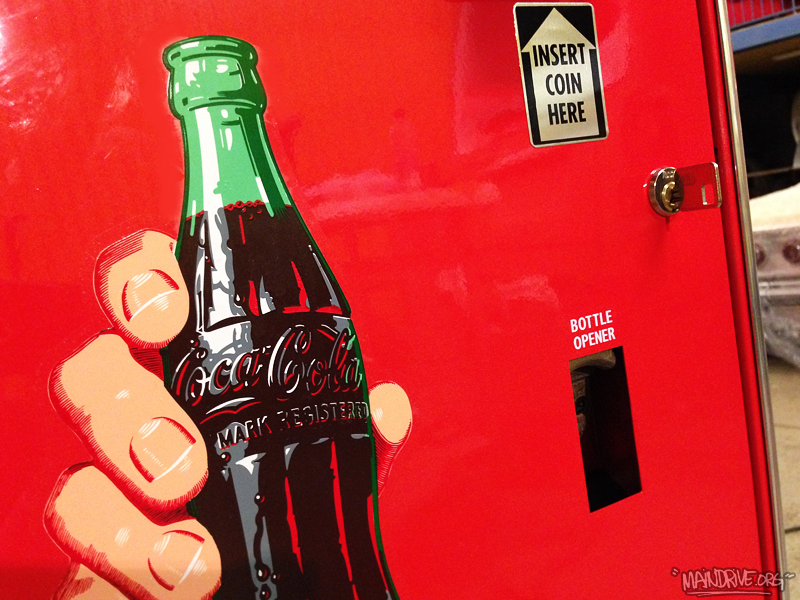
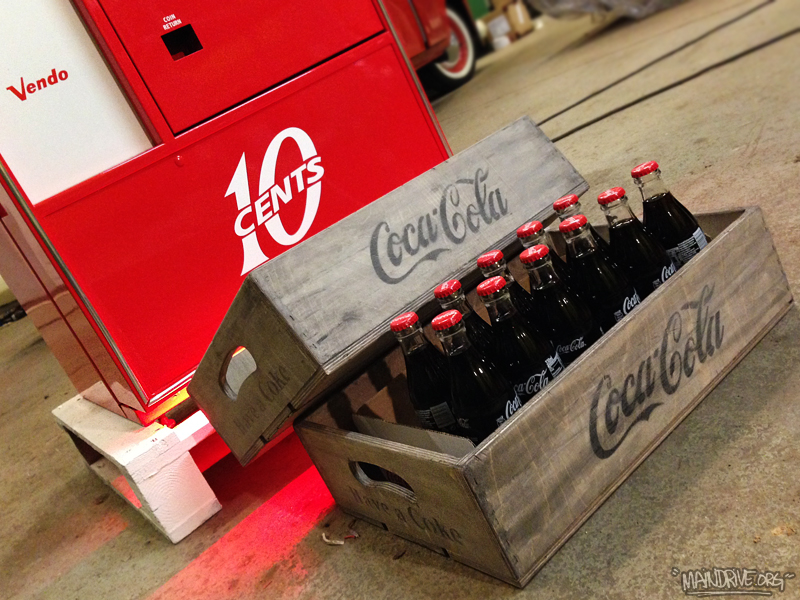
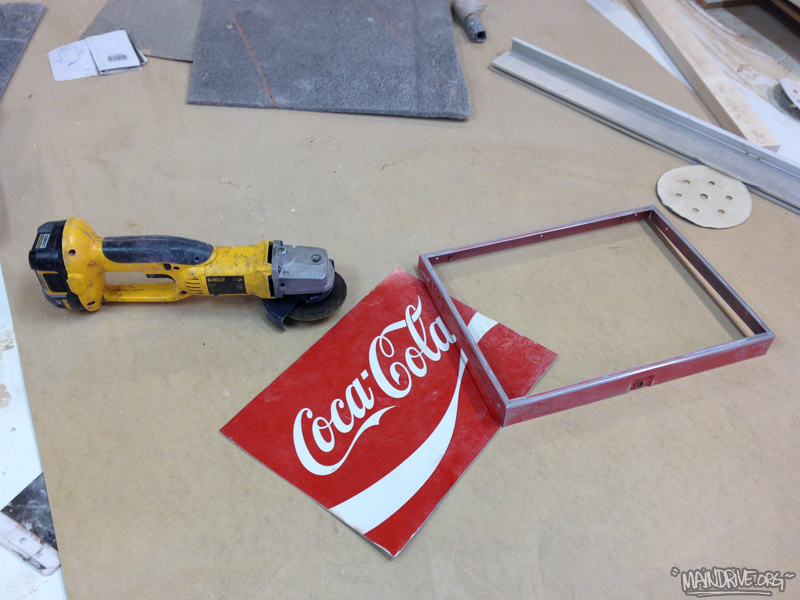
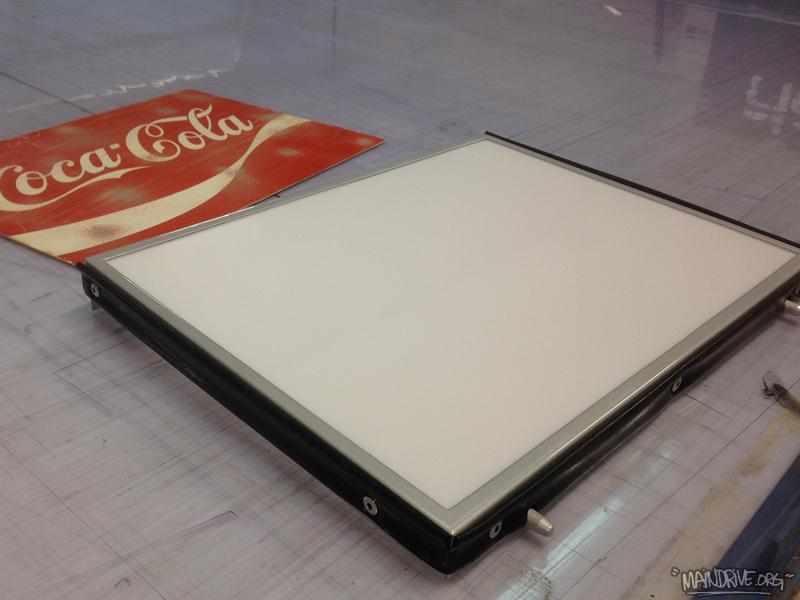
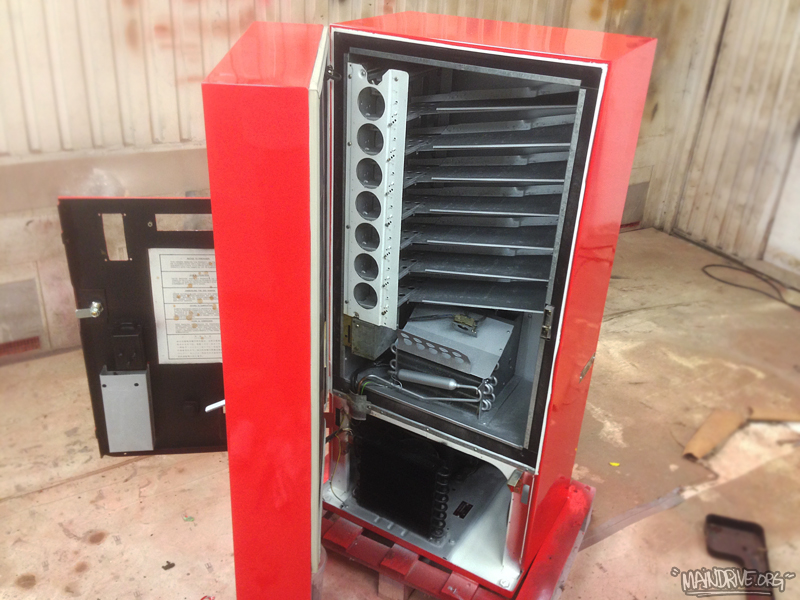
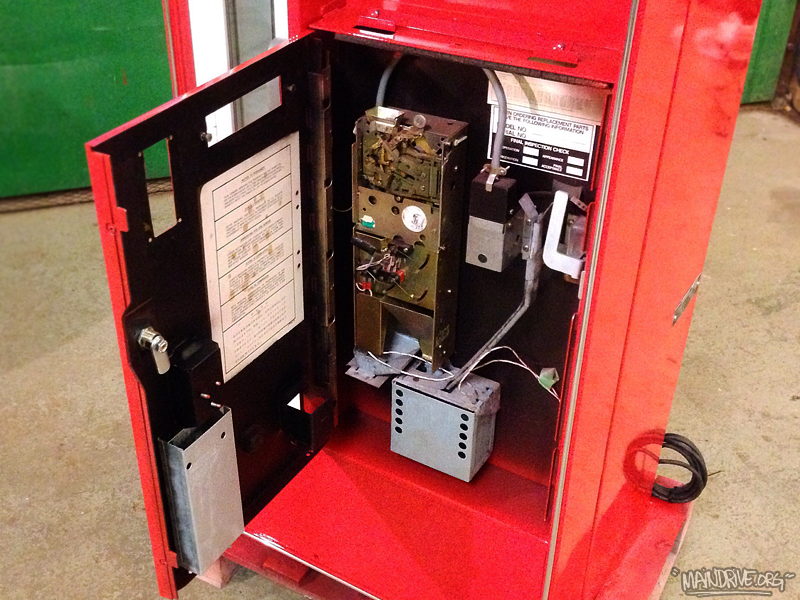
Almost finished with the Coke machine! I cut the metalsign up and converted it to a lite-up sign instead, this was an original option on these machines. Powdercoated the frame that was left in silvermetallic and installed two LED lightbars 3000K warmwhite color. Cleaned up the shelfs and compressor, checked all wires, oiled up the coin mechanism. Got all new emblems, locks and water decals on. Only waiting for the stickers on the sides of the machine “Have A Coke” the ones I got from US was in wrong color. Soon its time to load it up with bottles and just plug it in! The last final pics coming soon…
Looked like this 6 days ago (!) Quick turn around time!

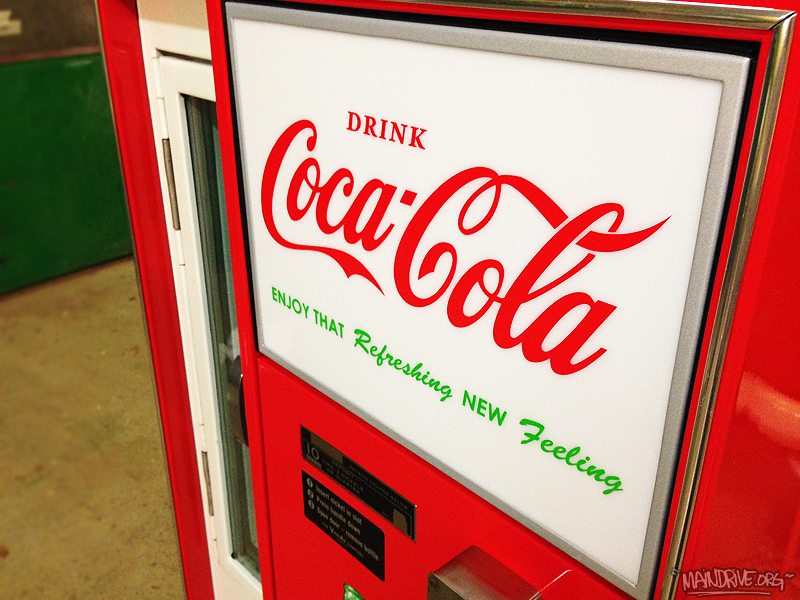
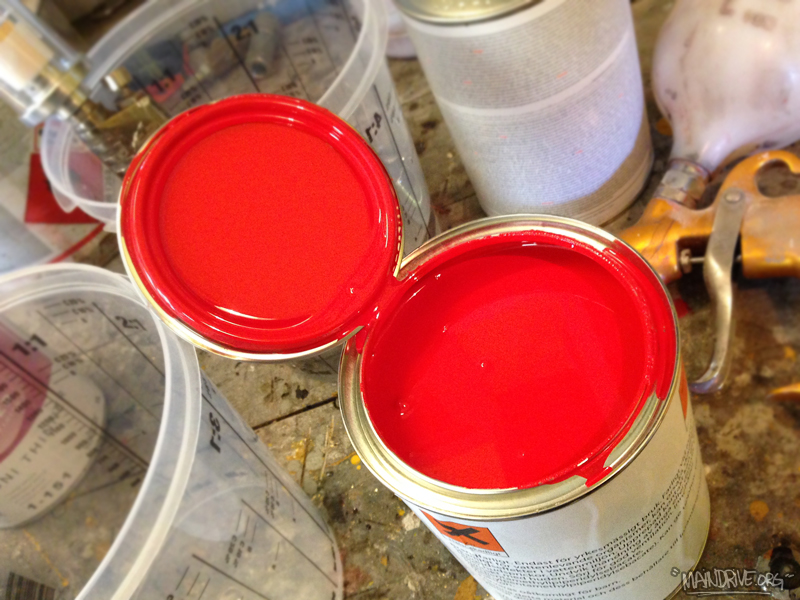
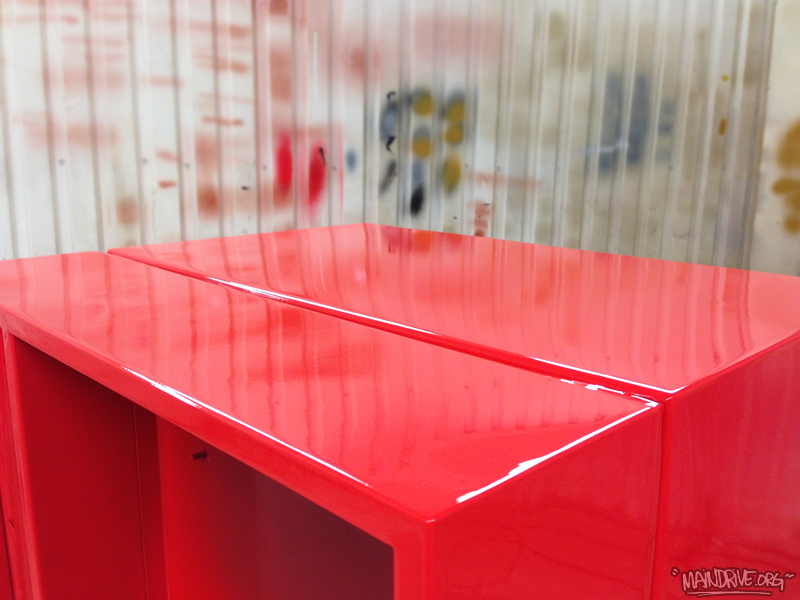
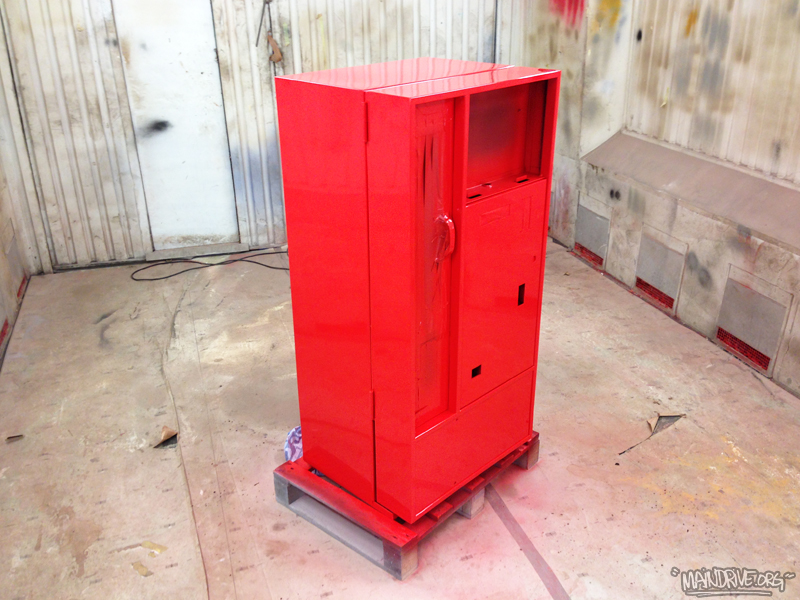
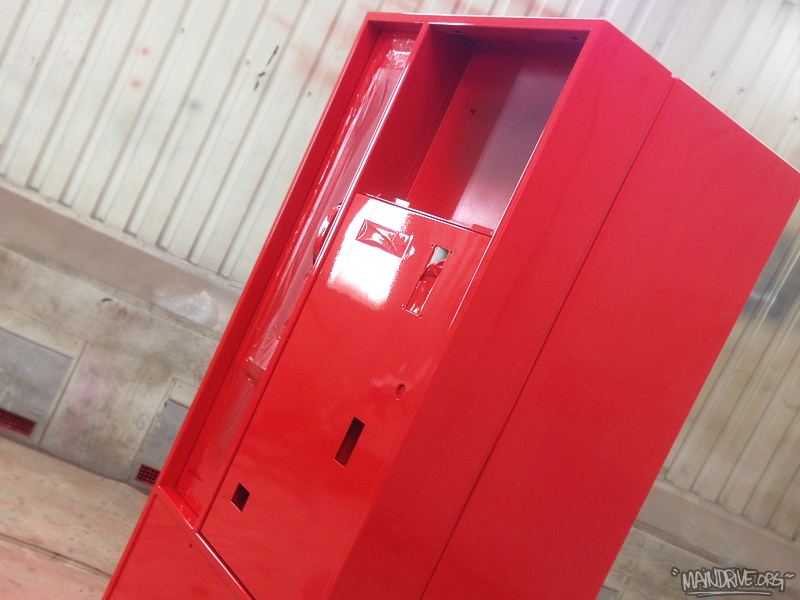
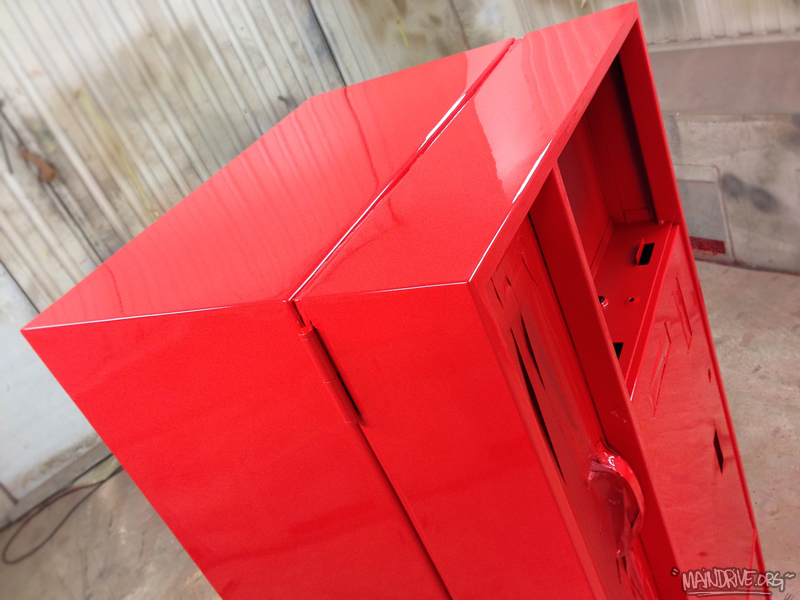
Today I started to sand down the black surfacer/primer so it was all smooth! Found some new dents that needed to be fixed also. And when it was all done it was time for shooting the Coca-Cola red paint. It was a hardtime to find the paintcode. Maybe it is trademarked. But the paintshop sells paint directly to the Coca-Cola company in Sweden so they had all the codes. It turned out great, looking really good. Next up is mounting back all hardware, trims and logos etc. The sign was in metal on the machine but Im going to convert it to a light up sign instead and using modern LED lightning. Also going to check up the compressor and all wirings before its ready to be put in service.
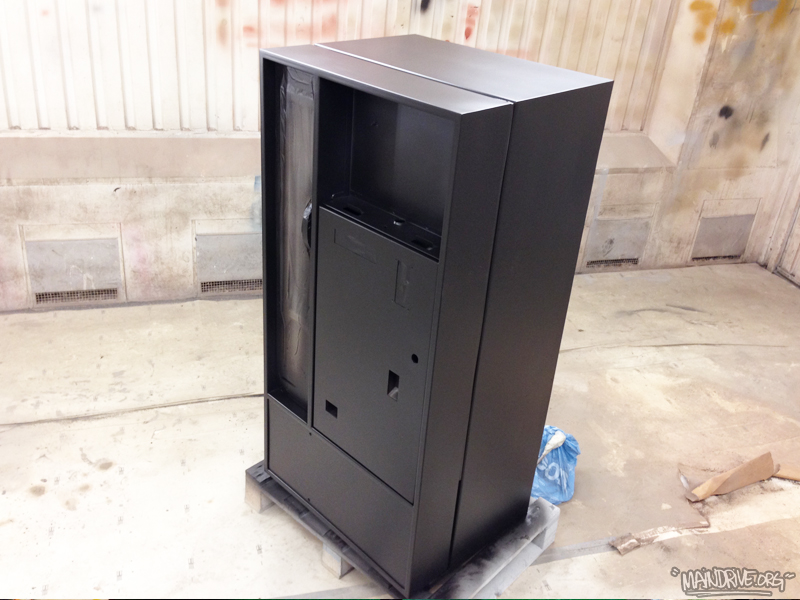
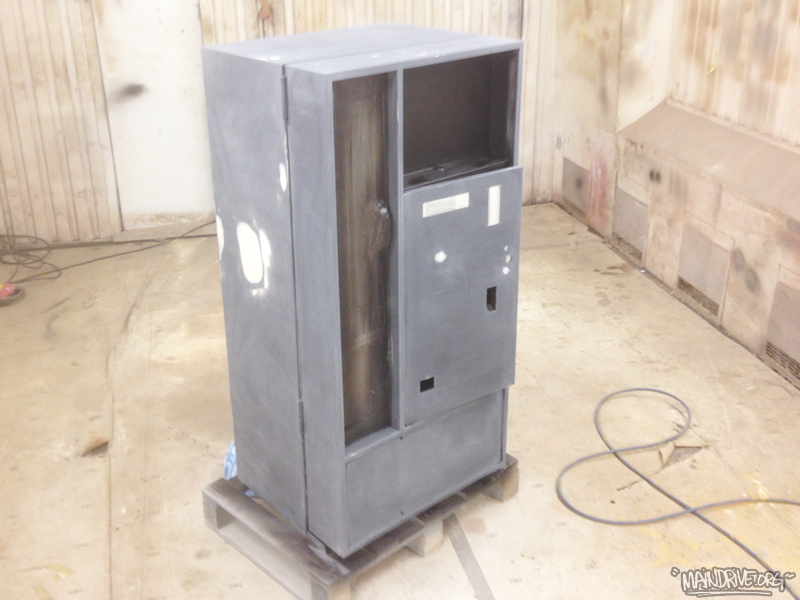

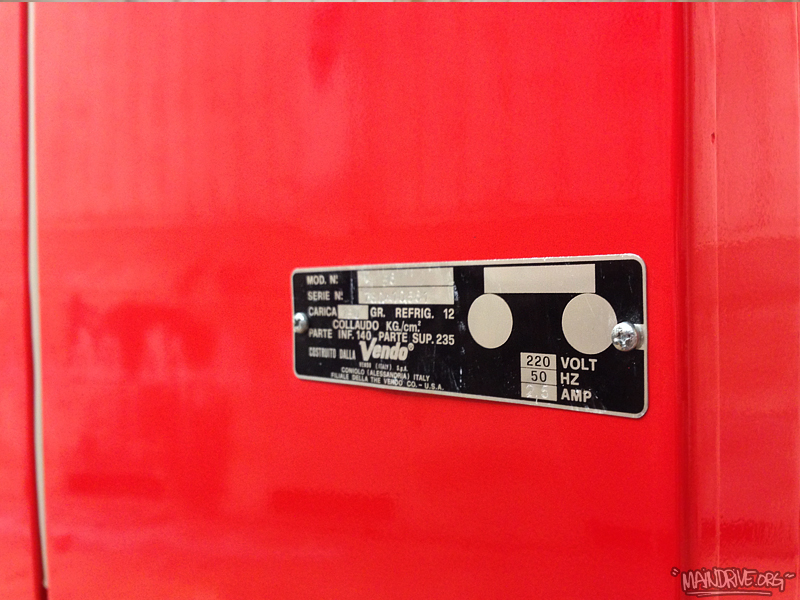
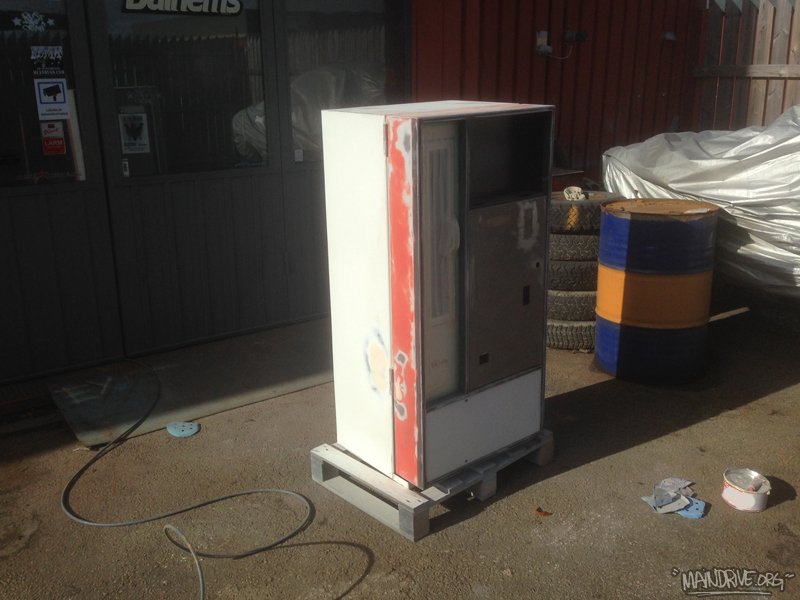
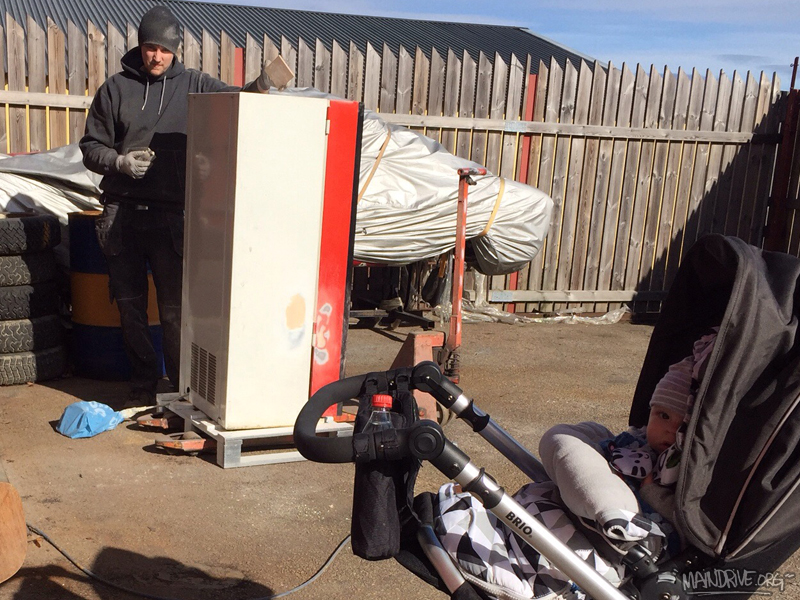
Started on the Vendo HA56 Coke Machine from the 1960s today. Got it stripped down on parts and then started on the bodywork. Painted two coats of surfacer/primer on it and it dryed fast in the warm sun outside the garage. I choosed a black basecoat to get that nice deep Coca-Cola red paint. The real and correct shade of red paint is ordered and also some parts from the US. More to come soon!

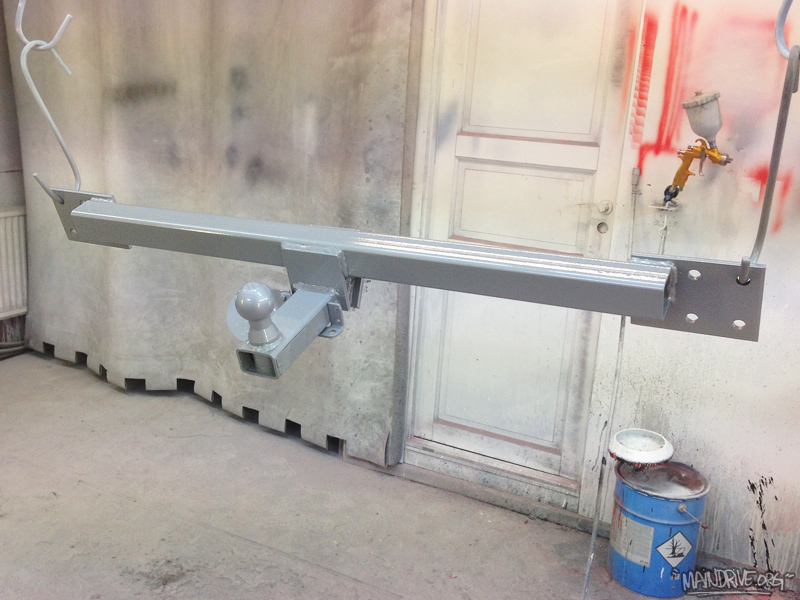
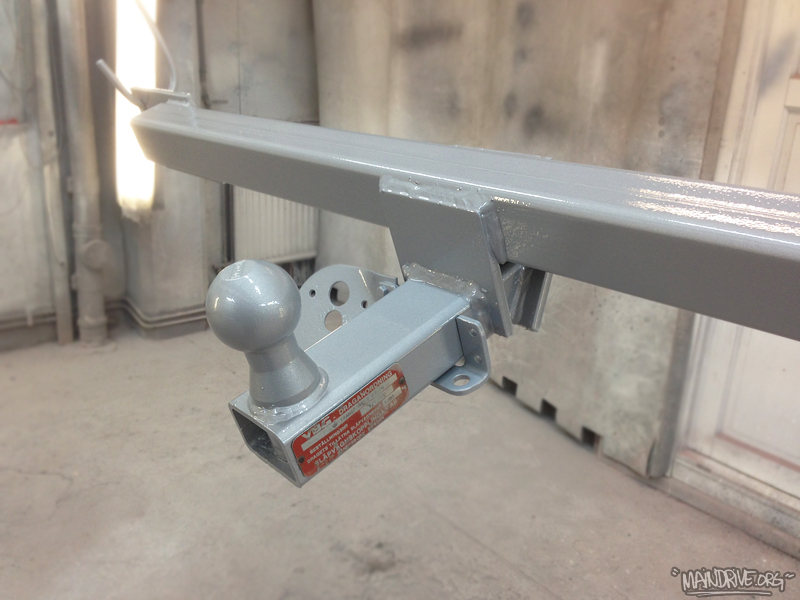
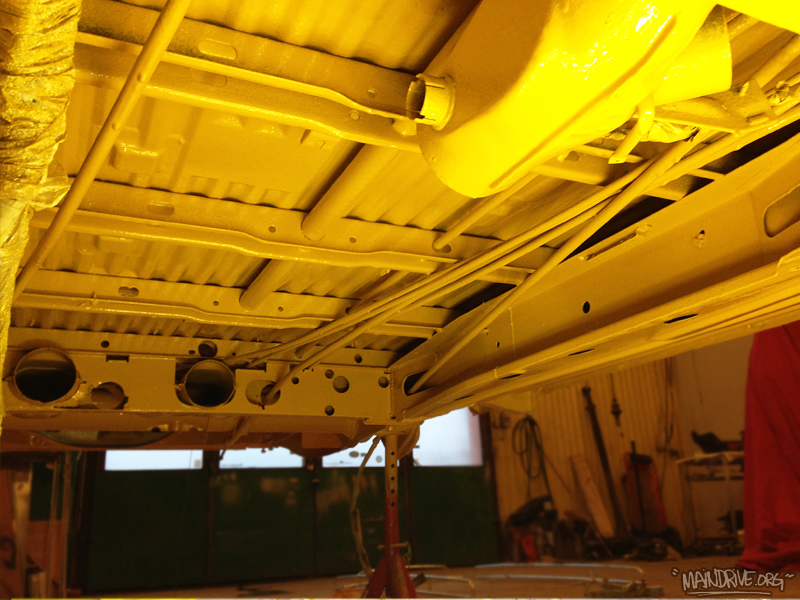
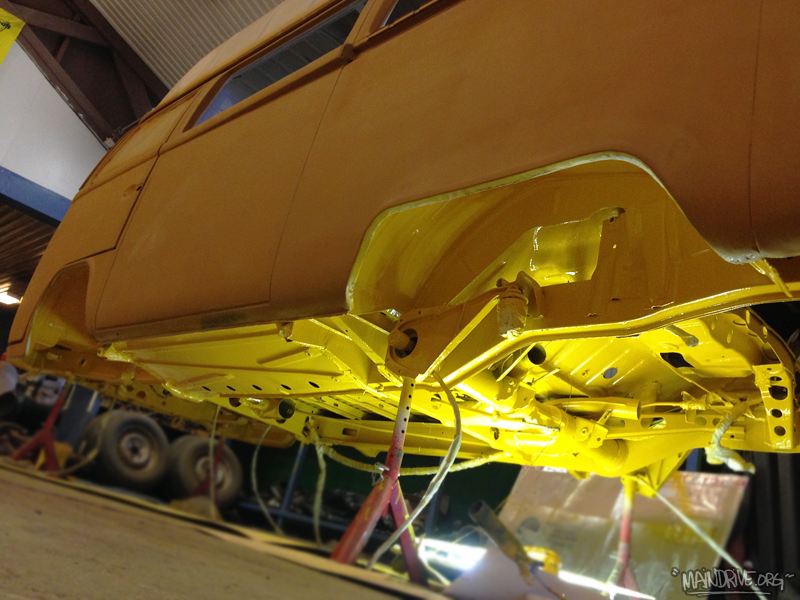
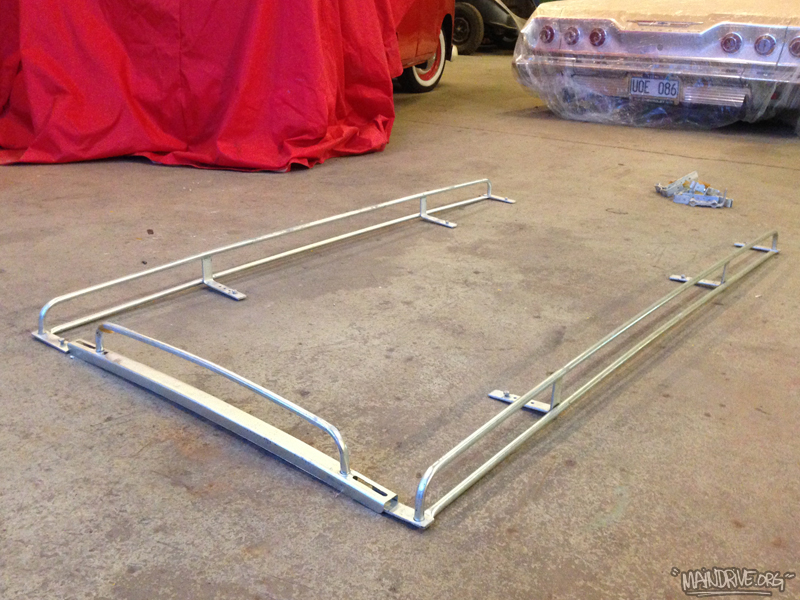
Some more progress made on the Highroof bus. More parts have been sandblasted and painted during the week. The chassi is finally painted too, after months of hard work. 2k polyurethane paint with elastic attribute. Good if you dont want to have stonechips in the paint later on. Cant wait to start bolting on all the new parts on the shiney chassi, no more dirty work! Also got a NOS 1960-70s roofrack that will get modified to fit on the highroof, perfect for the future solarpanels etc. Got a spare BA6 Eberspacher burner too, will be good to take parts from when I start the restoration of the original one. Here is the pics…
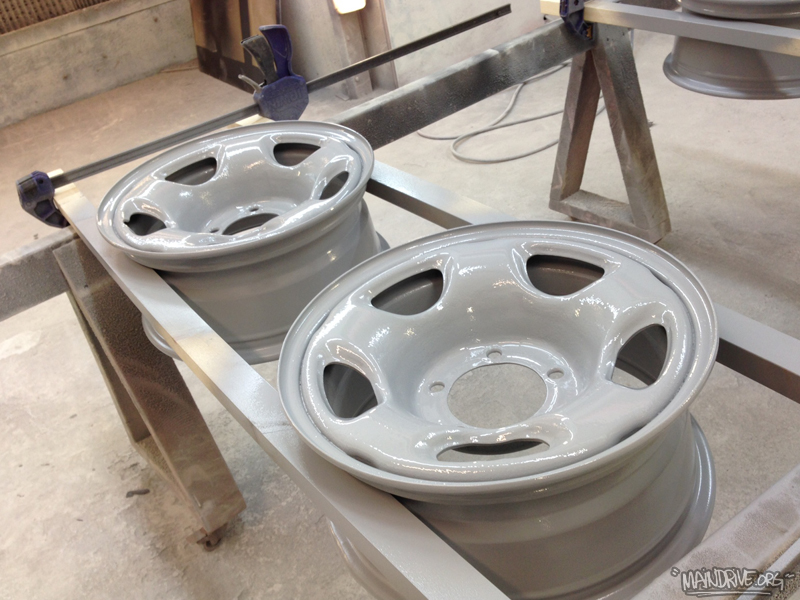
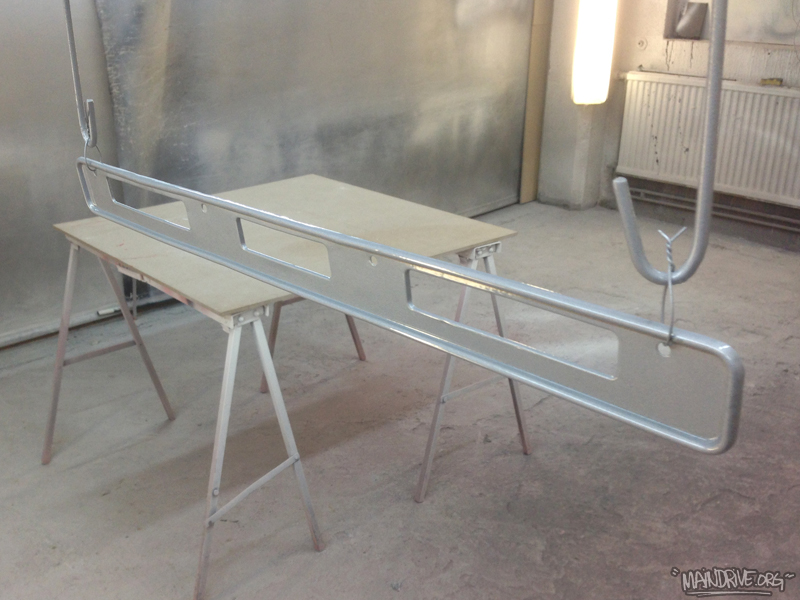
 Sandblasted and painted silver metallic. RAL9006.
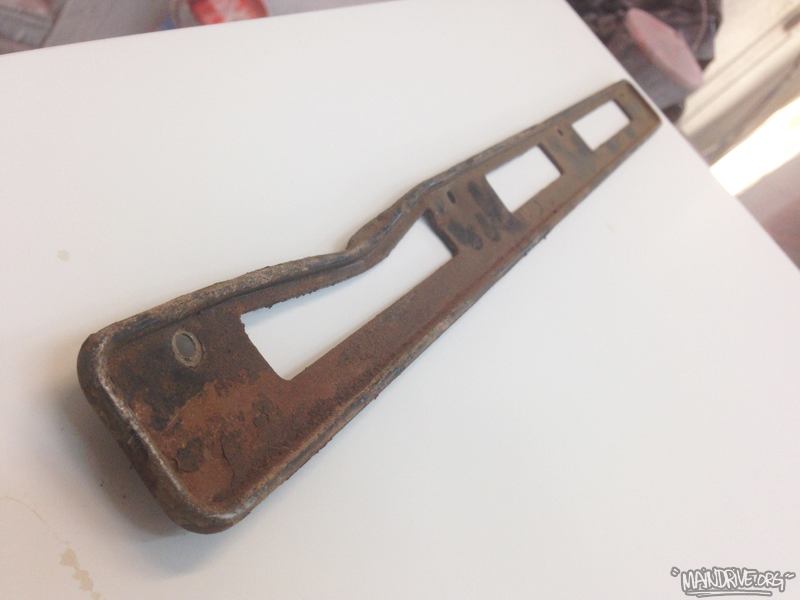 BEFORE.
 DURING. Straightned out and sandblasted baremetal
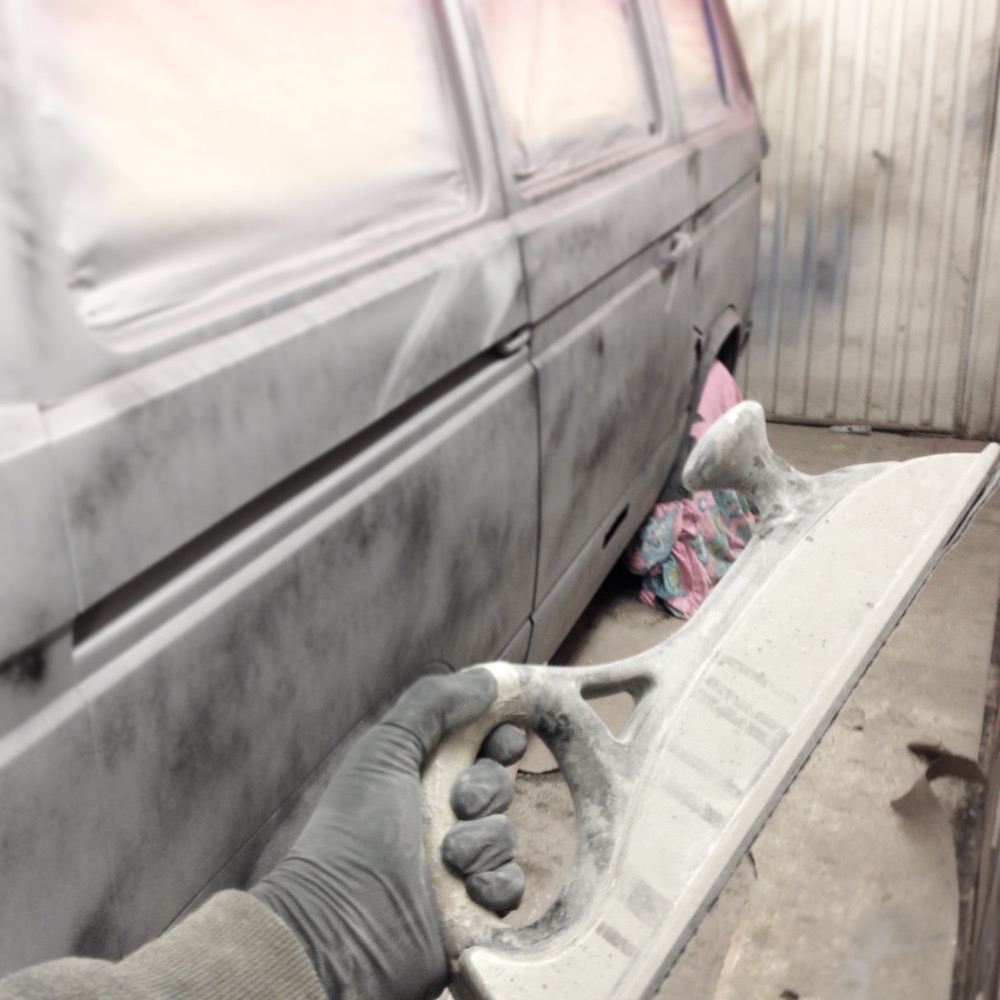
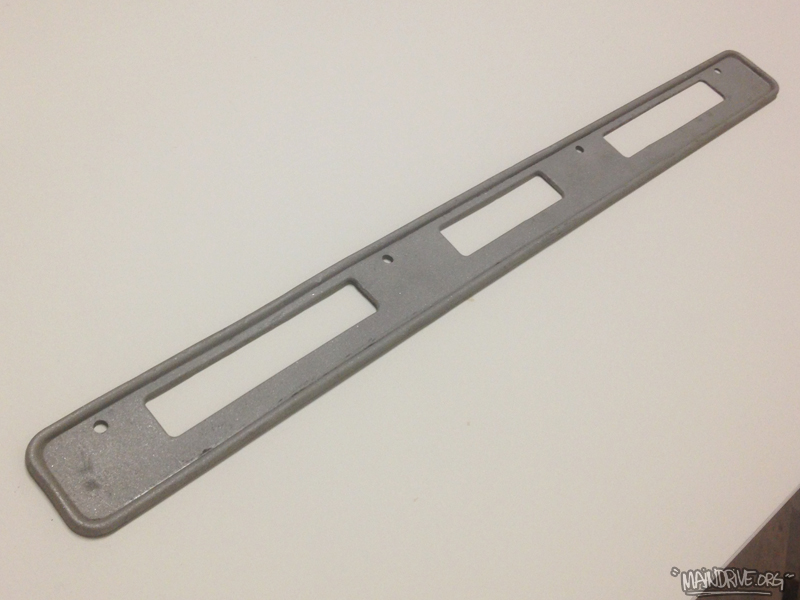
 AFTER. Painted, also made a custom mesh in stainless for it but forgot to take photo.
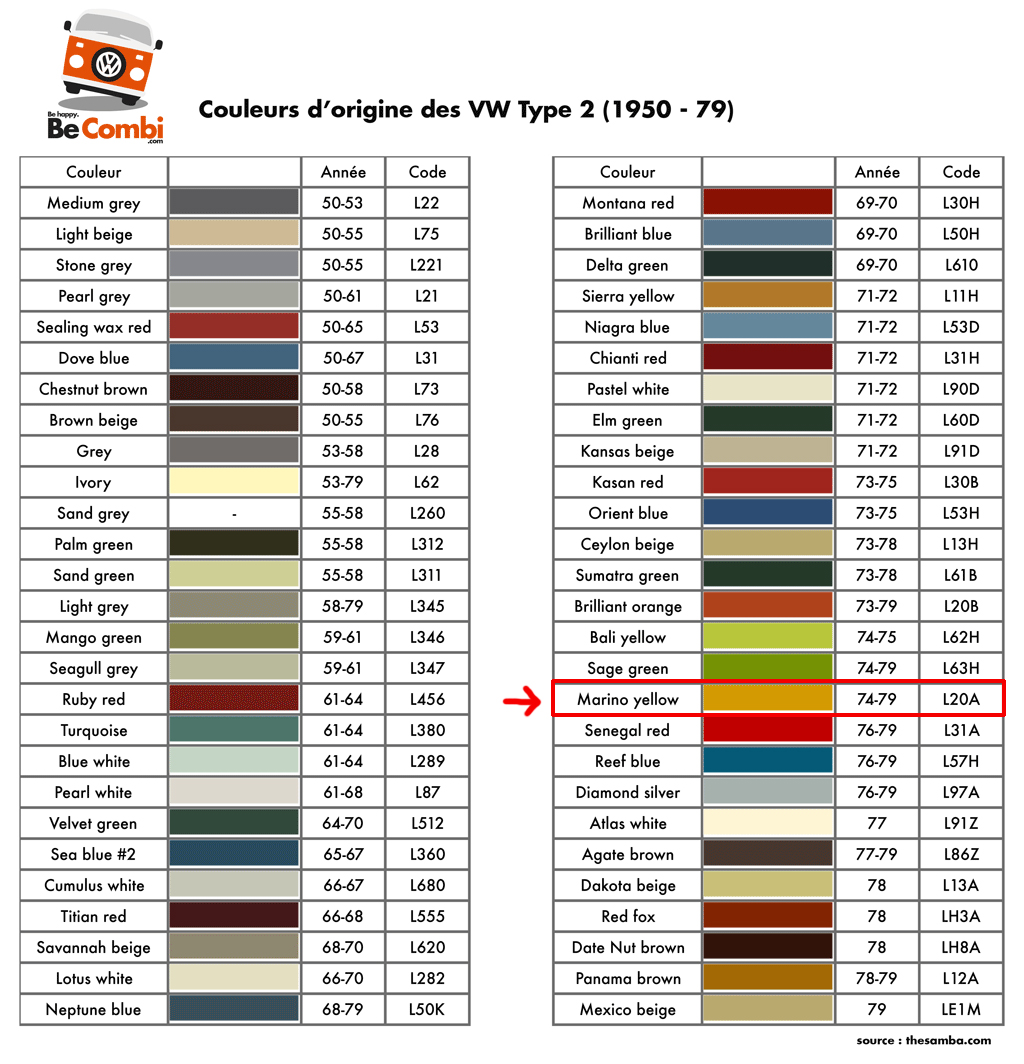
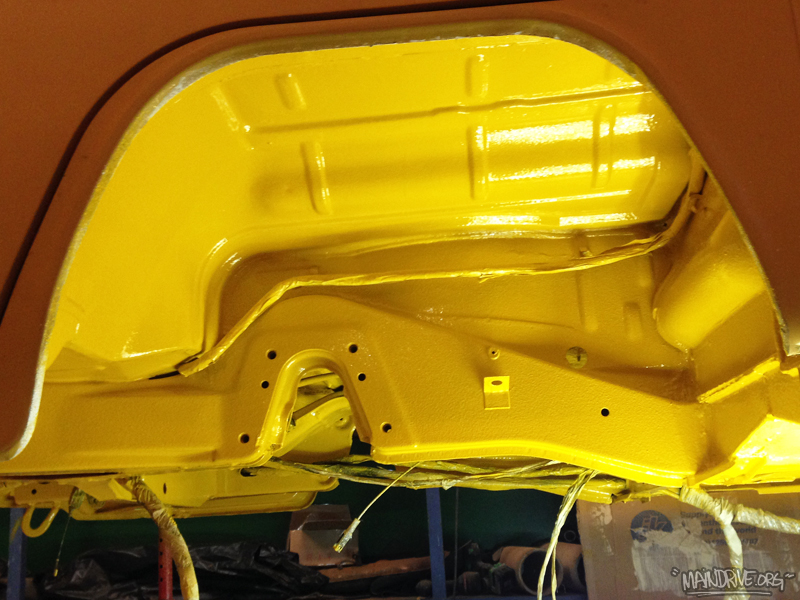
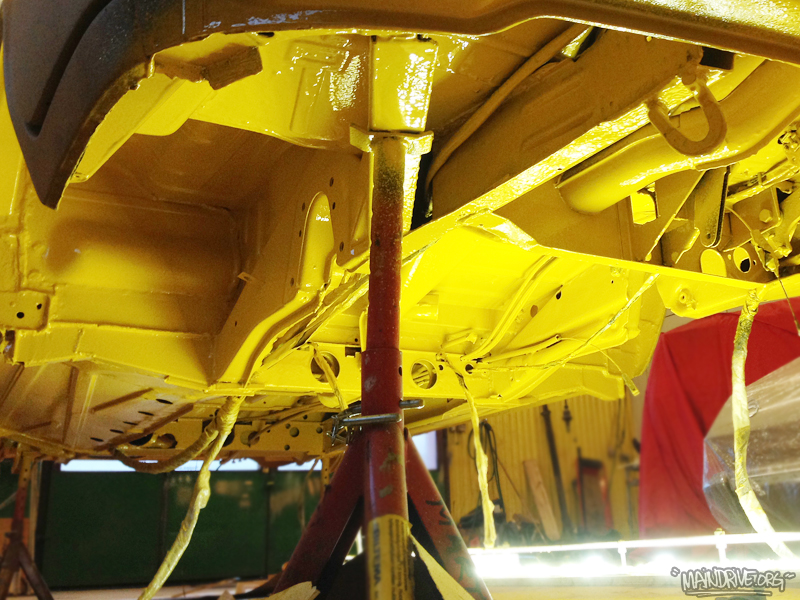
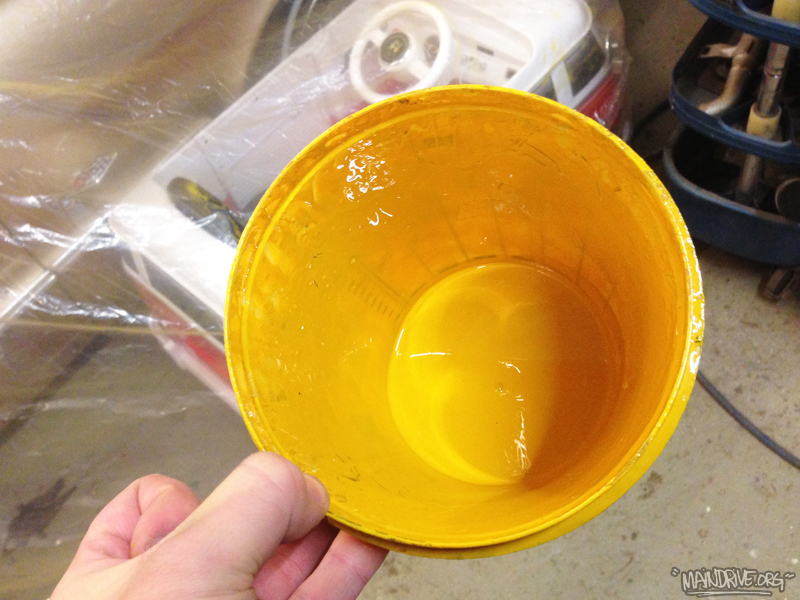 Marinoyellow VW L20A period correct.

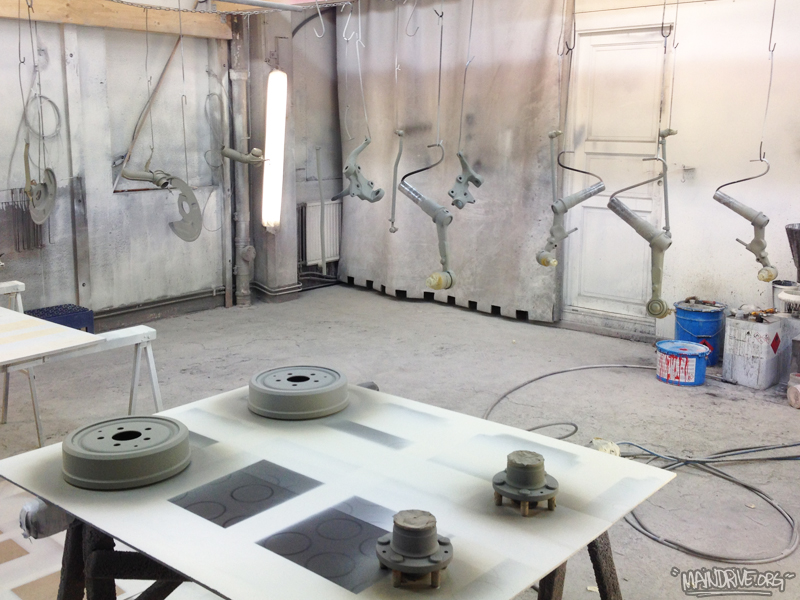
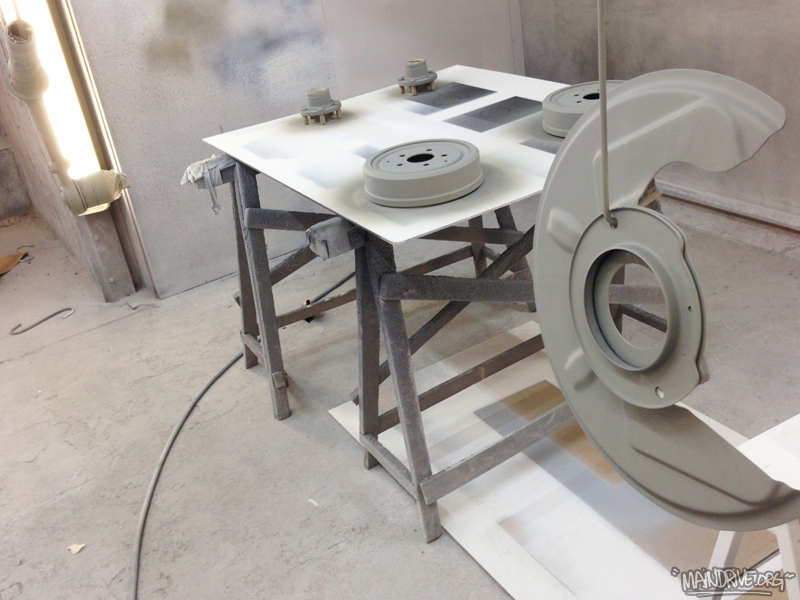
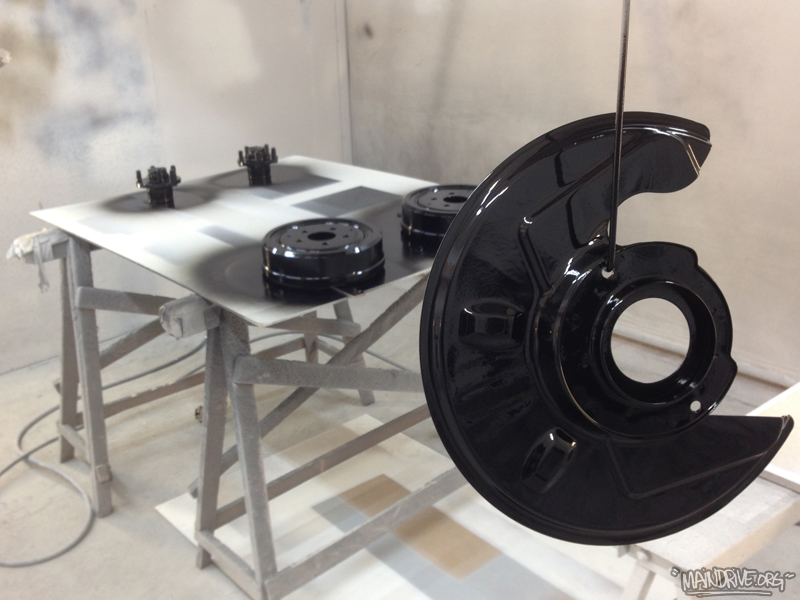
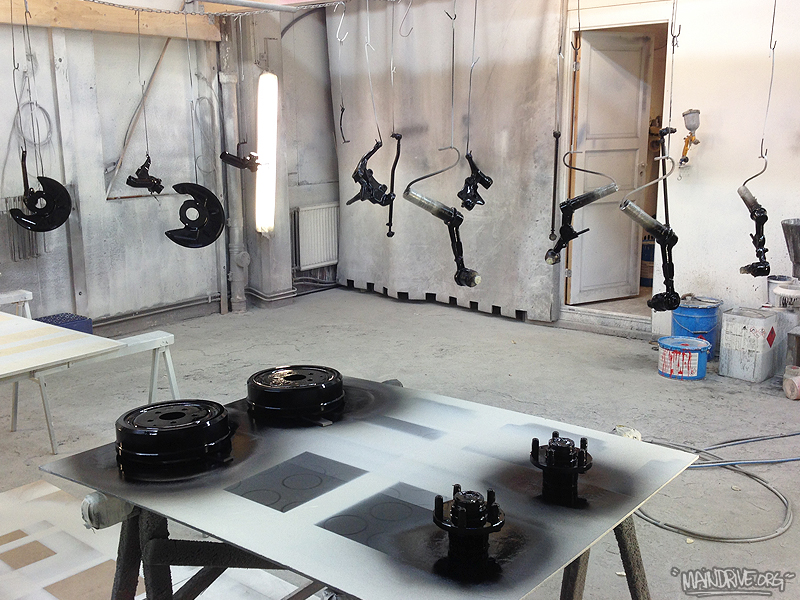
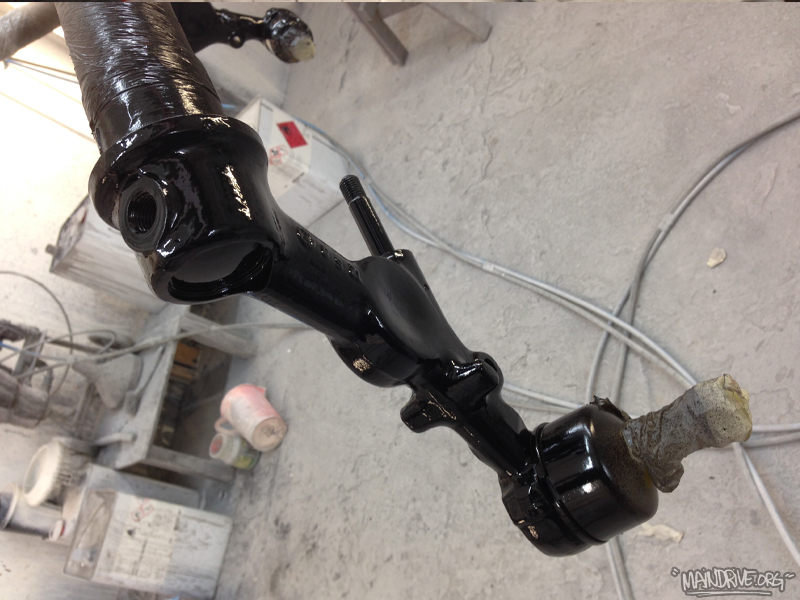
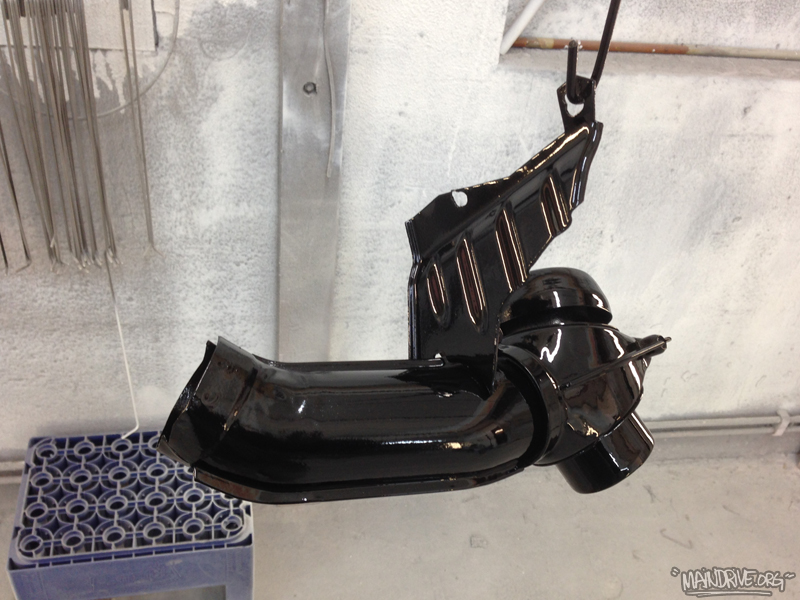
Painting tons of chassi parts in Deepblack paint at the moment to the Highroof bus!
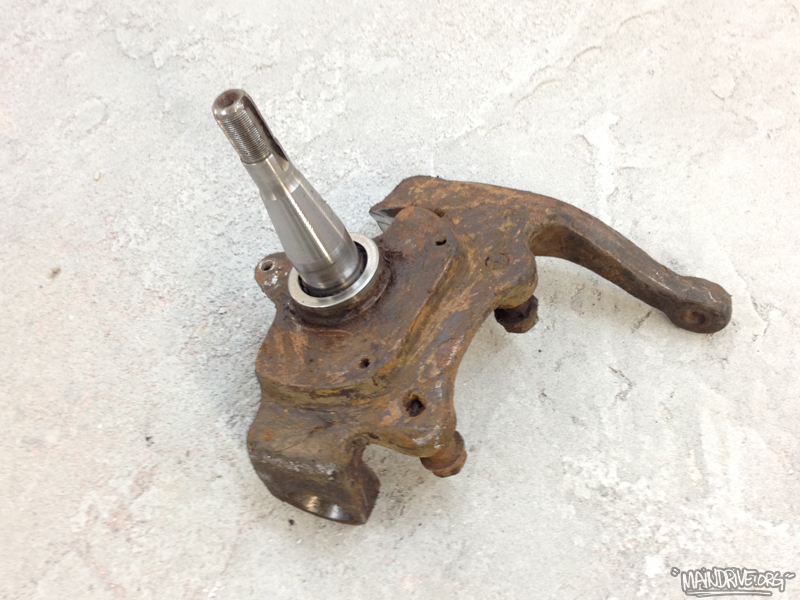
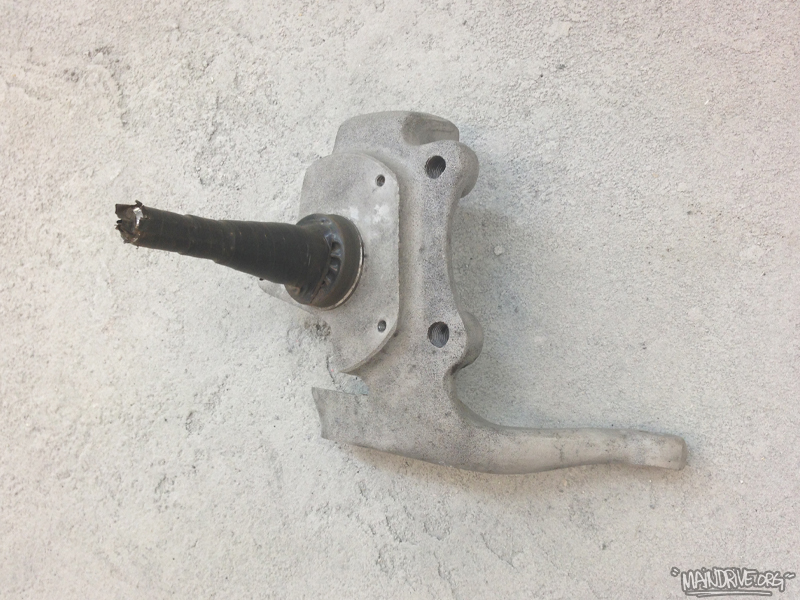
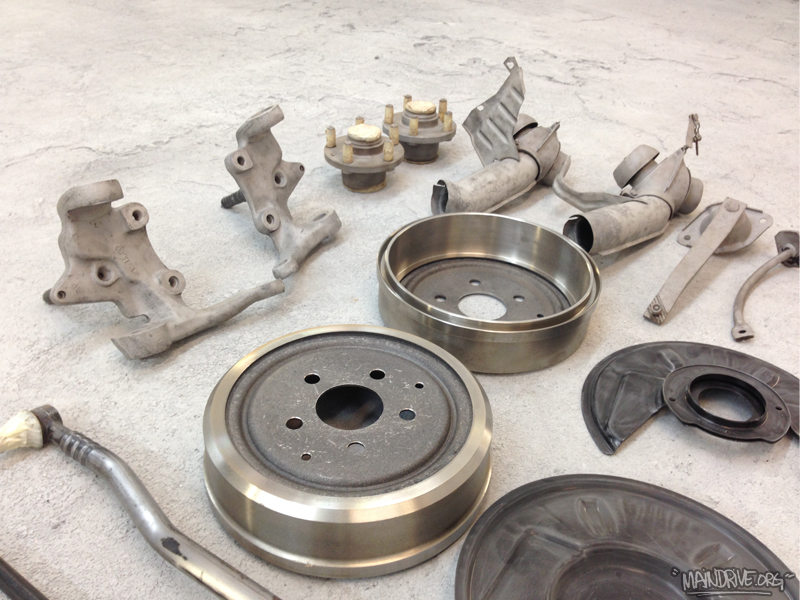
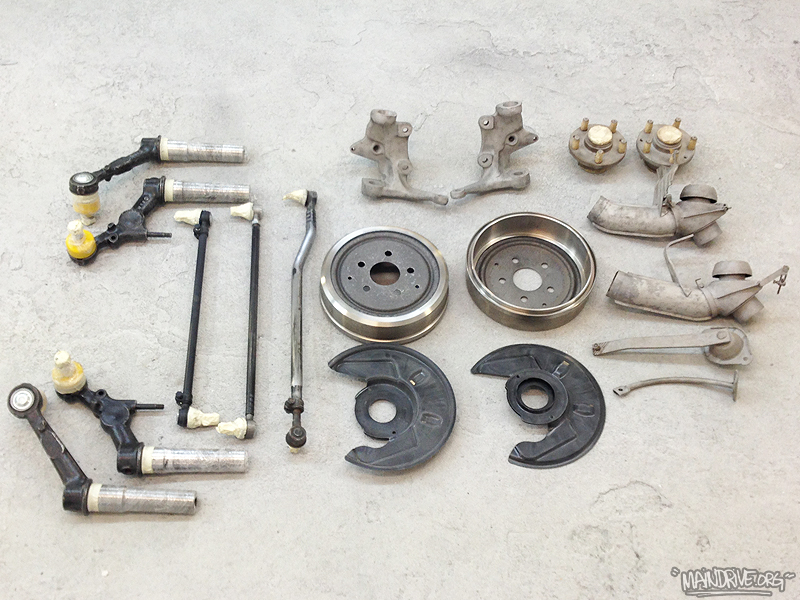
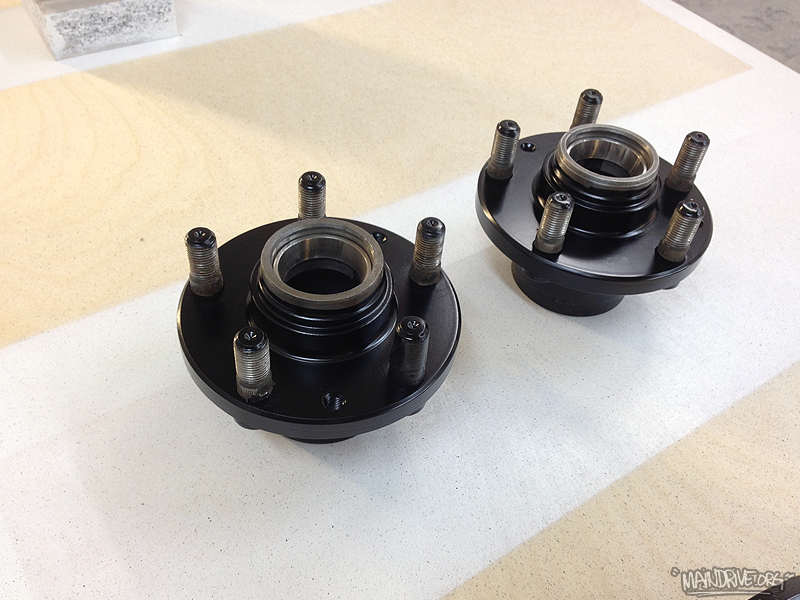
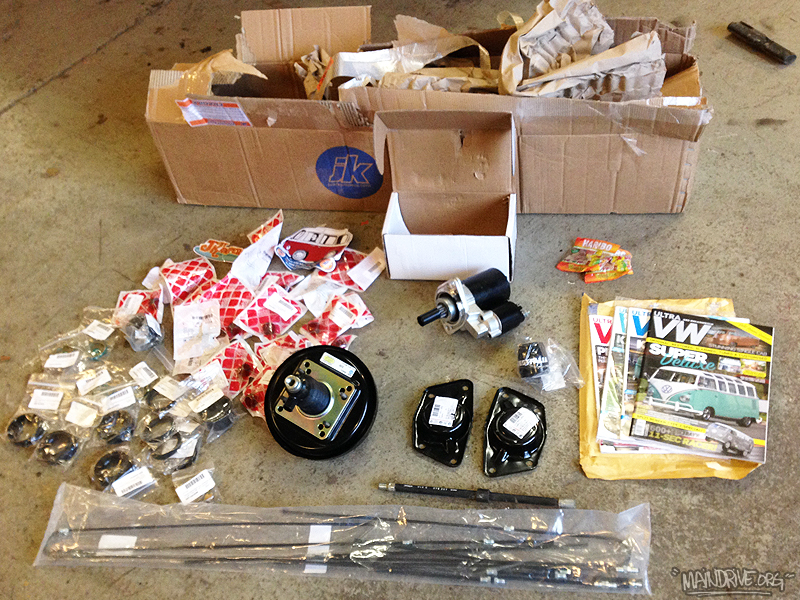
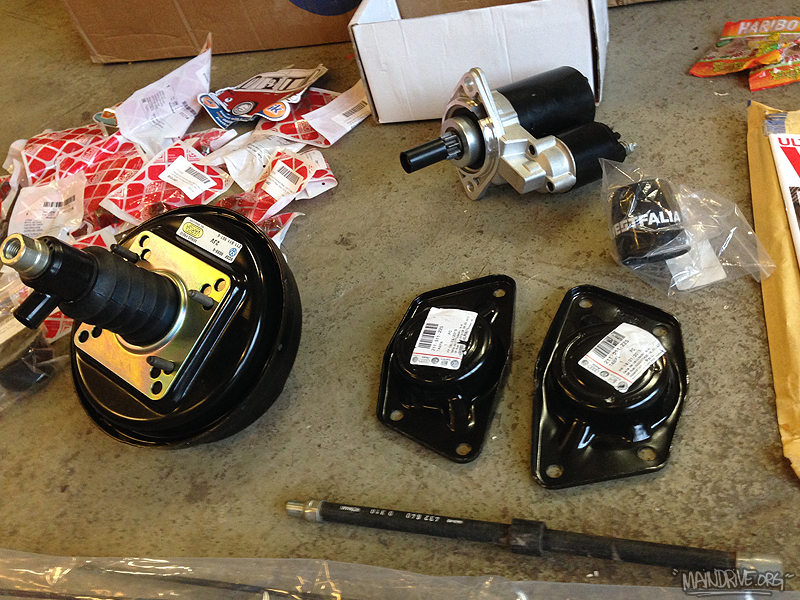
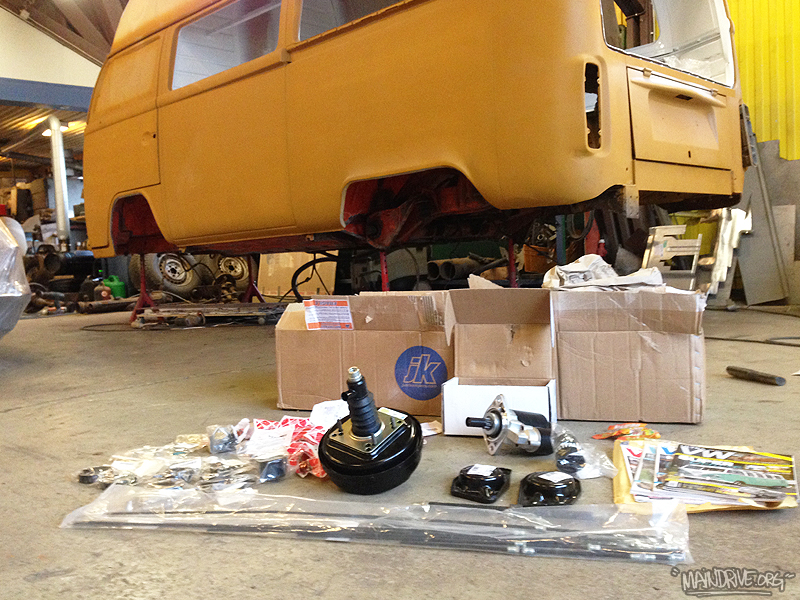
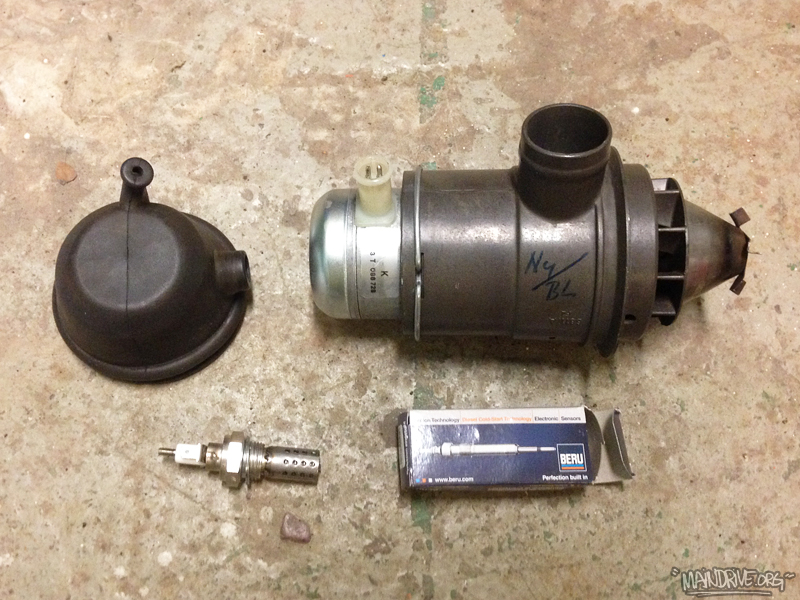
Have sandblasted alot of parts in the new cabinet, so nice to have. No need for waiting on the mediablasting company any more. Just put it in the box and go! Got a box full of new parts from Justkampers.com yesterday too. Brakeservo, starter, all brakepipes, front beam seals, 4 torsionarms with new pressed in balljoints, transmission gaskets and seals etc. Also scored a NOS Eberspächer combustion/airpump for the BA6 heater. Found a supplier in the UK of new BERU glowplugs for BA6, the GZE201 plug replaces the old (original) BZE22. Have anyone tried the new GZE201? Let me know how it worked: info@maindrive.org
Have scraped and cleaned all of the chassi during the last 2 weeks. Hope to push on further with the chassi this week and weekend and get it primered, seam sealed, undercoated and painted in body color. After that the chassi is ready to get all the new parts bolted on! More coming soon…


#maindrivegarage on Insta
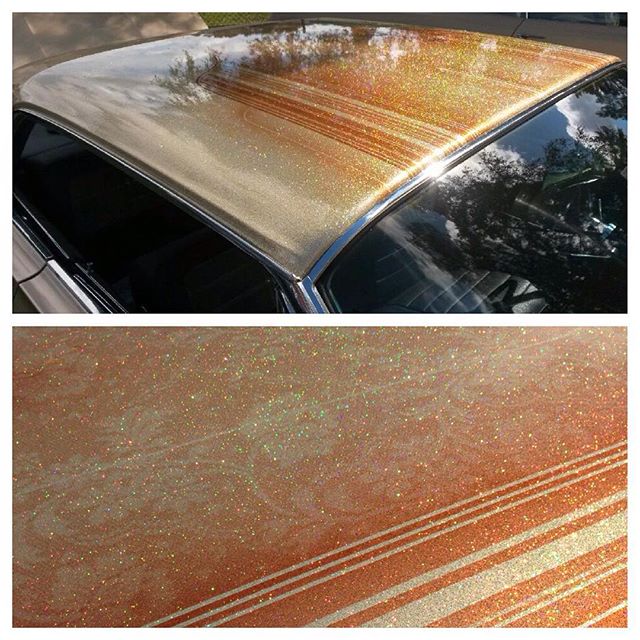
Need anything painted in metalflake or candy? Send an e-mail to: info@maindrive.org


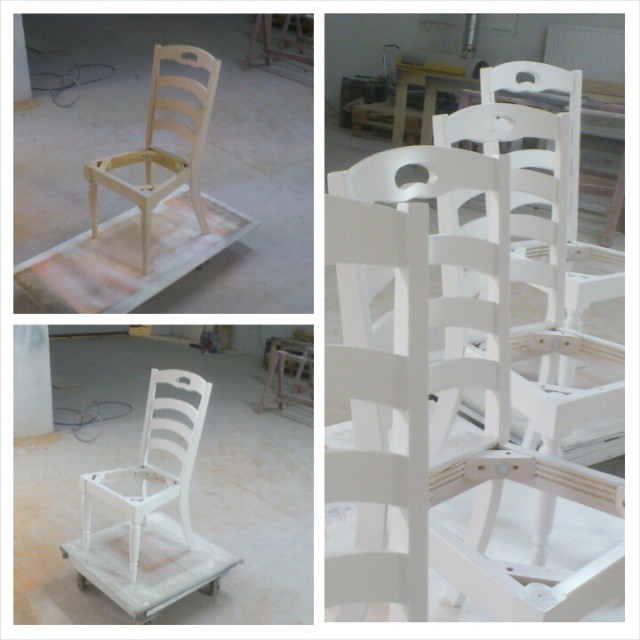
Någon som behöver stolar, bord, kök eller något annat lackerat? info@maindrive.org