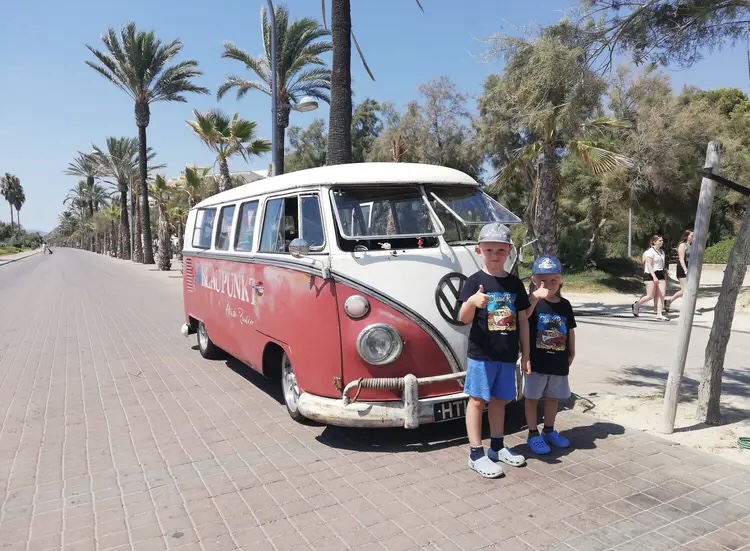
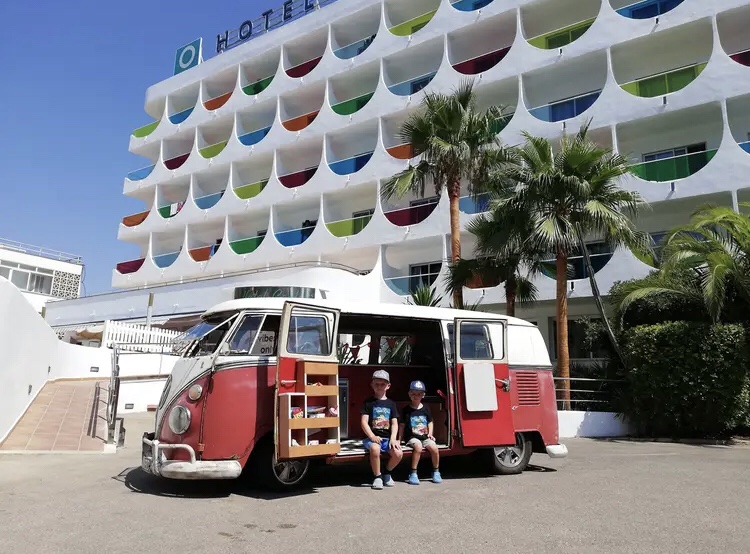
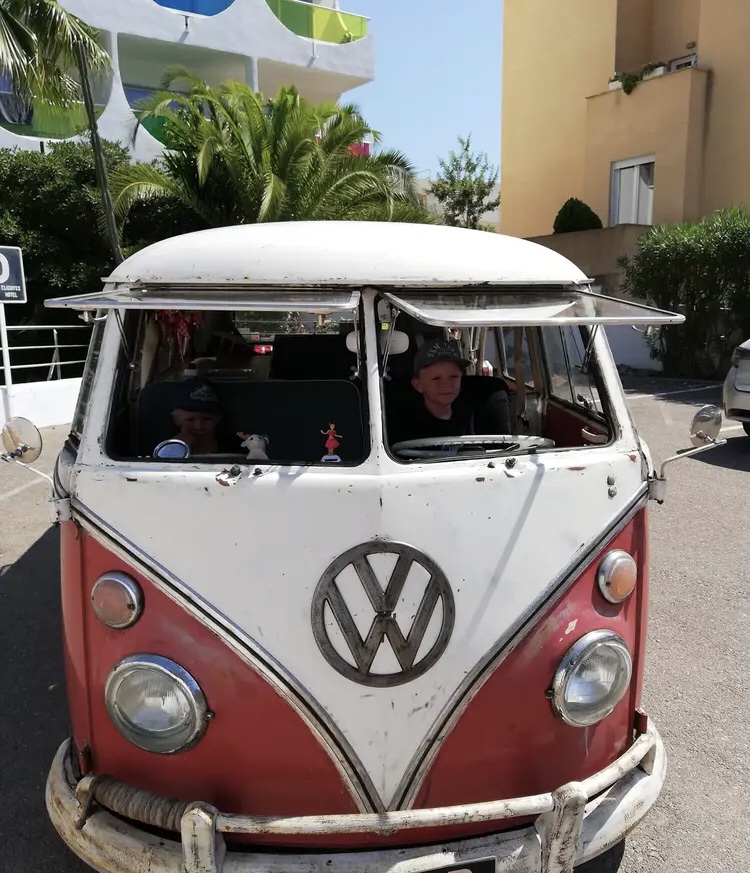
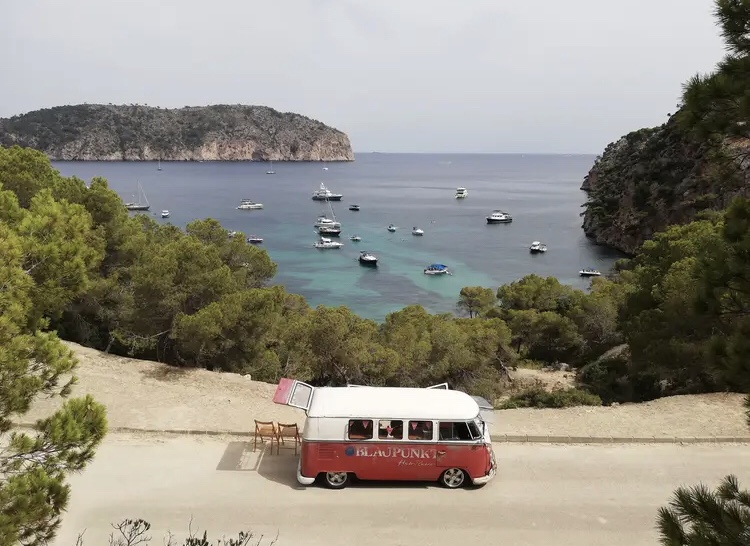
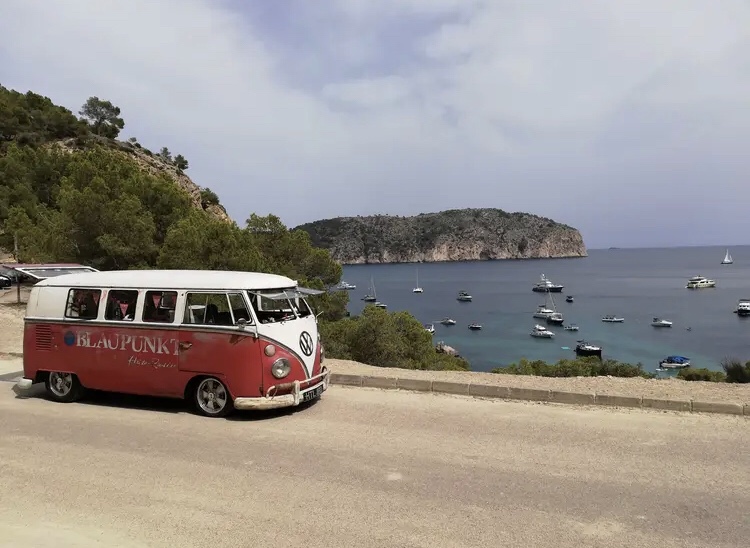
I found and saved this bus here in Sweden 15 years ago. It now lives with its new owner in Mallorca. Here is my boys on vacation in La Palma and got to see the bus and take a cruise. Thanks to Noel Dyne!
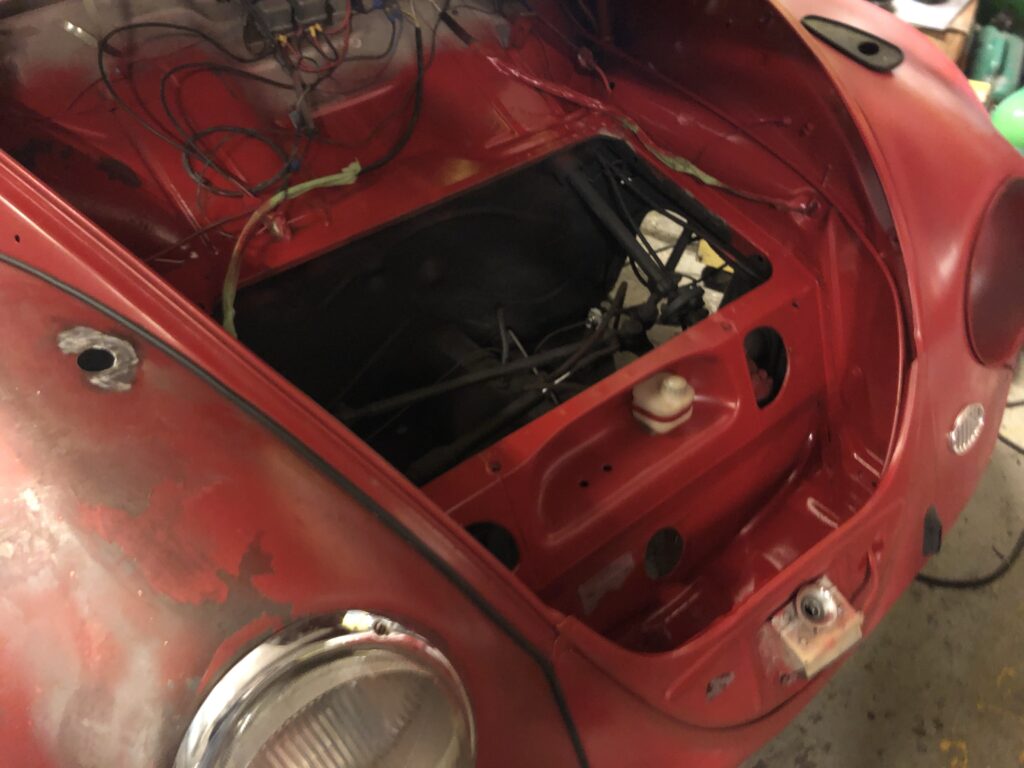
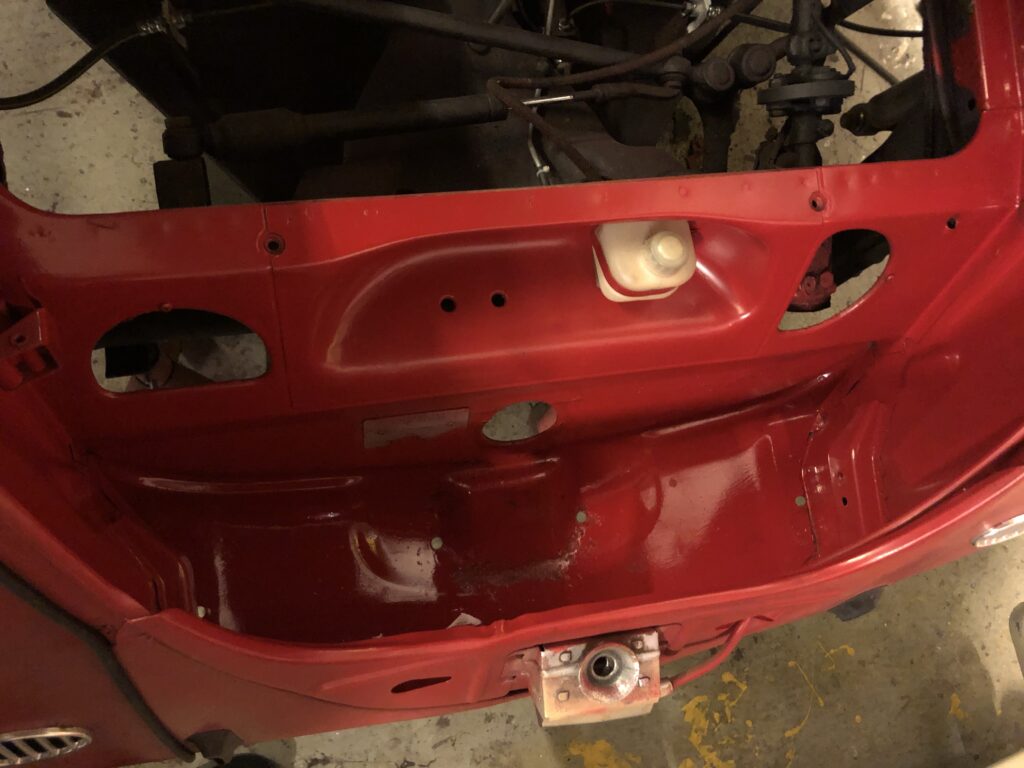
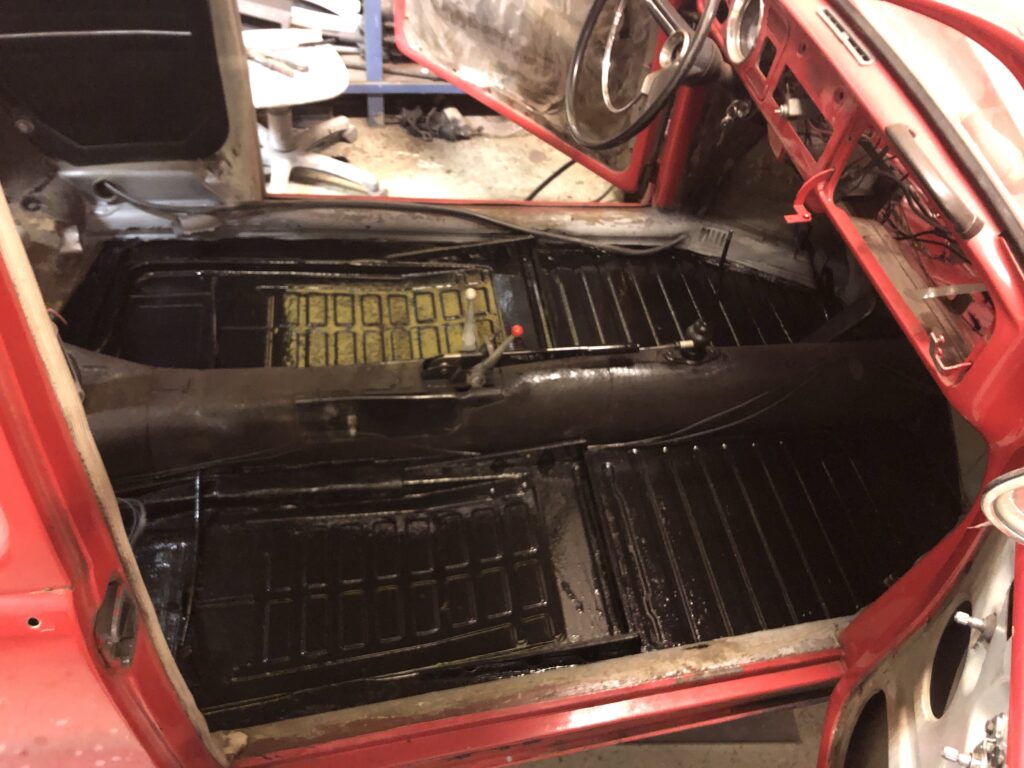
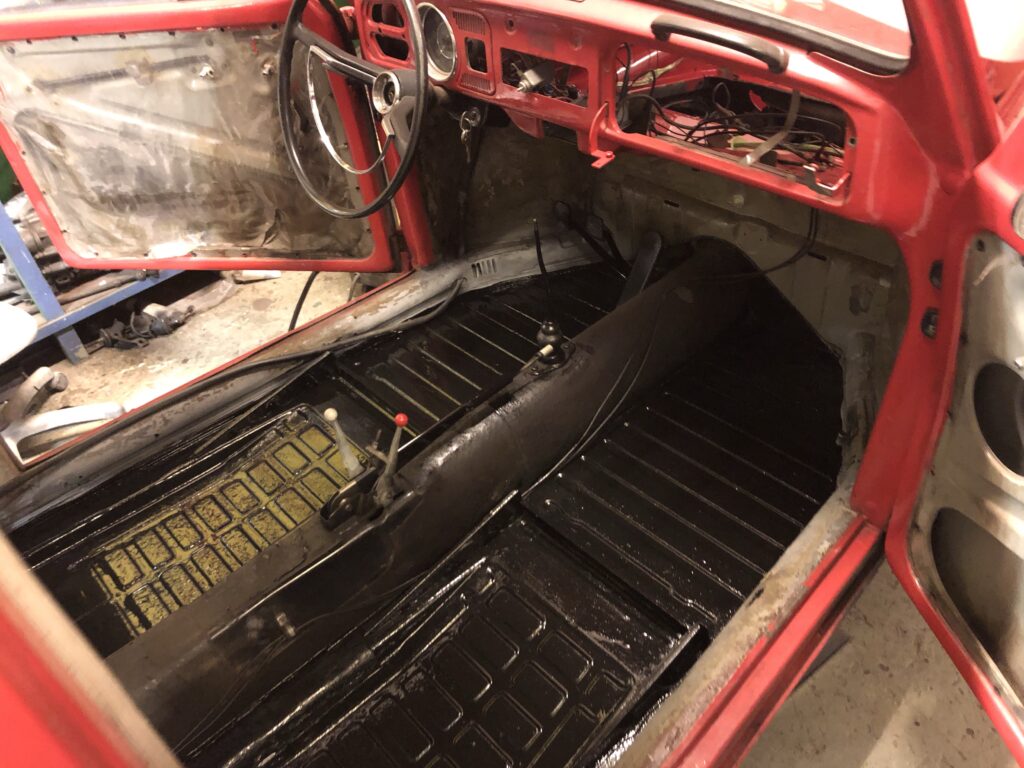
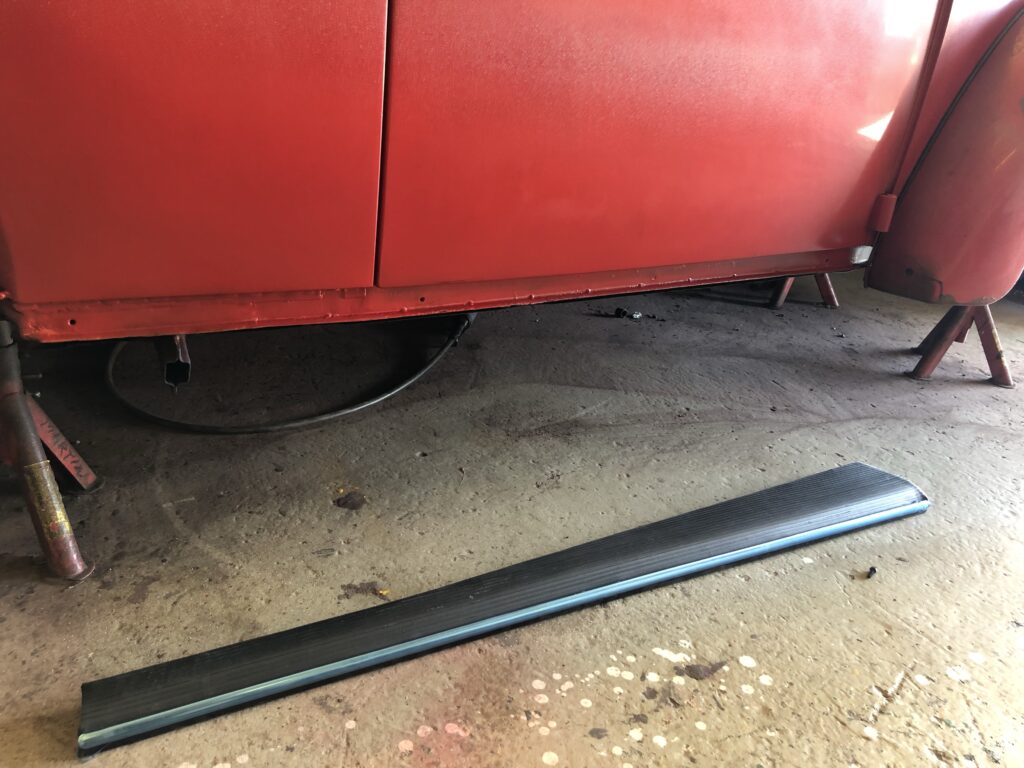
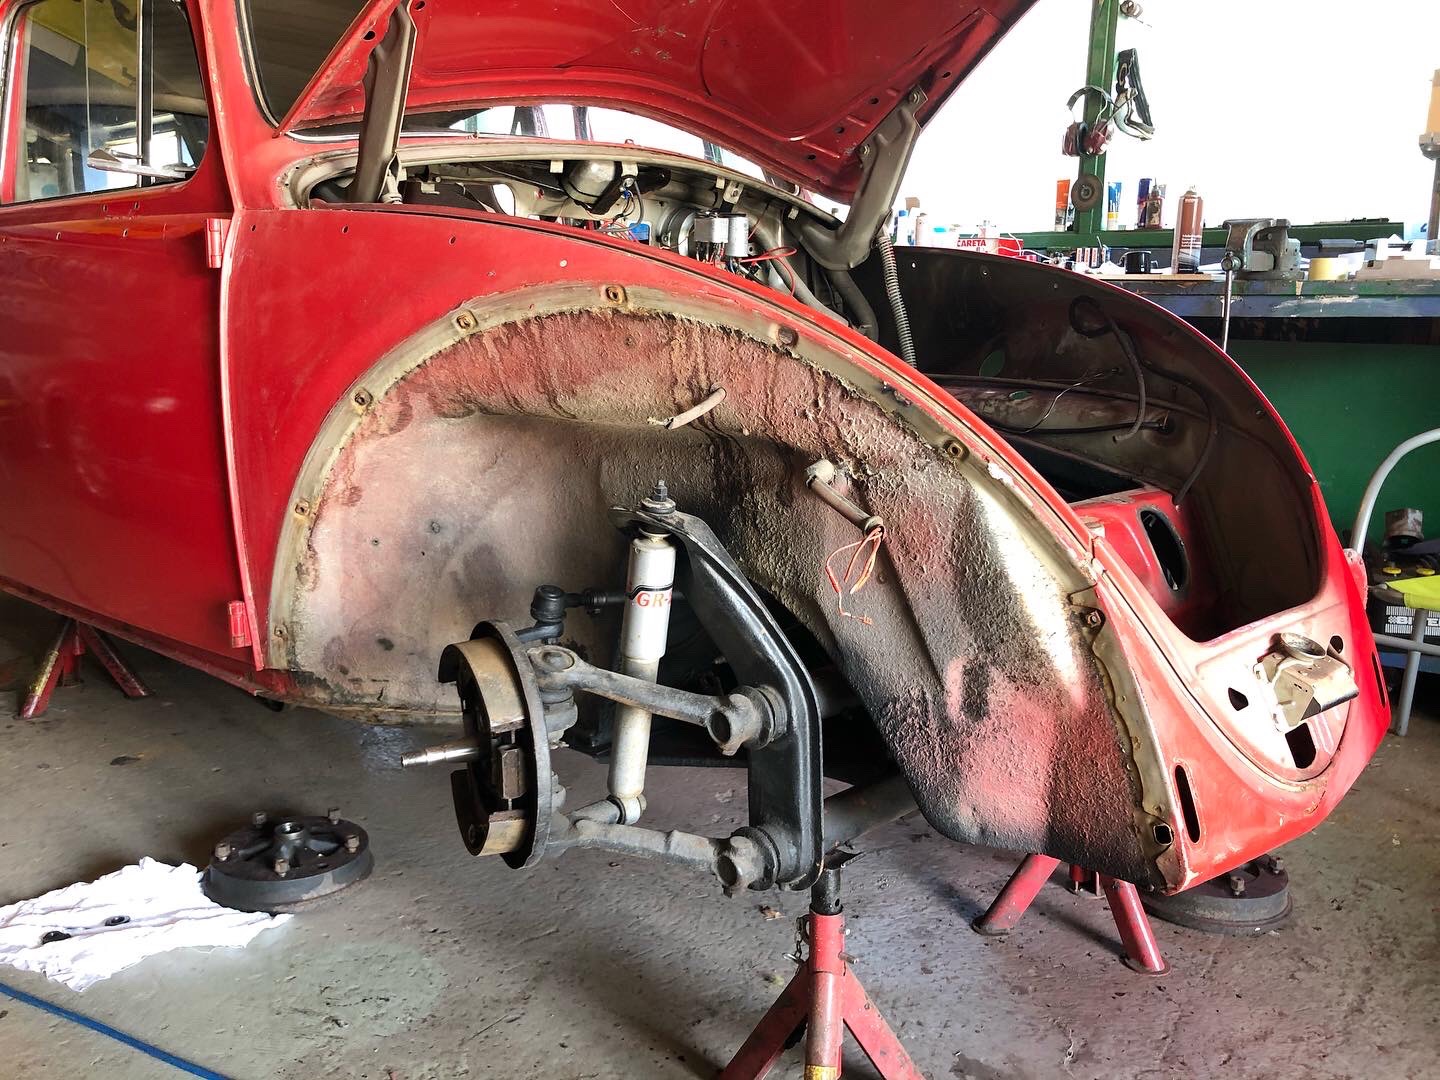
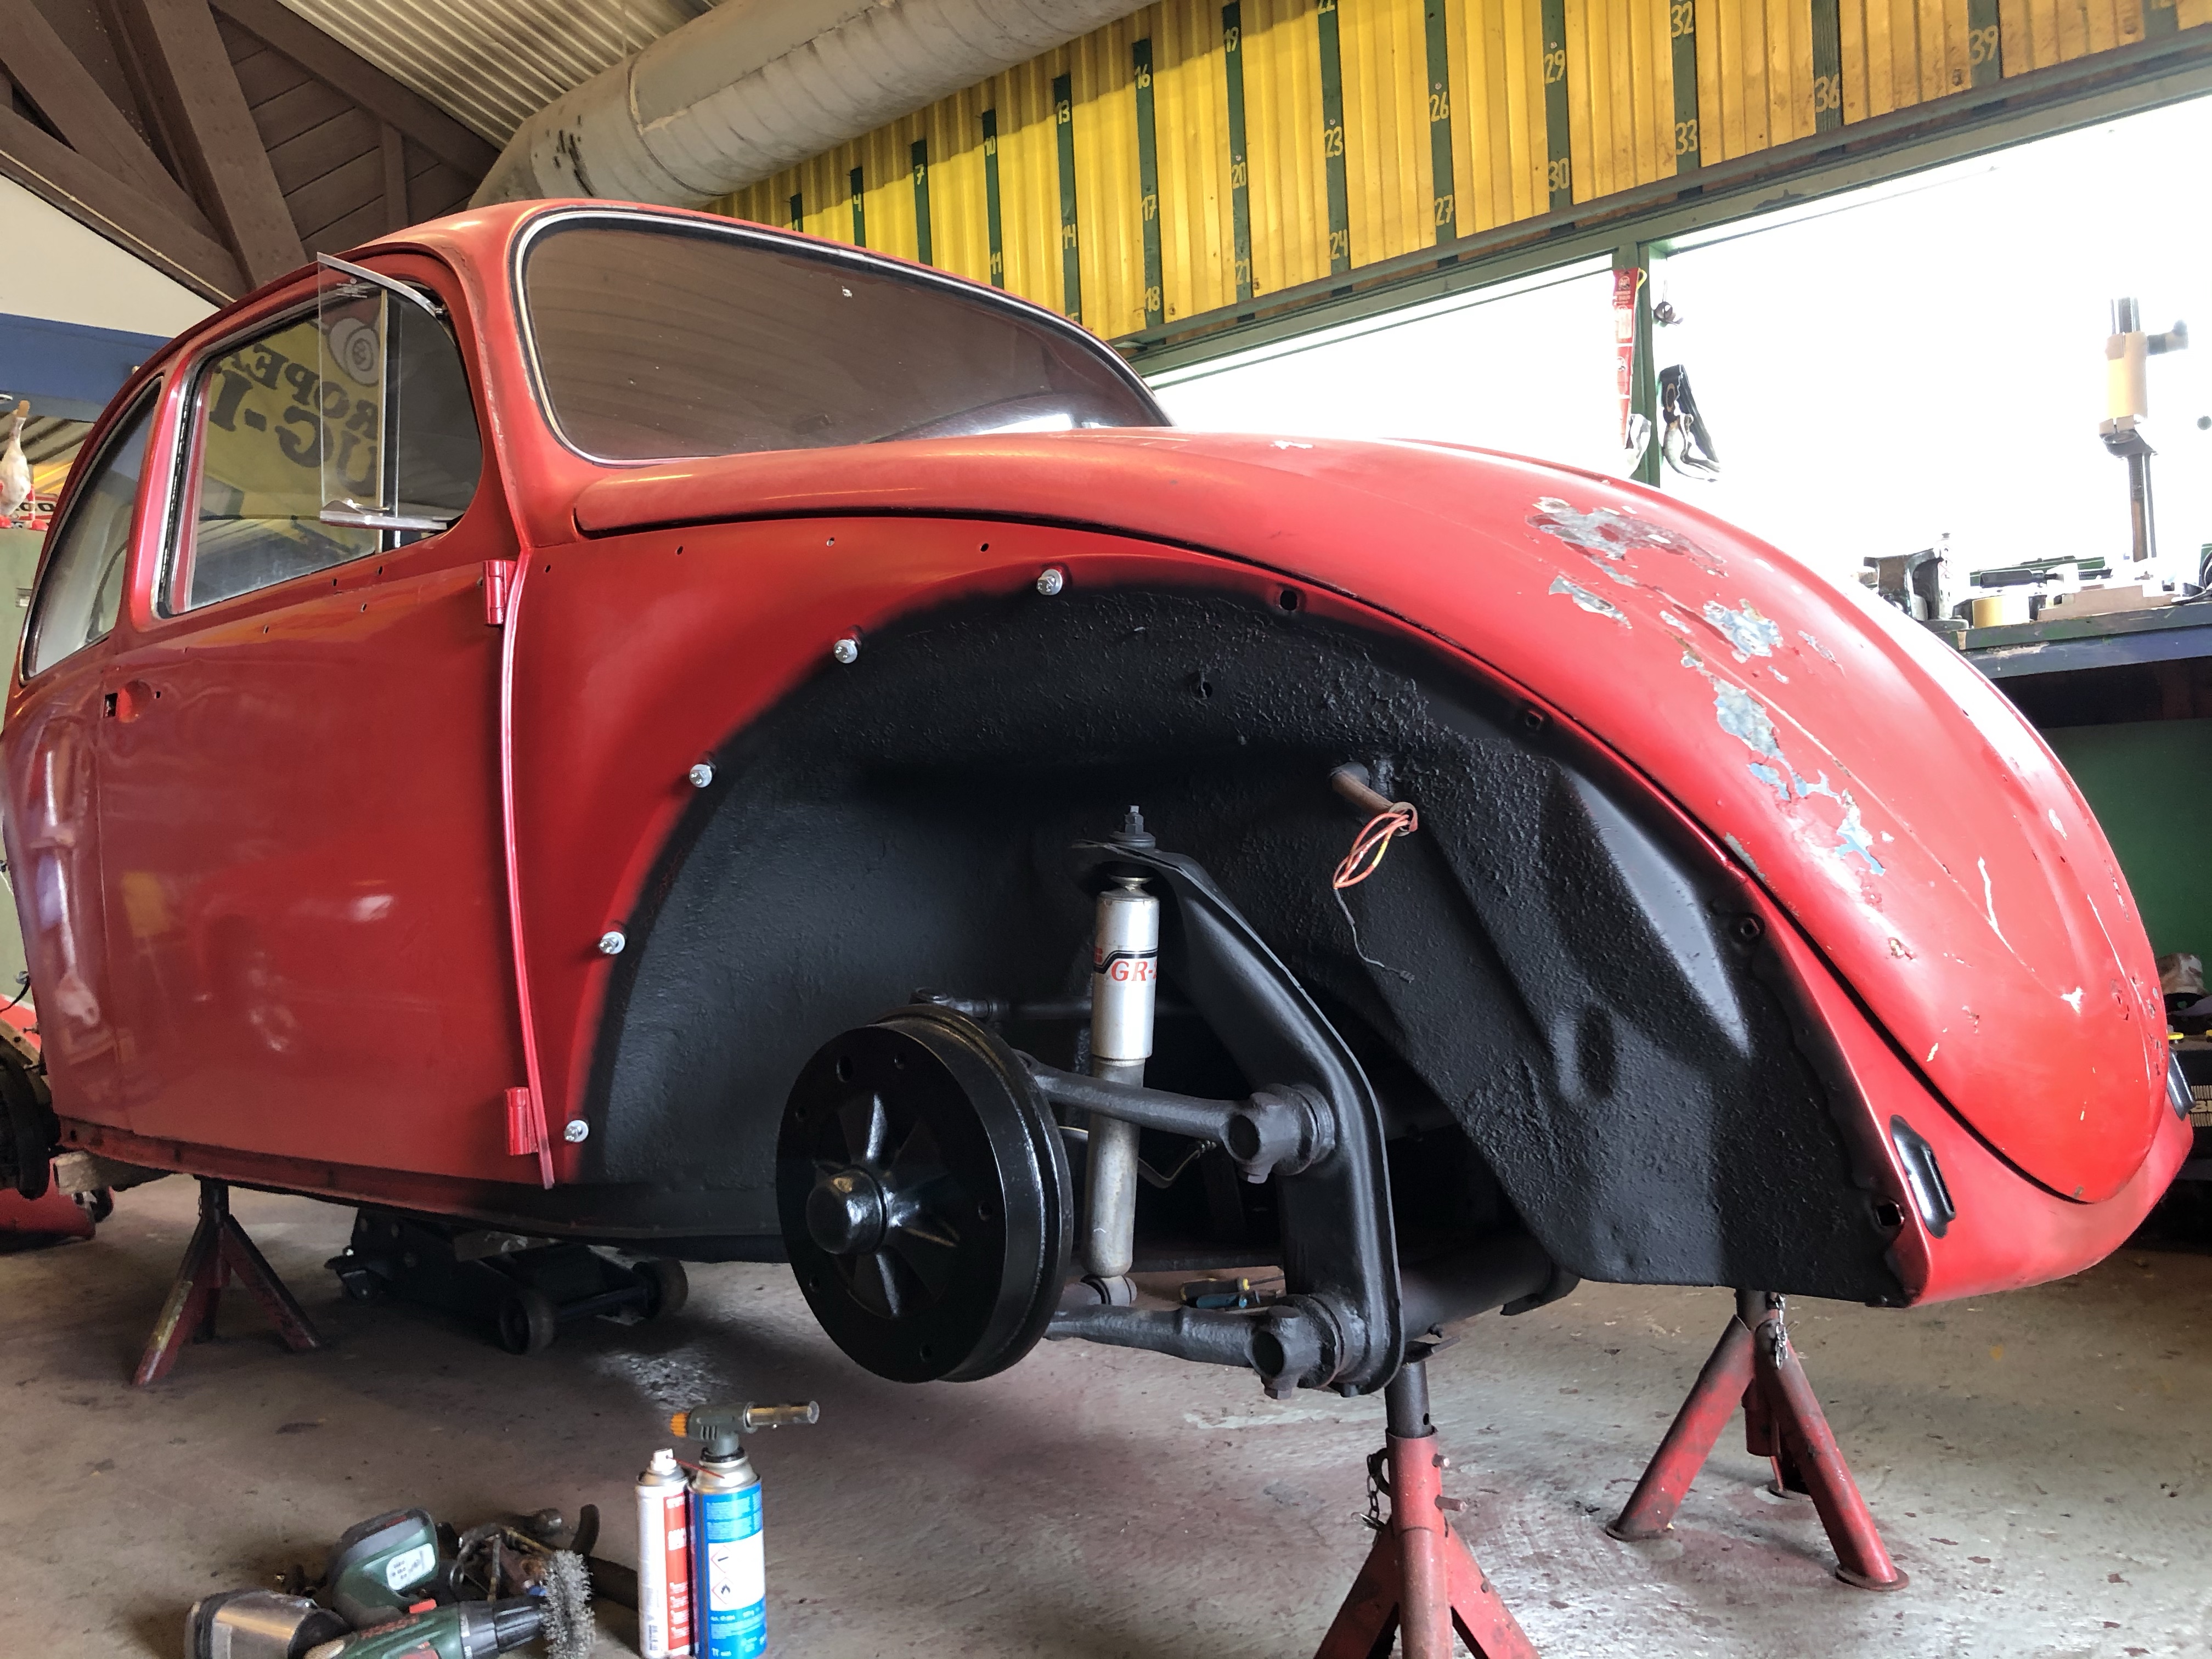
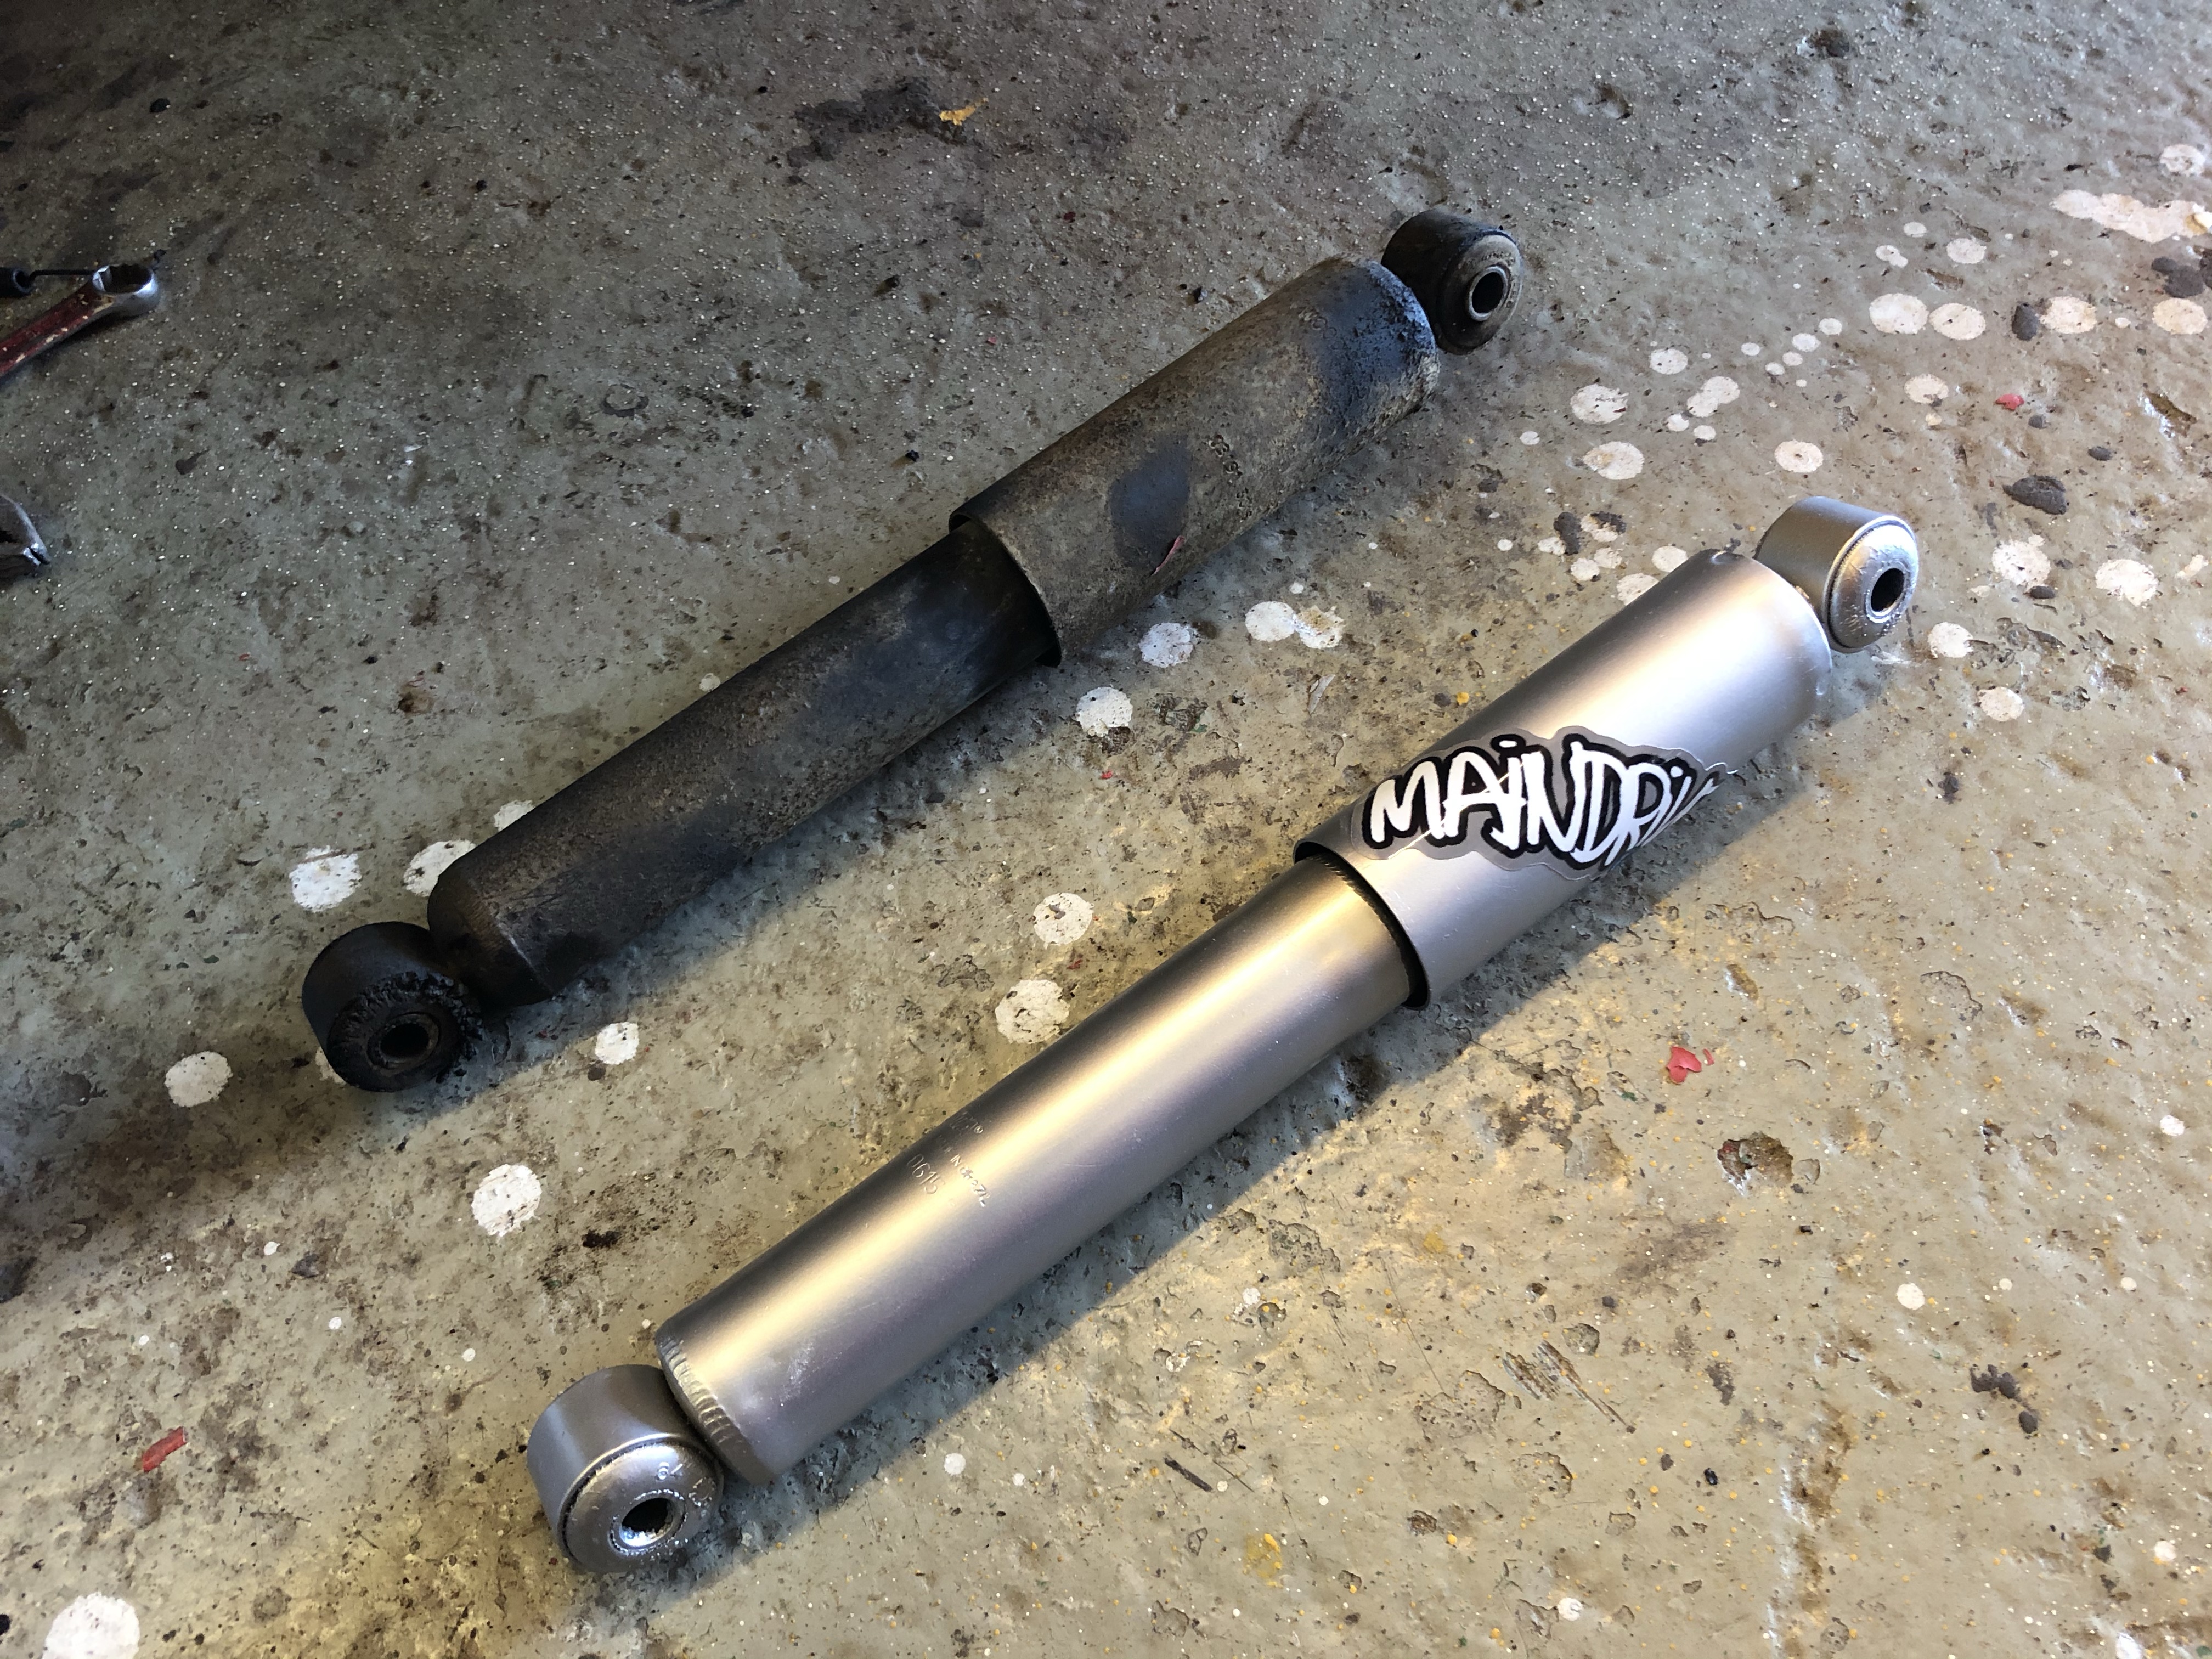
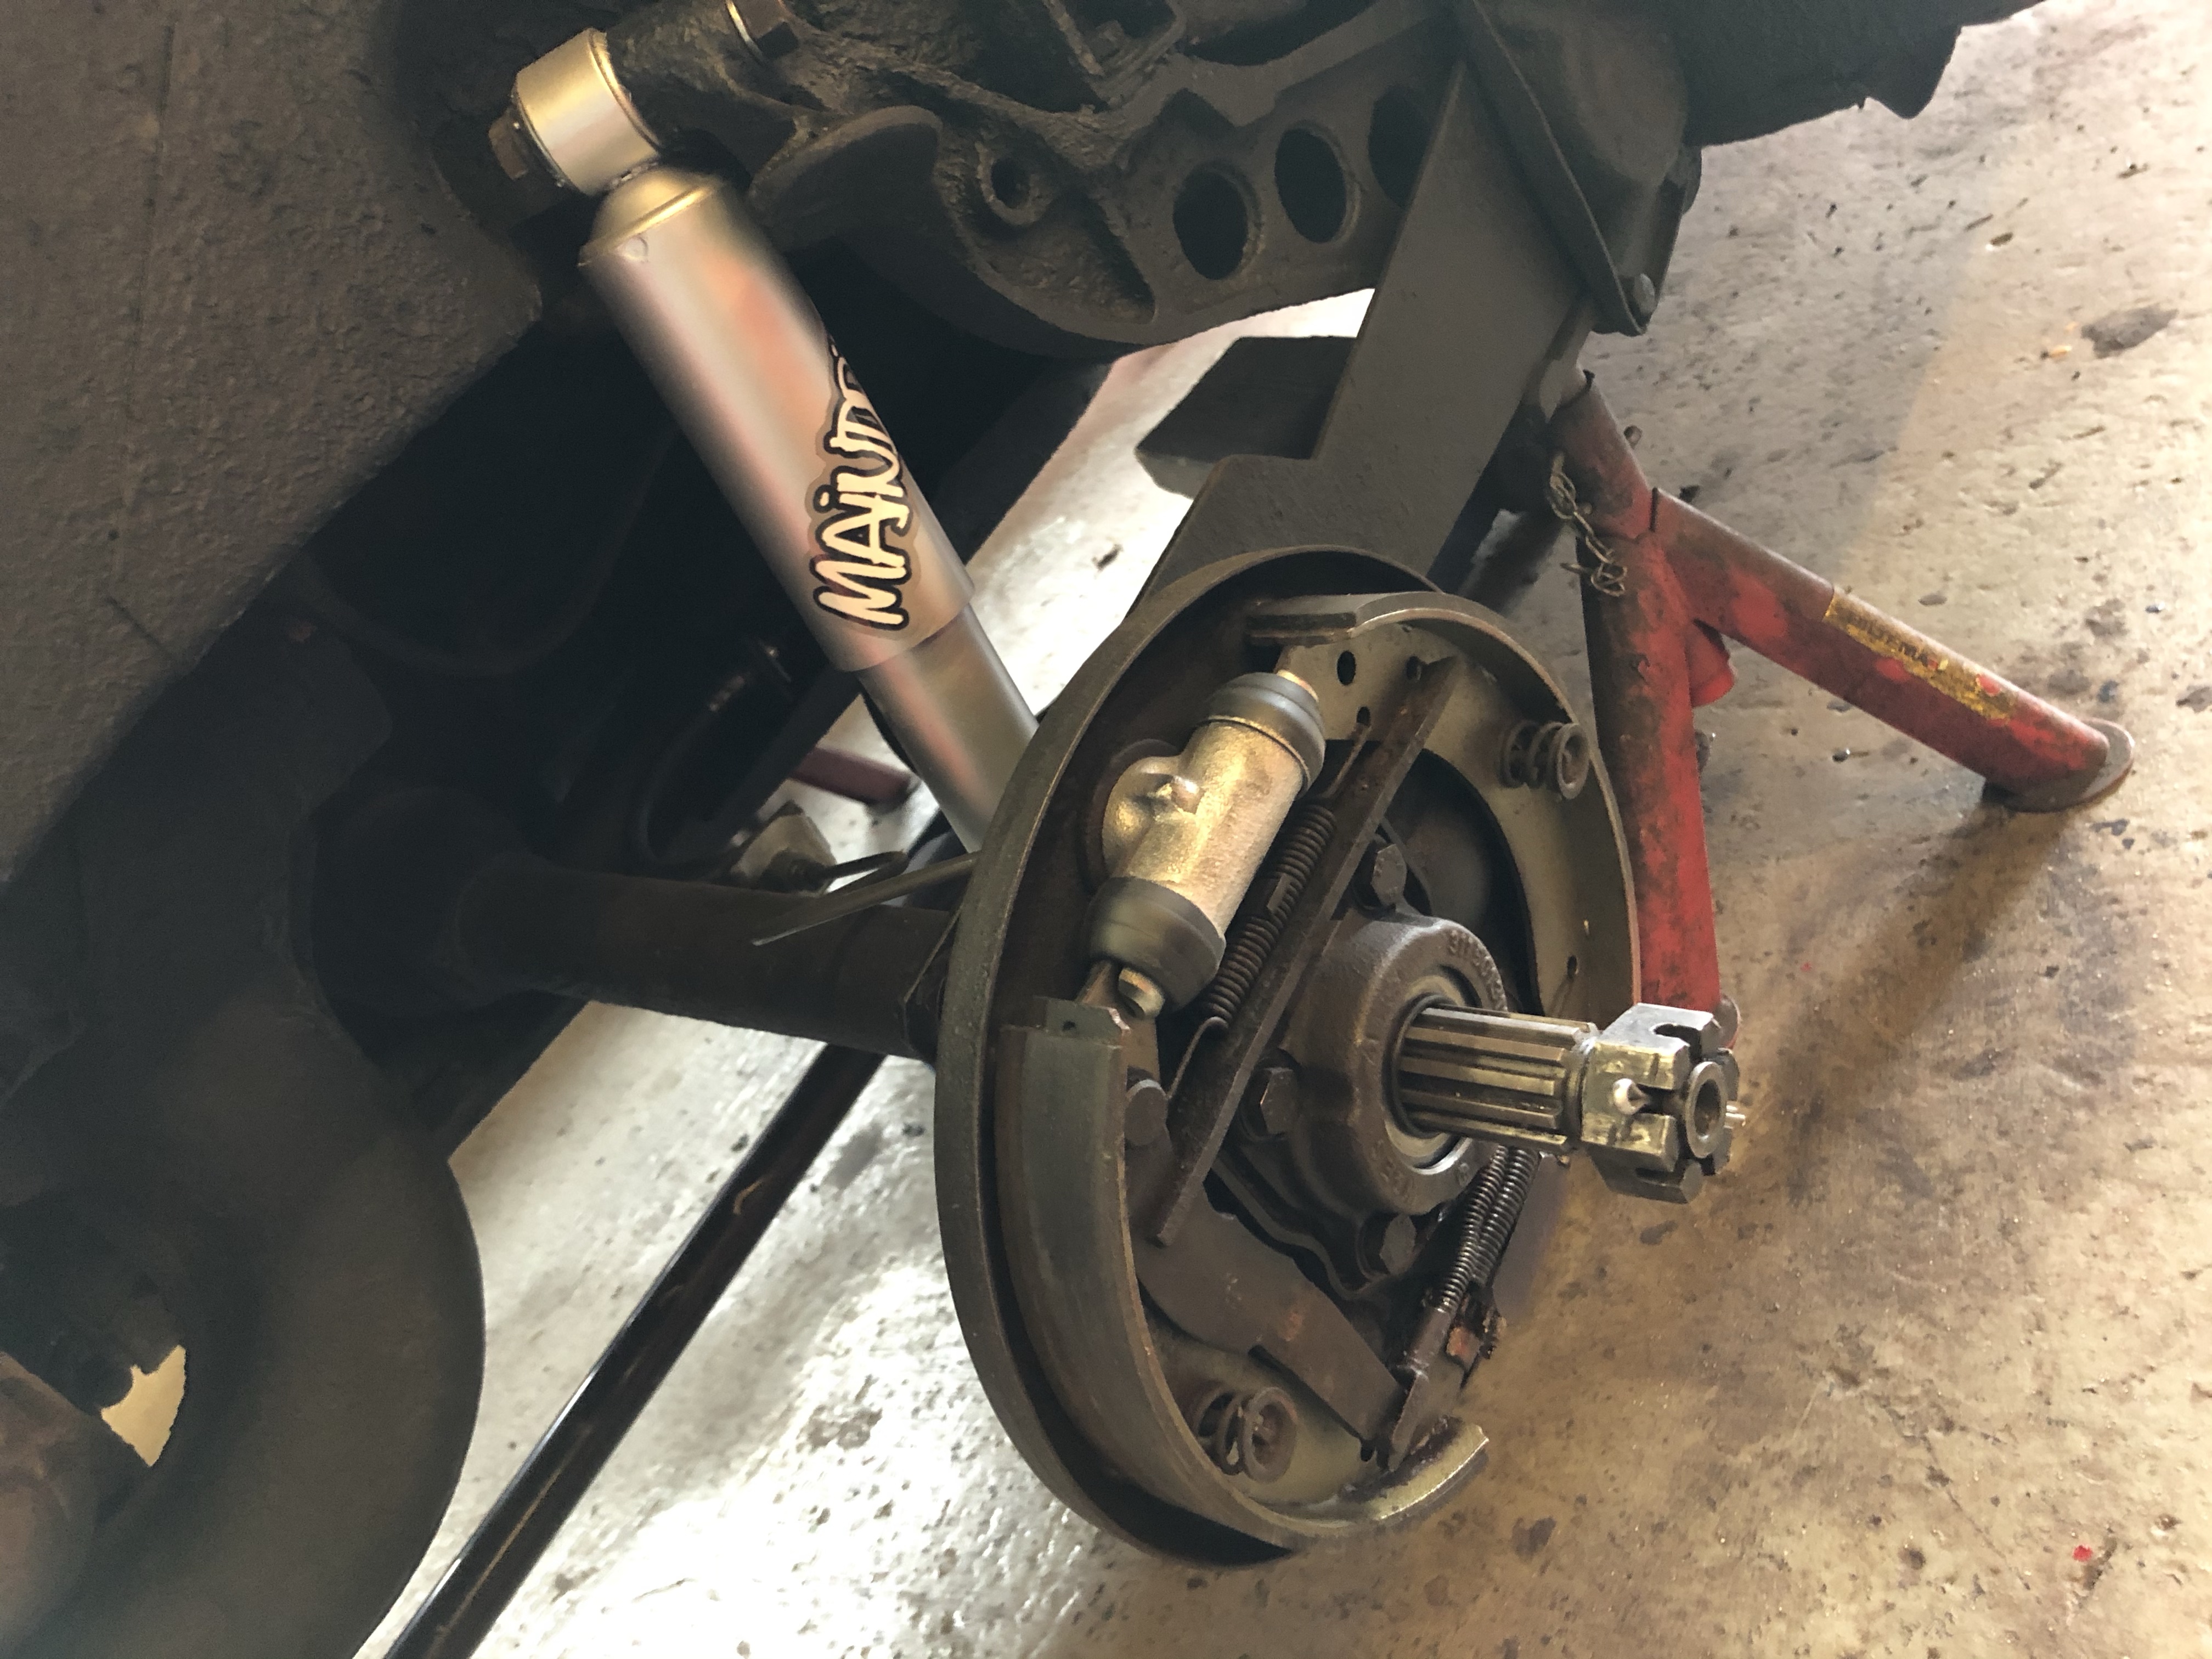
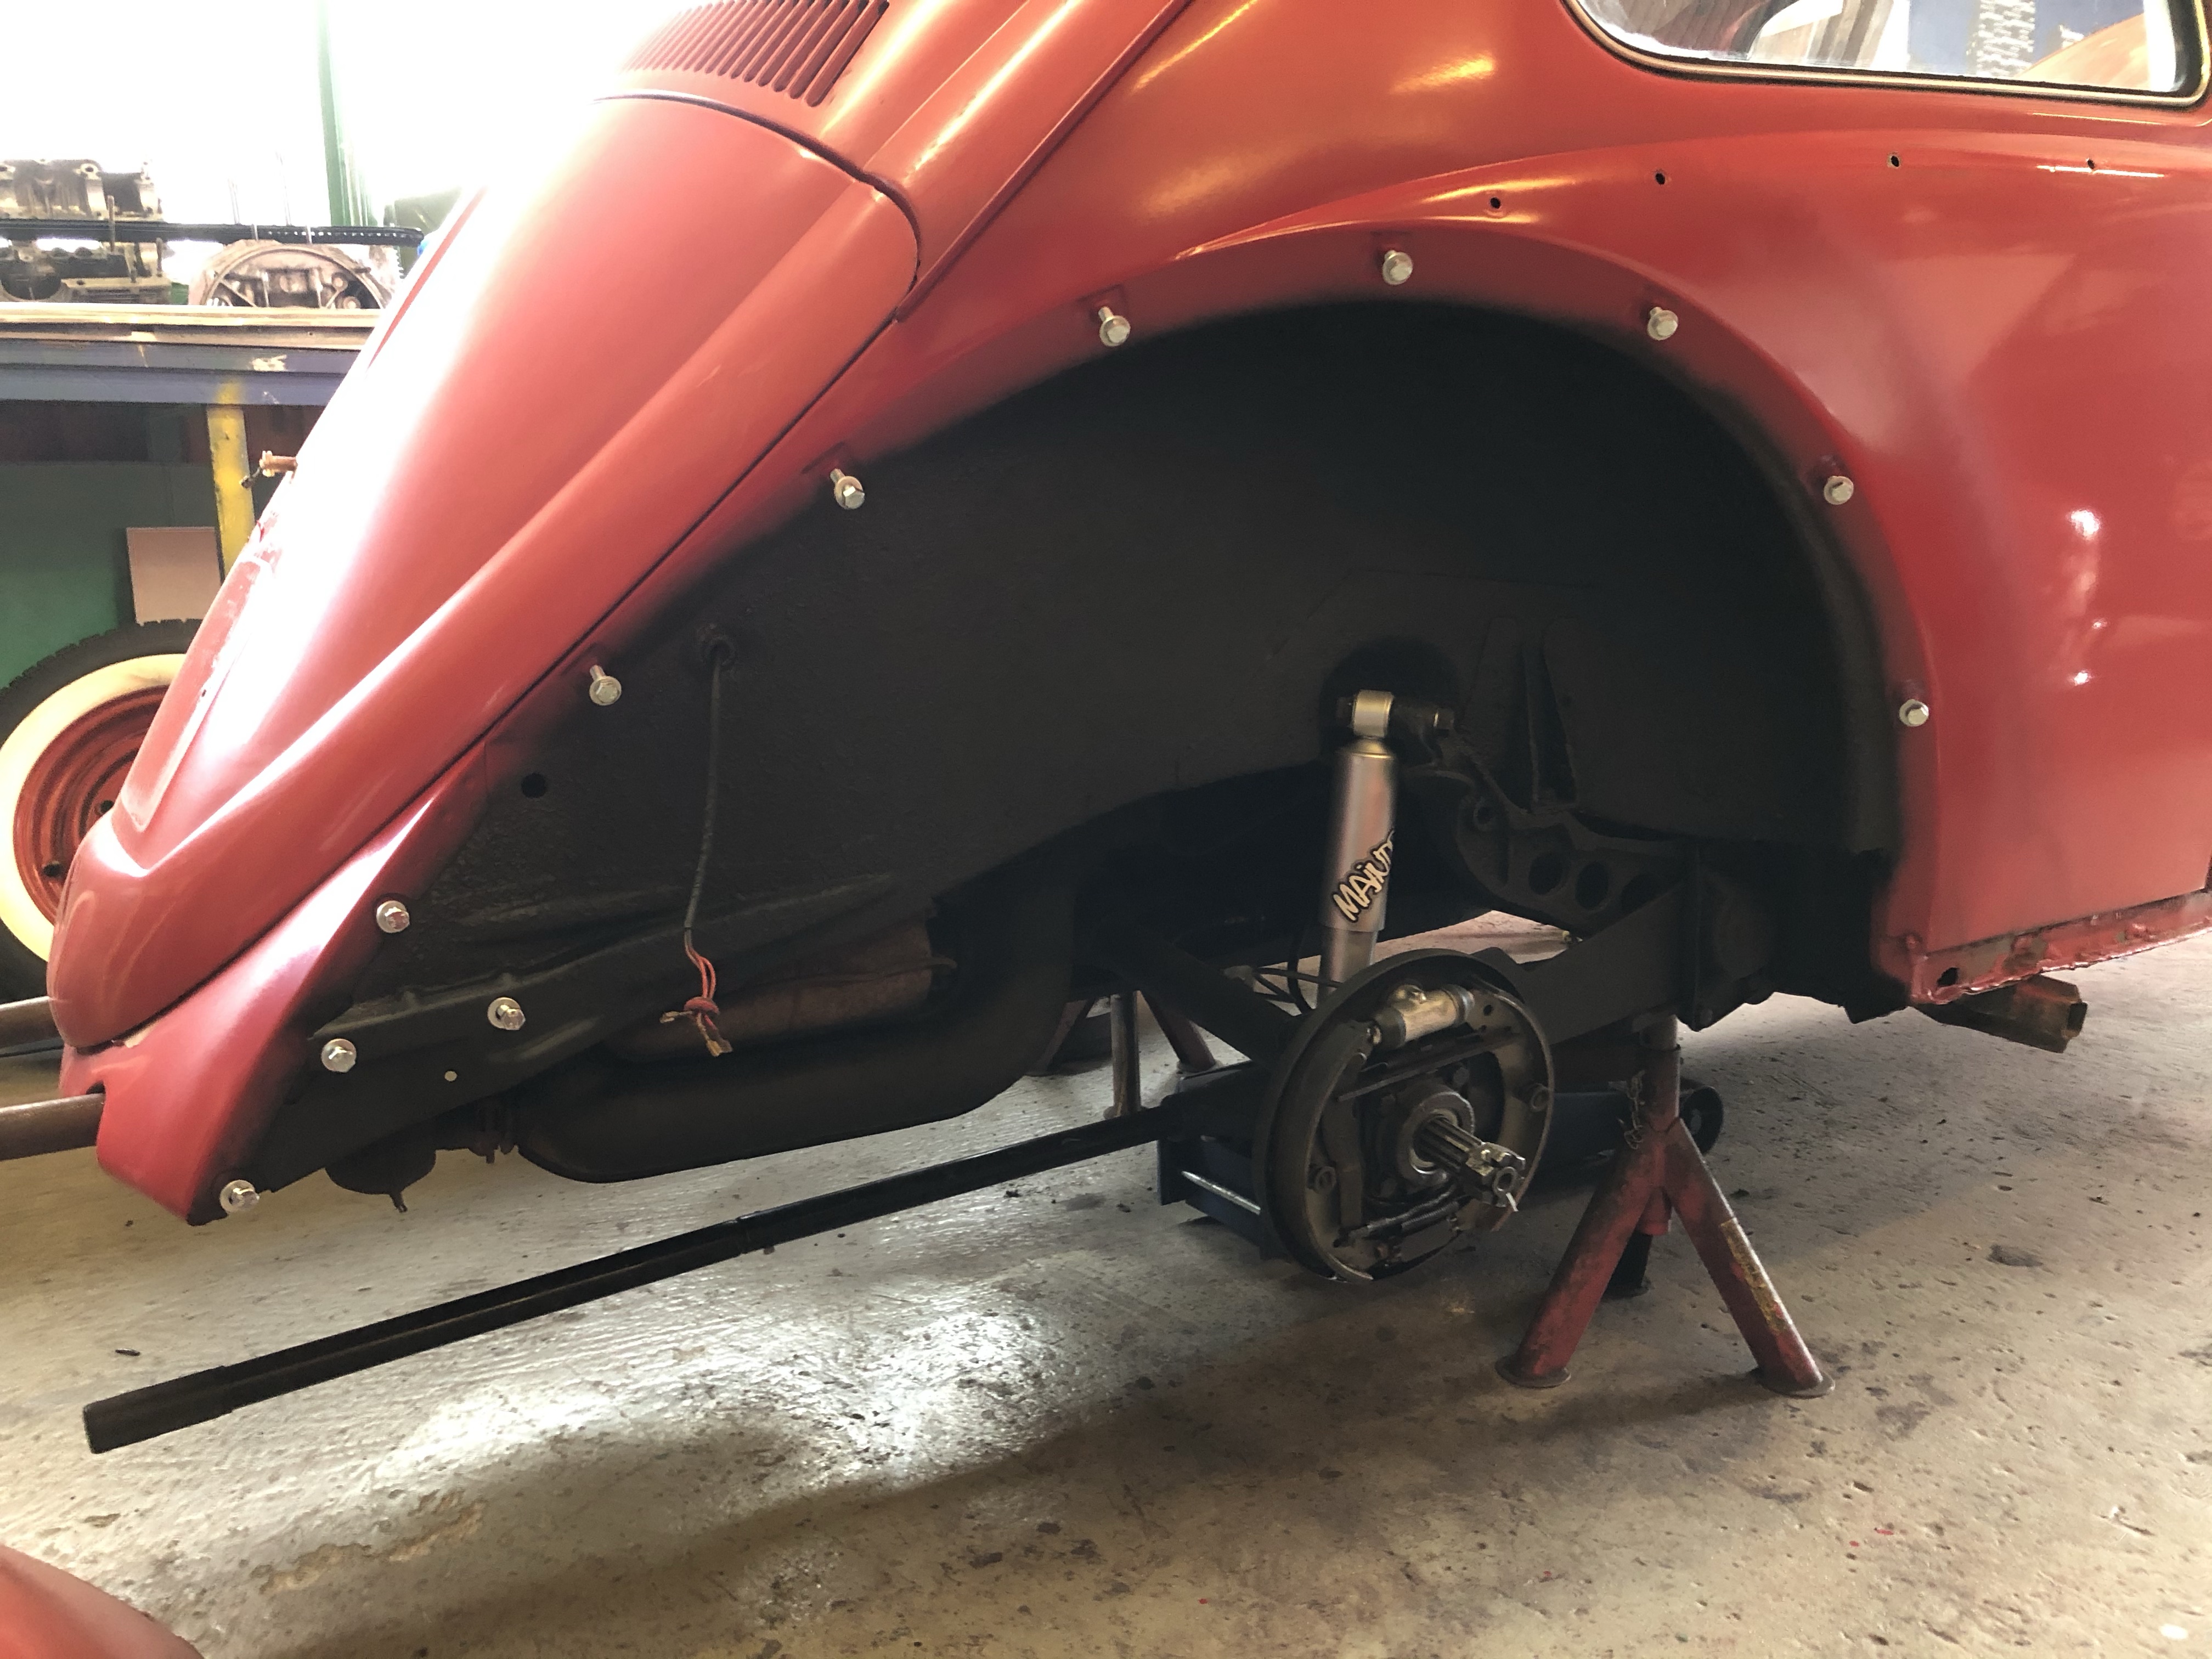
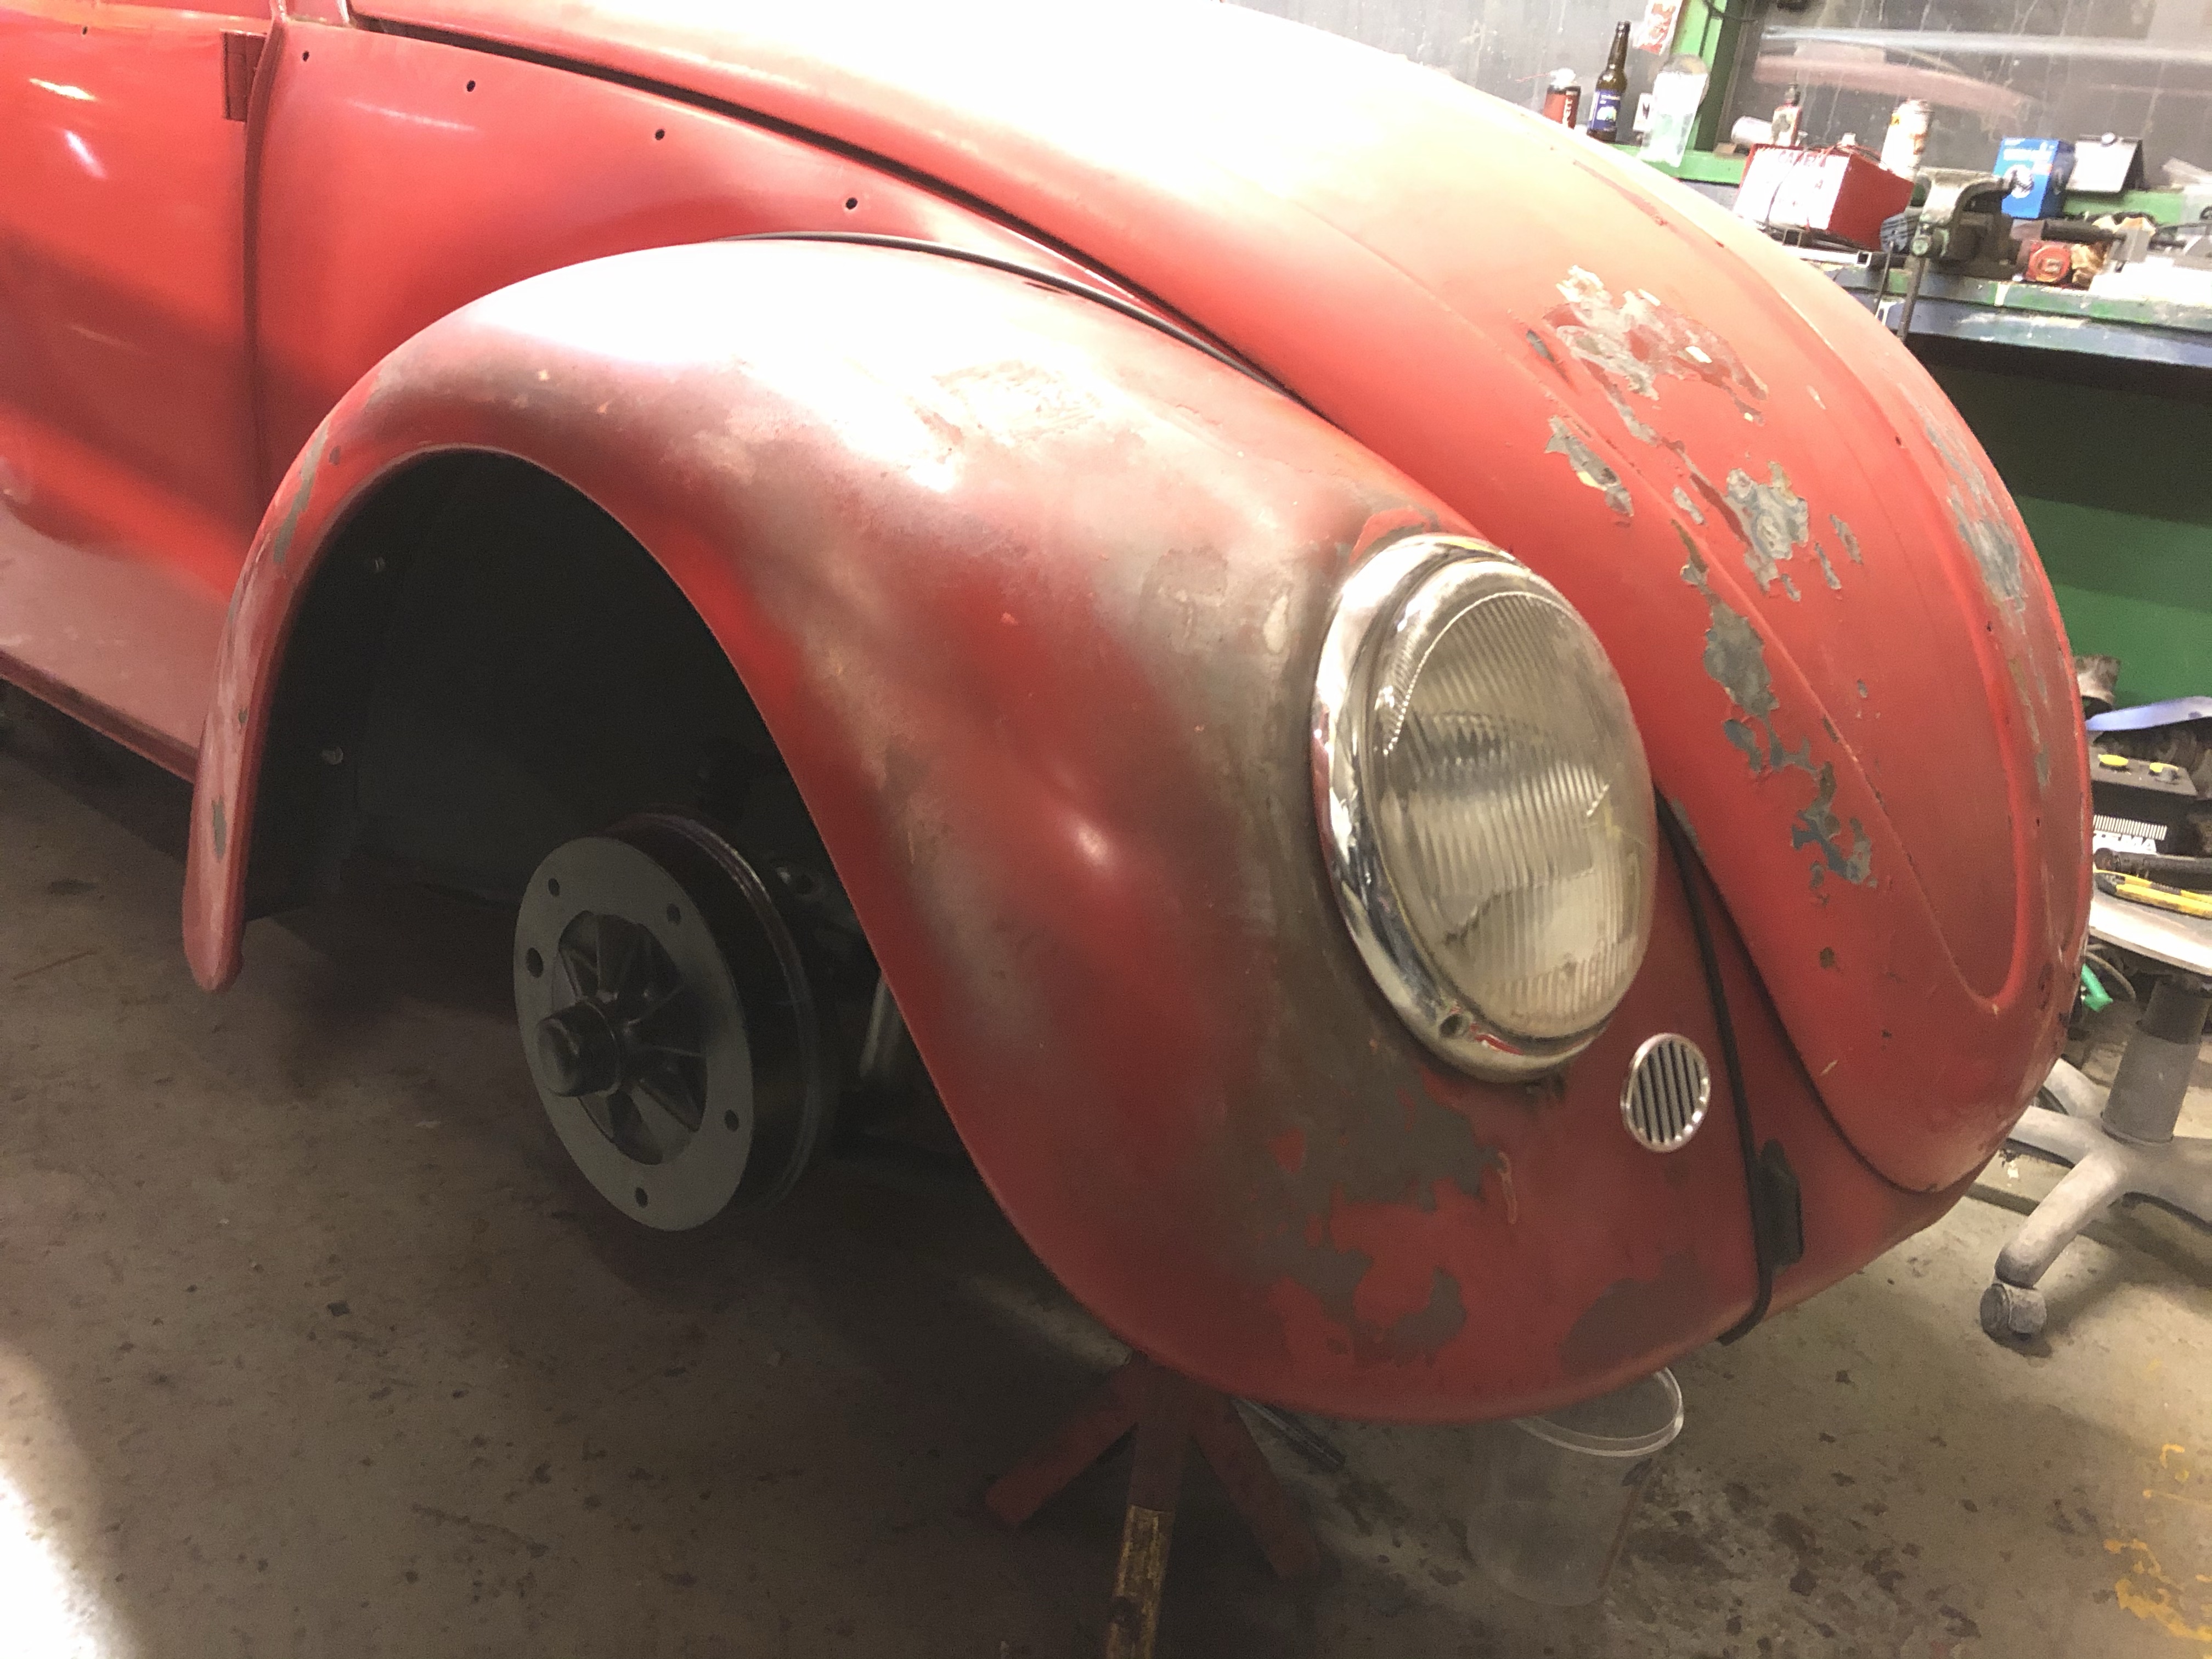
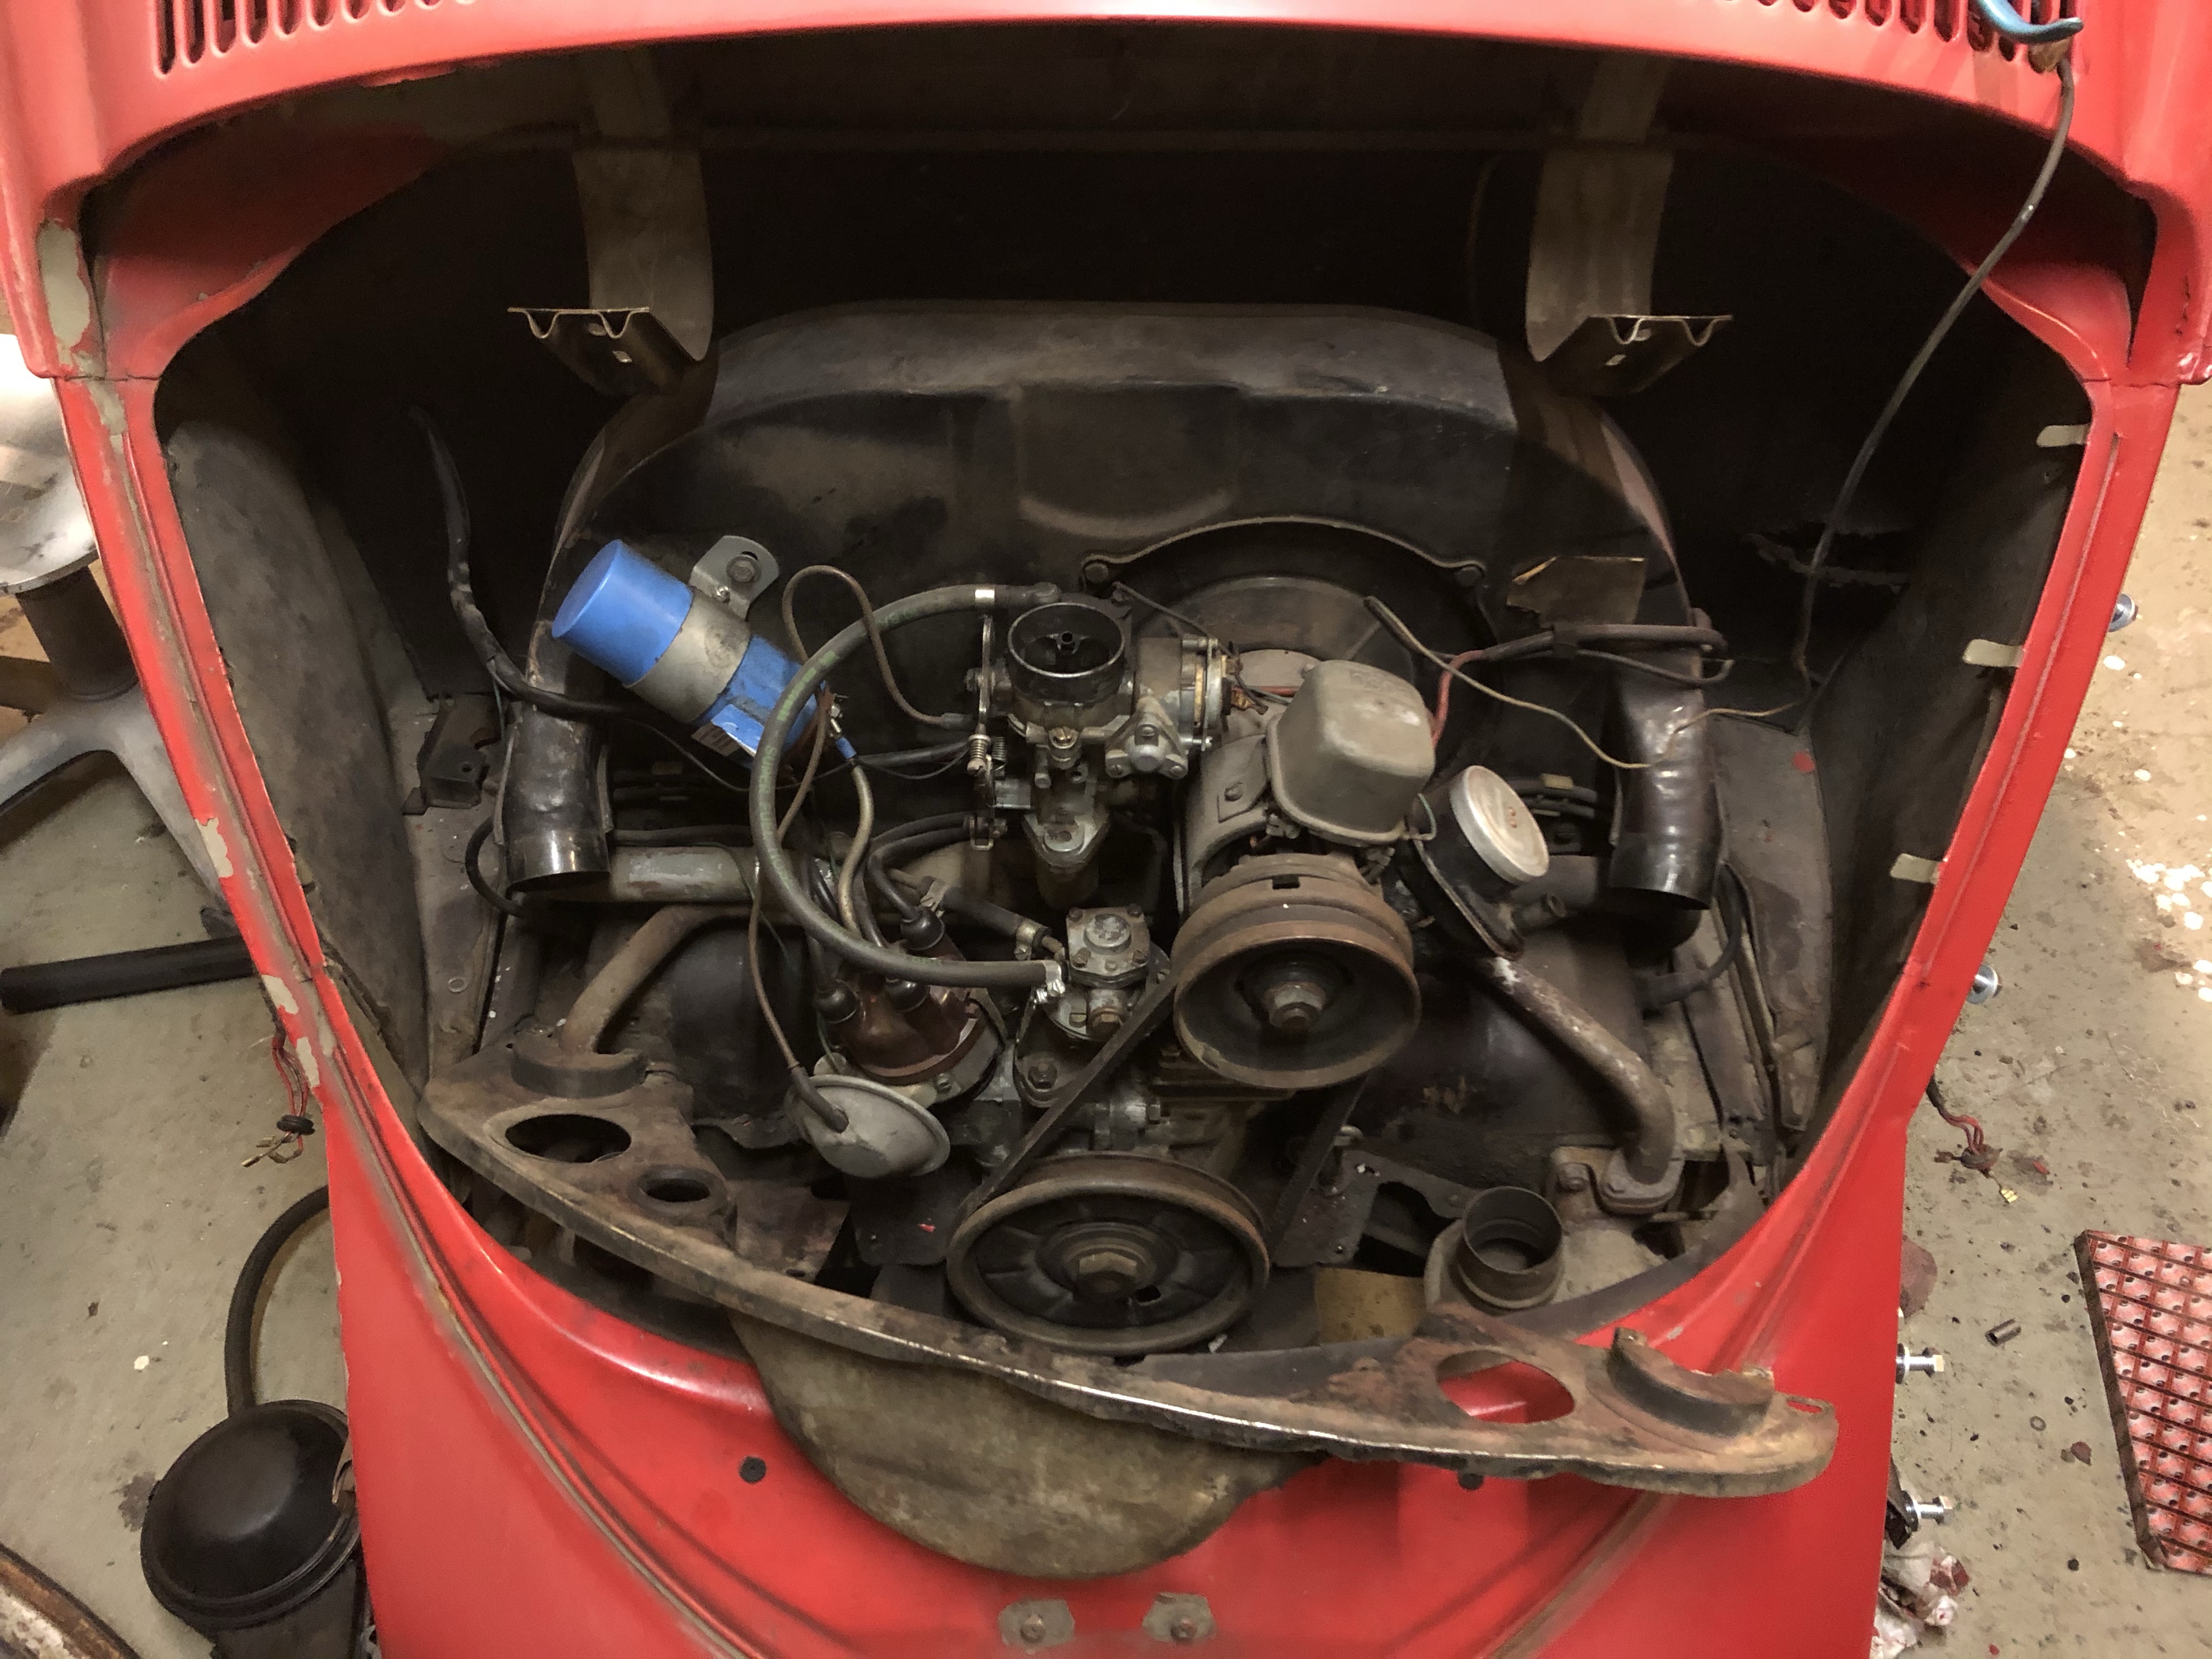
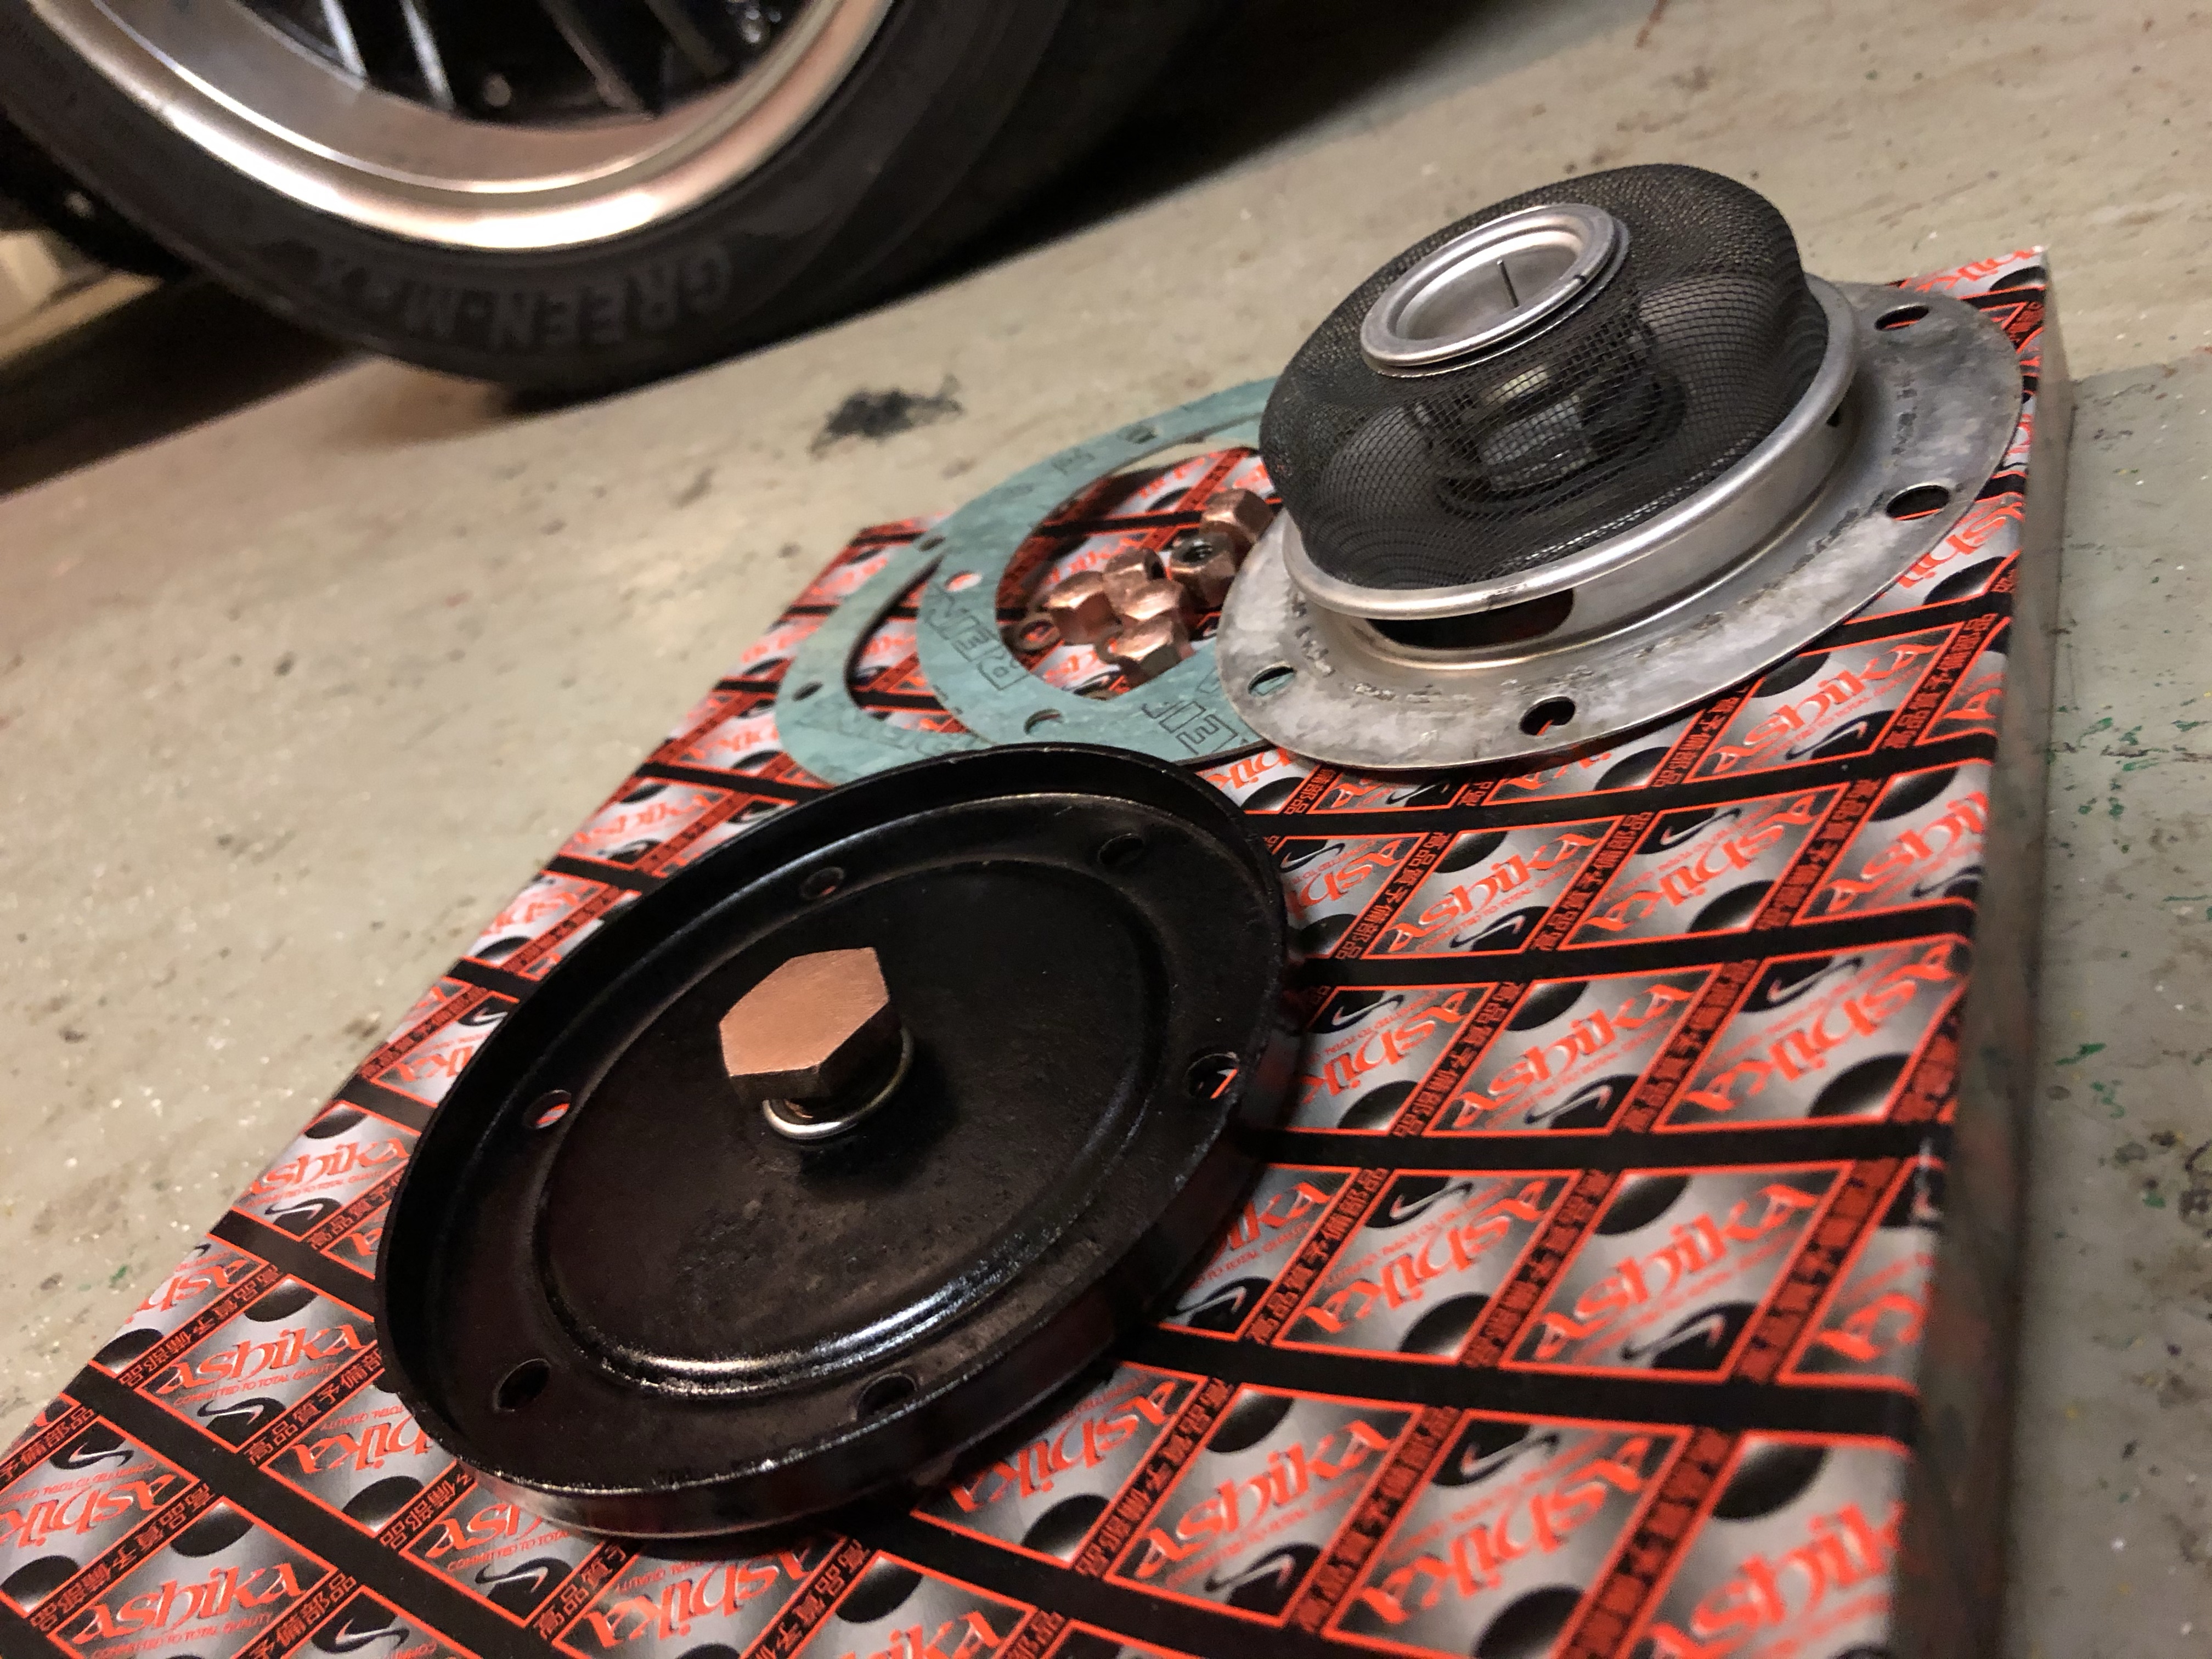
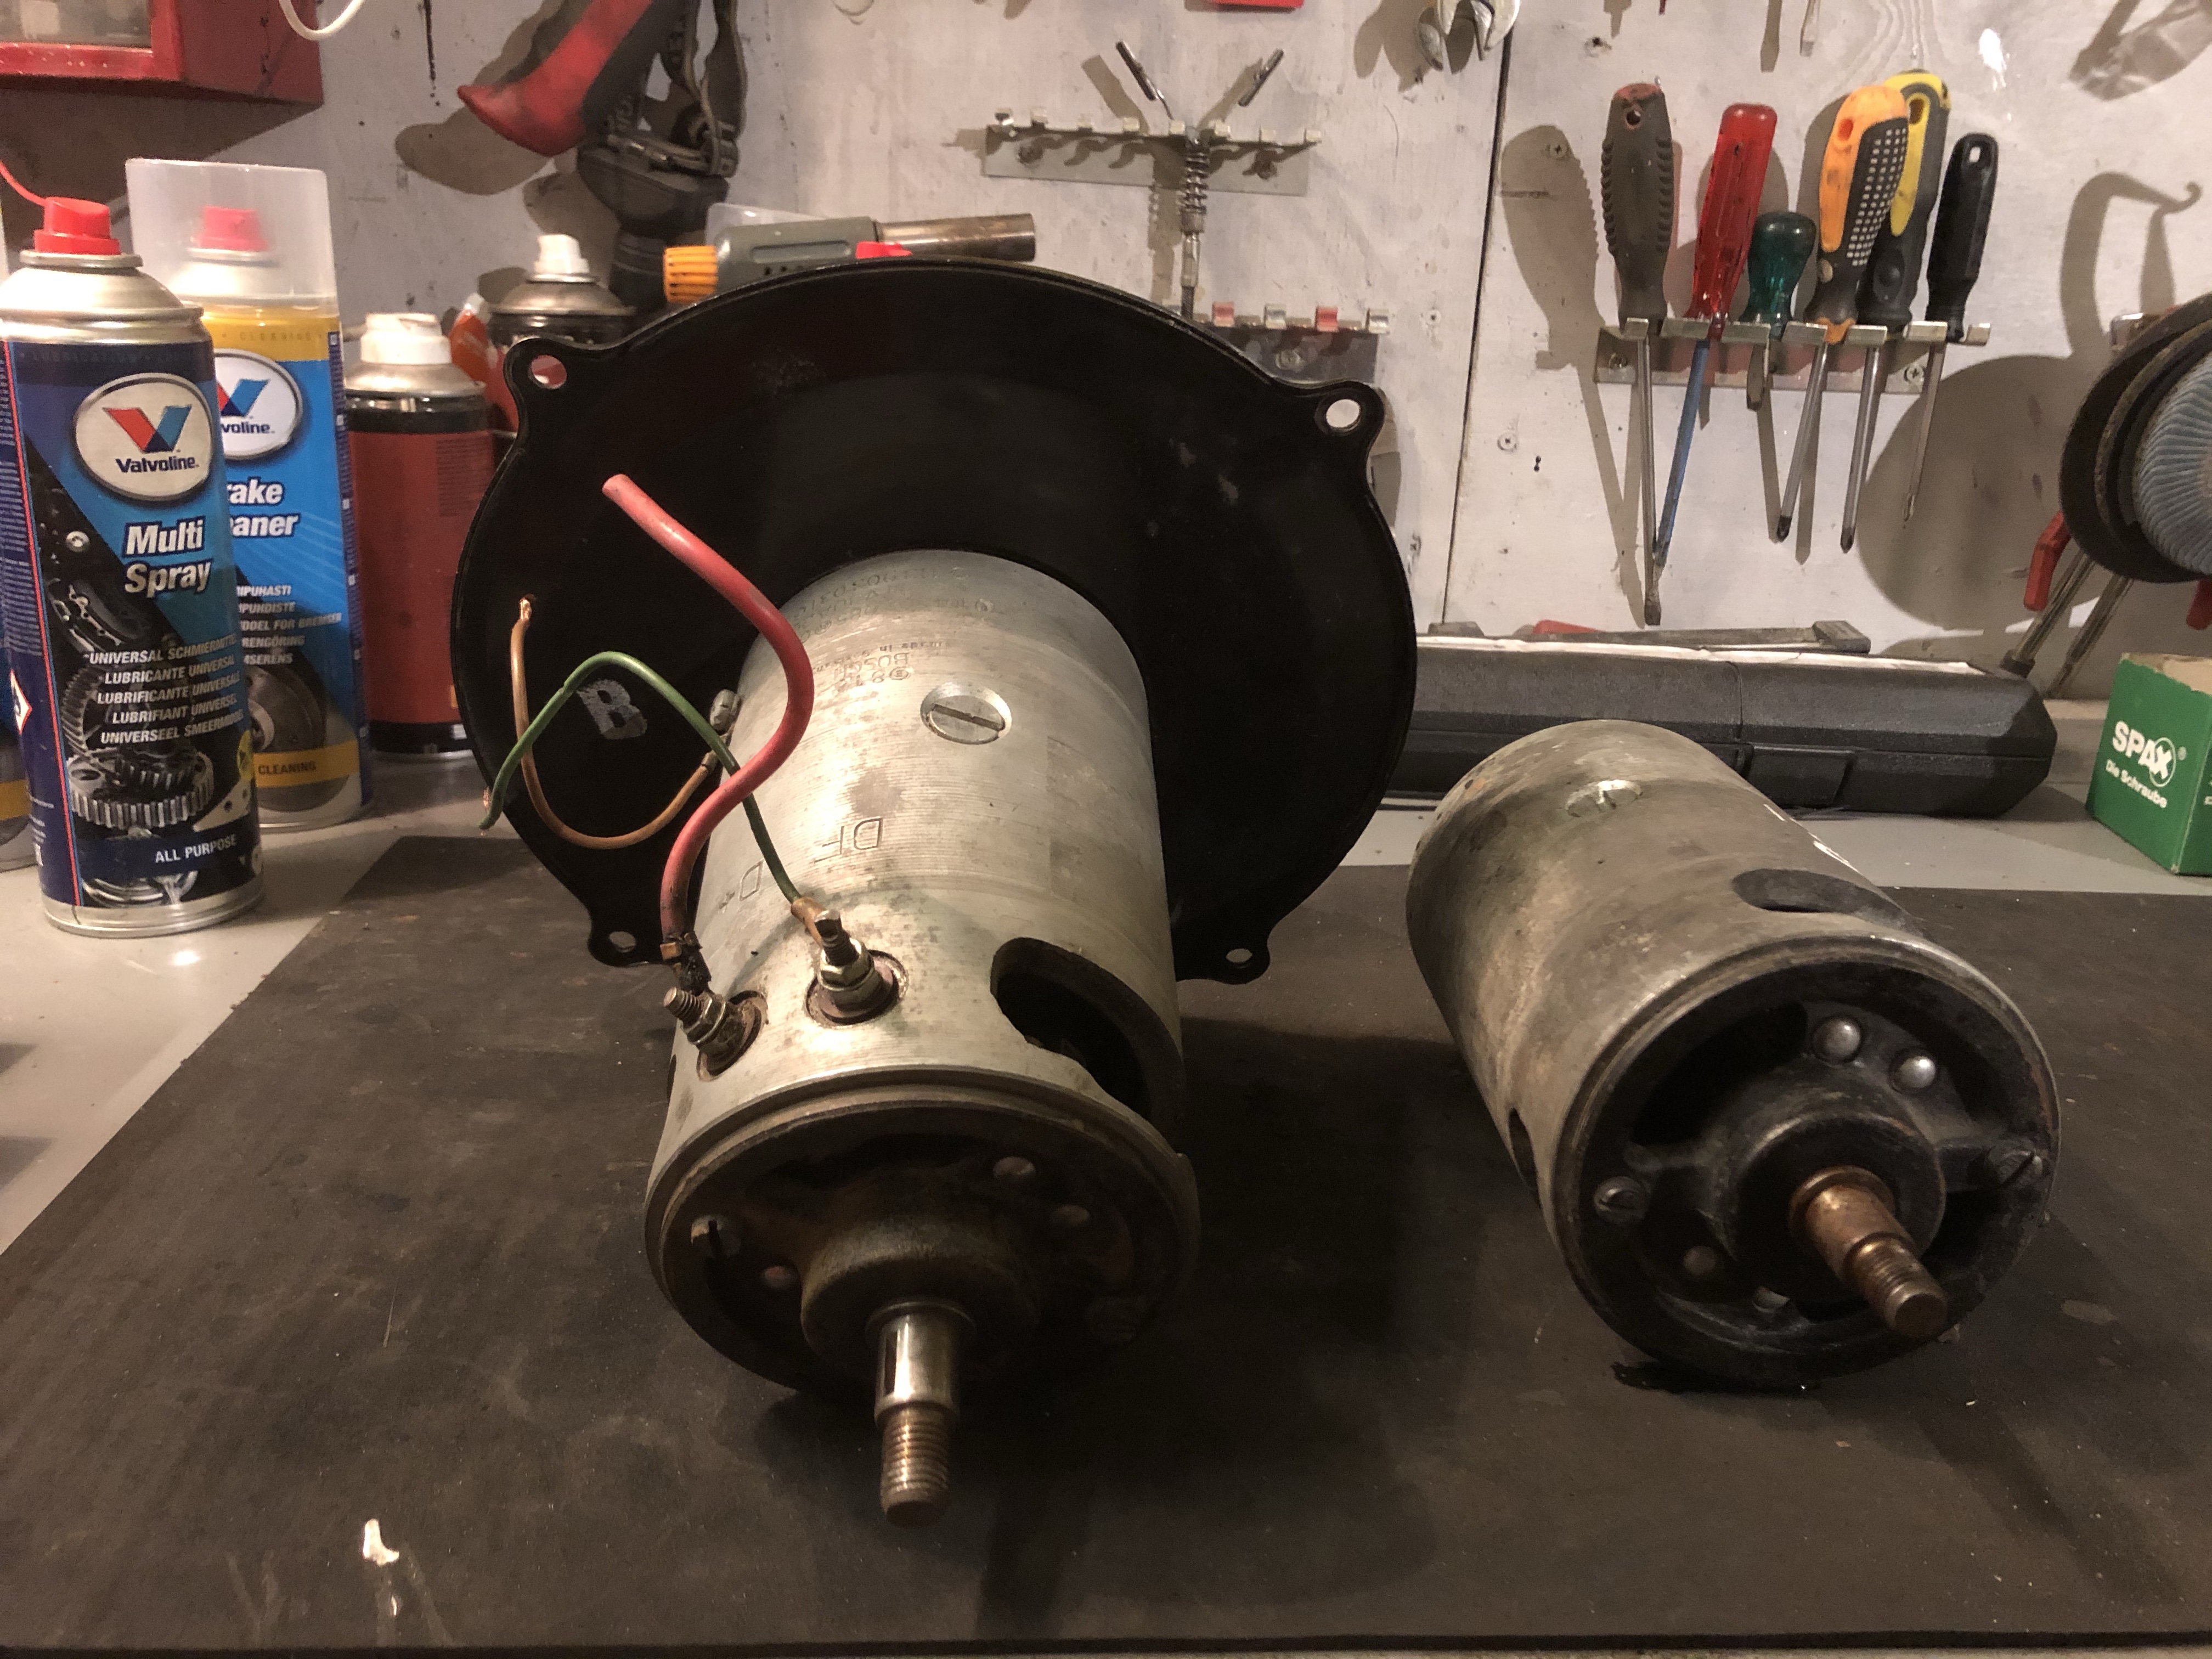
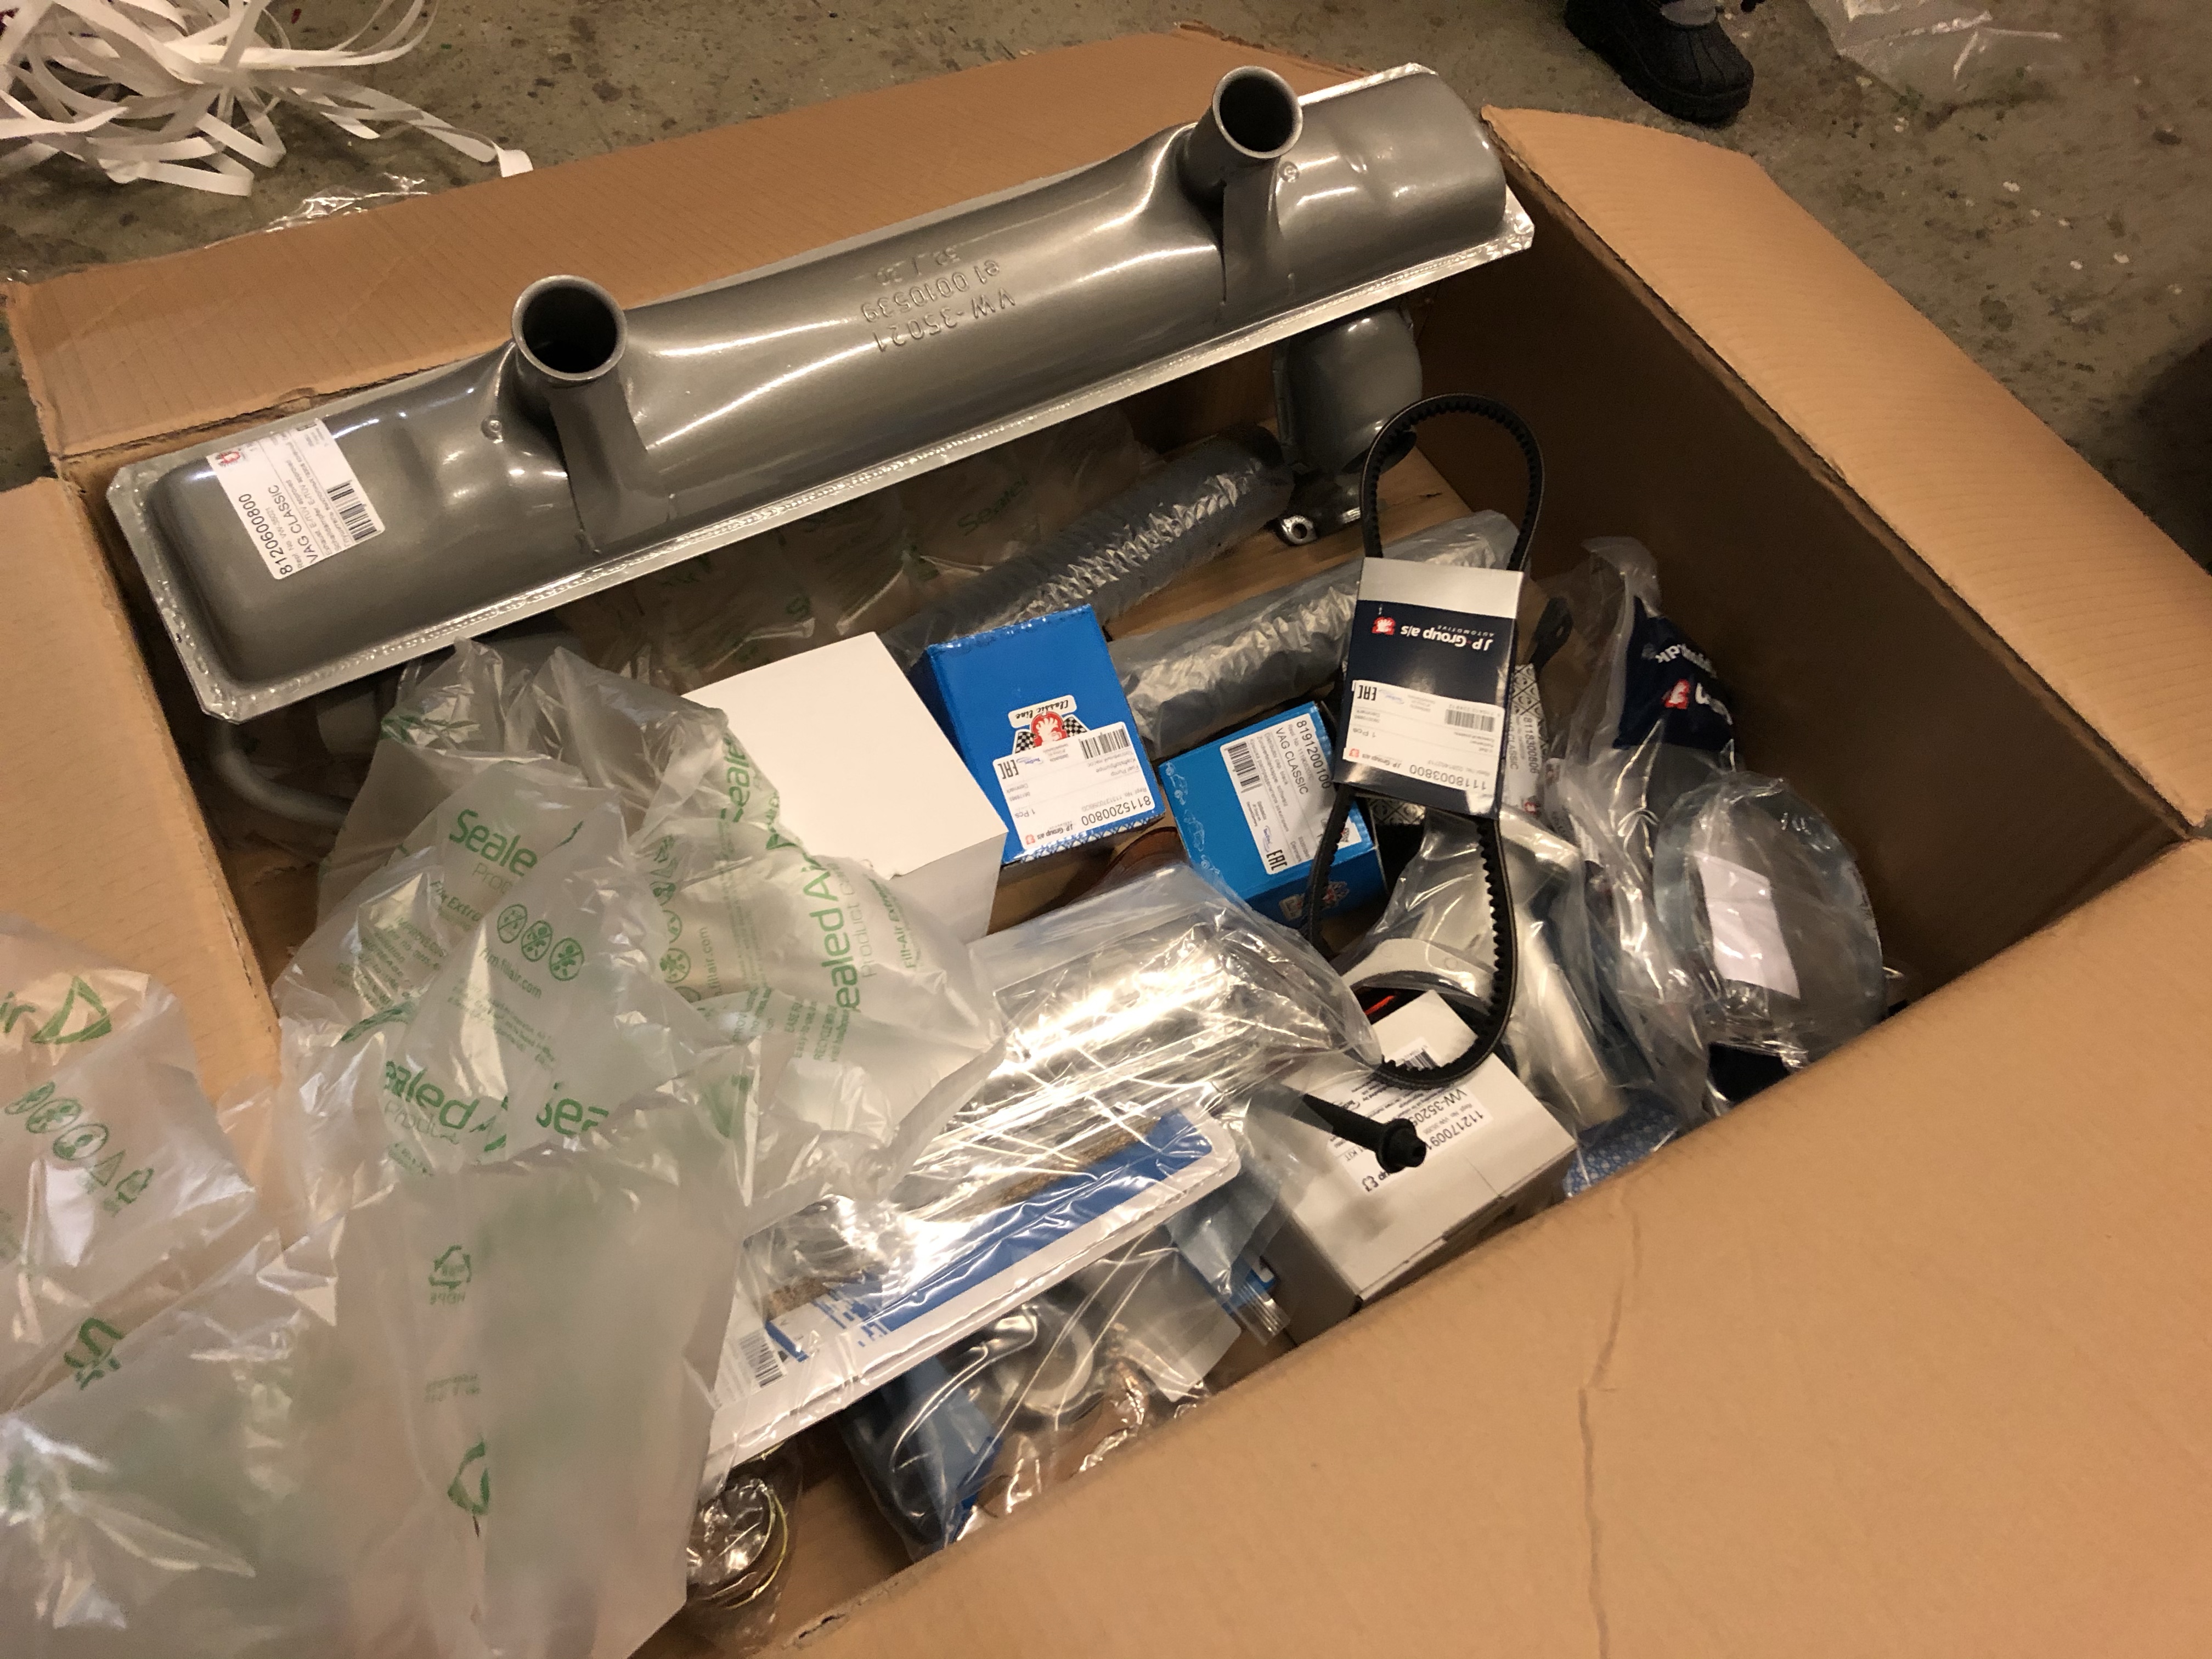
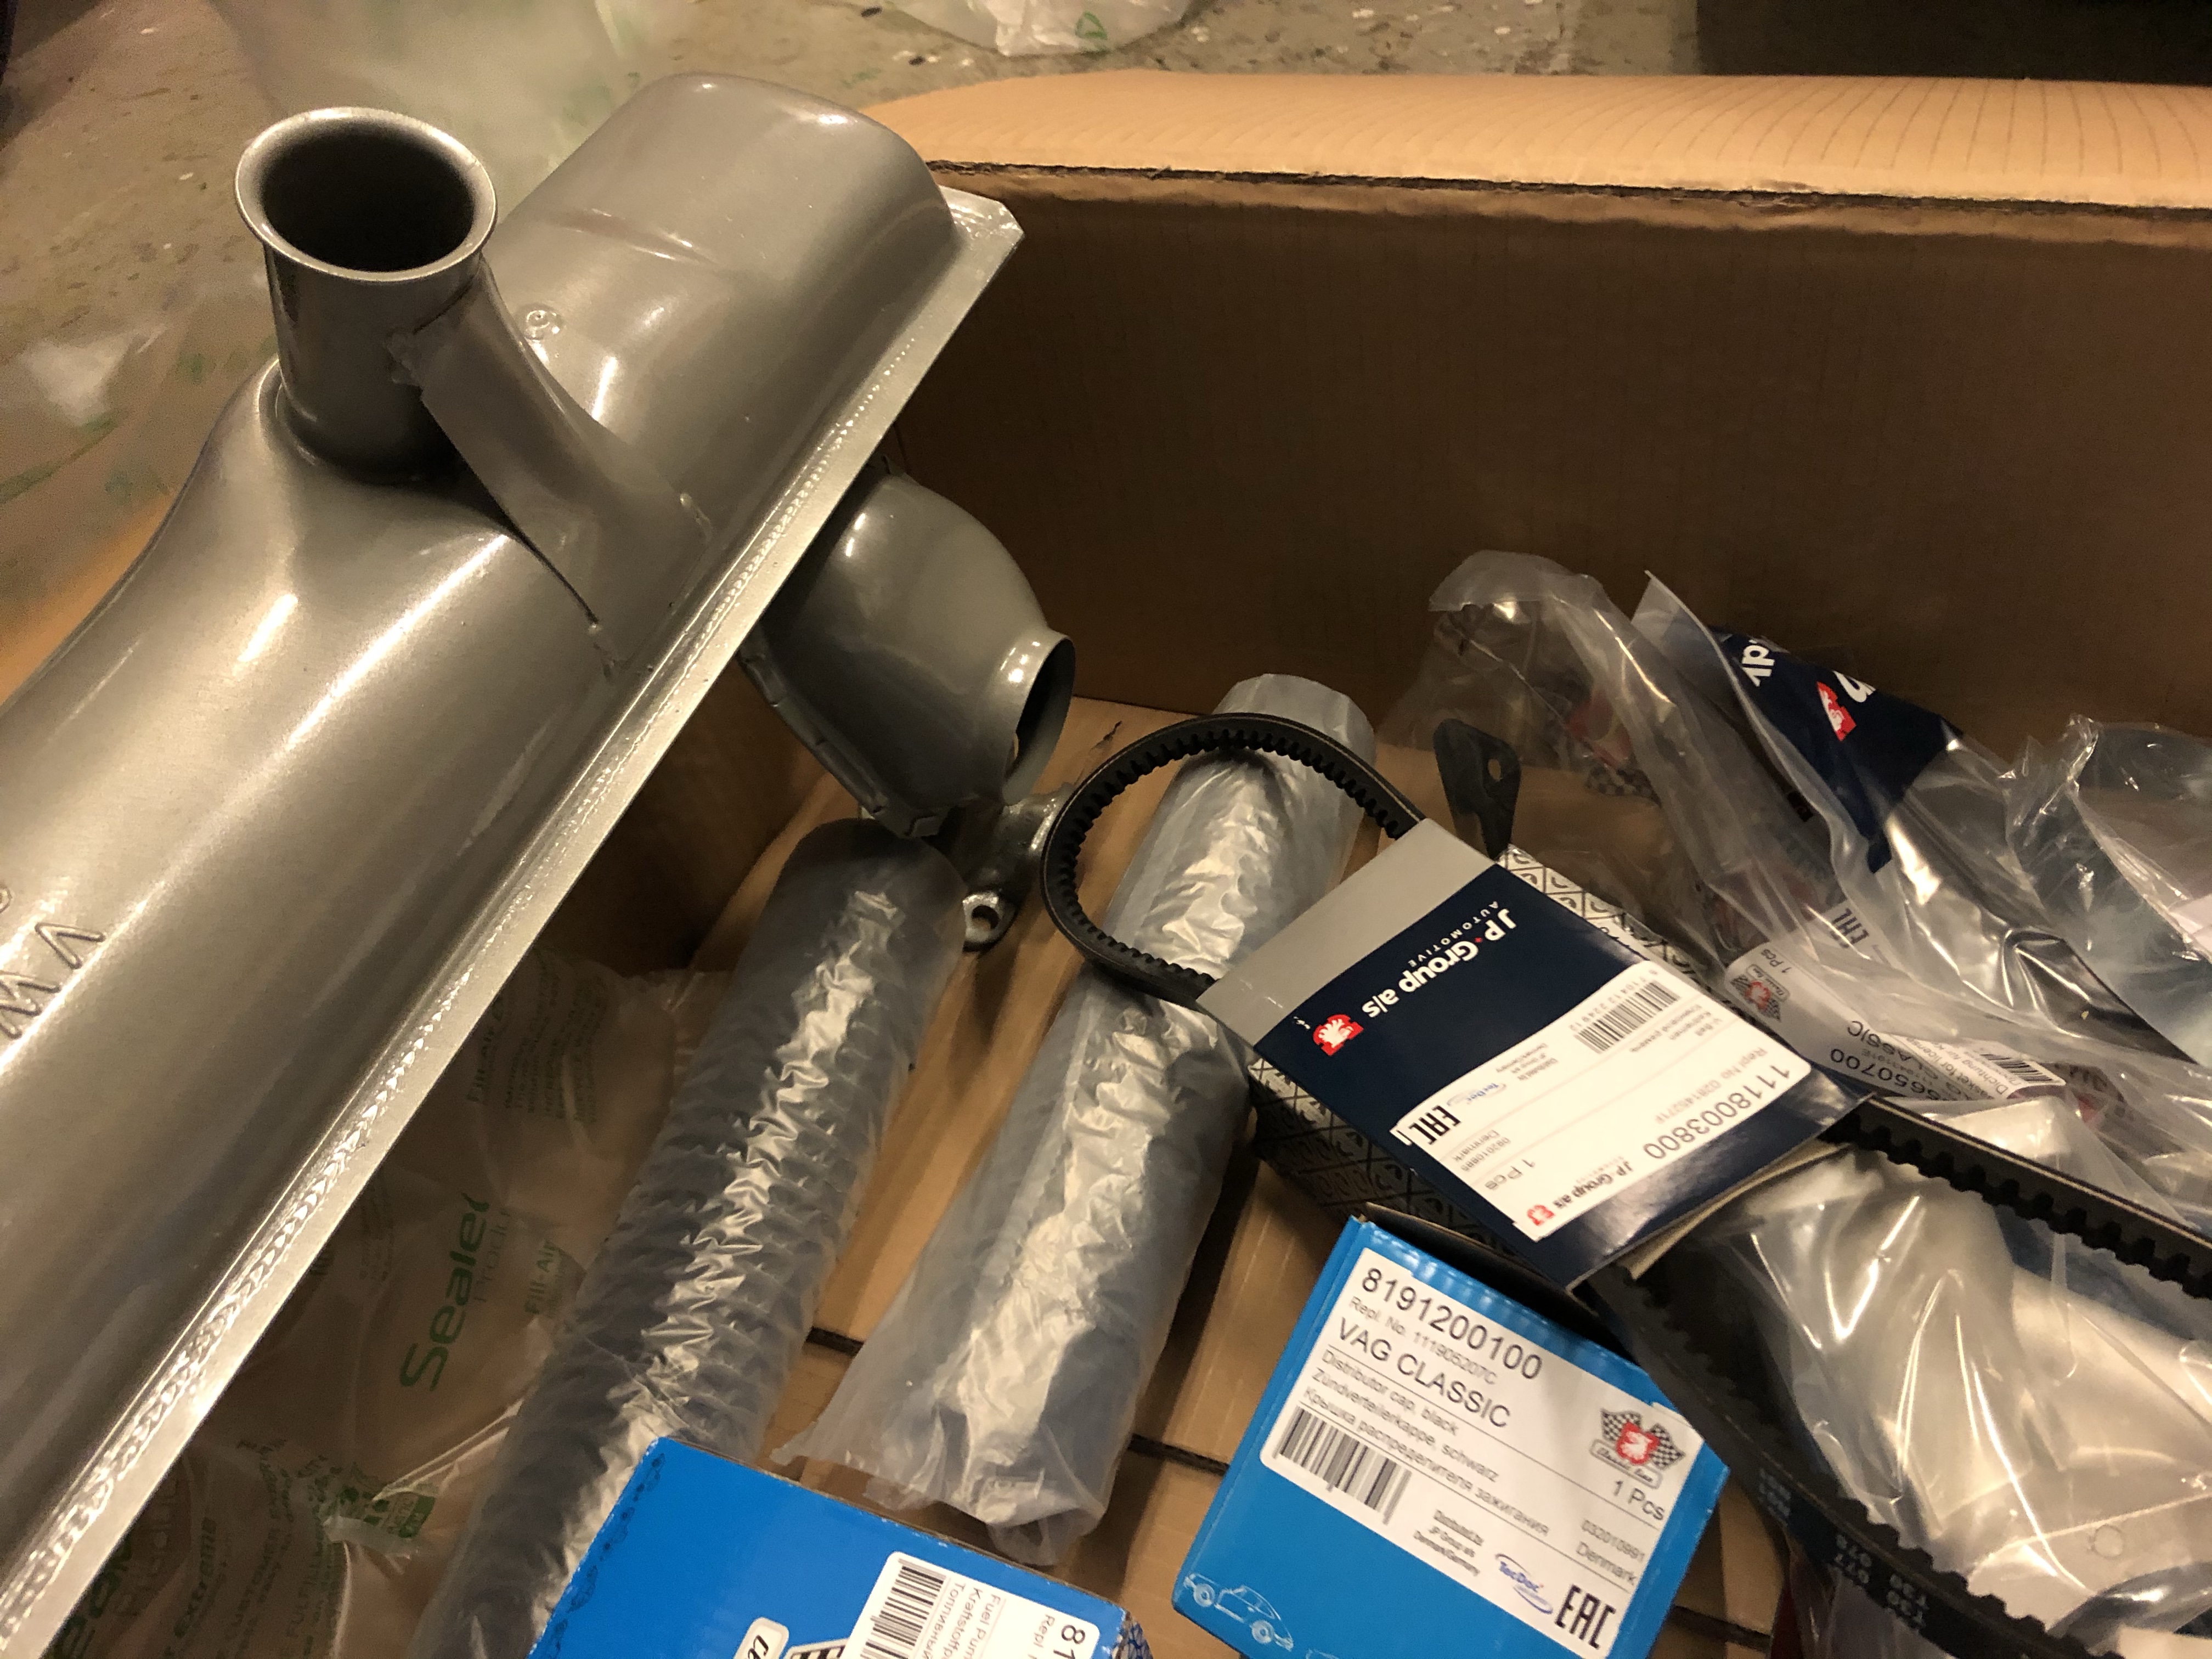
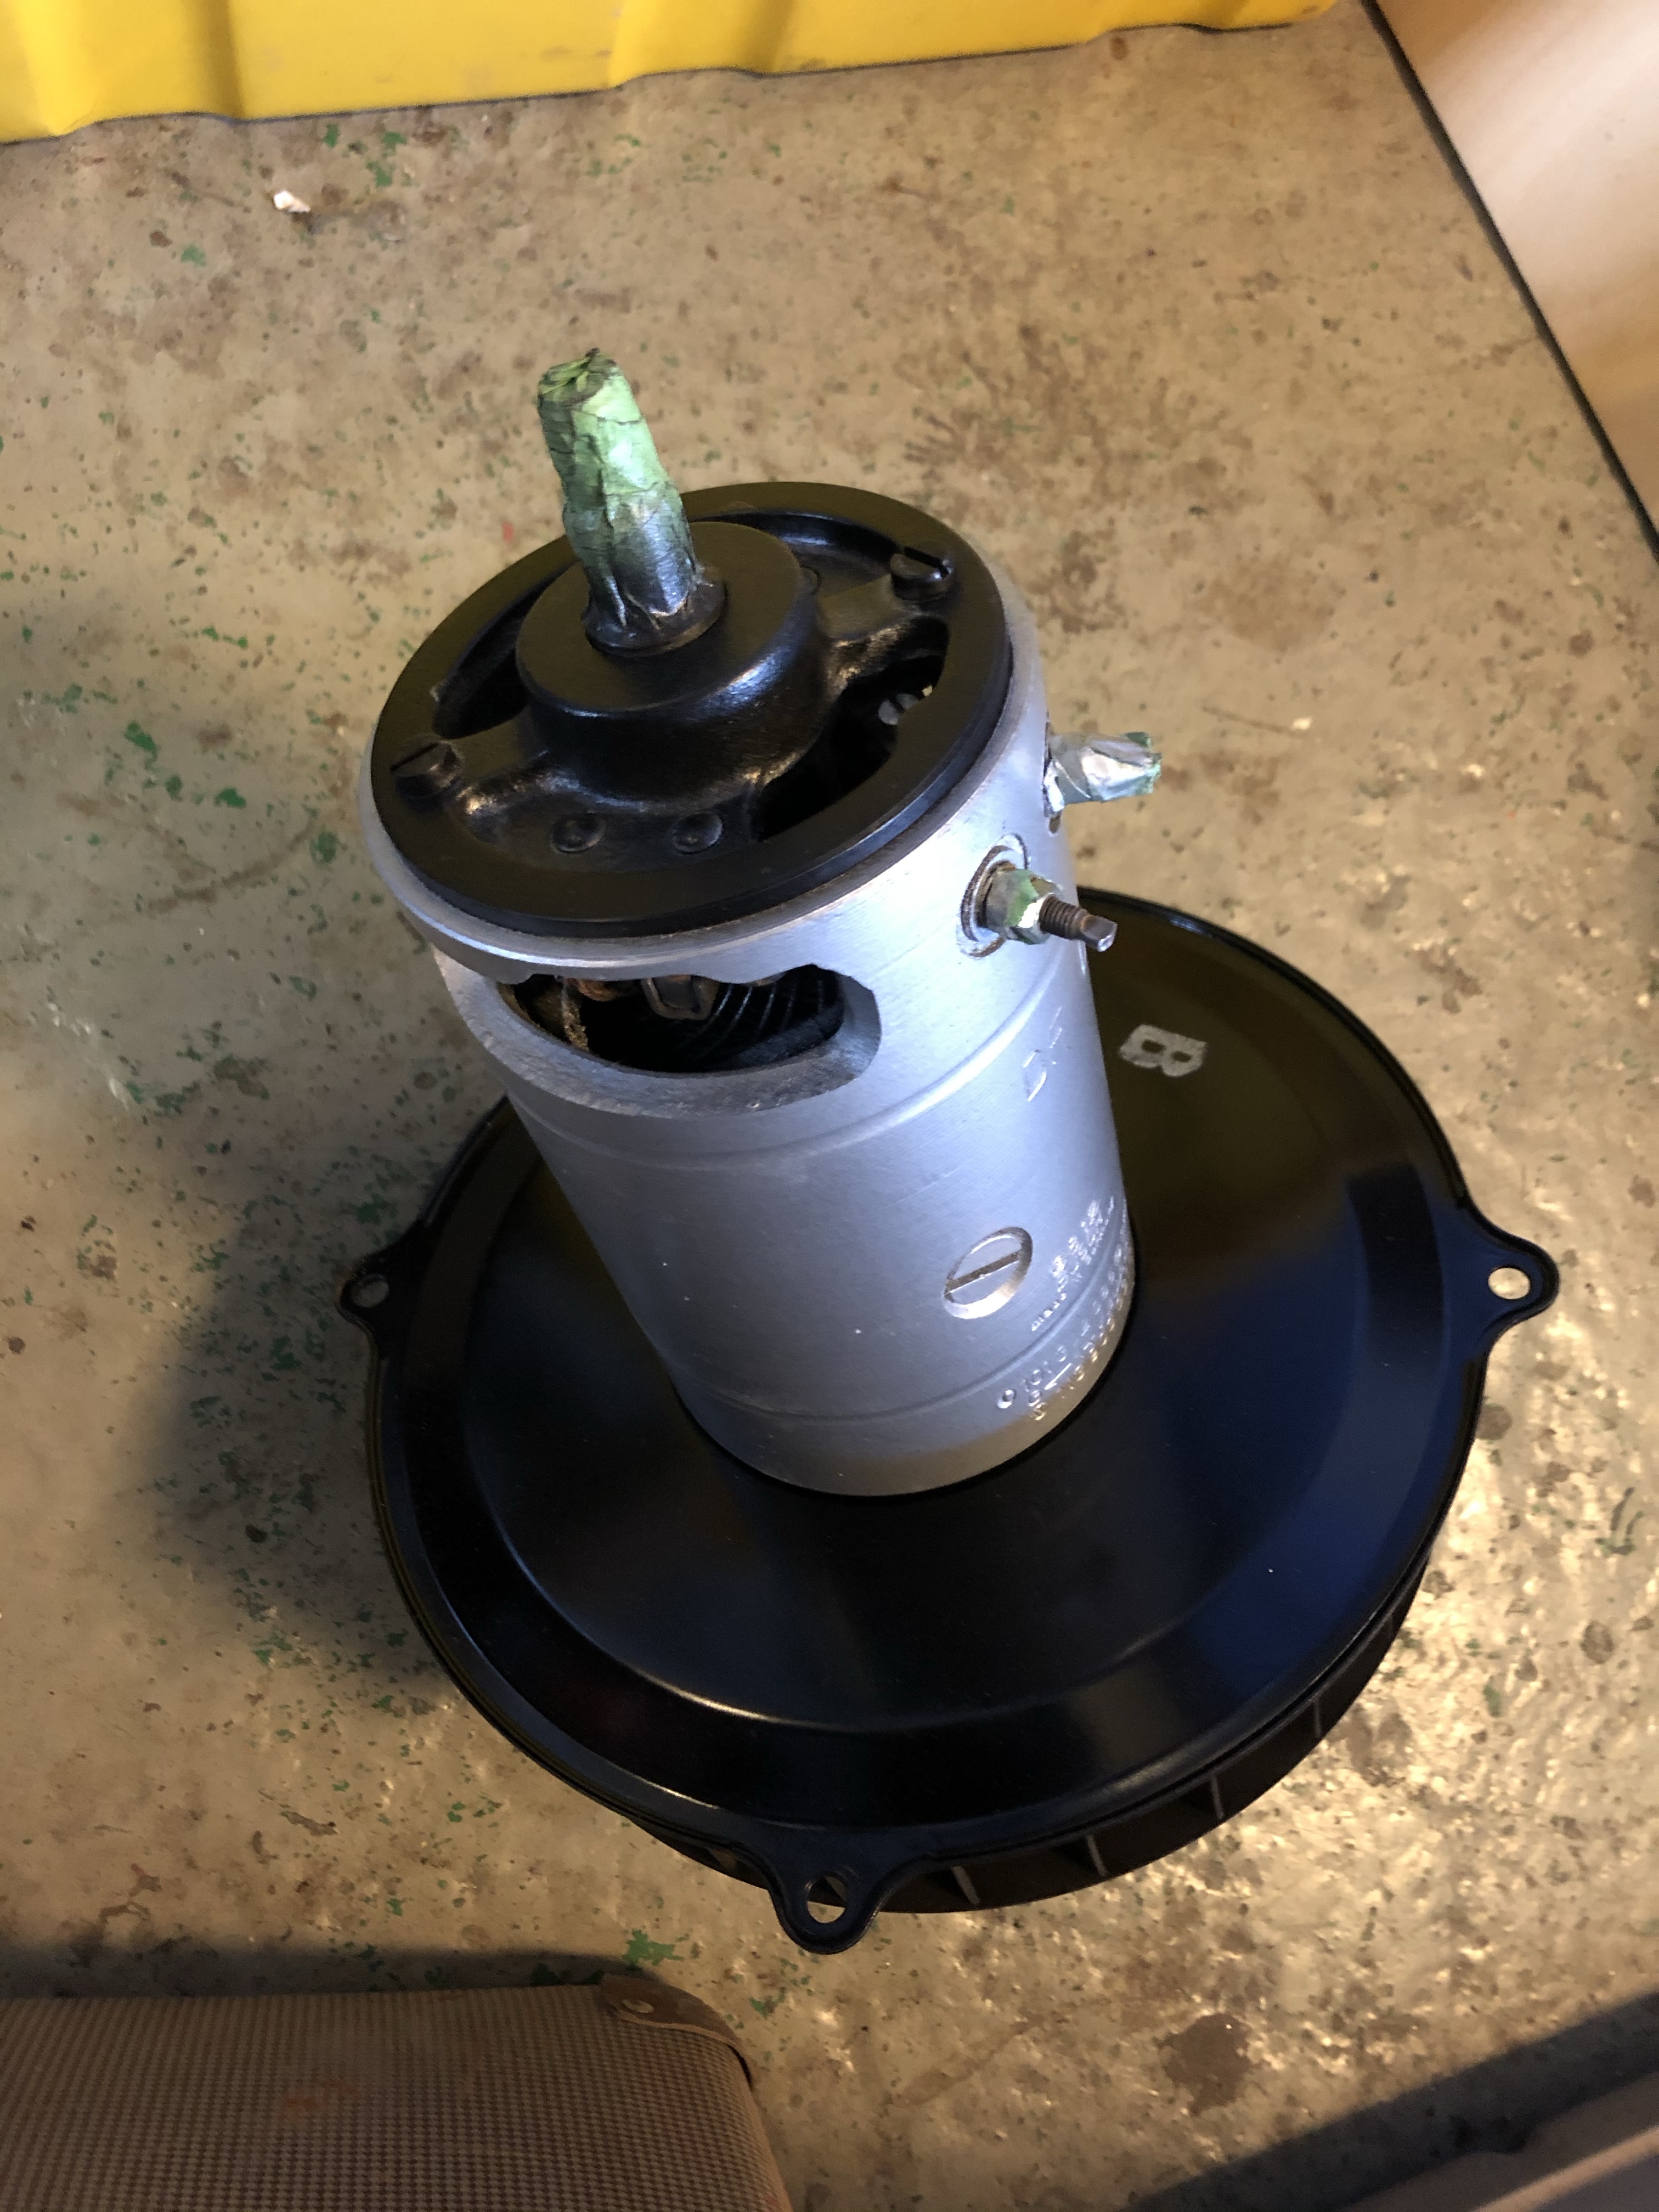
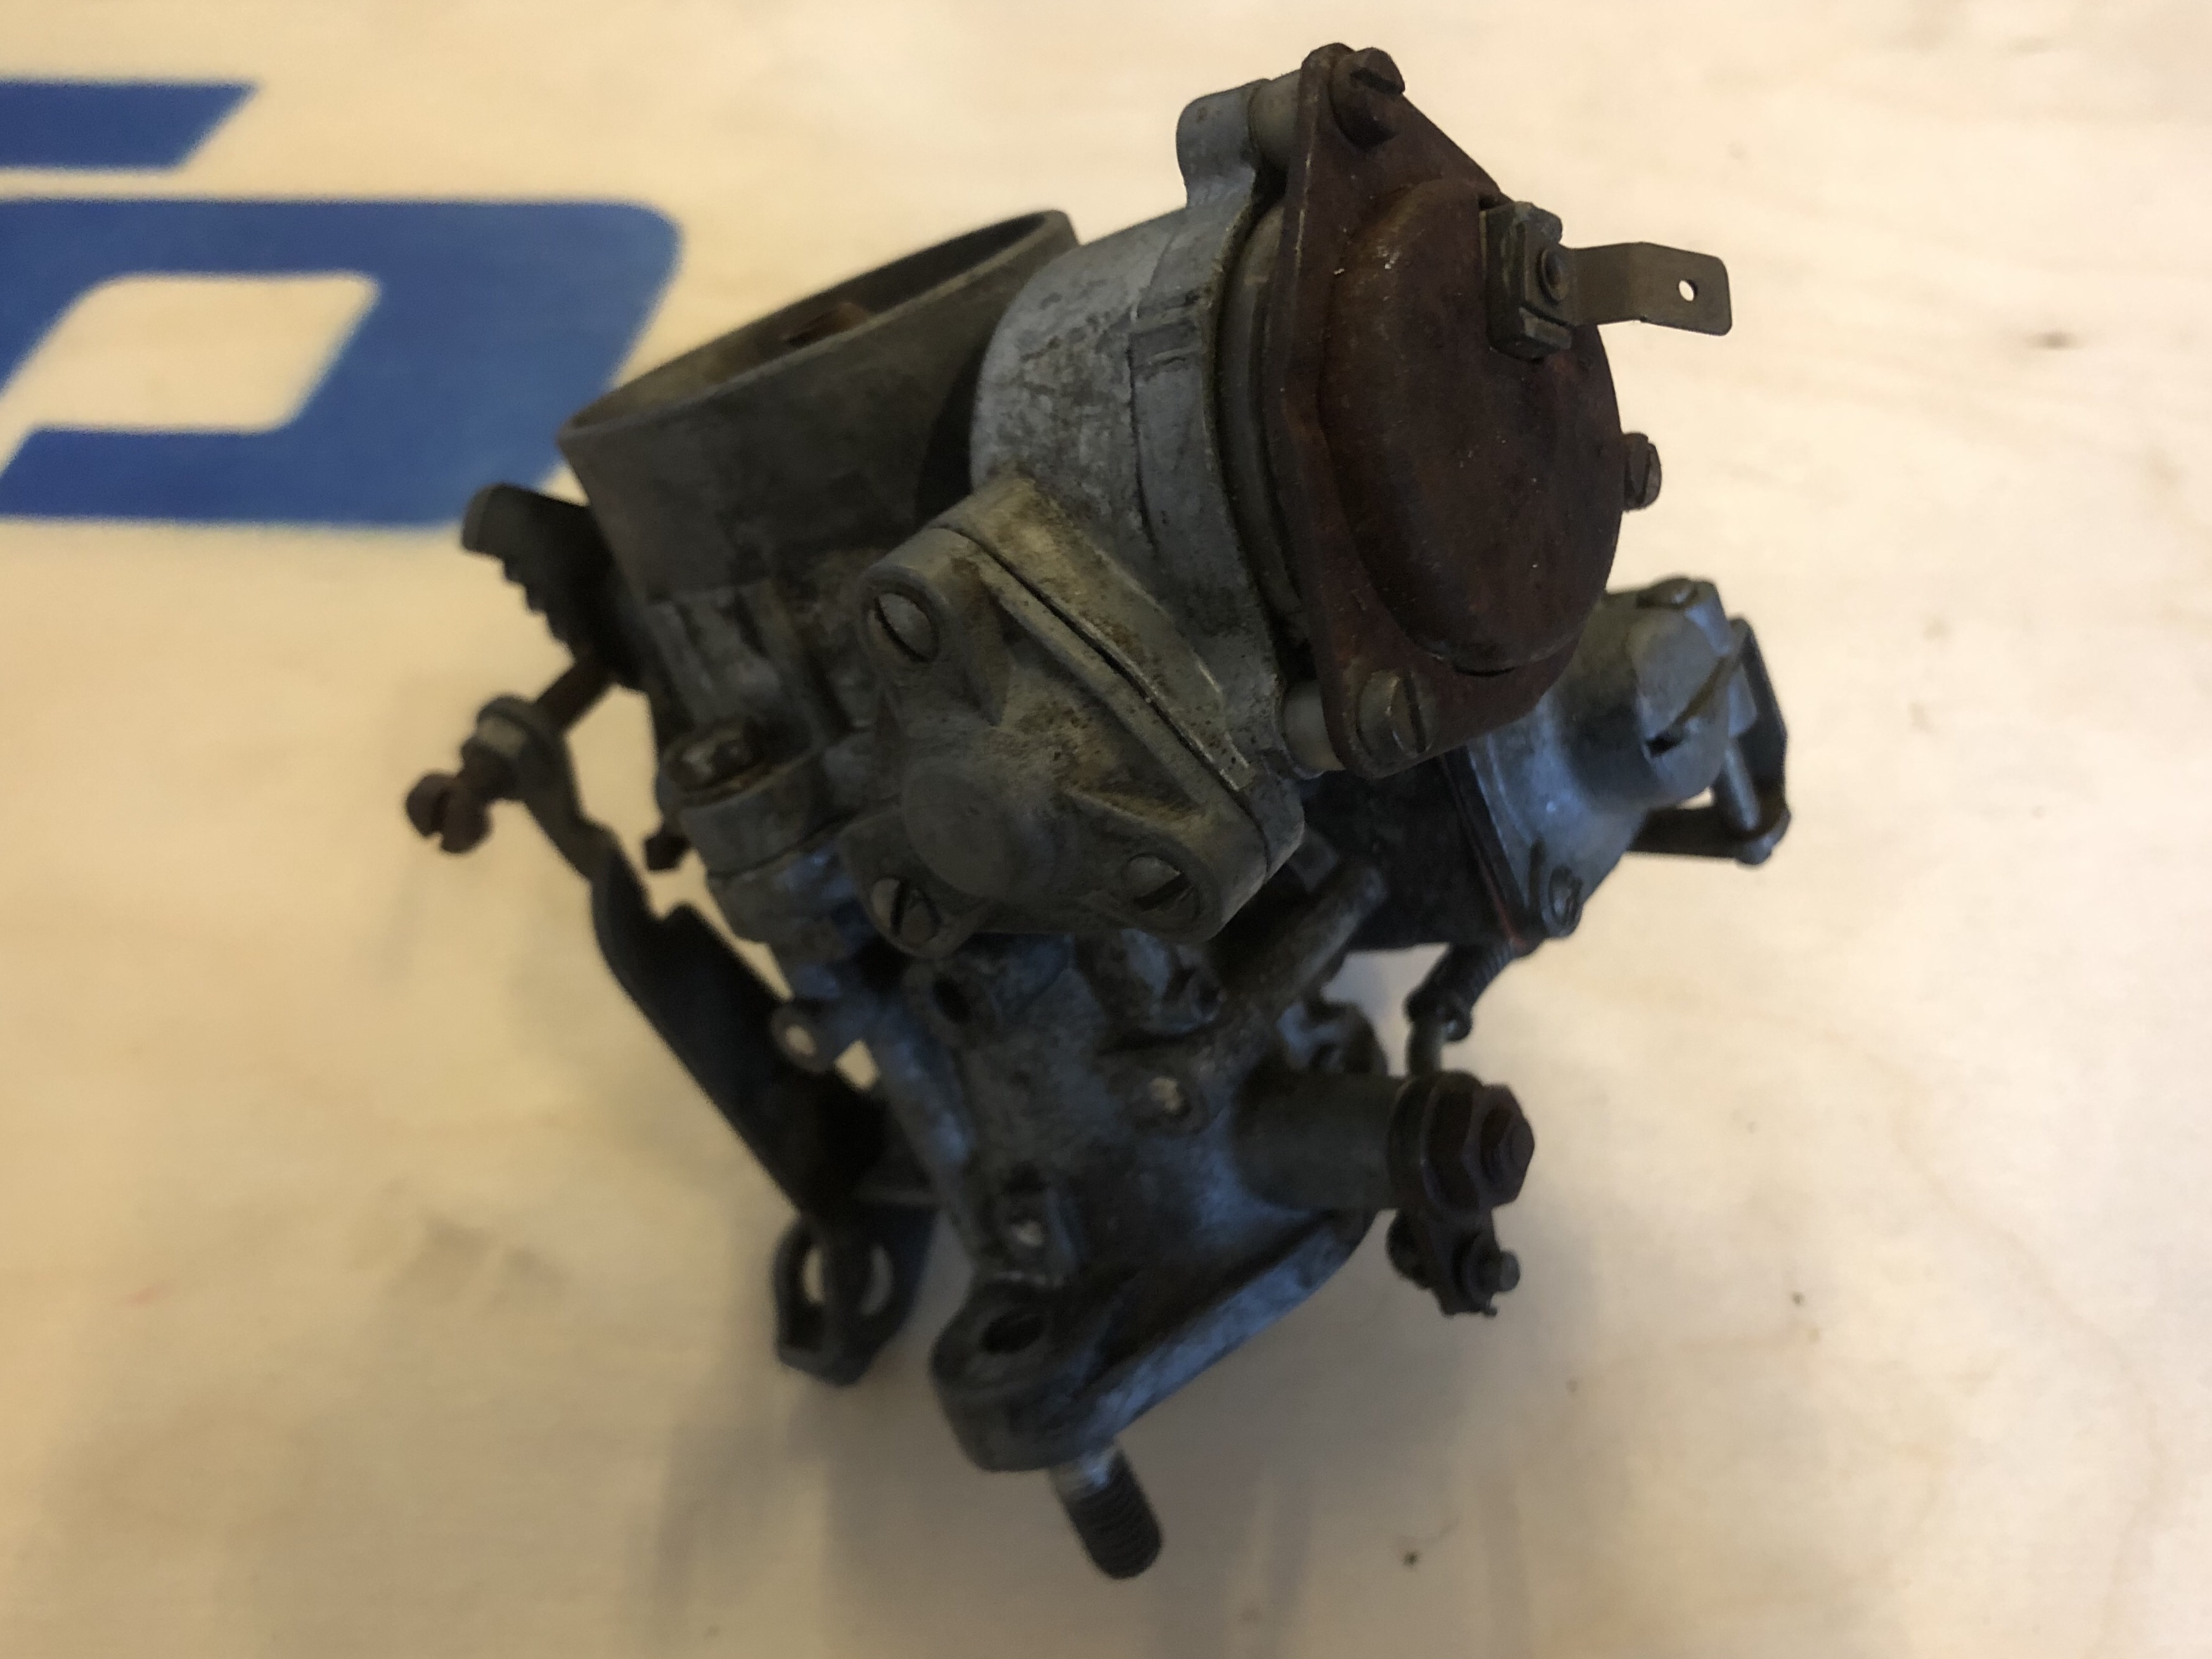
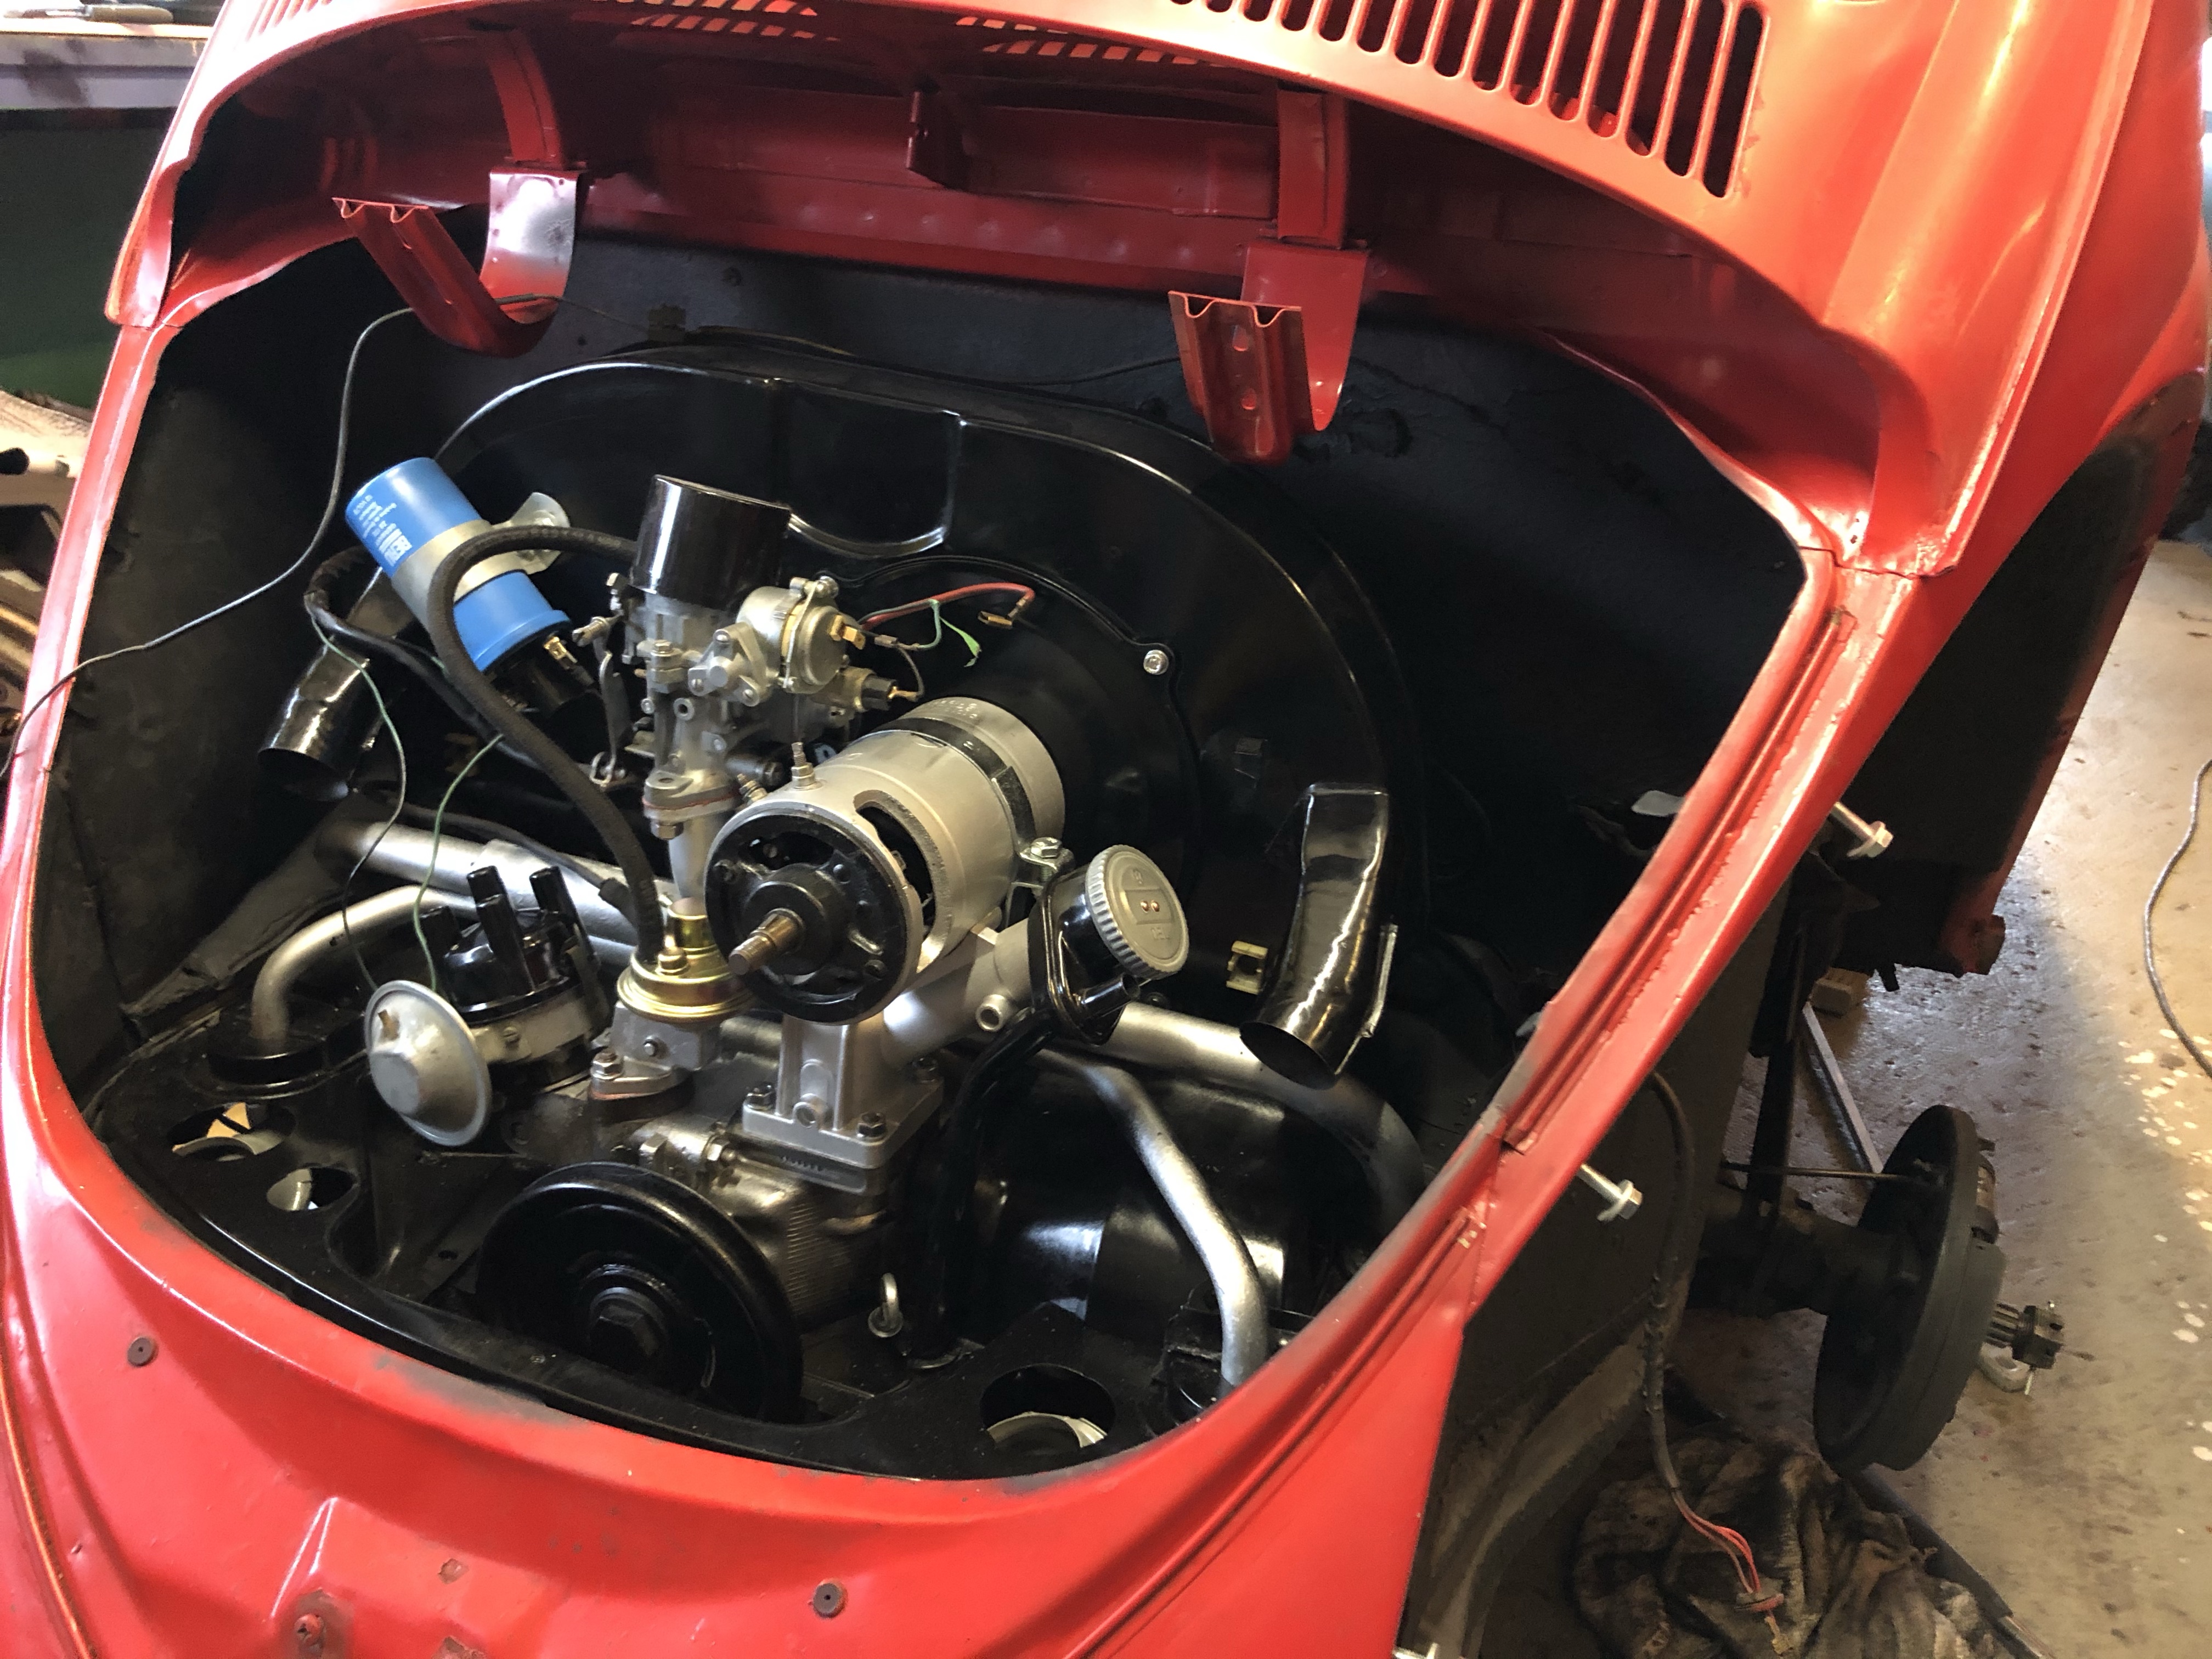
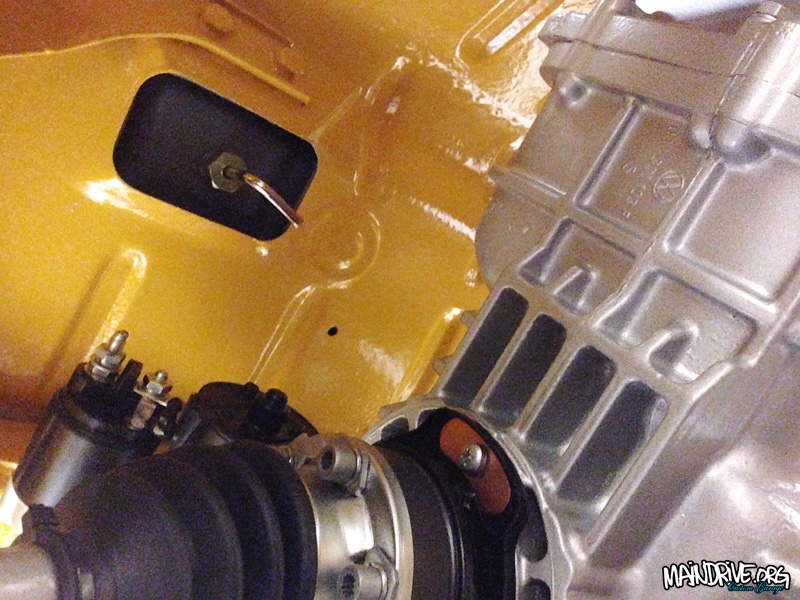
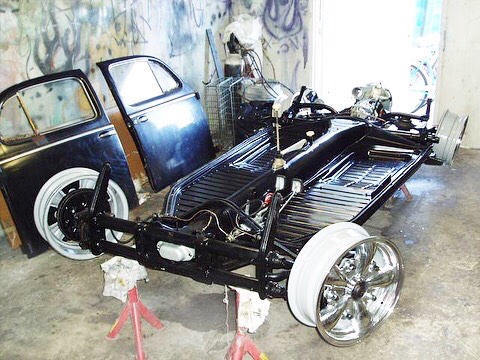
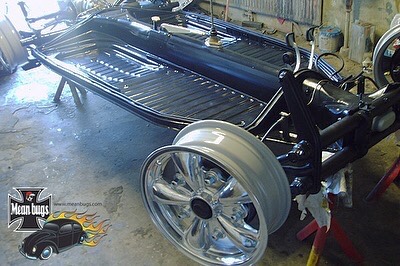
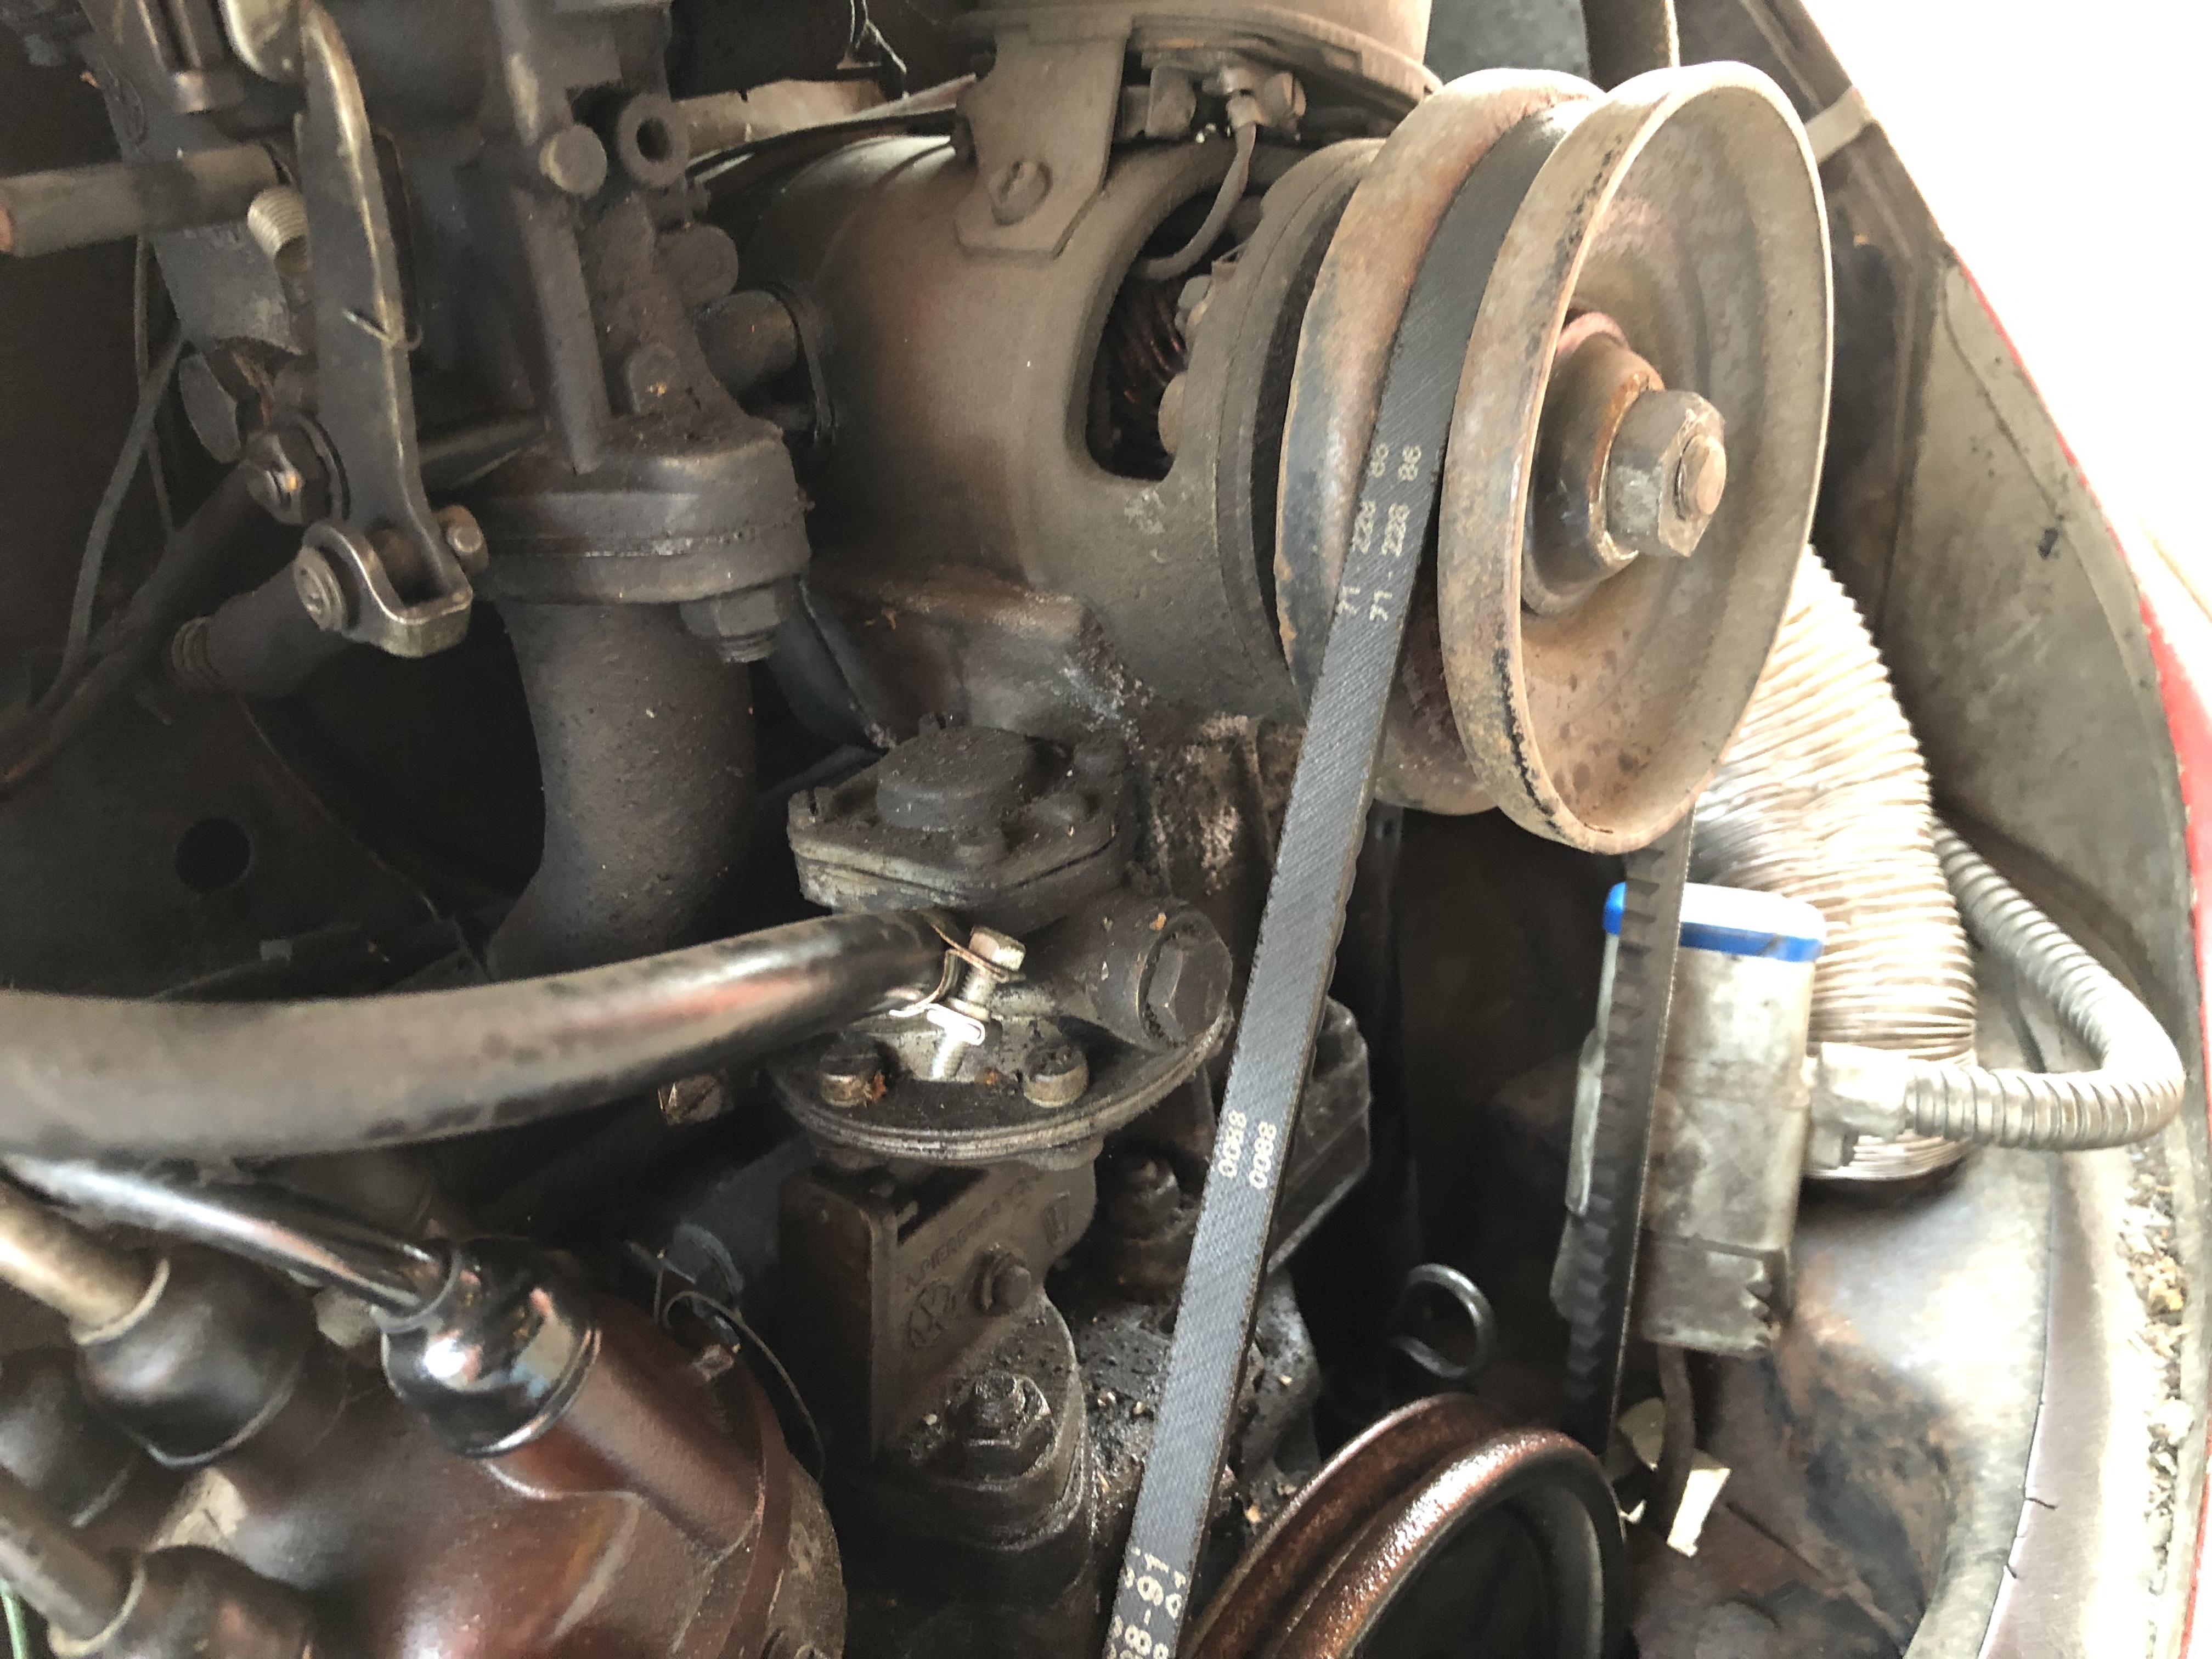
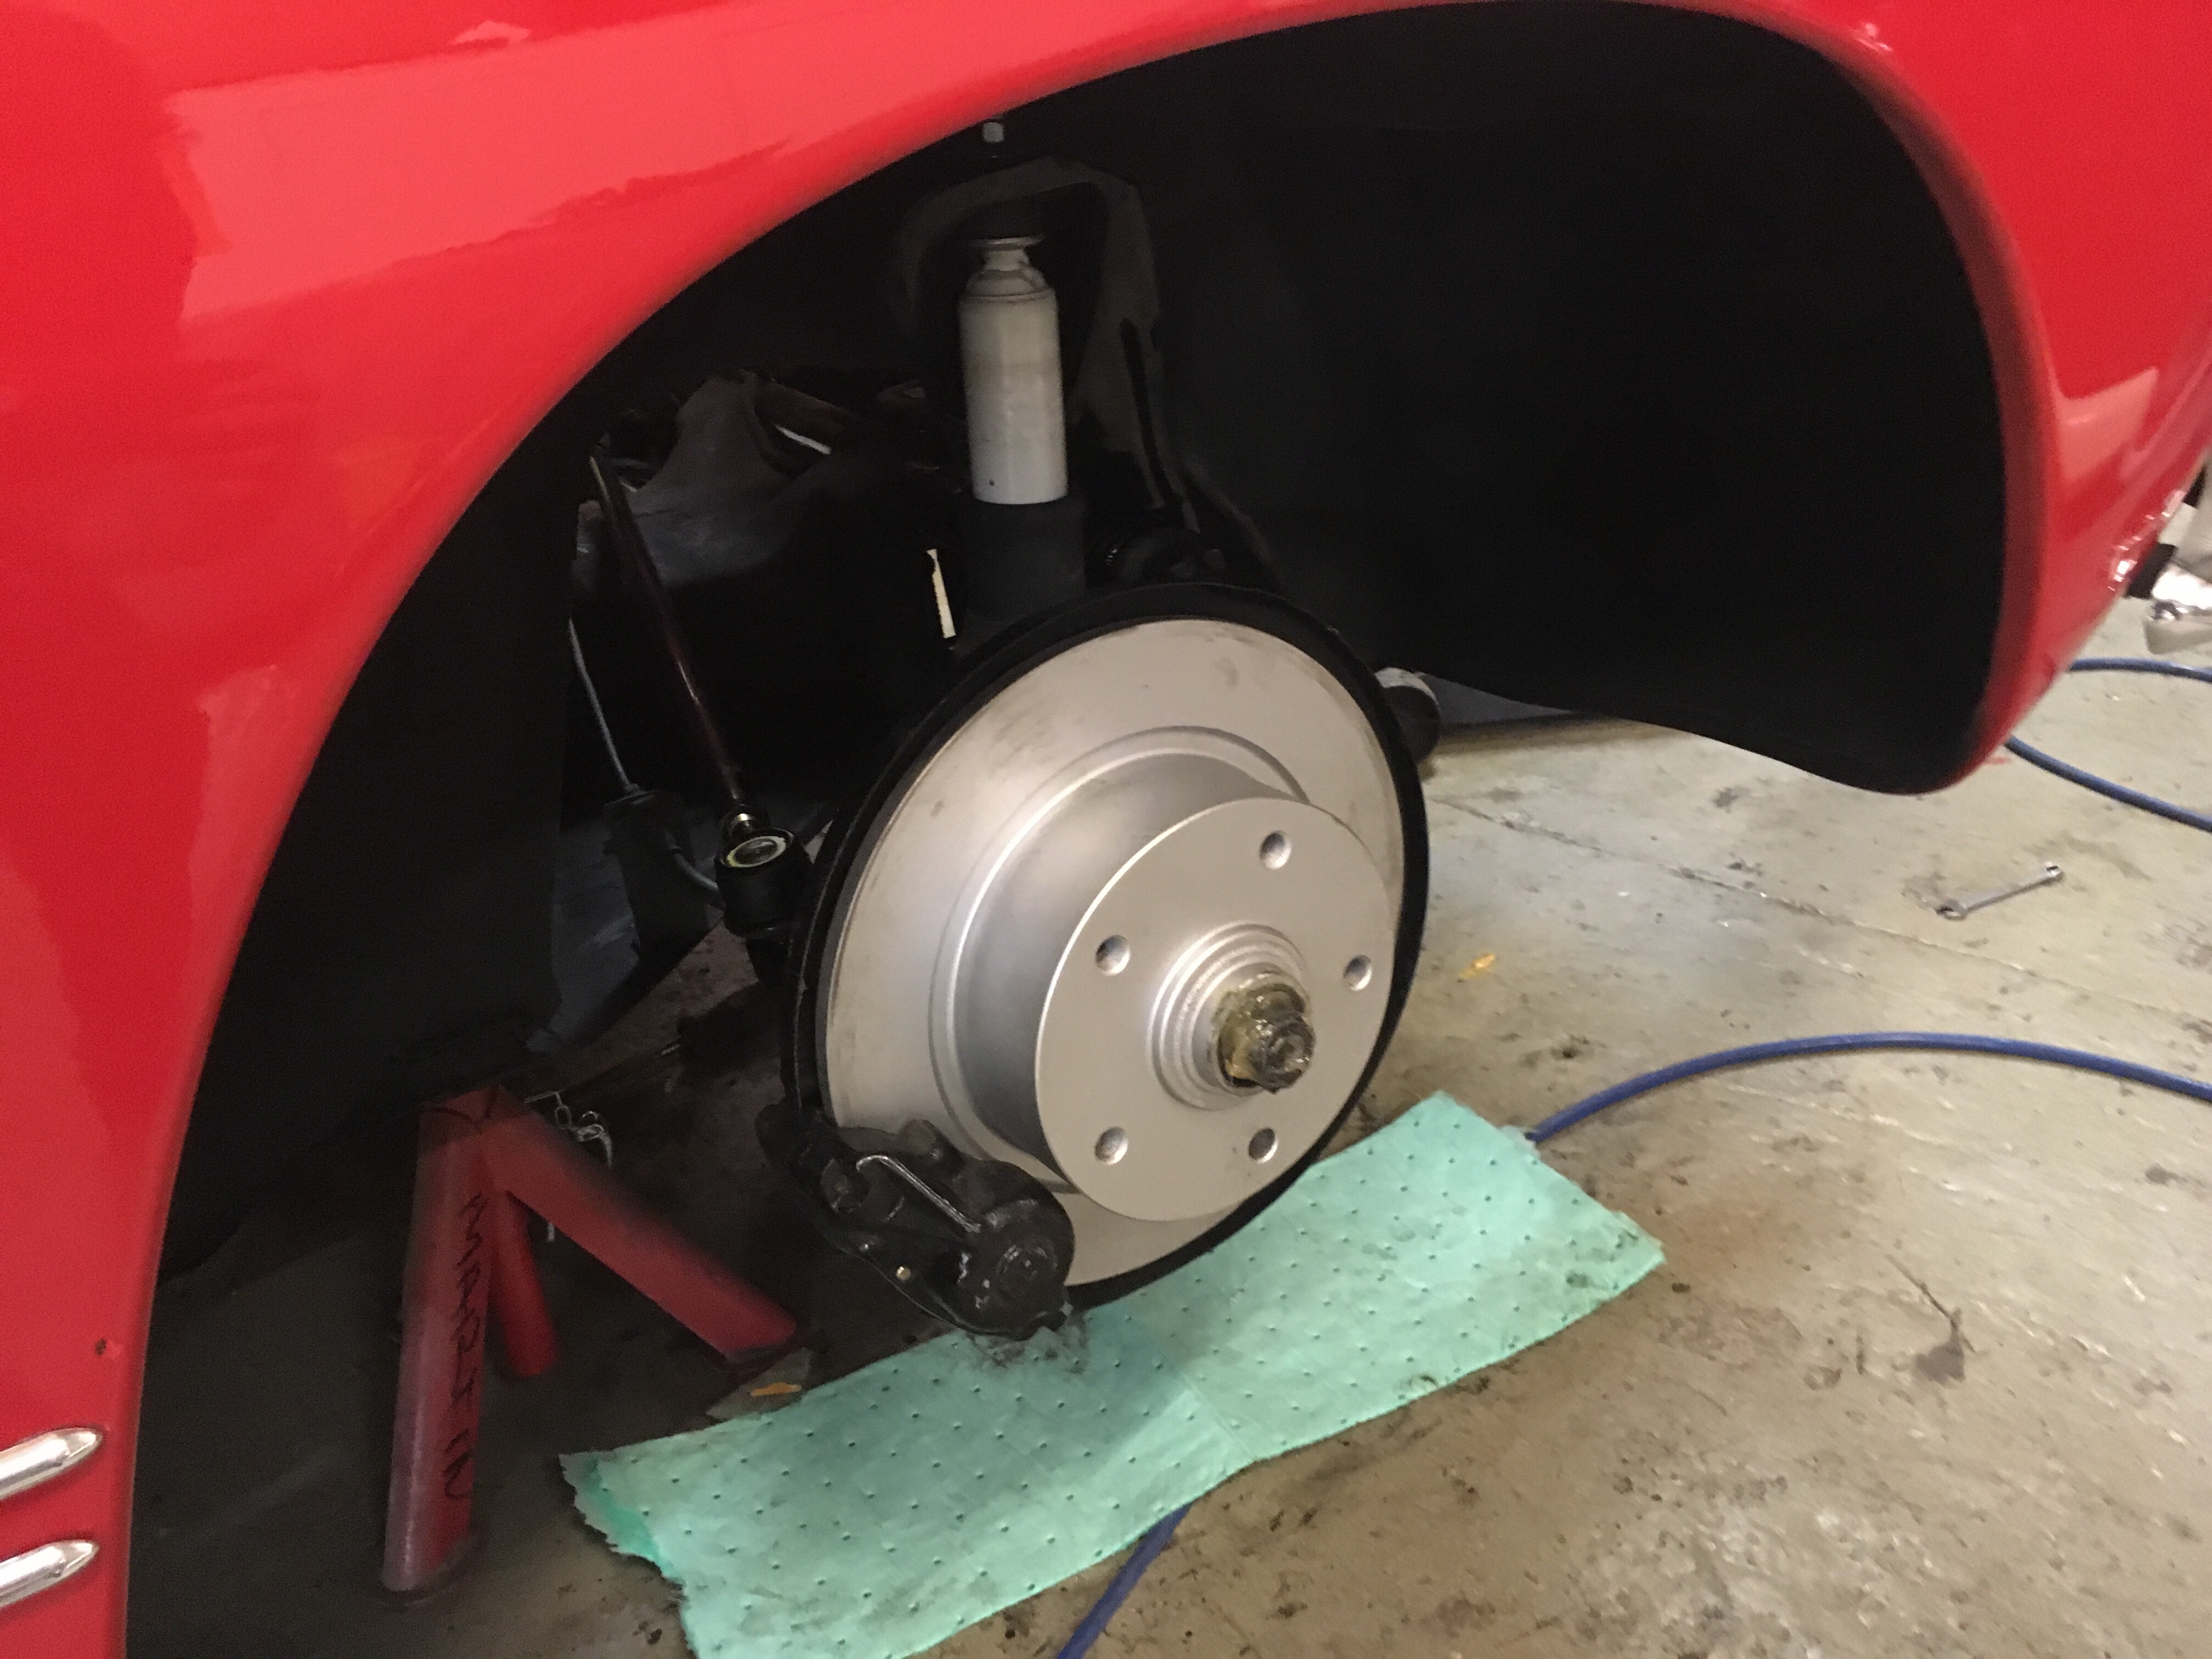
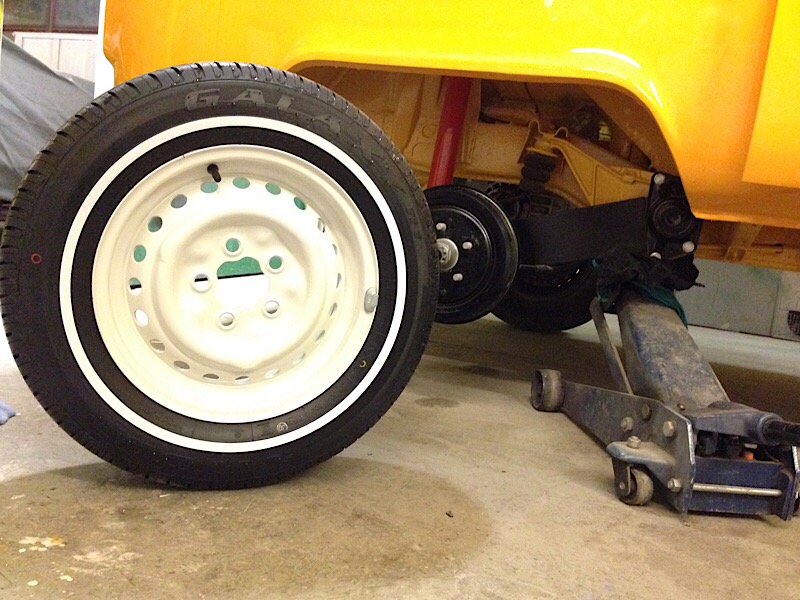
Some progress on the 65’. Engine got a 12v generator, new spark plugs, distributor cap/rotor, ignition coil, ignition wires, 12v regulator, serviced carburetor, new exhaust, valves adjusted, new oil. New shocks all around. Fenders are bolted back, floor painted, fuel tank cleaned, new fuel lines and filter. The new brake system is bleed and works perfect.

En sväng förbi Piece Performance och Hans nya dragracing bil. 1,6 L låter vass!
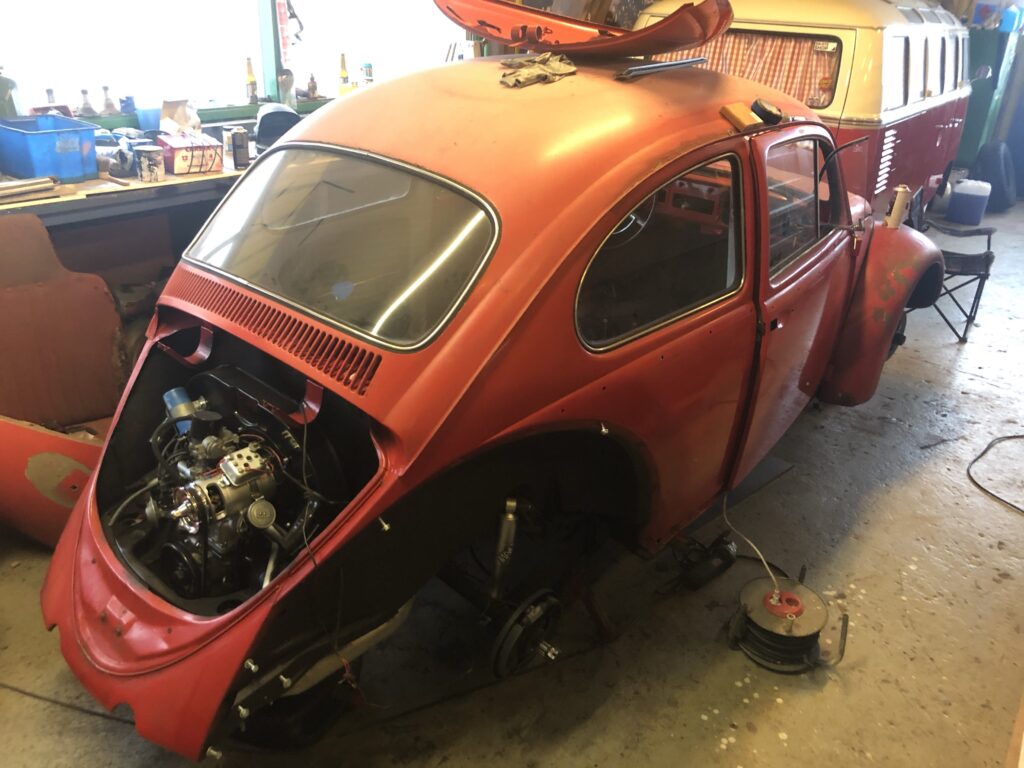
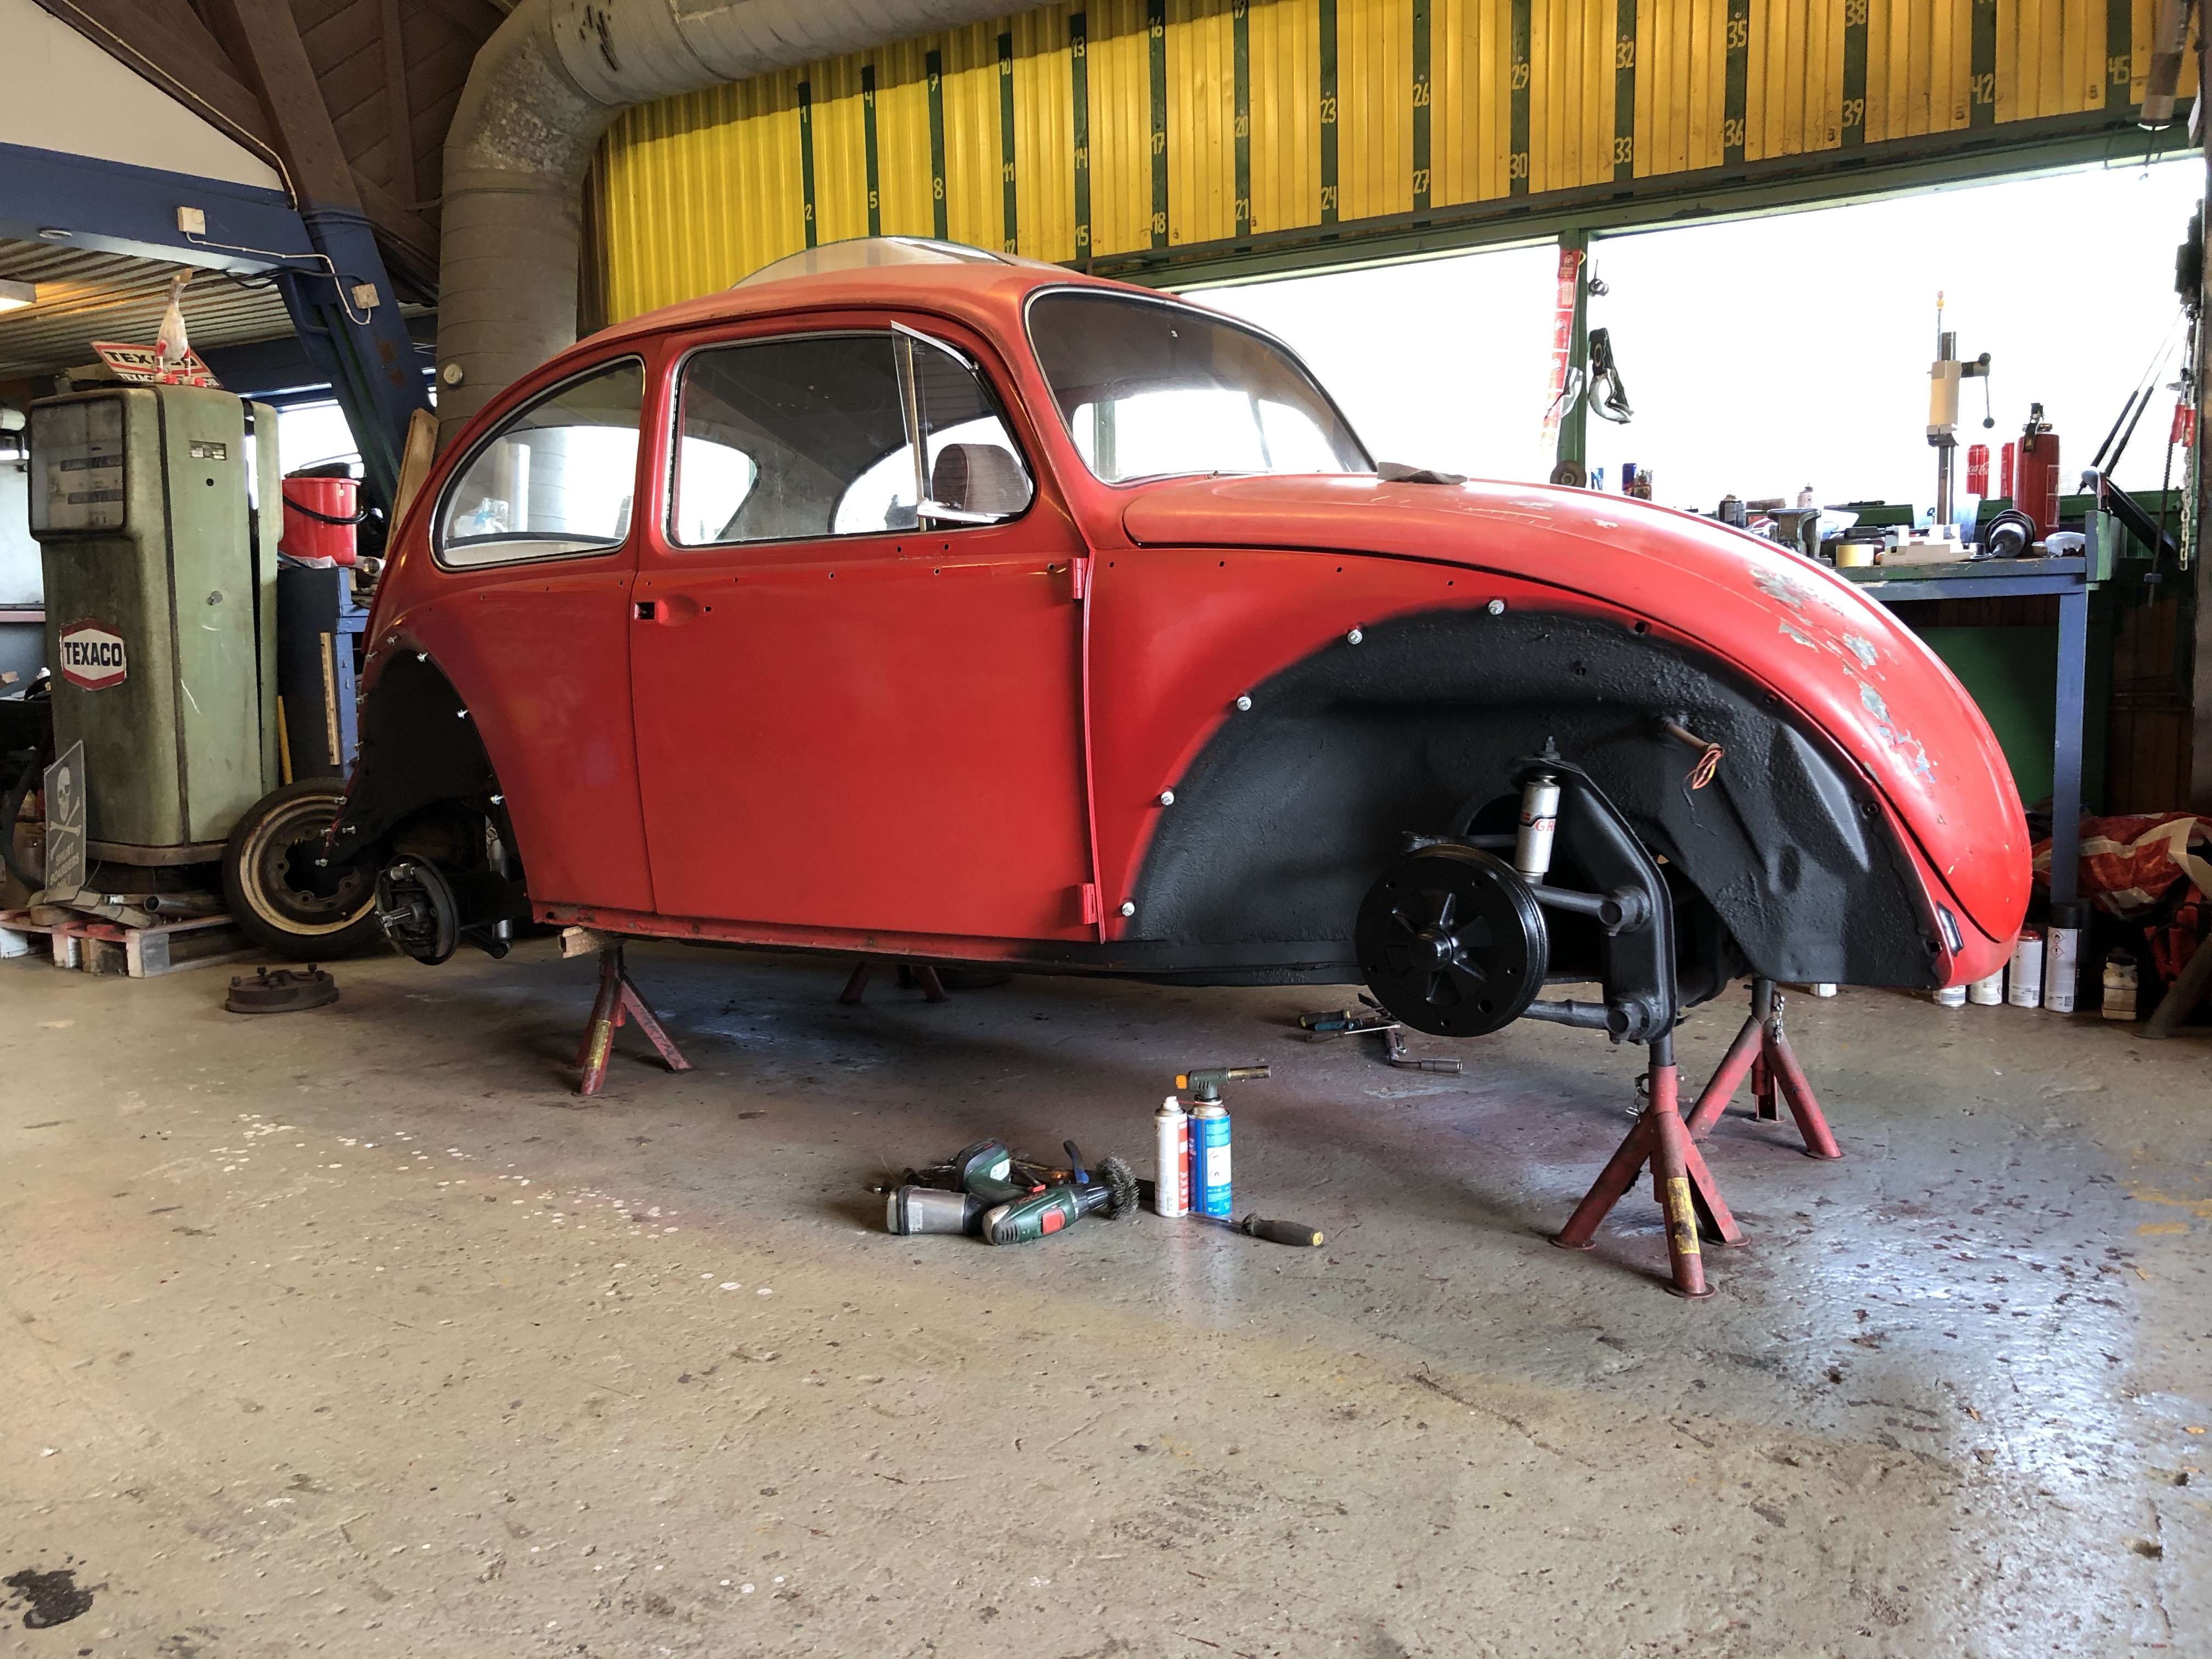
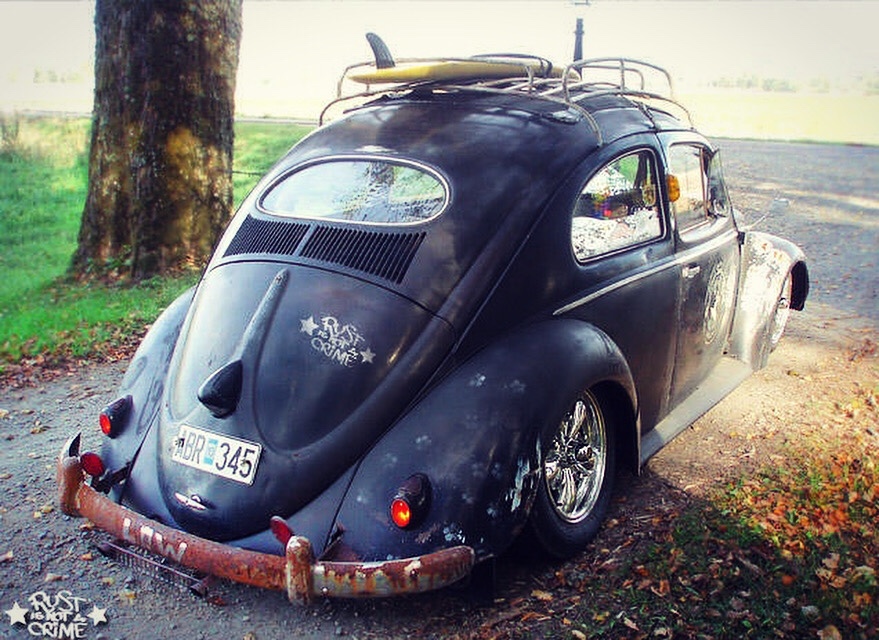
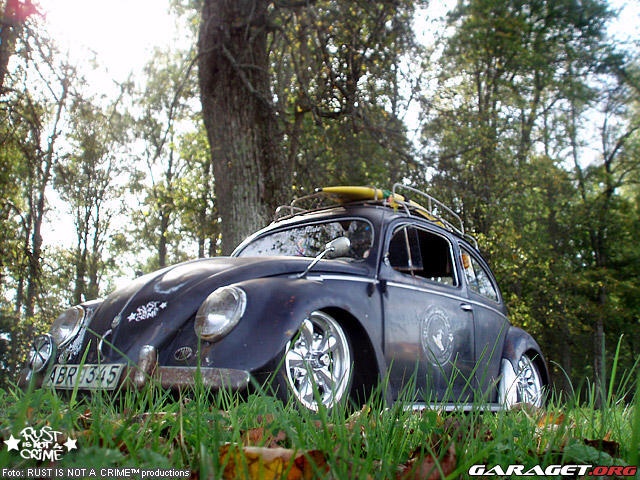
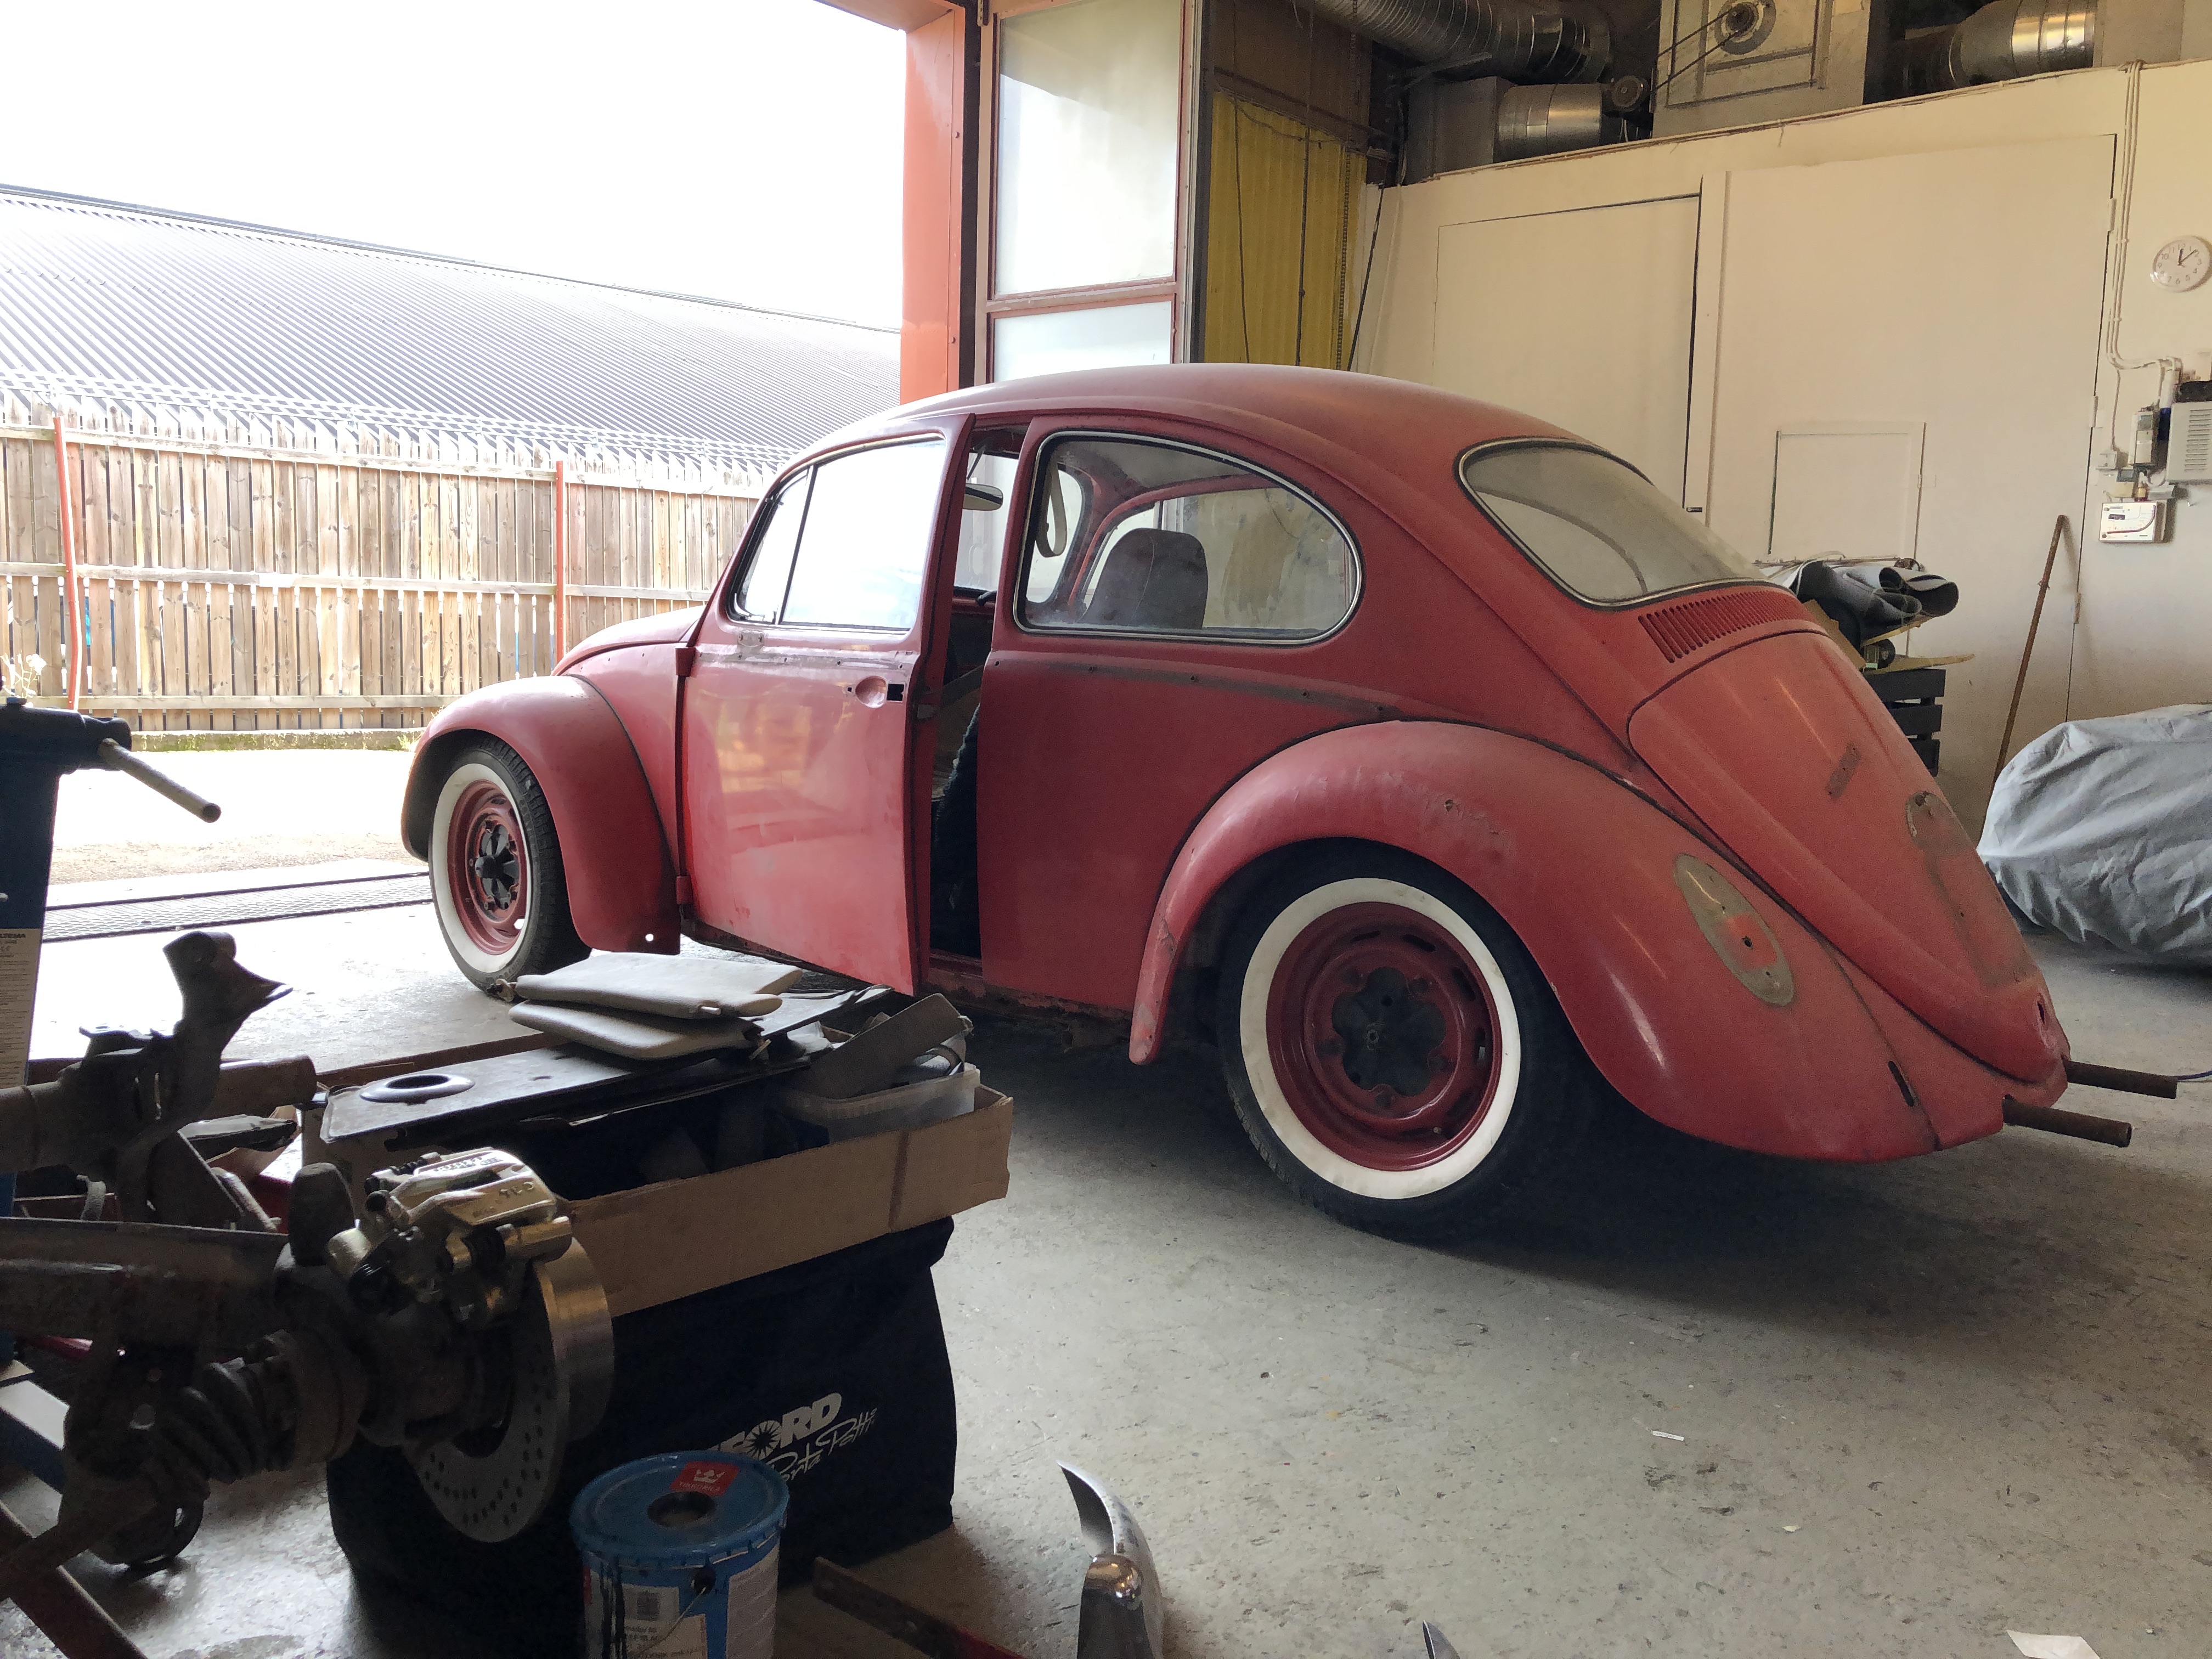
It’s been awhile since I updated anything about the 1965 Rat Beetle. Moving slowly forward but hopefully it can be ready for Safety Inspection this spring/summer.
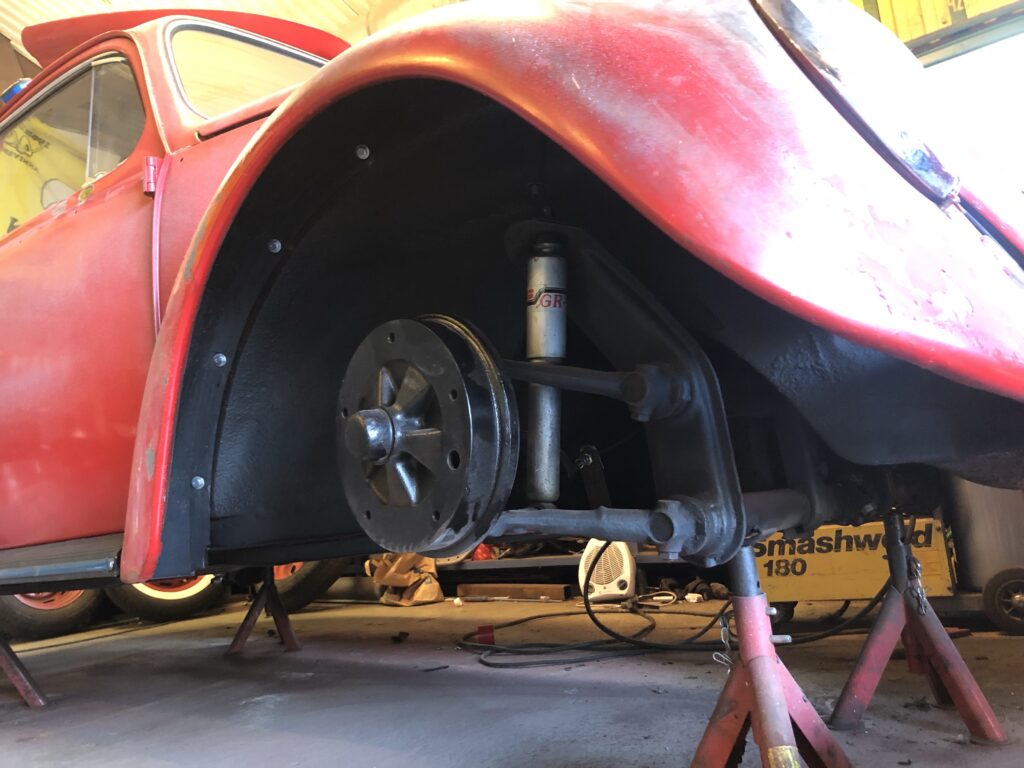
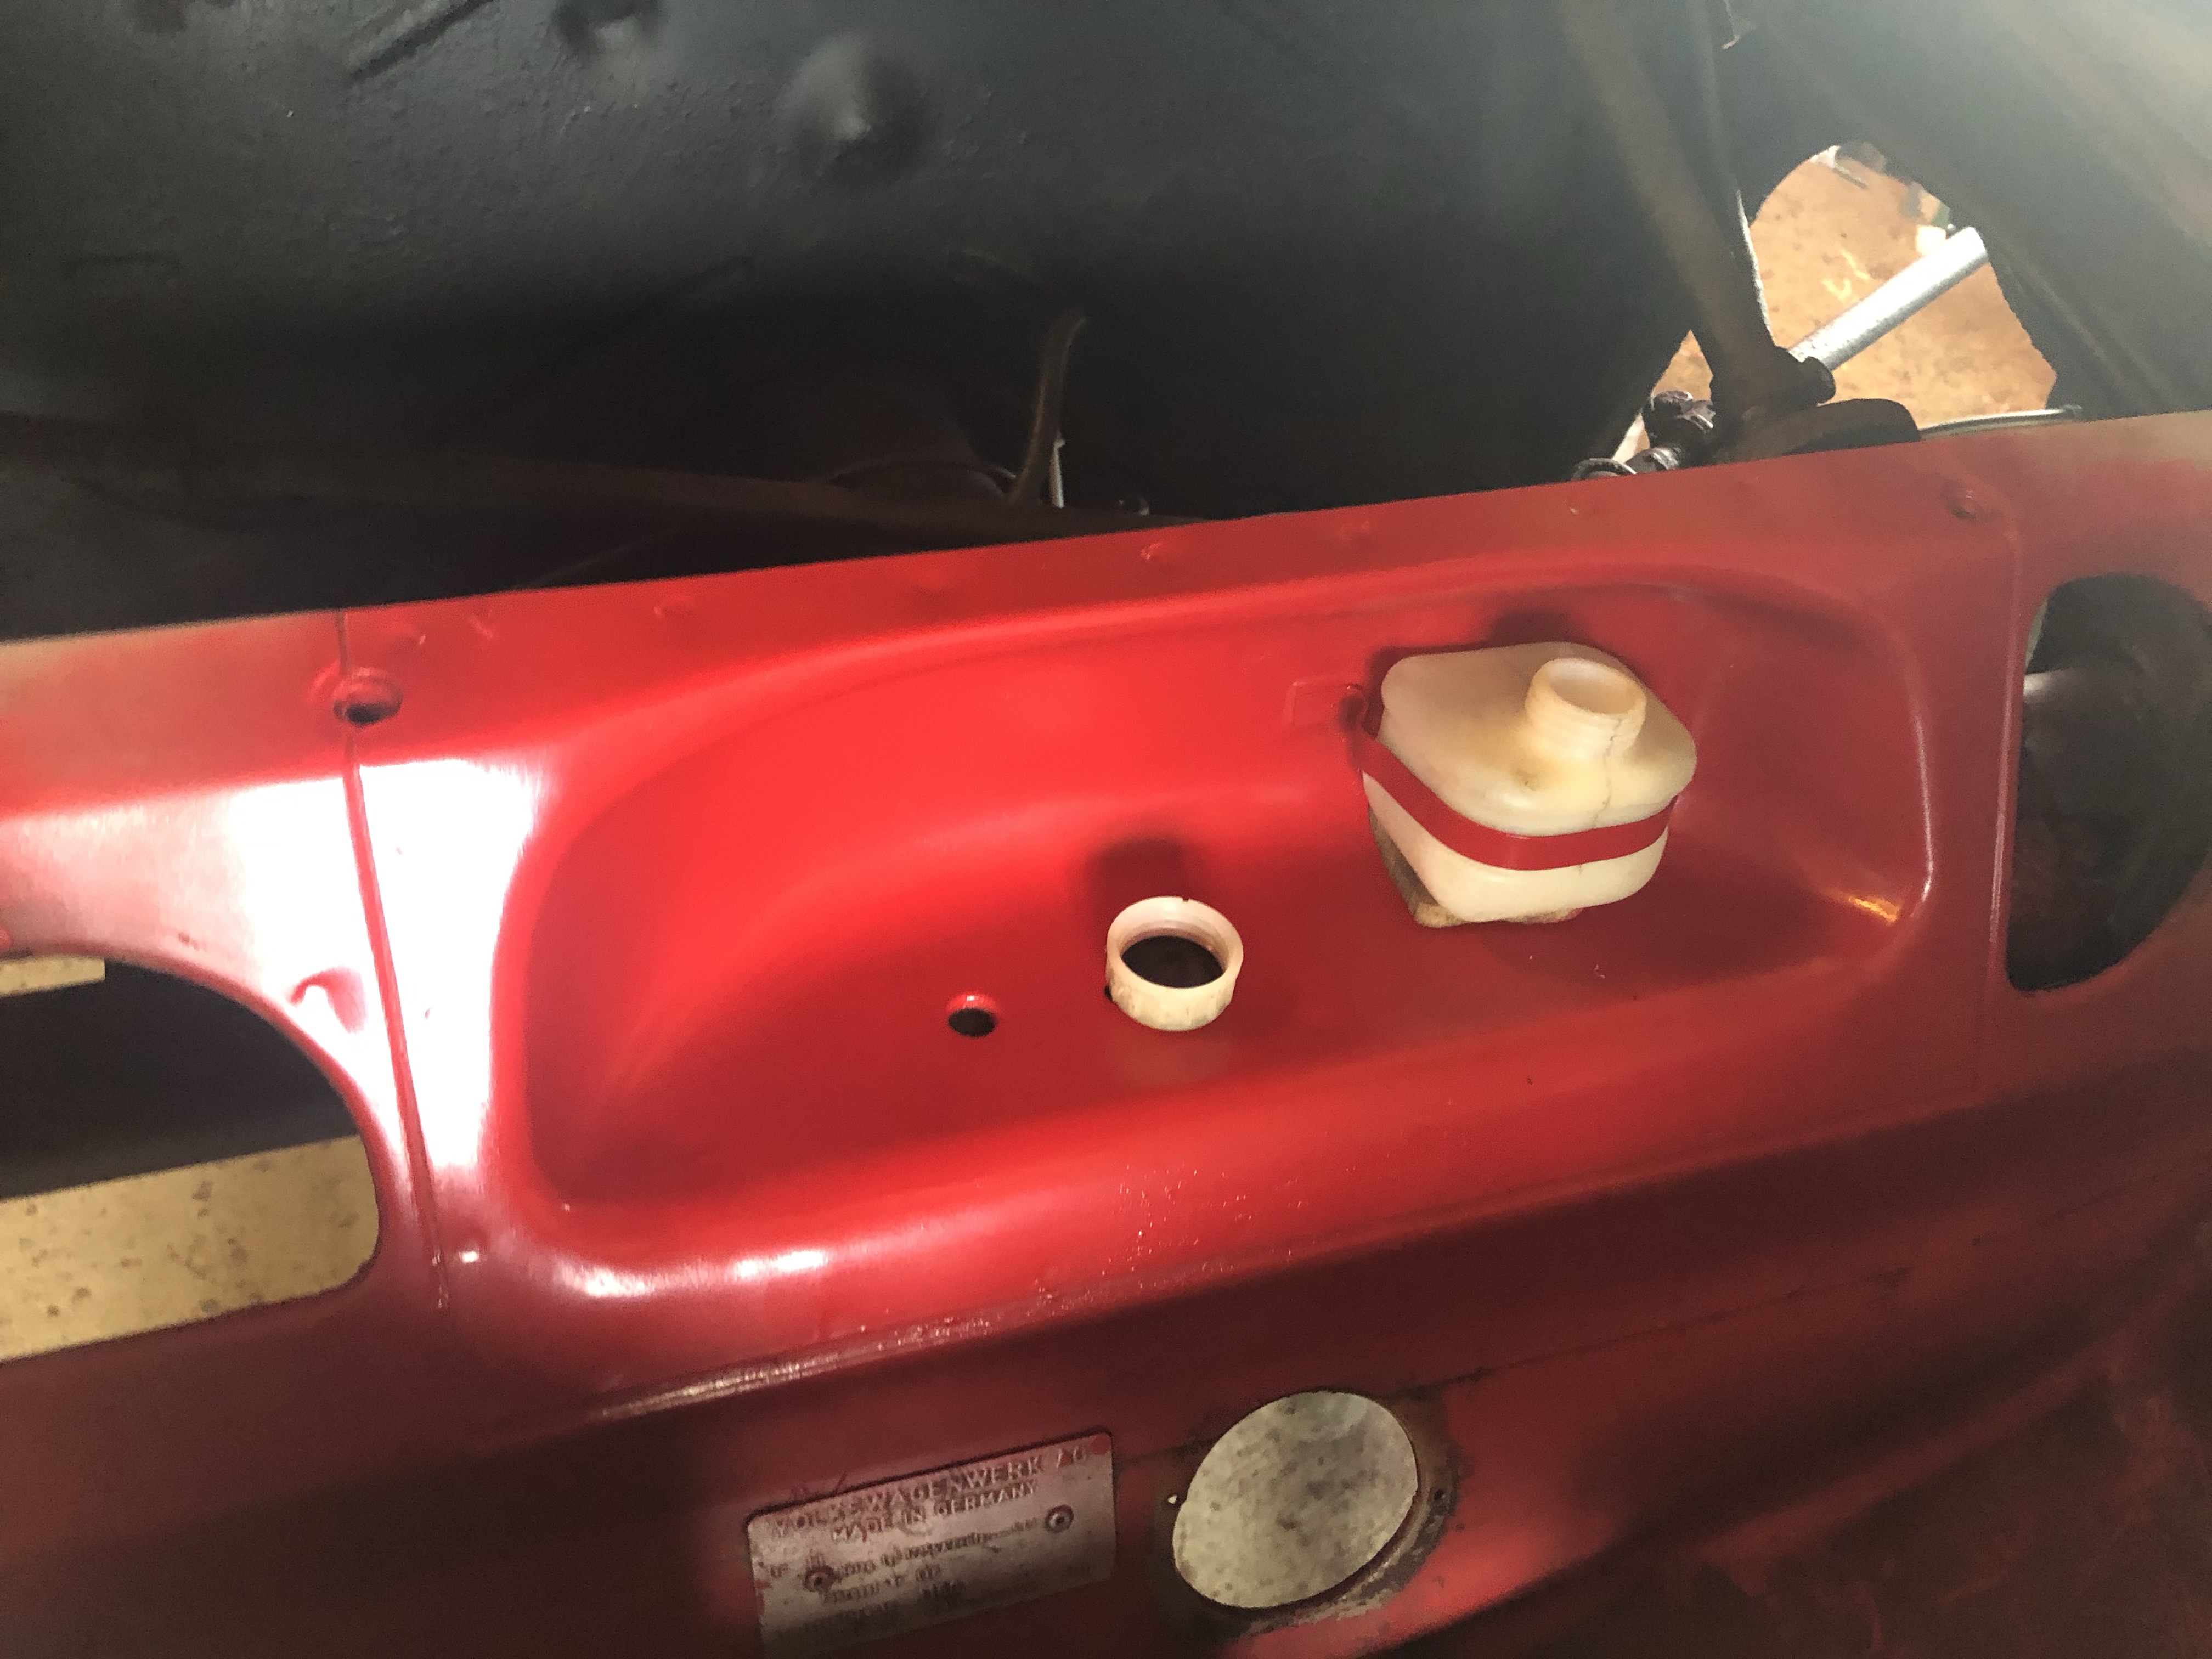
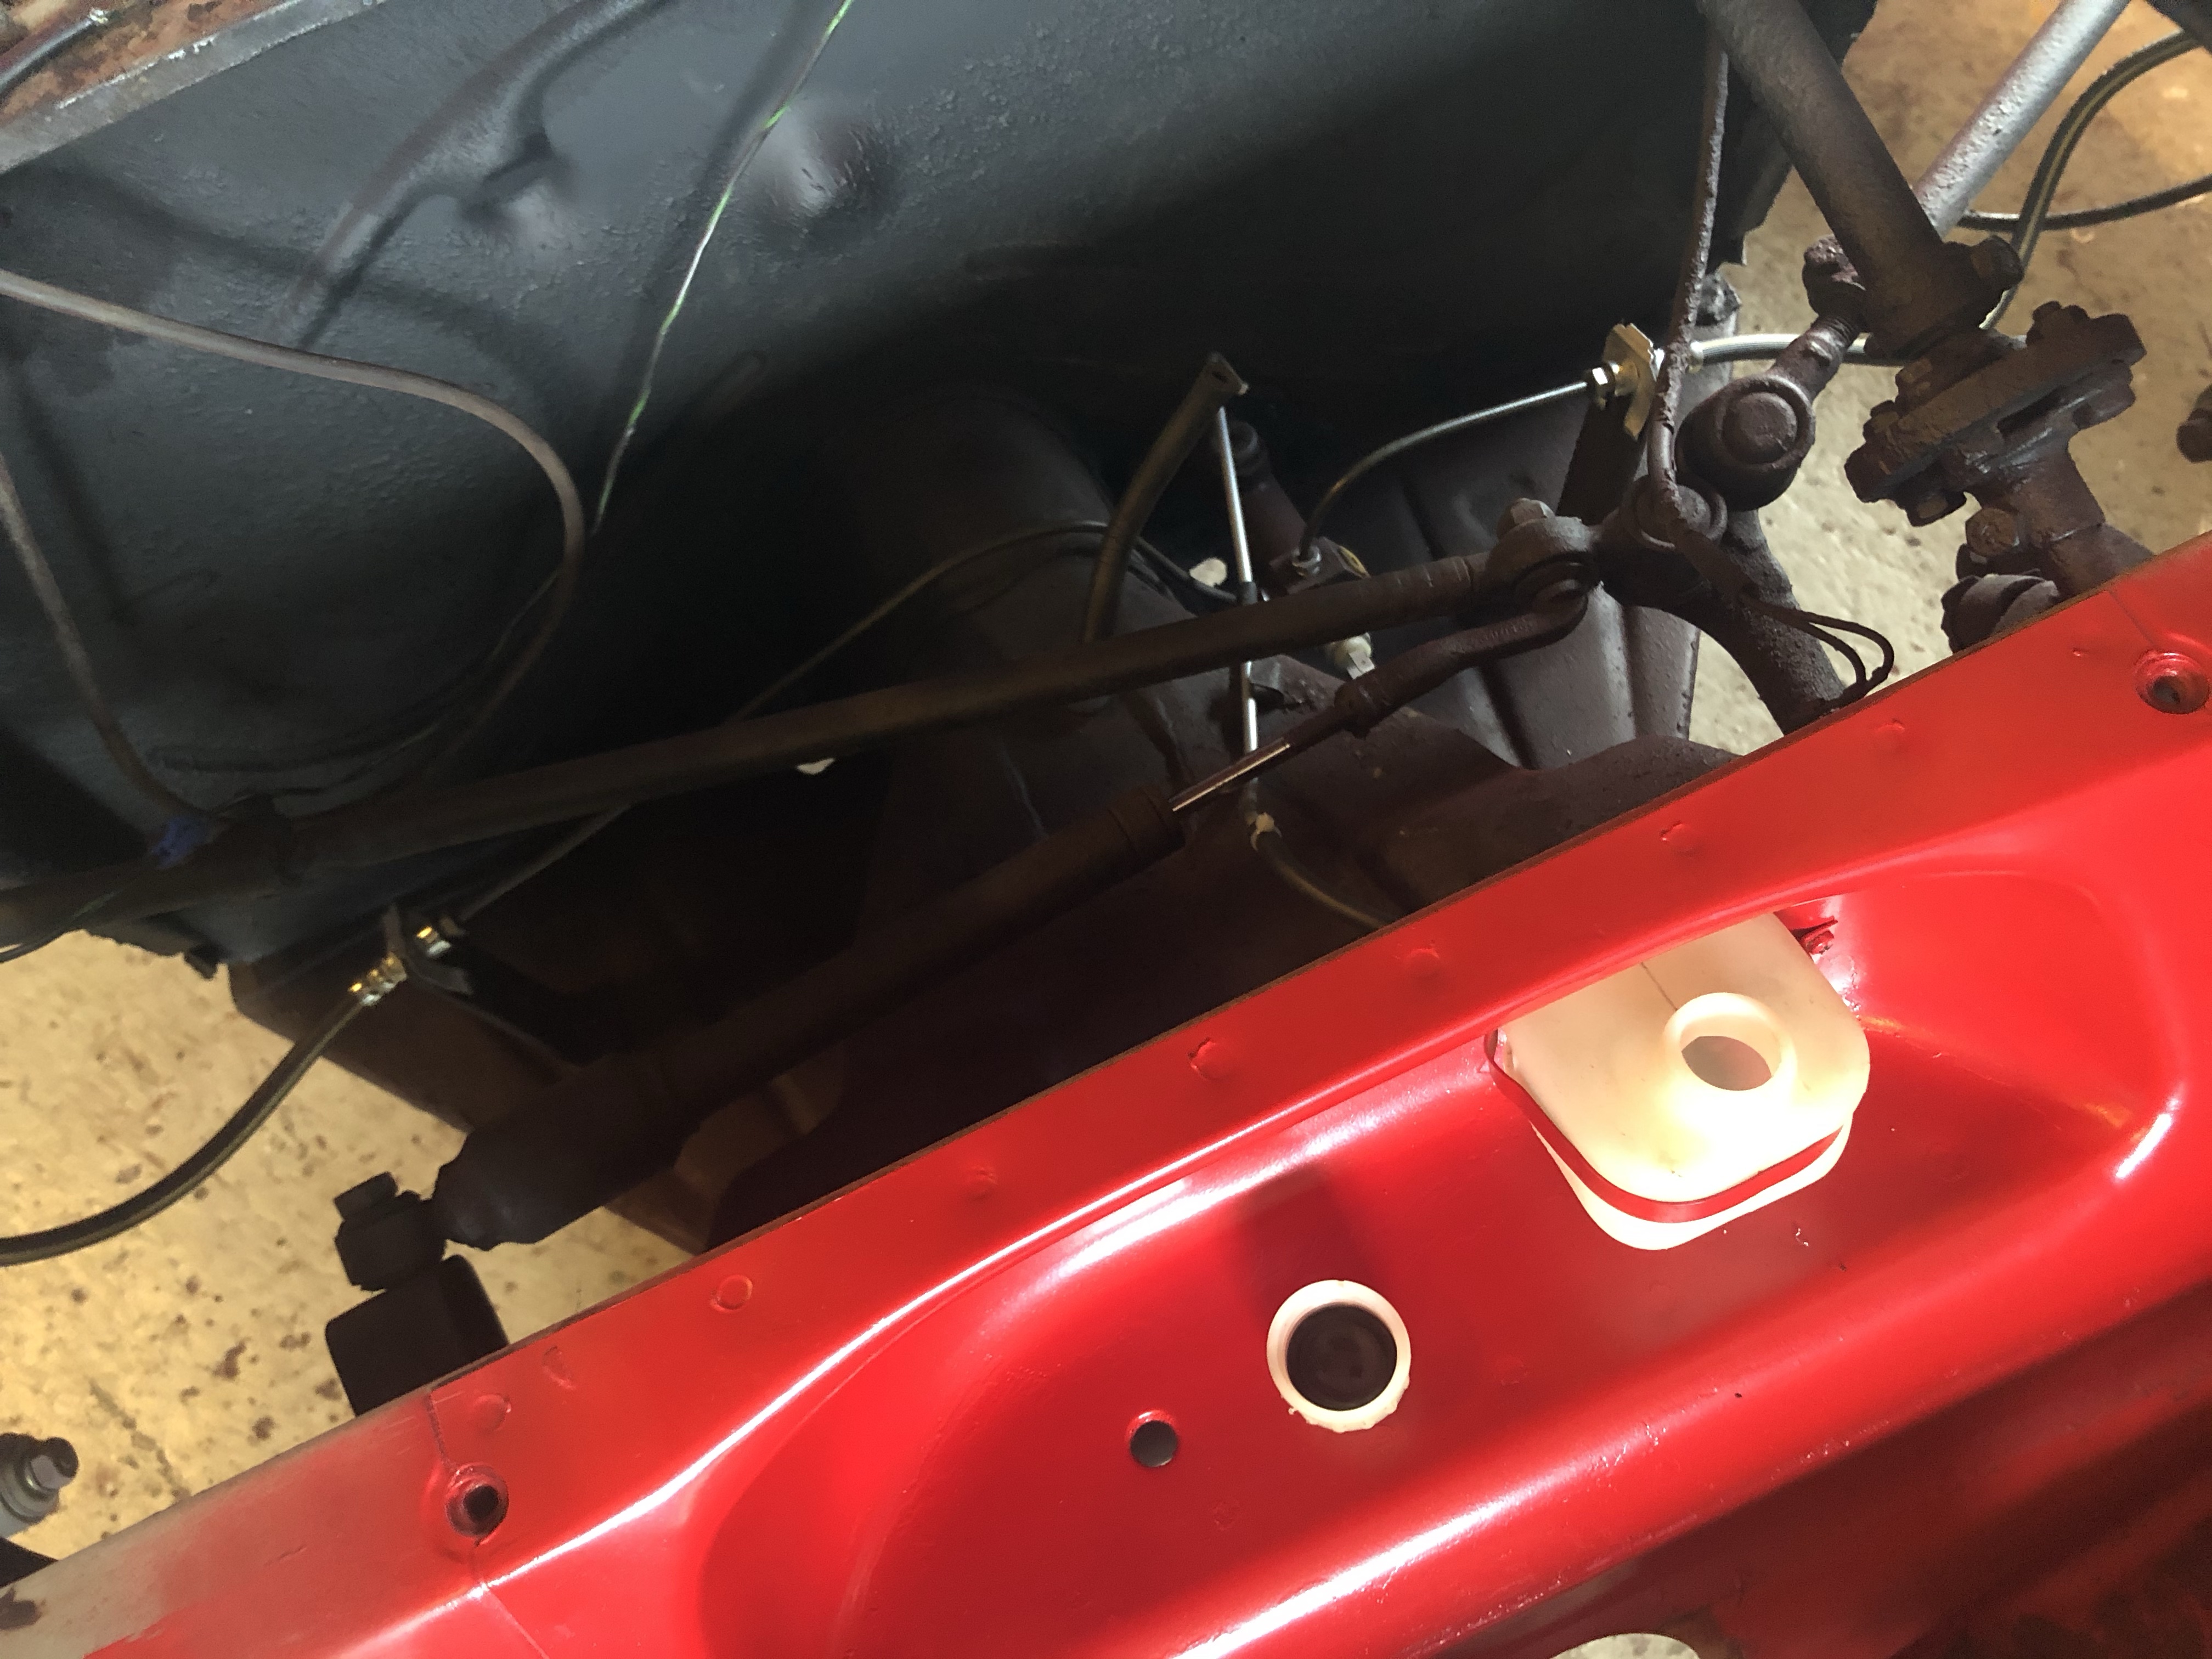
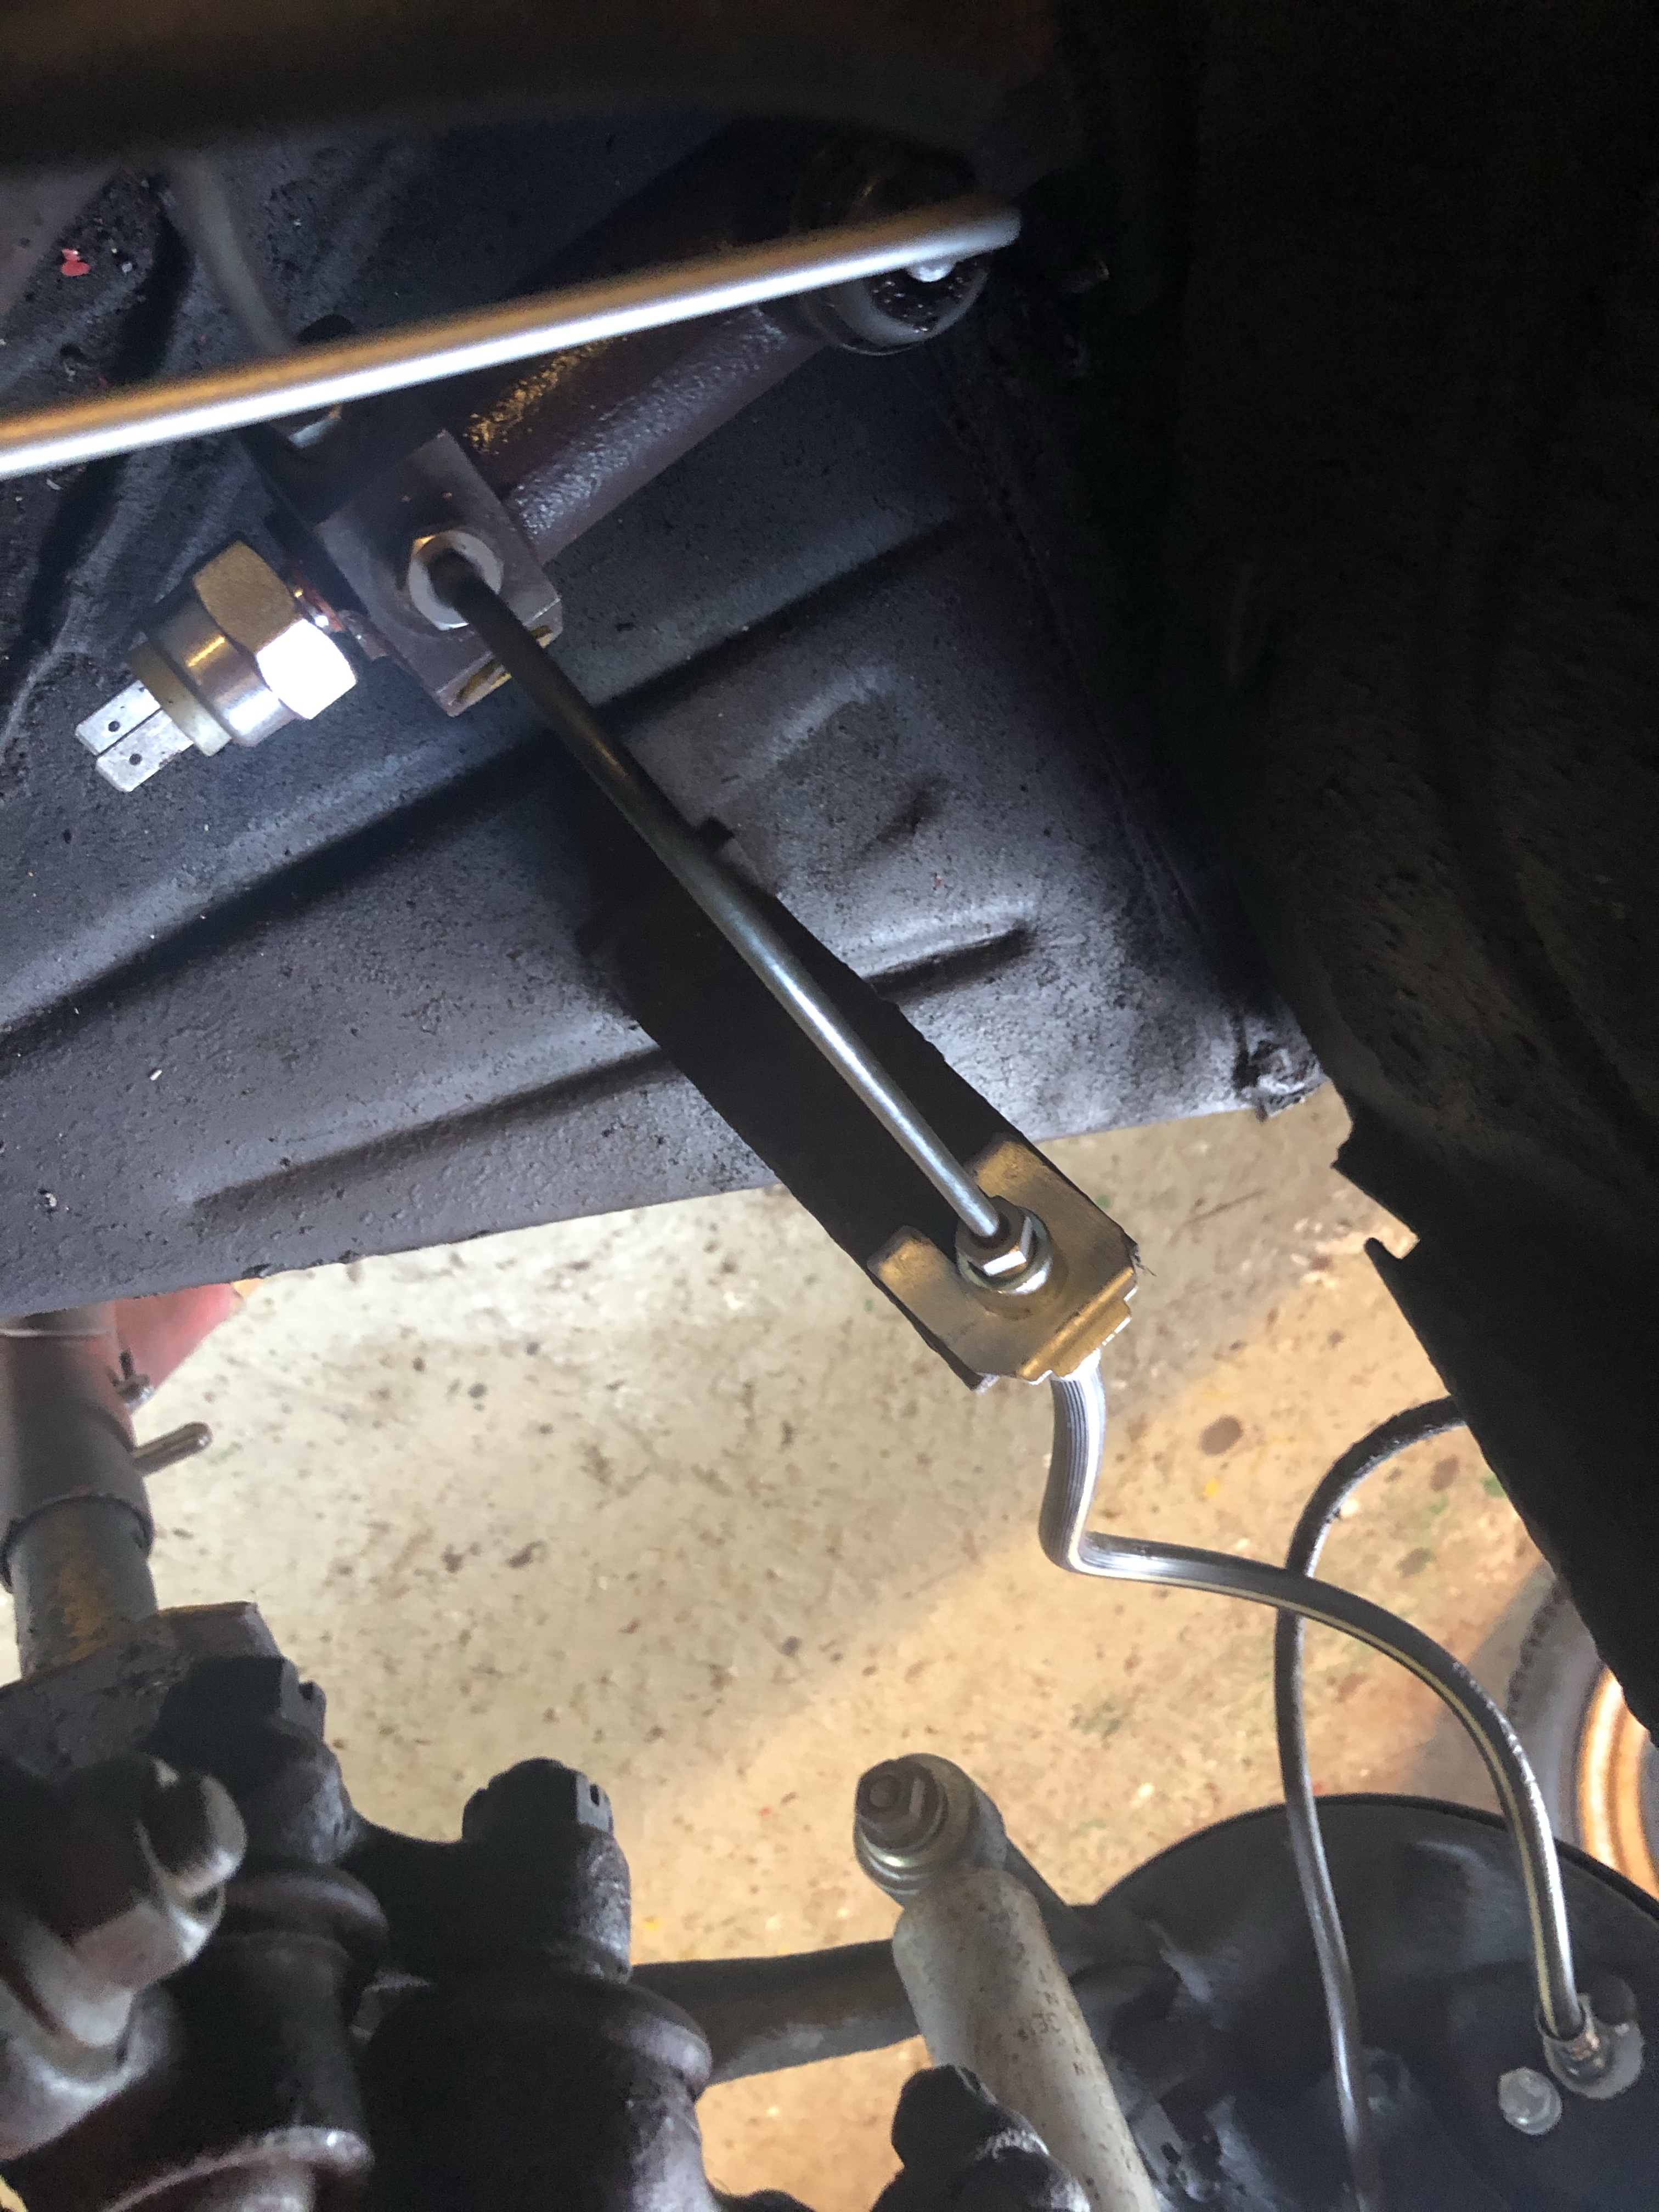
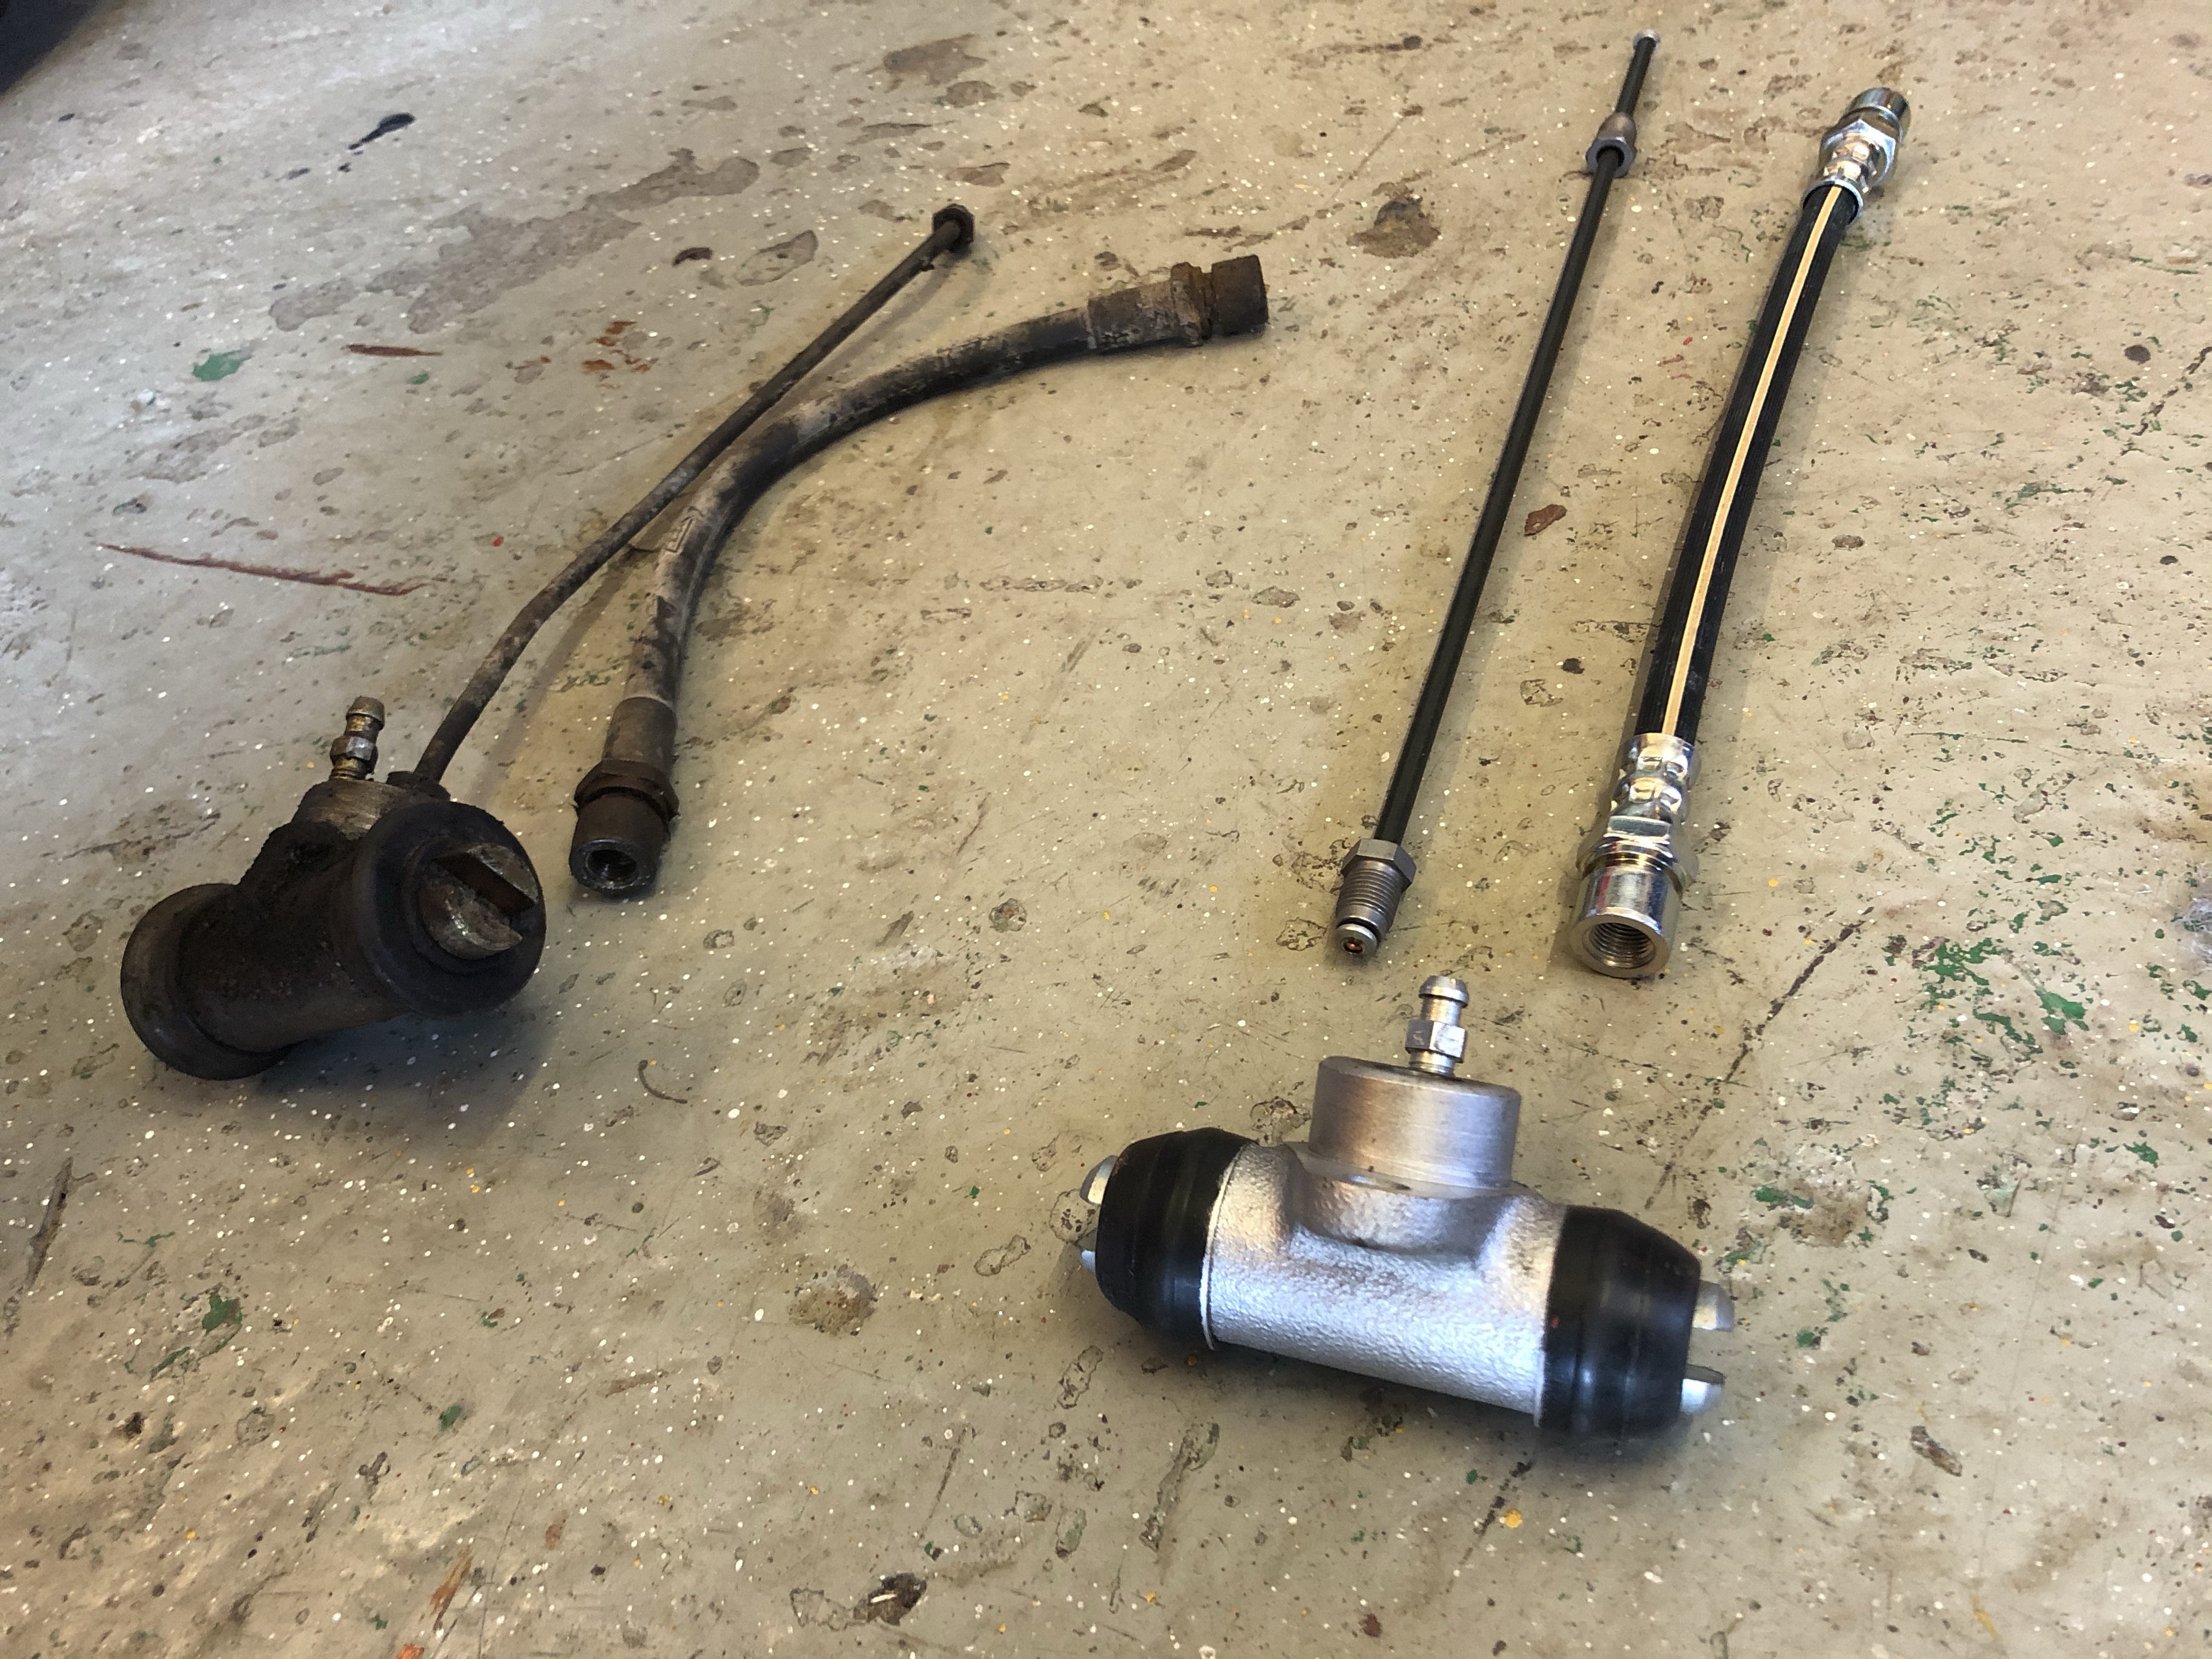
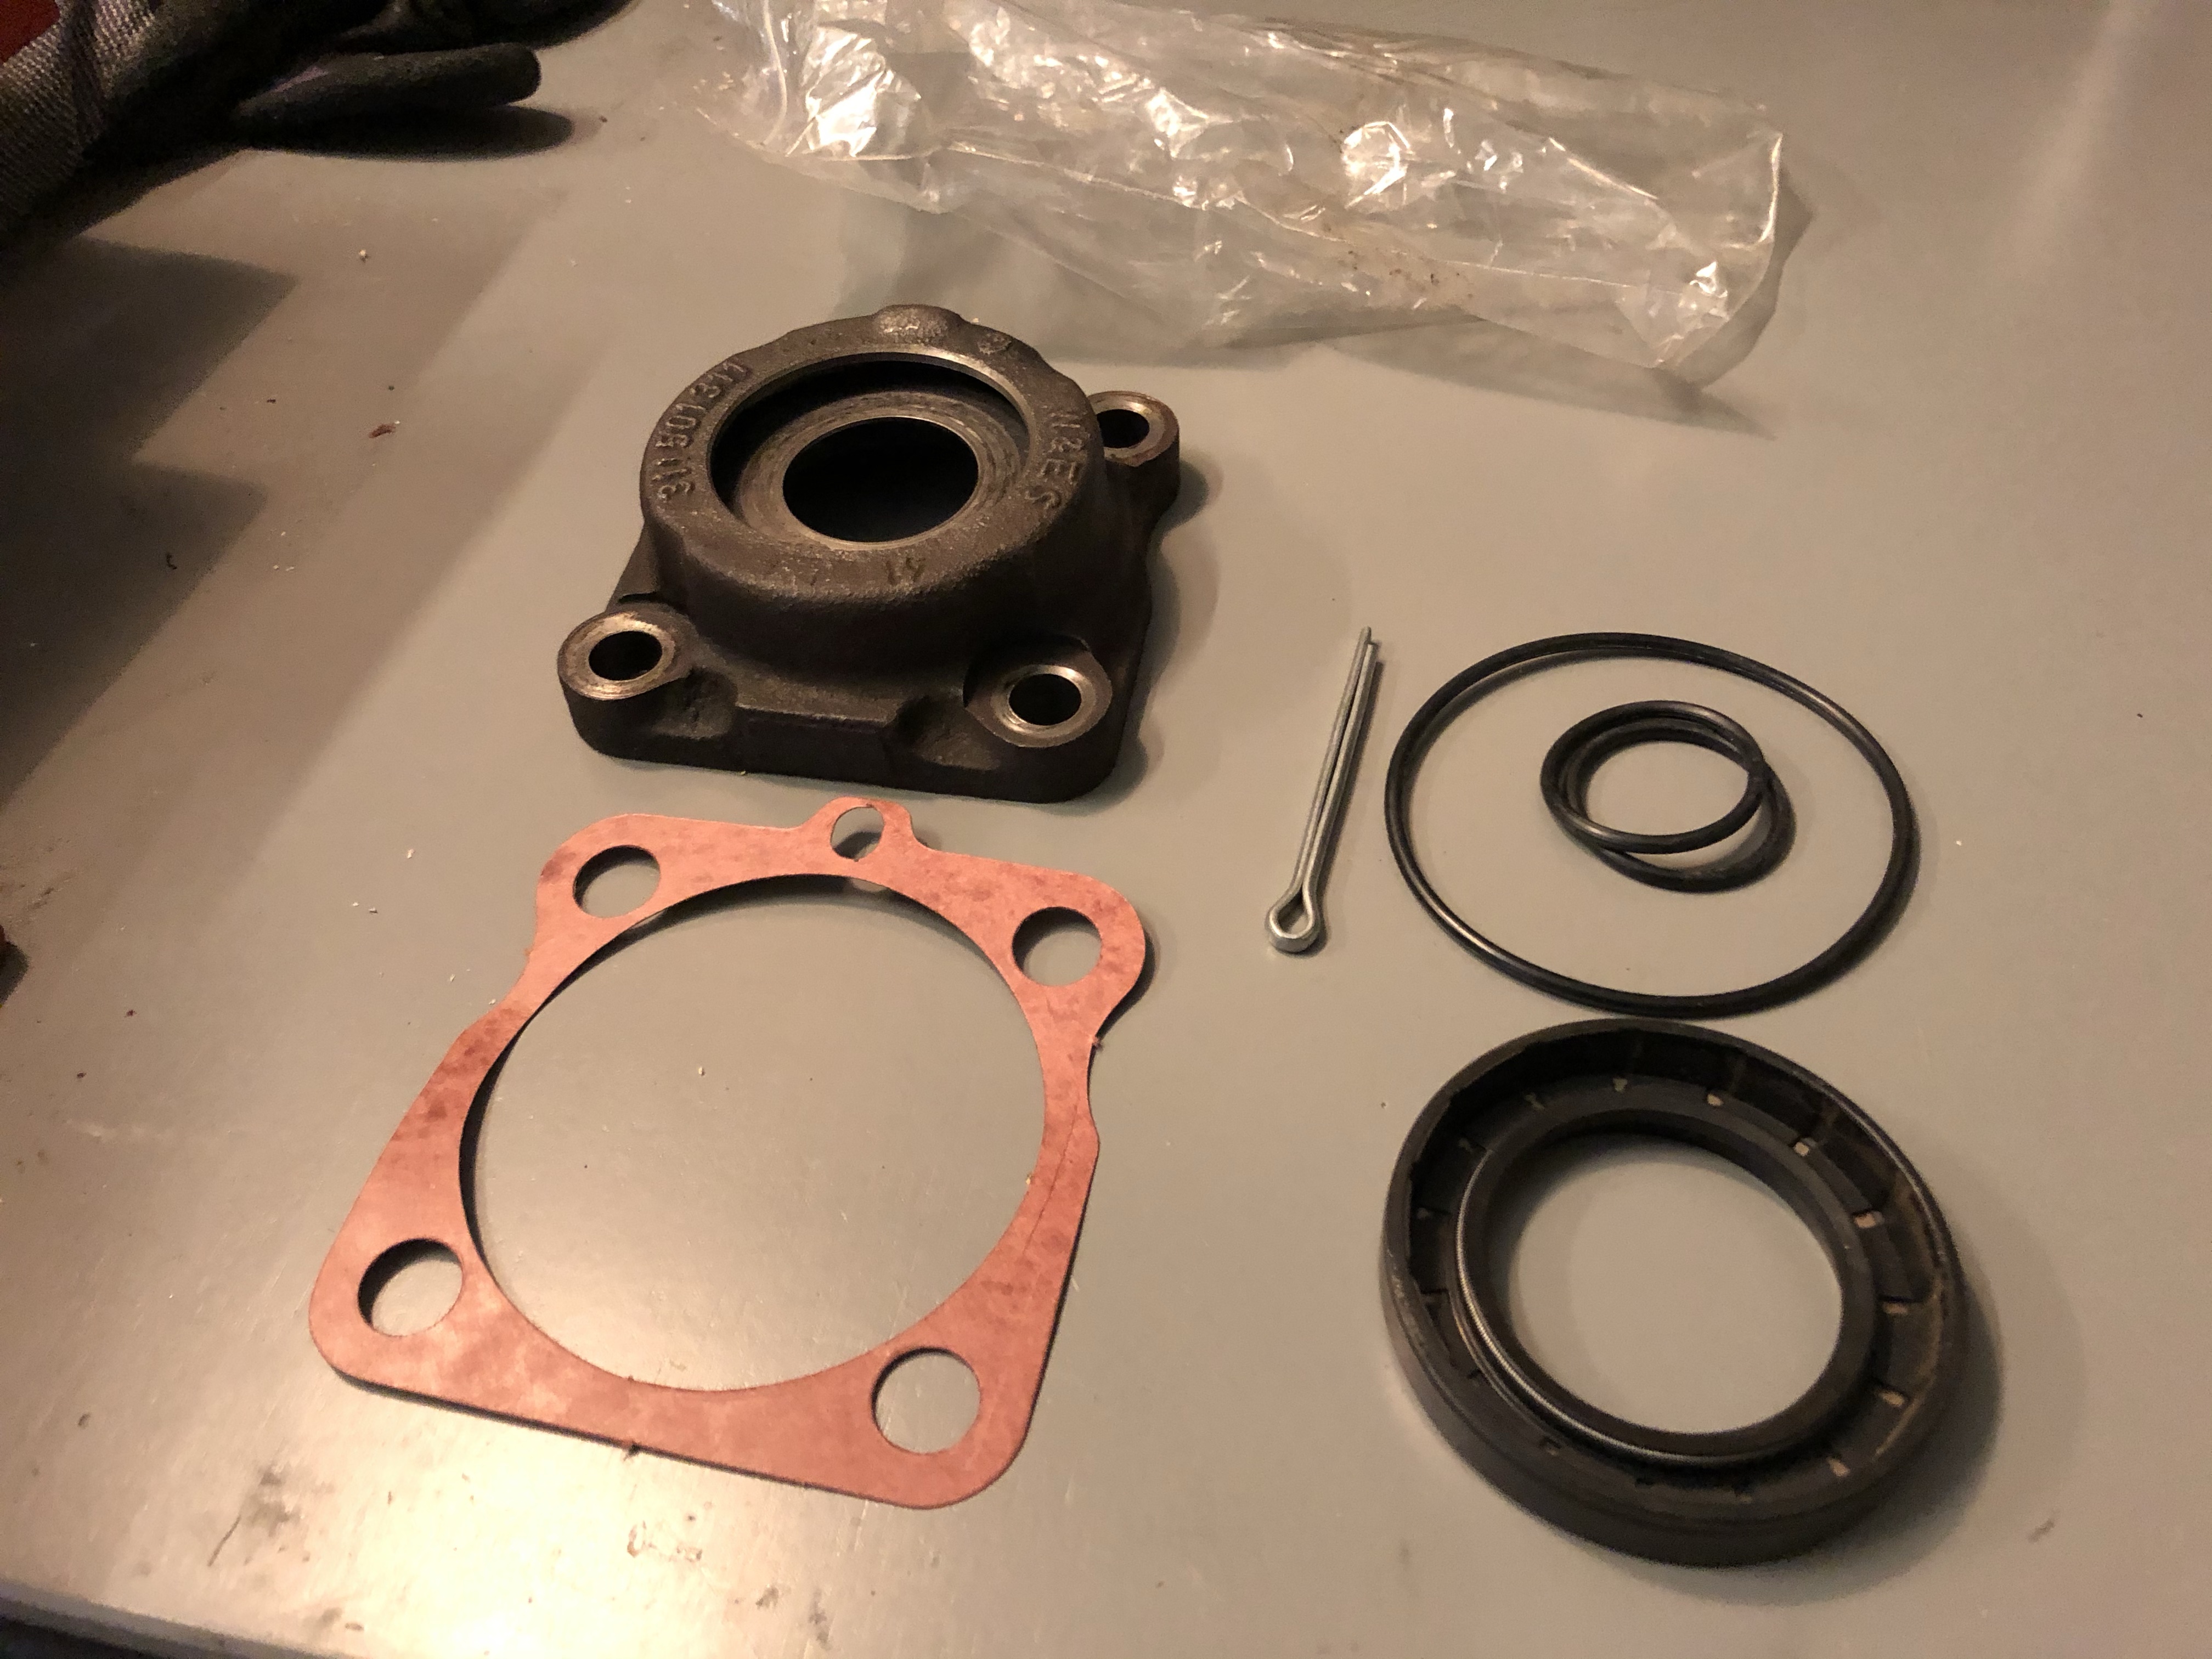
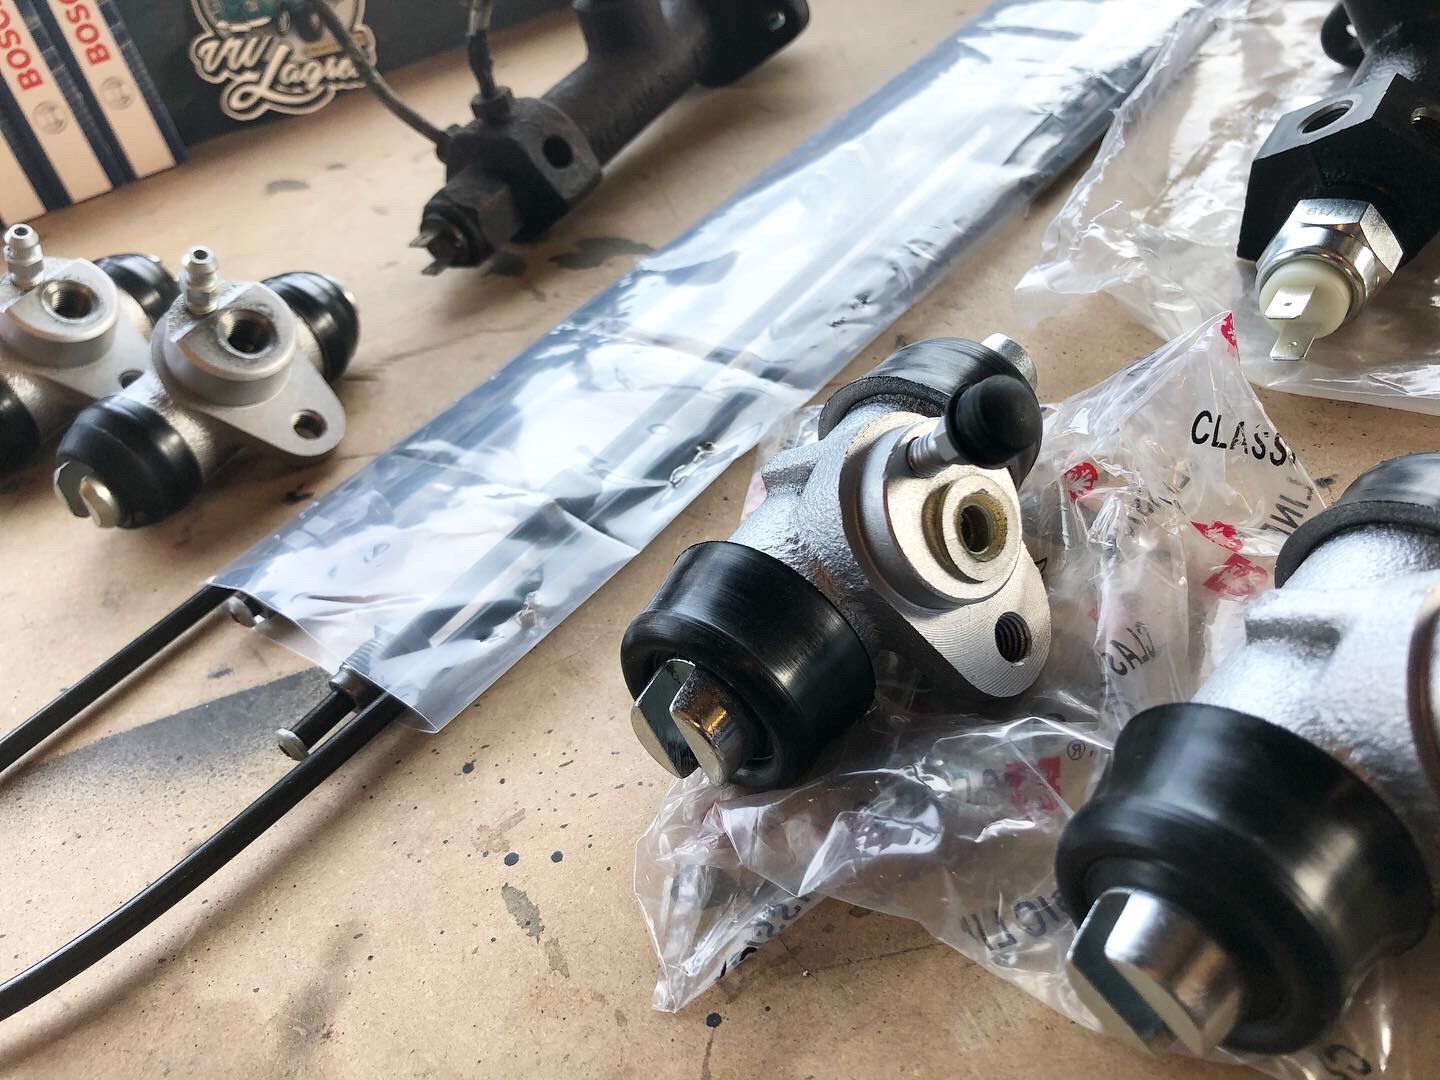
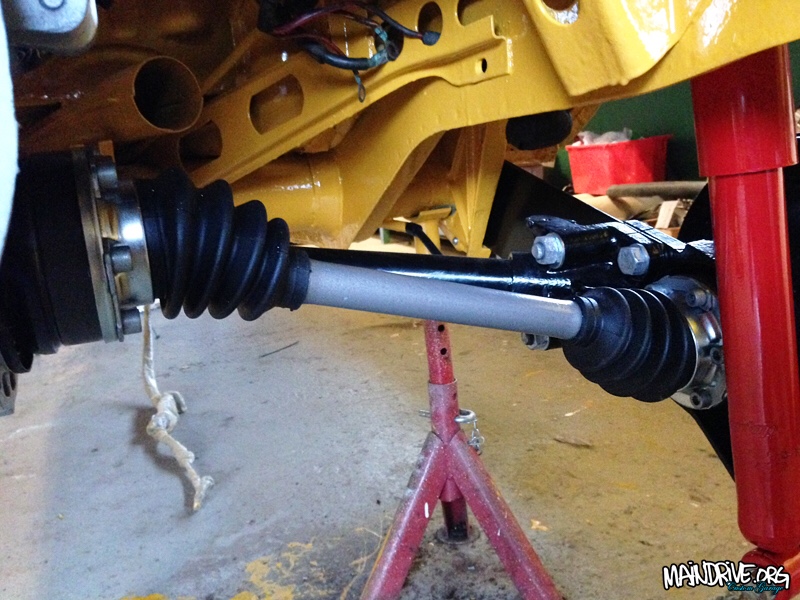
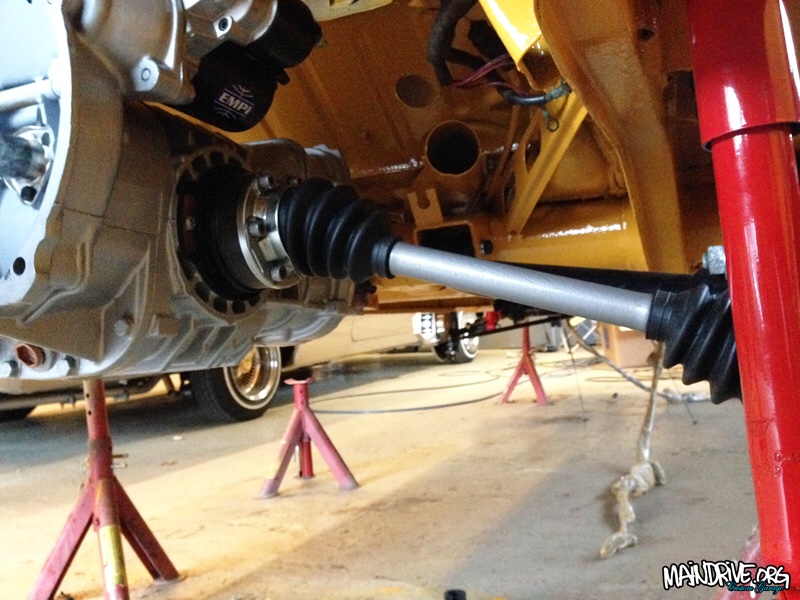
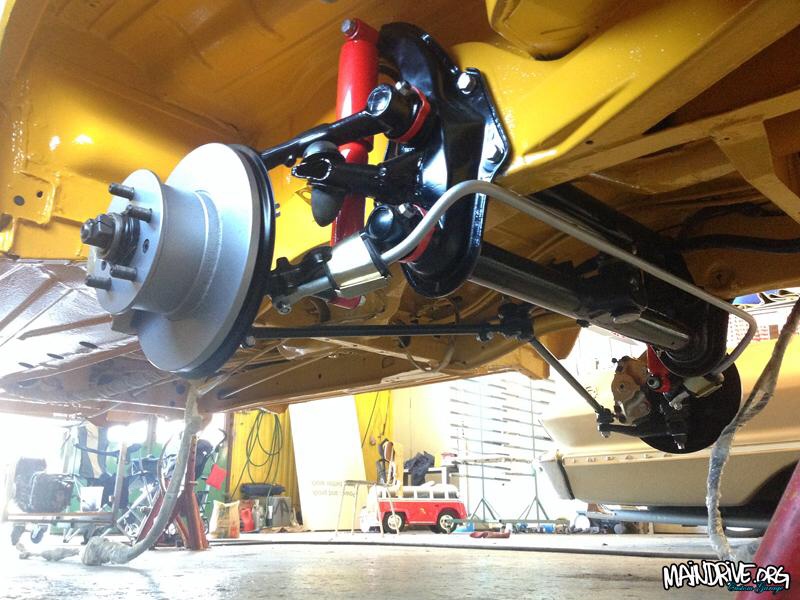
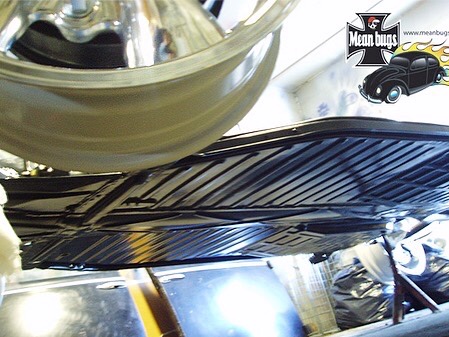
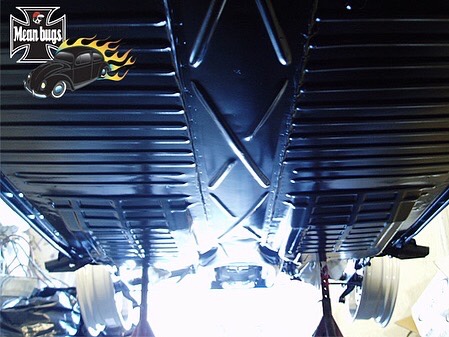
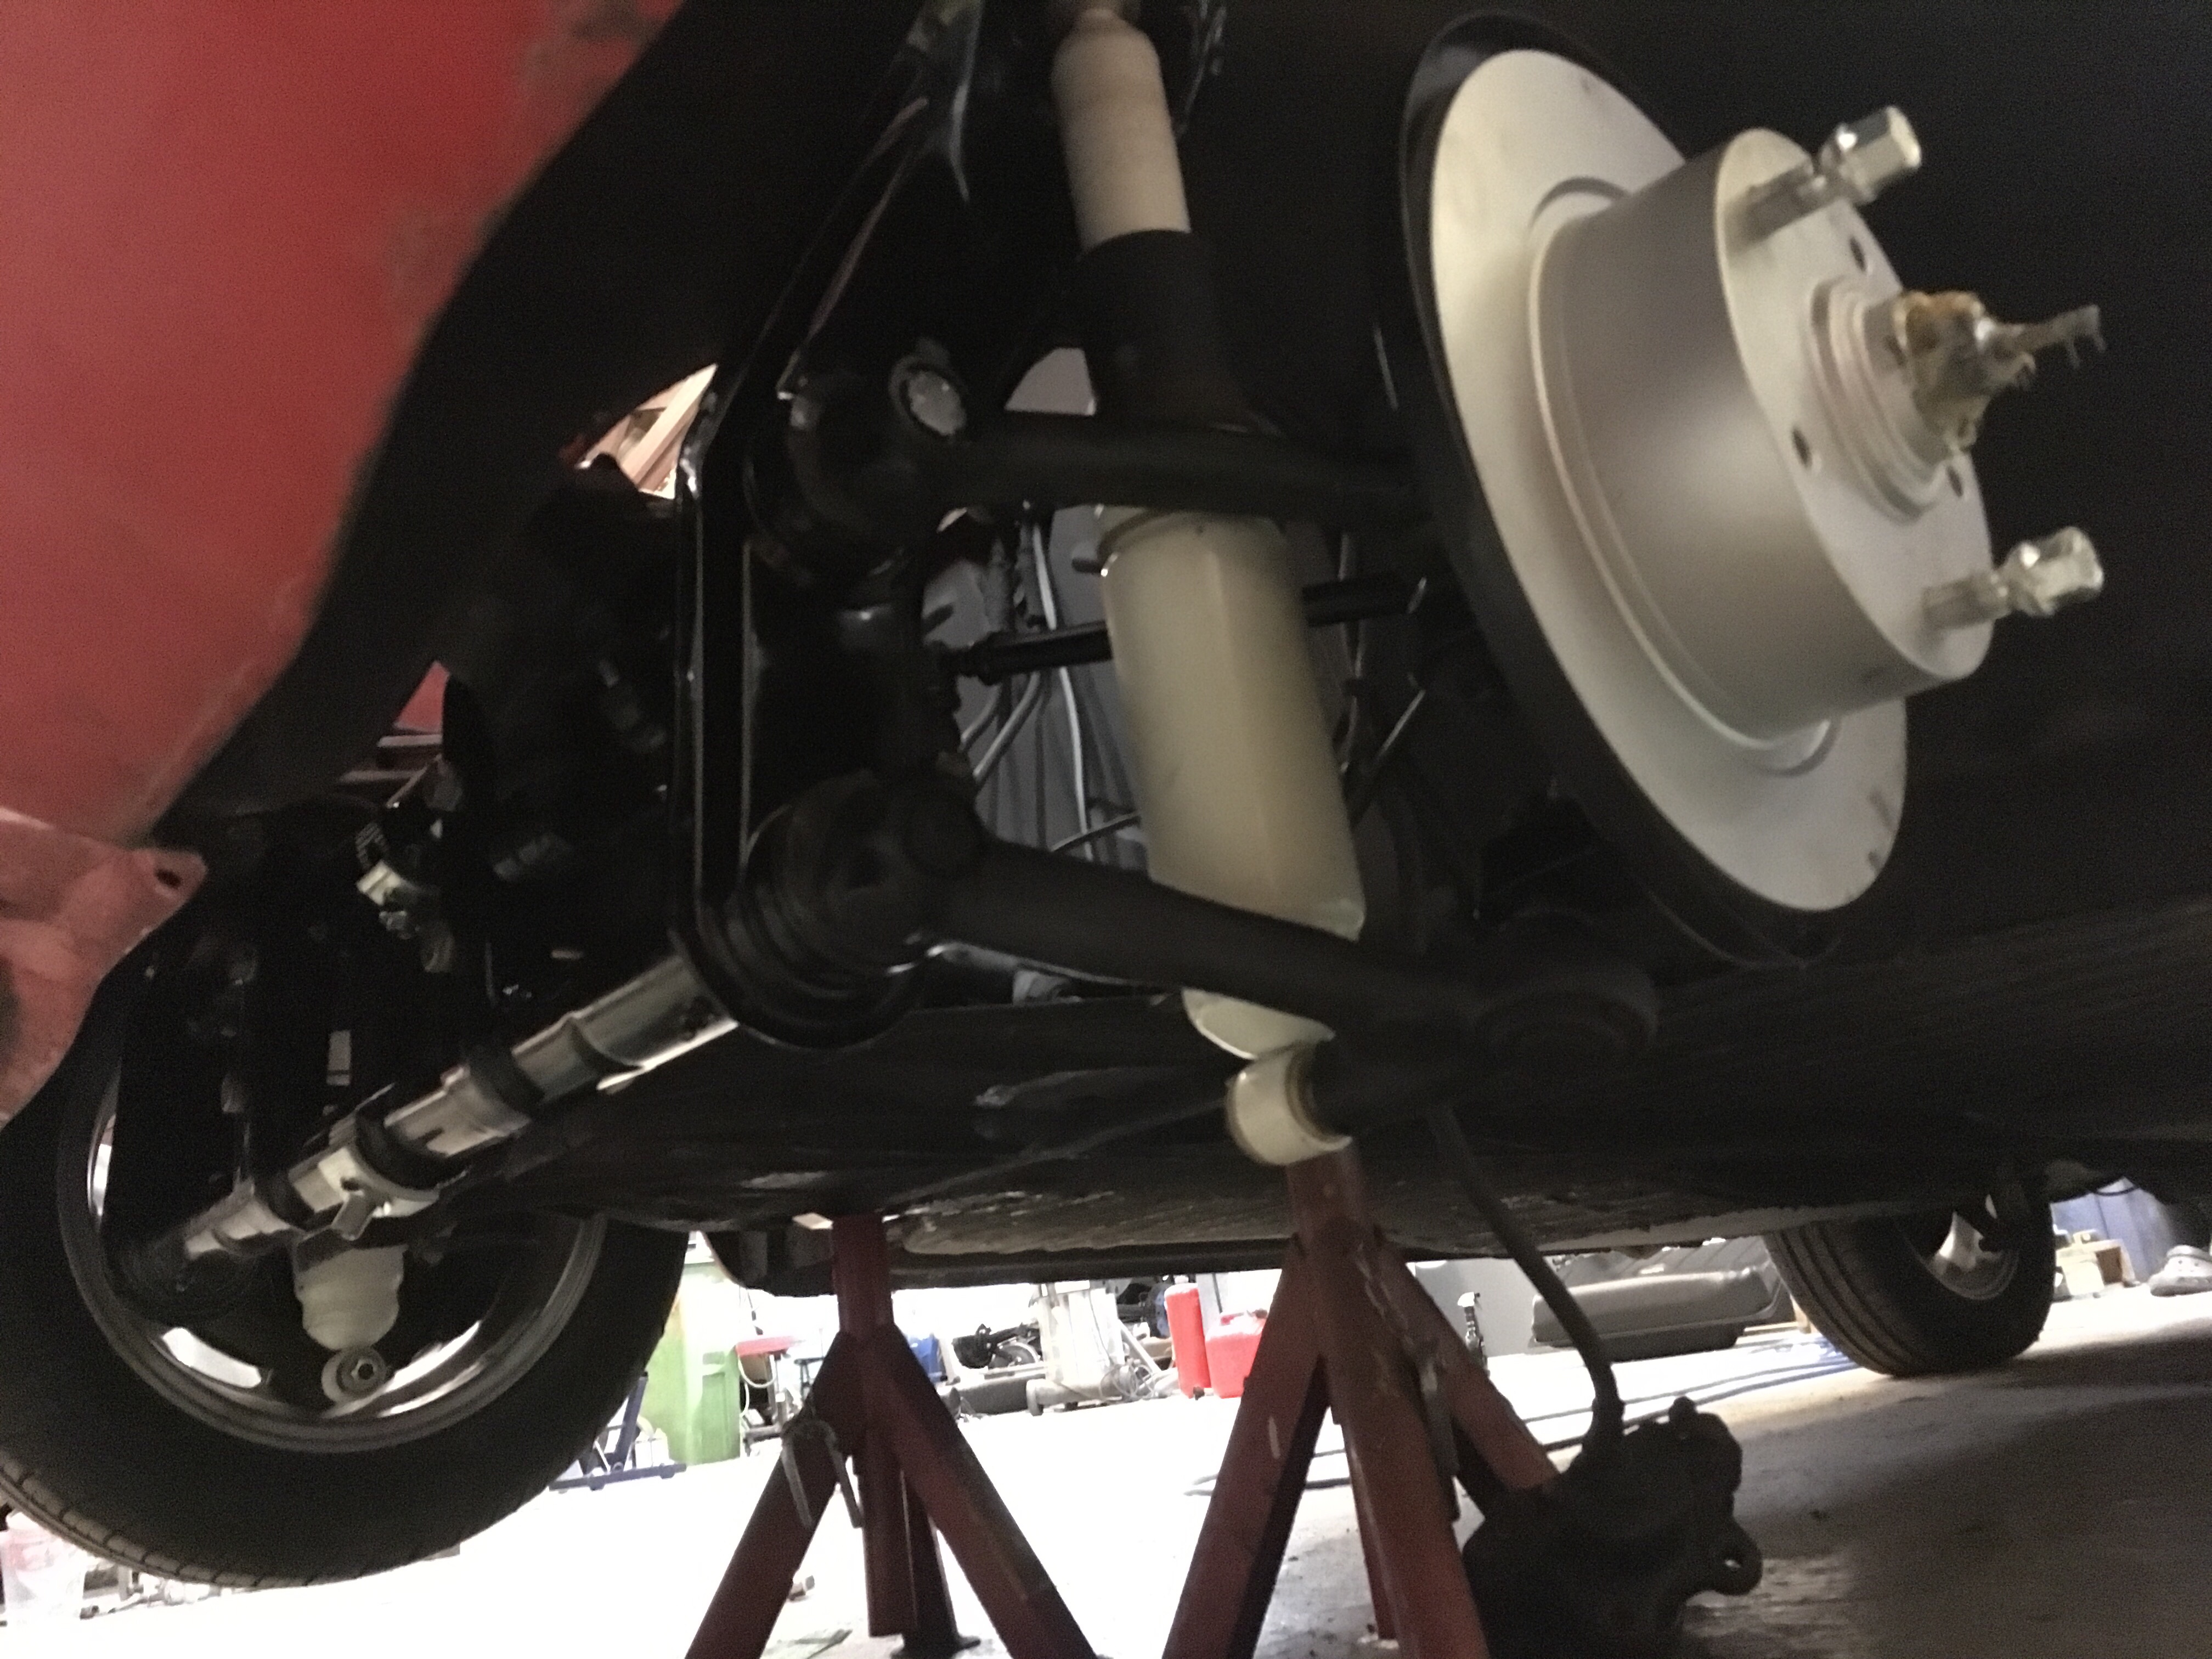
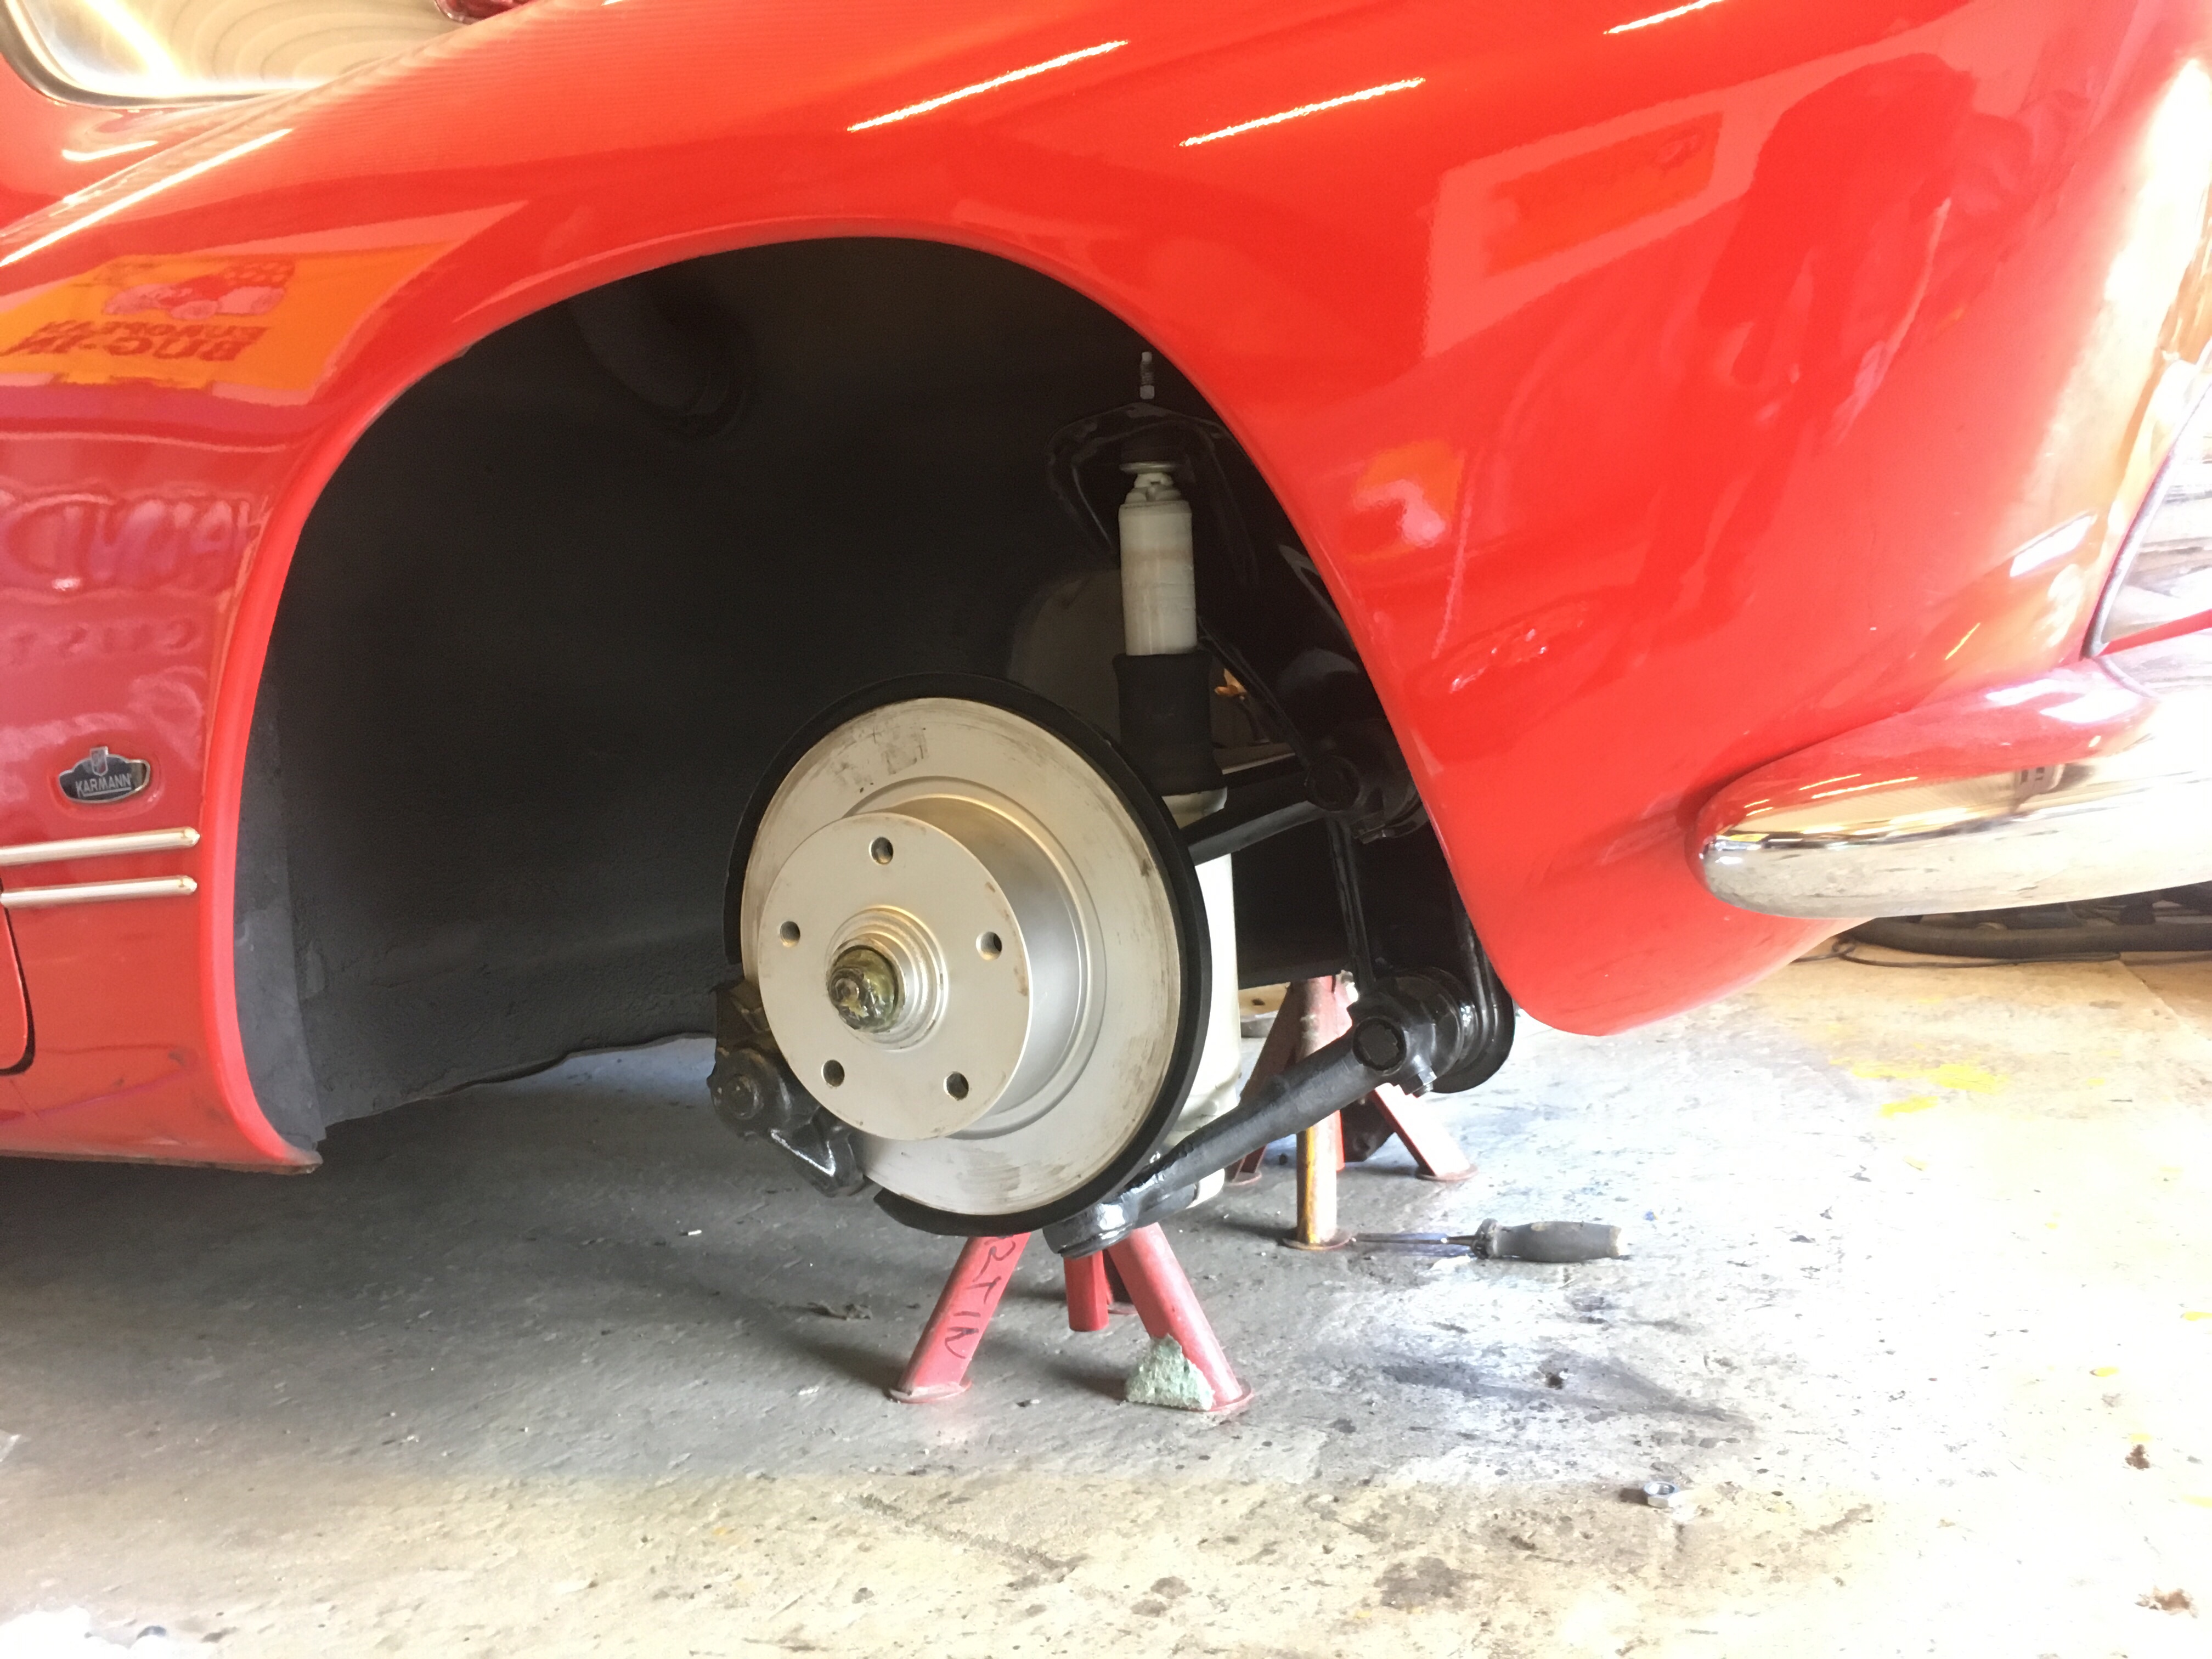
All of the old (complete!) brake system was thrown in the thrash and replaced with brand new parts. New shocks all around too. New wheel bearings. New hoses, brakelines and every nut/bolt is new in the brakesystem. Fenders have been removed for clean up and new blackbody/ship paint applied to underside. Going to be re-installed with new bolts and seals, anti rust wax etc.
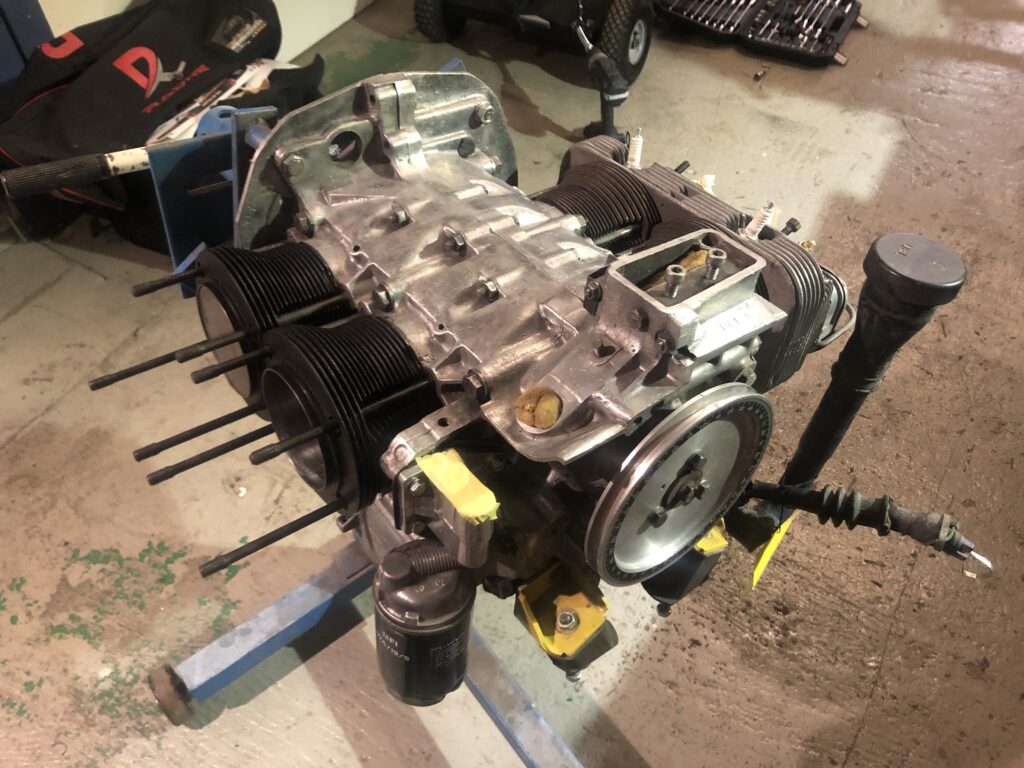
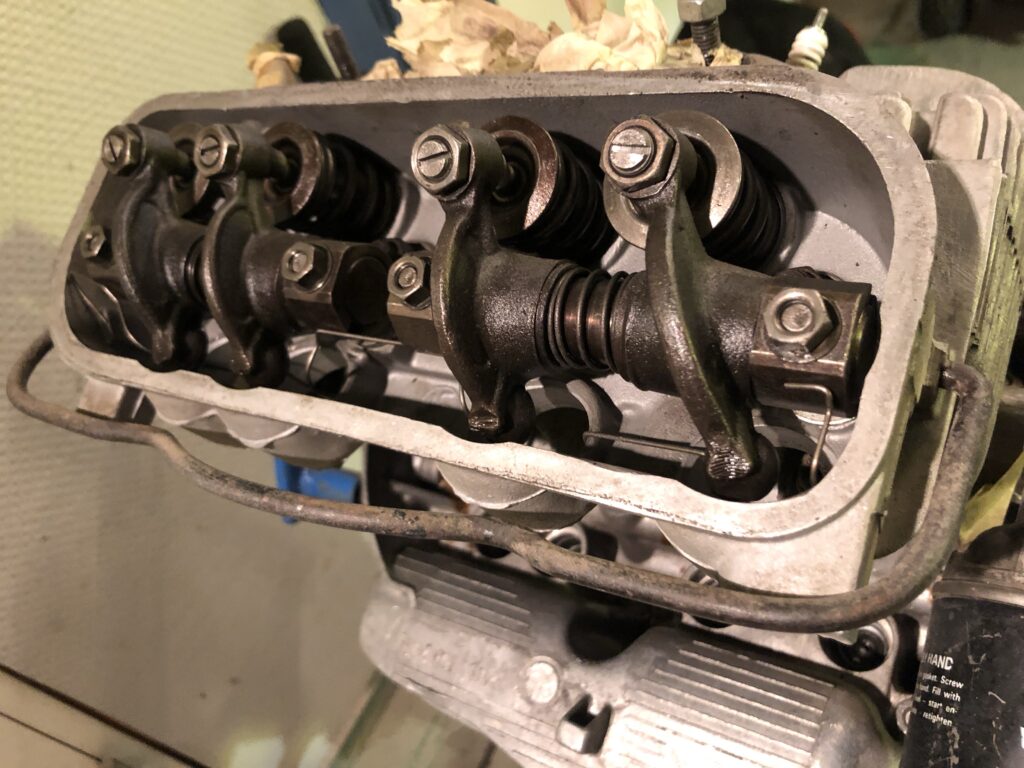
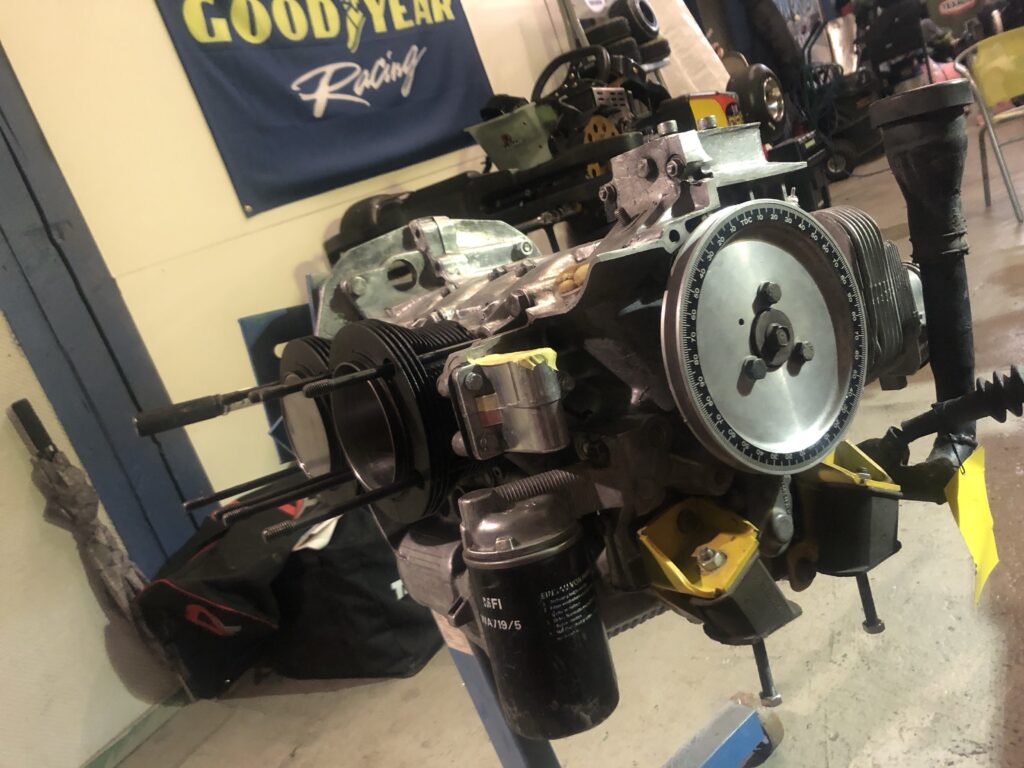
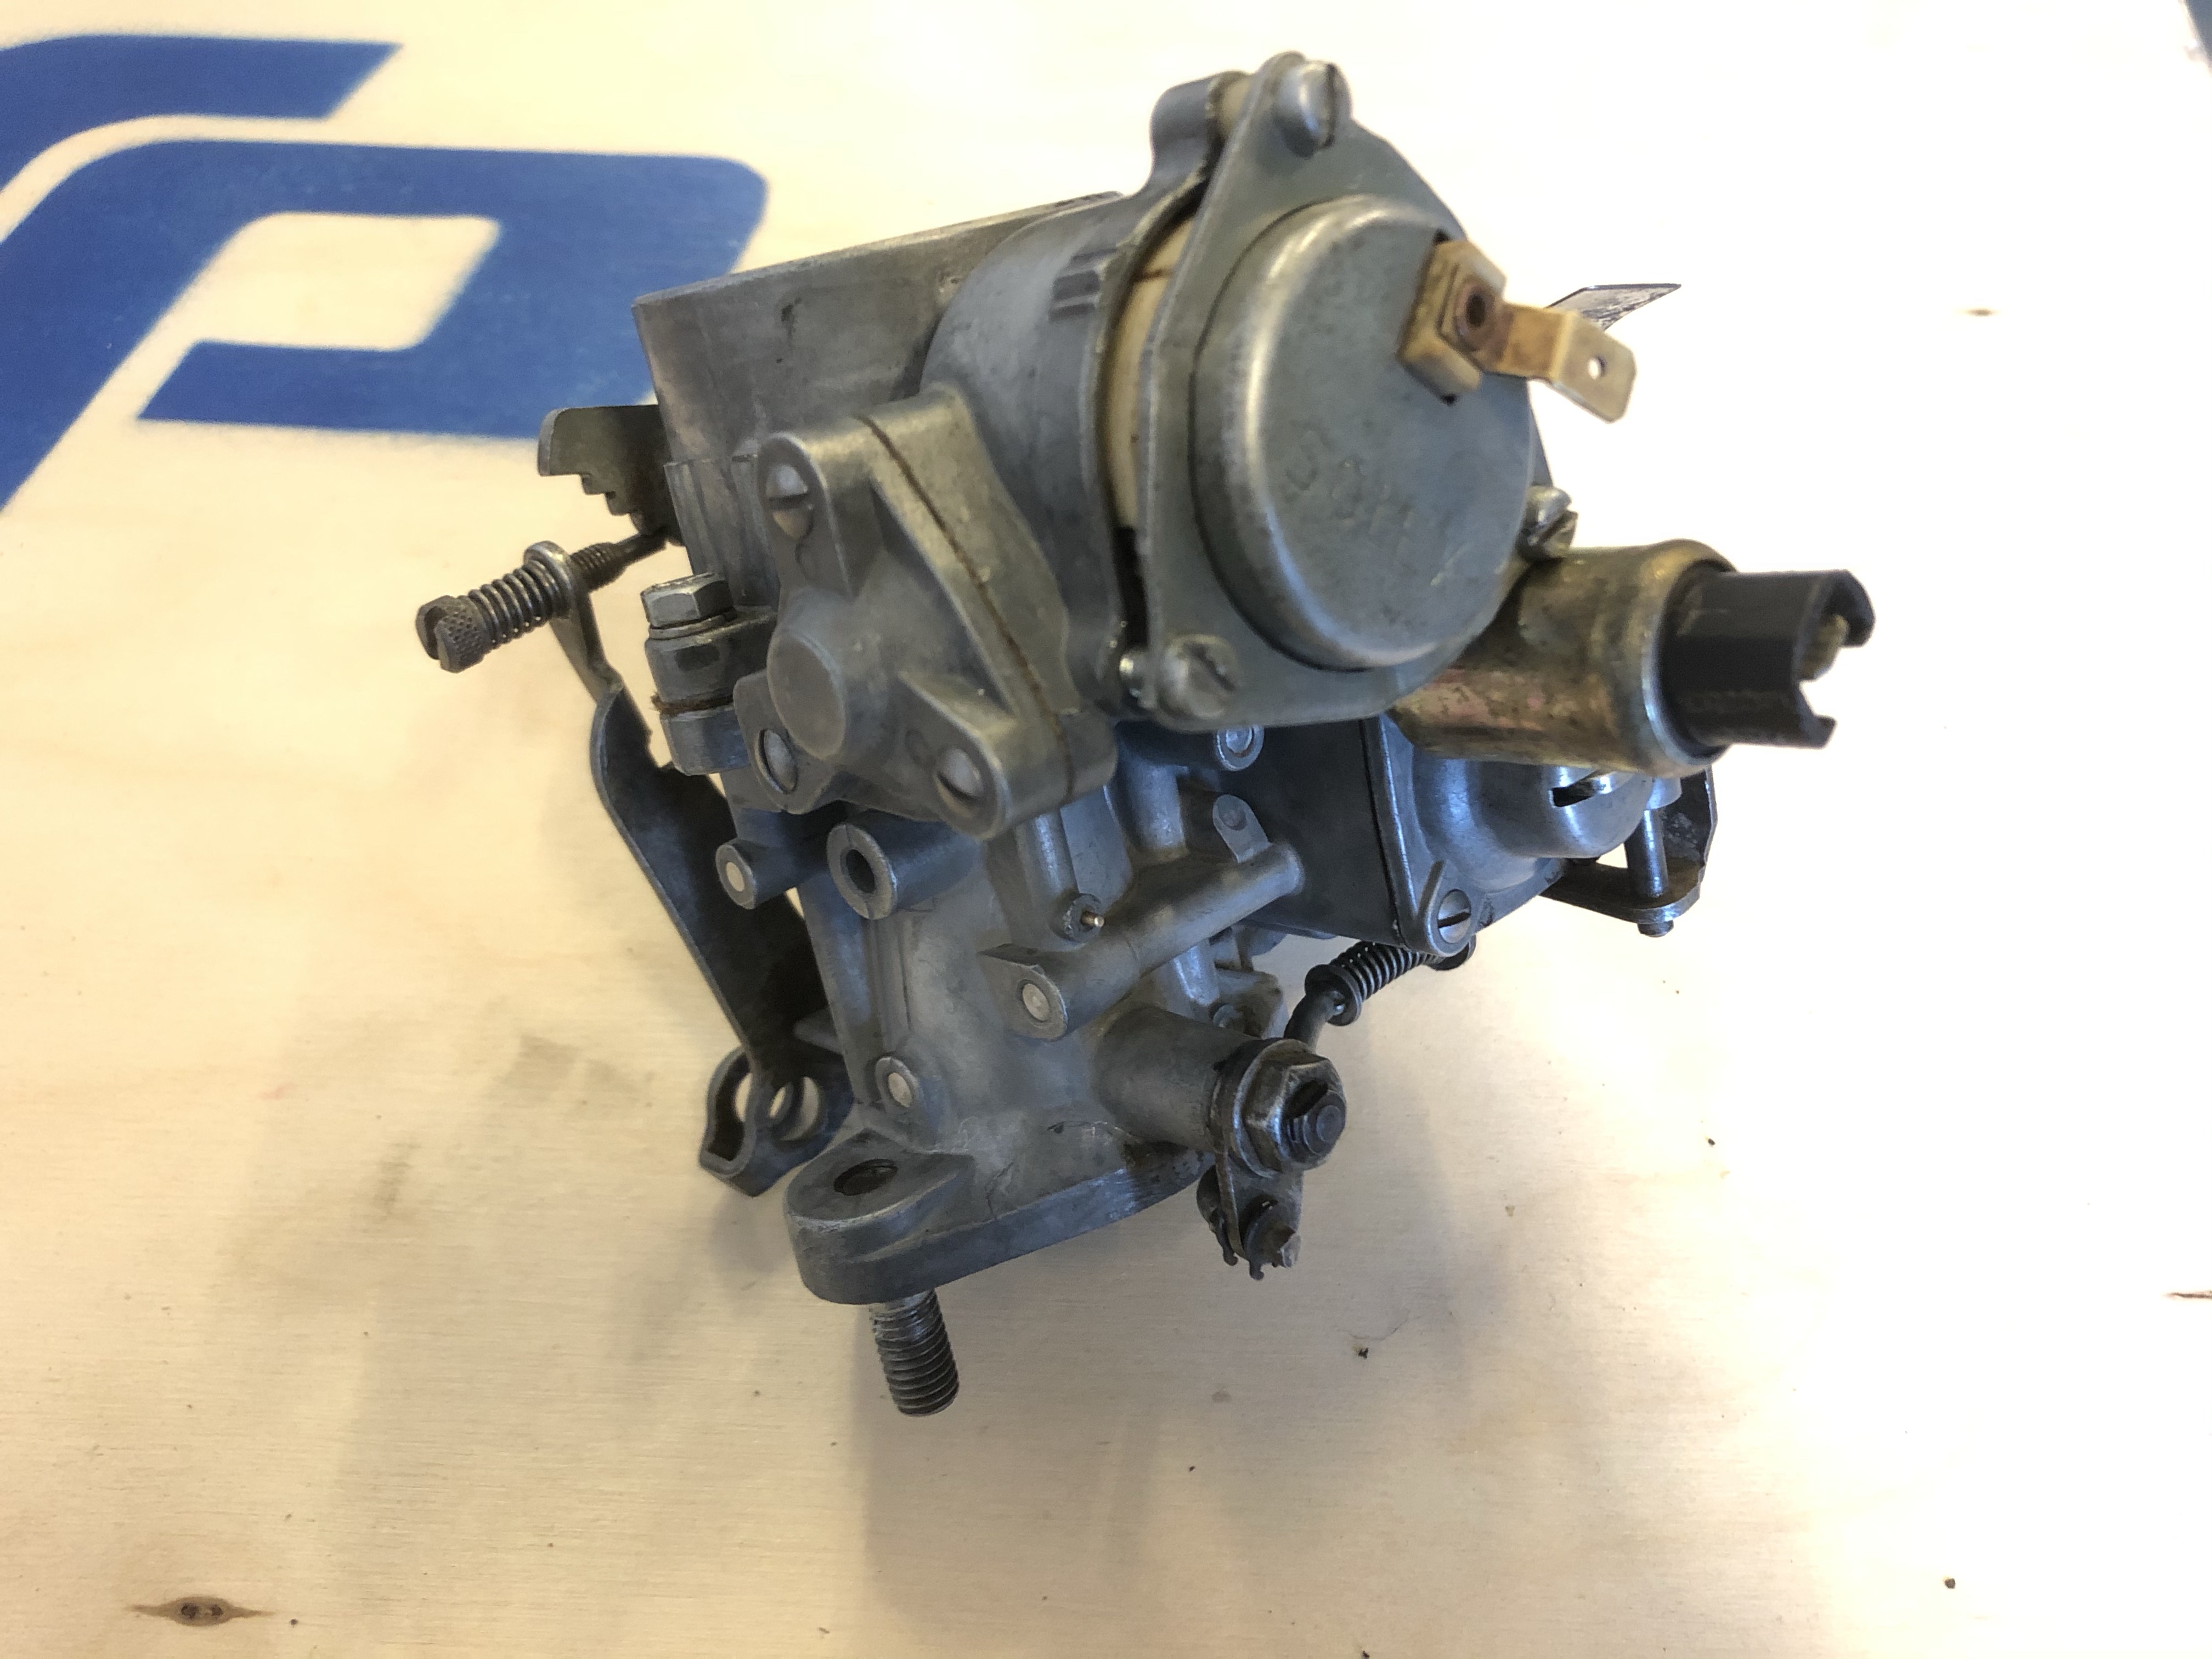
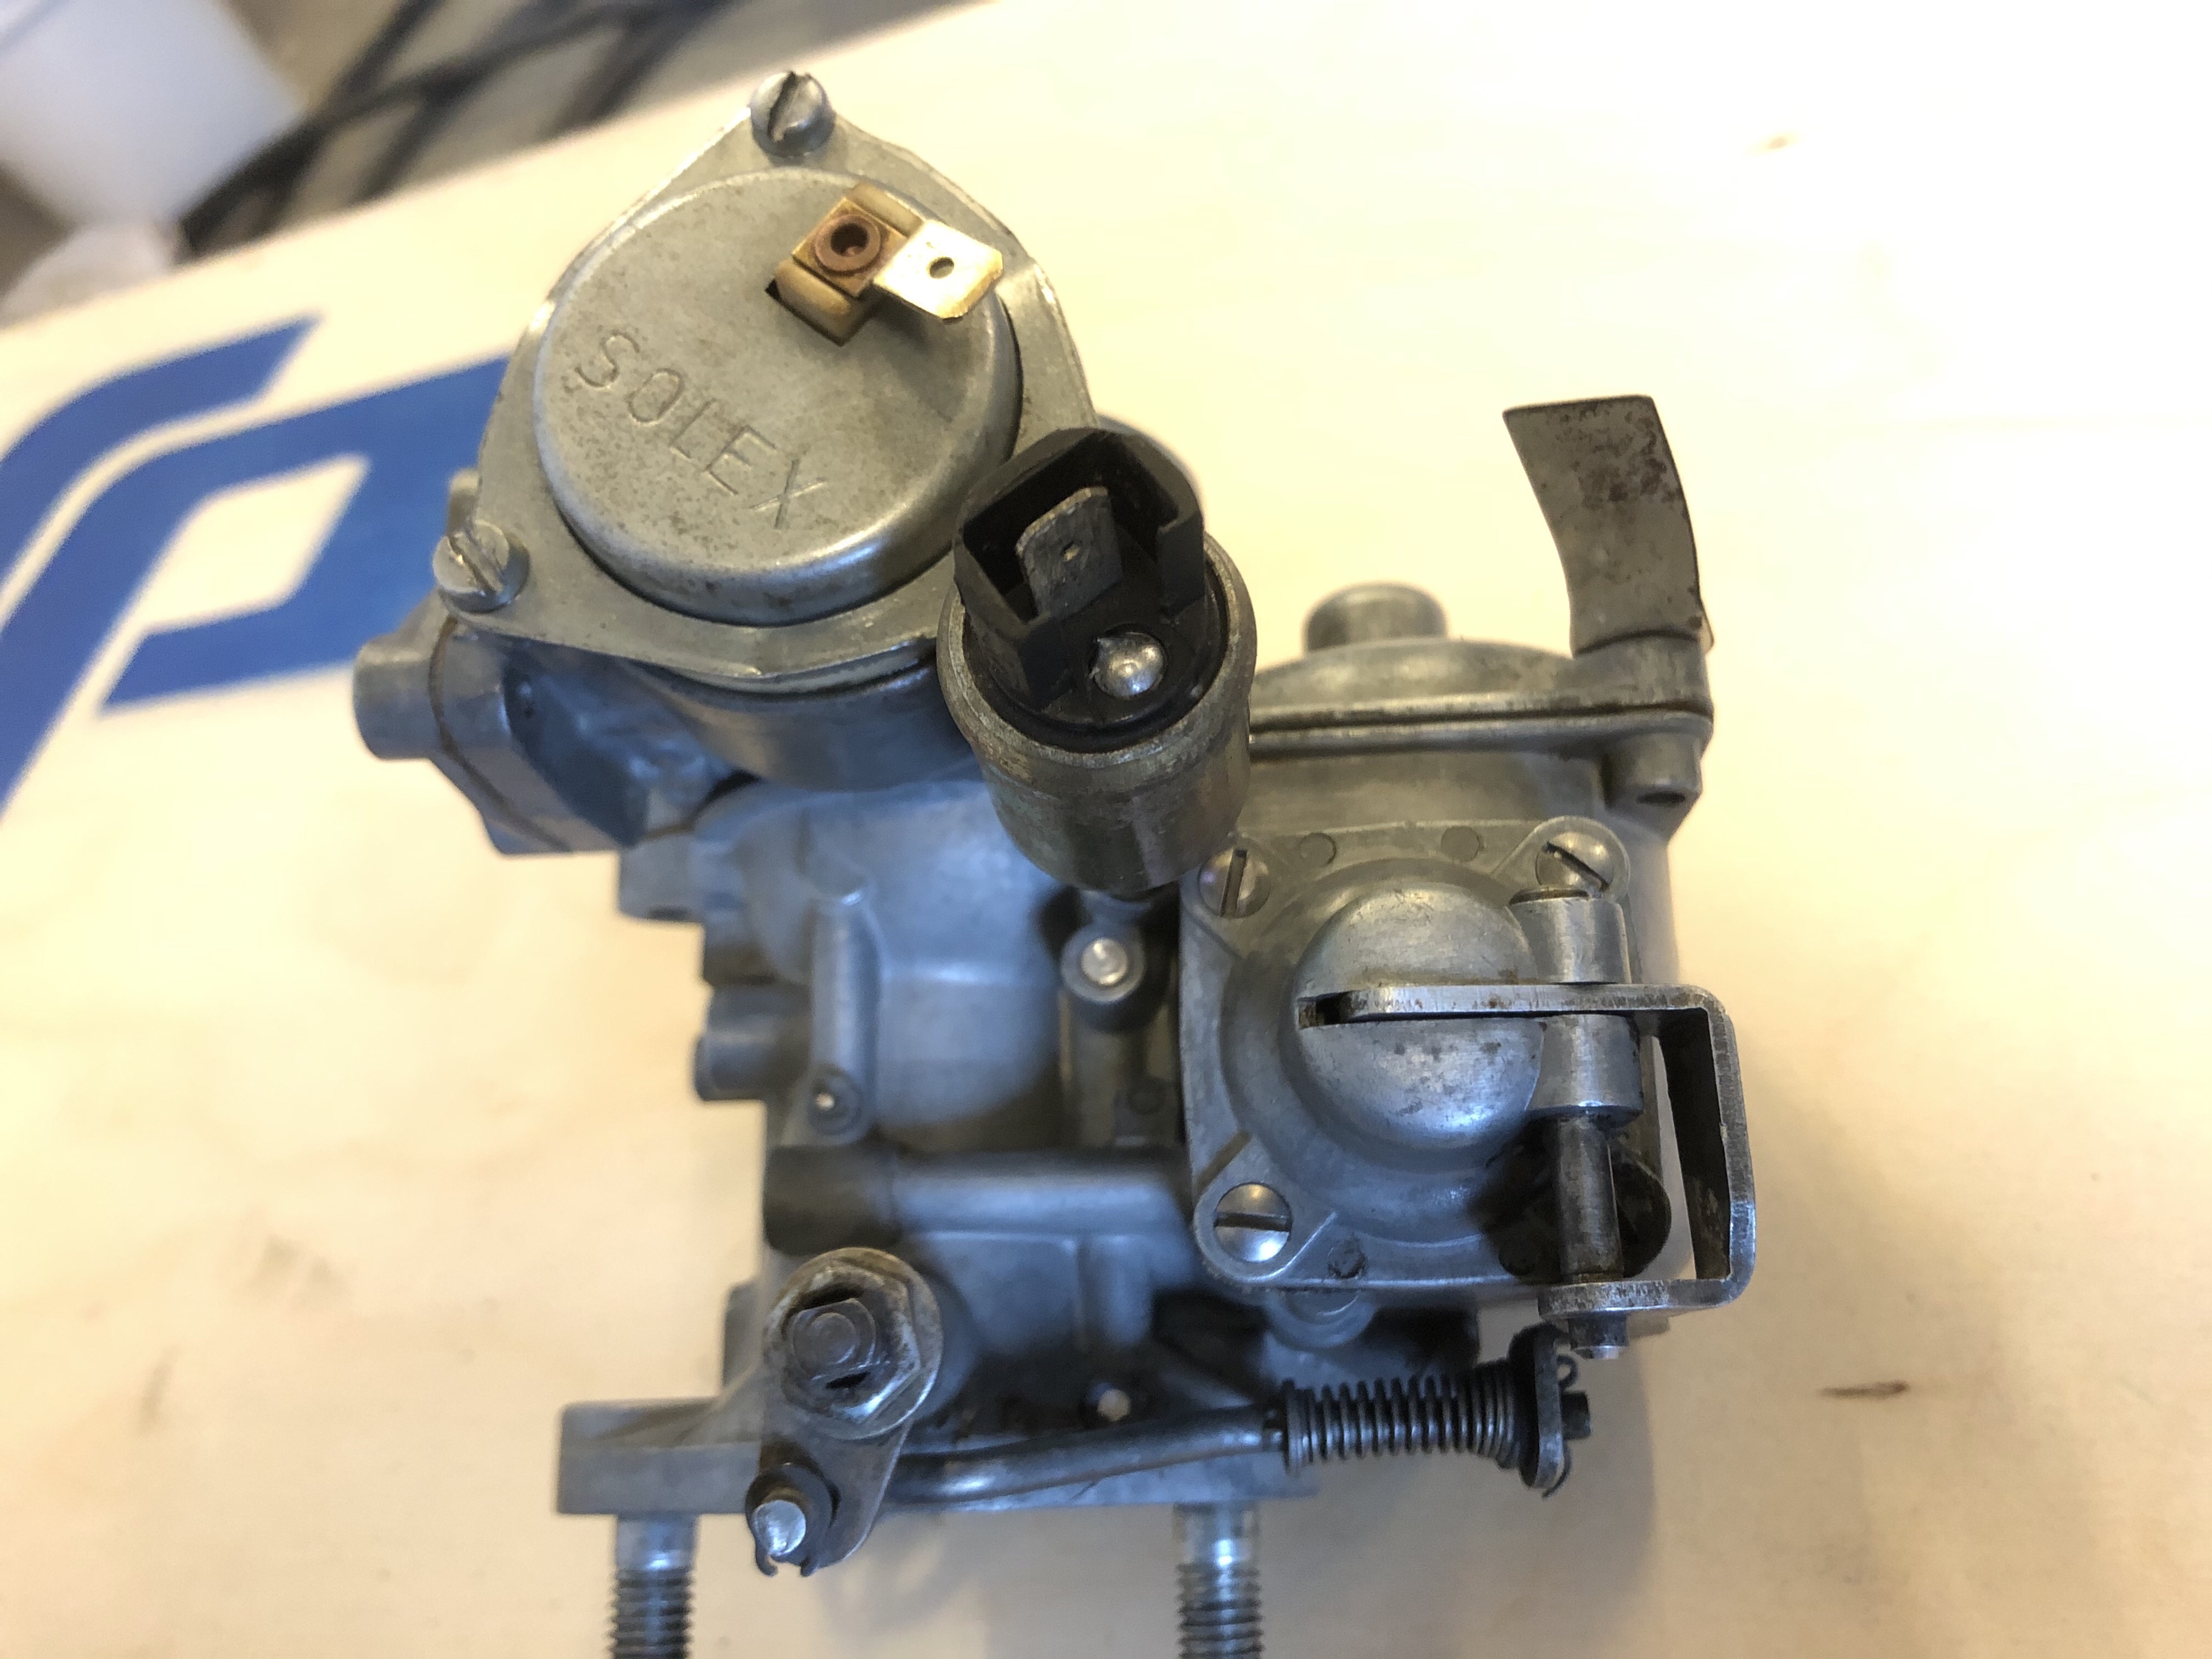
Engine have been worked on also, valves adjusted, new oilsump/gaskets, new: sparkplugs, dist.cap, ignition coil and wiring, rotor, condensator, restored Solex 30-pict carb, new fuel lines everywhere, new exhaust system and all gaskets, restored 12v generator and new Bosch charge relay and 12v generator stand, new fan belt and pulley, new throttle cable etc.
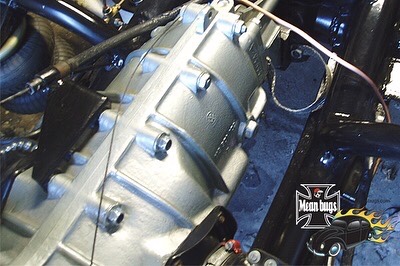
That’s it for now! Next up is transmission overhaul and then test start the engine for first time in 20 years…


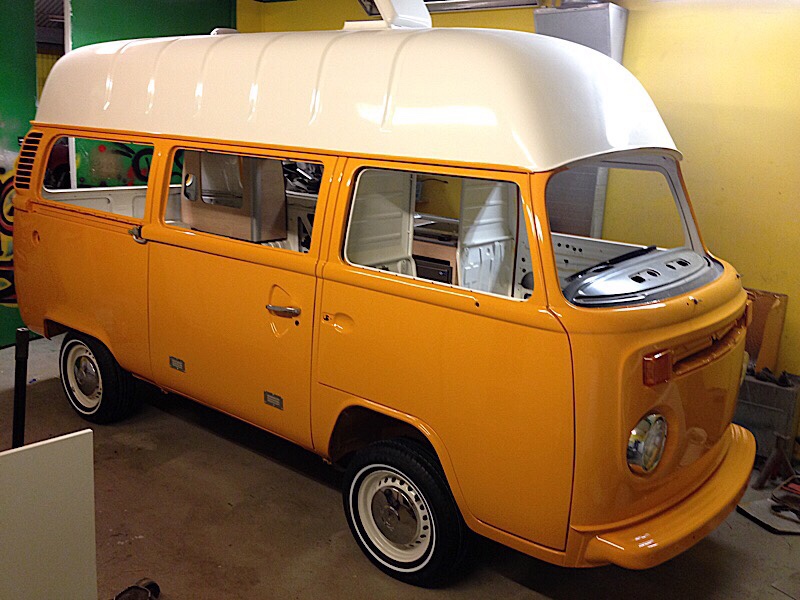
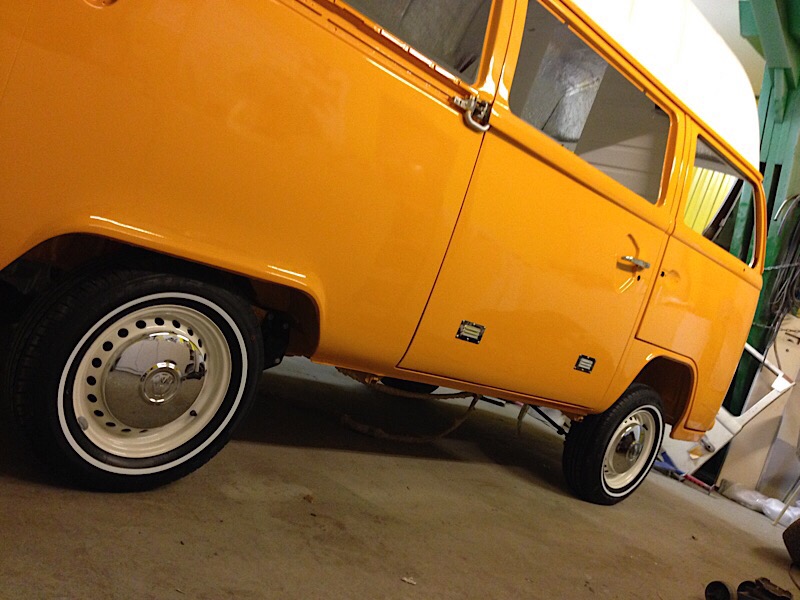
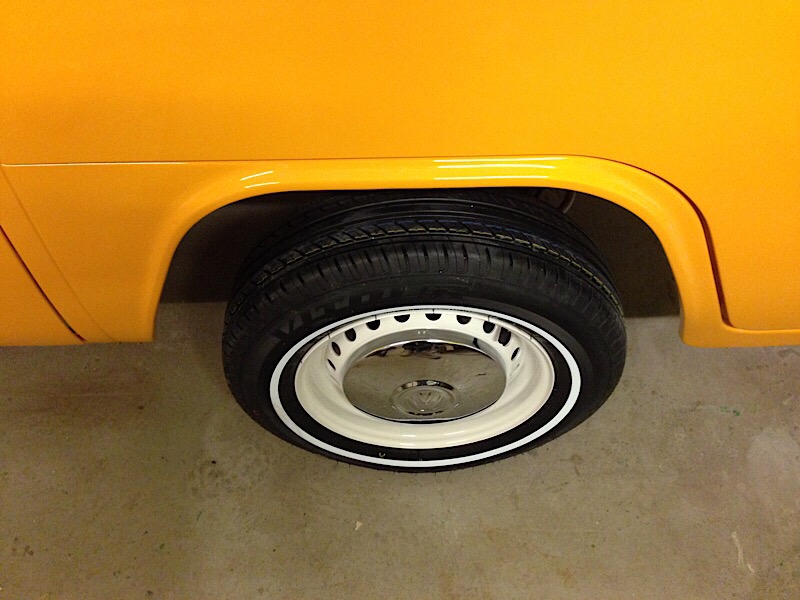
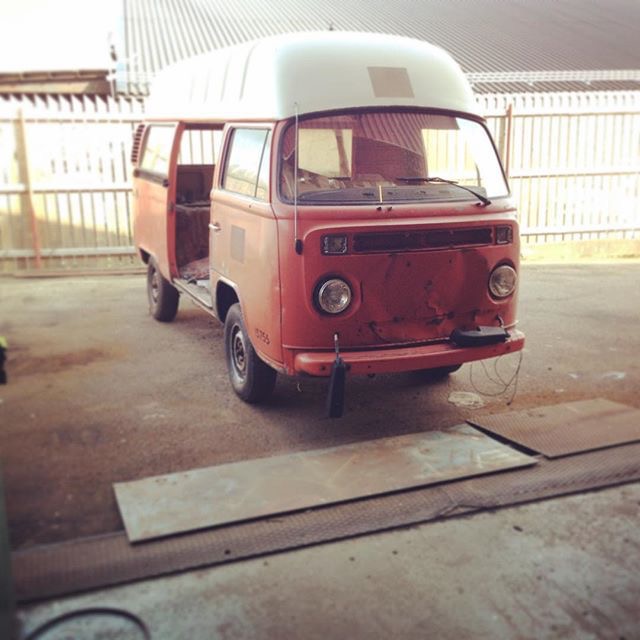
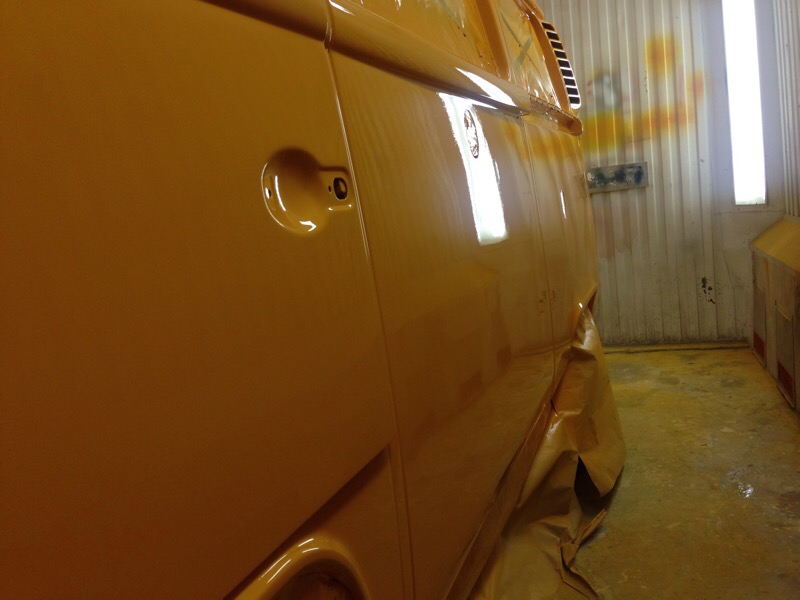
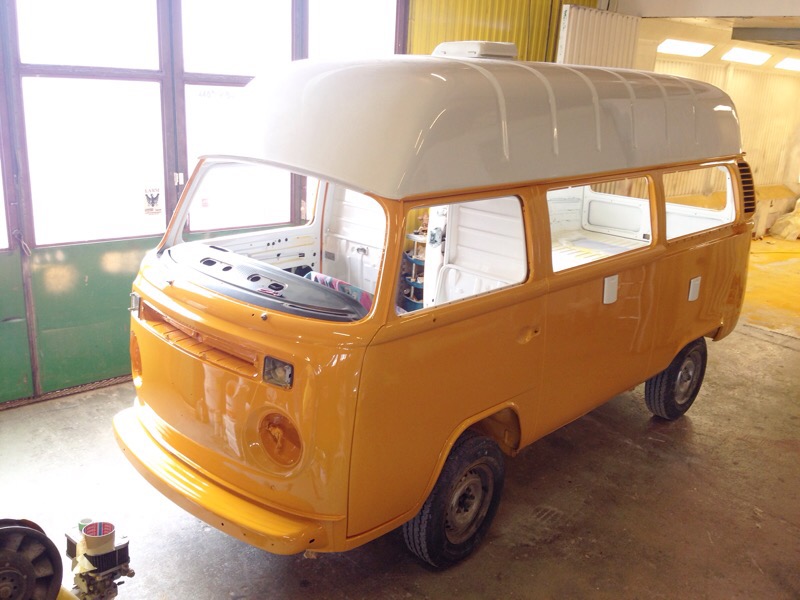
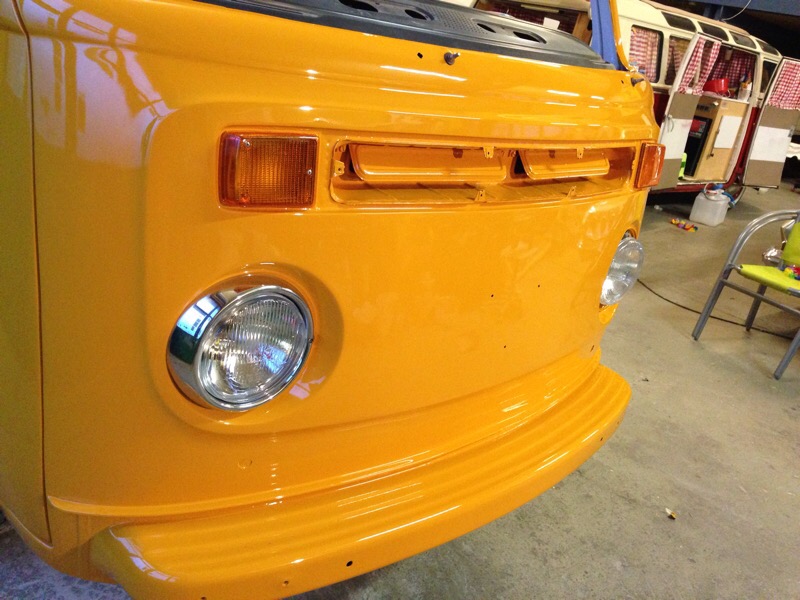
Some pictures on my 1975 VW T3 Baywindow bus with factory spec highroof. Color is “VW Marino Yellow L20a”. Last picture shows how it all started…


My old Oval ragtop, a pan off restoration but with original paint/patina body. This was 2005.
Follow MainDrive on Instagram: @maindrivegarage

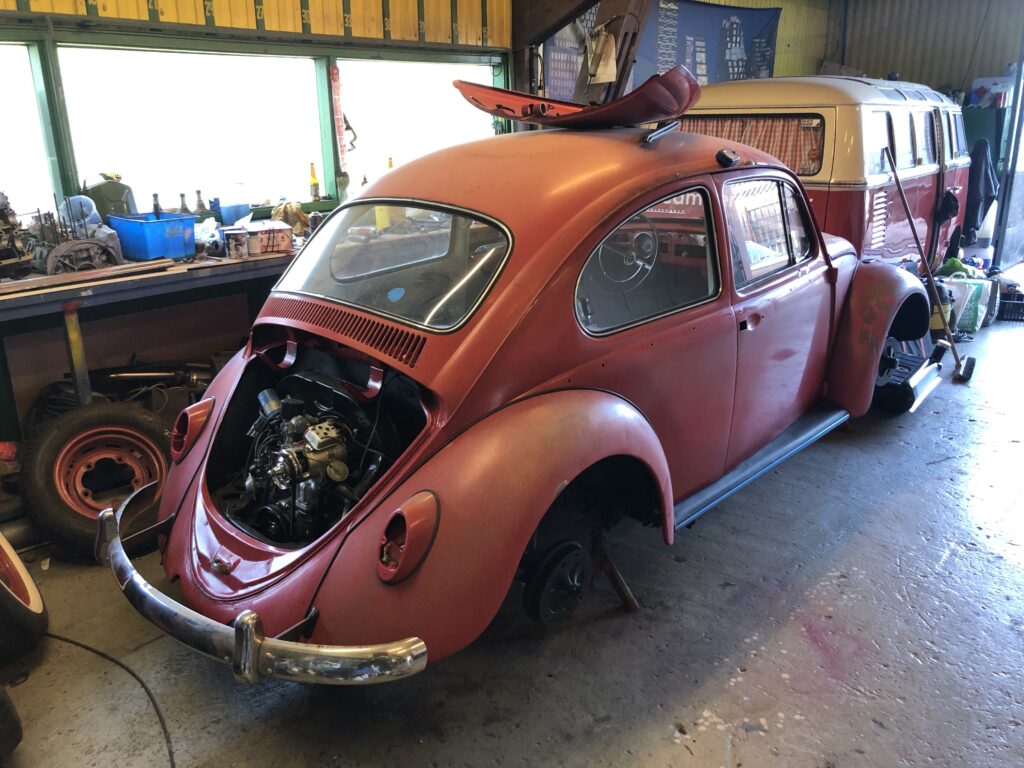
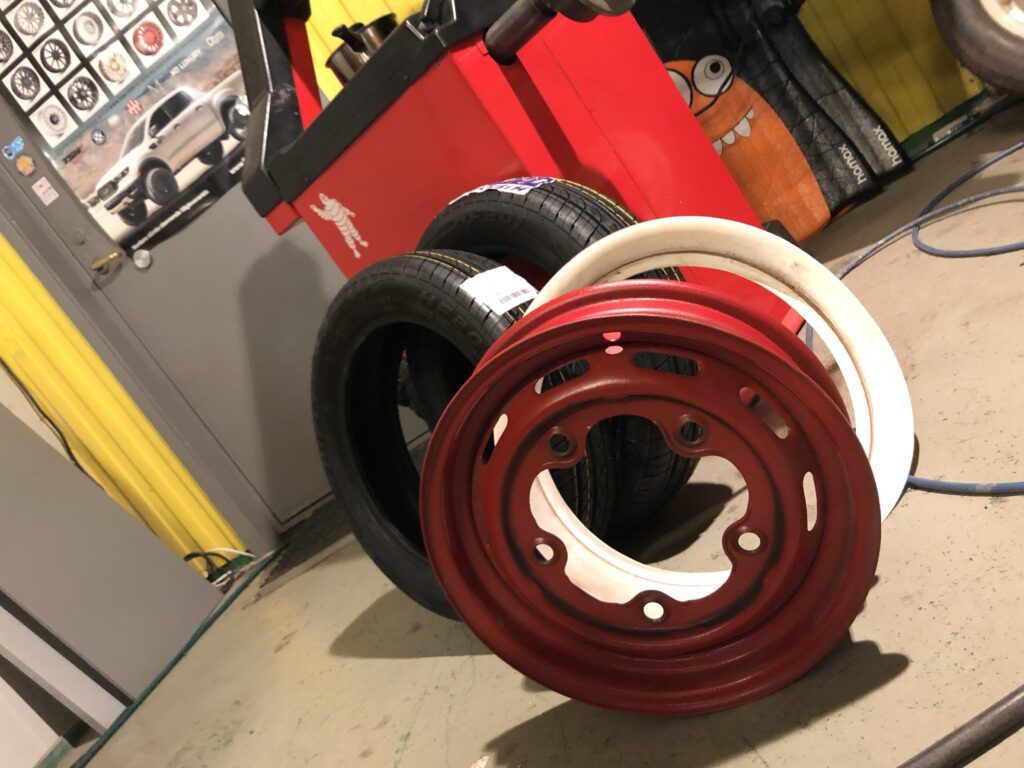
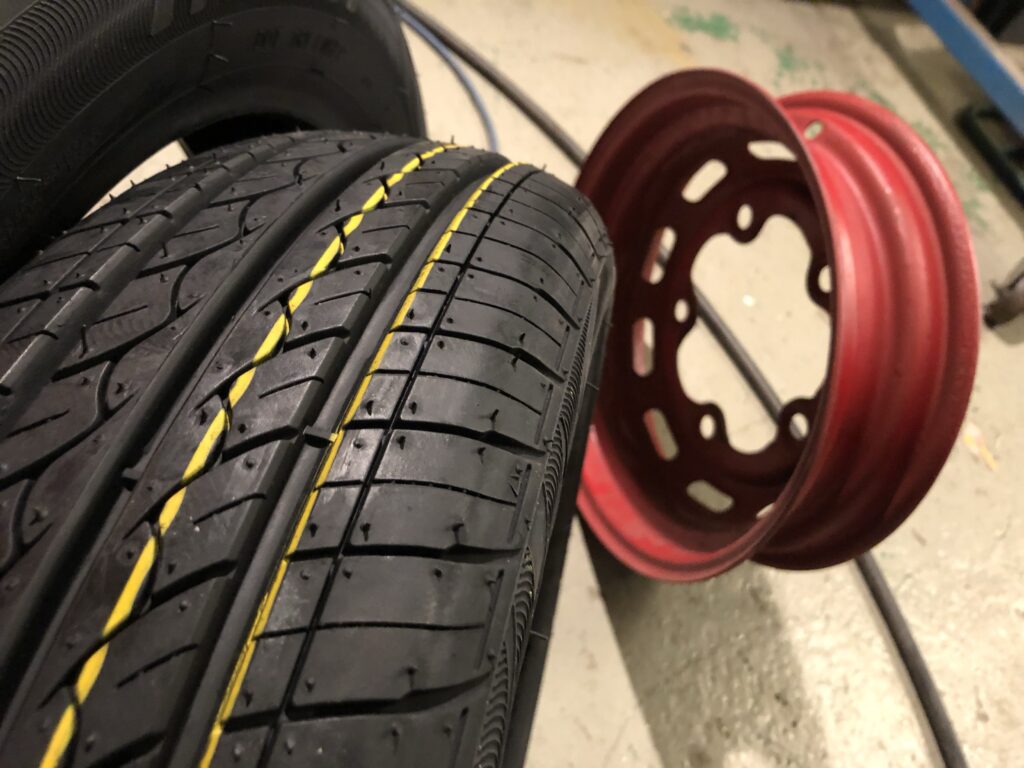
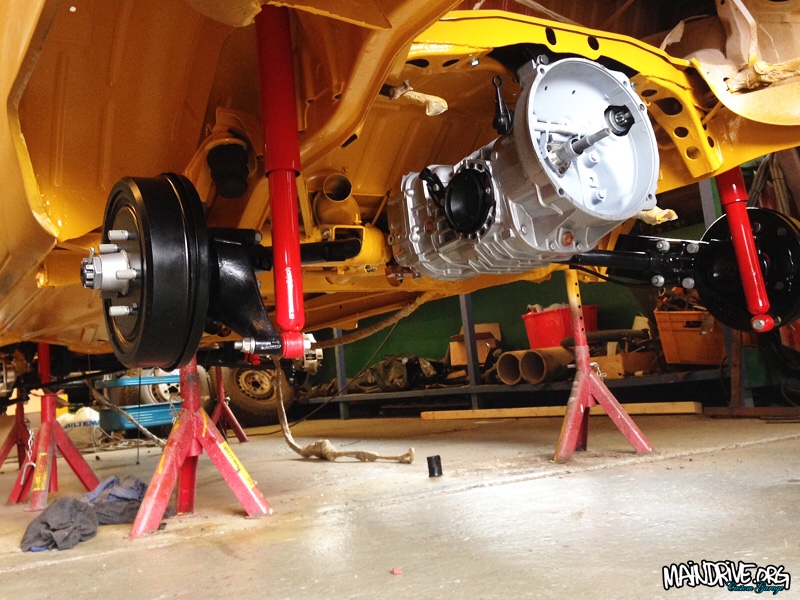
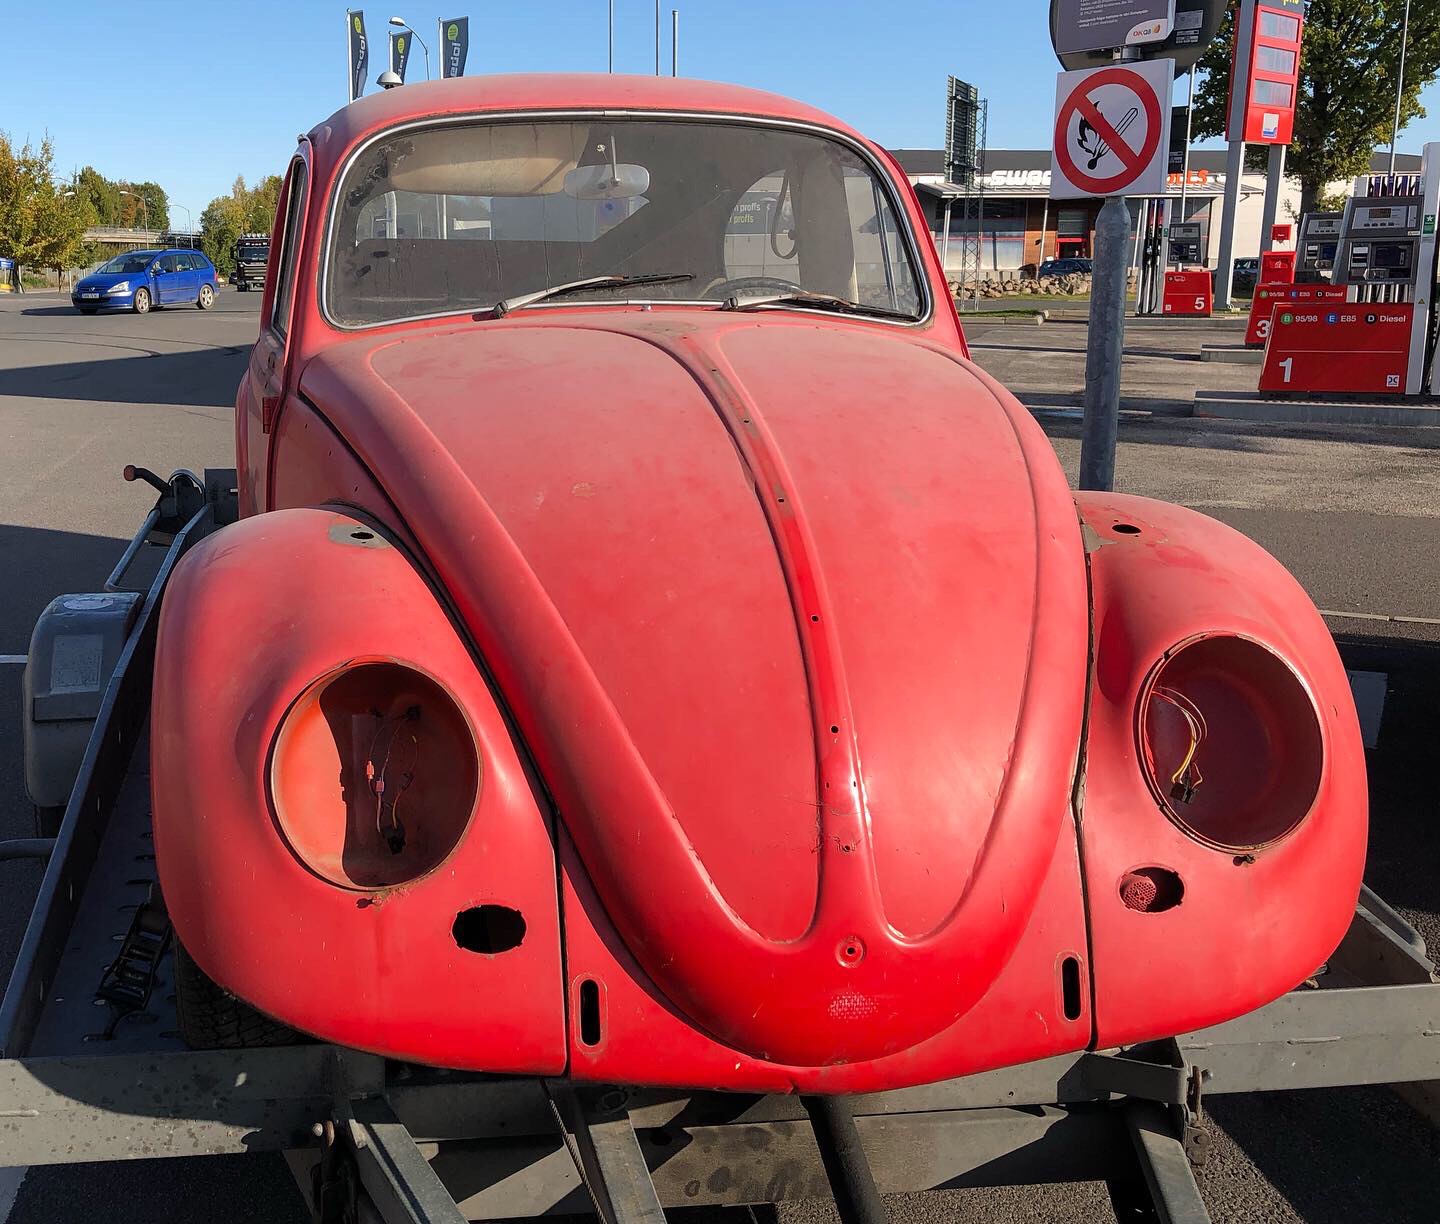
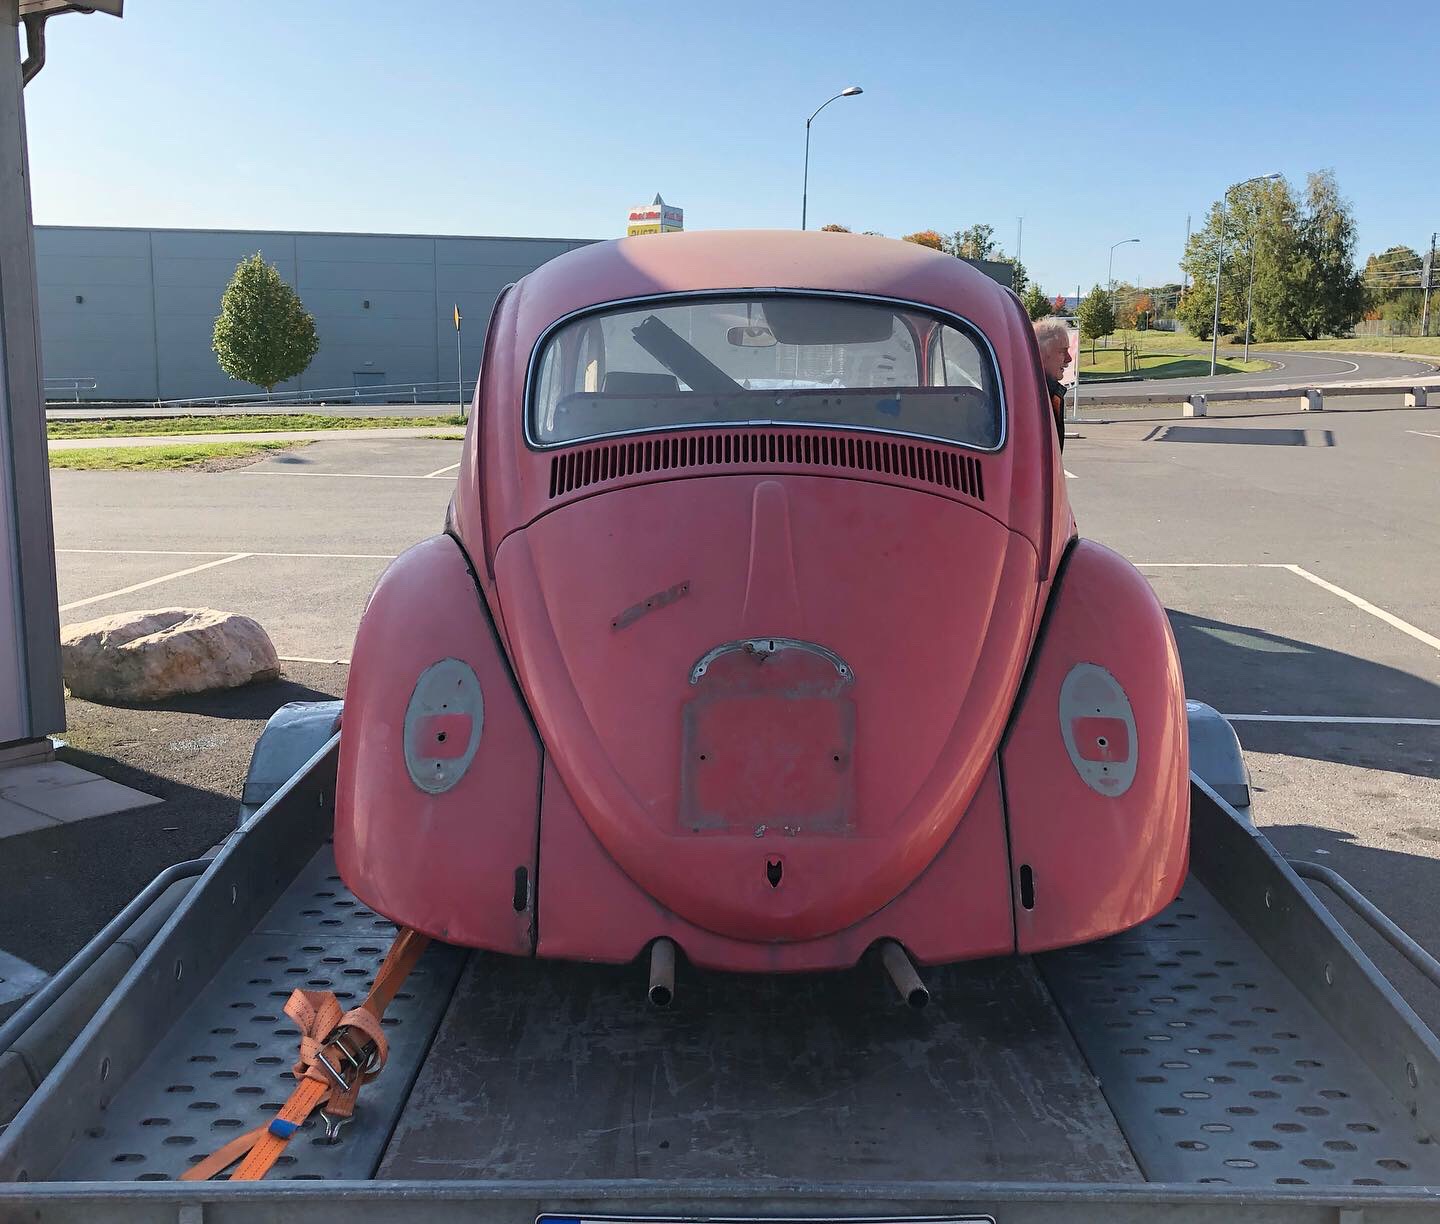
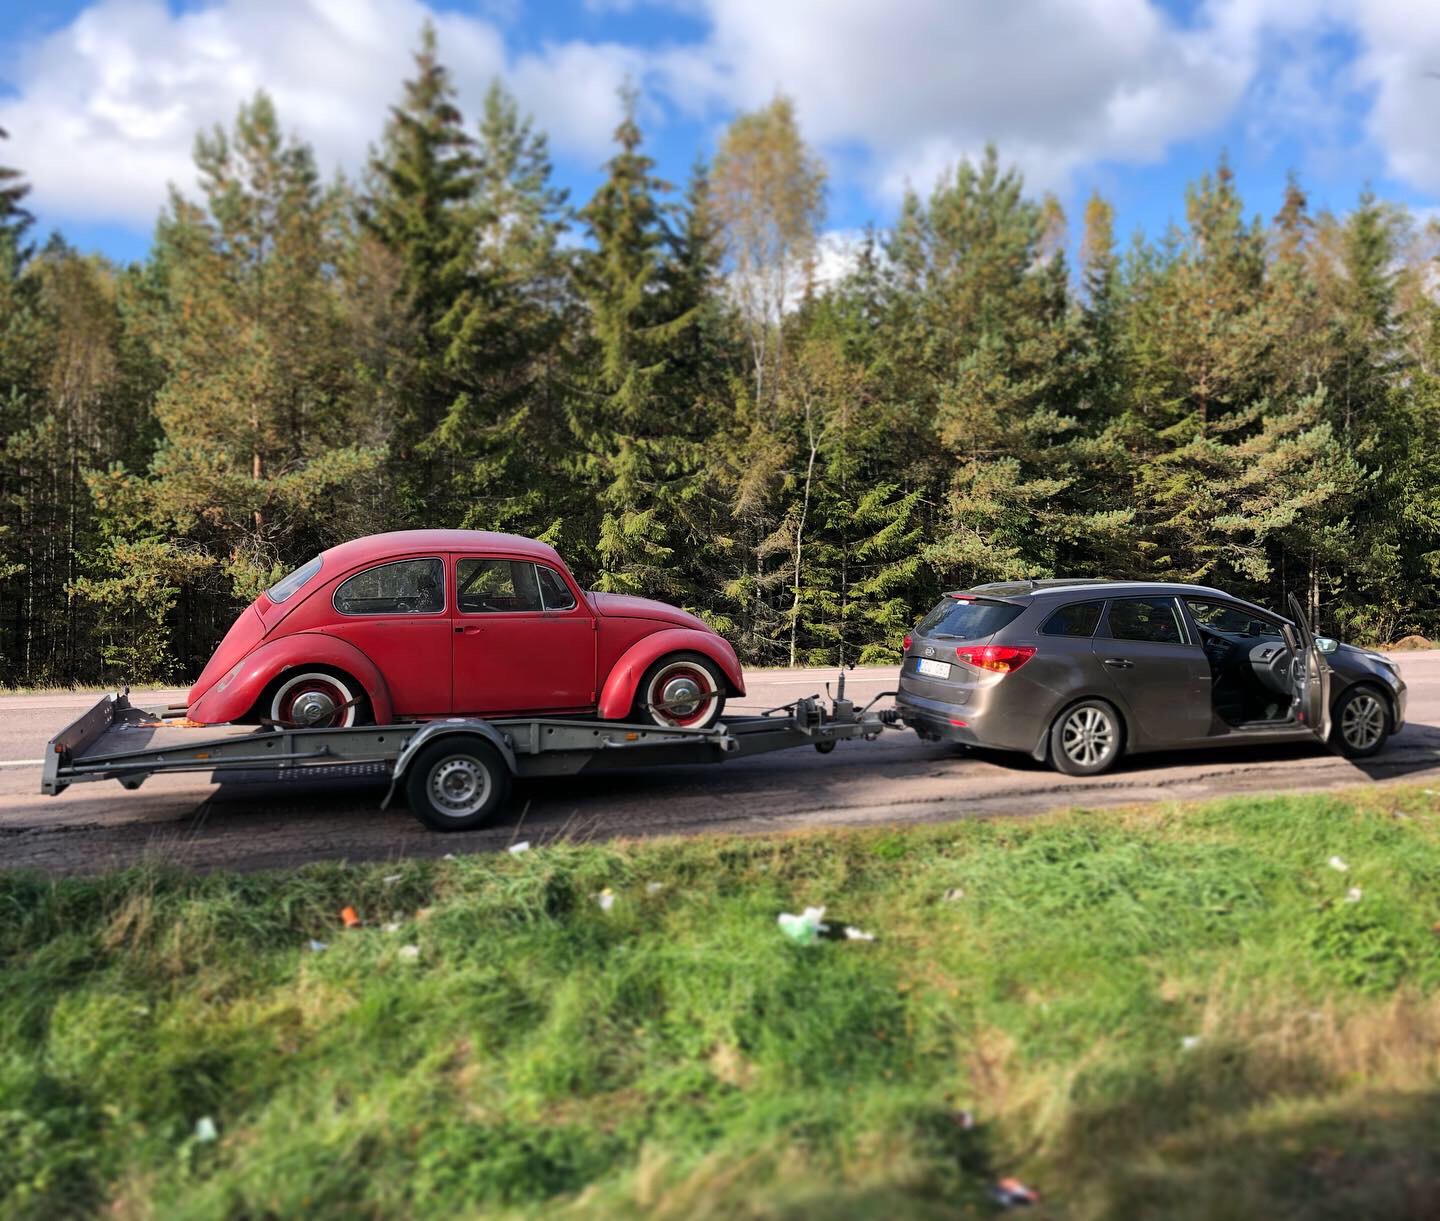
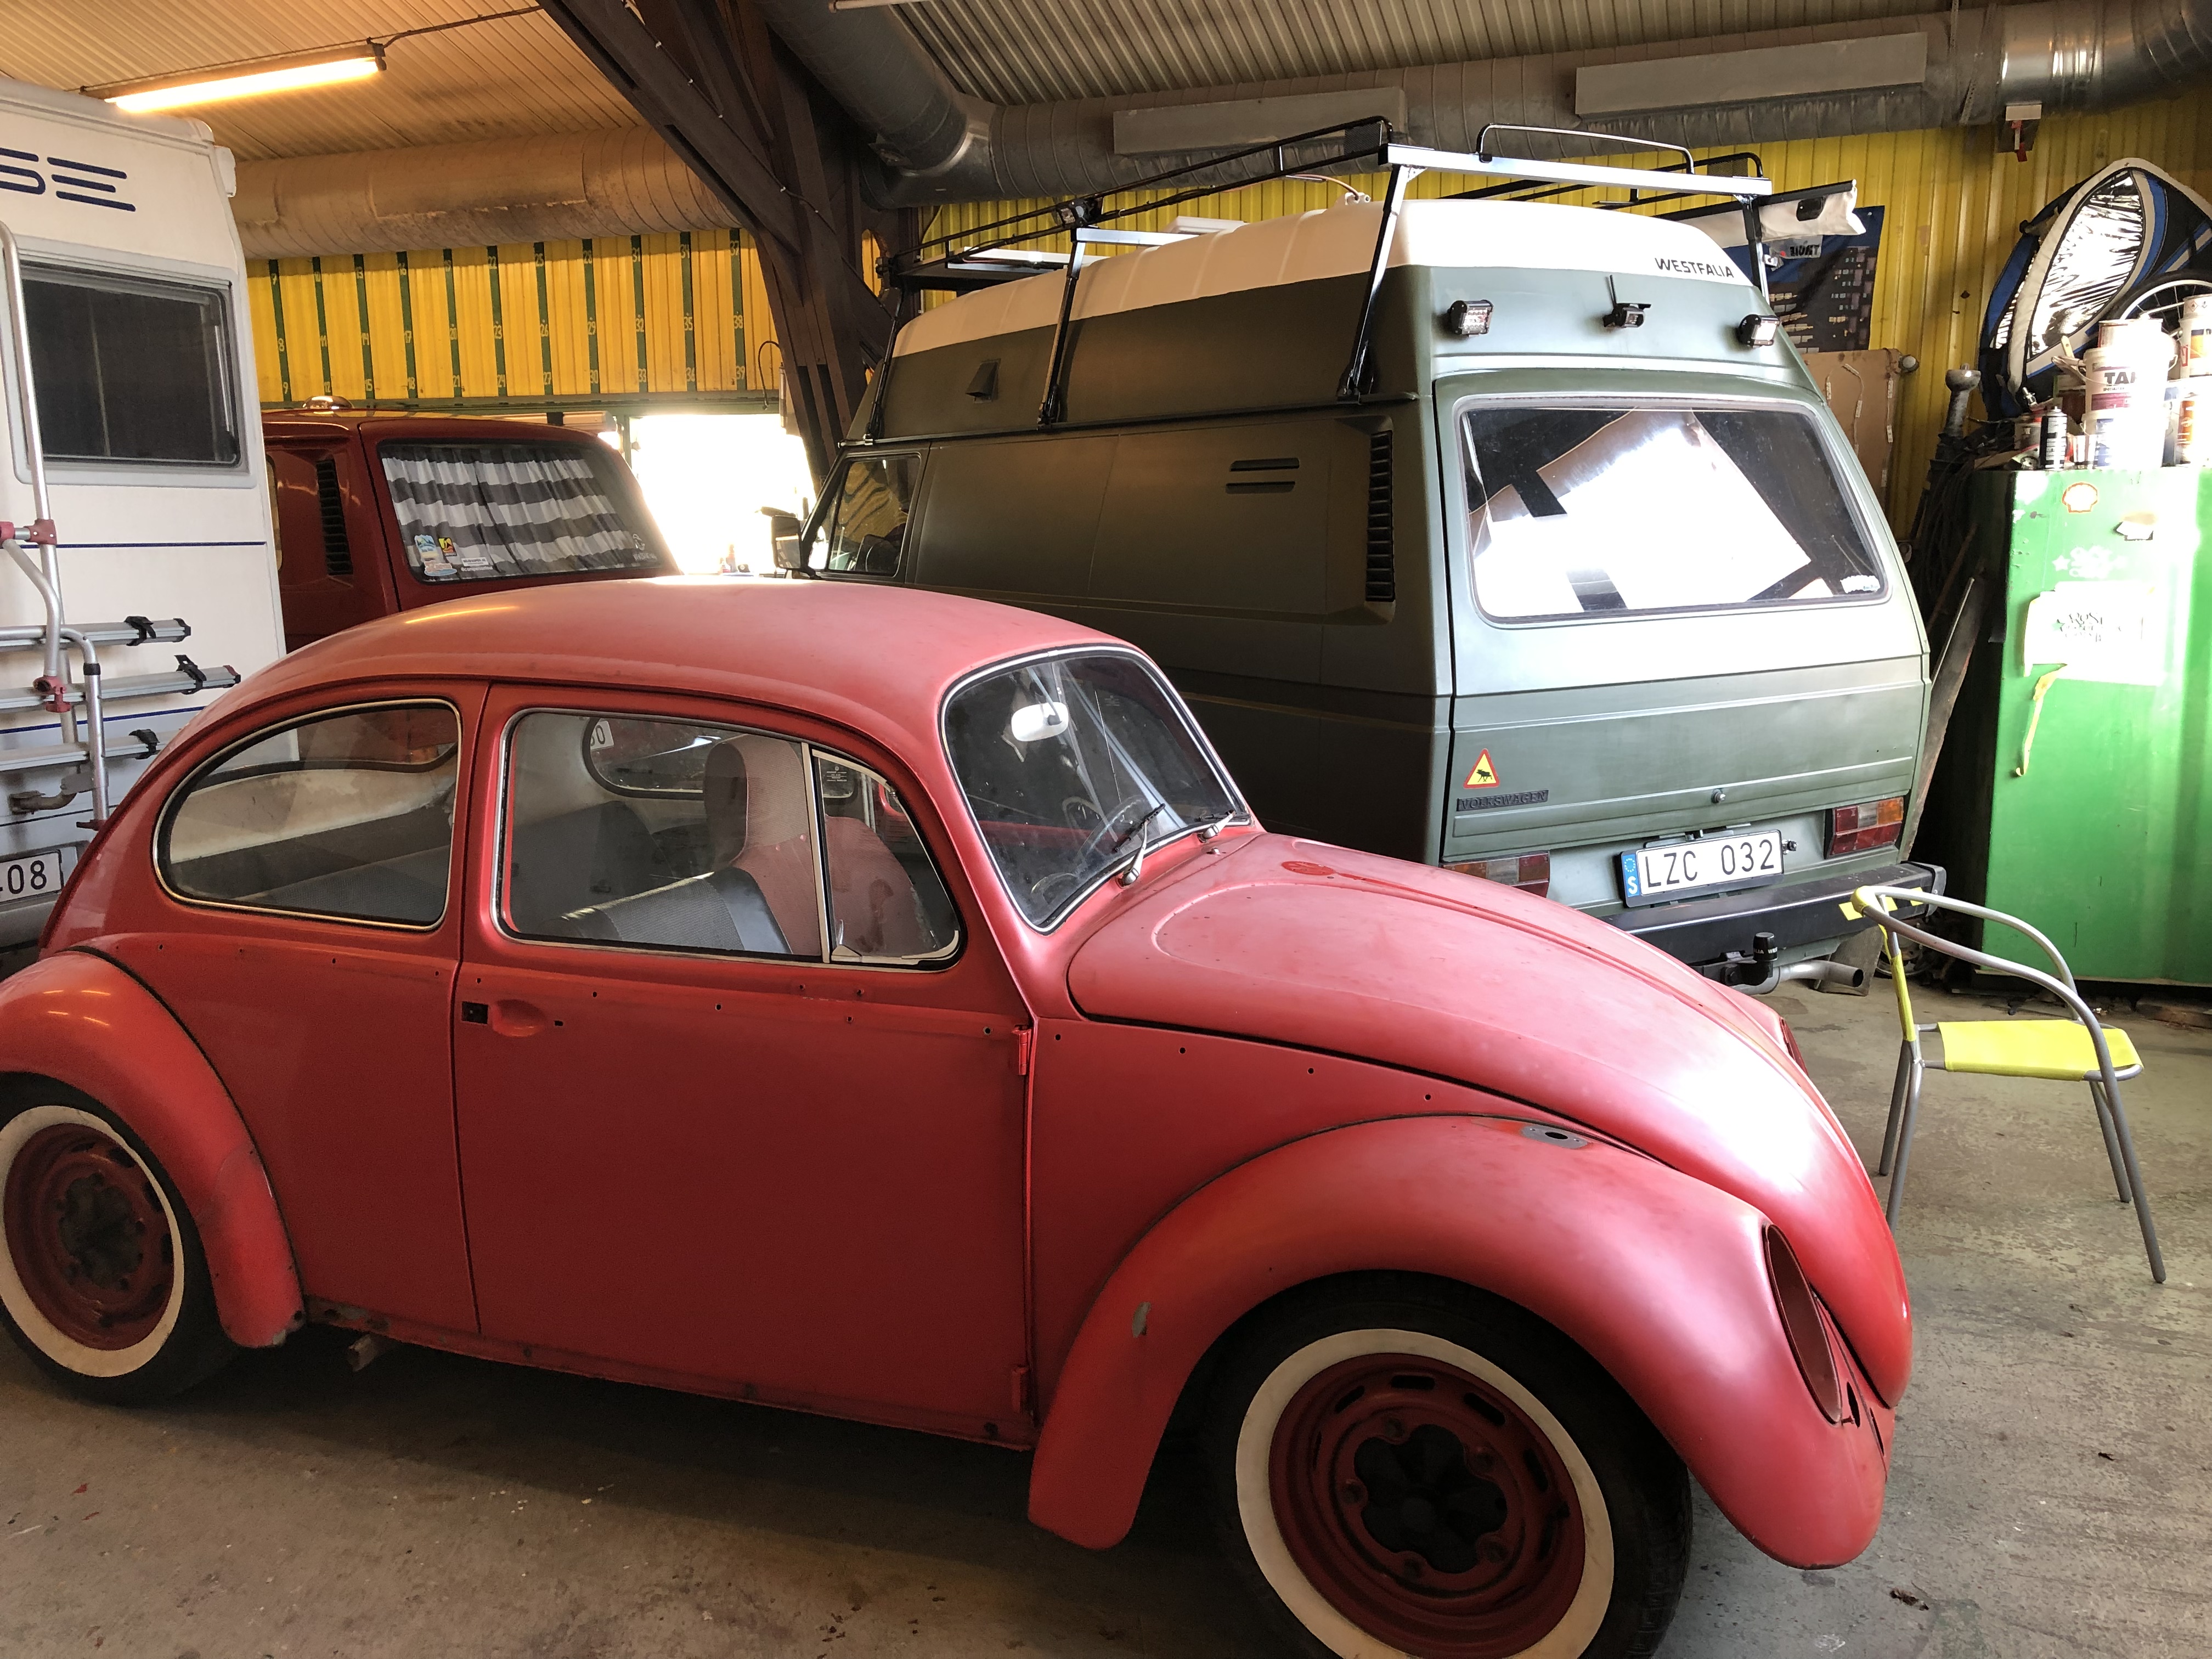
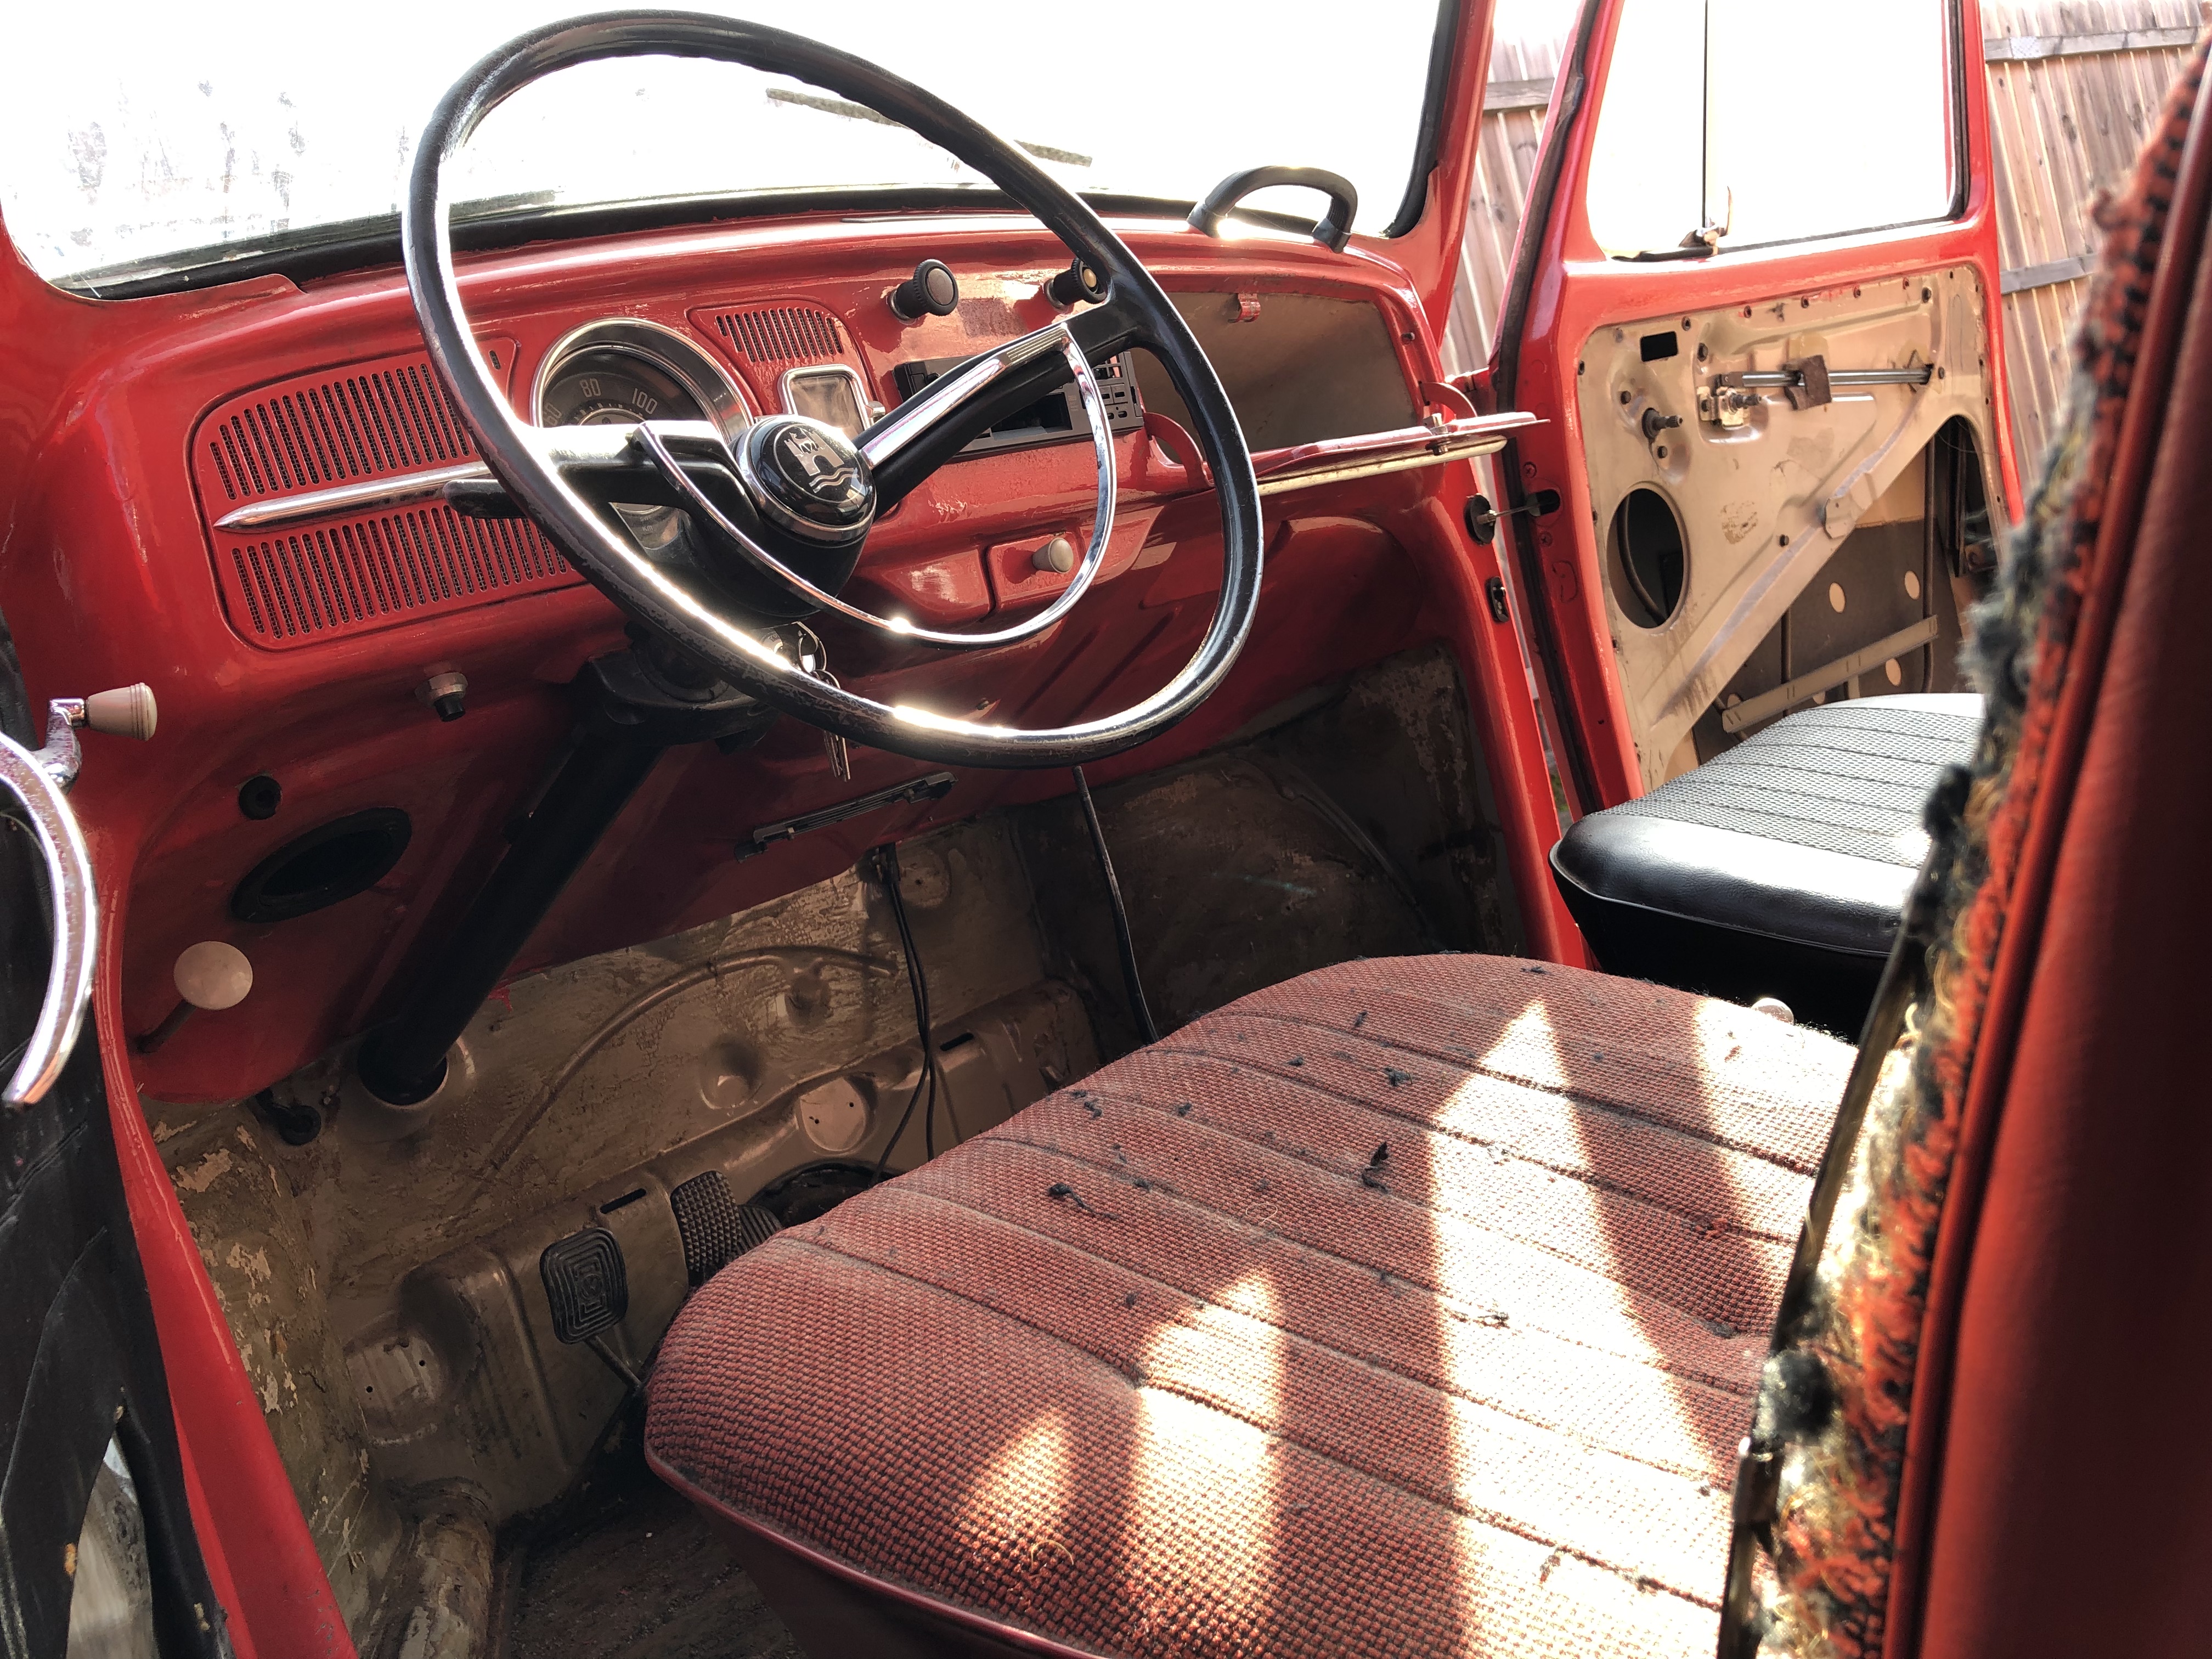
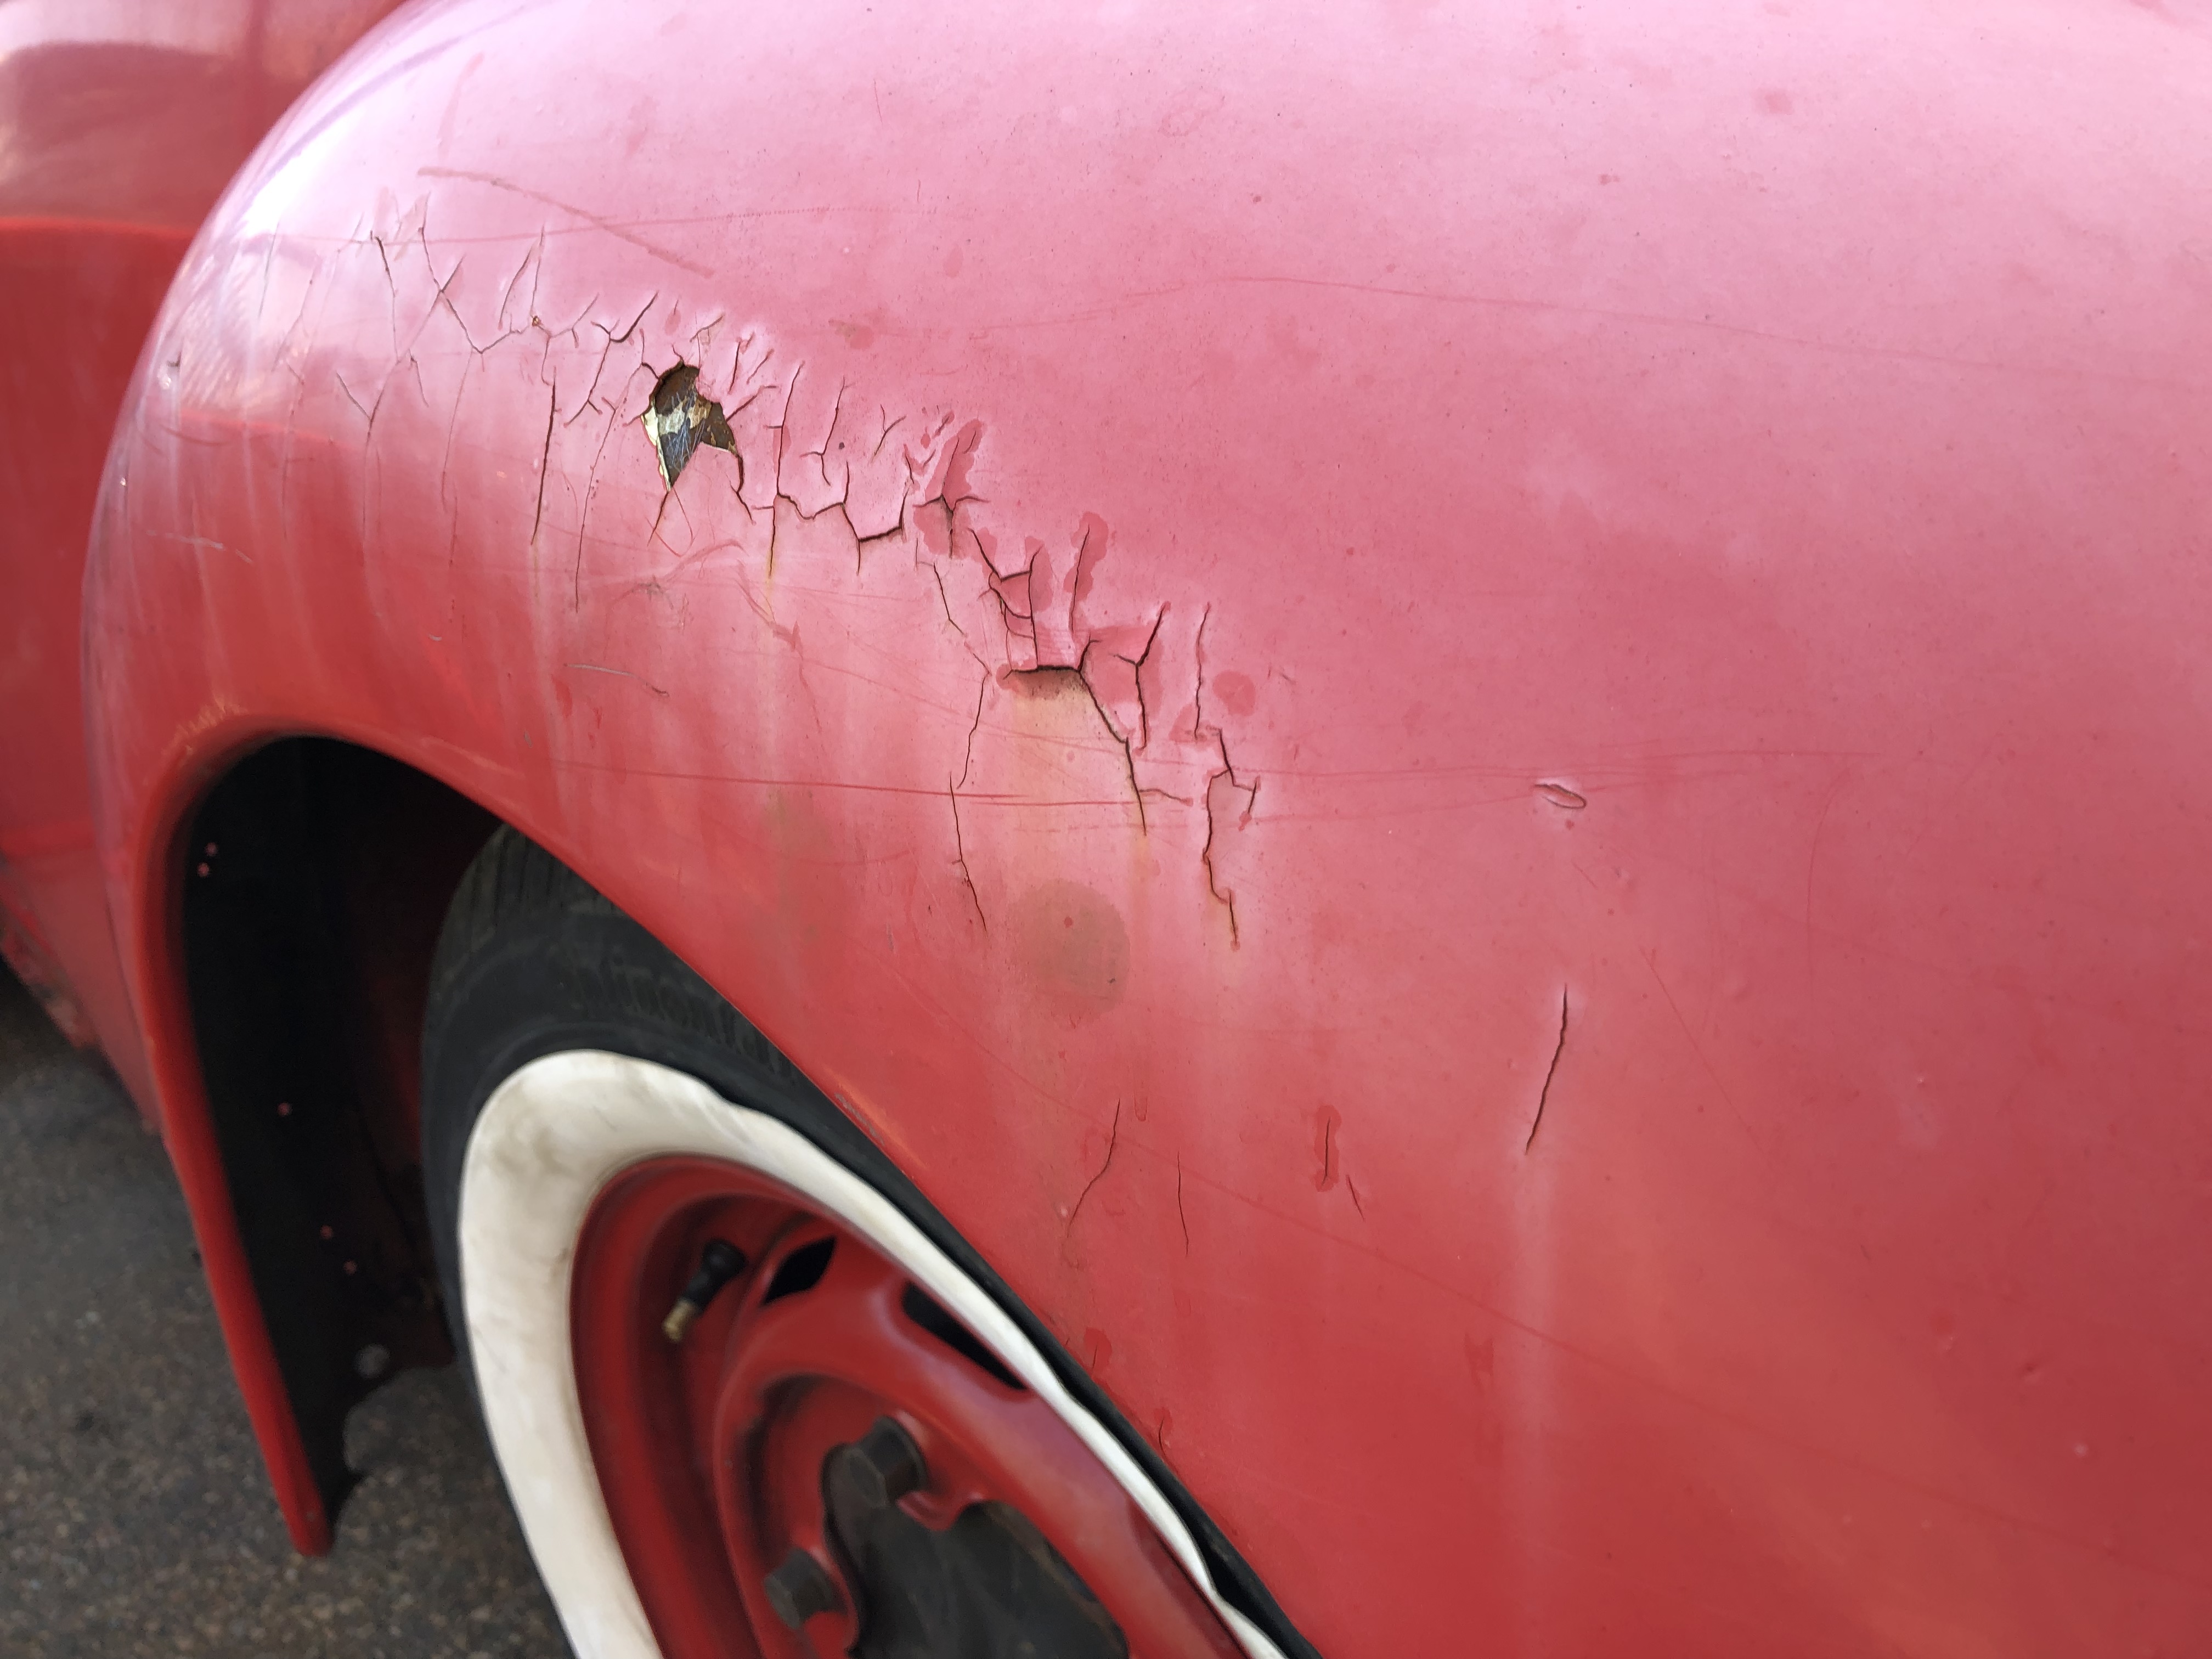
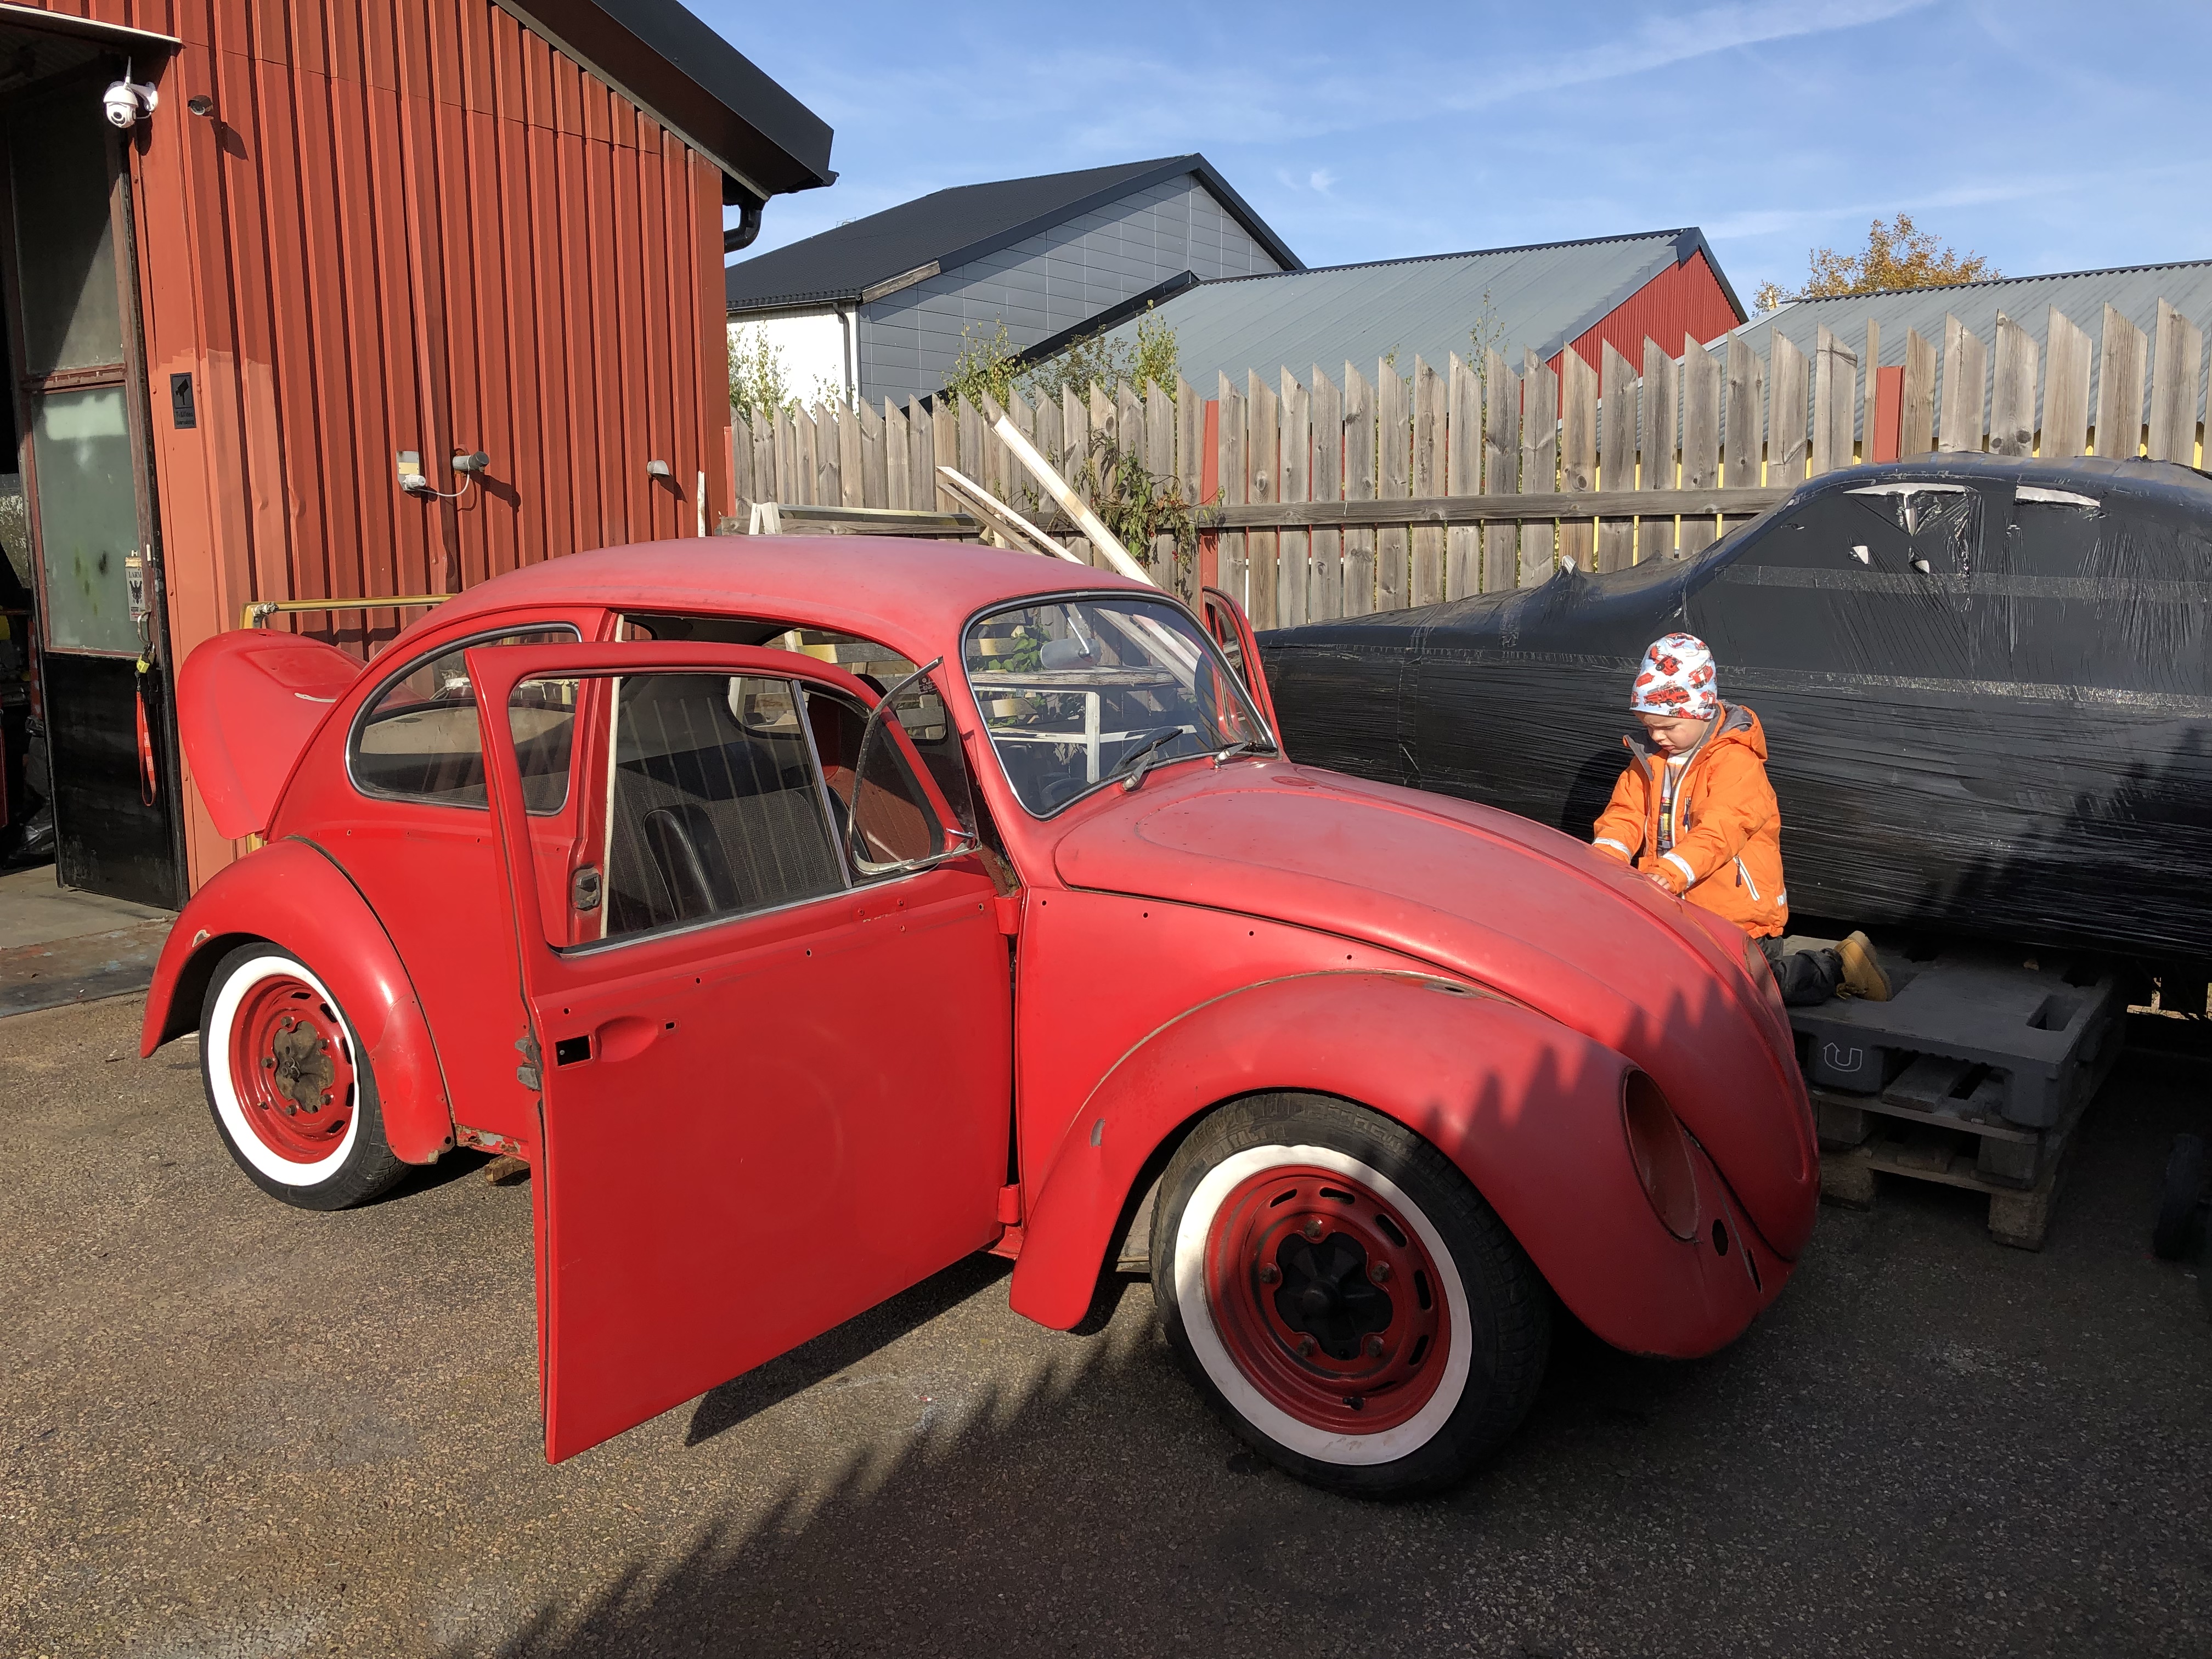
A Ruby red 1965 VW type 1 Beetle. Solid project, not much rust at all. Will get new paint and interior, engine overhauled, new chrome trim, new rubber seals and new brake system and more. Pics coming soon and maybe a simple video serie on the YouTube channel. Stay tuned!
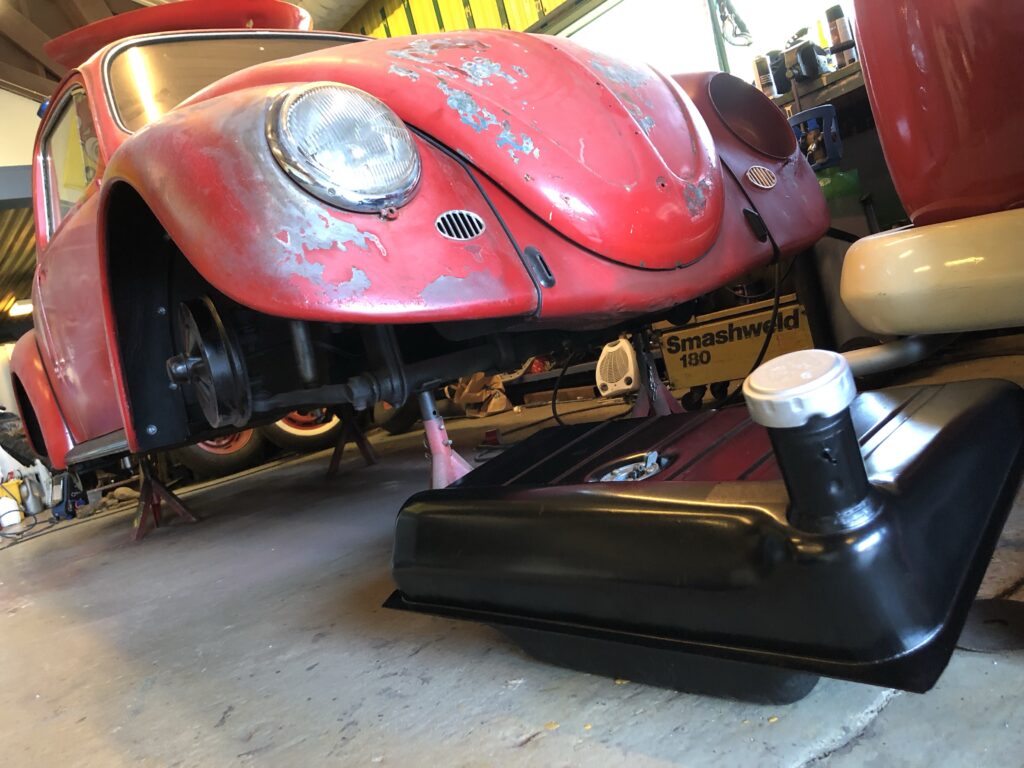
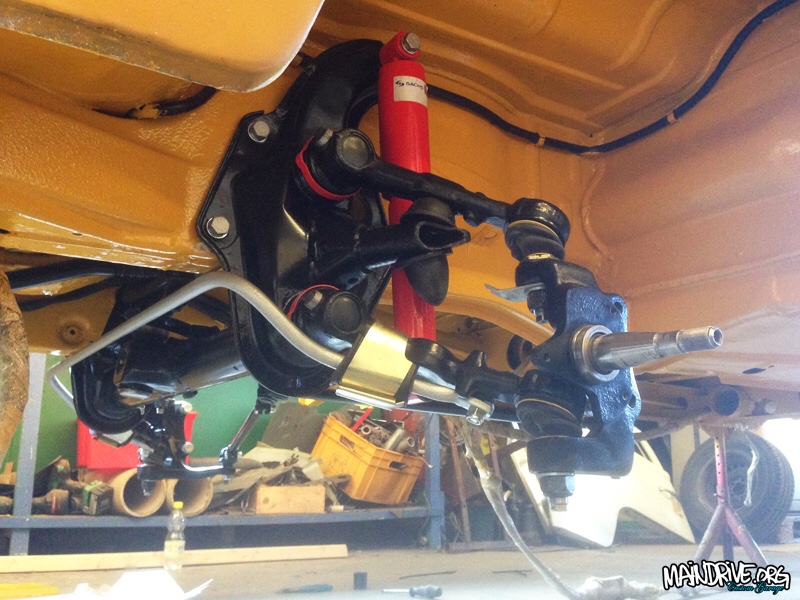
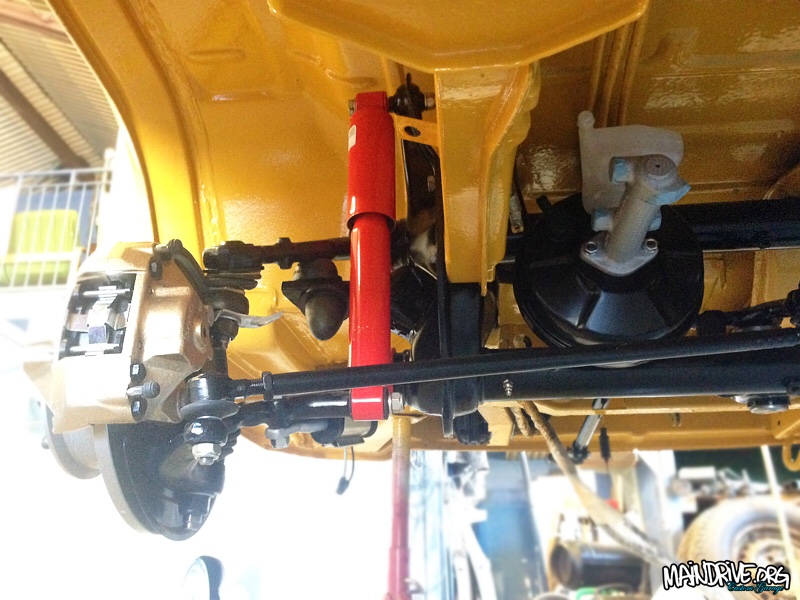
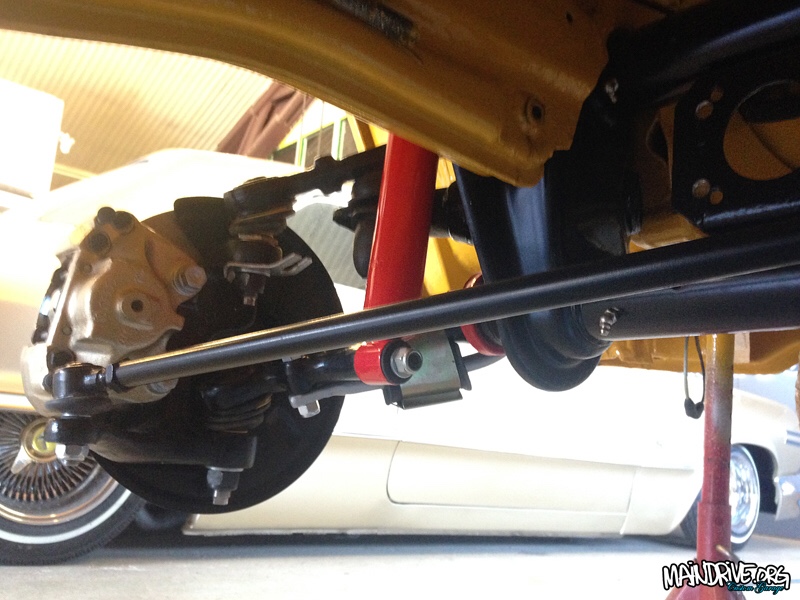
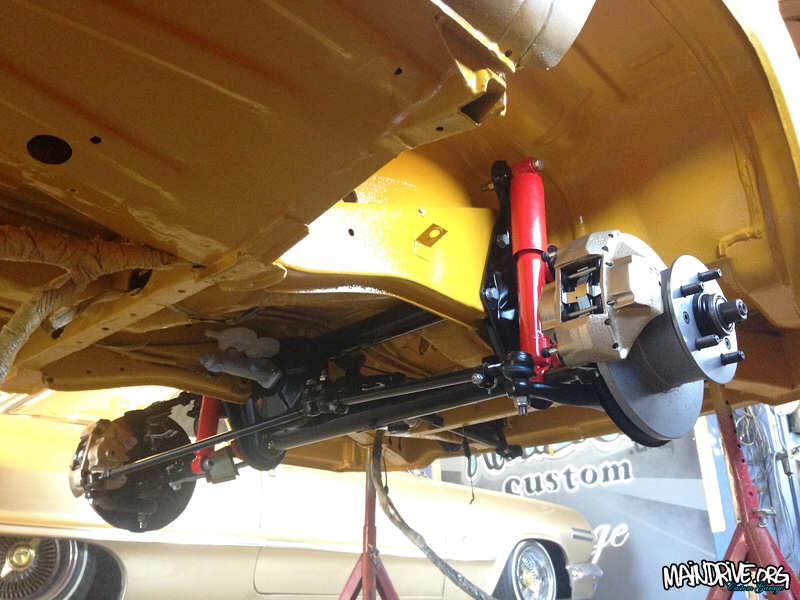
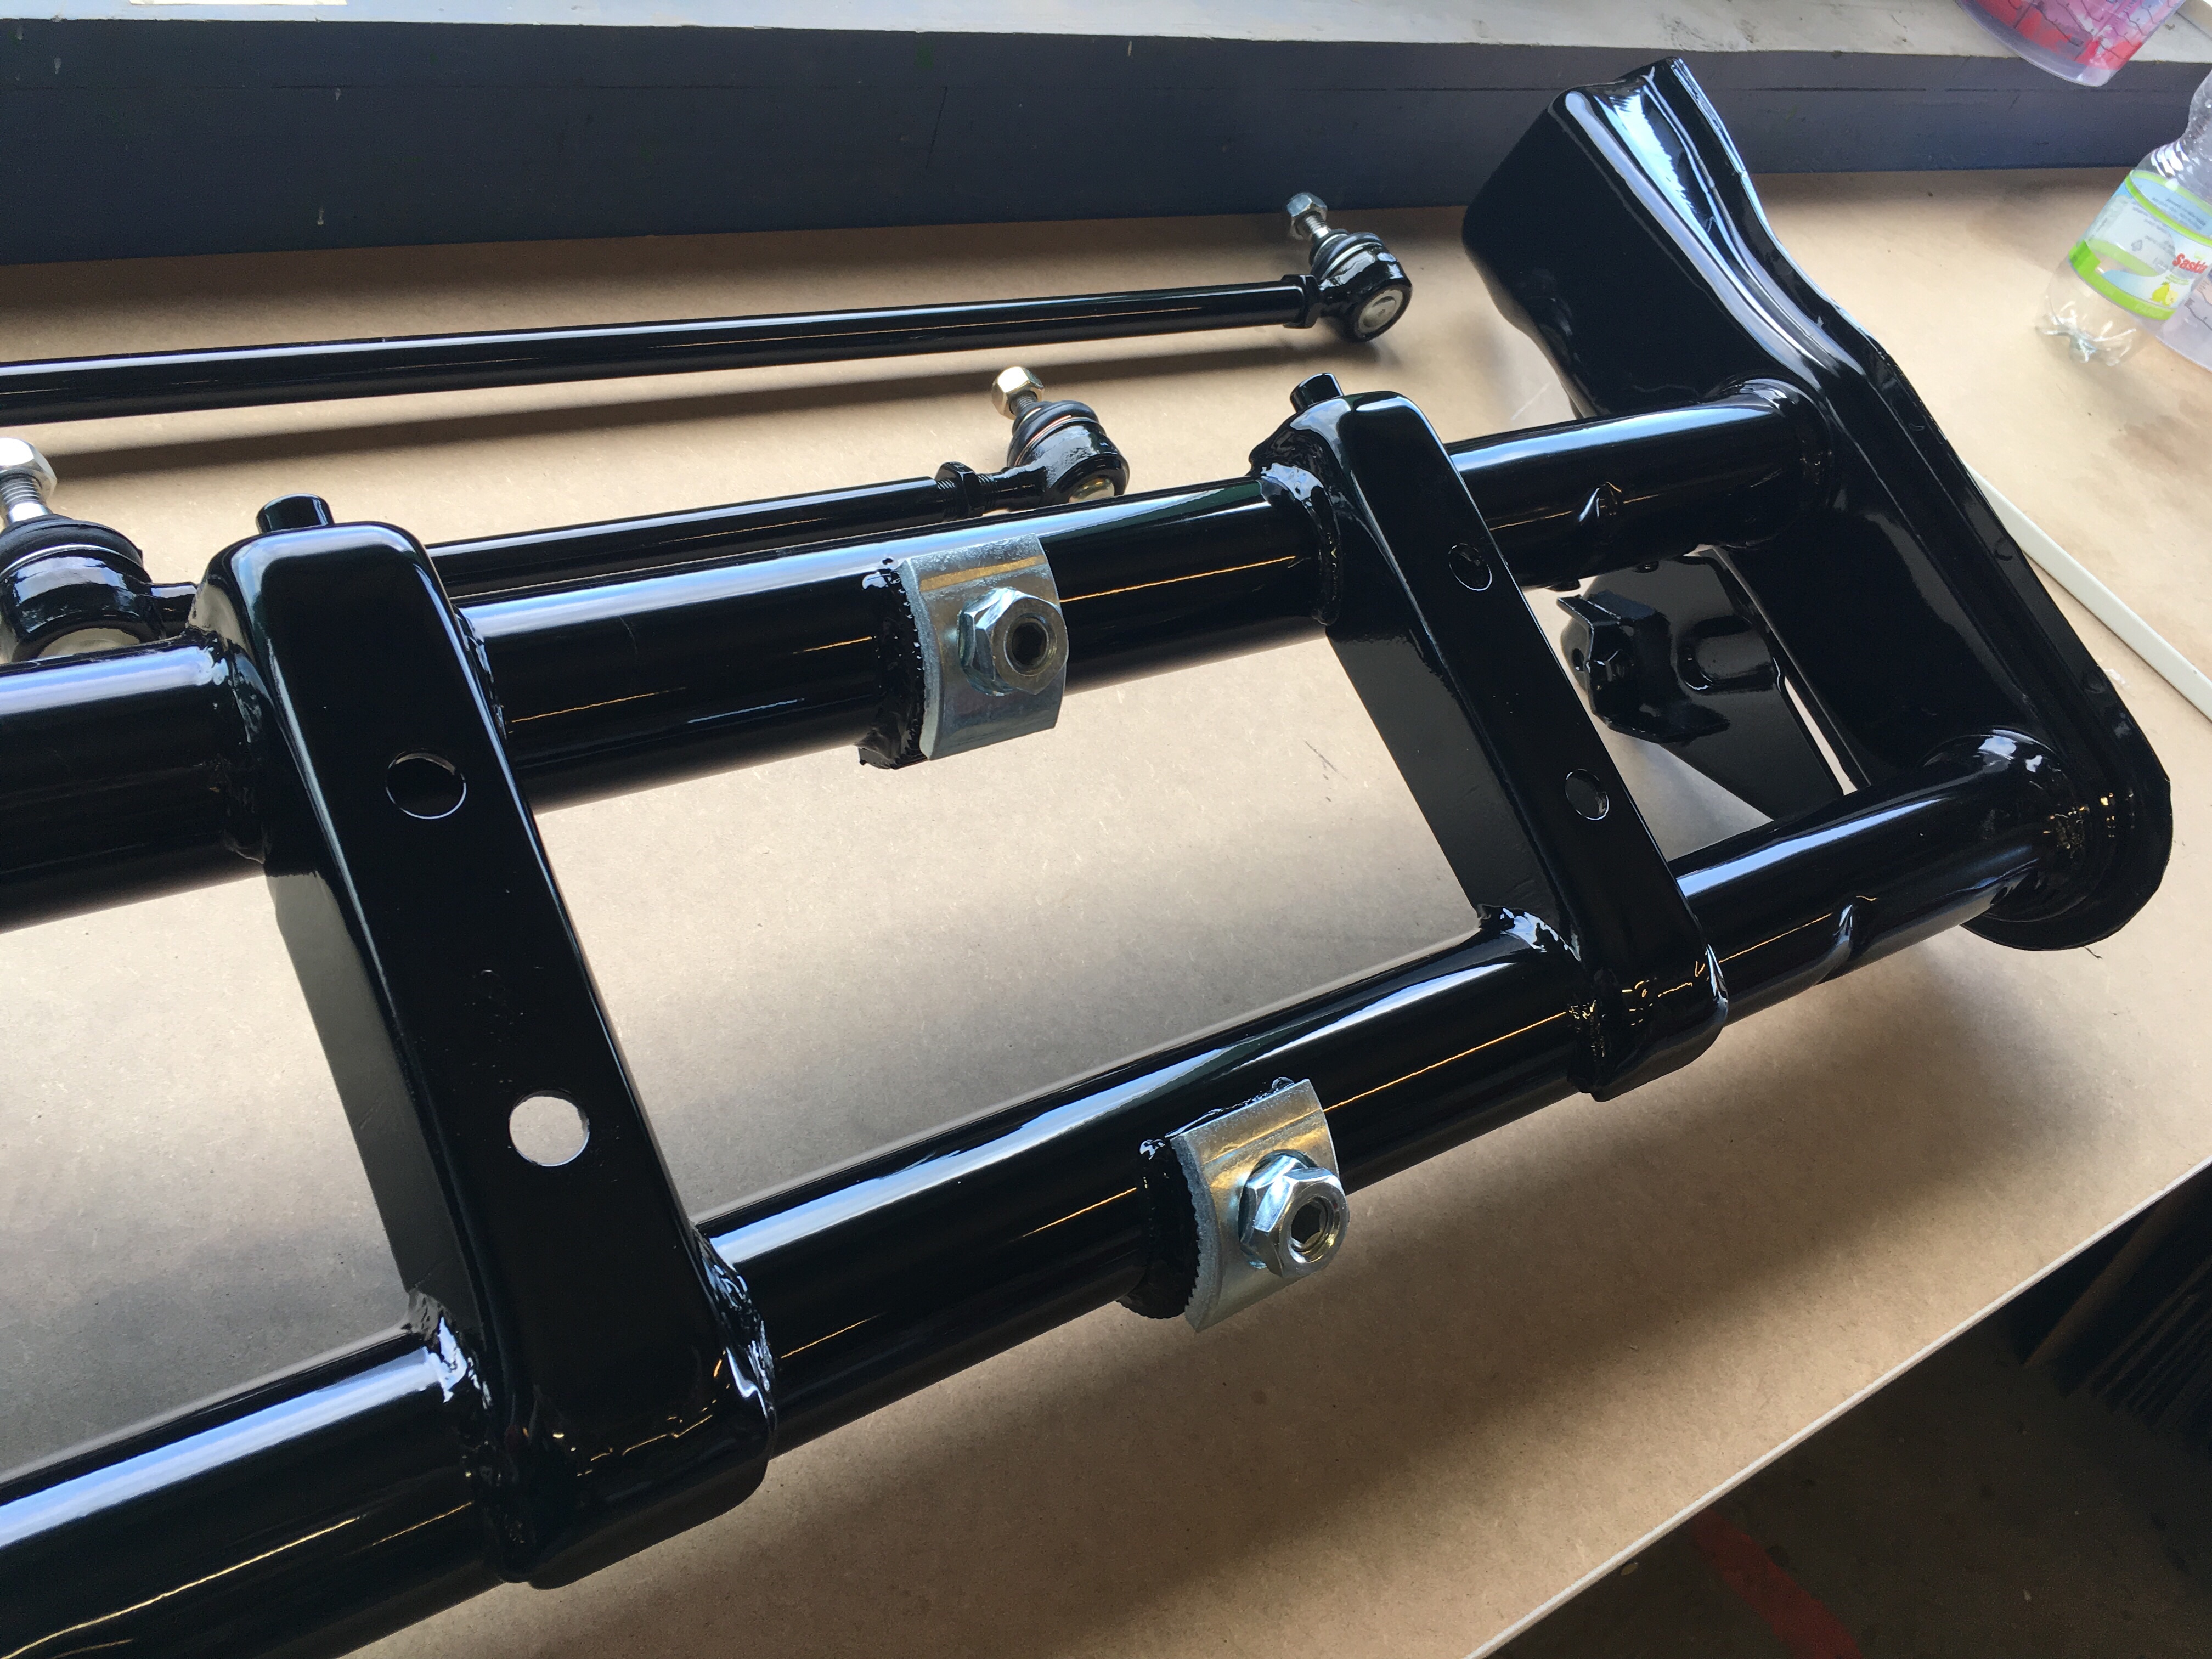
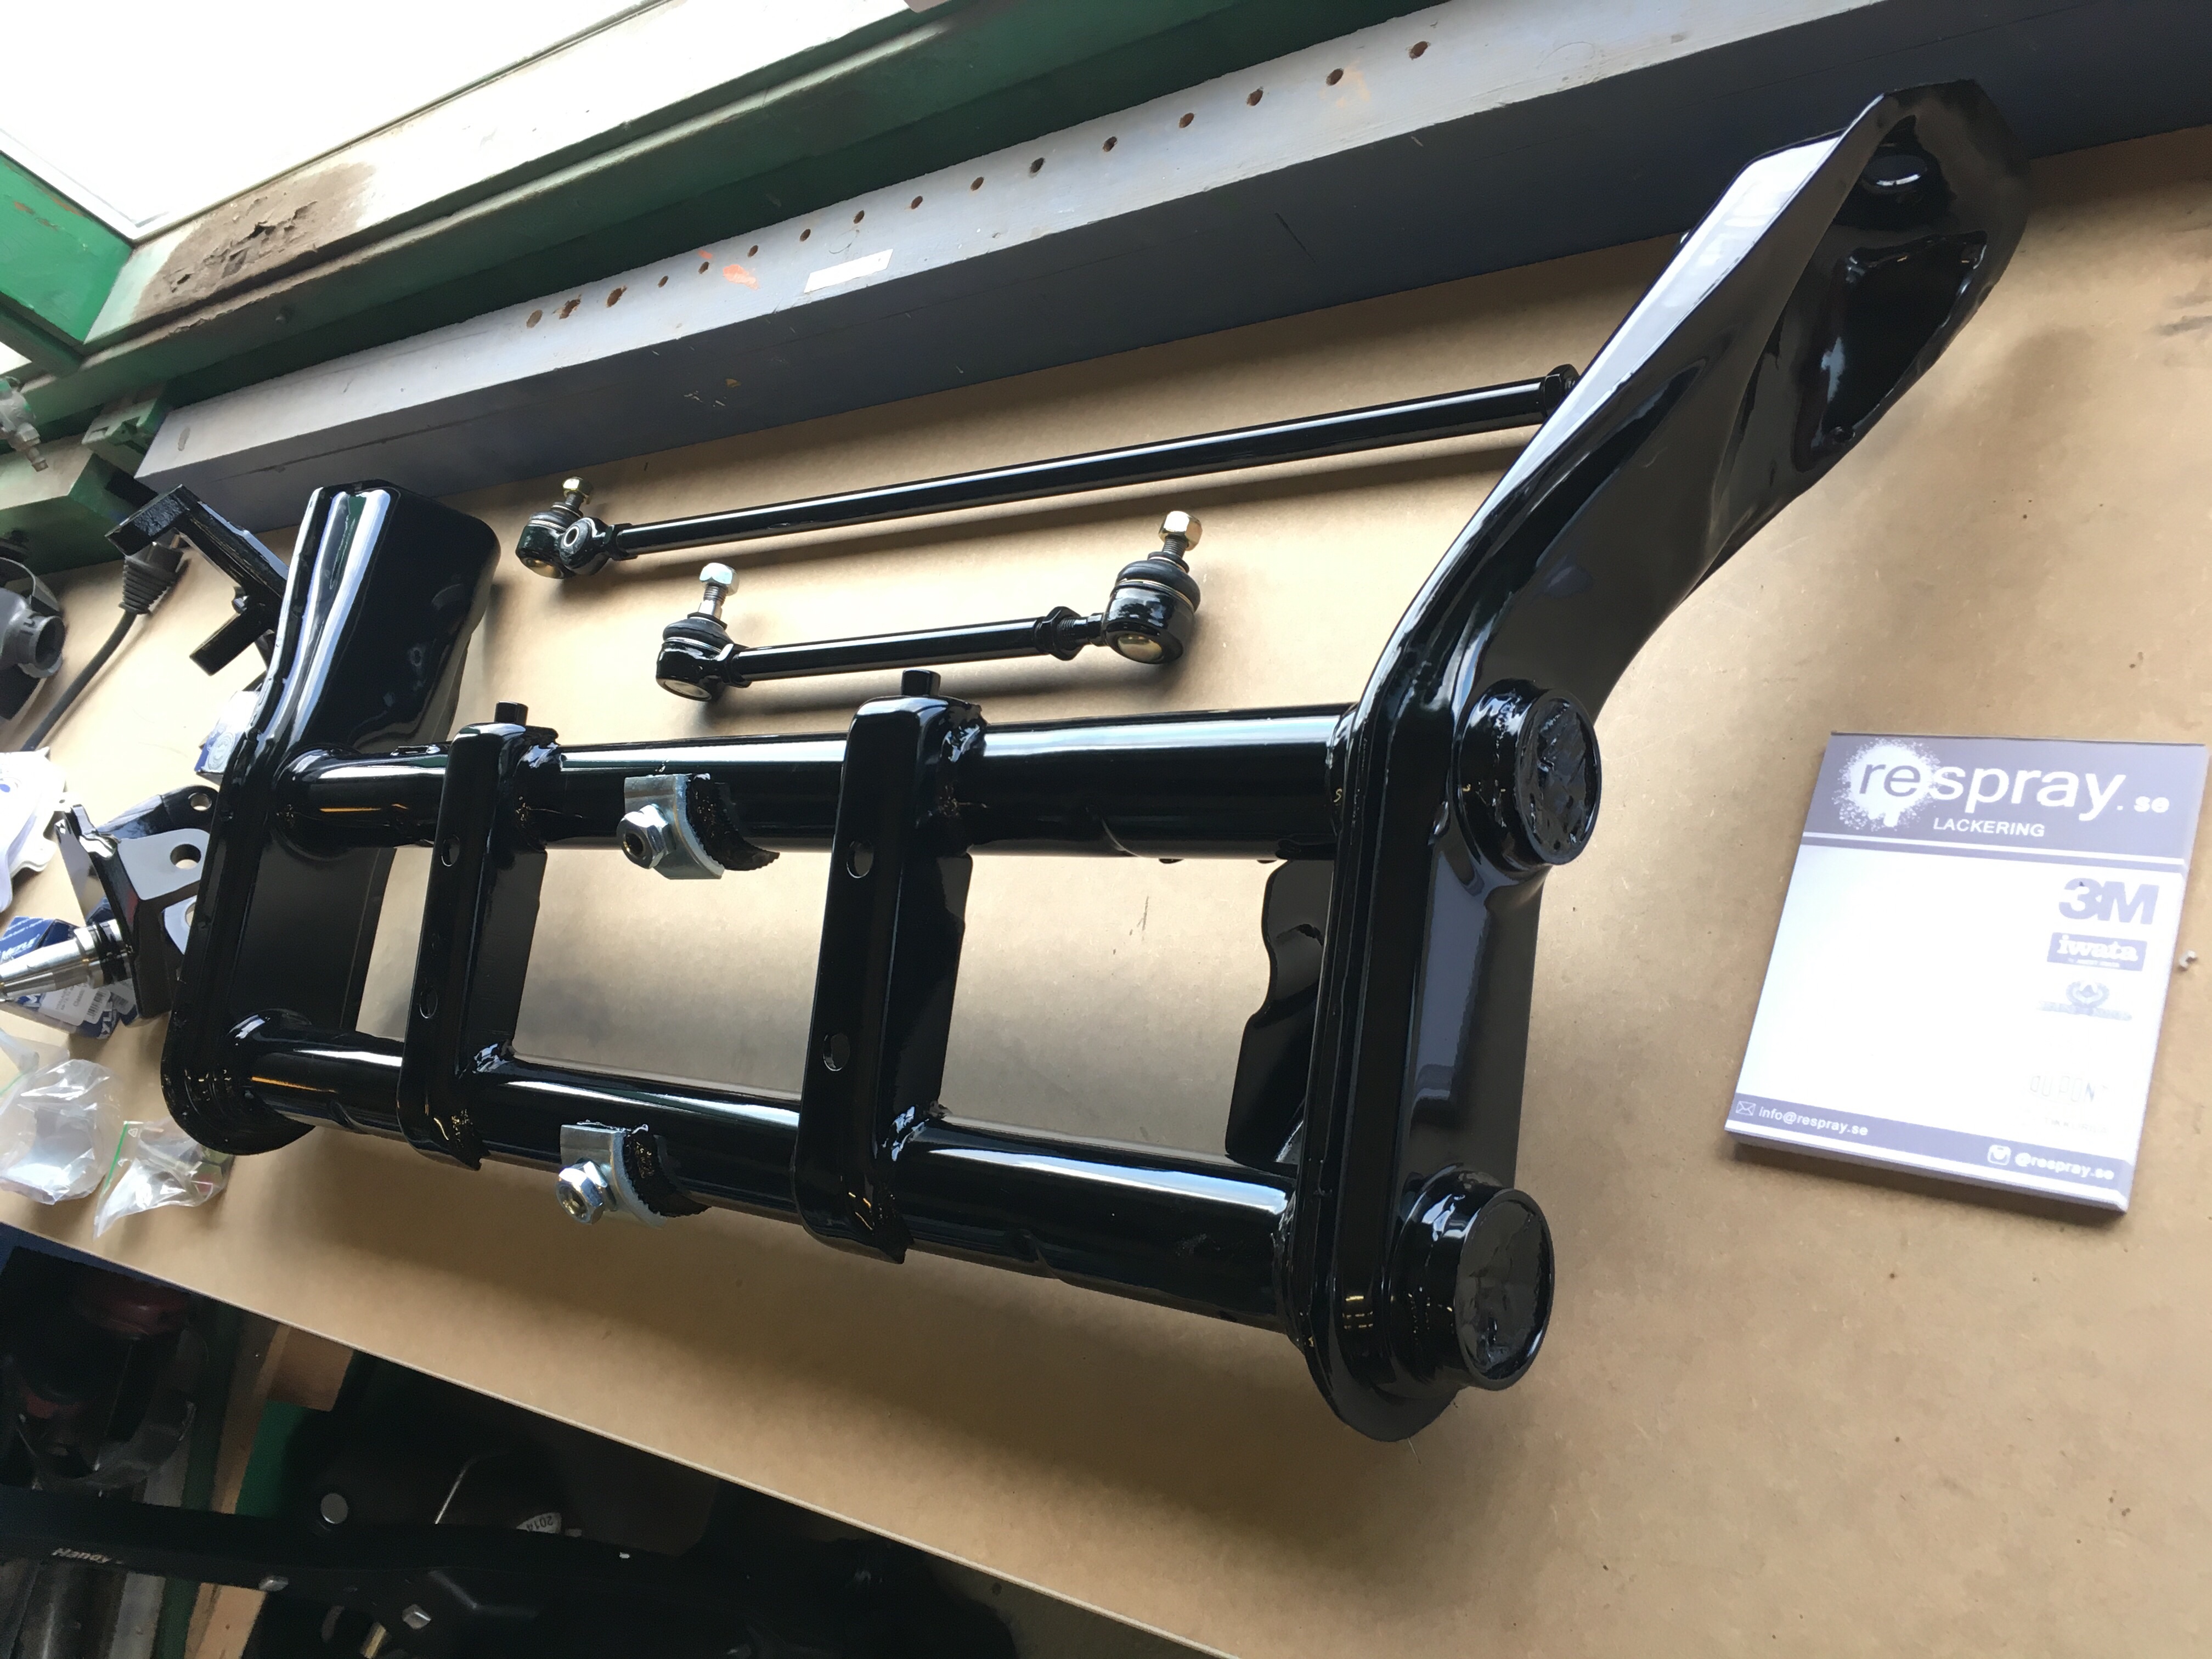
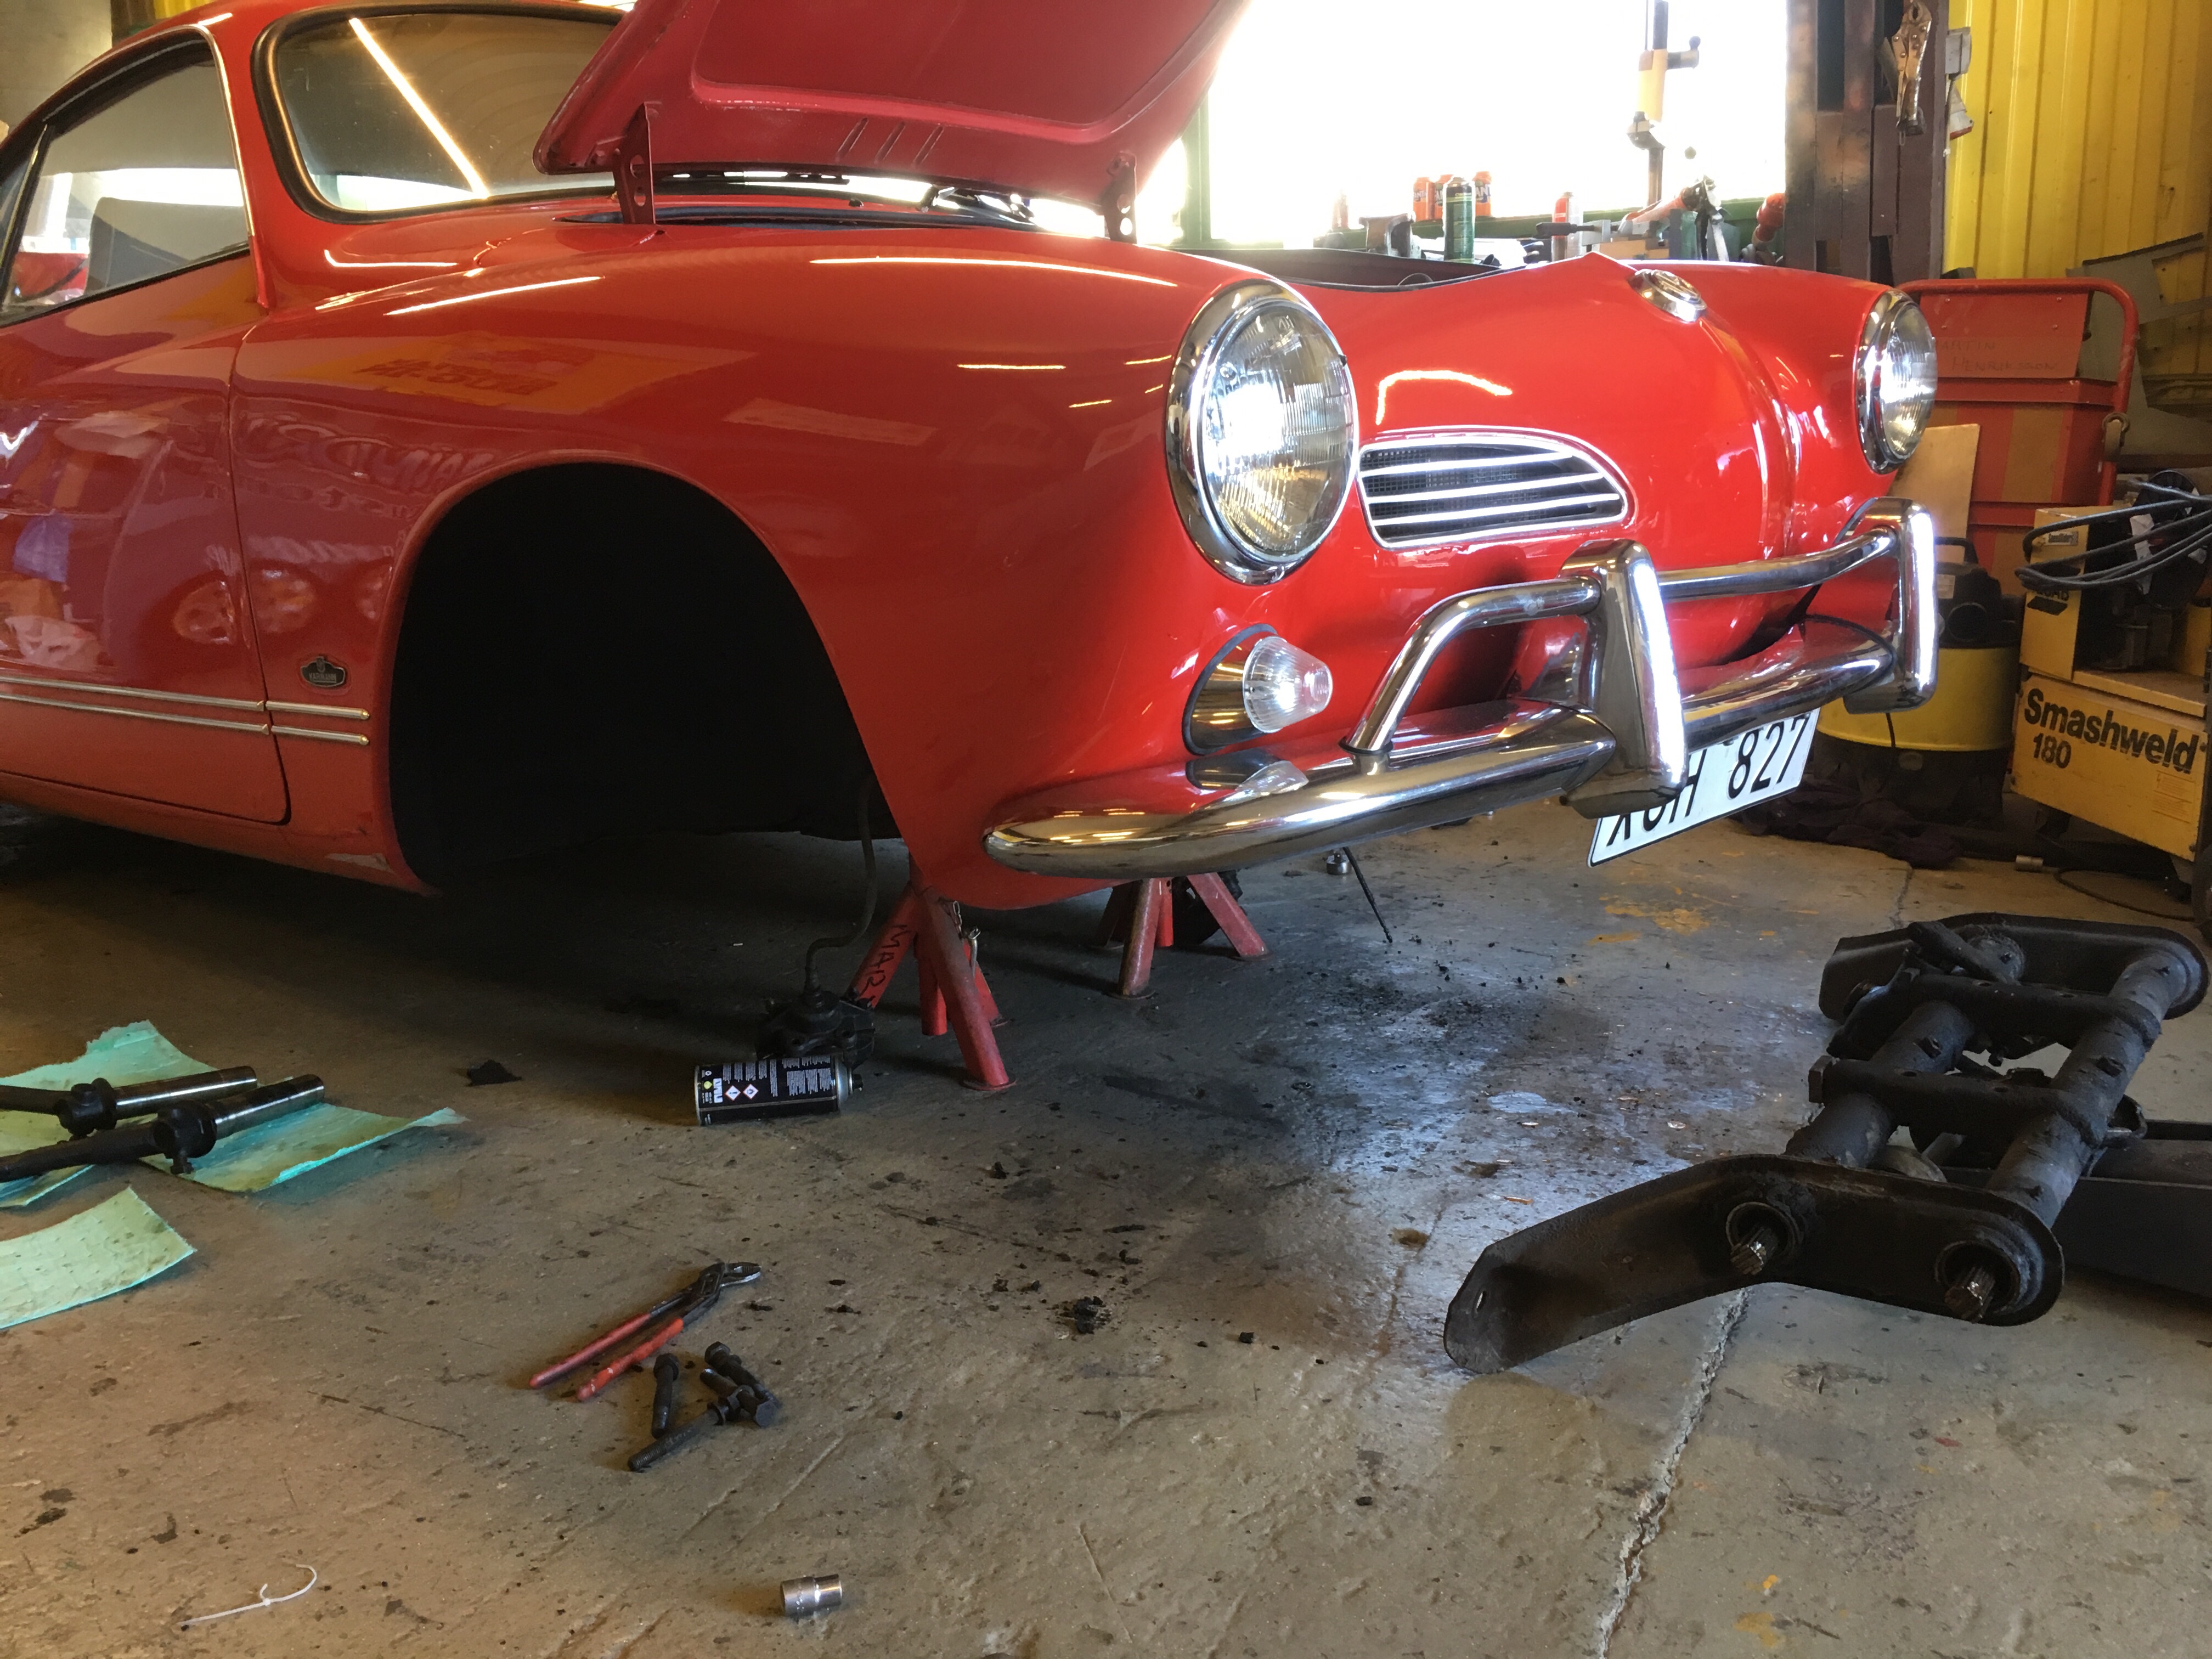
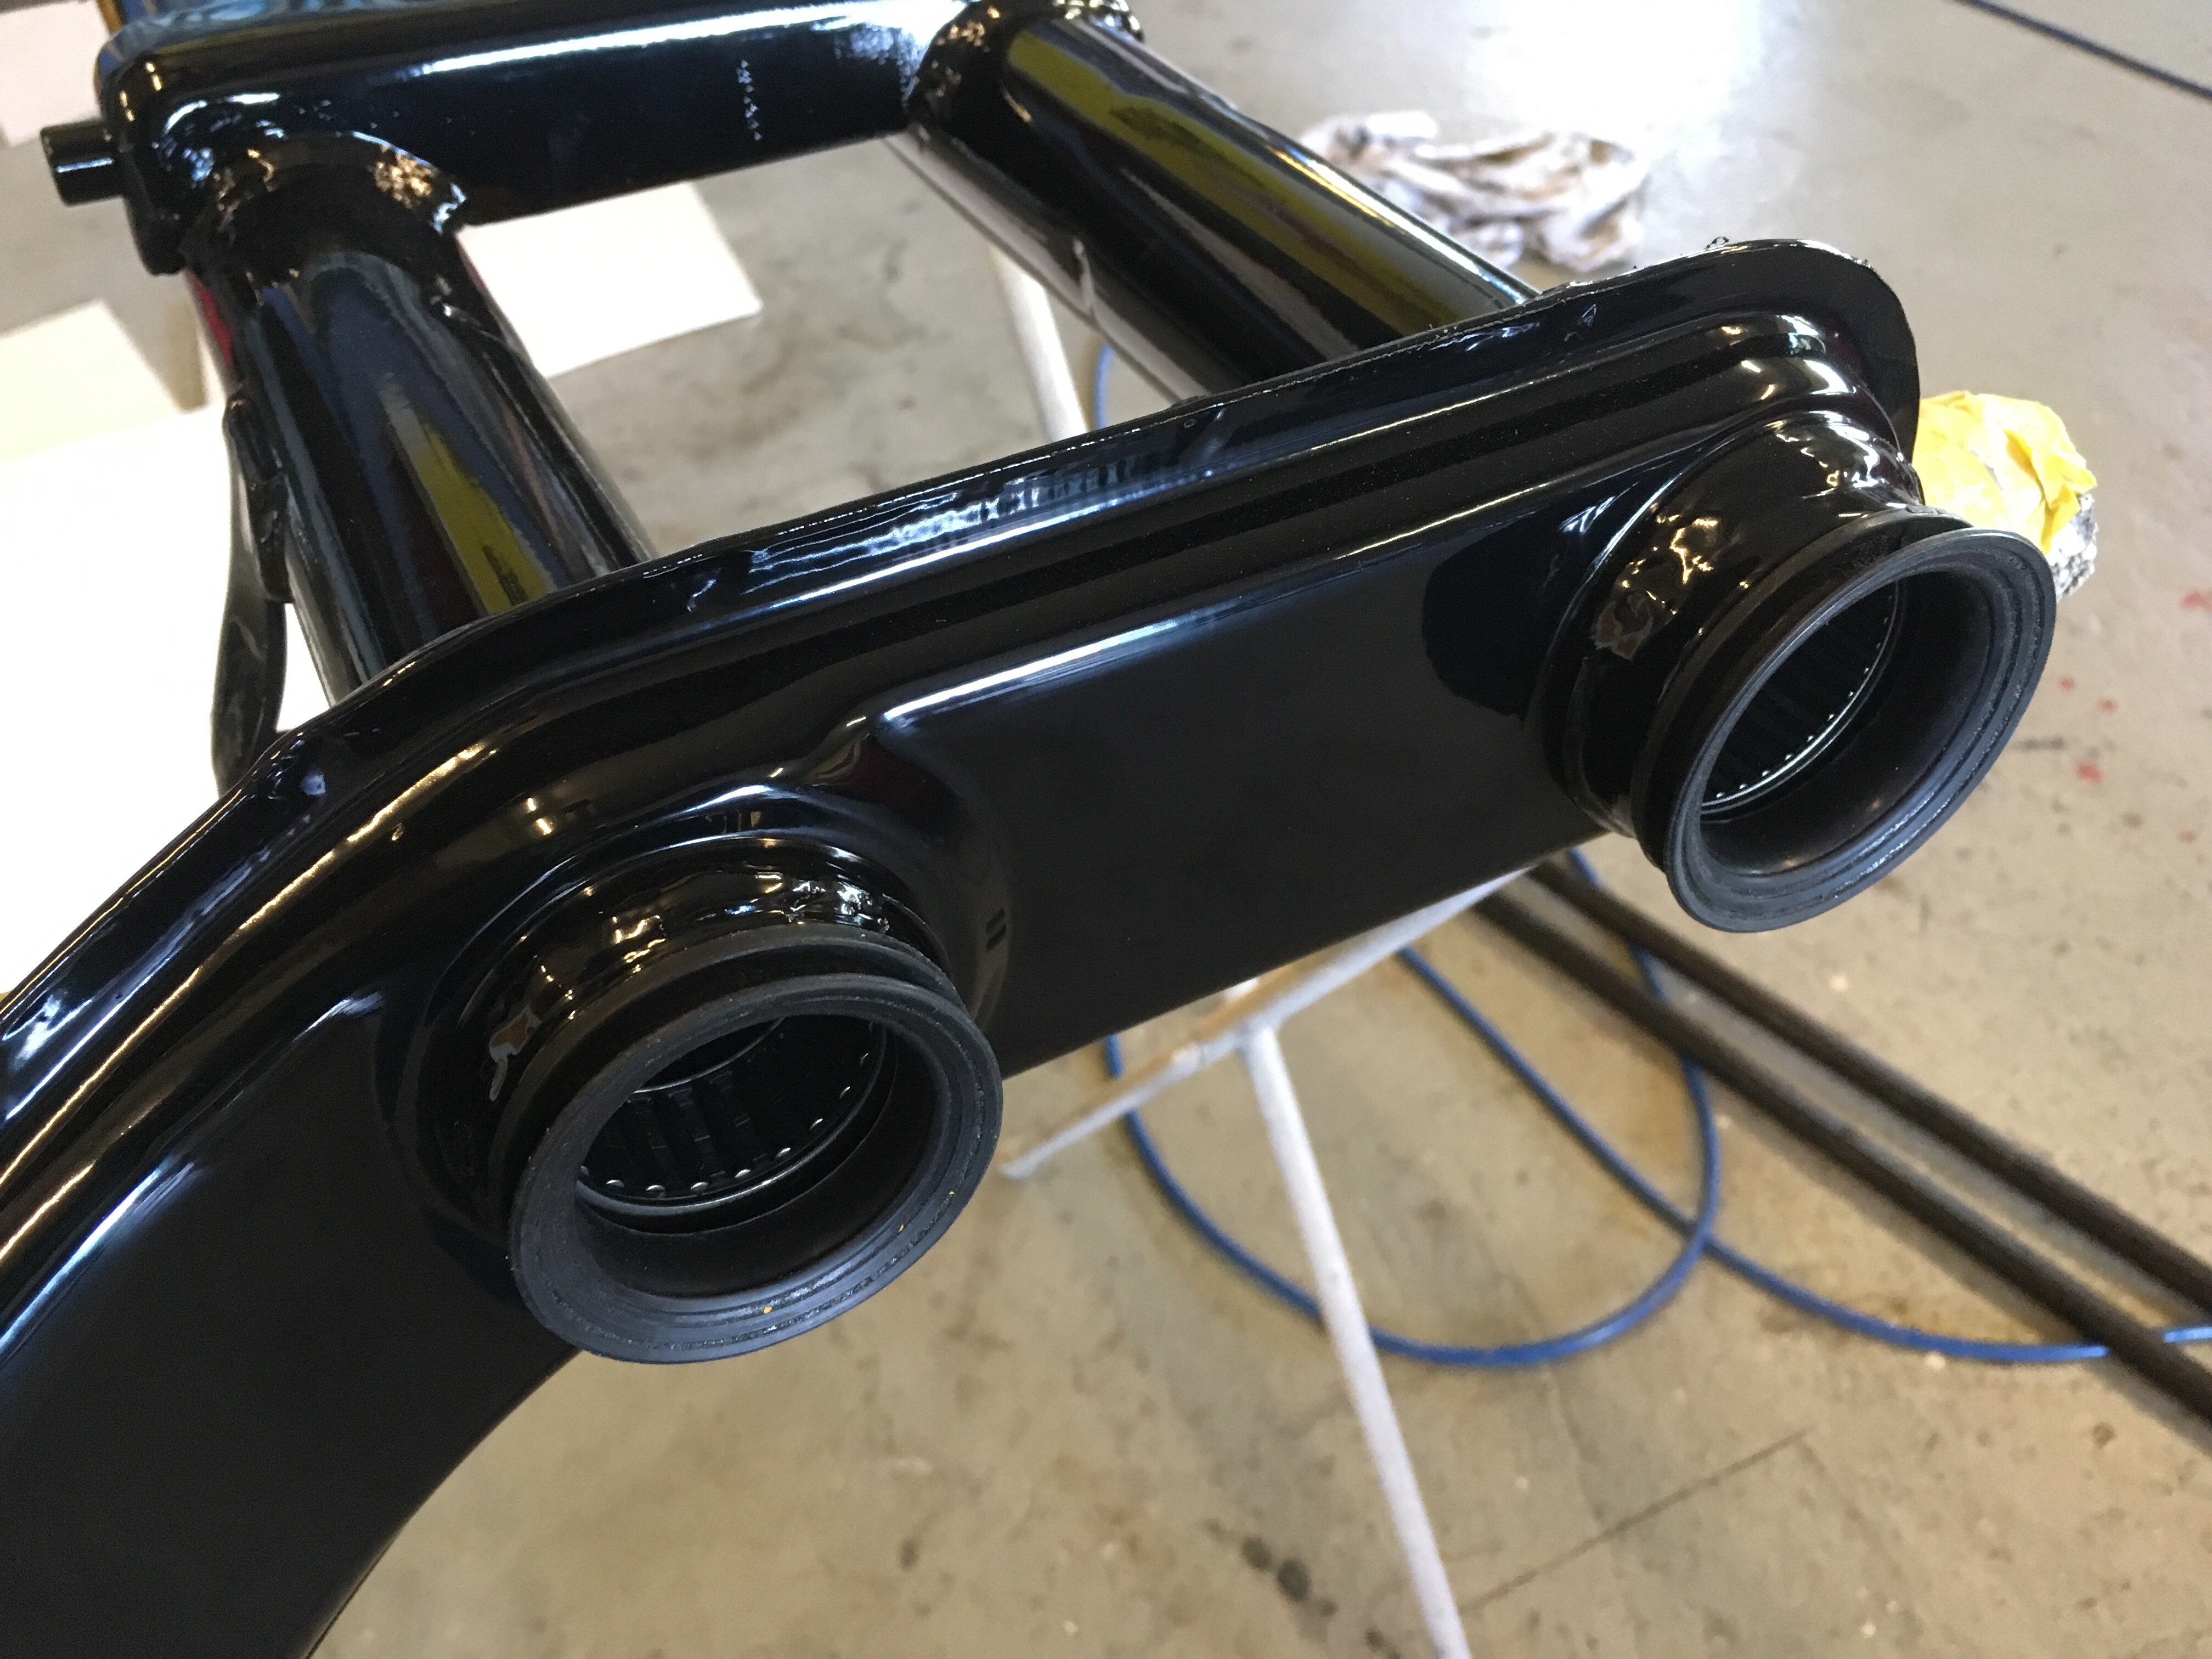
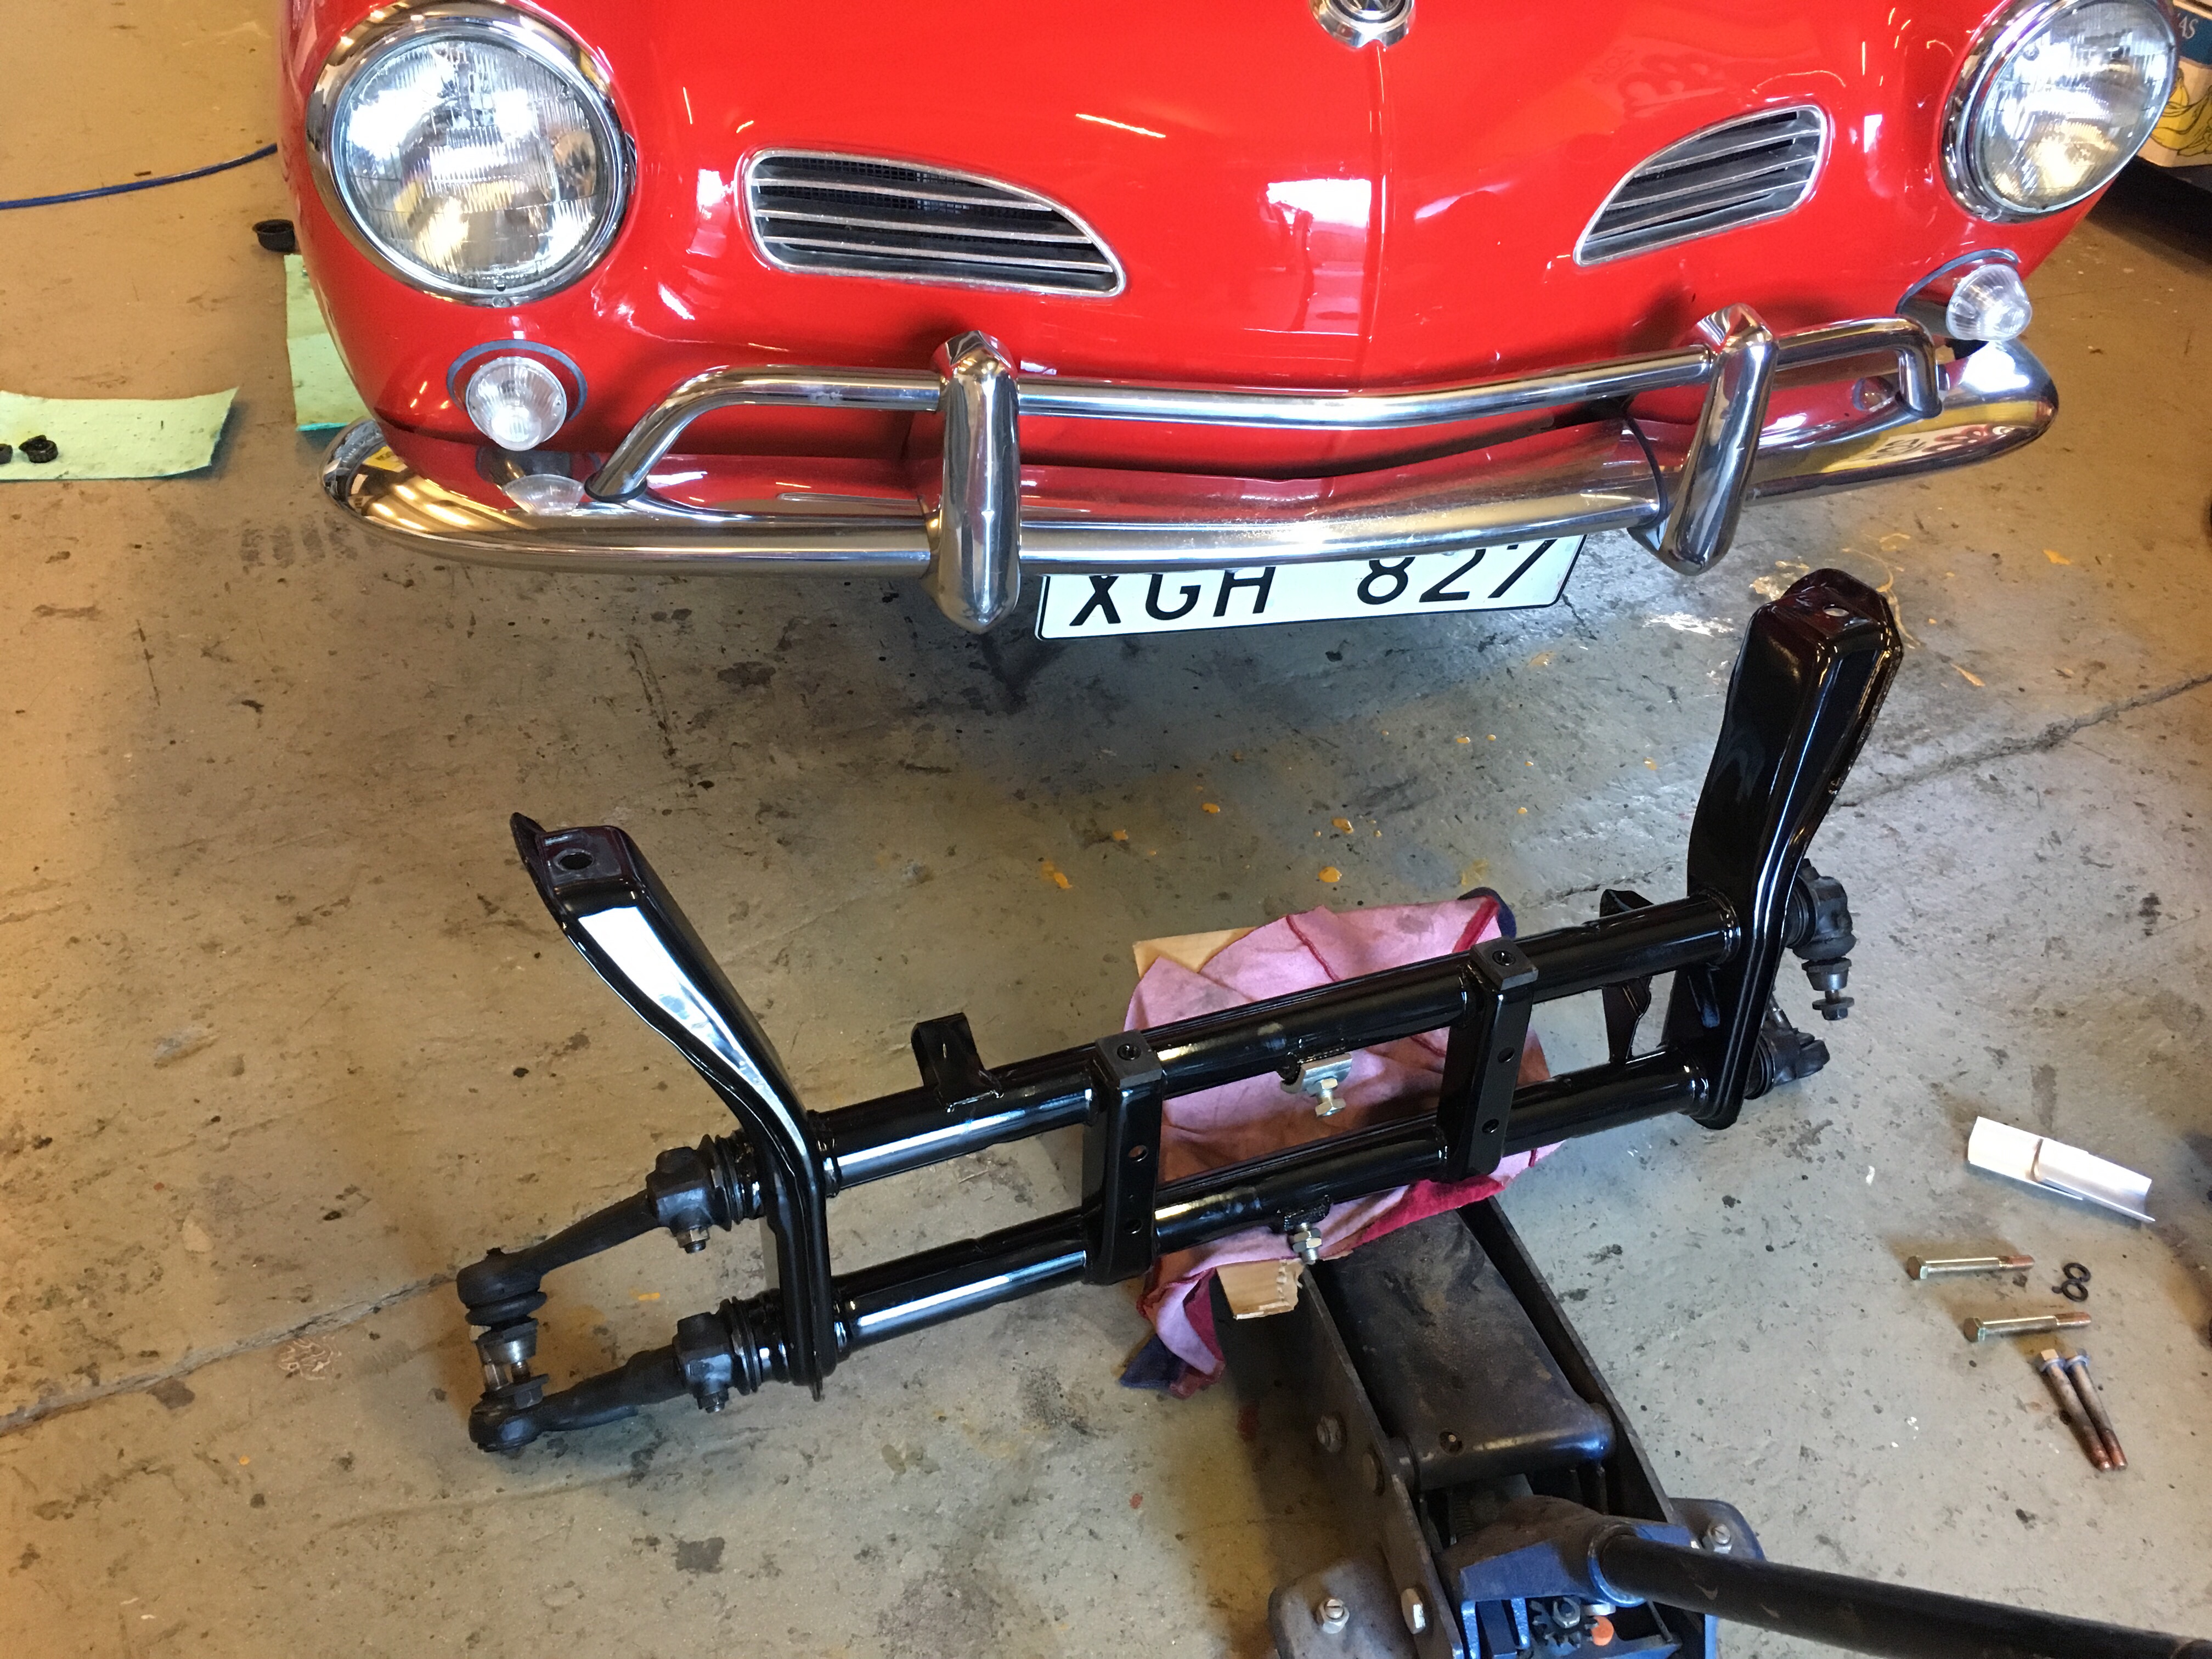
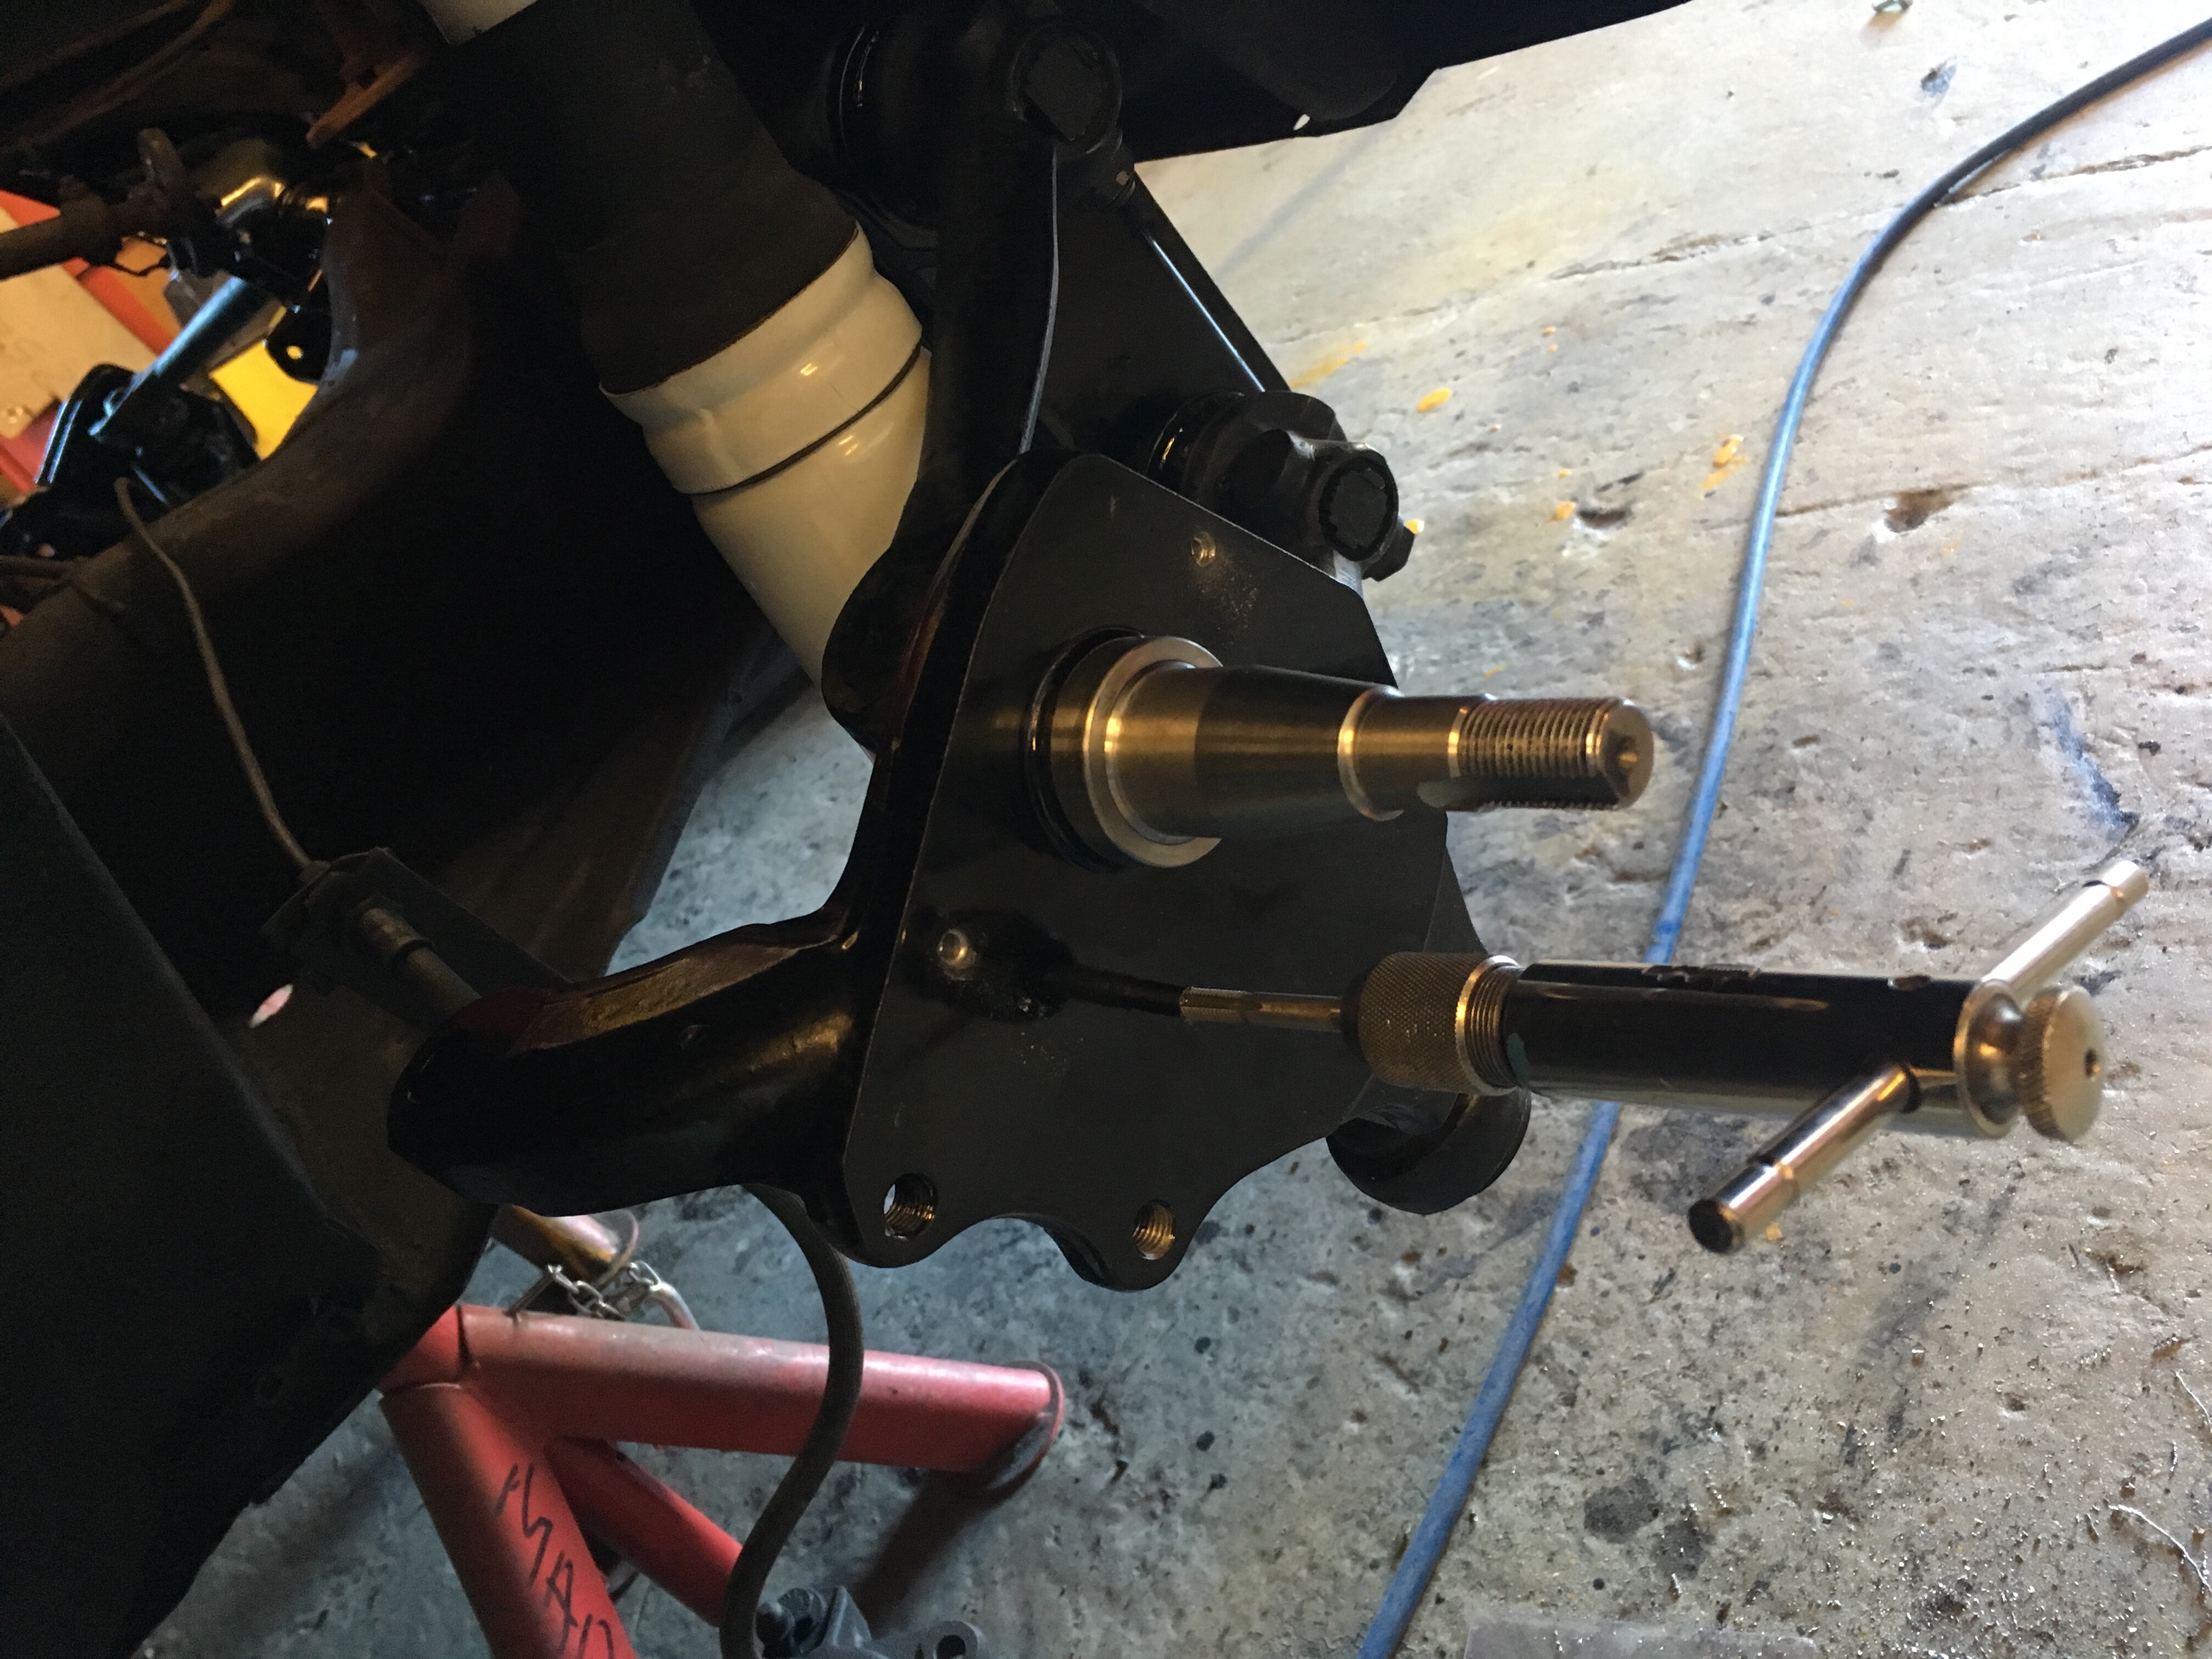
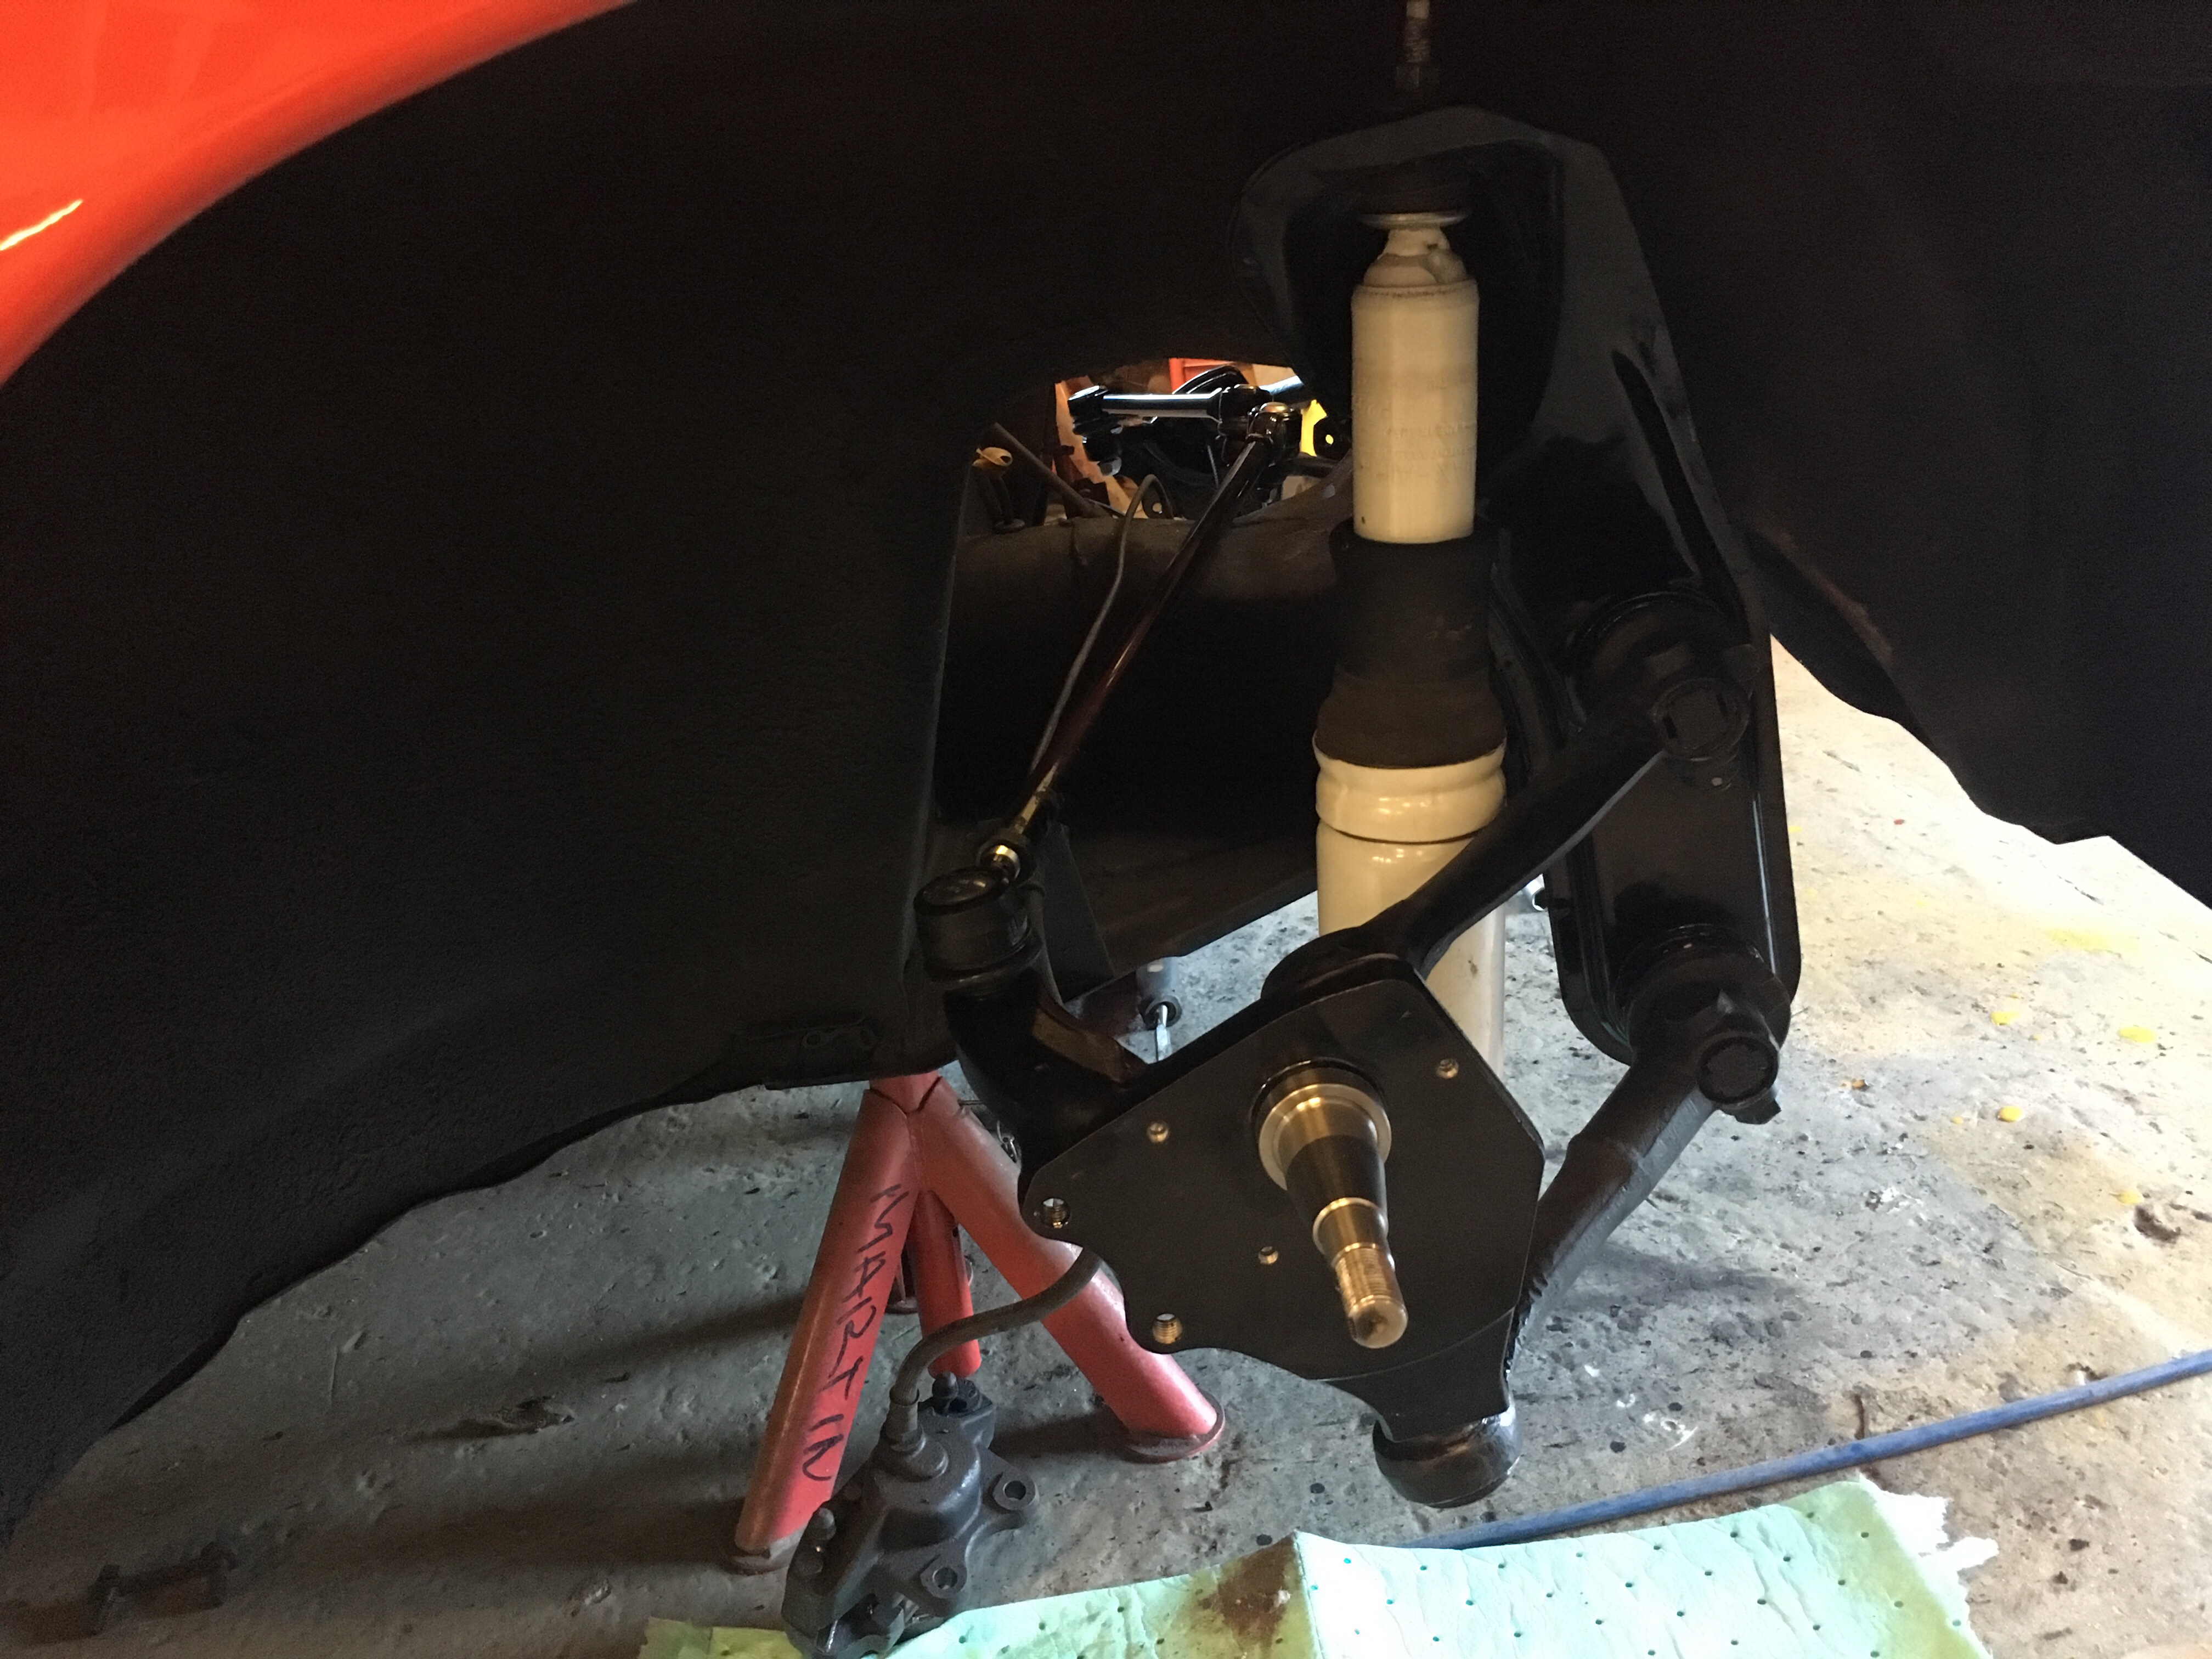
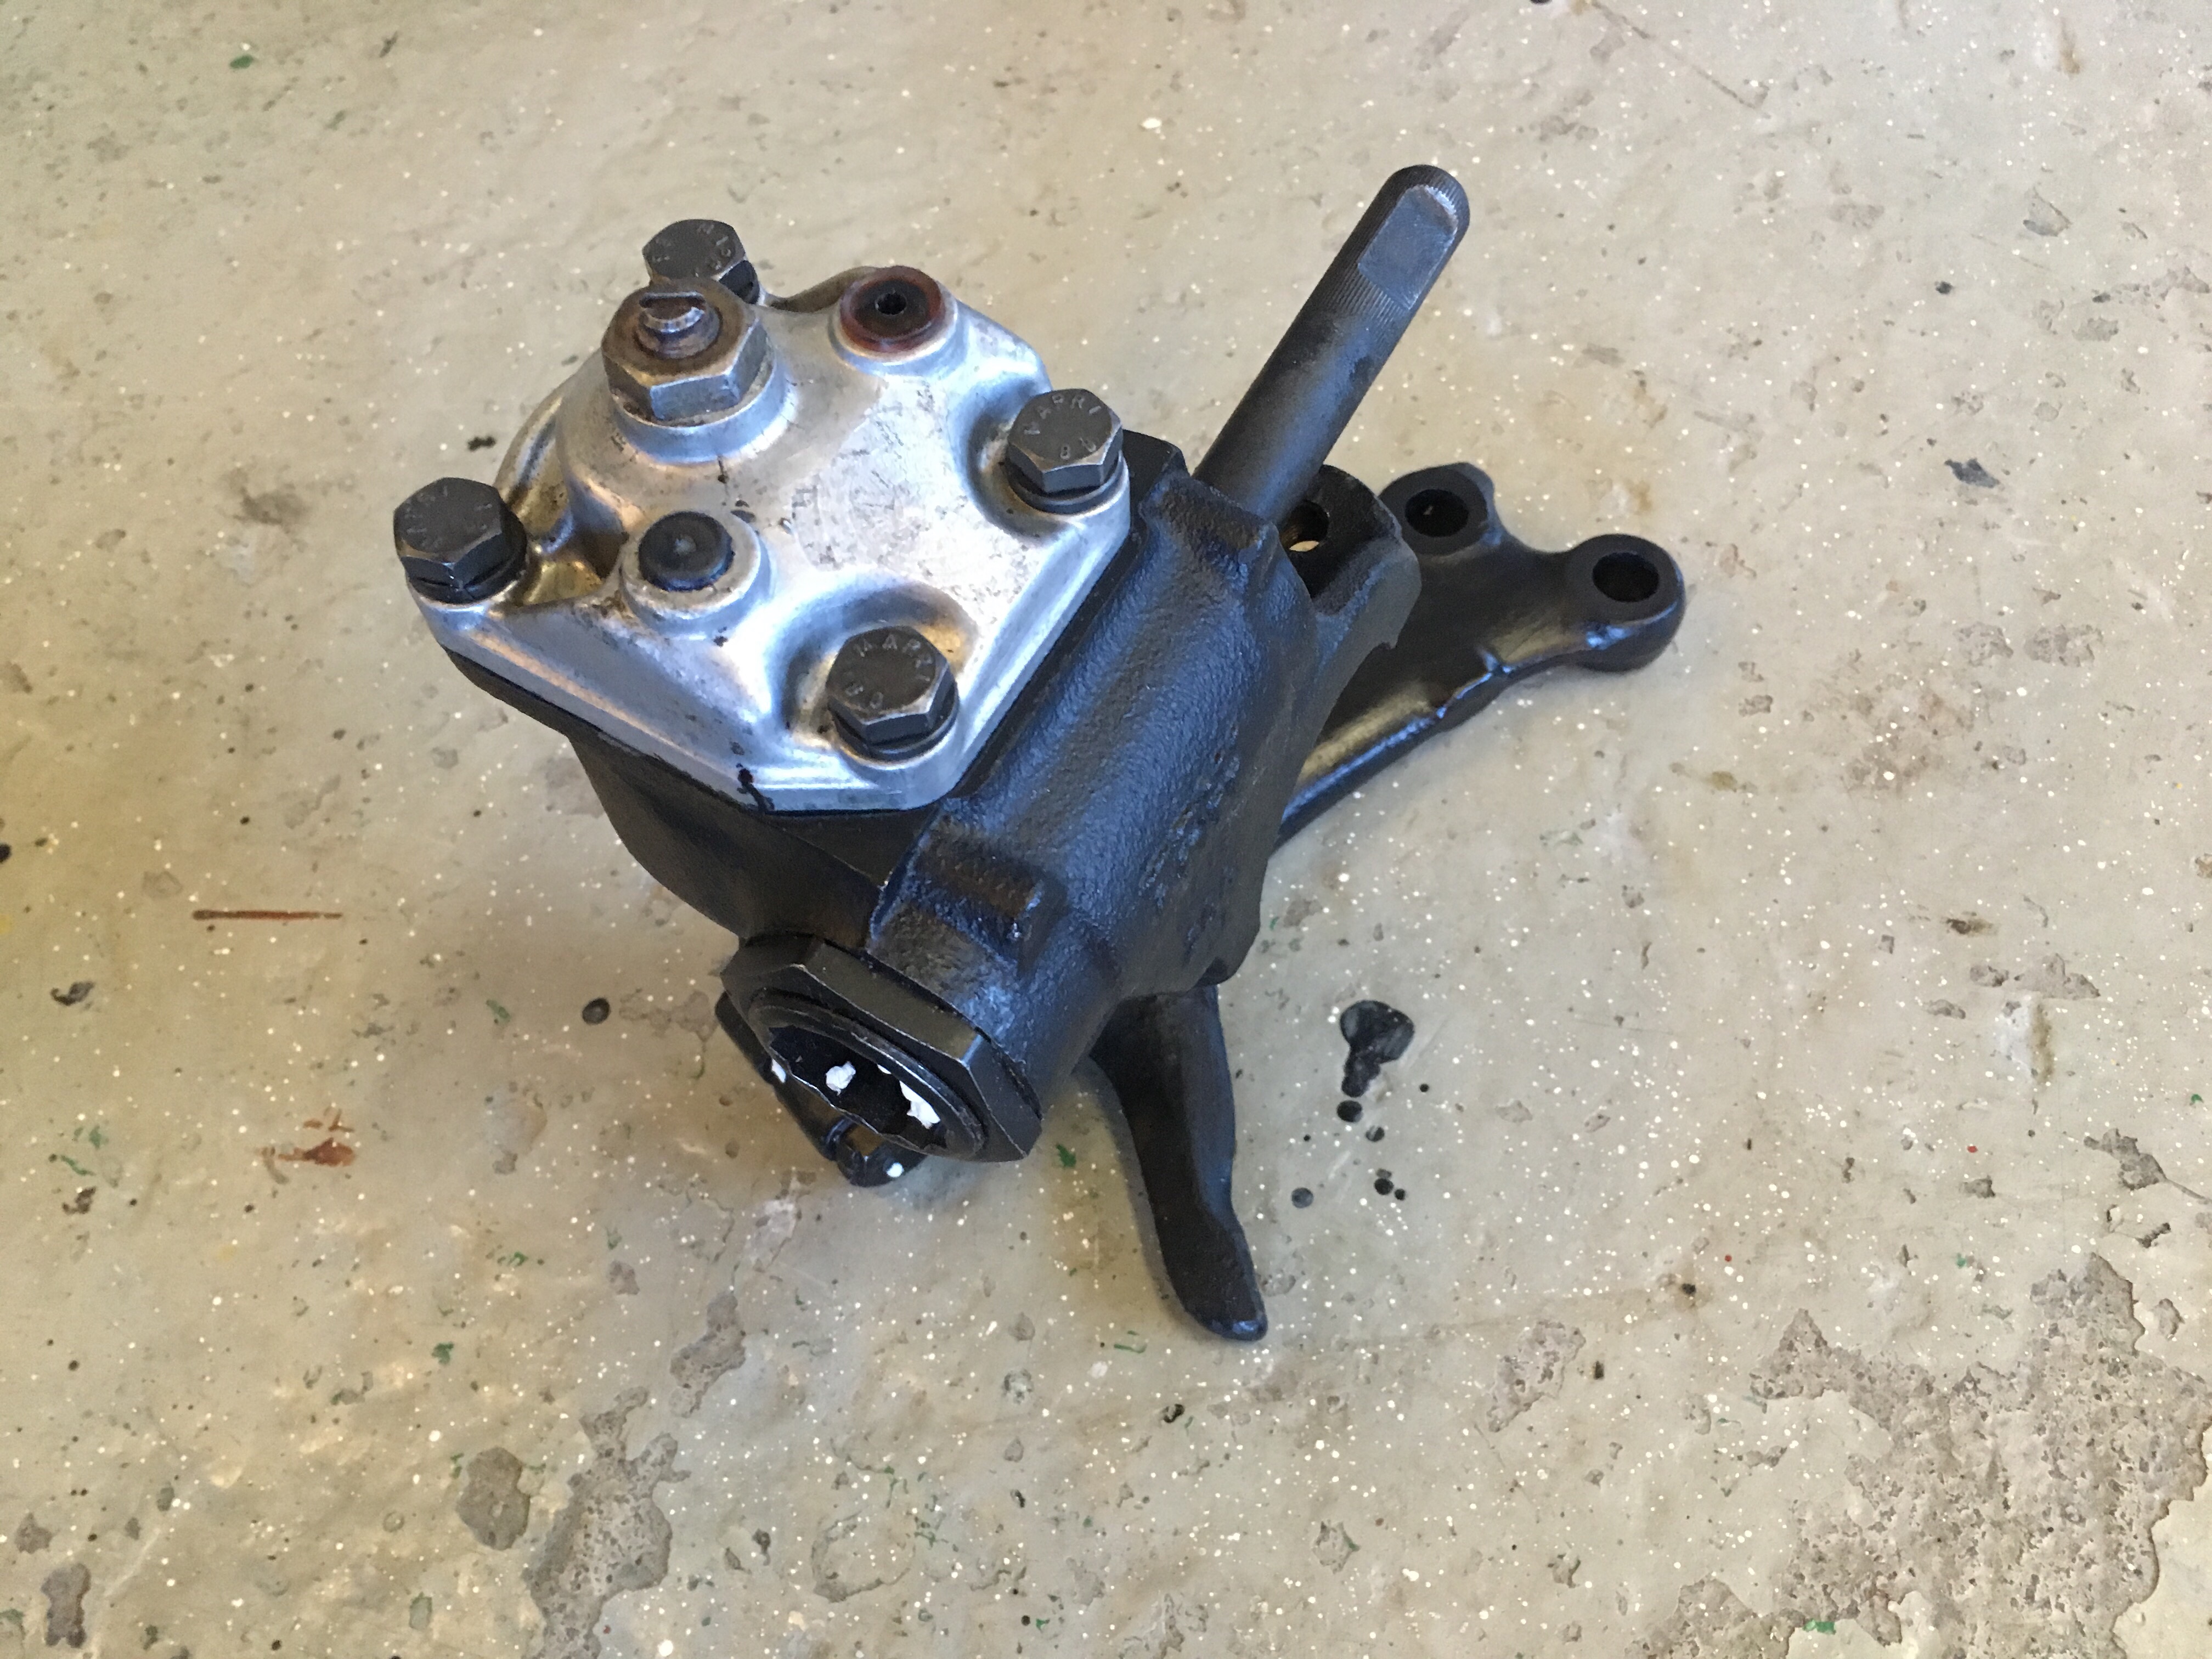
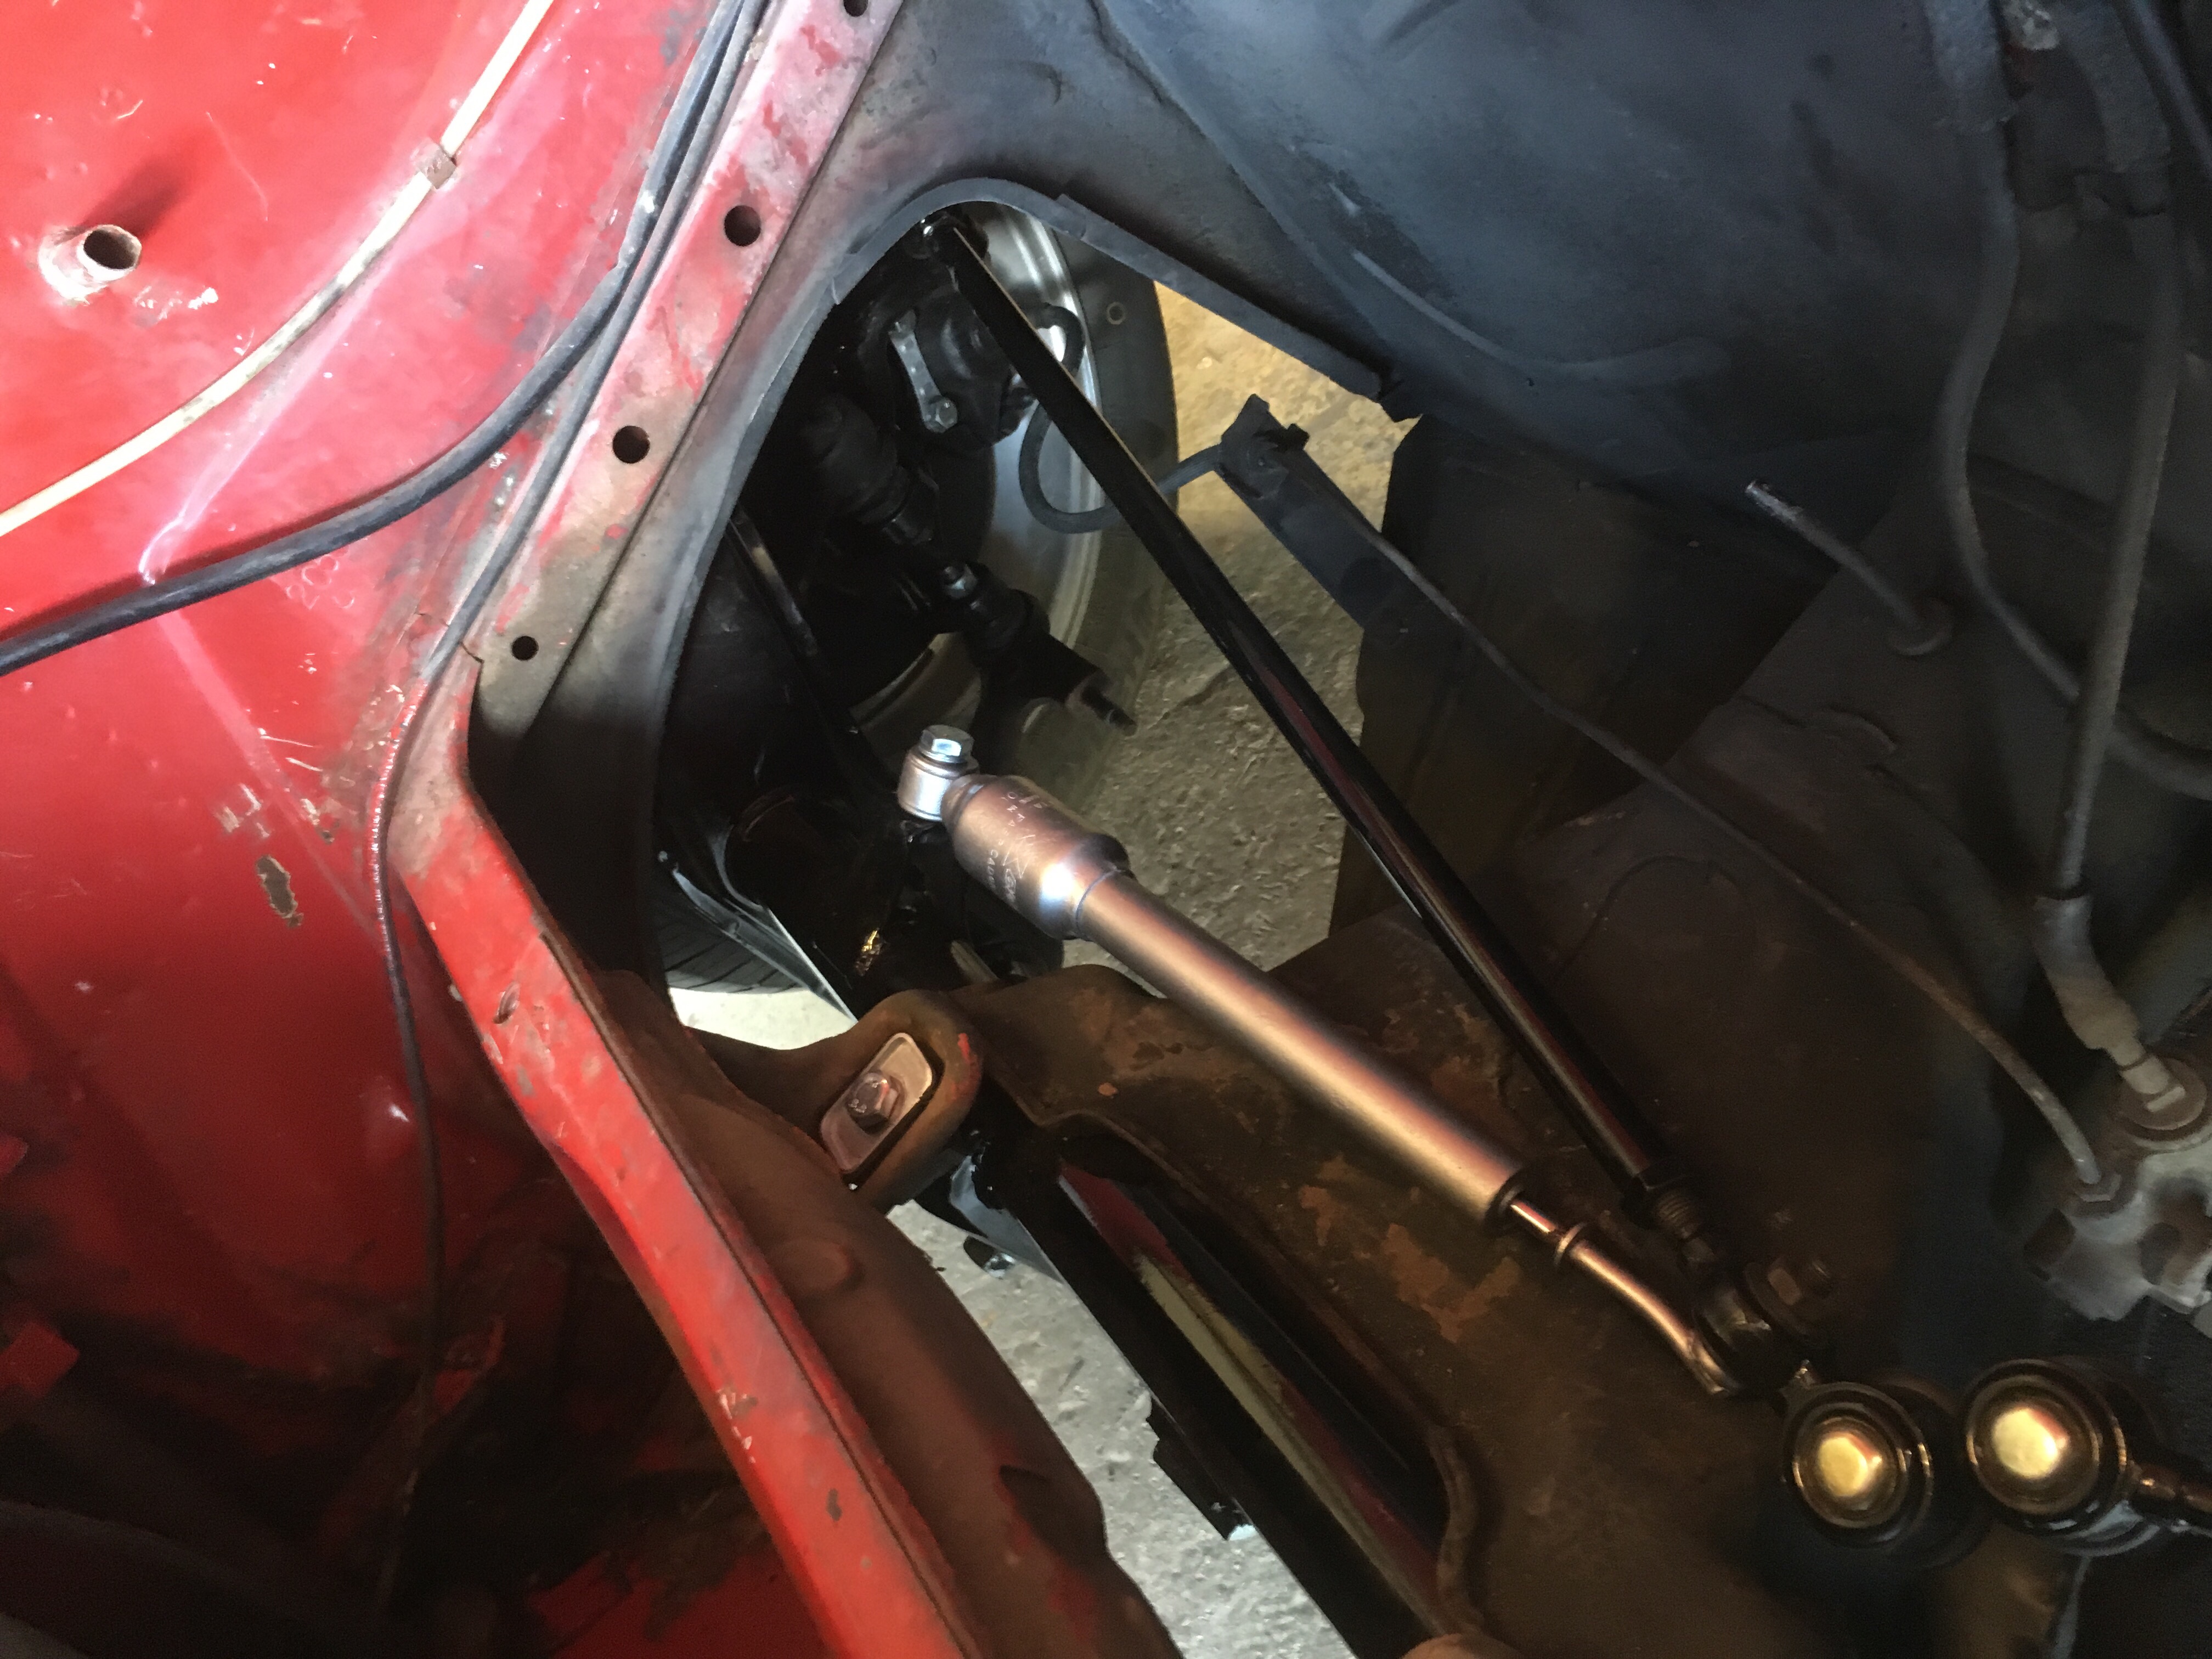
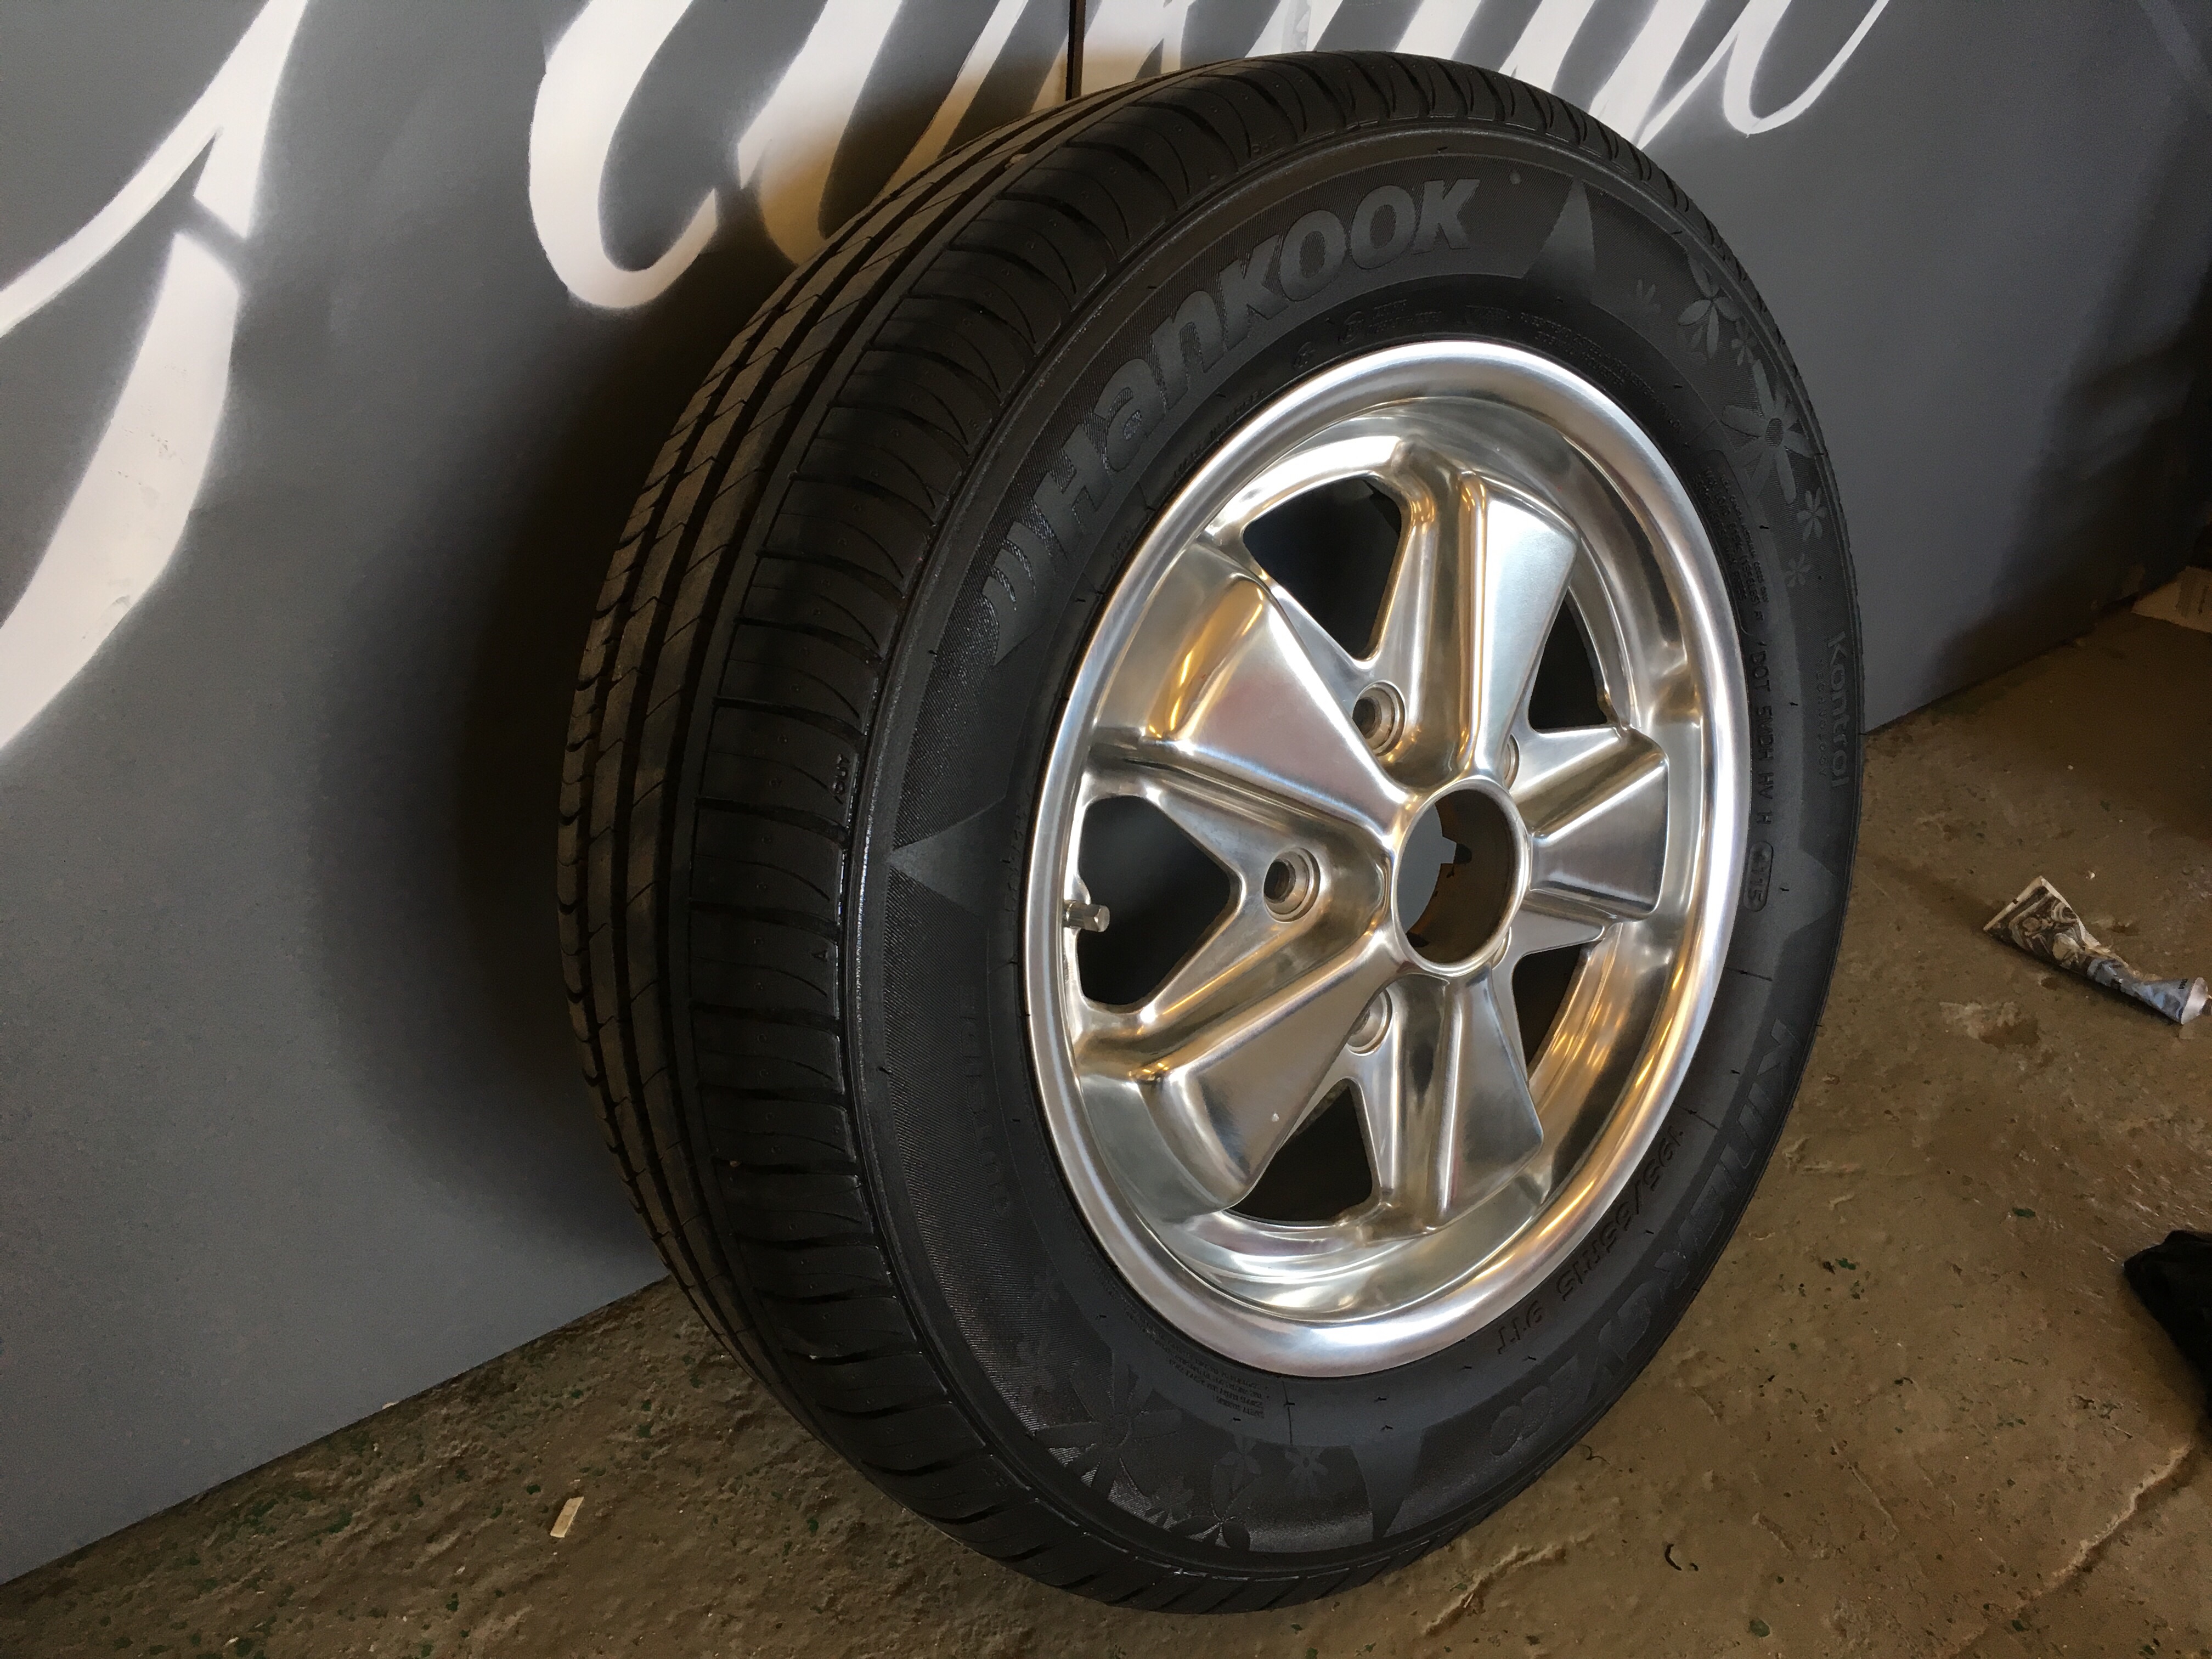
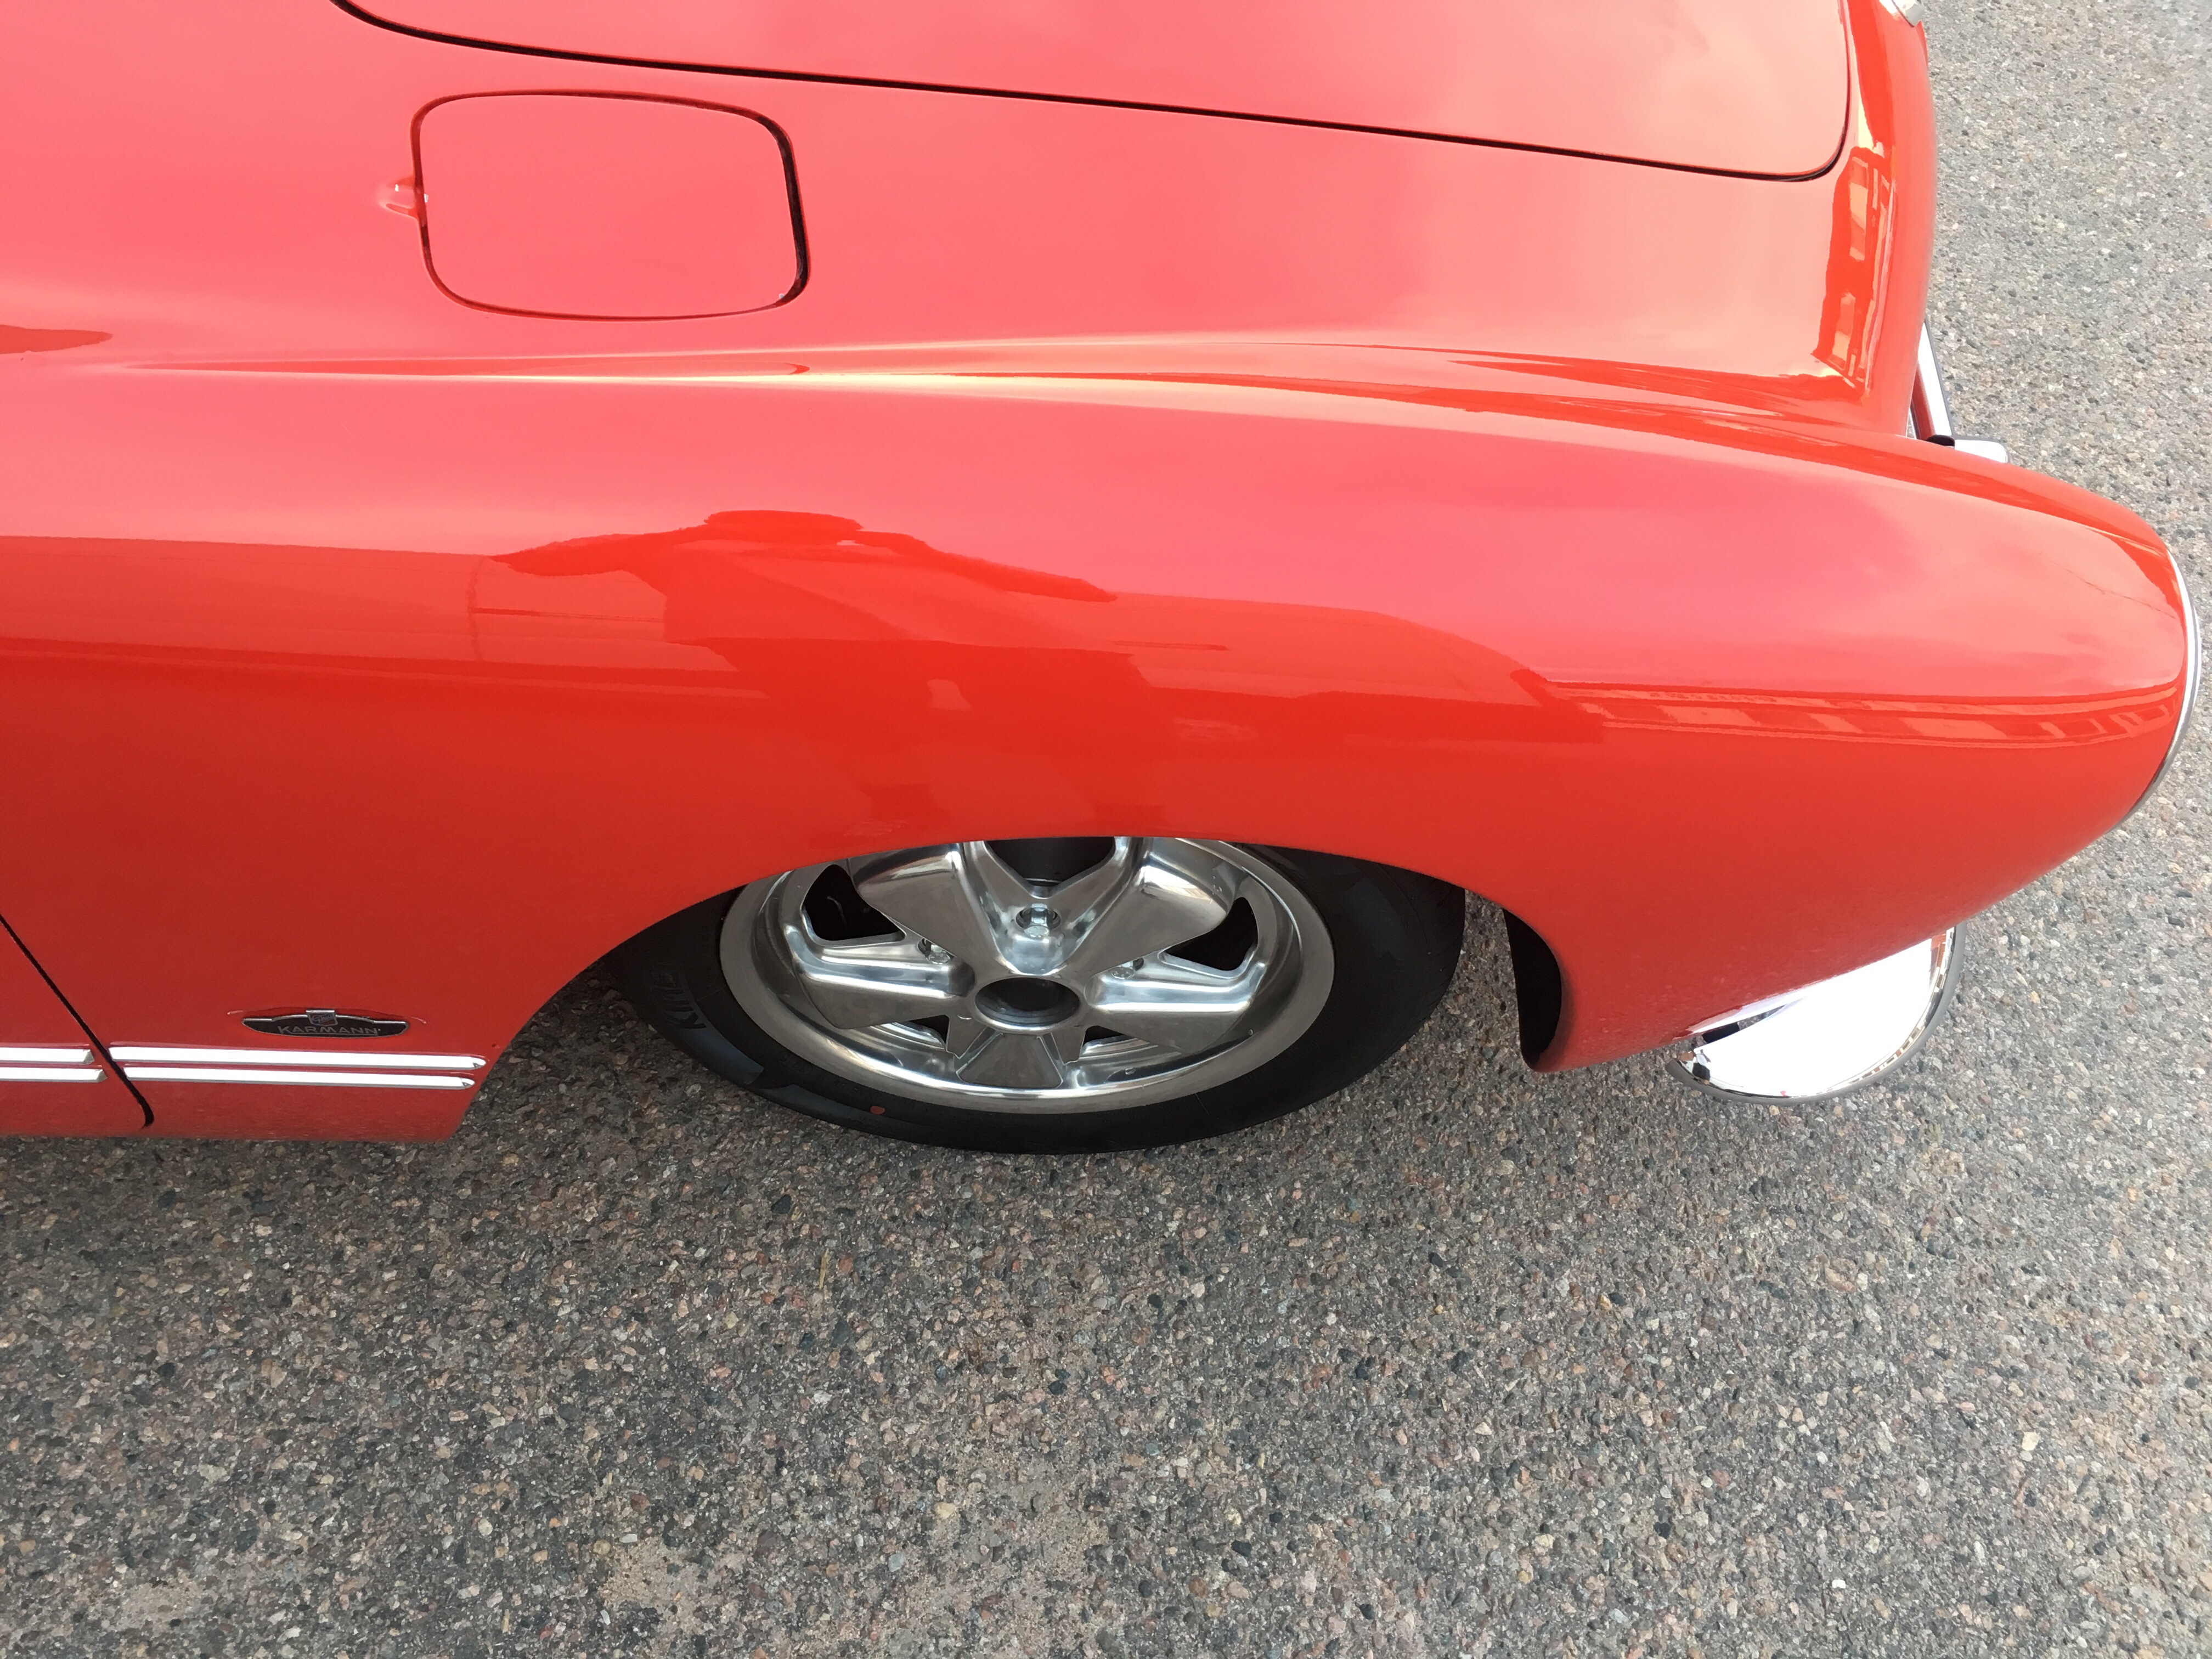
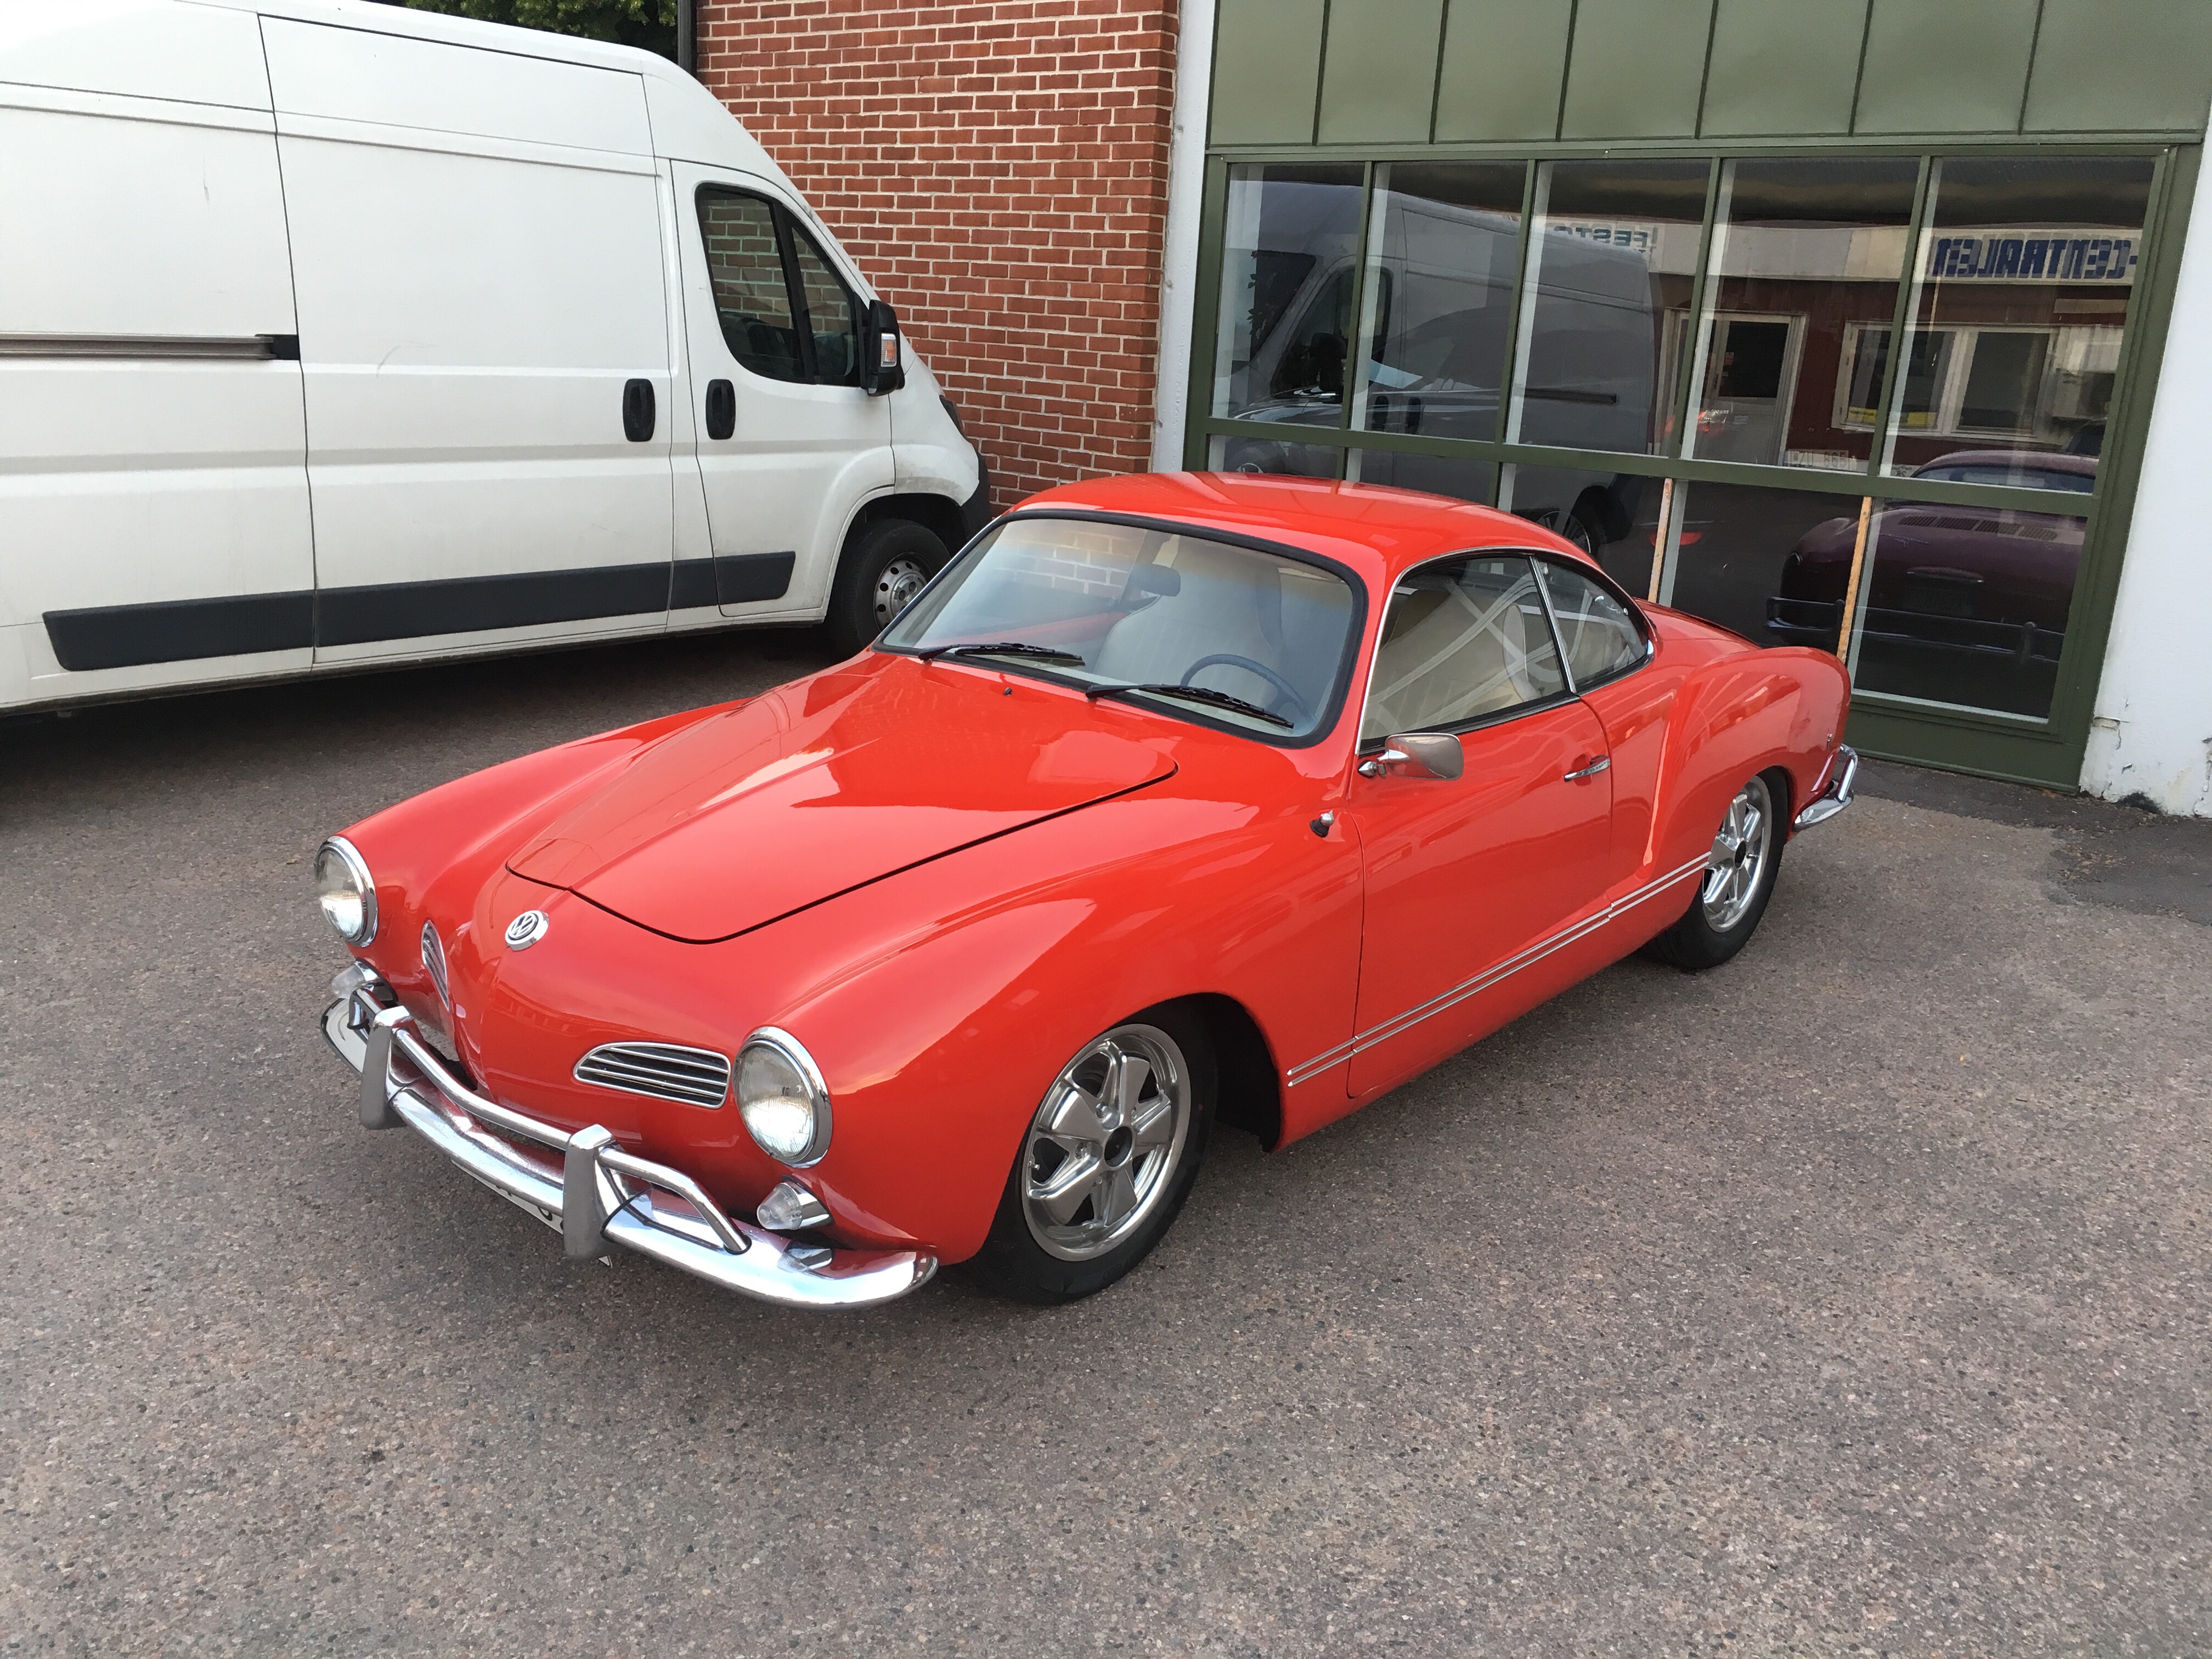
My 1967 Ghia gets a complete overhaul of the frontend. It was all stock height but the front is a little to high for my taste, it needs to be lowered around 50-100mm to get the beauty lines of the car to really flow. Rear is stock height. A brand new adjustable 2″ narrowed front beam with needle bearings. New narrowed tierods, new droppen spindels, new wheelbearings, new shocks, and all the brakestuff was already new. Wheels will be polished Porsche Fuchs. Since I had to remove the fuel tank I installed new fuel lines and cleaned up the front luggage compartment a little. Here comes some pics…


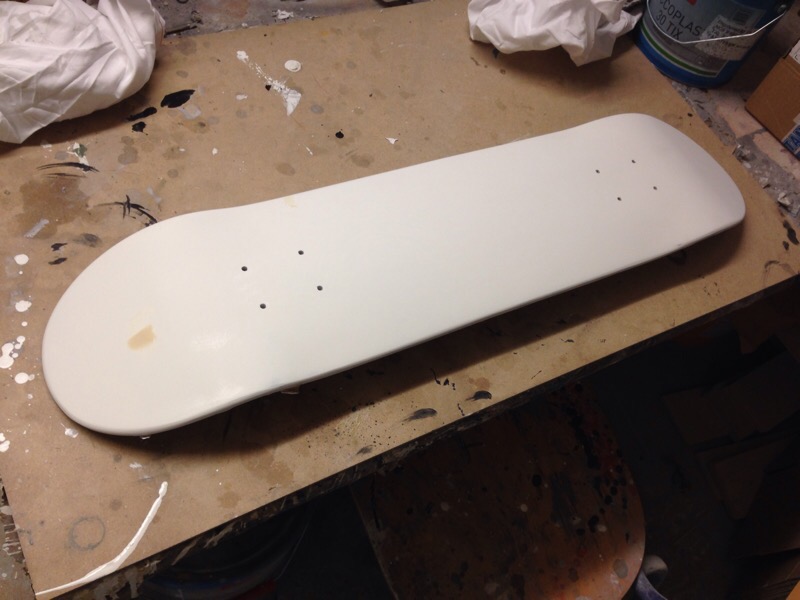
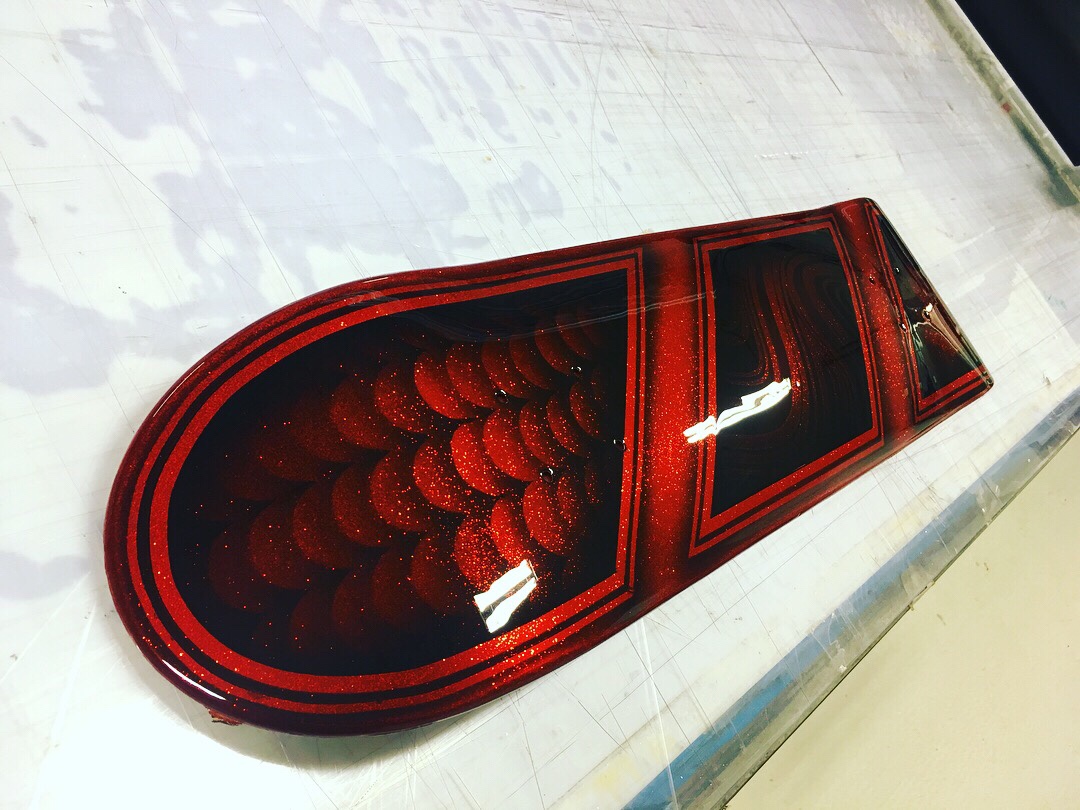
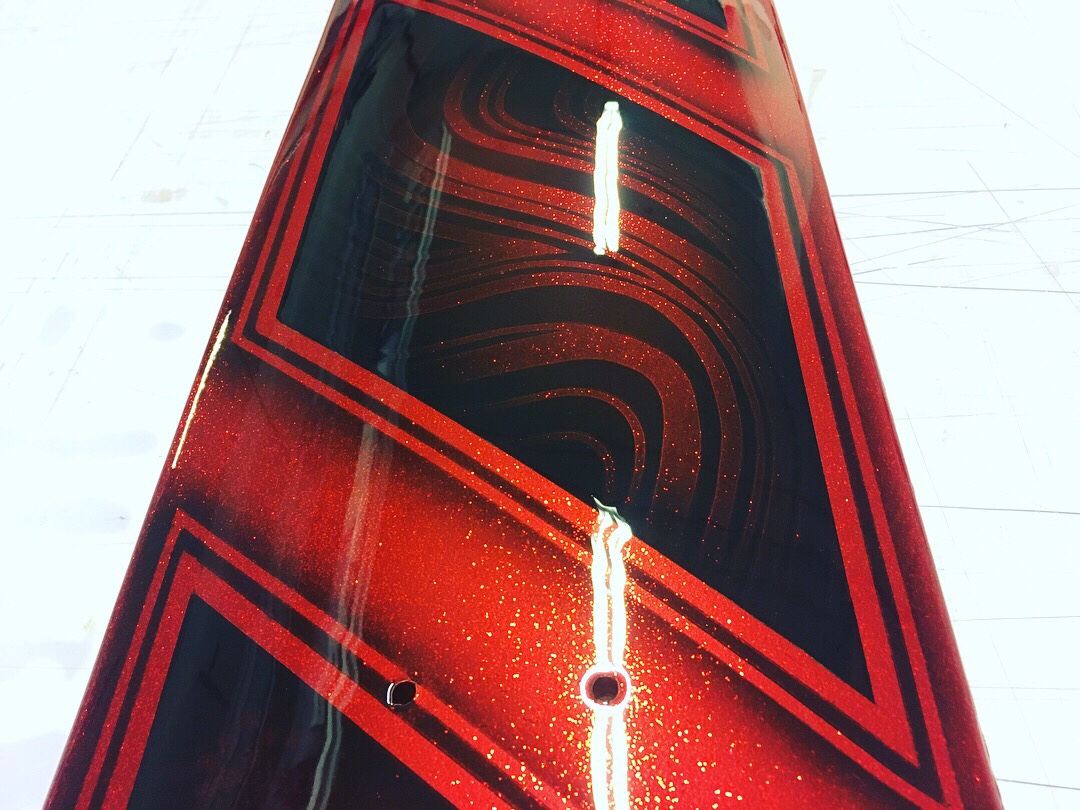
Painted this skatedeck recently. Red chunky flake with deep black paint patterns. One more to the collection! ;-p
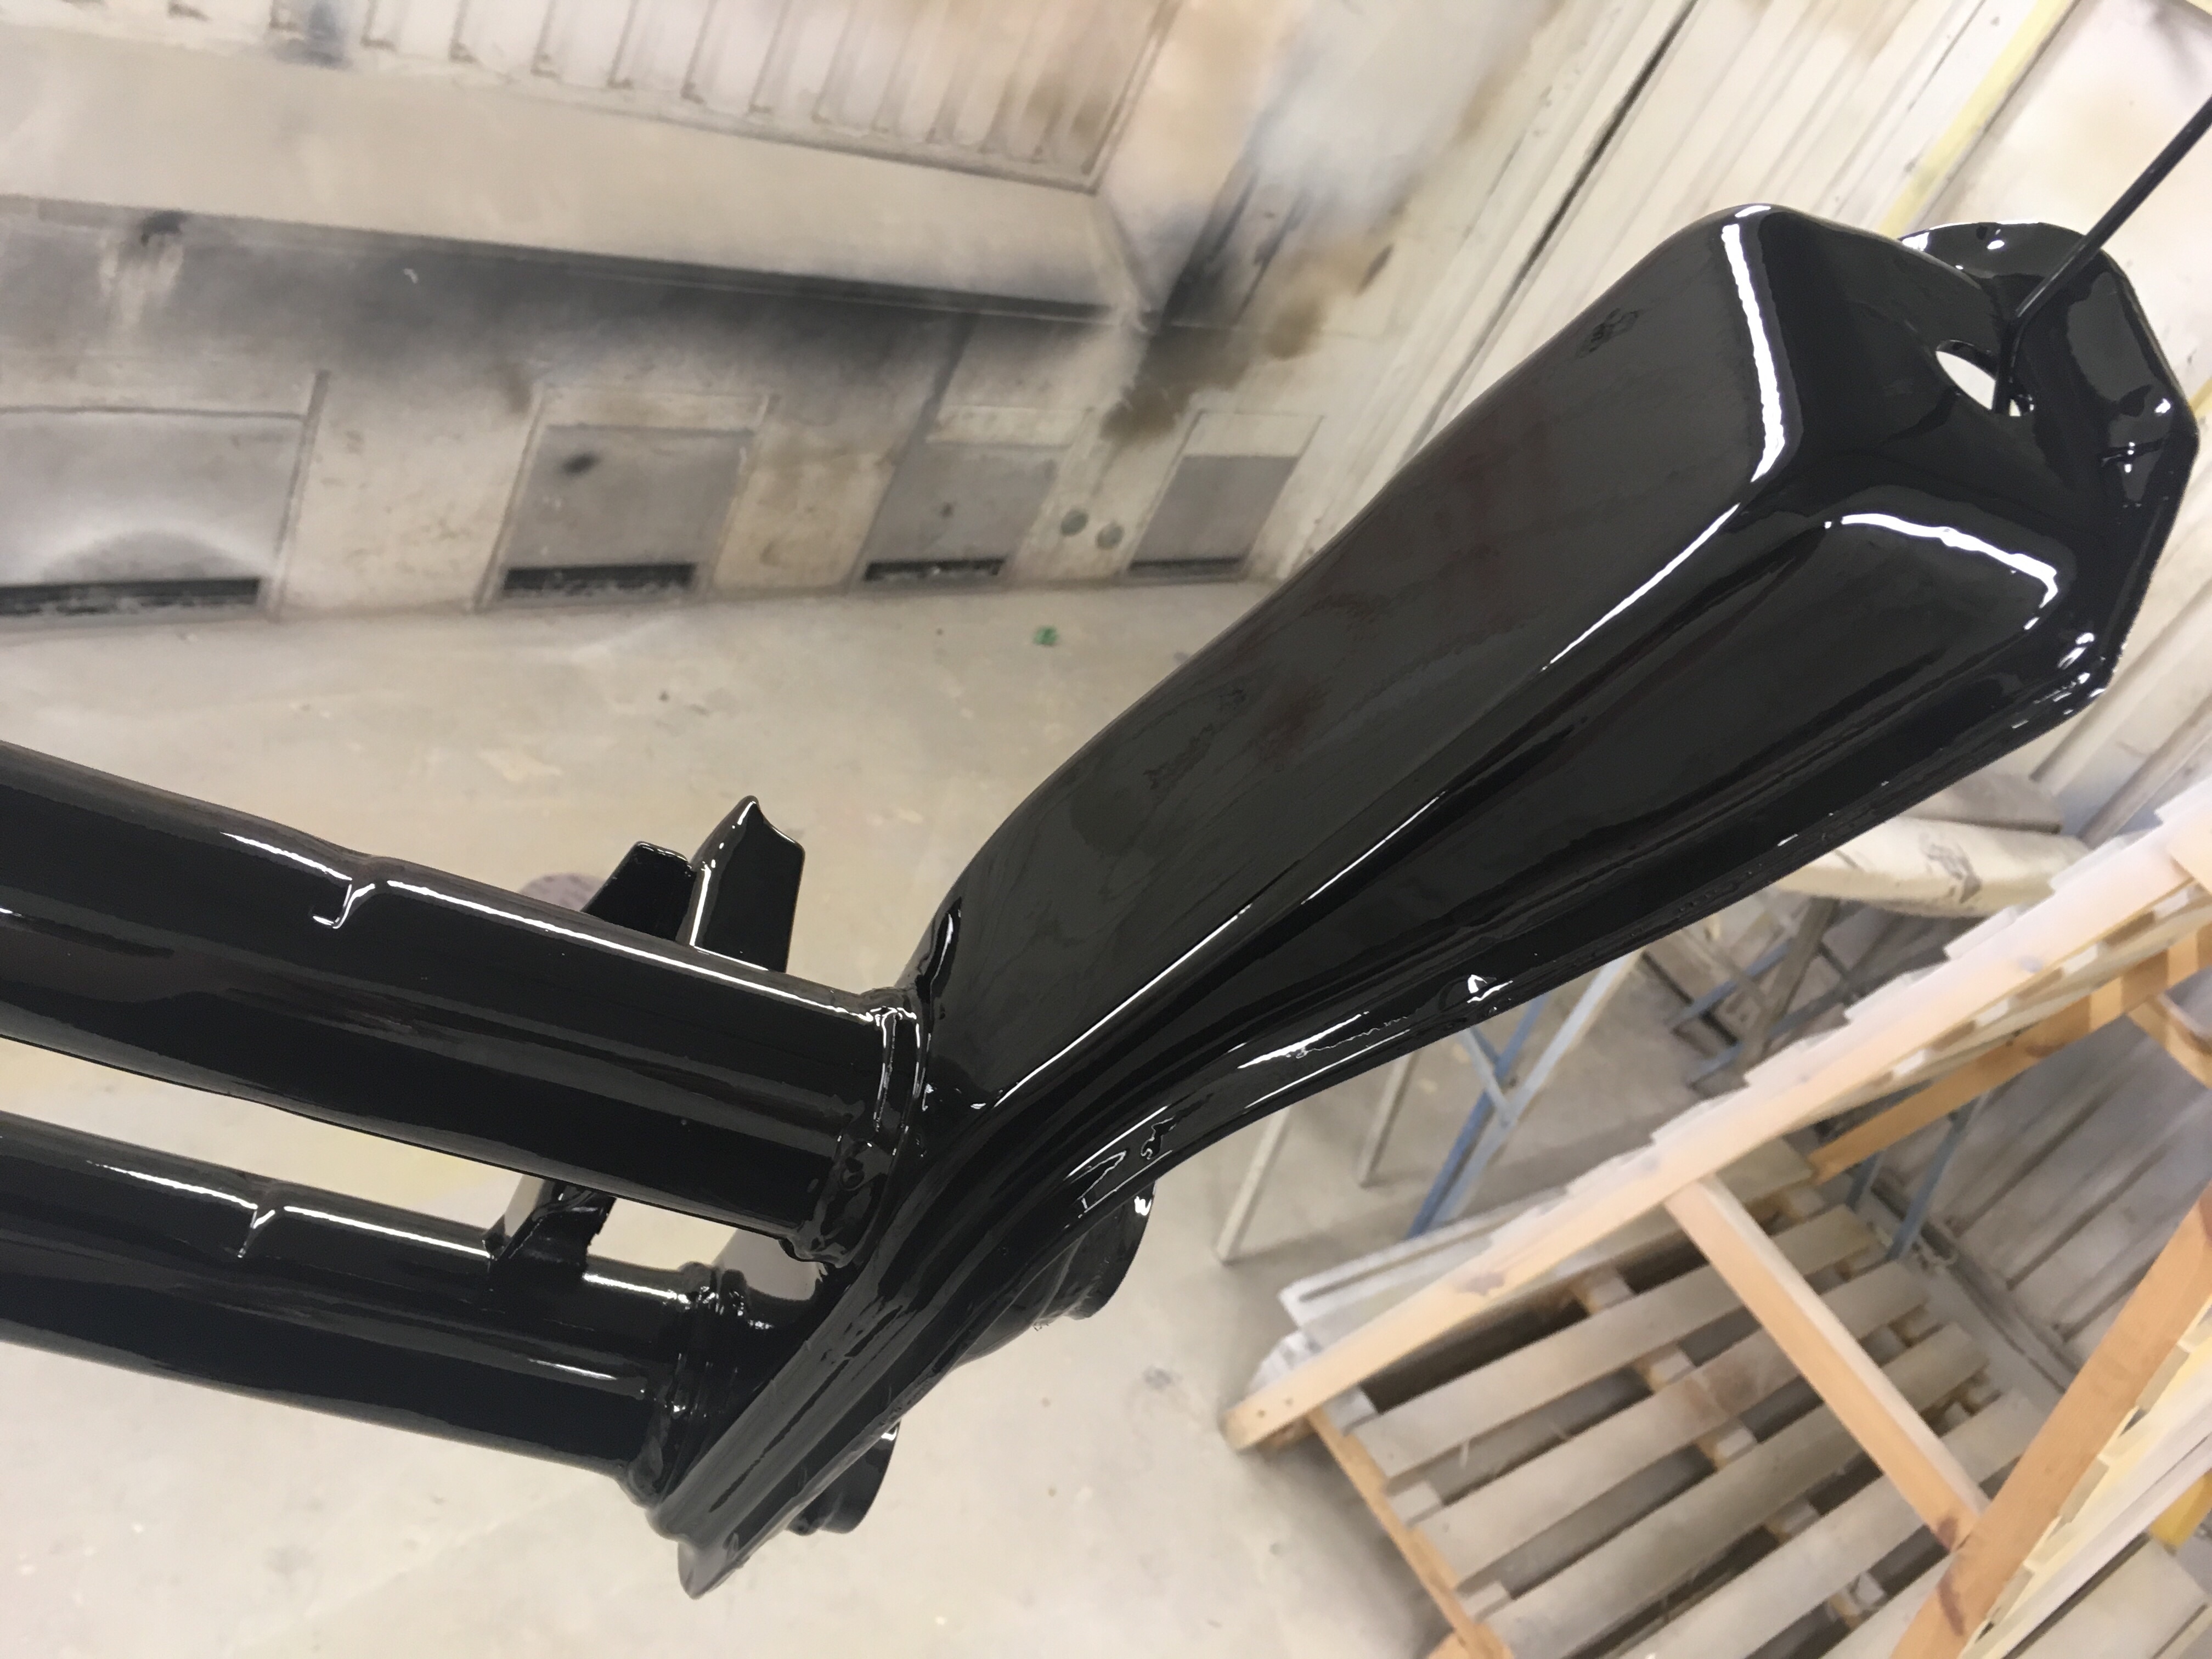
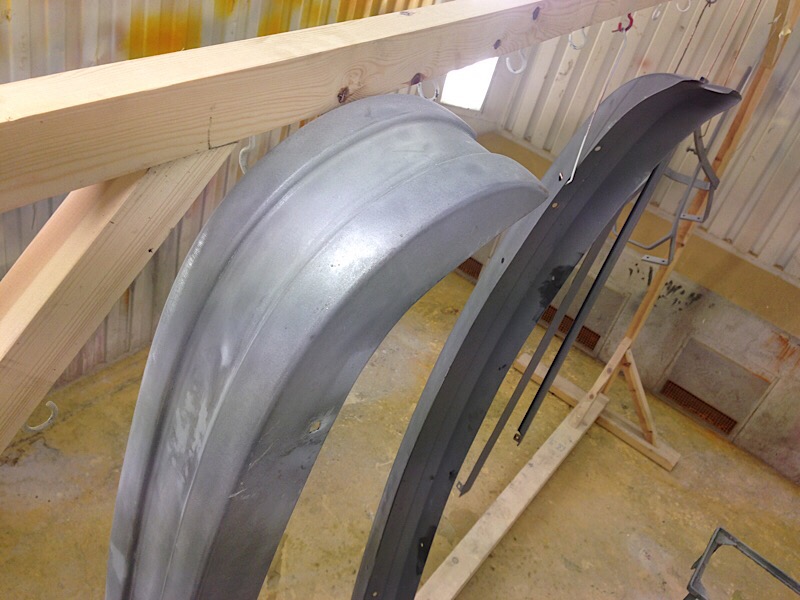
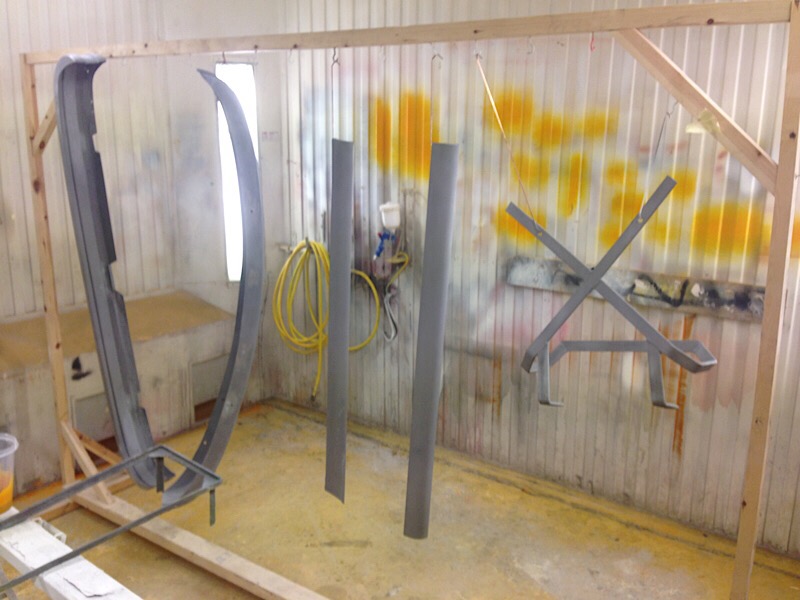
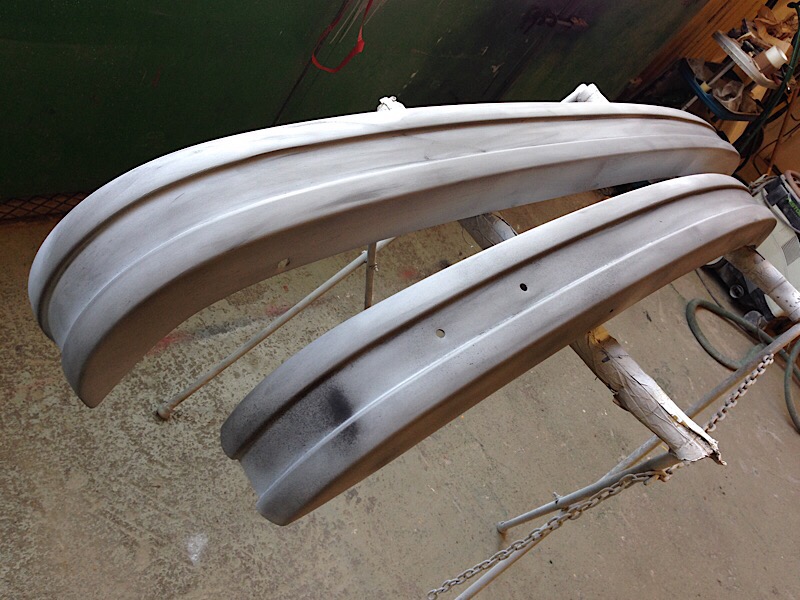
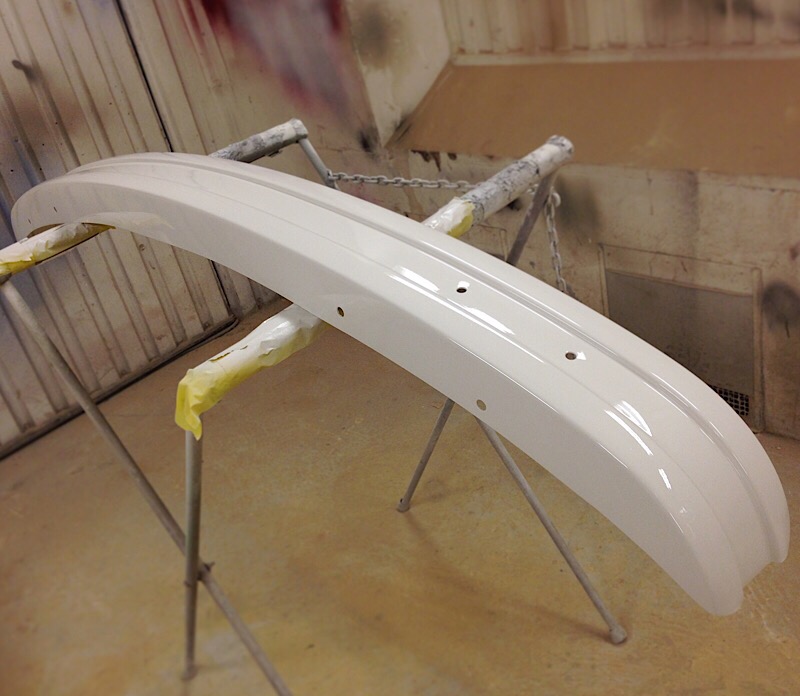
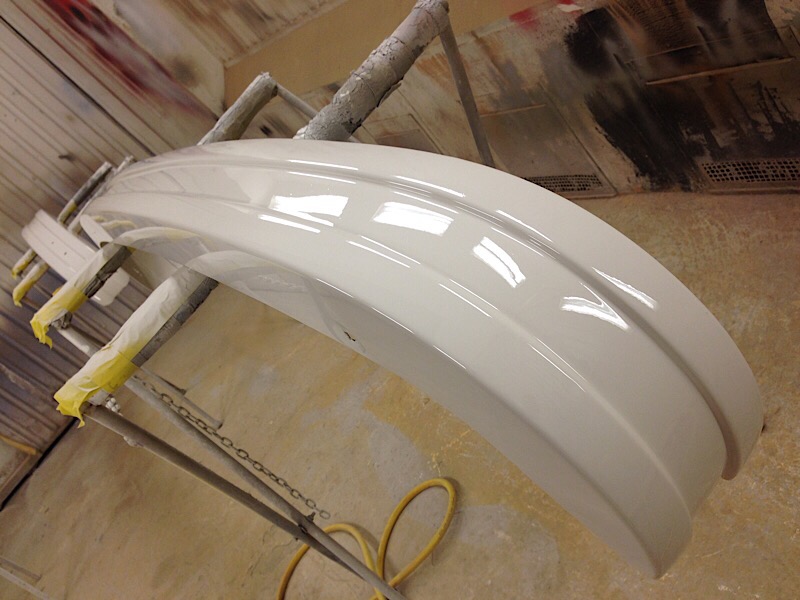
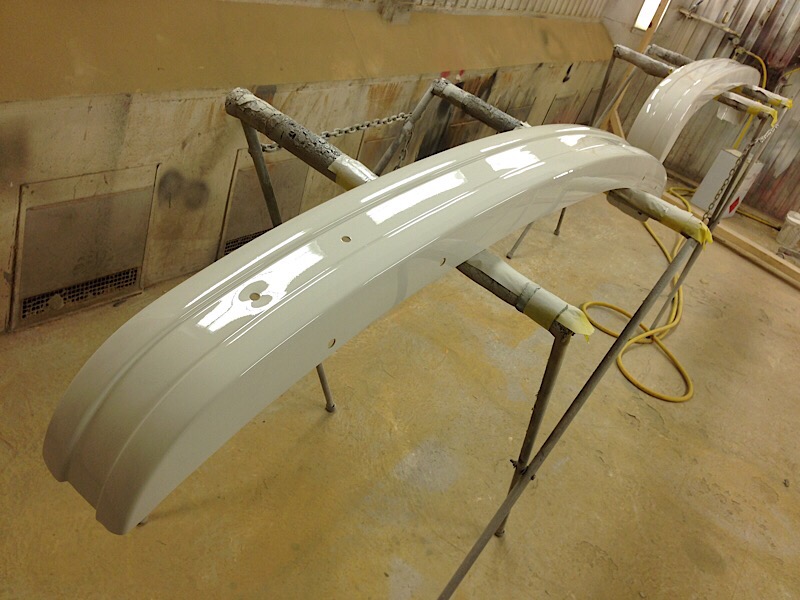
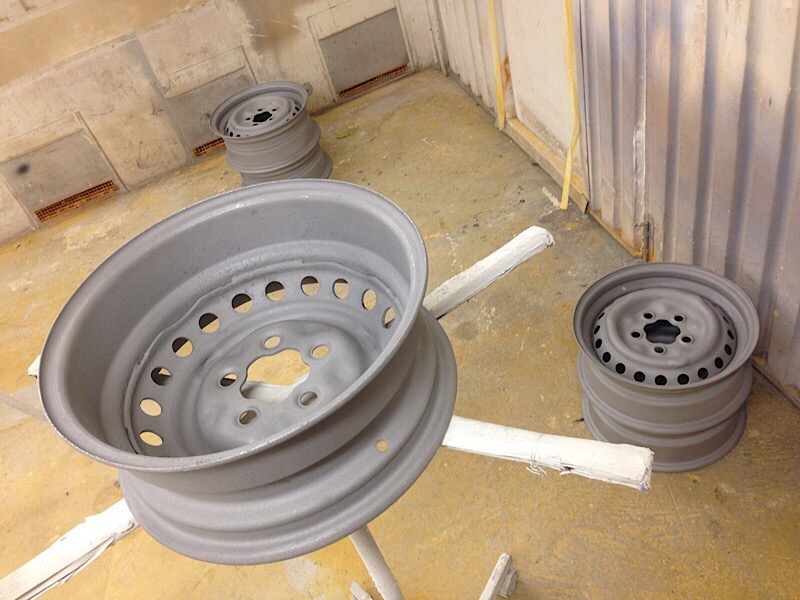
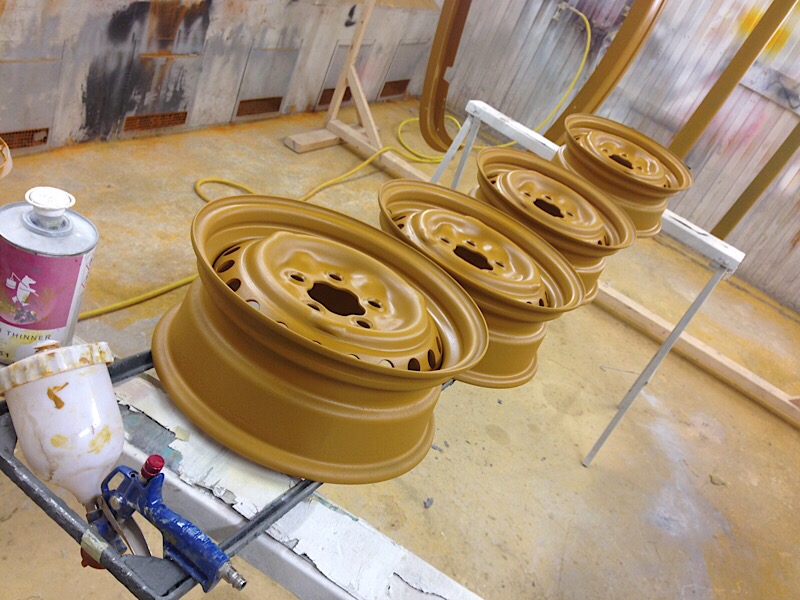
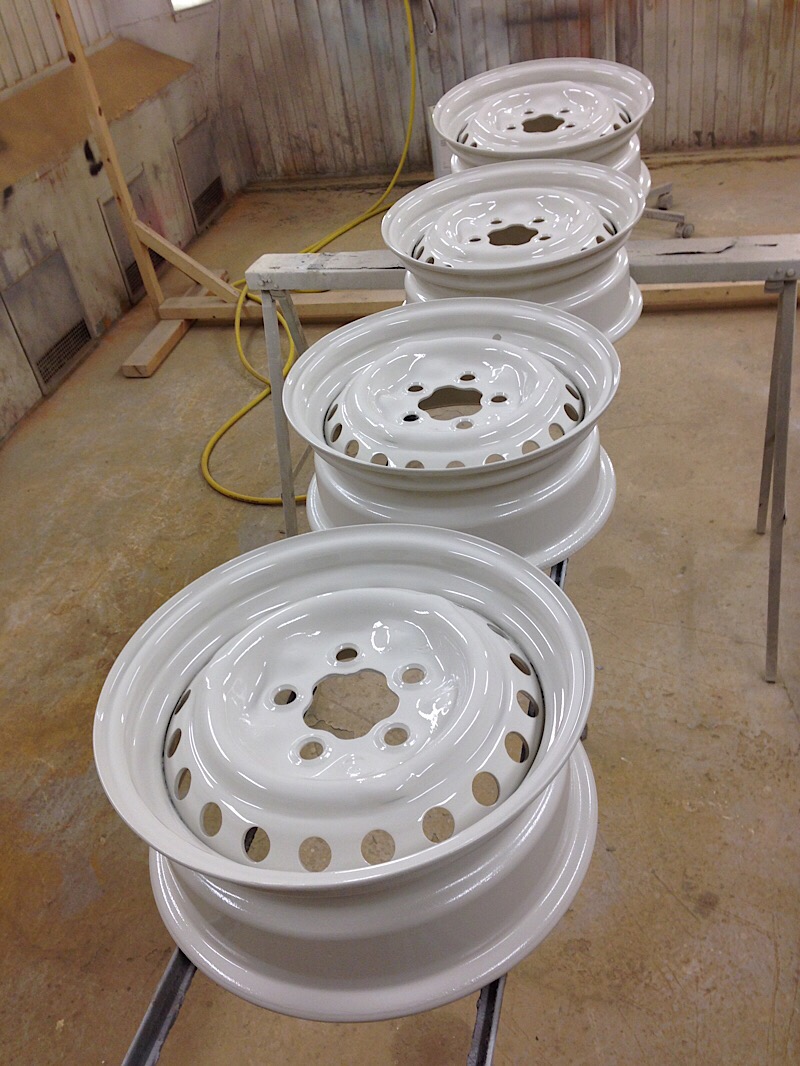
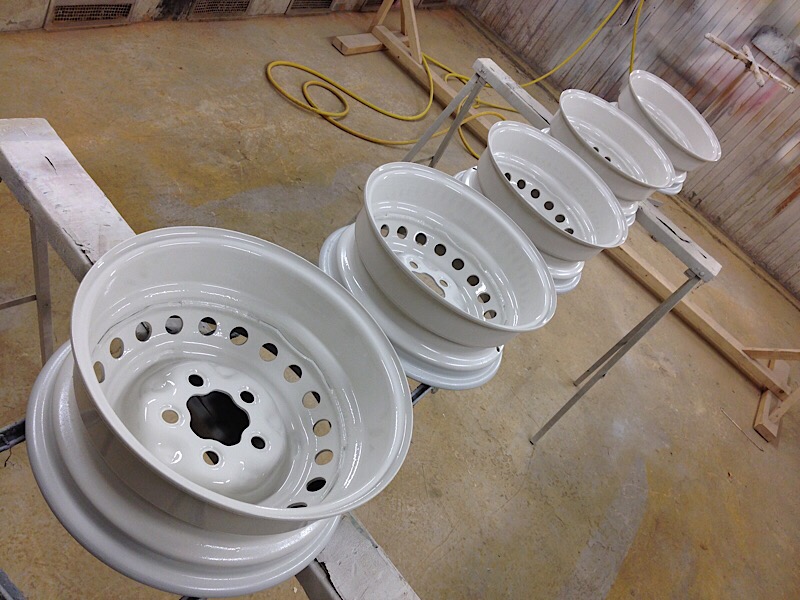
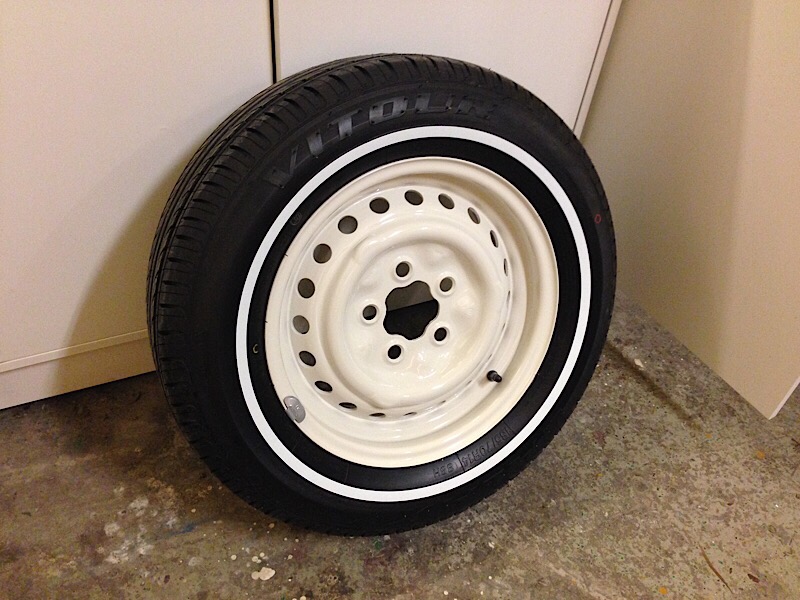
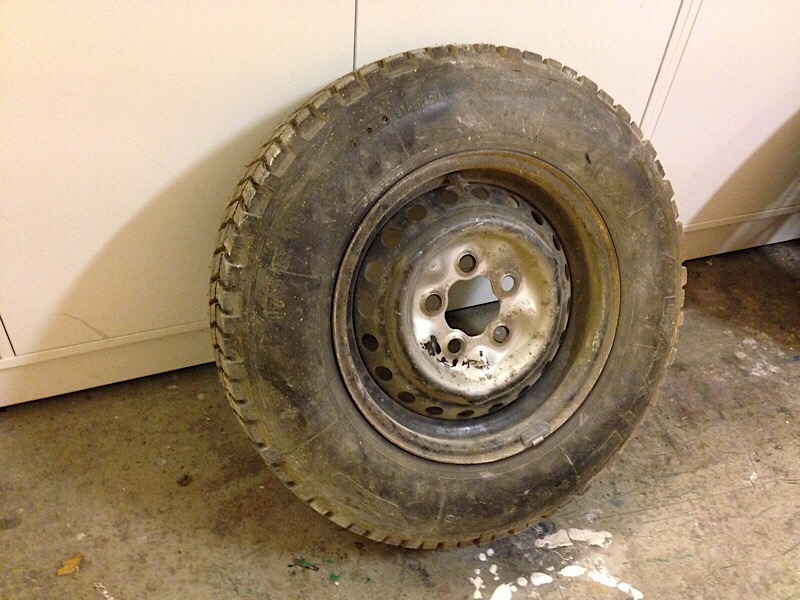
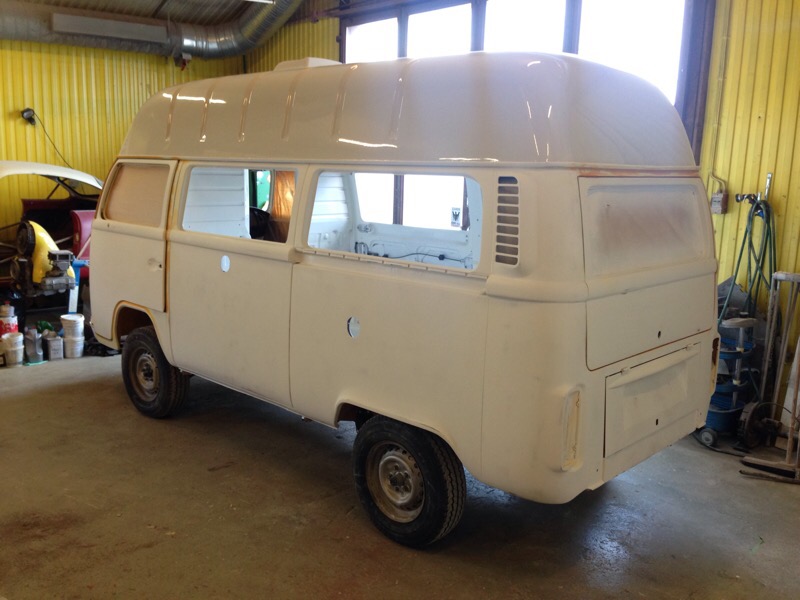
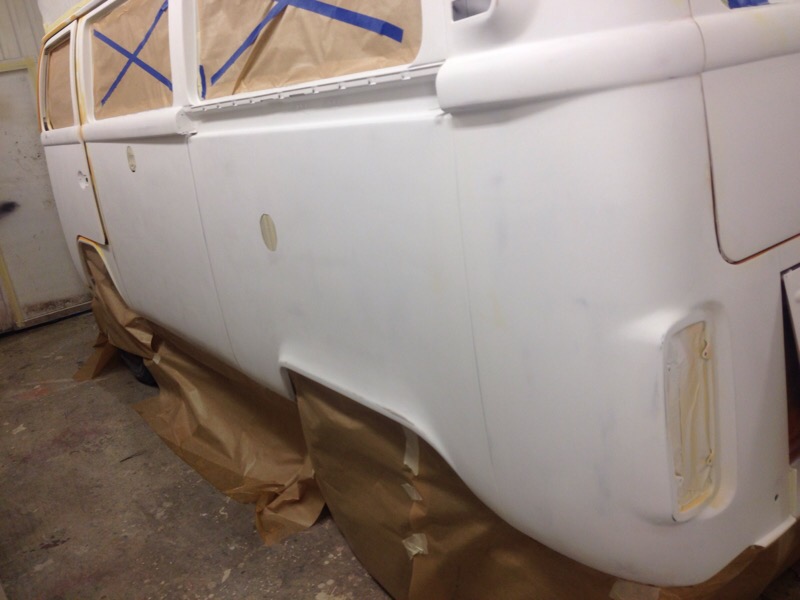
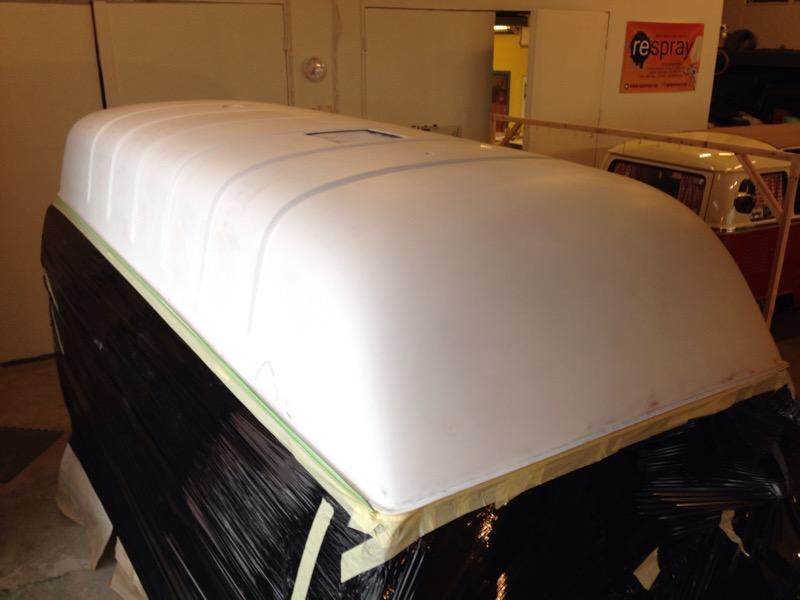
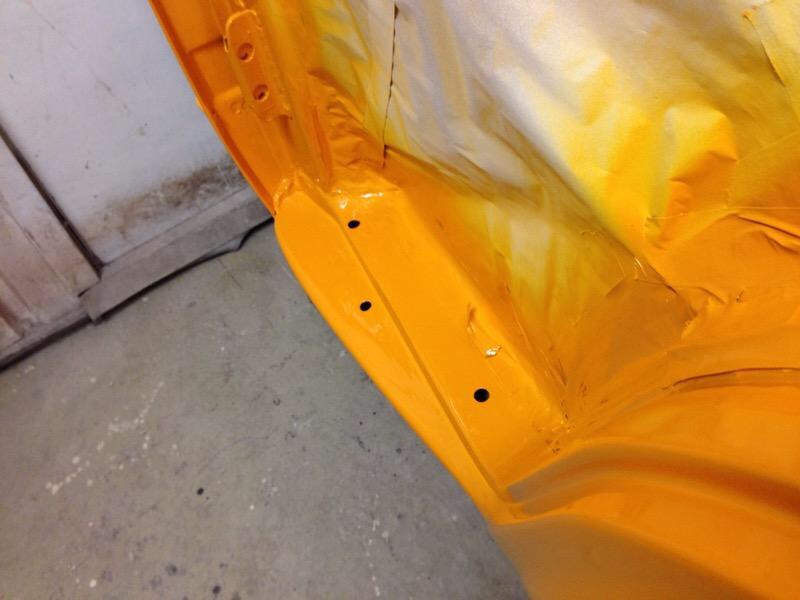
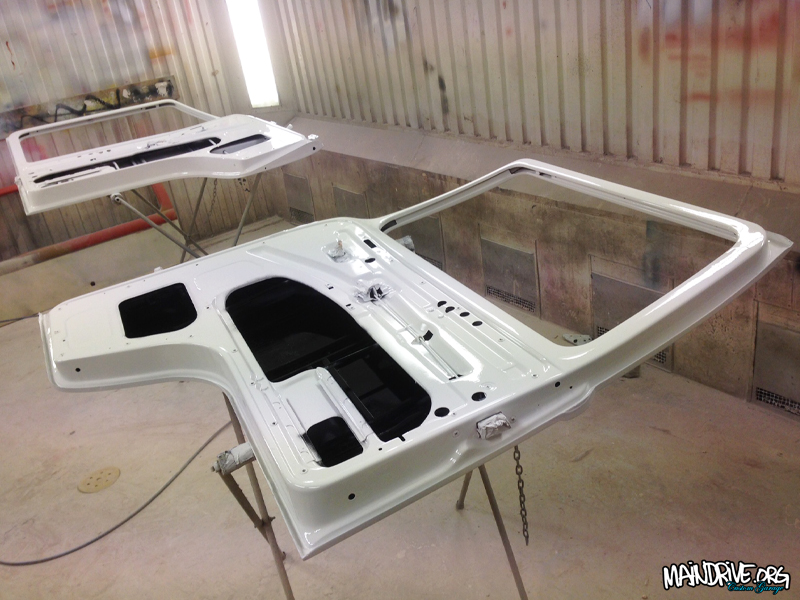
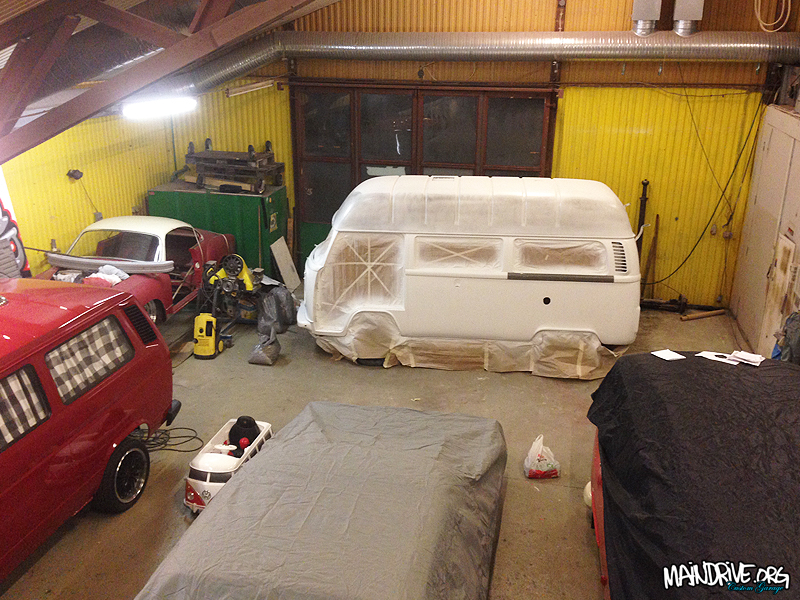
Piece by piece it’s coming together! I Have been fixing with the bumpers and wheels lately. It have all been sandblasted, welded, epoxyed, sanded, primered and painted in same white as the roof. Really starts to come together now, some light in the tunnel. But still lots left to do, here is some new pics…
#highroofbayproject


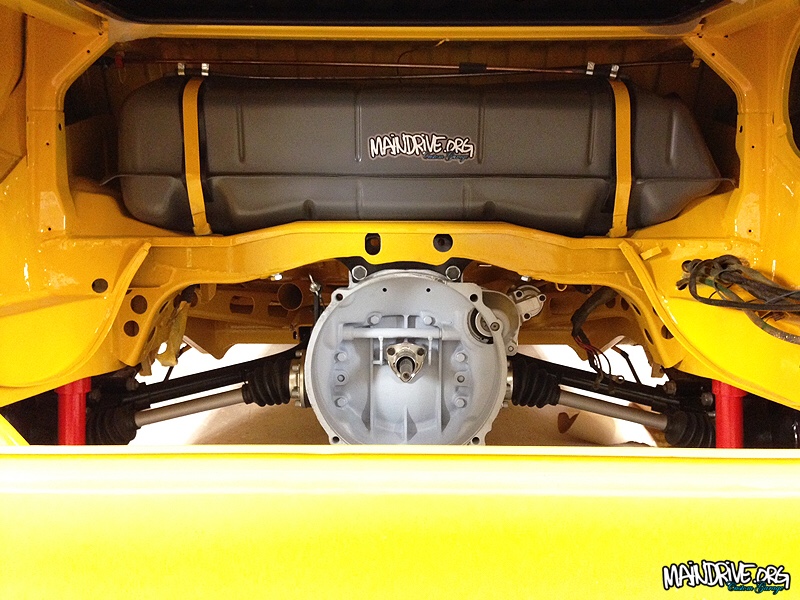
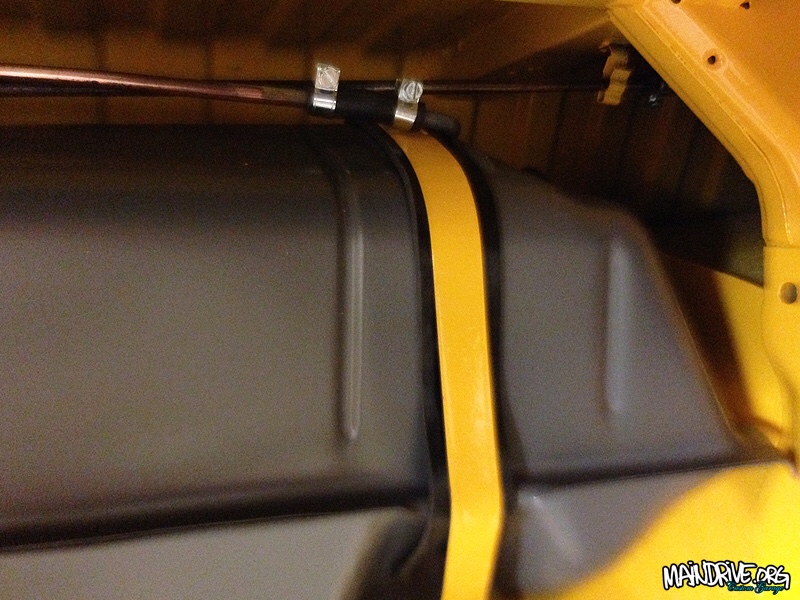
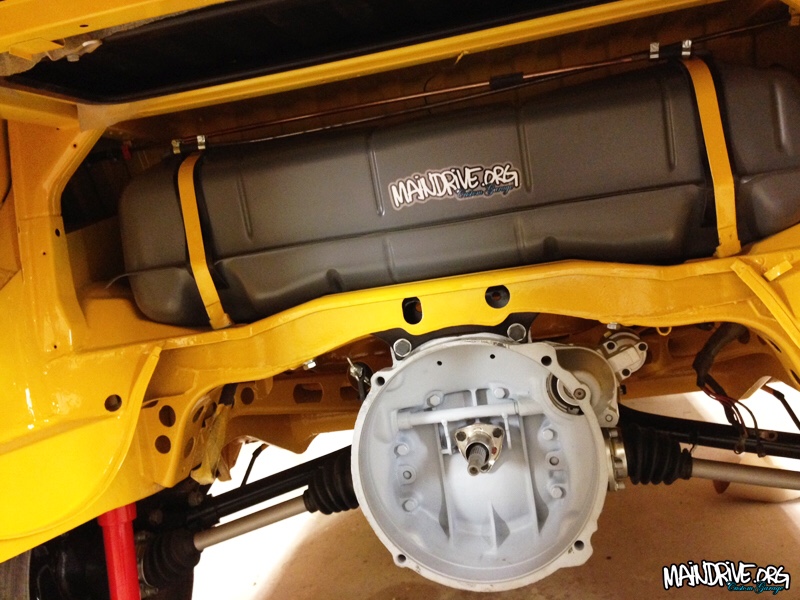
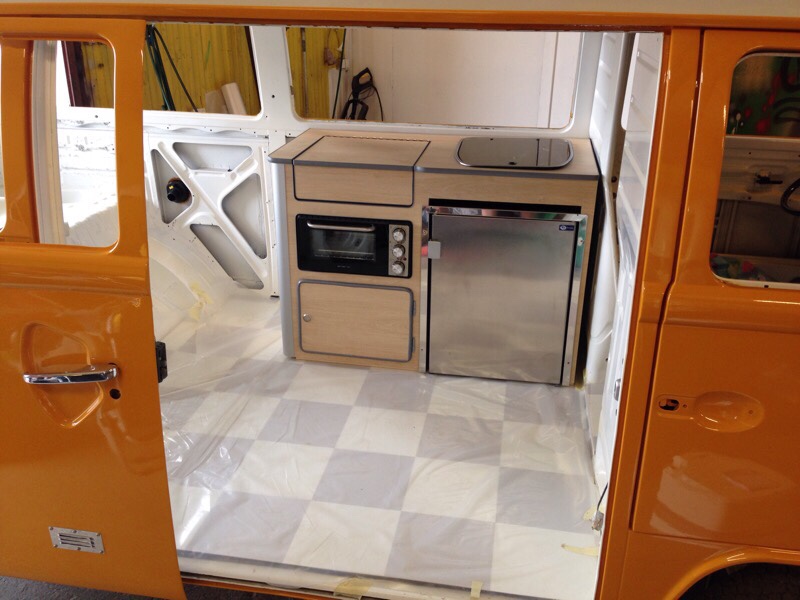
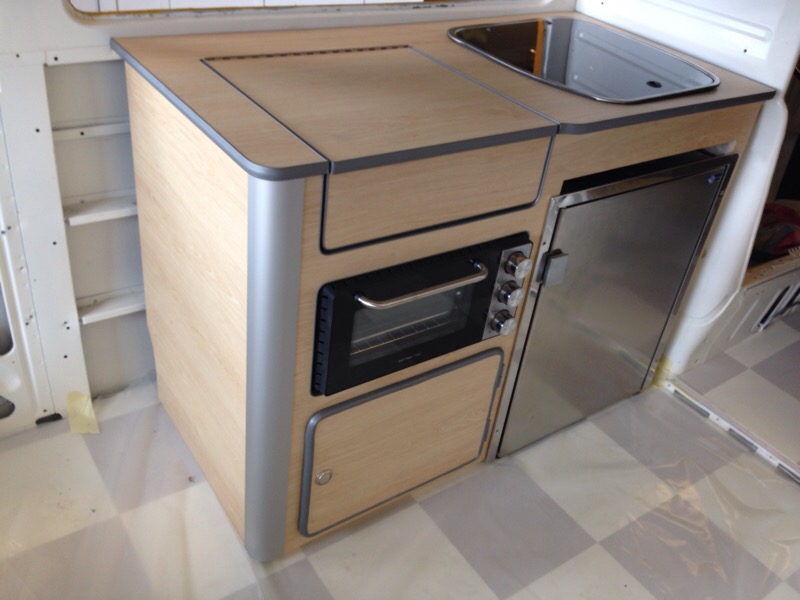
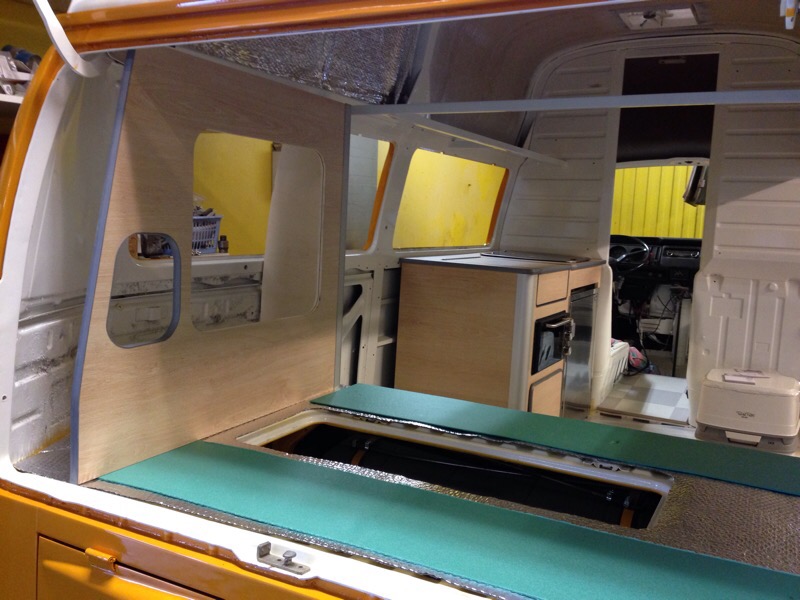
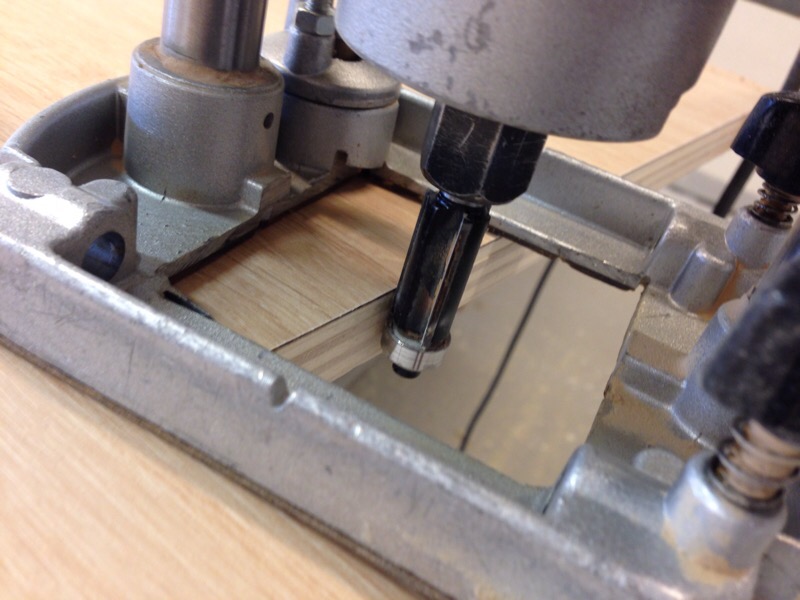
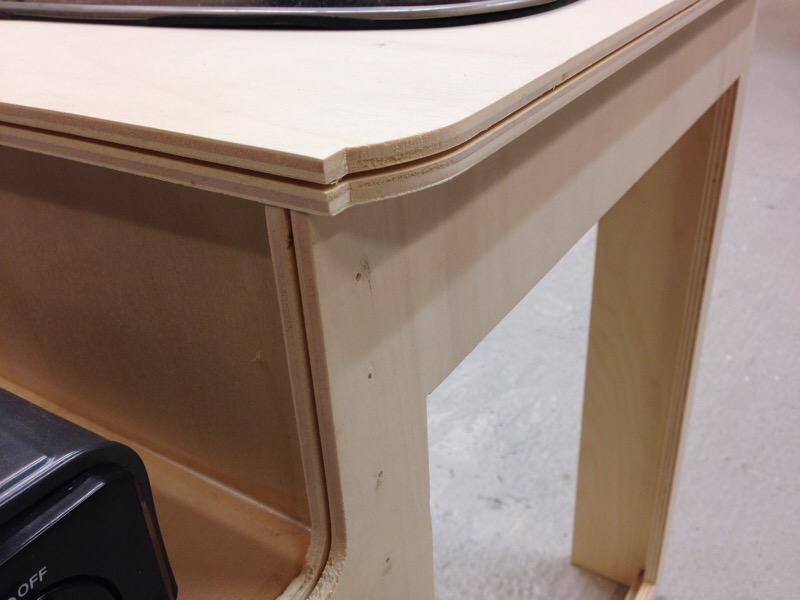
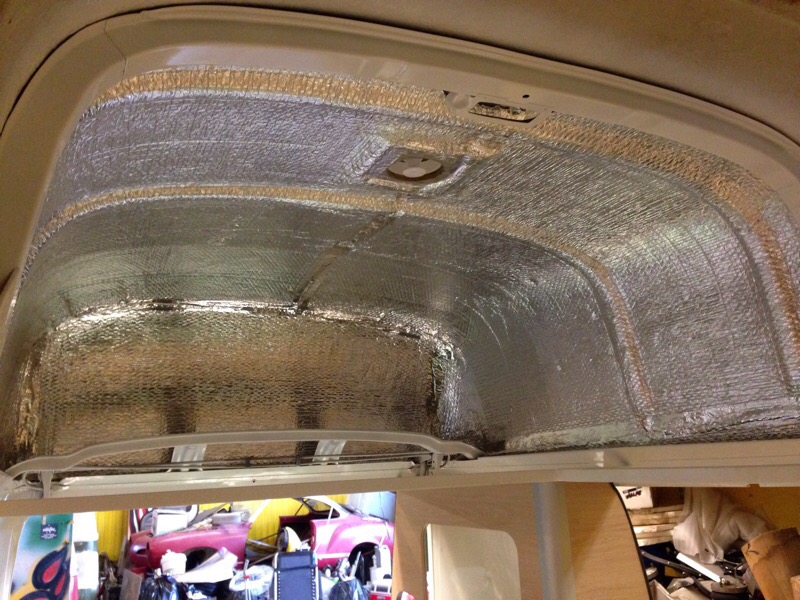
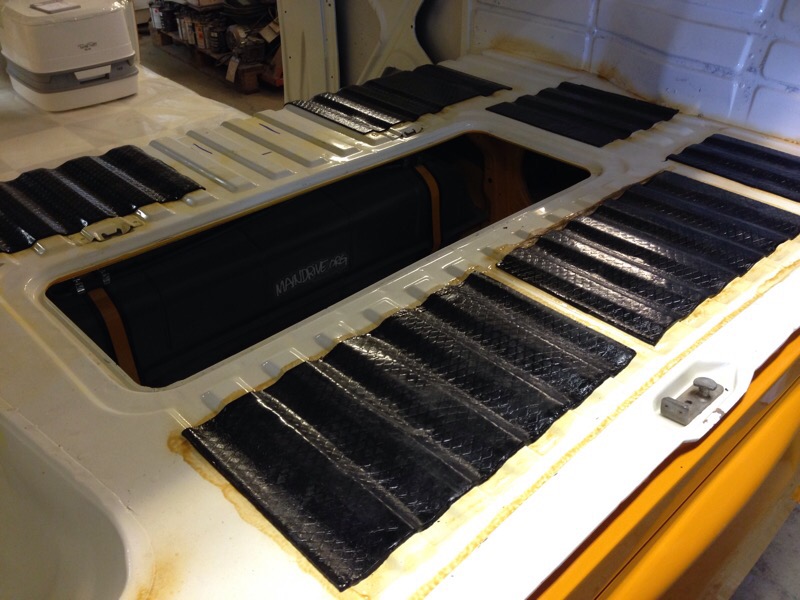
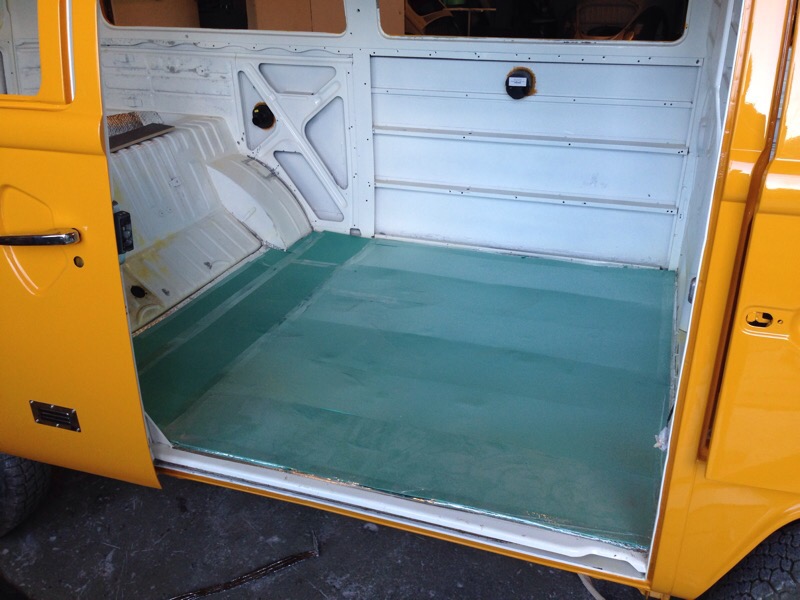
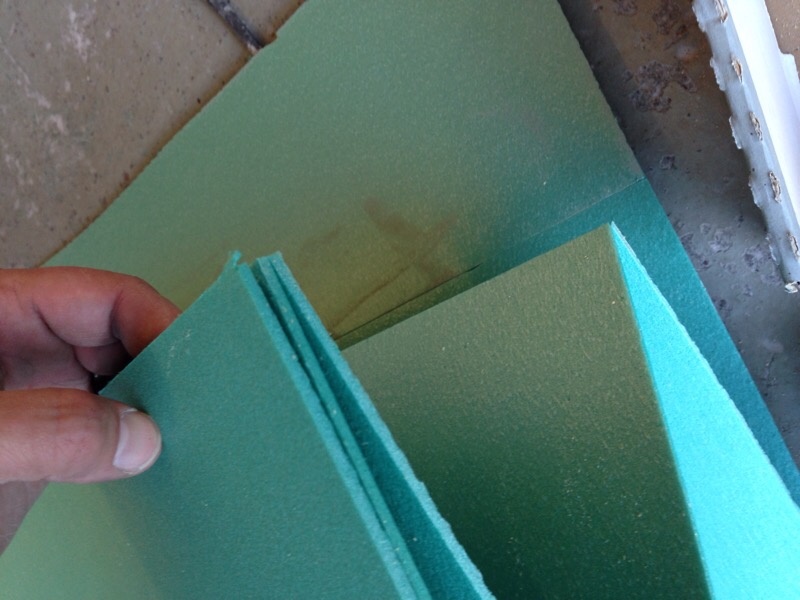
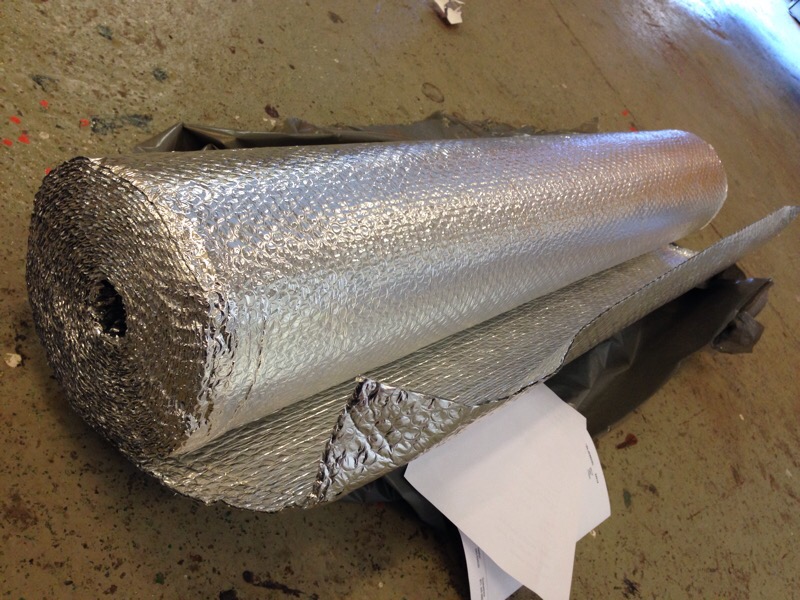
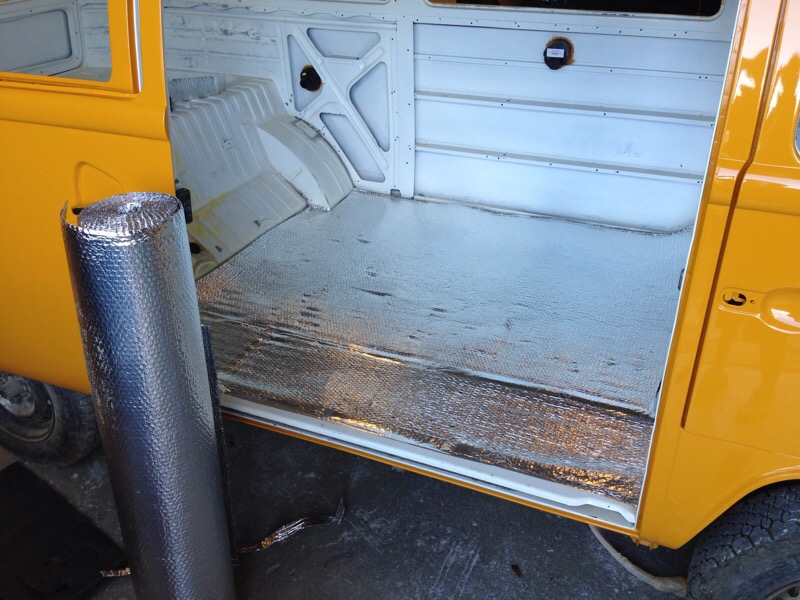
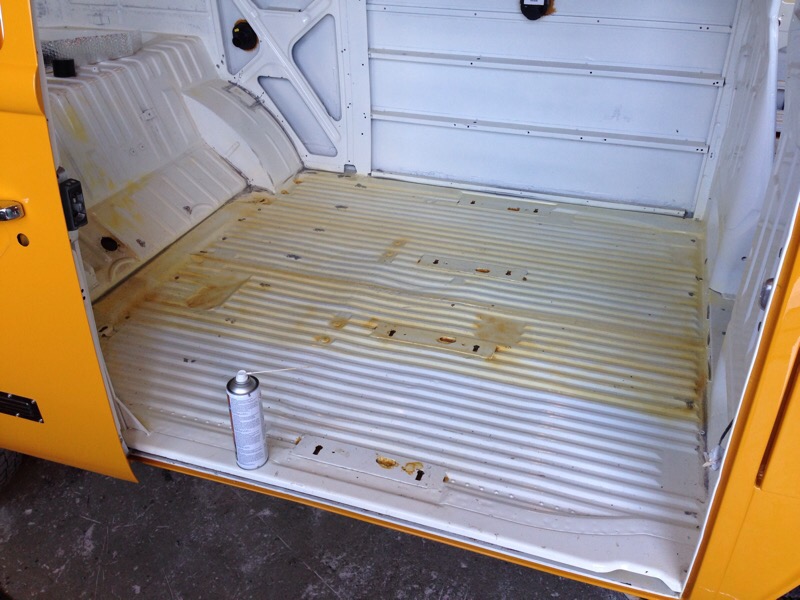
Have now started with the interior on the Highroof bus. Have put sounddeadning mats in floors and doors, sprayed it all with wax for rust protection. Then added insulation (Refectix) a material of aluminium with plasticcells of air in middle. NASA came up with this tecnology when insulating spaceships actually! After this I put some extra 5mm insulation foamboards (green) then 15mm marine plywood and then a new linoleum carpet in Classic checker pattern, went with light grey to match the grey details on furnitures. The furnitures itselfs is in Light Oak wood finish (laminate). I built it all in a special extra light plywood 15mm. This interior is gona weight nothing!! And thats great in a slow VW bus, all the stuff thats going to be loaded in the cabinets are heavy enought 😉 The kitchen pod/cabinet is featuring a new Vitifrigio fridge on 48 liters + 2 liter freezer. A new small owen in stainless that will be running on 240v (euro). The zink is from a newer crashed/parted out Knaus campervan I bought cheap online. The lid in top is hiding a gastove and the cupboard in bottom will be housing the greywater tank etc.
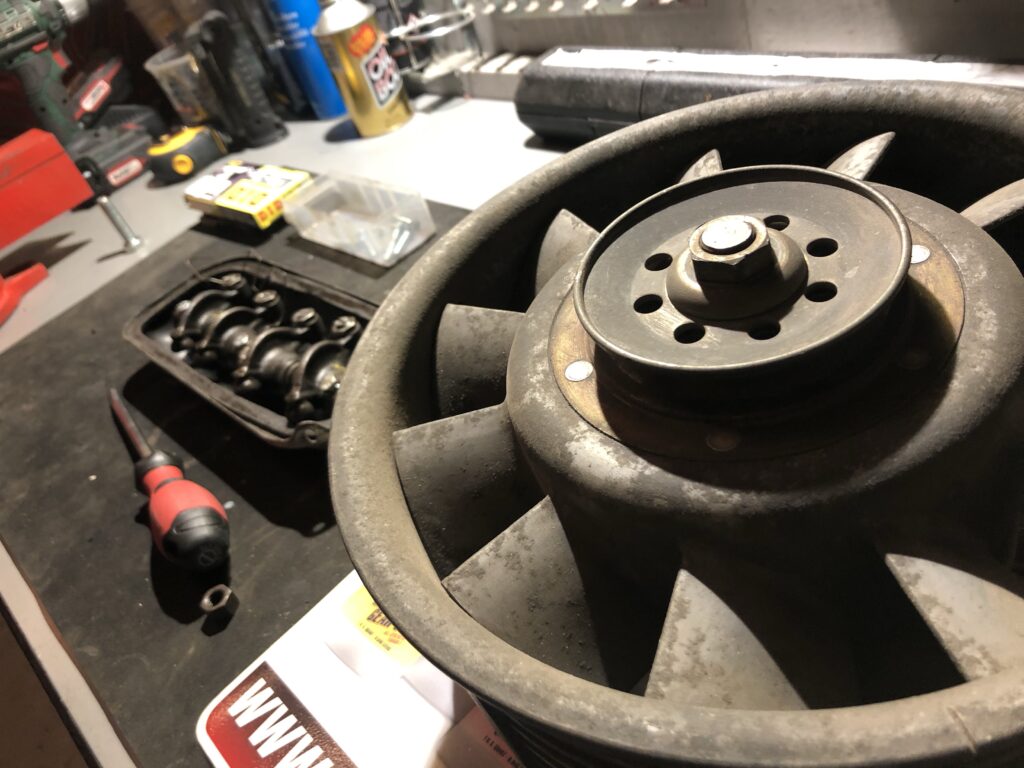
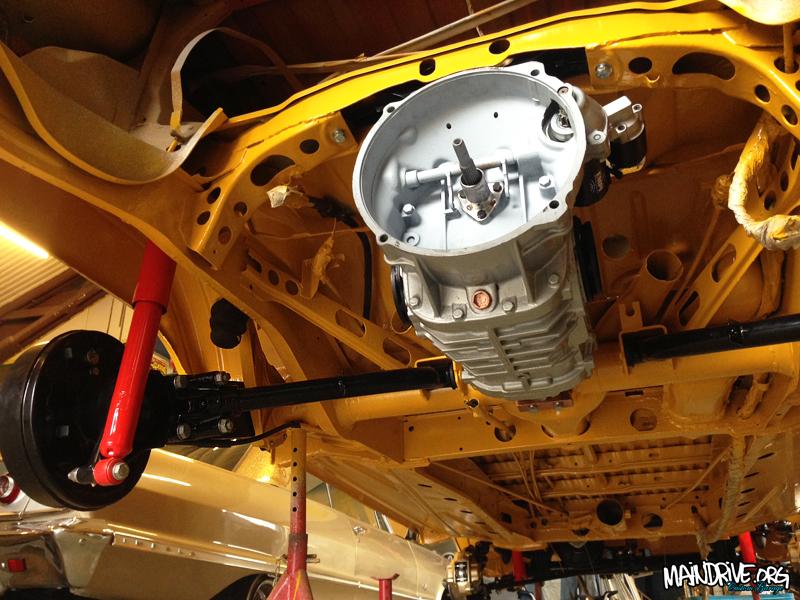
Still have plenty to do before I can start restoring the 1800cc AP engine.
More to come soon!
#highroofbayproject

Some movies from this summer with my VW Samba splitbus. Follow: @campersontour at Instagram for daily pics!
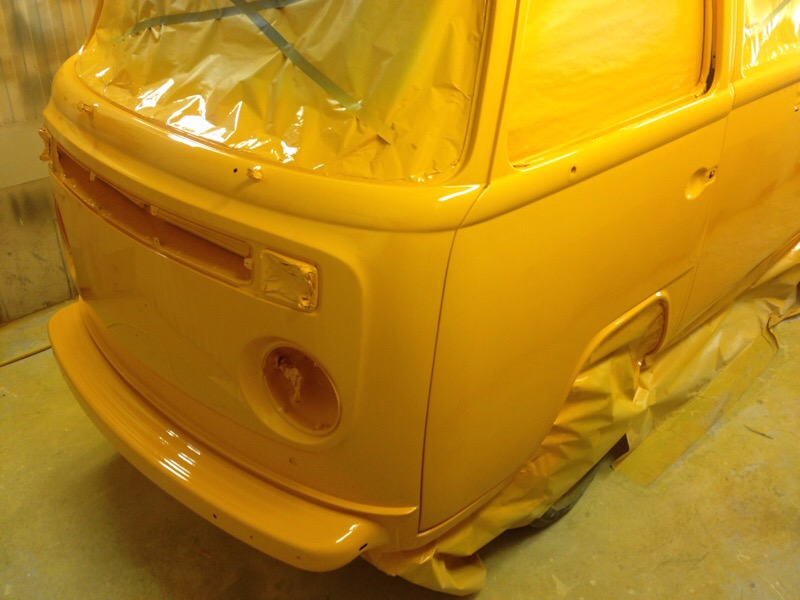
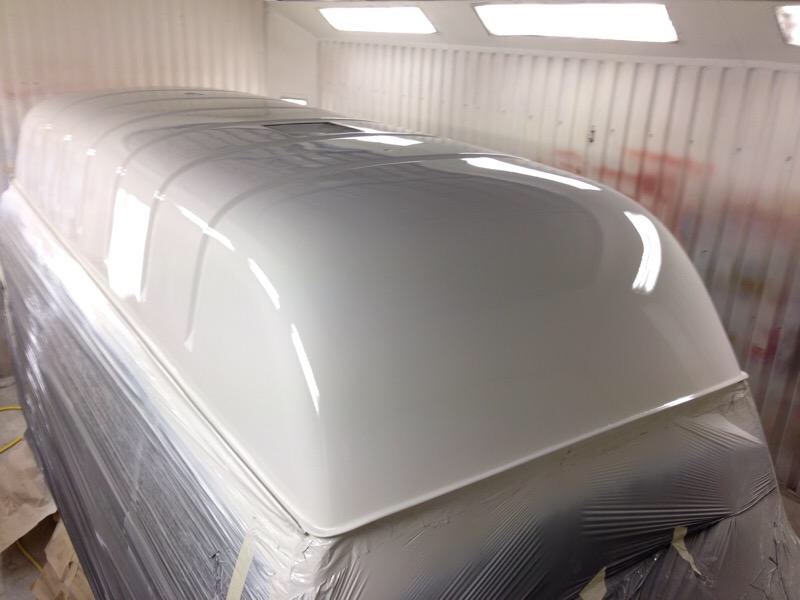
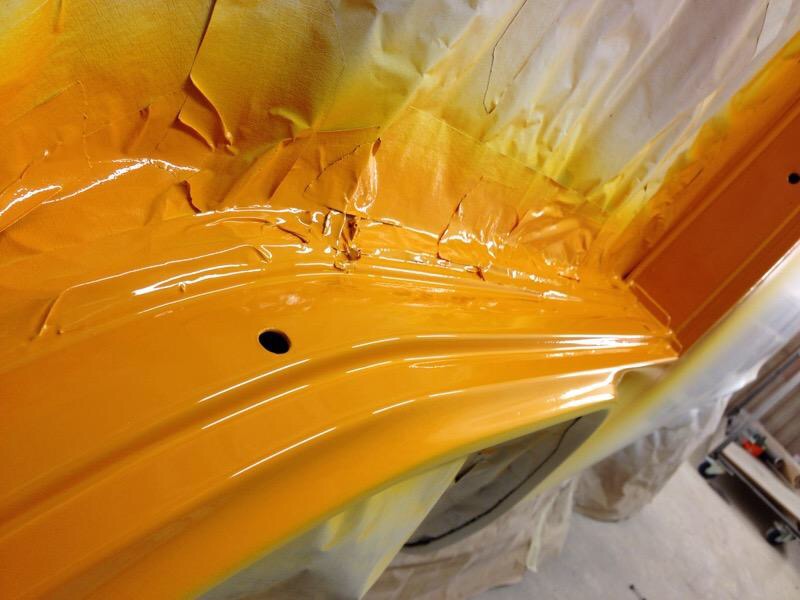
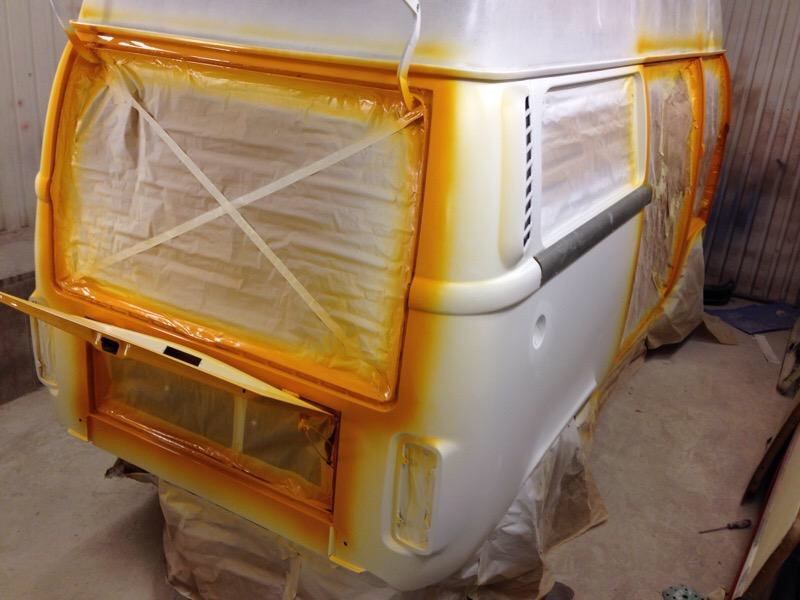
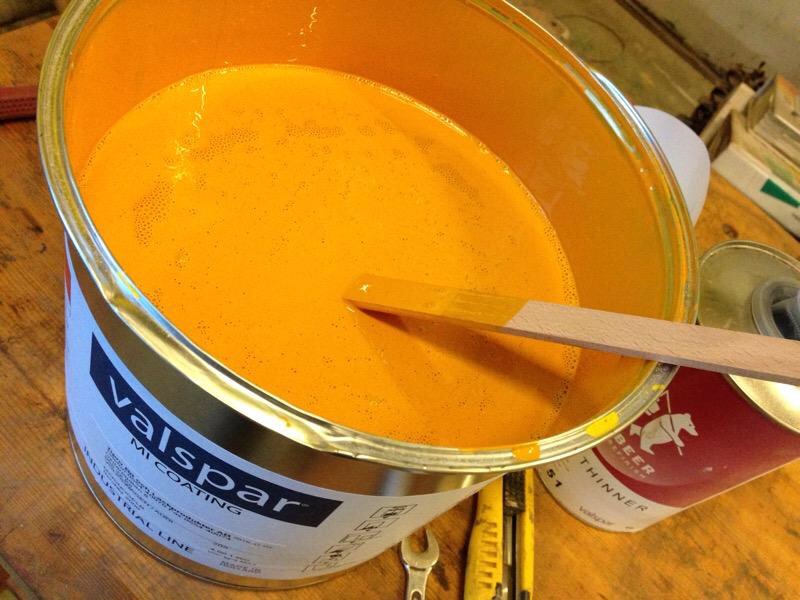
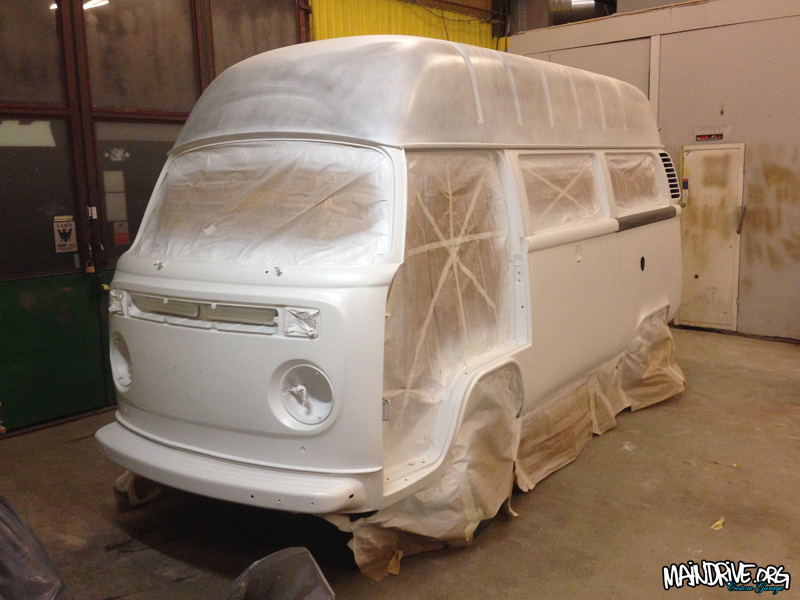
So the Highroof is now painted at last, in Marino Yellow VW L20a, period correct for 1975. It have been a ton of work and to get that yellow color to cover the bus needed to be painted 4times/coats. That because all yellow (and sometimes red) colors have less pigment than all other colors.
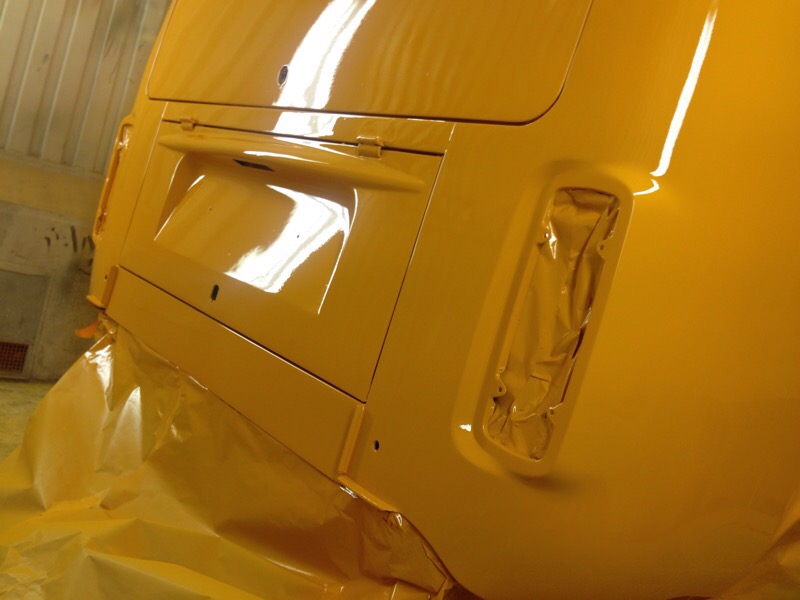
Now the fun can begin, mounting on all new parts like lights, handles etc! Next step will be to start with the interior and begin with insulation in walls and floor. Would be nice to have the most done on interior and exterior until fall so the winter can be focused on engine build and install etc.
More pics coming soon!
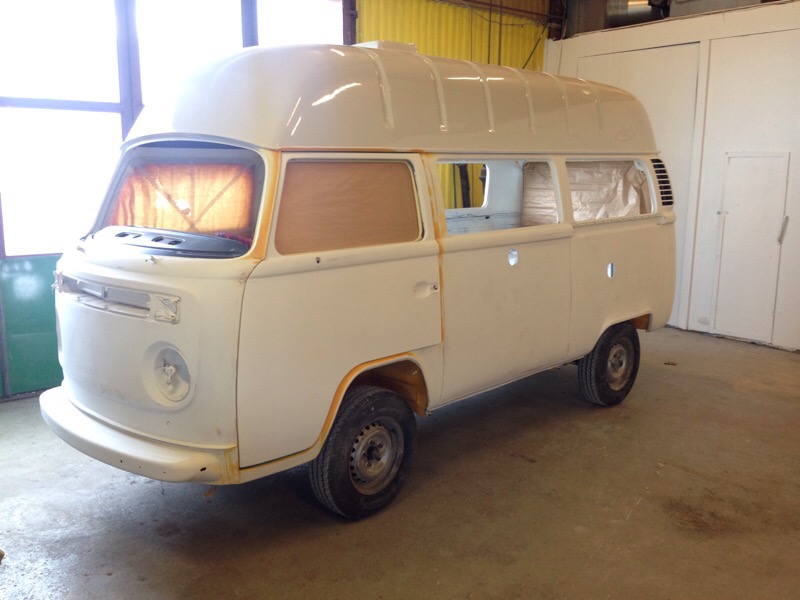
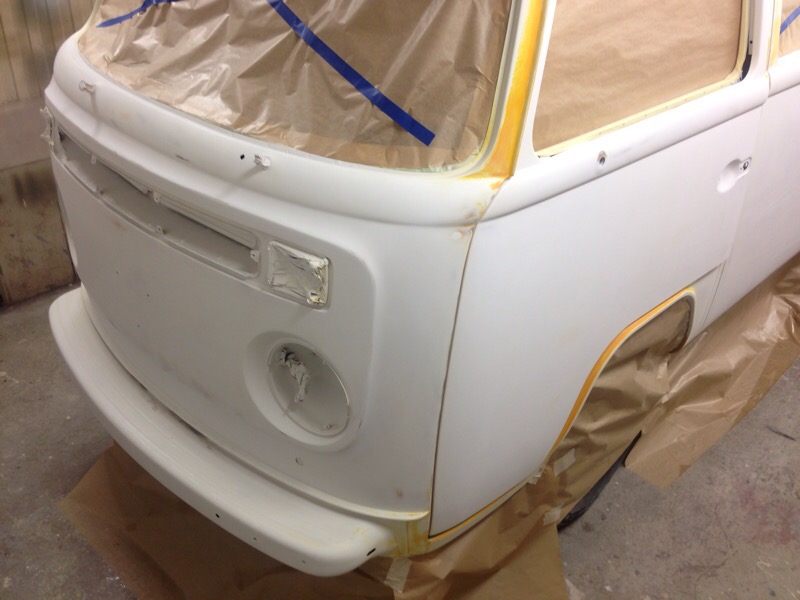

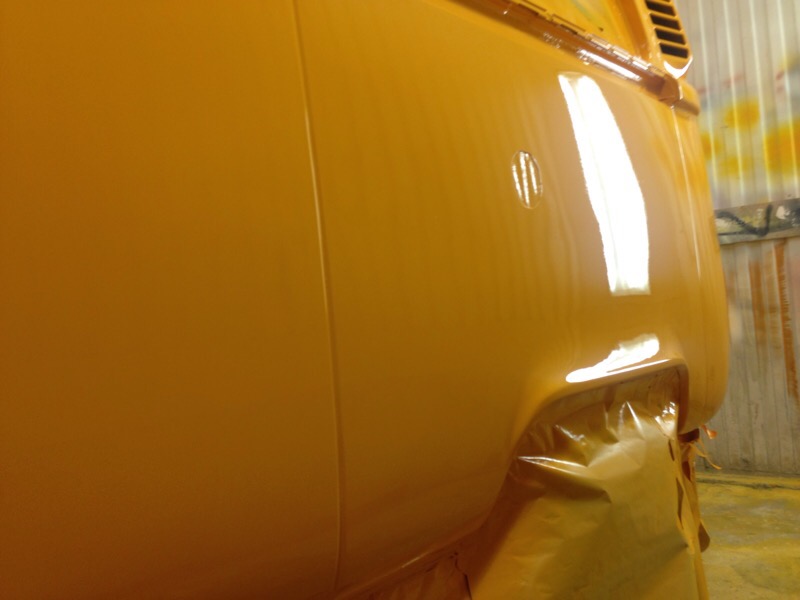


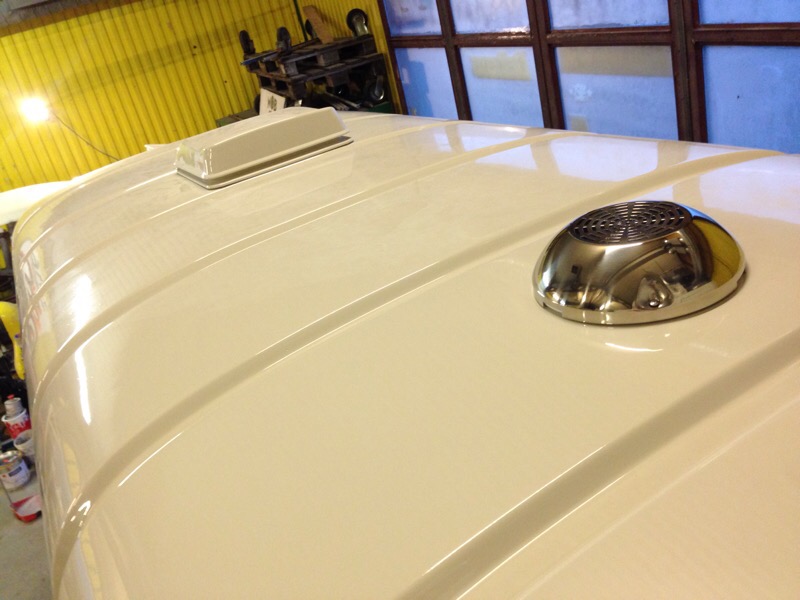
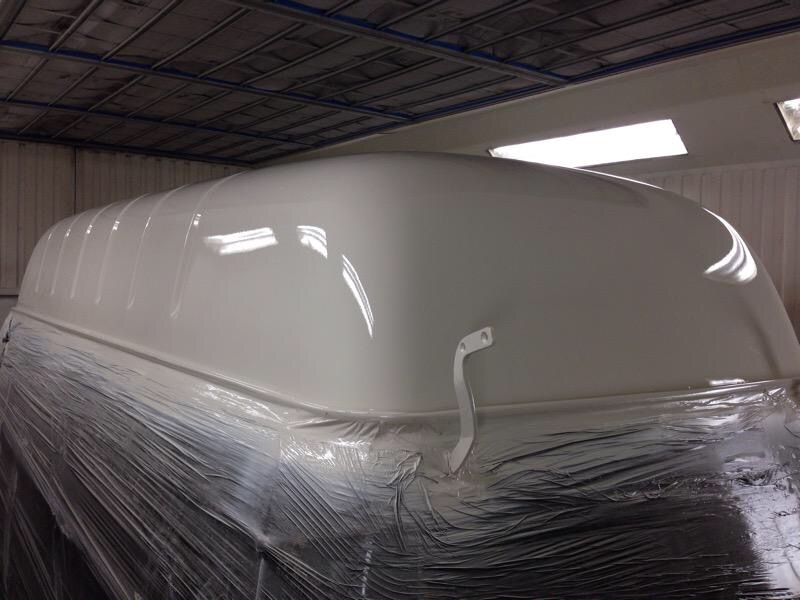
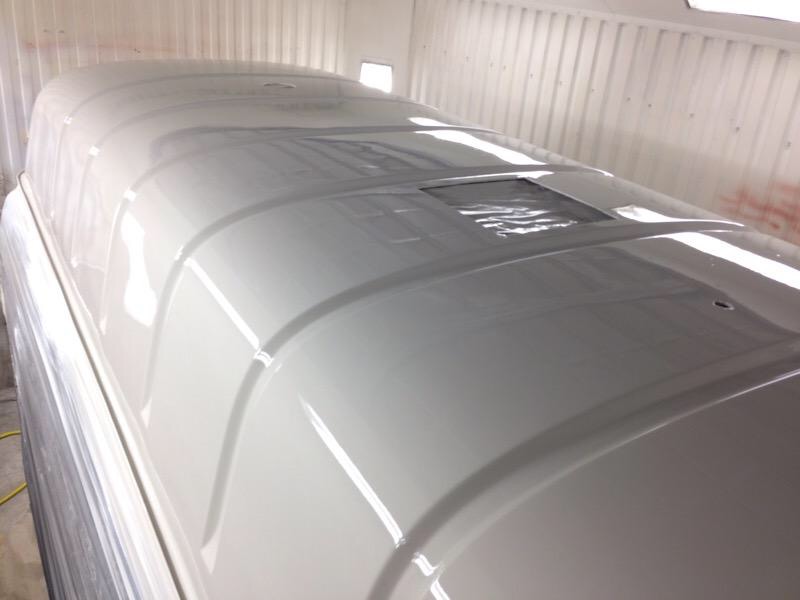
Lots of work have been done lately on the VW Baywindow Highroof! Whole roof have been finished in California White color. All doors and lids have been painted on the insides and then fitted back on the body. All panels are now sanded in 800grit and ready for toppaint in VW L20a Marino Yellow!
#highroofbayproject
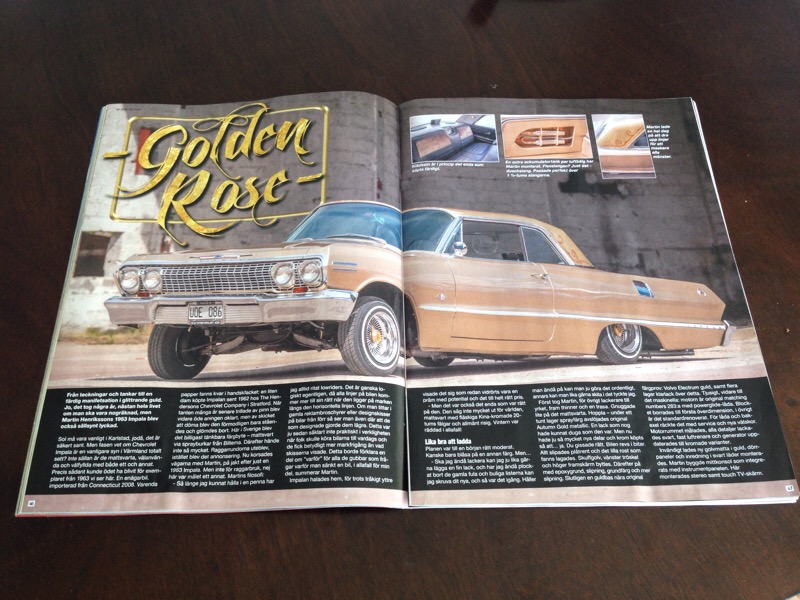
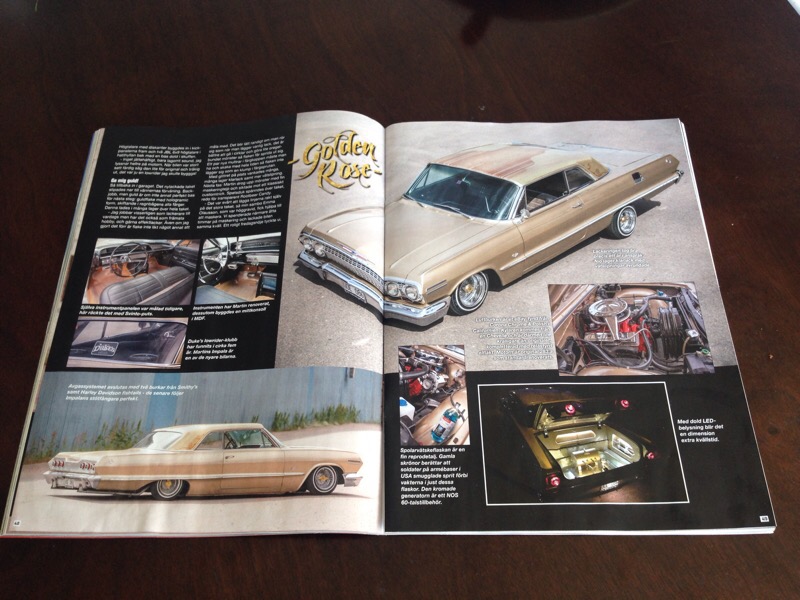
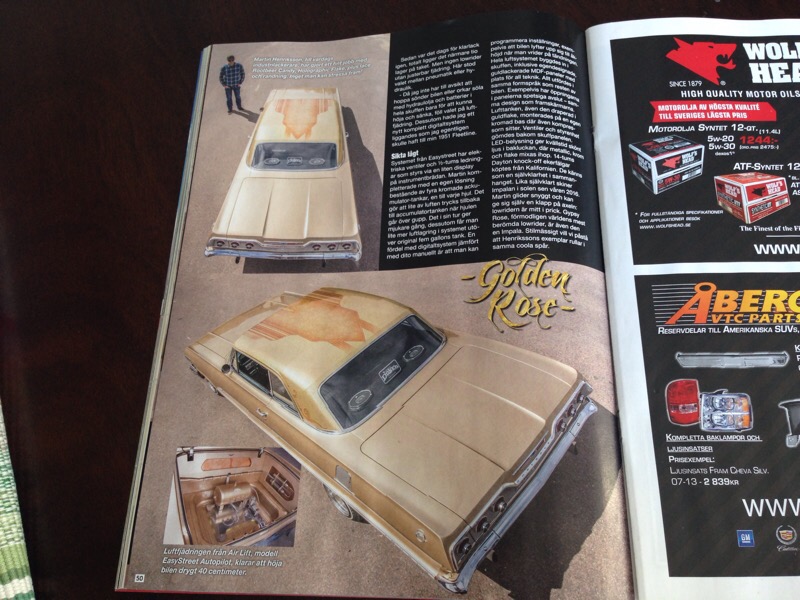
In the latest issue of Power Magazine you can read all about my 1963 Chevrolet Impala lowrider that I built finish recently. More build pics can be found here on the website under Rides & Projects in Menu.
www.powermagazine.se
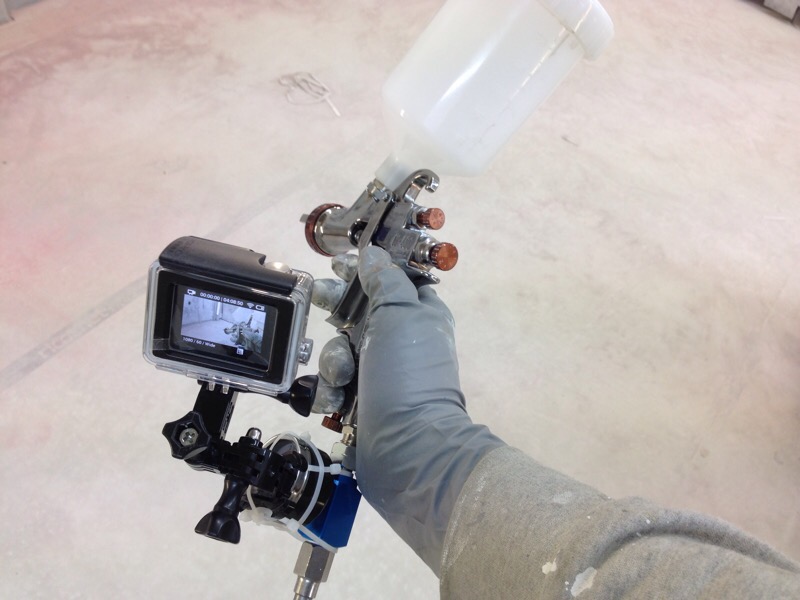
Short movieclip from when I painted the skate deck, check out all videos on the Maindrive Youtube channel and dont forget to subscribe: https://m.youtube.com/c/MainDrive
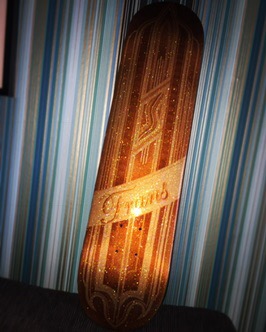
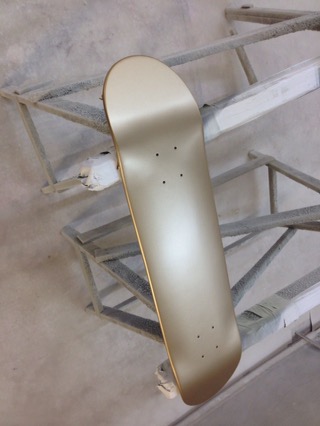
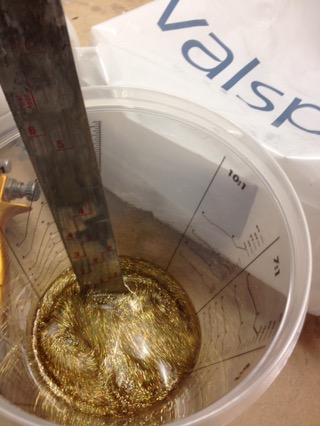
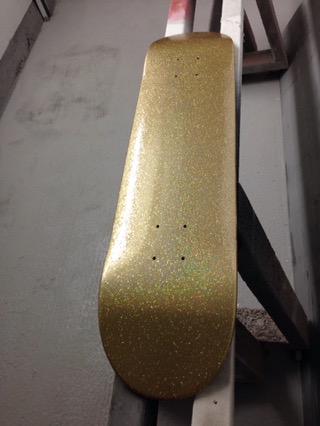
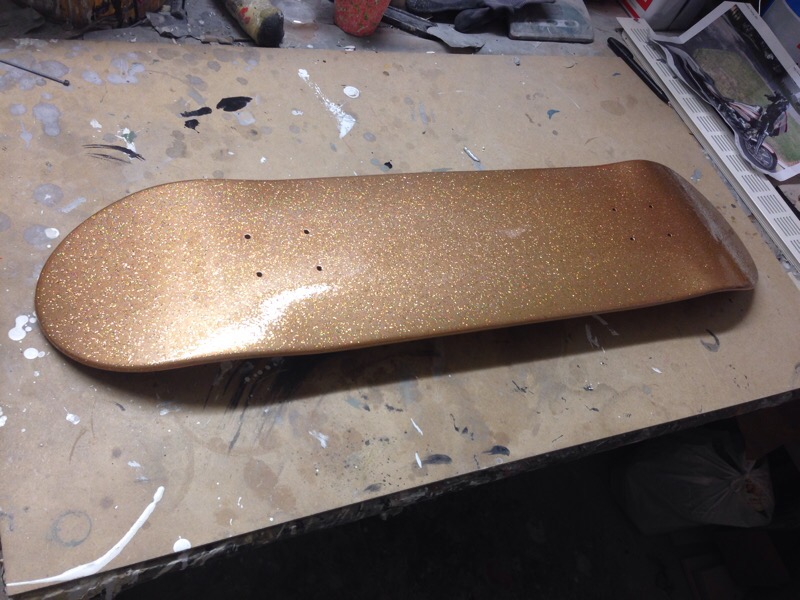
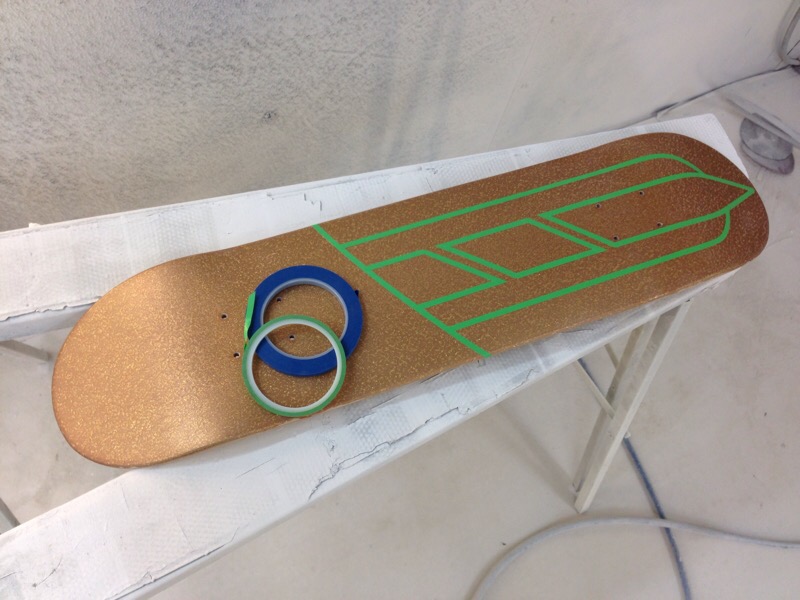
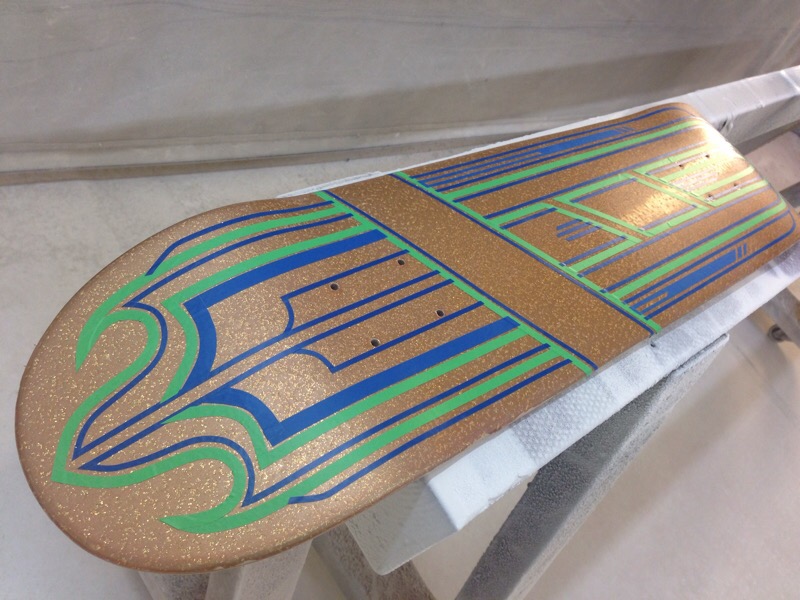
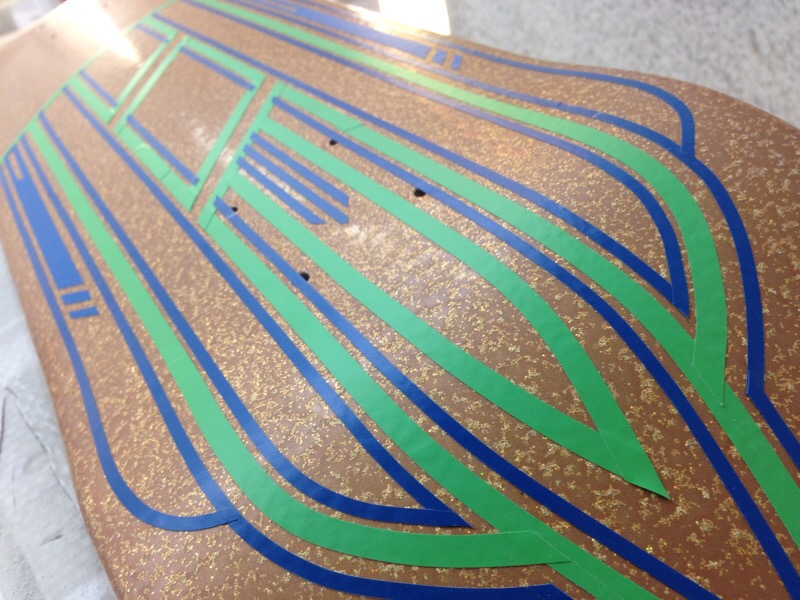
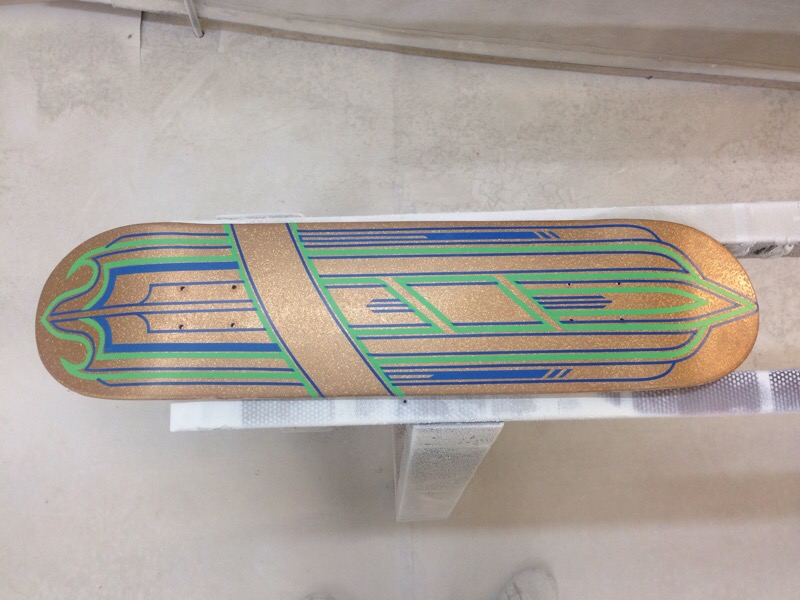
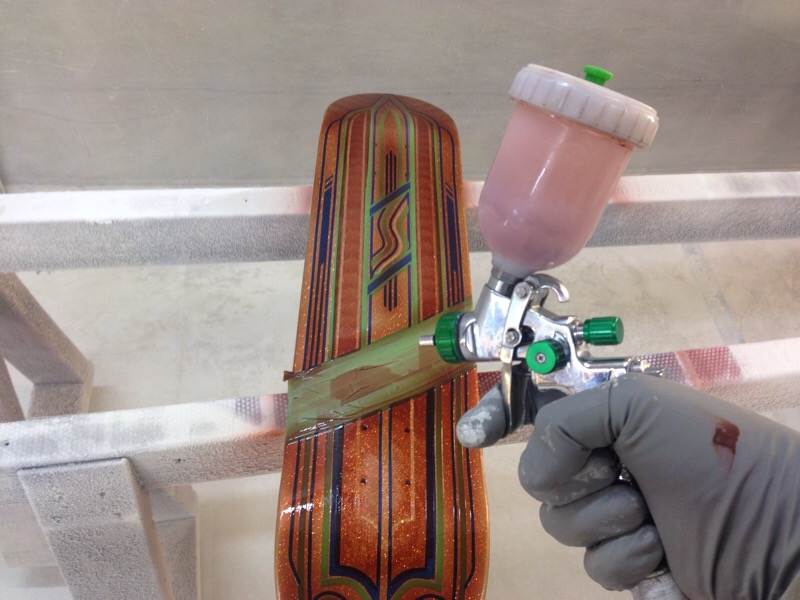
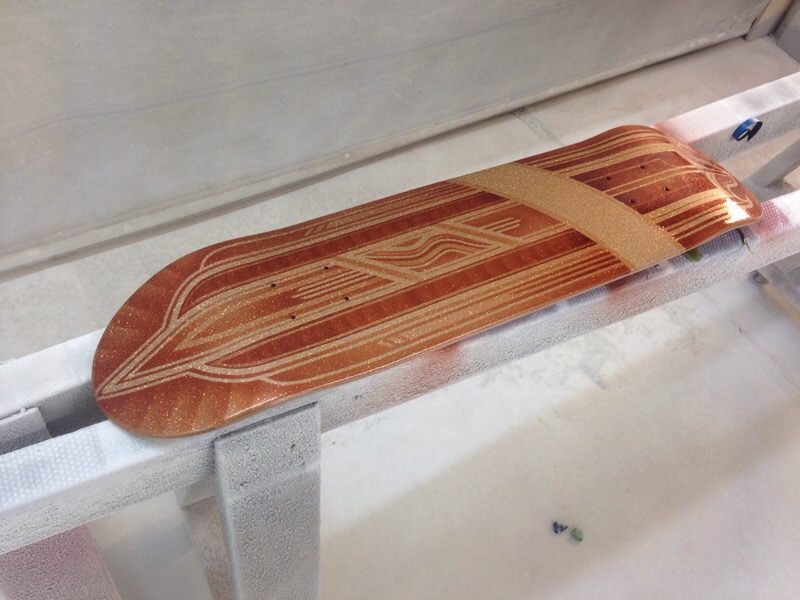
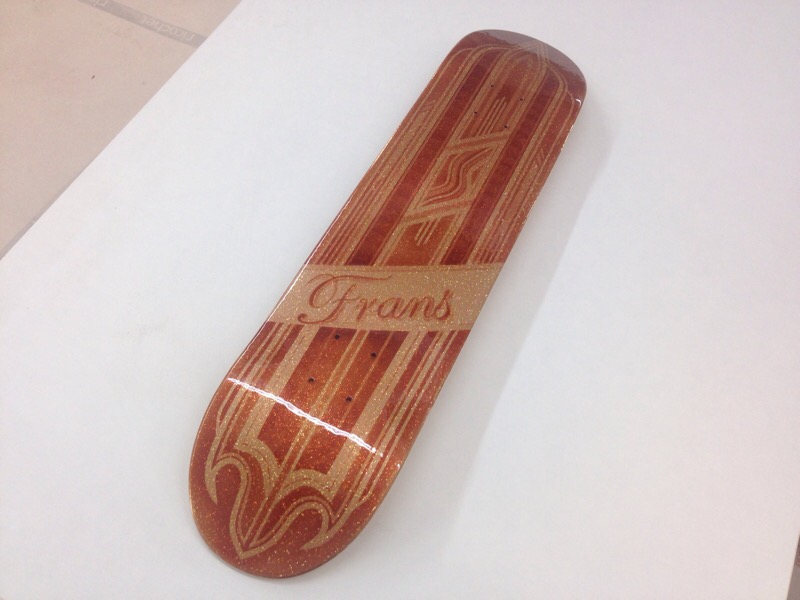
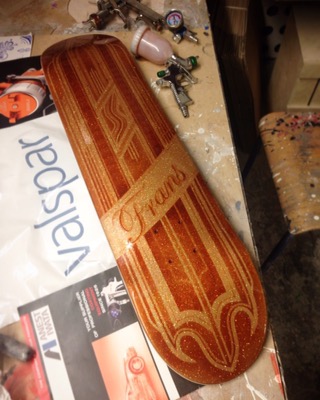
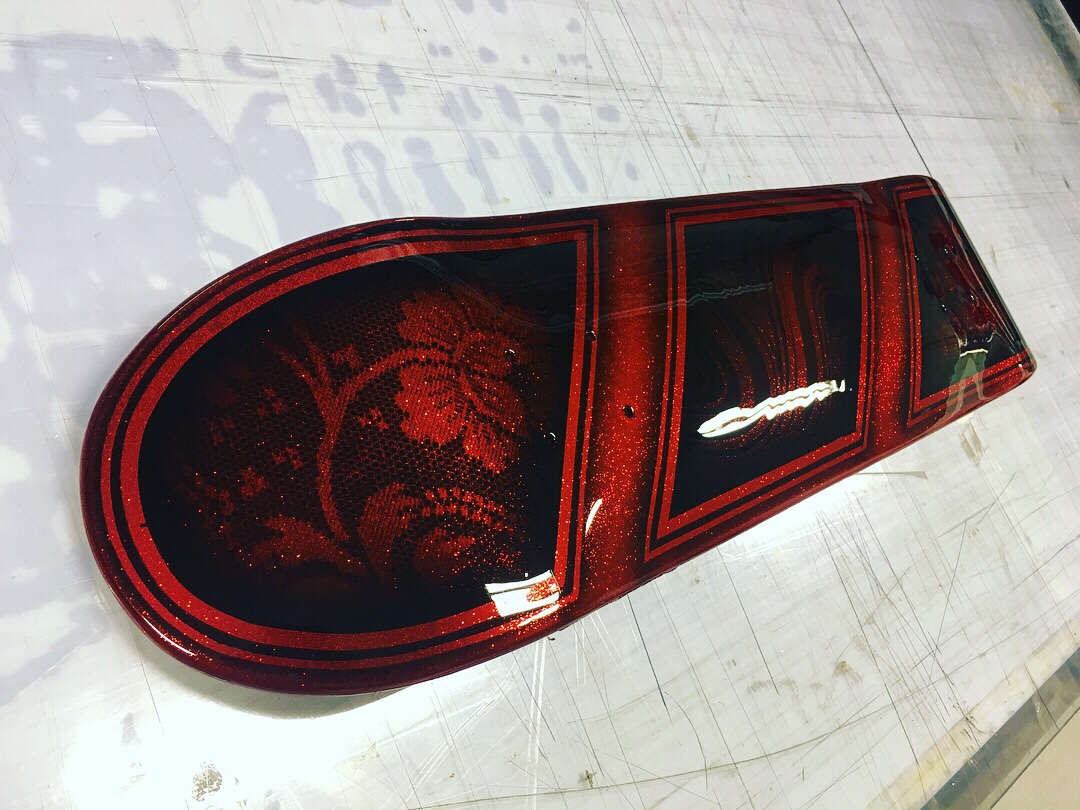
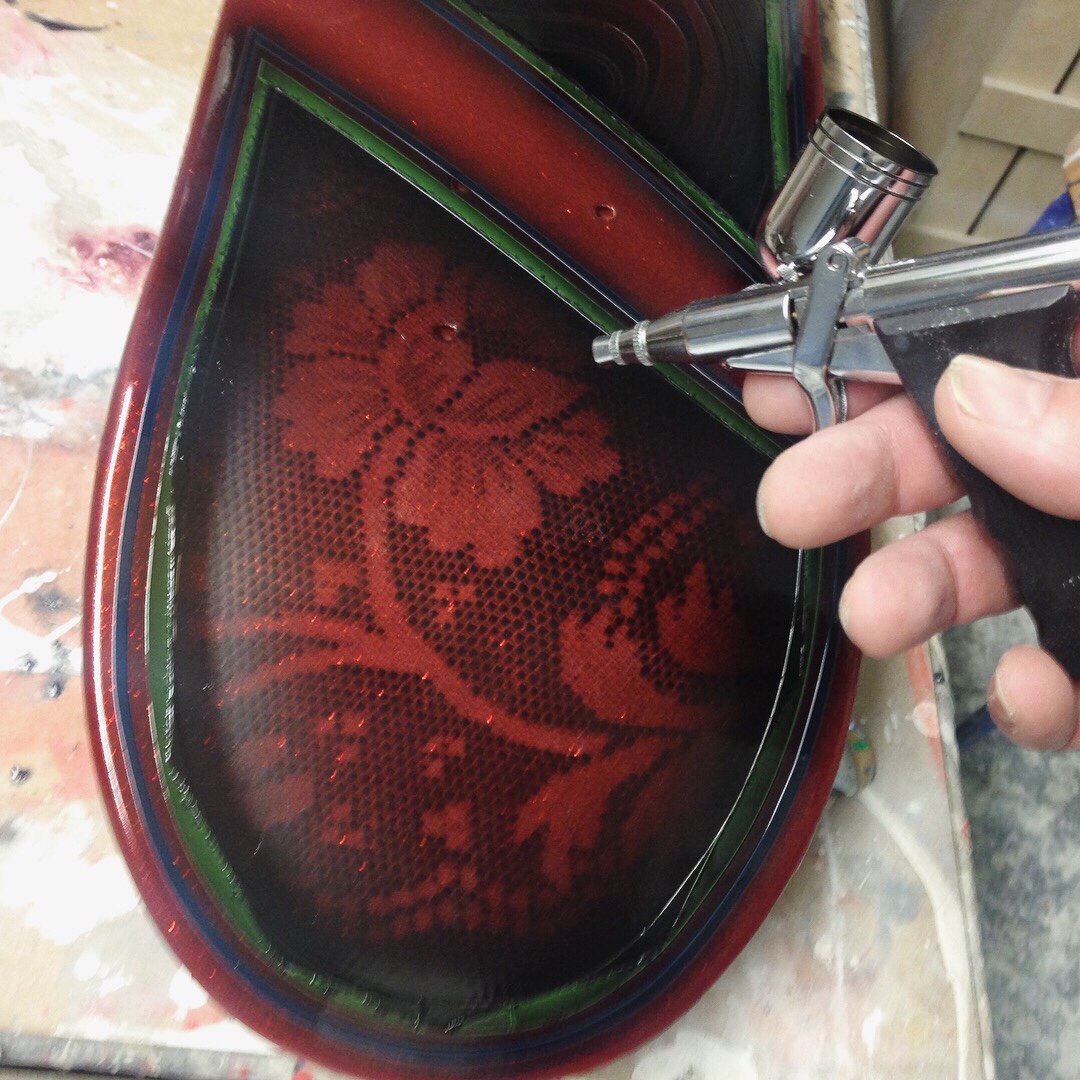
Painted a skateboard for my son Frans. Goldbase with hologramic metalflake in gold that shifts in all of the colorspectra and then I lined up a classic lowrider design that later was painted with candy paint in Root beer shade. Topping it all off with loads of clearcoat and sanding between each layer to get it super smoooth, like a mirror! Lots of hours in this board, I hope he dont make a boardslide with it 😉
Want something custom painted in flake? Just send me a message at: info@maindrive.org
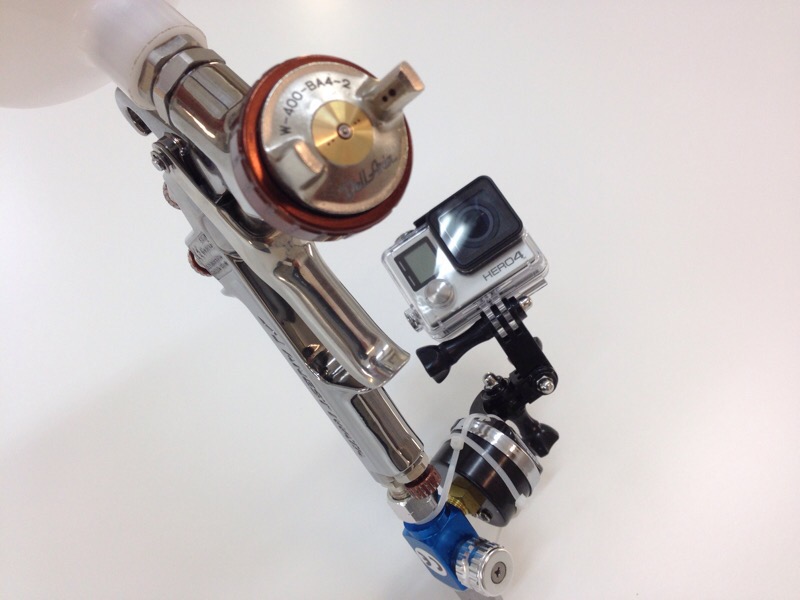
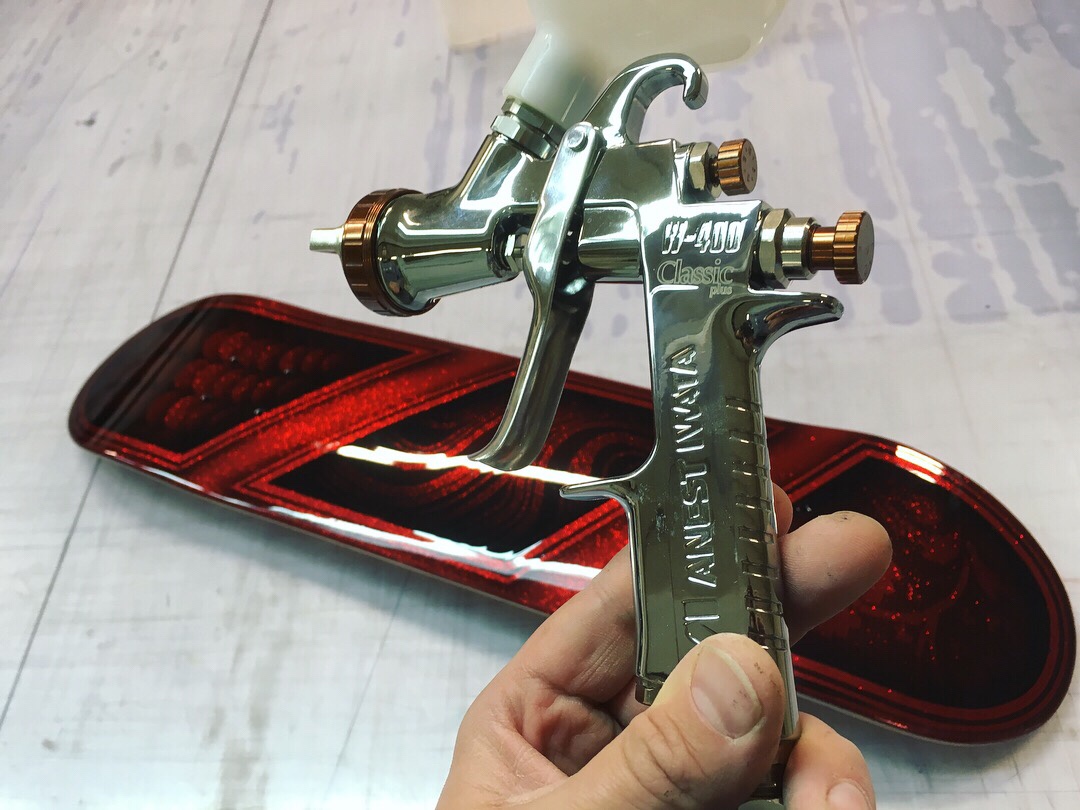
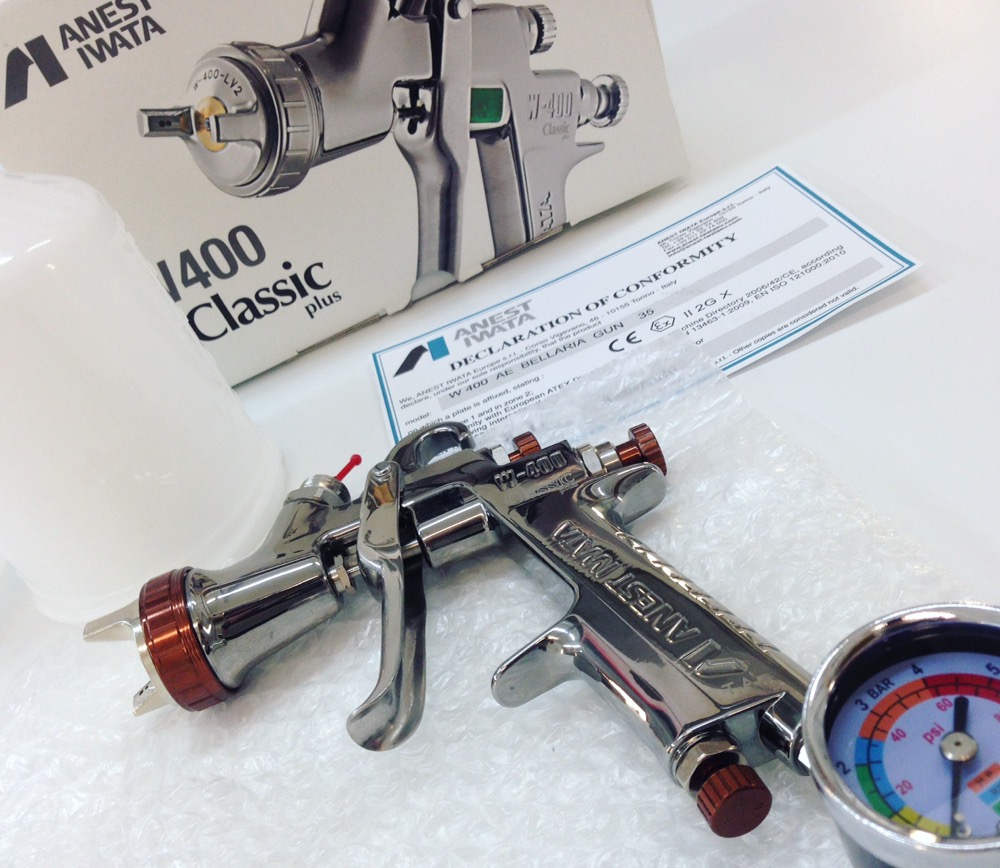
The new paintgun! Anest Iwata W400, Low Volume Low Pressure. Many professional carpainters favorite gun. Only the best, Iwata 4 ever!
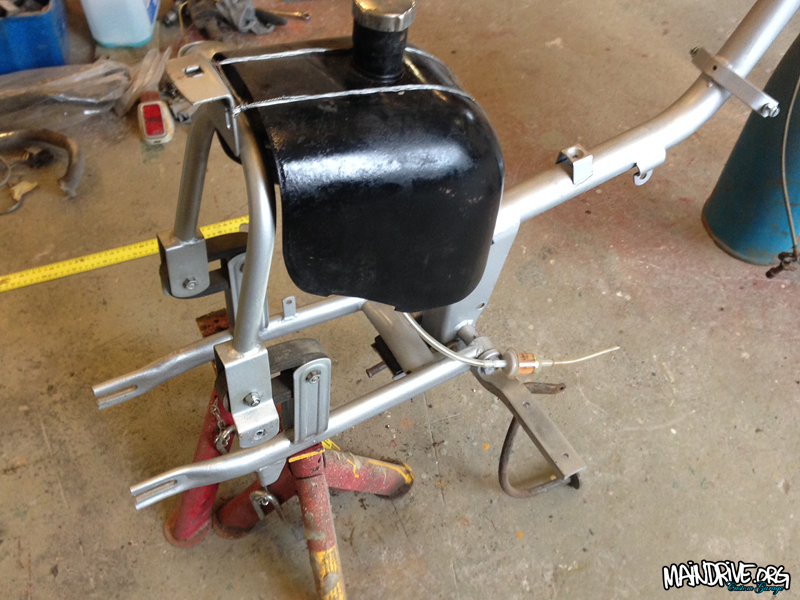
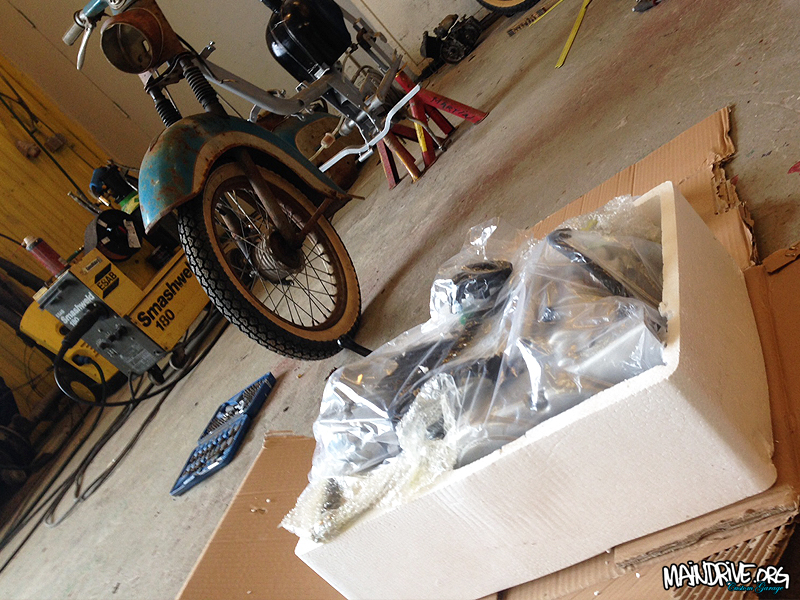
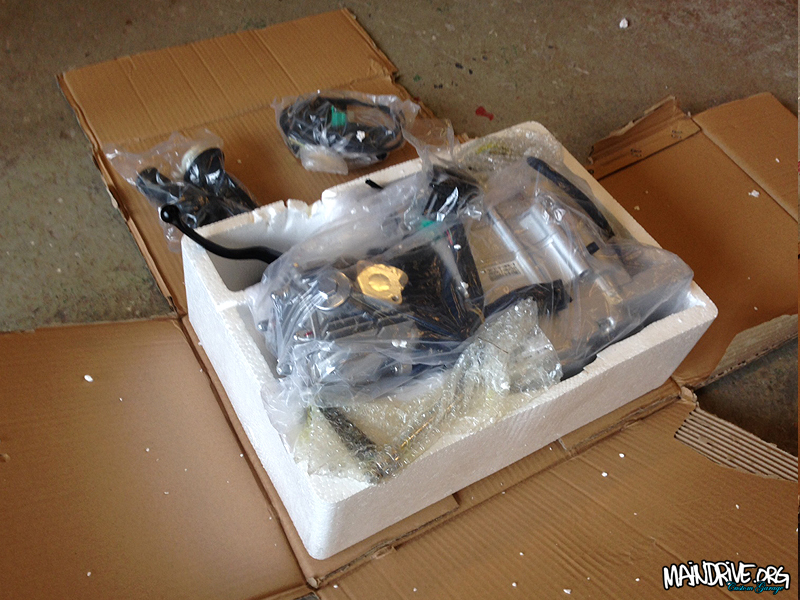
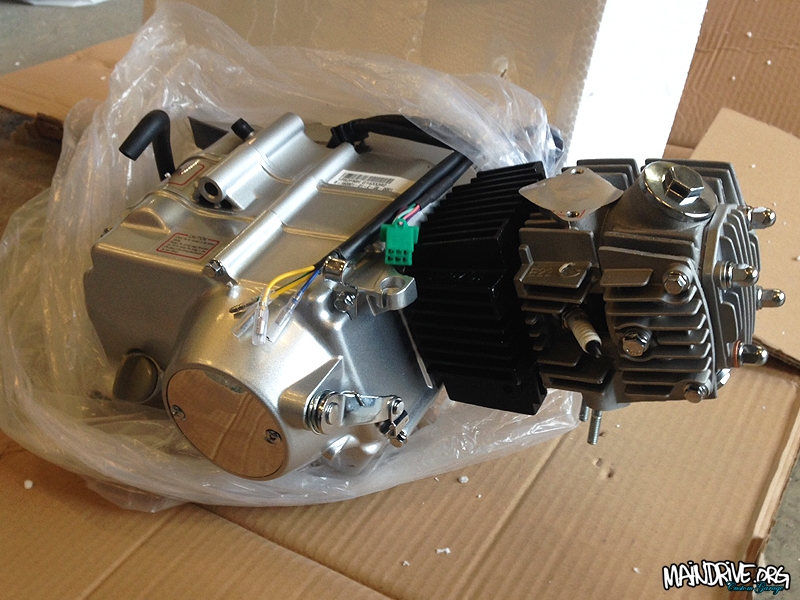
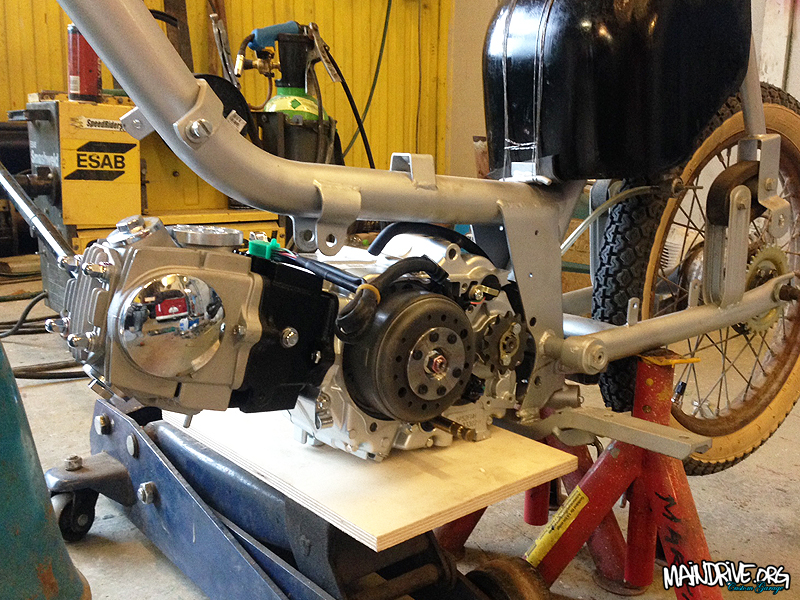
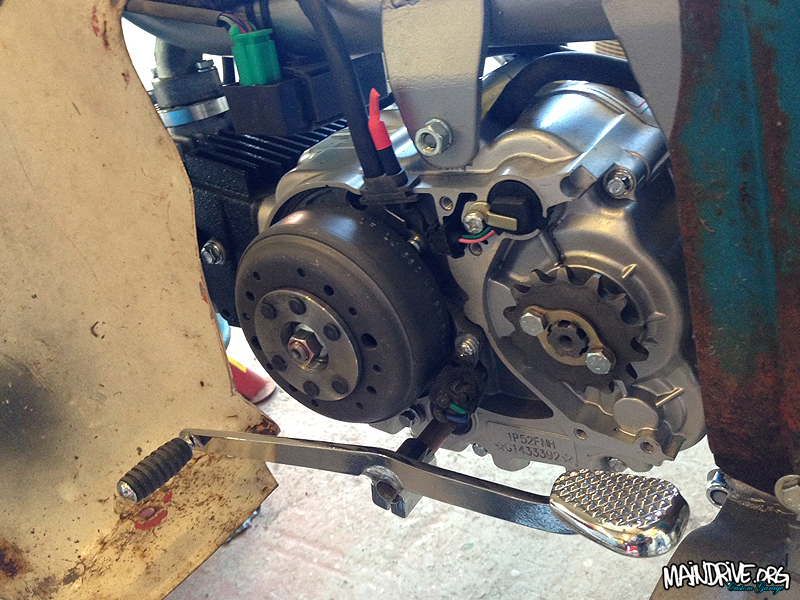
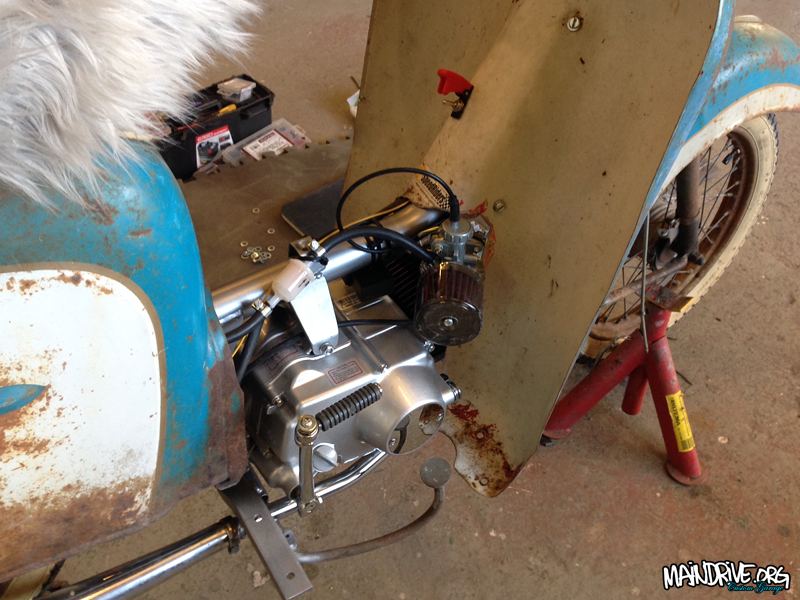
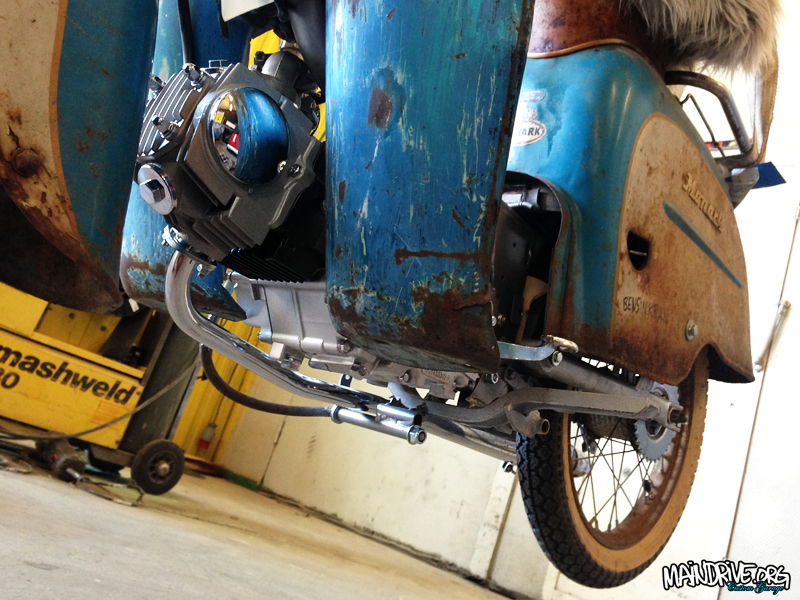
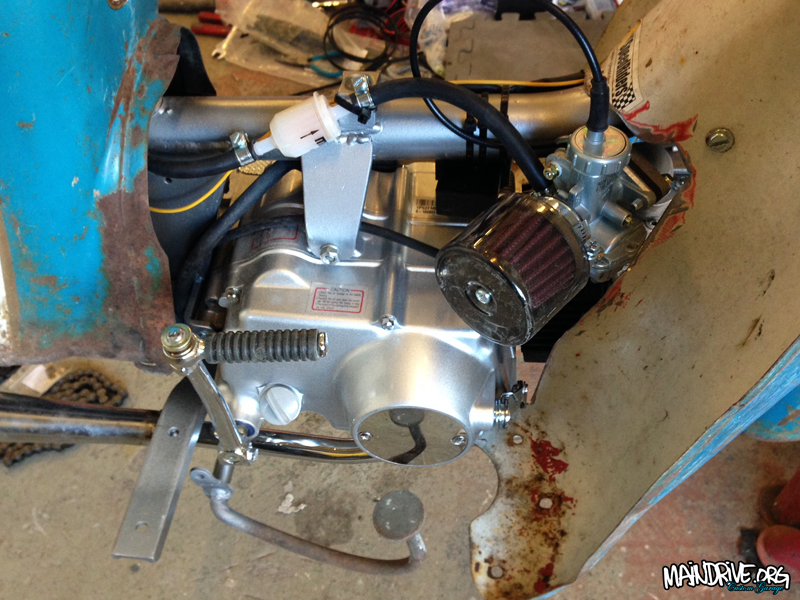
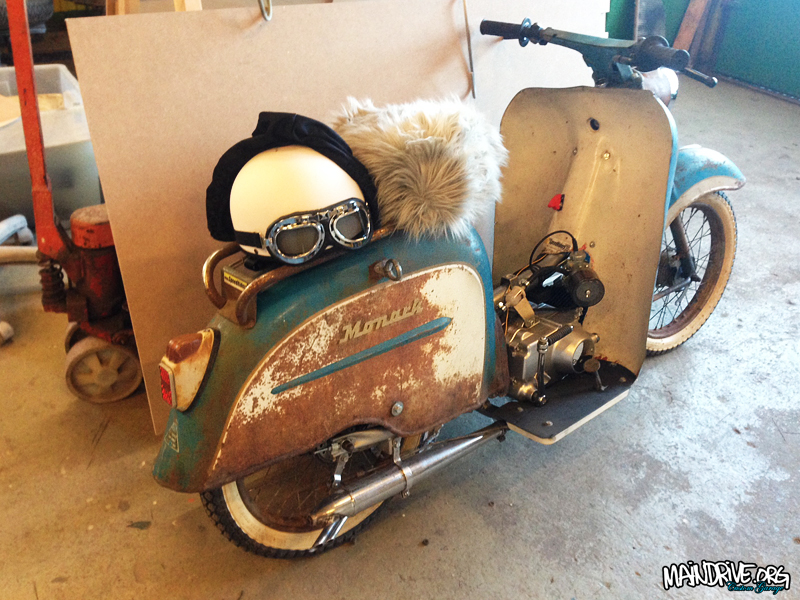
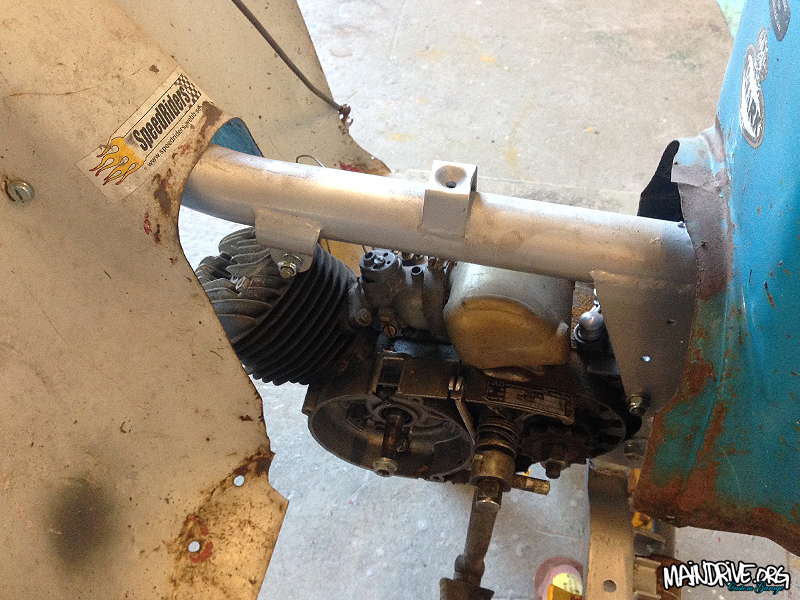
Sorry for late update! ALOT have been done to this project. Fueltank have been cleaned with citrusacid inside, looks like new now. Frame have been reinforced, all seams have been fully welded instead of factory spotwelds and rear swingarm have been boxed for the extra torque from the new engine. Rearend have been lowered in the suspension 40mm also for looks. Frame have got new engine mounts welded in place after alot of measurements and calculation, then frame was stripped and sandblasted then painted in 2k silver. A brand new engine have been installed, a manual 4 speed trans, 4-stroke 110cc Lifan (Honda copy). Carburetor have fullflow airfilter. Footplates and sheetmetal around the engine had to be trimmed to make it fit. Will be a fast rustbucket! To get the same power as the new engine have I would need 8 Ilo Piano engines. 🙂
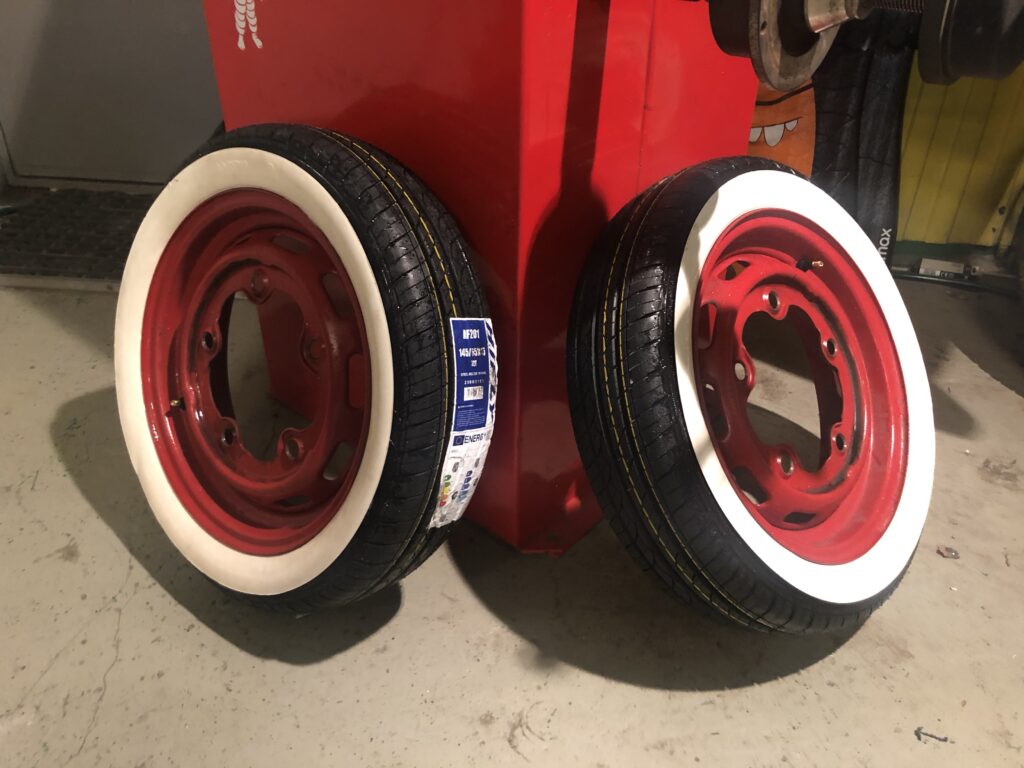
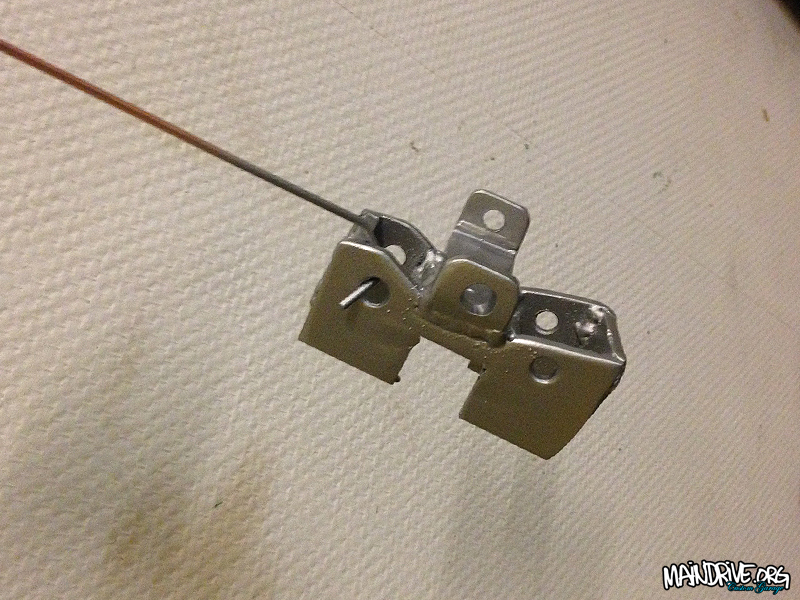
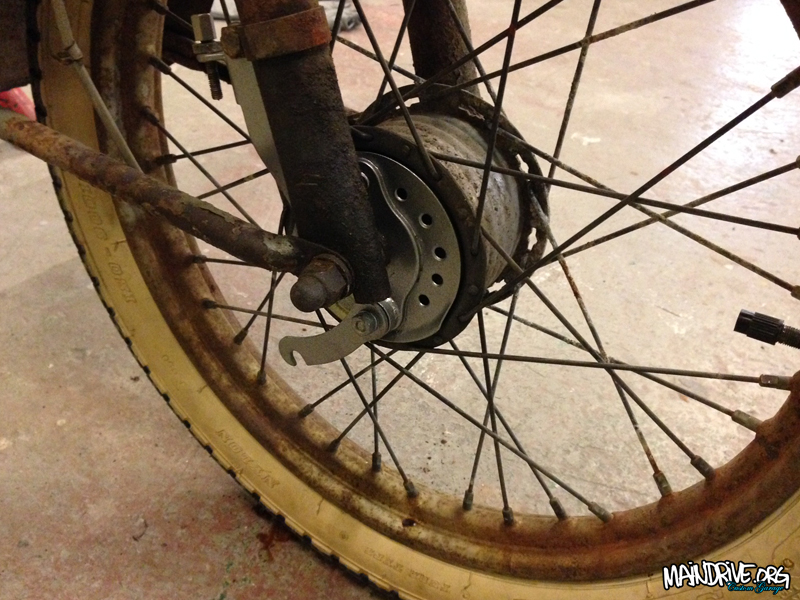
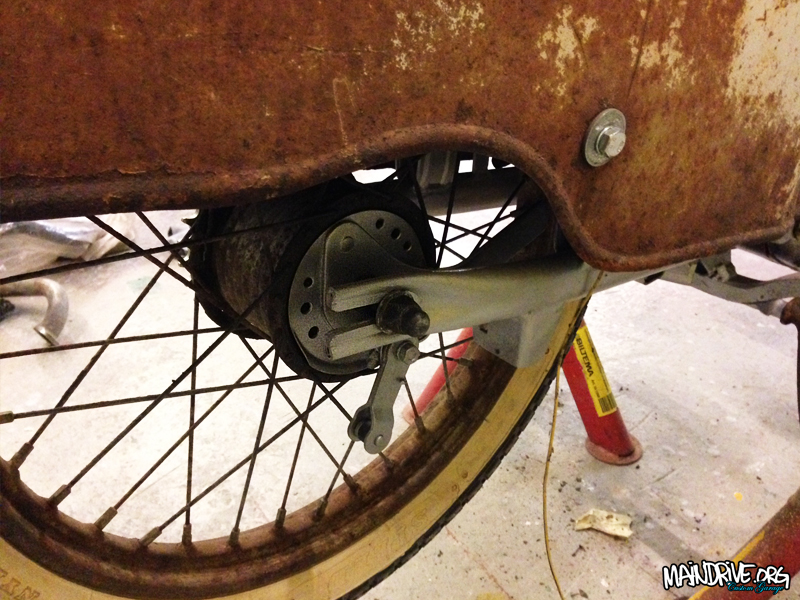
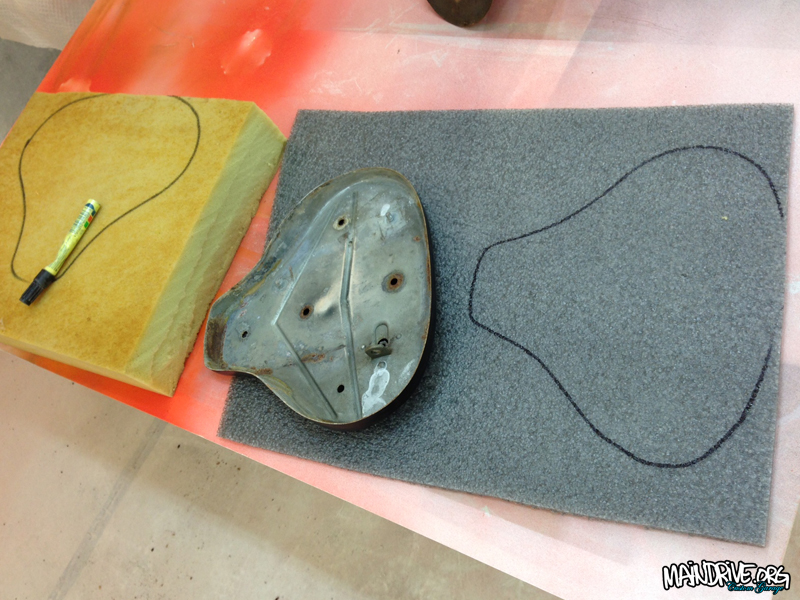
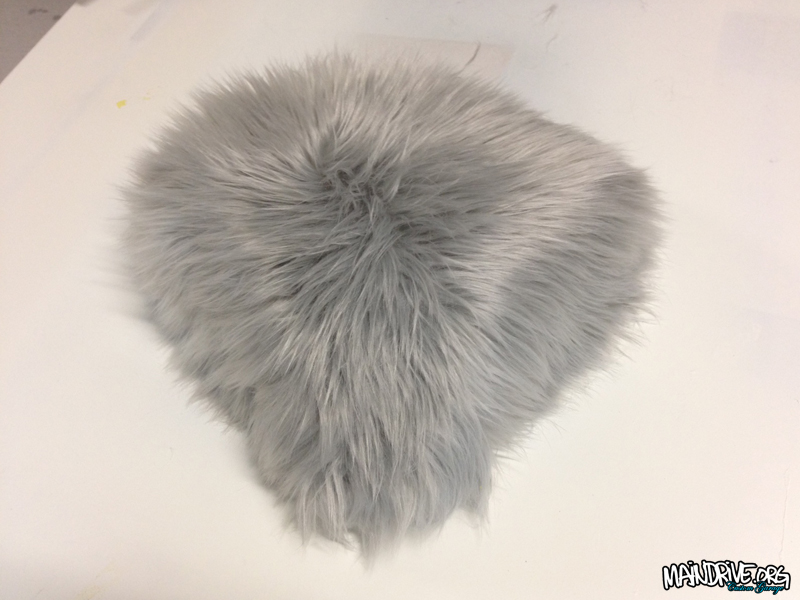
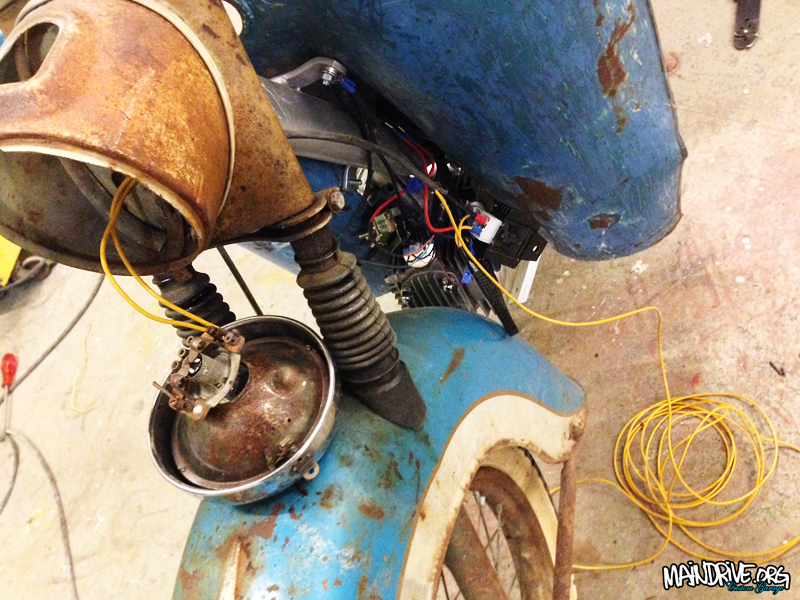
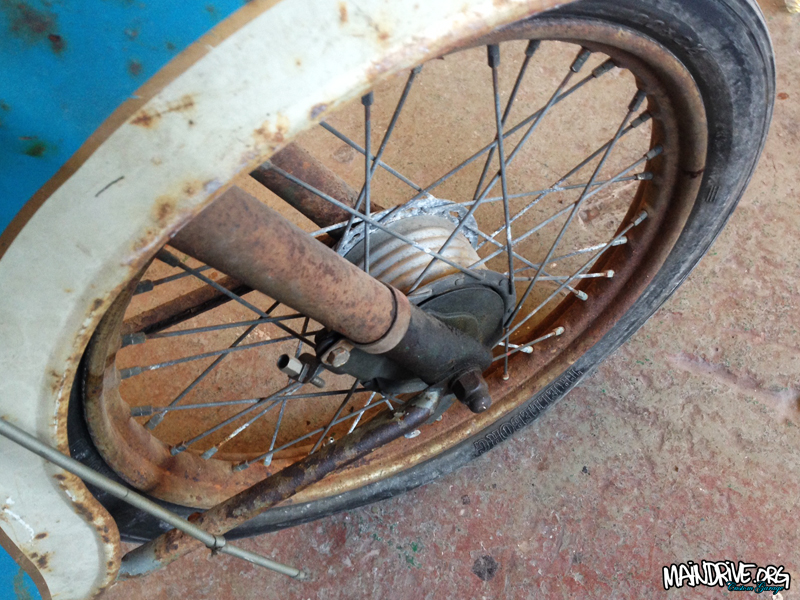
Seat got new foam and a hairy touch. 🙂 Brakes is new, front and back, new bearings and grease. Also made some holes in the brakehubs/covers for better cooling the brakes at high speeds. New tires with whitewalls in place too. New chain and rear sprocket is 36 cog and front (engine) 14 cog (maybe change to 16 cog later on). Had to fabricate a own chain tensioner, plastic wheel with bearing, to get the right slack and to clear swingarm mount, similar like on a motocross dirtbike. Rear brake mechanism have been shorted and moved and welded 15mm lower than stock location, to clear the exhaustpipe. The old rear stock muffler is used again, but modified inside for better flow of course and extra outlet pipes. New wireharness is in for CDI box, coil, ignition, voltregulator, switch and front and rear lights etc. Managed to hide the most of the electrics on the inside of the front breastplate on the legcovers. Now also 12v instead of 6volts and electric ignition, no more adjusting points! Airplane safetyswitch to turn ON or OFF the engine. All new fueltap, fuellines and filters.
Handlebar now sports new handles and wires also a bicycle computer with speedometer. After 20km the engine oil should be changed and first after 1000km the engine will be fully “seated and runned in” since its brand new with 0 miles on it. So need to drive it nice and easy in the begining. Its now ready for start and test run. A new update will come soon!
#sleepermonarscoot
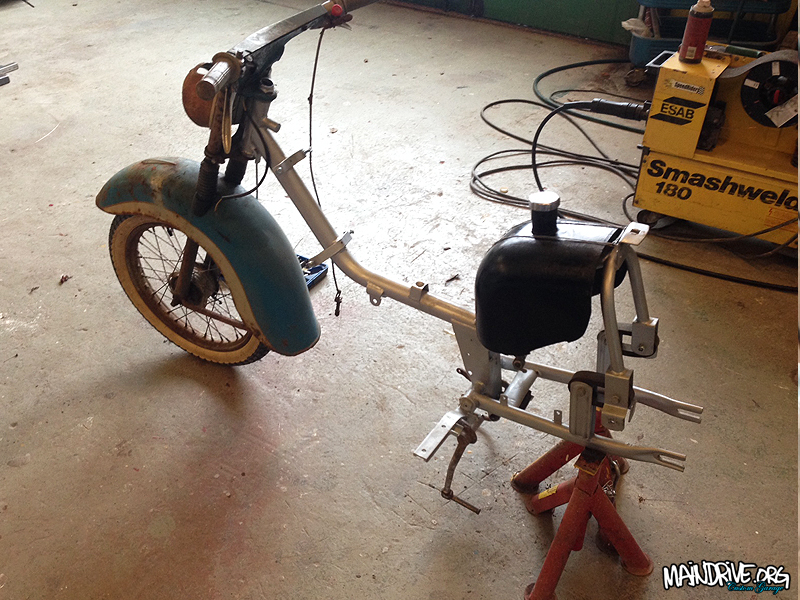


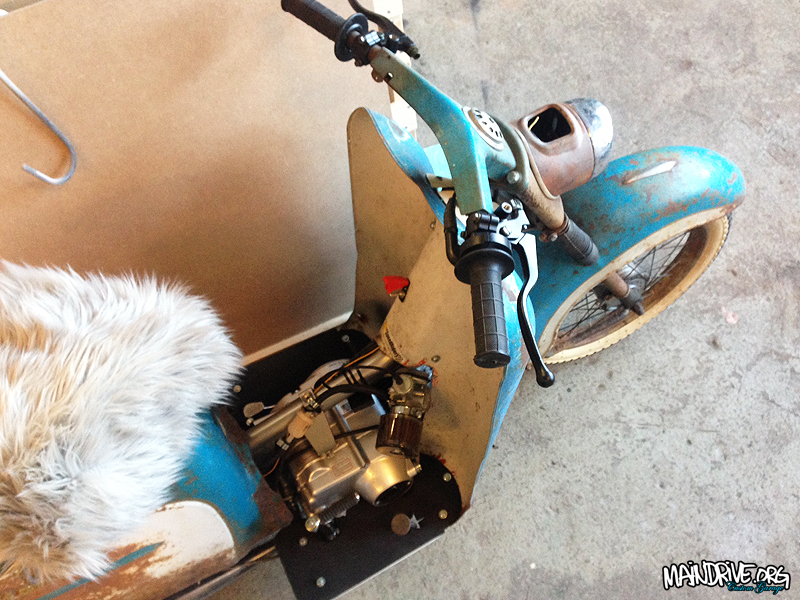
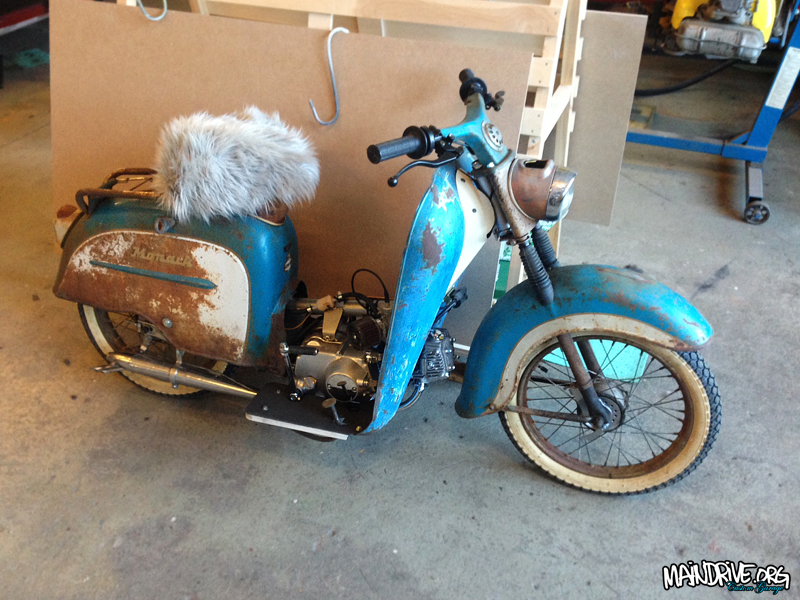
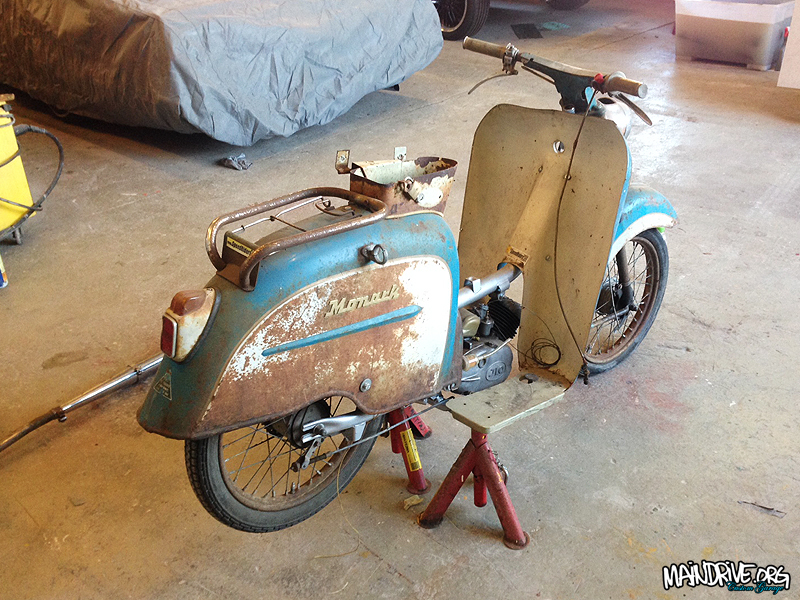
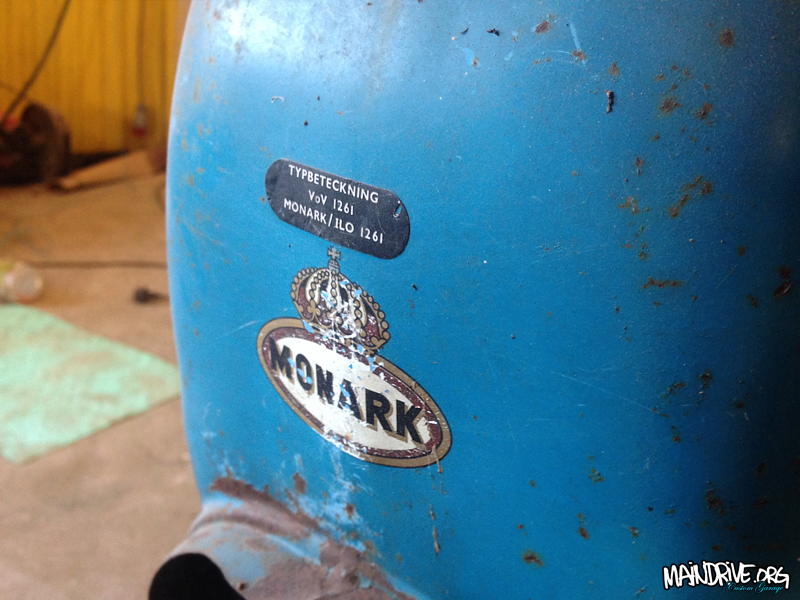
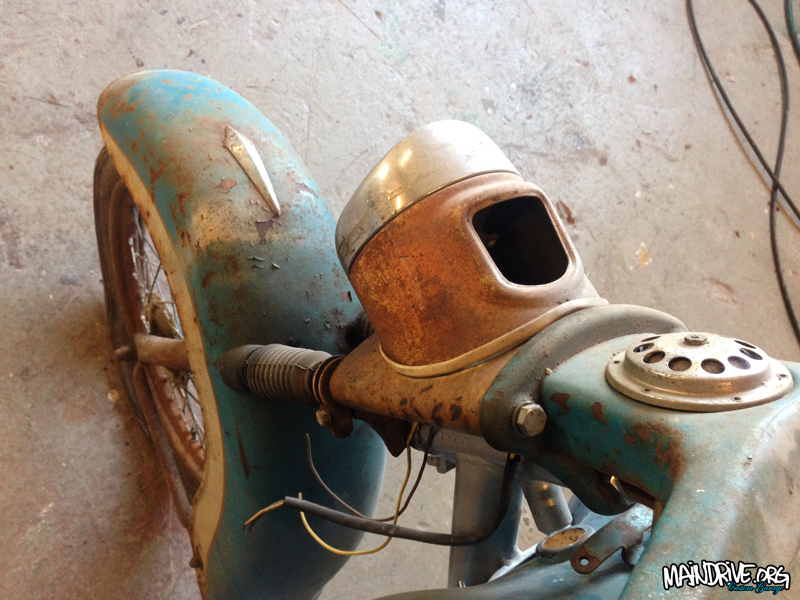
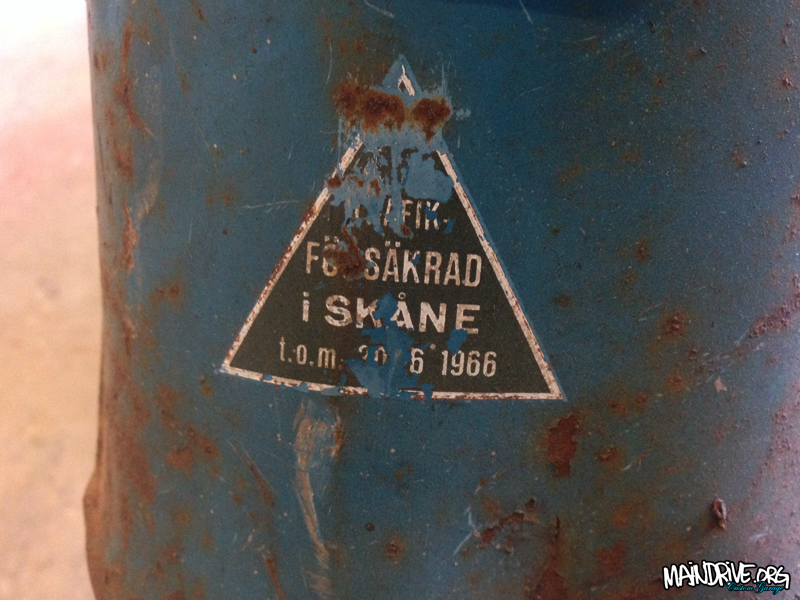
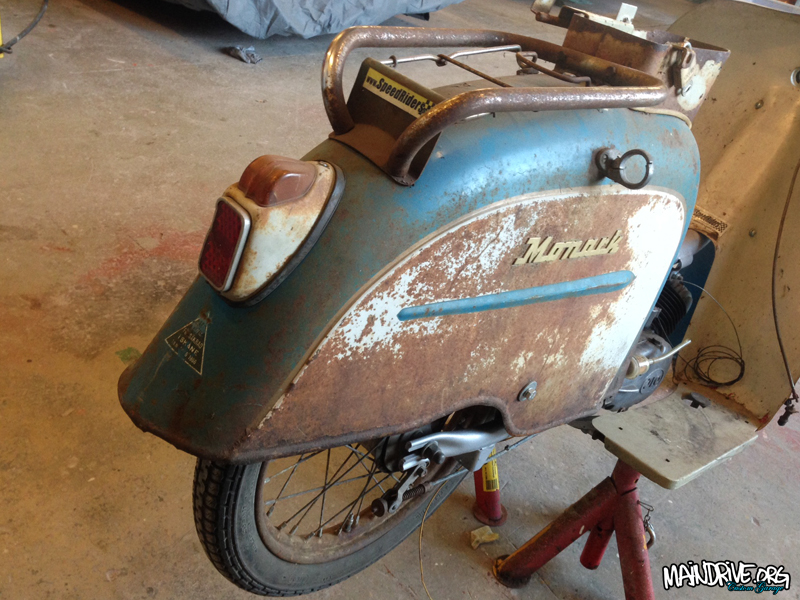
It is time to get this beast out on the road again! A 1961 Monark Monarscoot with a 2 speed Ilo Piano engine. It was found and digged up in the forest/woods 15 years ago and have since then been resting in my garage. Still sporting cool old SpeedRiders stickers from back in the day (1998-ish). Needs lots of love, as picture shows, basicly everything is shot and need to be replaced with new parts.
Plan is to make it a ratlooker with a updated drivetrain with more performance. 🙂 Stay tuned for more updates, this is going to be a quick build, needs to be done before the spring, so its ready for all the mopedrallys this summer. Will be a fun ride!

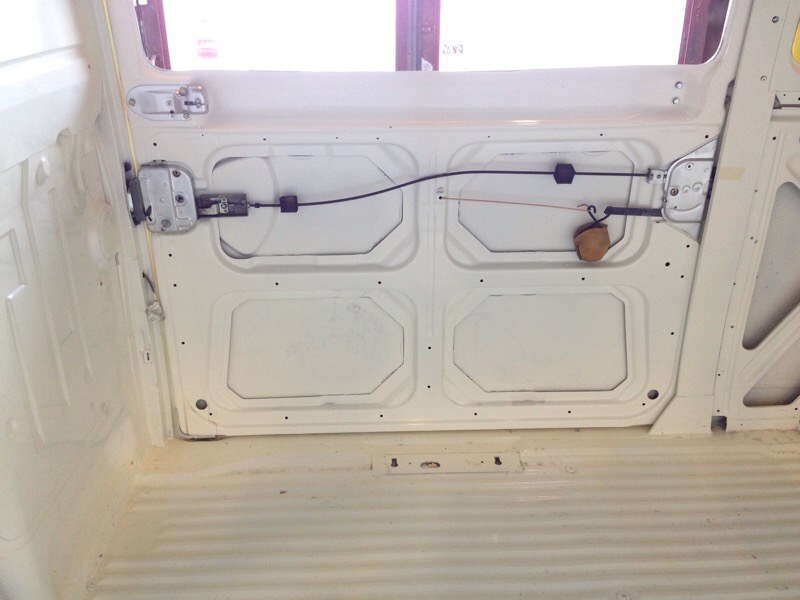
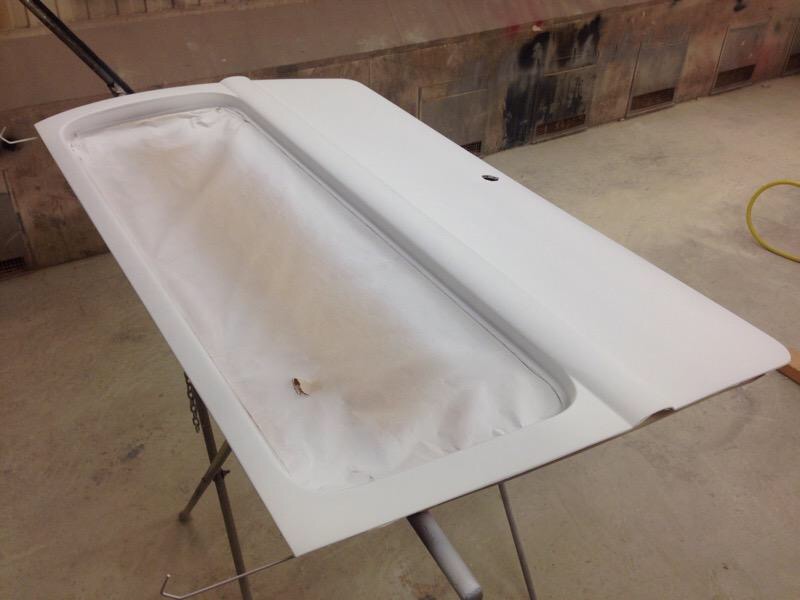
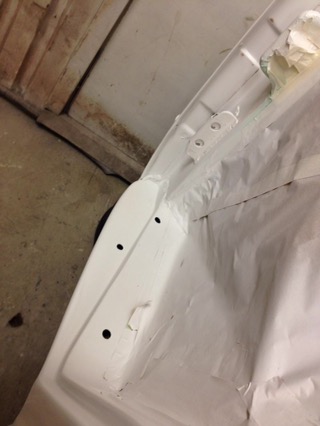
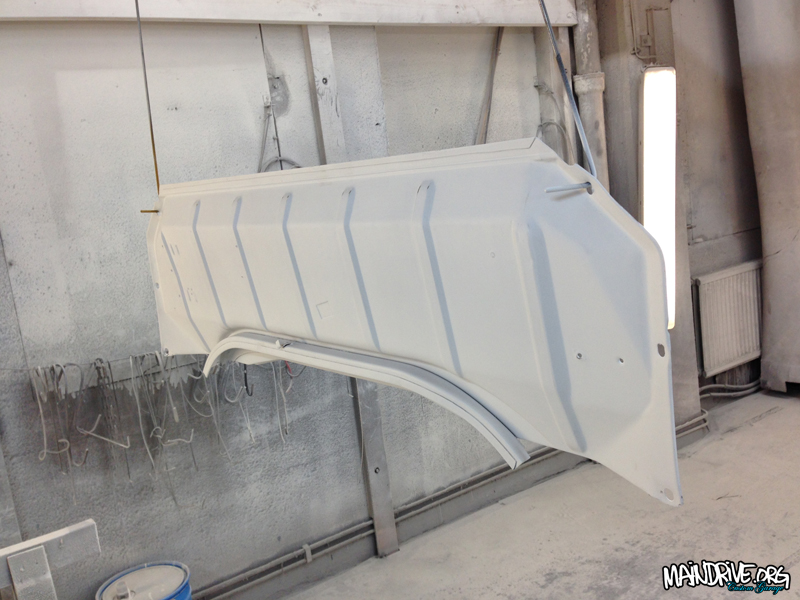
Front doors are ready for paint. Inside is already finished painted. Engine case have been cleaned up also!
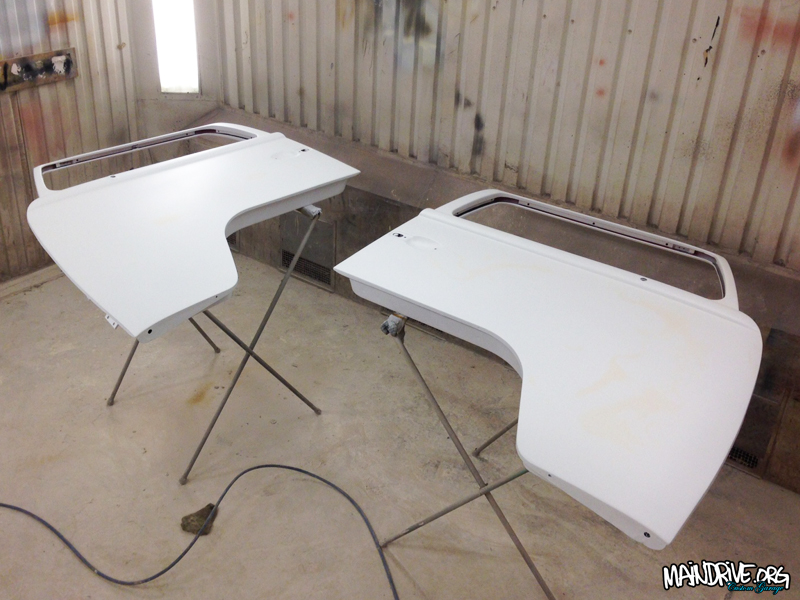
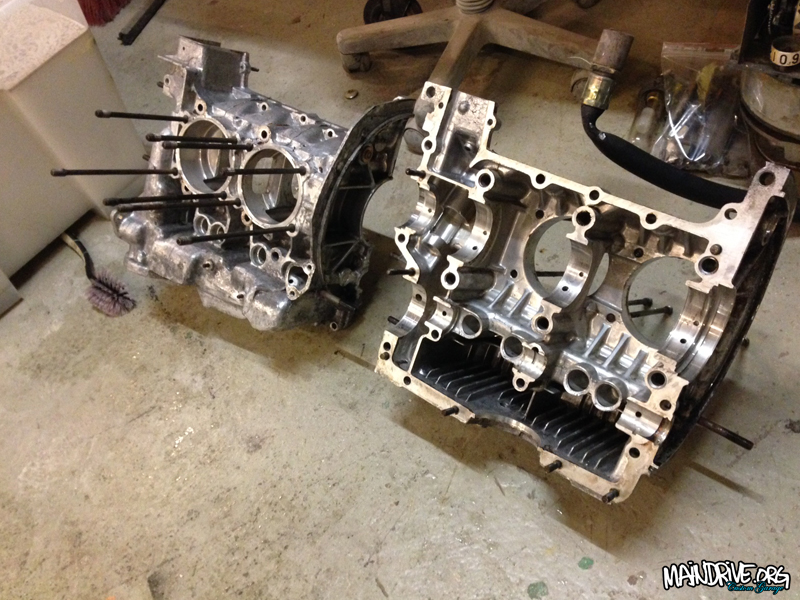
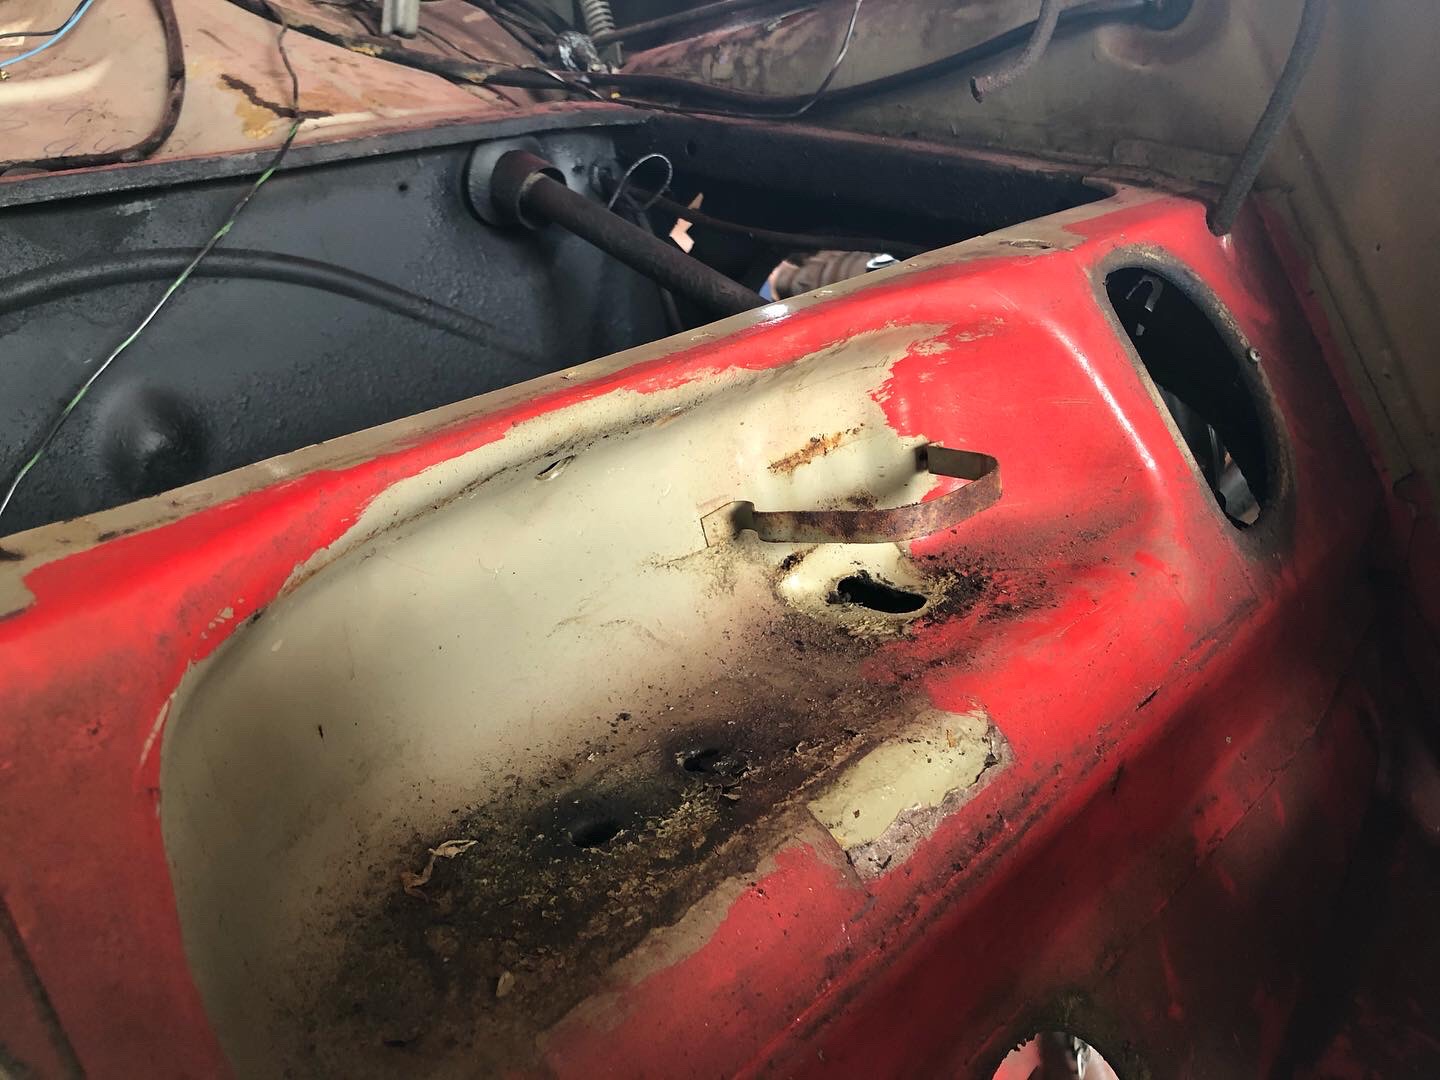
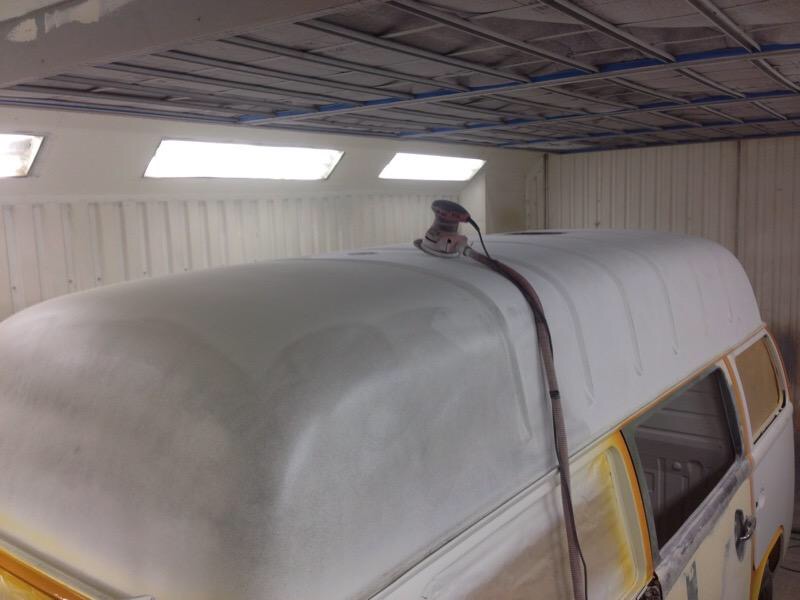
Have not got very much done lately. As my first son (1 year old) takes most of the time now. So that more important at the moment. But Im trying to push forward on the bus too, couple of hours after work and on weekends etc. Soon have all doors and lids in primer and then it all just needs a easy sanding and then its time for a paintjob! Have also sandblasted the fueltank cover and bellypan and got them painted and ready too. Hope to start rebuild of the 1800cc Type 4 engine in begining of February also!
More to come, but thats it for now, here is some pics…
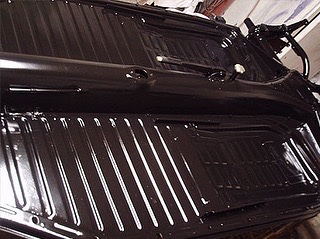
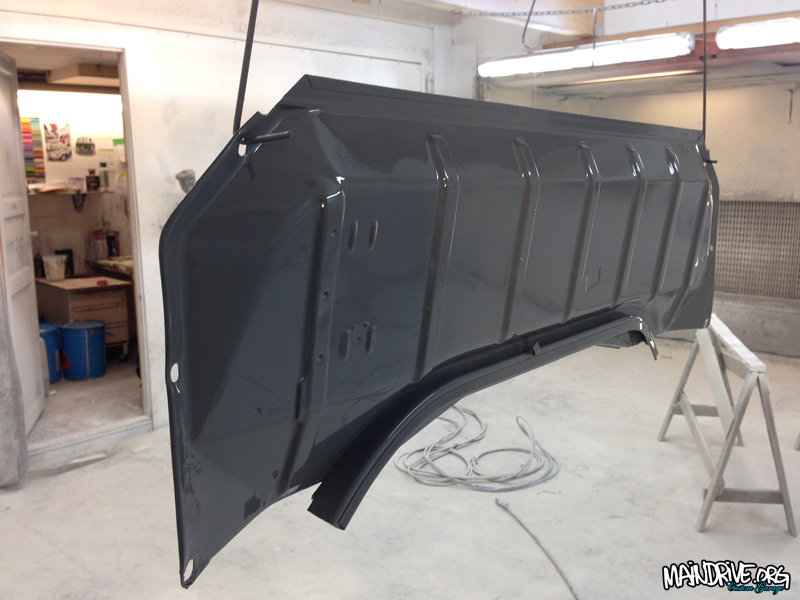
Blasted and epoxyprimer, ready for topcoat in VW factory greyish
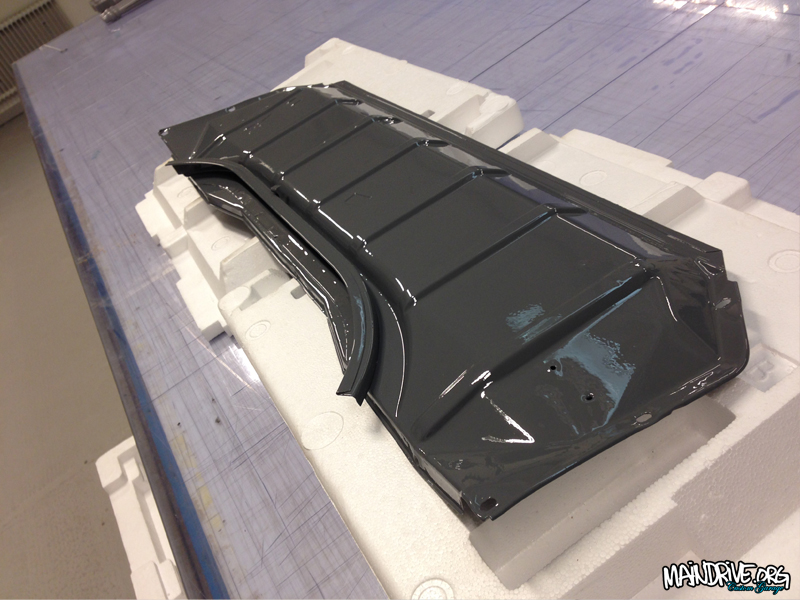
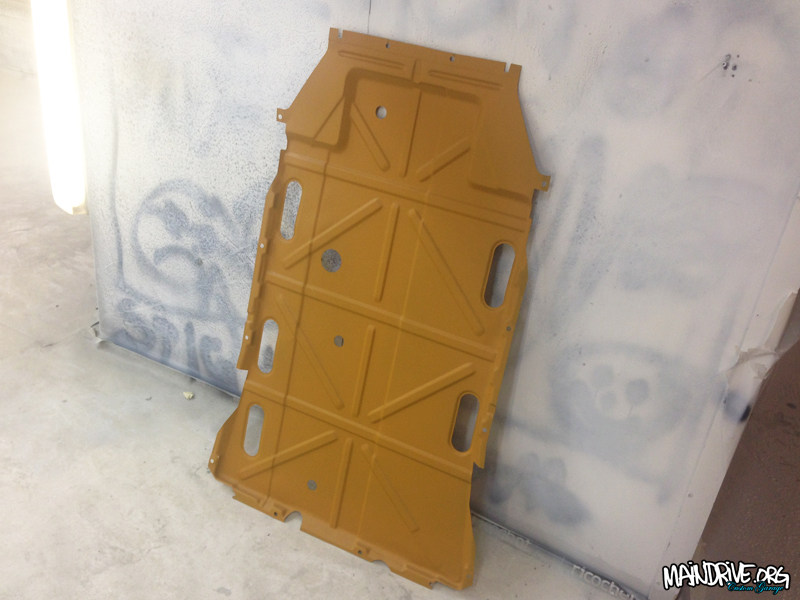
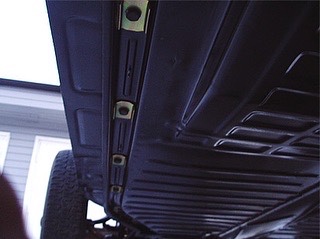
Baremetal then yellow epoxy/zinc primer
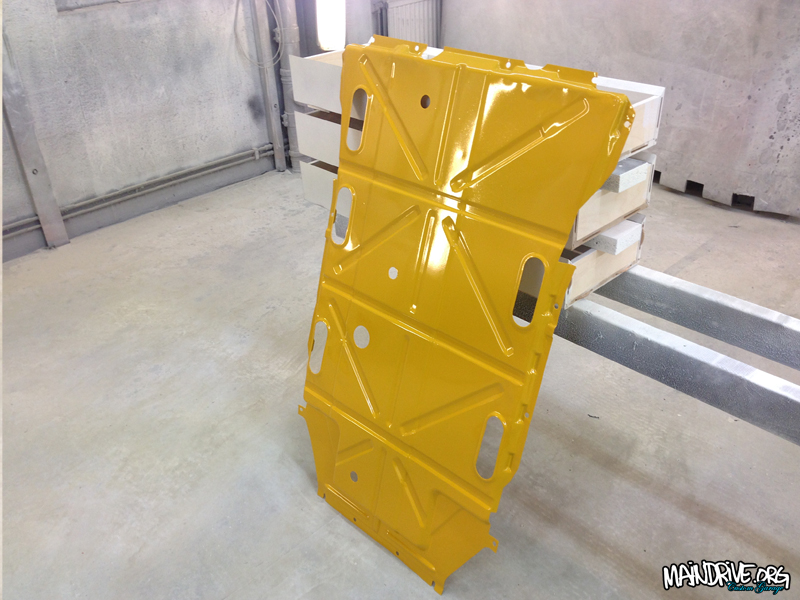
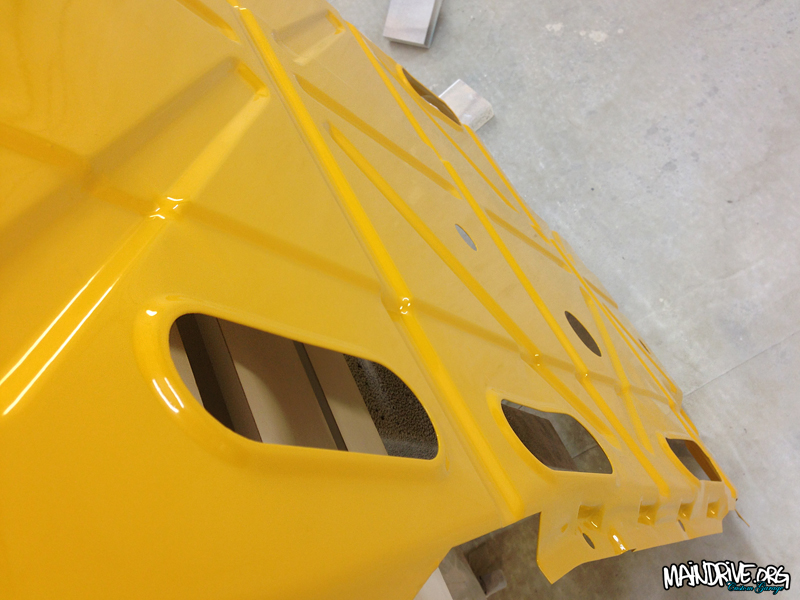
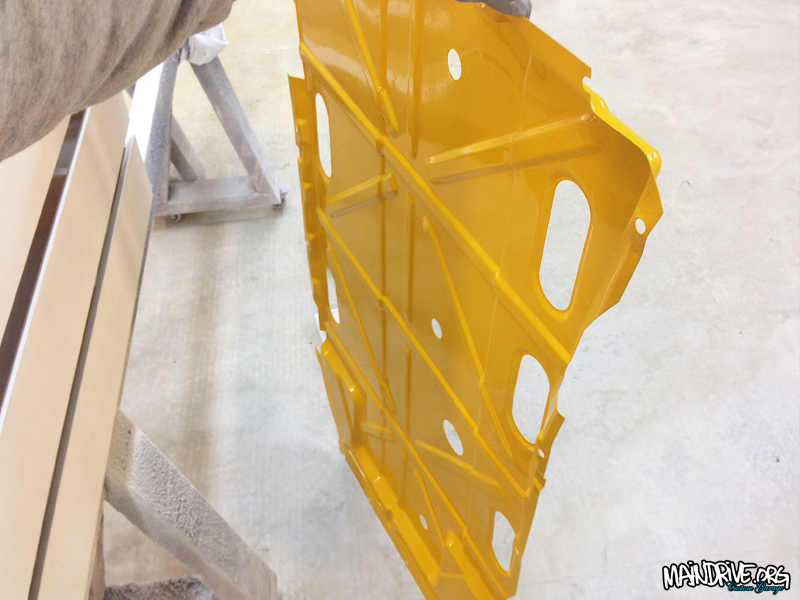
Topcoat in VW L20a Marino Yellow with 2K polypaint with elastic characteristics. So the stones wont chip the paint. The gloss on the elastic is a little less, but this panel is under the car and you normaly never see it anyway.
Panhead painting I did on canvas years ago. 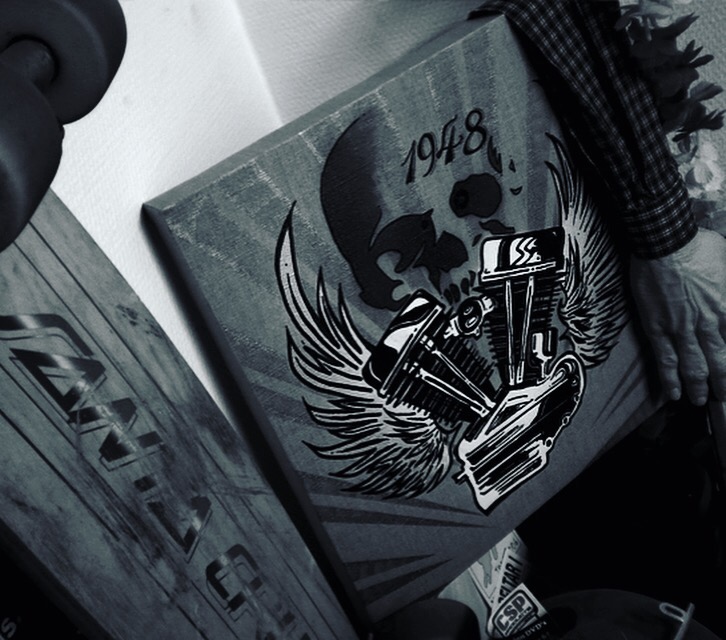
Me and my son Frans, summer 2016.